February 17, 2018 Chicken Mushroom Enchiladas

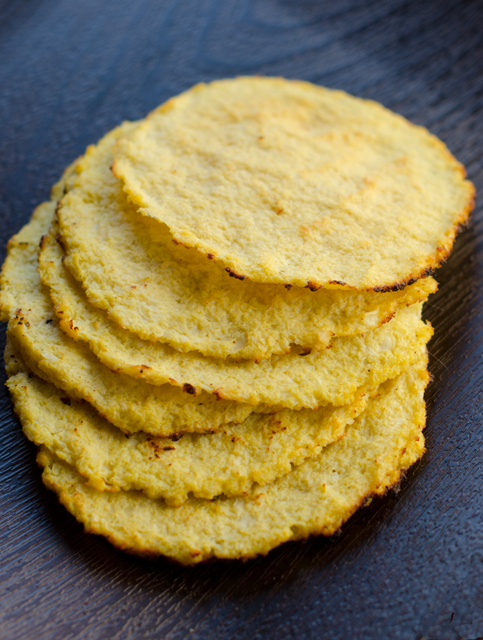
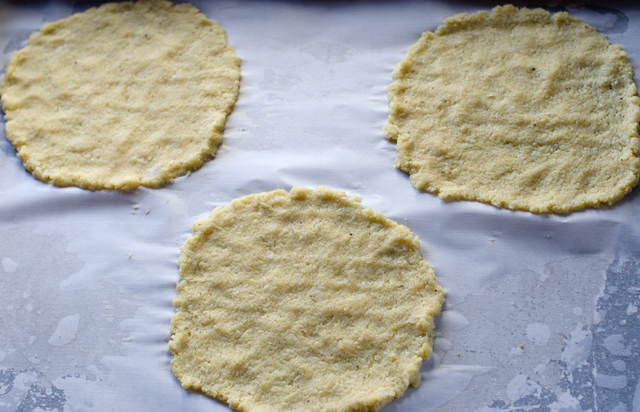
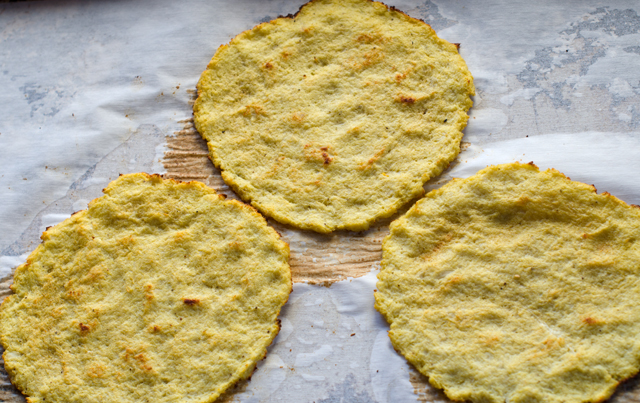
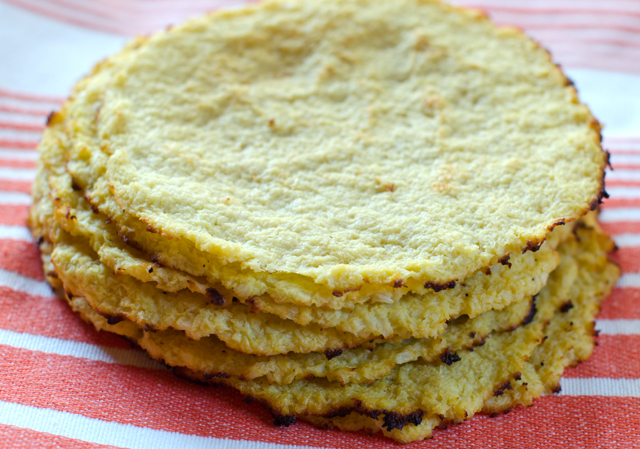
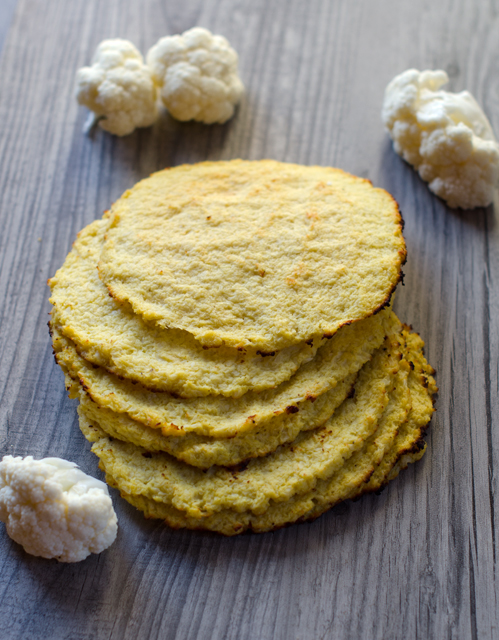
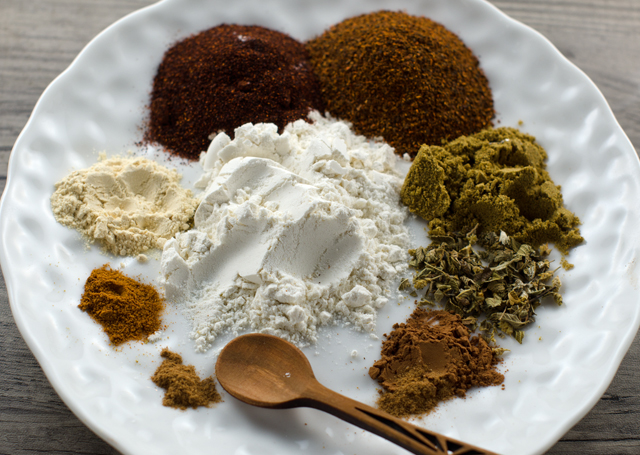
Now that I’ve mastered the cauliflower tortilla I thought it would be fun to try them in a chicken enchilada recipe. The “caulitillas” are just about the same size as a corn tortilla and not delicate as I was originally concerned, but very pliable and sturdy. Of course corn tortillas are what you would typically use and would be fine in this recipe. You can buy enchilada sauce in the supermarket but it’s quick and quite simple to make your own. You also can control the heat to your own taste. My advice would be to start out on the safe side with the amount of chili powder you add, you can always add more, it’s harder to tame the heat. I used a combination of regular and chipotle chili powder for its smoky quality. Measure out your ingredients before you start the recipe because you will be busy whisking to ensure a smooth sauce.

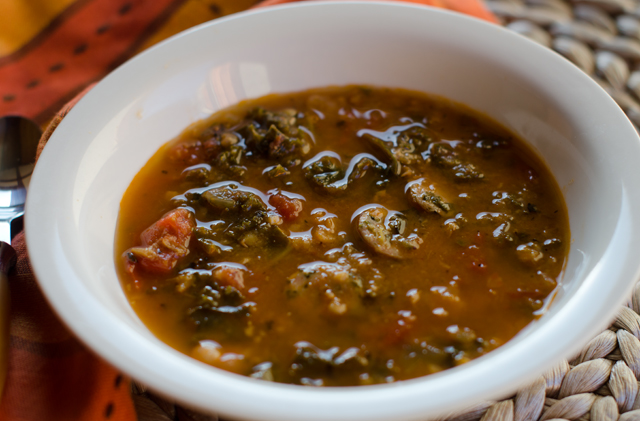
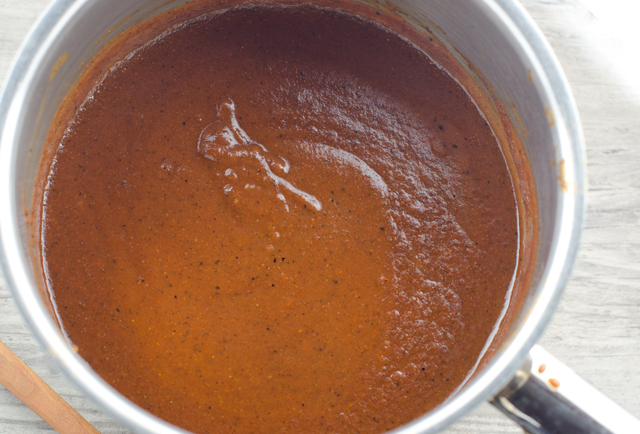
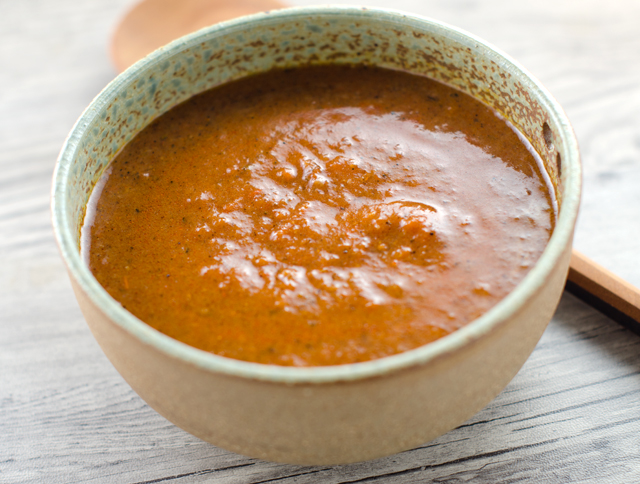
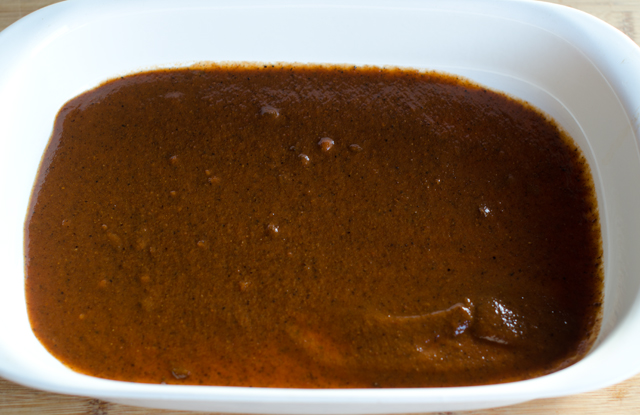
Heat the oil in a medium saucepan until it begins to sizzle. Add the flour and spices, whisking constantly until the spices become fragrant and deepen in color. Add tomato paste, tomato sauce and chicken stock and continue to whisk constantly to remove any lumps. Allow the sauce to come to a simmer, it will begin to thicken slightly. Taste sauce and adjust seasonings to your liking.

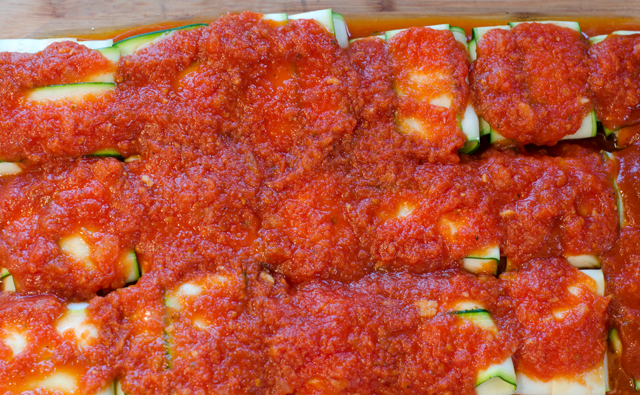
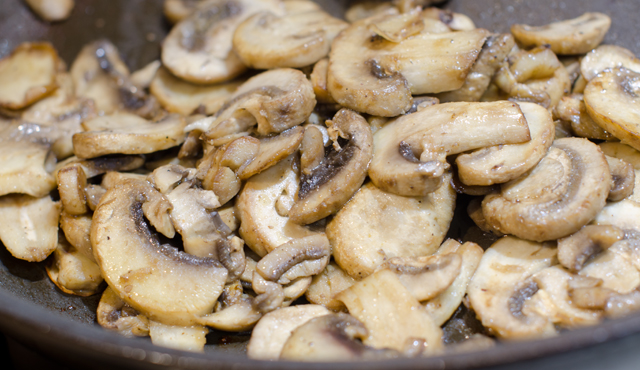
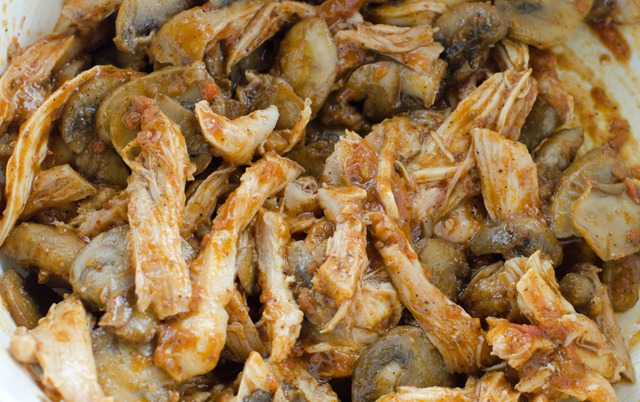
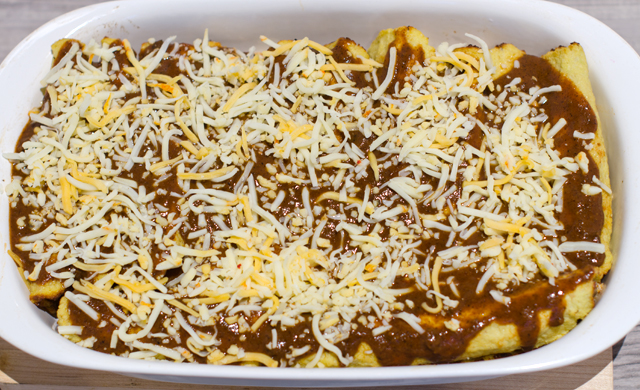
Now it’s time to assemble, you should have ready, a 9 x 13  inch baking dish, the tortillas, the warmed filling, the warmed sauce and shredded cheese.   I chose to make a filling of shredded chicken and sautéed mushrooms but this sauce would be good with many filling combinations. Many recipes call for dipping the tortilla in the chili sauce. I thought that was too messy so I just put a thin layer of sauce in the bottom of my casserole dish.

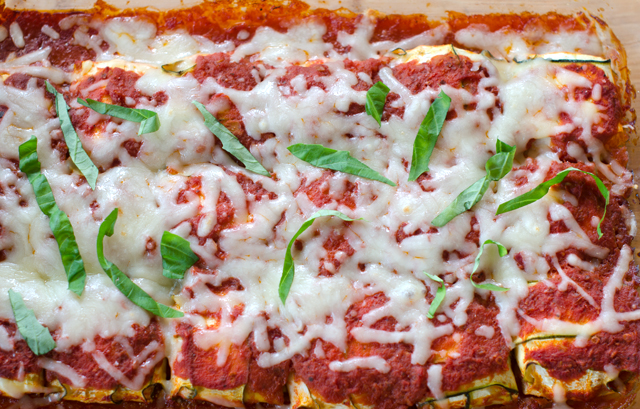
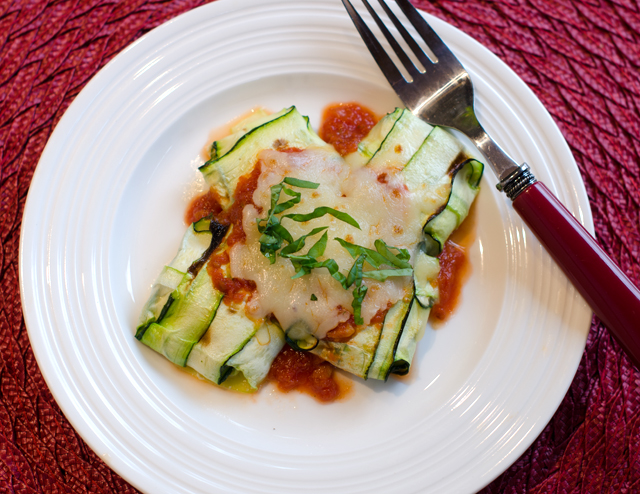
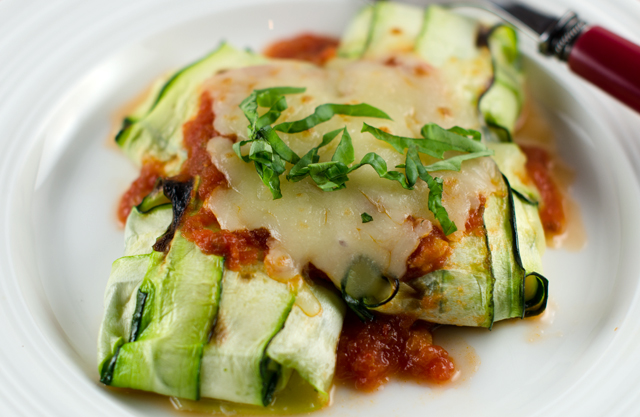
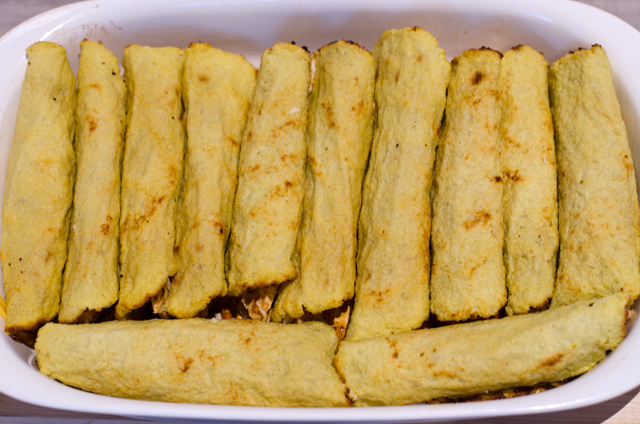
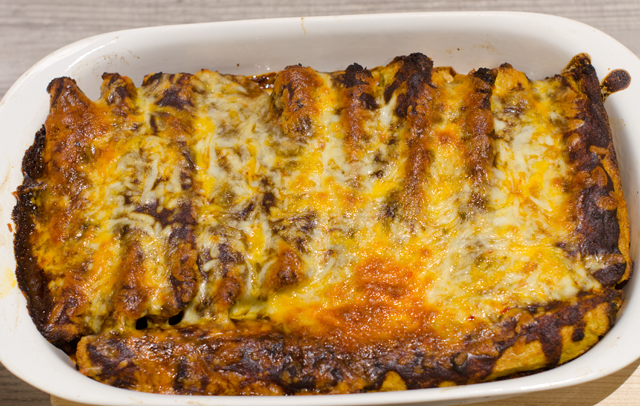
Lay out your tortilla and spread about two tablespoons of the filling down the center. Roll up the tortilla and place seam side down in the baking dish. Repeat with the remaining filling and tortillas. Top with additional sauce and shredded cheese and bake until the cheese is melted. Not the prettiest dish for certain, but definitely delicious. Leftovers heat up nicely.

Spices and flour for the chili sauce.
Takes only ten minutes to make a delicious complex sauce.


Chicken and mushroom enchilada filling.
Filling the “caulitilla”.
A thin layer of sauce on the bottom of the baking dish.
Rolled and filled tortillas ready to be topped with sauce.
Next the sauce and cheese.
Ready to dig into!


Chicken Enchiladas

Makes 10-12

Red Enchilada Sauce

Makes about 2½ cups

Ingredients

  • 2 T vegetable oil (I used avocado)
  • 2 T all-purpose flour
  • 3 T chili powder-I used 2 T regular and 1 chipotle (Penzey brand)
  • 1 ½ t ground cumin
  • ½ t dried oregano (Mexican is best)
  • ½ t kosher salt
  • 1/8 t cayenne pepper
  • ¼ t cocoa powder
  • pinch of cinnamon
  • 3 oz tomato paste
  • 2 c chicken or vegetable broth
  • ½ to ¾ c tomato sauce

Directions

  1. Measure out the flour and the spices into a small bowl.  Whisk to combine.
  2. In a medium saucepan over medium high heat, warm the oil until it begins to sizzle.
  3. Add the flour/spice mixture and whisk constantly. Cook until fragrant and darkened in color.
  4. Whisk in the tomato paste and sauce until thoroughly combined with the flour/herb mixture. In a steady stream, whisk in chicken broth.
  5. Reduce heat to medium and let sauce come to a simmer. Cook 8 to 10 minutes, sauce will thicken slightly. If not using immediately you may need to thin it out with a little stock or water.
  6. Remove the sauce from the heat and let cool slightly. Add salt and freshly ground pepper to taste.

Shredded Chicken and Mushroom Filling

Ingredients

Directions

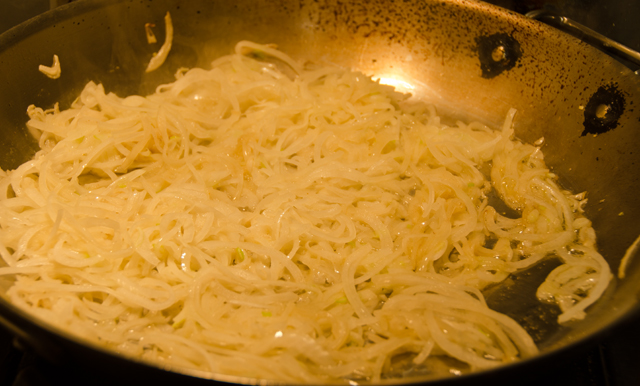
  1. In a medium saute pan cook the mushrooms over medium high heat until they release their juices and are softened, 6 to 8 minutes.
  2. In a medium bowl add chicken and slightly cooled mushrooms.
  3. Stir in about a half cup of sauce to moisten the ingredients.

Assembly

  • 9 x 13″ baking dish
  • 10-12 corn tortillas or “caulitillas
  • Chili sauce
  • 2 c shredded Mexican blend cheese
  1. Preheat oven to 375°F
  2. Coat the bottom of the baking dish with a thin layer of the sauce.
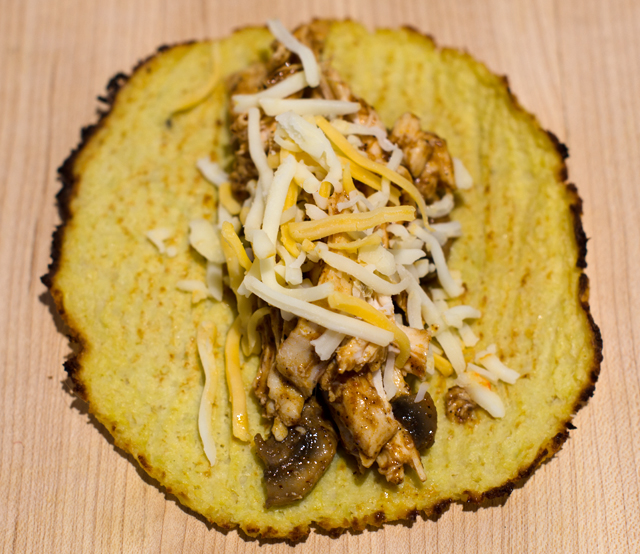
  3. Set up an assembly line to make the tortillas: corn or cauliflower tortillas, chicken mushroom filling, cheese and sauce.
  4. Lay out a tortilla and place about 2 generous tablespoons of the filling down the center of the tortilla. Sprinkle a little cheese on top. Roll it up with your fingertips and place in the baking dish, seam side down. Continue rolling and filling the rest of the tortillas.
  5. Pour the remaining sauce over the enchiladas and sprinkle with the remaining cheese. Bake for 20 minutes and serve immediately.


February 3, 2018 Chicken, Butternut Squash and Chickpea Soup

Chicken, butternut squash and garbanzo bean soup is the perfect comfort food loaded with lean protein, delicately sweet butternut squash, nutty garbanzos and spinach for a healthy meal. This hearty main dish soup of my own creation is a complete meal with almost all pantry items with exception of the spinach. Blue potatoes and butternut squash are still a part of the larder from last year’s  garden and I am finally making a dent into the supply of butternut squash from the fall harvest.

To save time you can buy cubed butternut squash in the produce section of most supermarkets. But if you choose to start with a whole squash, this is a method that works for me. I start by washing off the squash, any dirt left behind when you start cutting the squash will be transferred to your knife and subsequently, the squash flesh. Cut off a ½-inch piece at both ends so that they are flat, then I cut it where the neck and the bulb meet. I cut the bottom in half and scoop out the seeds and stringy fibers, a grapefruit spoon works well here. You can discard the seeds but I like roasting them for a snack or a salad topping. Use a vegetable peeler or chef’s knife to remove all of the skin and the green veins that are directly under the skin, your finished product should just be orange flesh. Now you can use a knife to cut the squash into pieces. I was aiming for 1½ inch pieces. The squash I used for this recipe weighed in 3.25 pounds and made about 8 cups of raw squash. In a large bowl, toss the squash with a little olive oil and salt and roast on a baking sheet until the cubes are caramelized but not at the point of disintegrating into the soup. The squash measured 4 ½ cups after roasting.

The soup would be good without it, but I added some chicken to up the protein quotient and really make it feel like a meal. Normally I would use chicken thighs, but I had boneless breasts in the fridge. I wanted to keep the chicken as moist as possible, (there is nothing worse than dried out chicken in your soup) so I turned to a method that I have used in the past, poaching. Poaching is a method that cooks chicken gently and slowly. Boneless breasts are arranged in a single layer and covered with the appropriate aromatics and liquid, water in this case, but a splash of wine is good too. The pot is brought to the boil, then reduced to a simmer. After about eight minutes, check the temperature of the chicken in the thickest part of the breast. Chicken is supposed to be cooked to 165°F but since I knew I would be adding it to my soup pot, I was aiming at 155-158°F so it wouldn’t overcook in that step. Remove from the poaching liquid and let cool, then shred into bite sized pieces. An easier approach? Use the meat from a rotisserie chicken.

Once you are finished these steps, the soup comes together very quickly. In a large Dutch oven, saute the onion, then add the garlic and herbs. The broth, tomatoes and garbanzos are next. Bring to a boil, reduce the heat. Add the squash, chicken and spinach and cook for about ten minutes, until the spinach is wilted.

Freshly cooked garbanzos are a favorite of mine and would be great in this recipe but would require some advanced planning. Puree a few cups of the soup before the last ingredients are added if you want to give the soup a more stew like consistency.

Peeled whole butternut squash.
Preparing the butternut squash.

Chicken, Butternut Squash and Chick Pea Soup

Serves four

Ingredients

  • 1 butternut squash, about 3 lb
  • Extra virgin olive oil-for baking the squash and making the soup
  • Kosher salt
  • ¾ to 1 lb chicken breasts 2-3 relatively the same size or already cooked and shredded chicken, breast or thigh meat
  • 1 medium onion, diced small
  • 2-3 cloves of garlic, finely minced
  • 1 t ground cumin
  • ½ t ground coriander
  • 3-4 c low sodium chicken broth
  • 1-10 oz can diced tomatoes and green chilies (mild or hot)
  • 1-15.5 oz can chick peas, drained and rinsed
  • 4-5 cups spinach leaves

Directions

Preparing the butternut squash

  1. Preheat oven to 375°F. Peel, seed and cut squash into 1½-in cubes. Alternately use 8 cups  of pre-cut squash.
  2. Put the squash cubes in a large bowl, drizzle with olive oil and kosher salt. Toss to coat and place on a baking sheet, distributing the cubes evenly as possible.
  3. On the lower rack of the oven, bake squash for ten minutes. Gently flip the squash pieces so that the sides that aren’t caramelized are on the bottom, bake for another 5 minutes. Redistribute the squash pieces again and cook for another 5-7 minutes. Remove squash from baking sheet and transfer to a plate to cool.

Poaching the chicken

  1. Place the chicken breasts in a heavy bottomed pot, large enough to hold them without overlapping but relatively snug.
  2. Cover the breasts by an inch and a half with cool (not hot) water with a pinch of salt, or broth, garlic, a sprig of thyme or a bay leaf.
  3. Over medium high heat, bring to a boil, then reduce the heat to a simmer. Partially cover and at the eight minute mark insert an instant read thermometer at the thickest point of the breast to check the temperature. I like pulling mine off the heat around 158°F since they will continue to cook a little after they are removed from the cooking liquid and when added to the hot soup will cook a  little more.
  4. Let the chicken cool then shred along the grain into bite sized pieces.

Assembling the soup

  1. In a large 5-quart Dutch oven cook the onion over medium high heat until translucent. Add the garlic and spices are cook for another minute.
  2. Add chicken broth, tomatoes and chick peas and bring to boil.
  3. Reduce heat to a simmer and add squash, chicken and spinach, heat through for about ten minutes or until spinach is wilted.
  4. Serve in warmed bowls.

January 27, 2018 Sausage, Kale and Chickpea Soup

Nothing fancy here, just an easy satisfying soup for a cold winter night. It’s hearty and healthy as well. You can swap out ingredients to suit your own taste. Spicy sausage for the chicken, spinach for kale, cannelini beans for the chickpeas etc. I added the red lentils because they cook quickly and give body to the soup.Make this a day ahead because we all know soups like this taste better the second day. Shred a little Parmesan on top and pair with an arugula and radicchio salad, some crusty bread for a quick satisfying meal.

Sausage, Kale and Chickpea Soup

Serves 4-6

Ingredients

  • 2 T olive oil
  • 1 medium onion, finely chopped
  • 3-4 cloves of garlic, minced
  • ½ t smoked paprika
  • 1 t ground cumin
  • ½ t ground coriander
  • ¼ t sumac
  • 4 c low sodium chicken or vegetable broth
  • 1 (14.5-ounce) can of fire roasted diced tomatoes
  • 1/3 c red lentils
  • ½ t dried thyme
  • 2 bay leaves
  • Kosher salt and freshly ground pepper to taste
  • 1 (14.5-ounce) can chickpeas, drained and rinsed
  • 8 ounces of fully cooked chicken sausage, cut into 1-inch pieces
  • 4-5 cups chopped kale

Directions

  1. In a Dutch oven, heat olive oil over medium high heat. Add the onions and cook, stirring occasionally until soft, about 5 minutes. Add the garlic and spices and cook, stirring occasionally so the garlic doesn’t get brown, about 2 minutes more.
  2. Add broth, diced tomatoes, lentils, thyme, salt and pepper and bring to a boil. Cover the pot and simmer for 15 minutes. Add the chickpeas and cook for 10 more minutes.
  3. Remove the bay leaves and pour 2-3 cups of the soup, depending how thick you want it, into a bowl and purée with a hand blender until smooth. Return the puréed soup to the pot and stir.
  4. Add sausage and kale and simmer until the kale is wilted and the soup is hot.
  5. Ladle soup into bowls and serve.

January 21, 2018 Cauliflower Tortillas

Does any vegetable come close to having the versatility of cauliflower? It has a nutty sweetness when roasted and a creamy sumptuous quality when steamed and puréed. It’s a low carb, paleo, gluten-free option that substitutes for rice, couscous and even pizza crust. Let’s not neglect to mention the nutritional benefits as well. Cauliflower is an excellent source of vitamin C. vitamin K, folate, pantothenic acid (vitamin B5) and dietary fiber and an entire head of cauliflower is only 156 calories!

Here’s a recipe to help keep you on track for a new year of healthy eating and a creative addition to your cooking repertoire, cauliflower tortillas. They have a texture similar to the real thing and a mildly nutty flavor.

Preheat your oven to 375°F and line two baking sheets with parchment paper, a Silpat liner works too. I use a little nonstick spray on the edges to keep the parchment from curling up. Start with a medium cauliflower, the one I used was 2 lbs, including the greens. Cut the cauliflower in quarters, remove the greens and most of the core. In a food processor, pulse the cauliflower into granules finer than rice, but don’t get to the point of liquefying it. I do this in batches so no chunks are left behind. If you don’t have a food processor you can go low tech and do this step with a hand-held box grater. The cauliflower needs to be cooked to remove as much liquid as possible. You can do this in either a microwave or a steamer. The next step is crucial to get the right consistency for the cauliflower “dough”. Gather the steamed cauliflower granules in a clean cloth dish towel (a thin one works best) and wring out all the excess liquid. Use rubber gloves or an extra towel to protect your hands, the cauliflower will be very hot. If you have the time, you can wait until it cools down a bit. When you think you have squeezed out all the liquid you possibly can, squeeze some more. The end result reminds me of masa dough, the ingredient corn tortillas are made from.

Place the well-drained cauliflower in a medium bowl and mix in two well beaten eggs and salt and pepper to taste. Many of the recipes I read add additional herbs and spices at this point and you are welcome to do so if you choose. I prefer to keep mine plain like a regular corn tortilla to showcase the flavors of what I fill it with.

Divide the cauliflower mixture into six portions and use your hands to press them evenly into six small circles, about five to six inches in diameter. Bake in the preheated oven for ten minutes, take them out of the oven and flip them to the other side and bake for an additional 5-7 minutes. I used convection heat and that helped them brown in the oven. You can also brown the tortillas in a pan to give them a crispy edge and a more nutty flavor.

The resulting tortillas are soft and pliable like the real thing and they hold up well to a variety of fillings. On my first attempt I filled them with taco seasoned ground turkey, guacamole and salsa. They would be great for quesadillas or enchiladas too. You don’t have to limit your choices to just Mexican, they would make a great breakfast wrap or with some smoked turkey, avocado slices, lettuce and tomato for a low carb lunch. Joe gave them two very enthusiastic thumbs up. Today we made breakfast tacos with scrambled eggs, cheese and chicken sausage topped with guacamole and salsa, delicious! Next to try, chicken enchiladas.


The cauliflower head, also known as the curd.
Pulse the cauliflower into fine granules.
Gather the cooked cauliflower into a dish towel, cheesecloth works here too.
After several minutes of squeezing the liquid out of the cauliflower, the finished product looks like this.
The resulting cup and a half of liquid that was squeezed out.
Mix the dried cauliflower with eggs and salt and pepper to taste.
Divide the mixture into six portions and form into circles on parchment lined baking sheets.
Cauliflower tortillas hot out of the oven.

Cauliflower Tortillas

Makes 6

Ingredients

  • 1 medium cauliflower (about 2 lbs total including the greens)
  • 2 large eggs
  • Kosher salt and freshly ground pepper to taste

Directions

  1. Preheat oven to 375°F (I used convection heat) with racks in the upper and lower shelves of the oven. Line two large baking sheets with parchment. I use a little non stick spray on the corners to keep them from rolling up.
  2. Cut the cauliflower in quarters, remove the leaves and cut out most of the core. In a food processor pulse the cauliflower into granules, smaller than rice. I ended up with 6 cups lightly packed cauliflower.
  3. Place the riced cauliflower in a bowl and microwave on high for two minutes, stir well, microwave two minutes, stir and microwave again for two minutes.Alternately you can cook the cauliflower in a steamer.
  4. Dump the cooked cauliflower in the center of a cloth dish towel or a doubled layer of cheesecloth. Gather up the ends, careful, it will be extremely hot and squeeze out any excess liquid.  You may want to protect your hands with an additional towel or rubber gloves. When you think you have removed all the water, give it one more squeeze.
  5. Return the cauliflower to a bowl, add two beaten eggs, salt and pepper to taste and mix well until combined.
  6. Scoop out the cauliflower into 6 fairly equal portions on the baking sheets and form into circles.
  7. Bake with trays in the upper and lower half of the oven for five minutes then reverse the upper and lower positions and bake for another five minutes. Remove both trays from the oven and peel the tortillas off the baking sheets, flip them over and return to the oven for another 5-6 minutes.
  8. Transfer cooked tortillas to a wire rack to cool.
  9. Heat a medium-sized non stick pan over medium heat and brown the tortillas on both sides to crisp the edges.
  10. Store in well sealed freezer bags. To use, reheat tortillas over medium heat in a small non stick pan.

January 13, 2018 Herbed Ricotta Zucchini Ravioli


Normally I wouldn’t share a recipe for zucchini in the middle of January, but this time I had to make an exception. I am always looking for new ways to prepare for the buckets of zucchini that our garden produces every summer, so I had to try out this recipe I saw on The Chew, “Herby” Ricotta Zucchini Ravioli. In this recipe, very thinly shaved zucchini slices take the place of pasta and are filled with a herbed ricotta filling.

The zucchini could be sliced on a mandoline, but to simplify things, a Y peeler works just as well. Remove the first strip of skin, then a few more slices until you have a flat surface. Make slices down the length of the zucchini until you reach the seedy core. Look for medium length zucchini. I found that strips 5-6 inches long and 1½ inches wide were the right size to accommodate a generous tablespoon of the filling. Place the slices on baking trays lined with paper towels and lightly salt to draw out any excess liquid.

The filling is very simple, ricotta cheese with an egg, grated Parmesan and seasonal herbs. Fresh ricotta is always best but one without preservatives is a good second choice. Drain the ricotta in a fine strainer to draw out excess liquid then squeeze it out in cheesecloth to make it as dry as possible. There aren’t any fresh herbs in the garden on this very cold January day, but Joe has brought some into the conservatory. For this recipe I used parsley, thyme and a little dried oregano. Let the ricotta herb mixture sit for 10 to 15 minutes to allow the flavors to blend.

Now it’s time to make the bundles. Put enough tomato sauce on the bottom of your prepared pan to lightly coat it. Blot any excess liquid from the zucchini. On a clean work surface, lay two strips of zucchini so that they slightly overlap lengthwise. Lay two more noodles on top perpendicular to the first two strips, it should look like a plus sign. Place a generous tablespoon at the intersection where the strips meet. Starting with the bottom strips, fold them over the center, repeat with the second set of strips. Place the ravioli seam side down in the prepared baking dish and repeat with remaining zucchini strips until you fill the baking dish. Top with sauce and sprinkle with shredded mozzarella cheese. Bake for about 25 minutes, take out of the oven and sprinkle on the remaining Parmesan.

The verdict? Joe and I both thought they were delicious and didn’t feel cheated with the zucchini wrapper. As Chew co host Clinton Kelly said,” this is an amazing alternative to pasta.” The calorie savings are pretty amazing too with regular ravioli coming in at 785 calories while the zucchini ravioli is 260 calories! The portion size wasn’t mentioned though. This is not the best dish for the freezer. Zucchini is 95% water so I think this dish would best be served fresh. This is a great meatless dish whether for lunch, dinner or as a side. Pesto would be a good addition to the ricotta filling and a cheesy Alfredo sauce could take the place of the tomato sauce. Can’t wait until summer to try these with zucchini from the garden and my own variations.

Drain the ricotta in a fine mesh sieve for a half hour.


Wrap the ricotta in cheesecloth and squeeze out any excess moisture.

Using a Y peeler, slice the zucchini into long thin strips.
Combine the ricotta, beaten egg, herbs, spices and cheese.
Slightly overlap 2 strips of zucchini and overlap two more strips, forming a plus sign.
Place a generous tablespoon of filling where the strips intersect.
Fold the bottom strips over the filling.
Fold in the other 2 strips to the center to completely enclose the filling.

Add the ravioli, seam side down to a baking dish lightly coated with tomato sauce.
Top with additional sauce.
Top with mozzarella cheese and bake .


Herby Ricotta Zucchini Ravioli

Serves 4

Ingredients

  • Olive oil for greasing the baking dish
  • 2 c ricotta – whole milk or part skim
  • 4-5 medium zucchini
  • 1/3 c plus 2 T grated Parmesan (divided)
  • 1 large egg
  • ¼ c fresh herbs, finely chopped (parsley, thyme, chives etc.)
  • ¼ t freshly grated nutmeg
  • 2 cloves garlic, peeled and finely minced
  • 2 ½ c tomato sauce-homemade or your favorite store brand
  • 1 c shredded mozzarella
  • Basil chiffonade for garnish
  • Kosher salt and freshly ground pepper to taste
  • Cheesecloth – that will be used with the ricotta

Directions

  1. Preheat the oven to 375°F.  Lightly grease a 8×12 baking dish with olive oil.
  2. Place a fine mesh sieve over a medium bowl and add the ricotta. Set aside and allow to sit for 30 minutes.
  3. Using a Y vegetable peeler, slice the zucchini lengthwise into thin strips, avoiding the seedy core. Place strips on a paper towel lined baking sheet, lightly sprinkle with salt and set aside.
  4.  In a medium bowl, add ricotta, 1/3 c Parmesan, egg, chopped herbs, nutmeg and garlic. Season with salt and pepper and stir until fully combined. Set aside for 10 minutes to let the flavors combine.
  5. Blot excess moisture off zucchini slices. On a work space, overlap 2 strips of zucchini and then overlap 2 additional strips on top and across the first 2 strips, forming a cross shape.
  6. Using a spoon or cookie scoop, place a generous tablespoon of the ricotta mixture into the center of the zucchini formation.
  7. Fold the bottom layer of the zucchini strips over the filling and into the center so that they are overlapping. Fold in the other two strips to the center so that the filling is completely enclosed. Repeat process with remaining filling and zucchini.
  8. In prepared baking dish, spread ½ cup sauce evenly over the bottom. Place zucchini seam-side down. Pour remaining sauce over zucchini. Top with remaining Parmesan and mozzarella. Transfer to oven and bake for 20 to 25 minutes, until zucchini is al dente.
  9. Garnish  with basil and serve.

January 6, 2018 Smoked Turkey Lentil Soup

Smoked turkey has been a favorite of ours for many years. The original recipe we found came from the first cookbook Joe ever gave me, Better Than Store Bought. The book, a classic for the DIY cook features “authoritative recipes for the foods that most people never knew they could make at home”. One of the many recipes that interested us was for smoked turkey. We invested in a water smoker and different varieties of wood chips, learned about brining and went to work. The results were delicious. The turkey was tender, succulent meat with a pleasing hint of smoke. It soon became a regular favorite on my catering menu, whether it was on a carving station or used in an hors d’oeuvre recipe. We still smoke turkey for parties, especially around the holidays. Inevitably there are leftovers and since the temperatures are going to plunge into the minus zero territory I thought a hearty smoked turkey lentil soup would be perfect to keep us warm.

This soup is rich in flavor in spite of its very simple ingredients. The turkey infuses the soup with deep rich smokiness. If you don’t own a smoker, smoked turkey legs are available in many supermarkets. If you can’t find smoked turkey legs, you can use smoked turkey sausage instead. You could even do this recipe with roasted turkey wings and legs.

If you are not already saving Parmesan rinds you should. Store them in your freezer where they will keep indefinitely.  Add one to your soup pot to infuse it with a subtle depth of flavor. It may totally dissolve in the soup, if not fish it out at the end of cooking along with the bay leaf.

Lentils are the perfect companion to the smoked turkey and they are very nutritious. A great source of antioxidants, vitamins A, D, E and K , the mineral selenium, lentils also contain high levels of soluble fiber and have zero cholesterol. Unlike other dried beans, lentils can be prepared the day of serving since a presoak isn’t necessary. Spread lentils on a light-colored plate to check for stones or debris. Then place the lentils in a fine strainer under cool running water. Purchase lentils in a store where you know there is high product turnover to ensure freshness. If they are more than a year or two old, they will often stay crunchy in the center no matter how long you cook them. I used the Puy variety, they are mottled green-brown in color and have a robust peppery flavor.

I adapted this recipe for the slow cooker but it could be done just as easily on the stovetop. In a dutch oven, cook vegetables until softened, add remaining ingredients and simmer partially covered for an hour. To serve, remove bay leaf,  cheese rind, turkey wings and drumsticks. Remove the turkey meat from the bones and stir back into the soup pot. Ladle soup into bowls and top with a dollop of sour cream or yogurt.

Smoked Turkey Lentil Soup

Serves 4-6

Ingredients

  • 1 T extra-virgin olive oil
  • 3 garlic cloves, peeled and chopped
  • 2 celery ribs, finely chopped
  • 2 carrots, peeled and finely chopped
  • 1 medium onion, finely chopped
  • 1 c crushed tomatoes
  • 1 fresh bay leaf
  • 1 cup lentils, green or brown
  • 2 smoked turkey wings
  • 2 smoked turkey legs
  • 1 Parmesan rind (optional)
  • 8 c chicken or turkey stock
  • Kosher salt and freshly ground black pepper
  • Yogurt or Parmesan cheese to top the soup
Golden brown smoked turkey wings.

Directions

  1. In a large pot, heat the oil. Add the garlic, celery, carrots and onion and cook over moderate heat until softened, 6-7 minutes.
  2. Transfer vegetables to a large capacity 6 qt slow cooker.
  3. Add the tomatoes, bay leaf, smoked turkey and stock optional Parmesan rind and simmer on the low setting for 5-6 hours.
  4. Before serving, remove bones and large pieces of turkey from the pot; allow to cool slightly on a platter. Once cool enough to handle, separate meat from the bones and any unappealing connective tissue. Return meat to the pot and discard bones.
  5. Ladle soup into bowls and garnish with sour cream or yogurt.

December 10, 2017 Chicken with Shallots

In the beginning it was Martha for me. Sure there was Julia, James, Jacques and the Silver Palate ladies, but Martha was my main inspiration as someone who was a novice at cooking, entertaining, and in a few years, a budding caterer. As the Martha Stewart empire expanded, so did the number of magazines published under the Martha Stewart brand. Among those titles was Everyday Food, a pocket-sized digest with recipes that were “fast and easy”. The recipes centered around ingredients that could easily be purchased at the grocery store and usually cooked in less than an hour. Quite a departure from many of the recipes in her many of her earlier cookbooks.

Though there are many good recipes from the magazine and accompanying PBS series, there is one that stands out from the rest, braised chicken with shallots. Over the years this recipe has been modified, updated and tweaked, this is my version.

Braised chicken with shallots is a one pot no fuss dish where the sum is definitely greater than the  basic parts. The original recipe used bone in skinless chicken thighs, you could equally substitute bone-in skin on chicken thighs or boneless skinless chicken thighs. I would definitely say choose thighs or chicken quarters (leg and thigh combination) rather than chicken breasts, dark meat holds up much better to braising.

Several versions of the recipe start with a definite no-no, rinse the chicken thighs in water. Washing raw poultry before cooking is not recommended by the USDA. Bacteria in raw chicken (in all meat actually) can be spread to other foods, utensils and surfaces, also known as cross contamination. Cooking chicken to the proper temperature kills the bacteria. So just pat the chicken very dry with paper towels and proceed with the recipe.

Coat the chicken pieces very lightly with flour and sprinkle with salt and pepper. Martha recommends (and I heartily agree) using Wondra flour for this step. If you haven’t noticed, it’s that bright blue canister tucked in next to all those alternative flours like coconut and almond. Wondra is an instant flour, precooked and dried. It dissolves quickly in liquids and makes lump free gravies. In this recipe it gives the chicken an extra light and crispy crust.

Melt butter in a large heavy bottomed skillet or Dutch oven. Cook the chicken three to four minutes per side, in batches if necessary. You want to develop a golden crust and leave behind brown bits that you will cook the shallots in. Remove the chicken from the pan and keep warm.

Shallots, usually a minor player in most recipes takes a starring role here. If you aren’t familiar with shallots, their flavor is sweet and mild, somewhere between an onion and garlic. This recipes uses about a pound, 12-15 medium to large shallots. Peeling shallots can be a tedious task. You can make this easier by soaking the shallots in boiling water for a few minutes and then putting them in an ice water bath so they won’t continue to cook. Make a shallow cut in the top layer and peel the skin and top layer away.

Sauté the shallots in the butter and rendered chicken fat until softened and caramelized. Return the chicken pieces to the pan and add a cup of white wine to bring some acid to the dish and to deglaze the brown bits in the bottom of the pan. I used vermouth, a fortified white wine that is flavored with herbs and spices. If you are going to use vermouth, look for a dry (not sweet) variety.

Stir in the Dijon mustard and add the fresh rosemary sprigs. Put a lid on the pan and simmer for thirty minutes. At the end of the cooking time add two cups of halved cherry tomatoes. Although I am not a fan of out of season tomatoes, there are some I will use as “supporting players” when they are necessary to the dish. With seed sourced from the south of France, Sunset Flavor Bombs are a good choice and available at big box stores.

This is a great dish for the busy cook, cook on a Sunday afternoon, reheat and serve several days later. Serve with noodles or rice to sop up the juices.

Shallots are a member of the onion family, their flavor is milder and reminiscent of garlic.
Chilling off blanched shallots before peeling them.

Chicken with Shallots

Serves 4-6

Ingredients

  • 2½ to 3 lbs chicken thighs (6-8 pieces)
  • 2 T flour (I used Wondra)
  • Kosher salt and freshly ground pepper
  • 2 T unsalted butter
  • 12 medium to large shallots, peeled
  • 1 c vermouth
  • 1½ T Dijon mustard
  • 2 large sprigs rosemary
  • 2 c small tomatoes cut in half or quarters

Directions

  1. Pat the chicken thighs dry with paper towels. Sprinkle them with salt, pepper and flour.
  2. Melt the butter over medium high in a heavy bottomed skillet large enough to fit the chicken pieces comfortably. When the butter begins to foam, cook the chicken, in batches if needed, 6-7 minutes per side. It should be brown and crisp on both sides. Set the chicken aside on a plate and keep warm.
  3. Sauté the peeled shallots in the butter and the chicken fat until they begin to soften and caramelize, 10-12 minutes. Stir in the vermouth with a large wooden spoon to deglaze the pan. Add in the mustard and the rosemary sprigs. Return the chicken thighs to the pan and cover. Turn the heat to low and simmer for 30 minutes.
  4. Add the tomatoes to the pan and stir them in to combine. Serve immediately or cool and refrigerate. Reheat and serve in the next two days.

December 3, 2017 Creamy Kale and Goat Cheese Gratin


Kale and goat cheese gratin is the ultimate winter comfort food and a great addition to any potluck or holiday feast. The original recipe from Fine Cooking called for dandelion greens but I have made it with baby chard greens and spinach as well, depending on the season. This time I used the bounty of fall kale from our garden. Joe planted several varieties, for this recipe I used a combination of Lacinato or Tuscan, Red Russian with its purple veins and stems and curly Dwarf Blue Curled. If we’re lucky, some of the plants that don’t die off this winter will provide us an early spring kale crop.

When shopping for kale look for moist, crisp, unwilted bunches, unblemished by tiny holes, which indicate insect damage. The leaves should not be yellowed or brown. Wrap unwashed kale in paper towels, then store in plastic bags in the refrigerator crisper for a few days. When you are ready to cook, submerge the leaves in a sinkful of cold water, swishing them around to remove any dirt. To trim for cooking, lay a leaf bottom side up on a cutting board and run a paring knife along each side of the center stem. I like using a Cutco steak knife in this step for the traction it gives. Repeat until all the stem are removed. Then cut the leaves in the size your recipe calls for, in this case, 2 inch strips. If you are so inclined, chop the stems into smaller pieces, store them in freezer bags and add them the next time you make a vegetarian stock.

Bring a large pot of well salted water to a boil and cook the kale for 3-4 minutes or until tender. You can do this step in batches if necessary. If you are doing this in batches, remove the kale with a Chinese strainer and allow the water to come back to a boil before adding the next bunch of leaves. Transfer the blanched leaves to a colander to drain well and cool. Put the cooled leaves in a clean cotton dish towel and gently wring the greens and get rid of any excess moisture. There’s nothing worse than a watery gratin!

Chop the greens coarsely and put in a large mixing bowl and combine with Parmesan and a creamy goat cheese. Combine well, don’t be afraid to use your hands for this. Spread the greens in a buttered baking dish and add cream that has been infused with garlic and lemon. Be sure to use a shallow gratin dish rather than a deeper, smaller one. The larger surface area helps reduce the cream. Top with the breadcrumb mixture and bake until the crumbs are brown and the liquid is bubbly and has reduced below the crumb level.

The kale and goat cheese gratin can be prepped in advance. Prepare the kale filling and add the cream to the dish but hold off on adding the crumb topping until right before you bake it. Cover with plastic wrap and refrigerate. If you have refrigerated the dish, bring it back to room temperature, or if baking right from the fridge, add a little extra time to your cooking.

Creamy, cheesy greens topped with a crunchy Parmesan crumb crust, what’s not to love? This flavorful dish is great served with lamb or turkey (of course!) and makes excellent leftovers.

Lacinato, Tuscan or Dinosaur kale.
Dwarf blue curled kale
Red Russian kale
It takes a lot of kale to make a pound.
Trimming the leaves.
It just needs a breadcrumb crust now.

Creamy Kale and Goat Cheese Gratin

Serves six or more

Ingredients

  • ½ t unsalted butter
  • Kosher salt
  • 1 lb. kale, stemmed, leaves cut into 2-inch strips
  • 1 c coarse fresh breadcrumbs
  • 3 T plus ¼ c finely grated Parmesan
  • 1-1/3 c heavy cream
  • 2 garlic cloves, peeled and smashed
  • ¼ t finely grated lemon zest
  • Freshly ground black pepper
  • 2 oz fresh soft goat cheese

Directions

  1. Position a rack in the center of the oven and heat the oven to 375°F. Coat a shallow medium-sized gratin dish with the butter.
  2. Bring an 8-quart pot of well-salted water to a boil over high heat. Working in batches, boil the kale just until tender, about 3 minutes. Drain well.
  3. Use a dish towel to gently wring the greens and get rid of any excess moisture.
  4. In a small bowl, combine the breadcrumbs, 3 T Parmesan and a pinch of salt.
  5. In a medium saucepan over medium high heat, bring the cream and garlic to a boil, about 5 minutes. As soon as the cream has come to a vigorous boil (but before it boils over), remove the pan from the heat and let sit for 5 to 10 minutes. Add the lemon zest and season with a little salt and pepper. Stir well and remove the garlic cloves.
  6. Transfer the greens to a cutting board and chop them coarsely. Put them in a large mixing bowl and add the remaining ¼ c Parmesan and the goat cheese. Using your fingers, mix well. Spread the mixture in the prepared gratin dish. Pour the cream over and stir gently with a spoon to distribute evenly.
  7. Season to taste with salt and pepper. Top the gratin evenly with the breadcrumbs.
  8. Bake the gratin until the crumbs are browned and the liquid has reduced below the crumb level, about 30 minutes. Serve warm.

November 26, 2017 Butternut Squash Gratin with Rosemary Breadcrumbs


When it comes to Thanksgiving dinner I am a traditionalist. For the main course, it’s always a juicy roast turkey and another one hot off the smoker. Not to mention the additional variations we tried in previous years, wrapped in puff pastry à la Martha or cooked outdoors in a deep fryer, not advisable on a windy day on a wooden deck. But when it comes down to it, I am most excited about the side dishes. For many years we hosted Thanksgiving dinner for family and friends and I was driven to make countless side dishes featuring every fall vegetable I could think of.

Now we are part of a collaborative effort of family, friends, and friends who feel like family. Our offering is a smoked turkey and a few side dishes. Fortunately I was able to draw from the bounty of our garden to make a butternut squash gratin. At Thanksgiving dinner I was asked what a gratin is and I shared the following. A gratin is always baked and/or broiled in a shallow dish. The topping is traditionally cheese and/or breadcrumbs that should get crispy in the cooking process. Gratin is derived from the French word gratiner-to broil.

This recipe begins with lots of thinly sliced onions sautéed in butter until softened and golden brown. Butternut squash cubes are added next and sautéed along with the onions until both are caramelized. This recipe can be made much easier with the advent of peeled, seeded and cubed butternut squash, available in many supermarkets. As for me I will be hacking away at my stash of butternut squash all the way to spring.

Pour the vegetable mixture into the buttered baking dish, cover and bake. Another plus is this step can be done a day ahead, just cool and refrigerate until you are ready to finish the dish. Make the breadcrumb mixture ahead as well and store separately in the refrigerator. If you are making components ahead of a special dinner, label them well so that your well-meaning kitchen help doesn’t mix them up! On the day you are cooking the dish, reheat for about 10 minutes, sprinkle with breadcrumb, cheese and herb mixture. A sharp cheddar is a good contrast to the sweetness of the butternut squash. Not just for your holiday table, this would be great as a side dish for weeknight suppers, any fall gathering or even as a brunch dish.

Saute the onions.
Next in is the cubed butternut squash.
The vegetables are placed in a 13×9 glass baking dish
Joe picked fresh rosemary for the breadcrumb topping.

Butternut Squash Gratin with Rosemary Breadcrumbs

Serves 6-8 as a side dish

Ingredients

  • ¼ c (½ stick) unsalted butter
  • 4 c thinly sliced onions
  • 2½ to 3 lbs butternut squash, peeled, seeded and cut into ¾ inch cubes
  • 1 t sugar (optional)
  • ½ t salt
  • ½ t freshly ground black pepper
  • ¾ c chicken broth
  • 2 c bread crumbs made from soft white bread
  • 2 c packed grated sharp white cheddar cheese
  • 1 ½ T chopped fresh rosemary
  • ½ t dried thyme

Directions

  1. Preheat oven to 350°F. Butter 13x9x2-inch glass baking dish.
  2. Melt butter in a large heavy skillet over medium high heat. Add onions; sauté until onions are light golden about 8 minutes. Add squash; sauté 4 minutes. Sprinkle sugar, salt and pepper over vegetables; sauté until onions and squash begin to caramelize, about 5 minutes
  3. Spread vegetable mixture into prepared dish. Pour chicken broth over. Cover tightly with foil and bake 45 minutes. (Squash mixture can be made 1 day ahead. Cool, then cover and refrigerate. Reheat in a 350° oven until heated through, about 10 minutes.)
  4. Increase oven temperature to 400°F. Mix breadcrumbs, cheese, rosemary and thyme in a medium bowl. Sprinkle over gratin.  Bake uncovered until top is golden brown and crisp, about 30 minutes.
Delicious!

November 18, 2017 Curried Butternut Squash Soup


A reluctant fall has finally settled in and made itself at home in Bucks County. We have experienced our first killing frost, officially ending the growing season. One of the last survivors of the garden is the kale. Cold weather just seems to make it sweeter. I have a sinkful soaking right now, reviving it for tonight’s dinner. We also have a wheelbarrow full of butternut squash in the garage that was harvested before the frost.

Fortunately butternut squash stores well in a cool basement, so I will be able to use it through to next spring. I cube and roast it to add to our green salads, butternut squash lasagna is a new favorite, and of course, soup. Smooth and silky butternut squash soup is a cold weather favorite. I have shared several recipes for butternut squash on this blog but this is the original, the recipe I have been making for over thirty years.

When I first discovered my love for cooking one of the first cookbooks in my library was The Silver Palate cookbook. Silver Palate’s recipe for curried butternut squash soup was a constant on our Thanksgiving table for many years. This velvety rich soup has just the right combination of sweet, tart and spicy and was met with rave reviews from friends and family alike.

Begin the recipe by sautéing chopped onions and curry powder in sweet (unsalted) butter. If your curry powder has been sitting in the back of your spice cabinet for longer than you can remember, it’s time to invest in a new jar. There is no one formulation for curry powder and each variety can have different component spices in differing amounts. For this soup the best choice is sweet curry powder. It will give you a wide range of flavors without too much heat. One large onion yielded the two cups I needed. The covered pan will allow the onions to cook slowly,  give them a stir every five minutes or so to keep them from sticking to the pan.

While the onion is cooking, peel and cube the butternut squash. The medium-large squash I used weighed in at 3.3 lbs and yielded about 6 cups of peeled, cubed squash. Add squash cubes, apple and chicken stock, bring to a boil and cook until squash and apples are tender. Purée the soup in a food processor or blender. Return the soup to the pot, add apple juice or cider and season with salt and pepper. Serve piping hot with a garnish of a tangy freshly grated green apple.

Over the years this recipe this soup has become less of a project for the home cook. Don’t feel like chopping a large unwieldy squash? You can buy peeled and chopped squash at most grocery stores. Does the thought of straining and pouring hot soup into a blender make you just a little nervous? An immersion blender eliminates this step. If you make this soup ahead of time, cool it and store in the fridge.  When you reheat the soup you may thin to thin it out a bit with a little more stock.

The most amazing thing about this recipe is you have made a rich, creamy soup without a drop of cream or milk. Perfect for the holidays or great alongside a sandwich of leftover turkey.

The primary players.
A three pound squash yielded about 6 cups of cubes.
Simmering on the stove top.
I pureed my soup in the food processor but a blender or immersion blender works too.

Curried Butternut Squash Soup

Serves six

Ingredients

  • 4 T unsalted butter
  • 2 c finely chopped onions
  • 4-5 t sweet curry powder
  • 3 lb butternut squash
  • 2 tart apples, peeled, cored and chopped
  • 3 c chicken stock
  • 1 c apple juice or cider.
  • kosher salt and freshly ground pepper to taste
  • 1 shredded unpeeled tart apple (garnish)

Directions

  1.  Melt the butter in a 5 quart Dutch oven. Add chopped onions and curry powder and cook, covered, over low heat until onions are tender, about 25 minutes.
  2. While the onions are cooking peel the squash, scrape out the seeds and chop the flesh into 1″ cubes.
  3. When the onions are tender, pour in the stock, add squash and apples, and bring to a boil. Reduce heat and simmer, partially covered, until squash and apples are very tender, about 25 minutes.
  4. Pour the soup through a strainer, reserving the liquid, and transfer the solids to a bowl of a food processor. Add 1 cup of the cooking stock and process until smooth.
  5. Return the puréed soup to the pot and apple juice and the remaining cooking liquid, about 2 cups, until the soup is of the desired consistency.
  6. Season to taste with salt and pepper, simmer briefly to heat through, and serve immediately, garnished with shredded apple.