November 17, 2013 Eggplant “Pizzas”

DSC_3935a


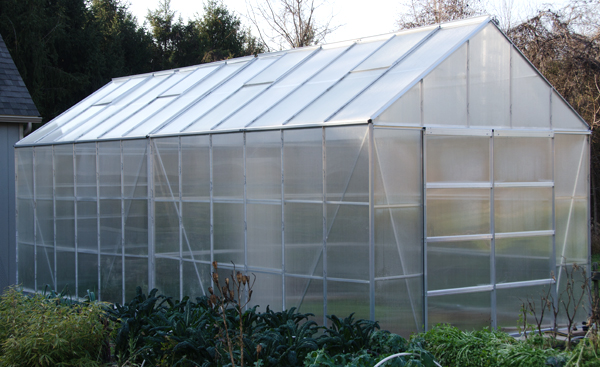
Joe’s not so little greenhouse set out in the garden extended our growing season for some vegetables to the latest date ever. When he brought in the last of the peppers and eggplants on Sunday I knew I needed to find a special way to use them to commemorate the end of their growing season. The peppers, for the most part were transformed into one of his favorites, stuffed peppers and for the eggplant I turned to a recipe from Julia Child.

In her 1975 cookbook, From Julia Child’s Kitchen, among personal anecdotes  and recipes for Caesar Salad (yes, Mr. Caesar Cardini actually made this tableside for a young Julia and her family), consommés, stews and apple charlotte is this gem. Tranches d’aubergine a l’italienne might put off the average cook, but eggplant pizzas, now that’s something we can all relate to. The recipe made a second appearance as miniature eggplant pizzas in her 1989 work and one of my favorite go-to cookbooks, The Way to Cook.

The classic pear shaped variety of eggplant like Black Beauty works best here. I began by cutting the eggplants crosswise into 3/4 inch planks, the skin was relatively thin so I left it on.Then I salted the slices on both sides to extract excess liquid. This is a step I would skip in the summer when the eggplants are at their freshest and not very seedy. I let the eggplants sit for about a half hour and started my sauce.

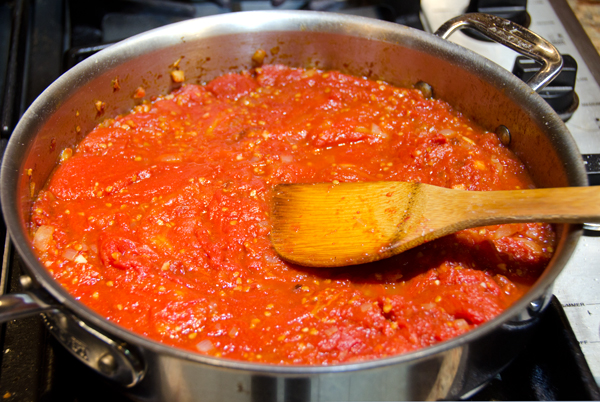
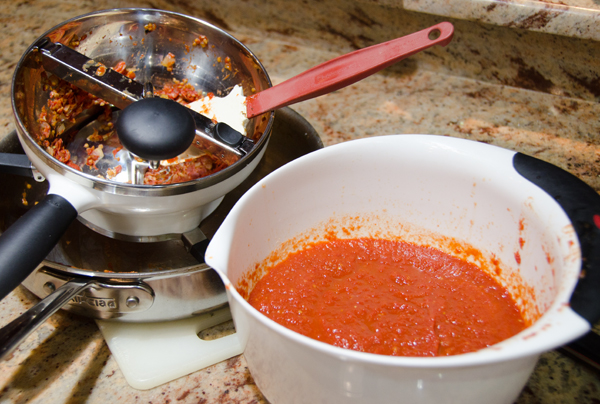
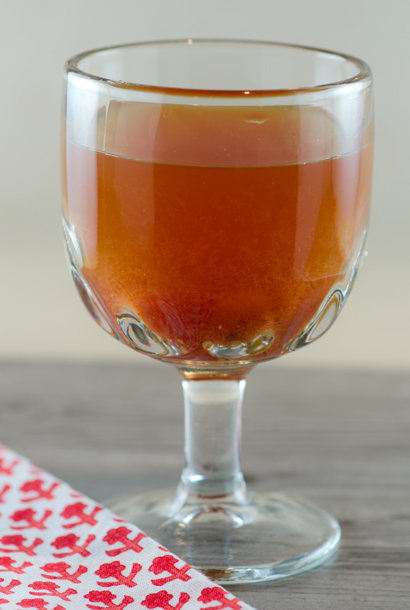
The day before I defrosted two quart bags of my roasted tomatoes, a 28 ounce can of plum tomatoes or a store bought sauce can substitute here. Step one for me is to pour off the liquid that accumulates in the bag, a little lagniappe for the chef. It’s definitely not the prettiest, but it is the best tasting tomato juice you will ever try. I sautéed one finely chopped onion and two chopped cloves of garlic until softened but not brown, about five minutes. Then the tomatoes and the rest of the liquid are added to the pan, breaking up the larger chunks of tomatoes with the back of a wooden spoon. When the tomatoes have cooked down sufficiently, I put them through a food mill to strain out most of the seeds. This results in a smoother sauce.

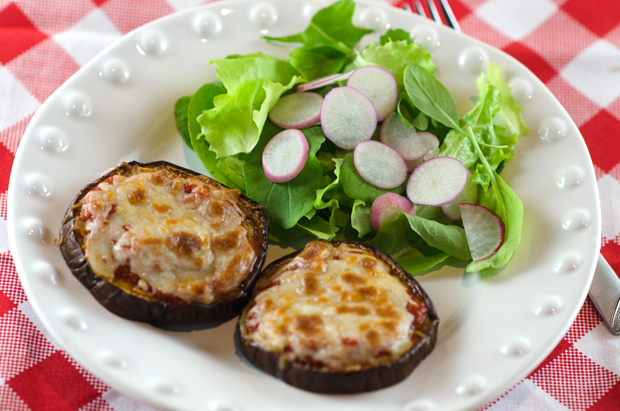
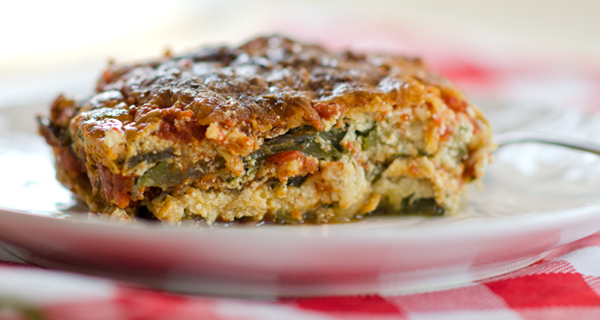
The eggplant slices are patted dry and lightly brushed with olive oil. I baked the eggplant slices on a wire rack over a baking sheet so that both sides would cook evenly. As Julia says “not so long that the slices become mushy and lose their shape”. After twenty five minutes I removed the baking sheet from the oven and now set the oven to broil. I covered the slices with a generous coating of tomato sauce and sprinkled a combination of mozzarella and grated Parmesan. The “pizzas” are now returned to the oven until the cheese is melted and slightly browned. Julia suggests these as part of a vegetarian combination or arranged around a main event, be it an omelet, a steak or a roast lamb.

Eggplant pizzas would make a good snack or a light lunch with a salad. A recipe that’s vegetarian, low carb and gluten free, as always “Our Lady of the Ladle“, Julia was ahead of her time.


Julia Child’s Eggplant Pizzas

Ingredients

  • 2  large eggplants (about 1 lb. each)
  • 1T salt, for drawing water out of eggplant
  • 2T olive oil for brushing eggplant before roasting
  • 2 t Italian seasoning, for sprinkling on eggplant before roasting
  • 1/3 c freshly grated Parmesan
  • 1/3 c finely grated low-fat mozzarella

Sauce Ingredients

  • 1T olive oil
  • 1 small onion, finely chopped (about 1 cup)
  • 2 large garlic cloves, very finely chopped
  • 1 28 oz. can of plum tomatoes (or use 3 cups peeled and diced fresh tomatoes)
  • 1/2 t Italian seasoning
  • 1/4 t dried oregano

Directions

  1. Cut eggplant into 3/4 inch thick slices. Place eggplant pieces on a double layer of paper towels and sprinkle both sides generously with salt. Let the eggplant sit with the salt on it for about 30 minutes to draw out the liquid. (After the eggplant sits for 15 minutes, turn on the oven to 375°F.
  2. Make the tomato sauce while the eggplant sits. Heat 1 tablespoon of olive oil and sauté the onion and garlic just until it becomes softened and fragrant.   Add the diced tomatoes, Italian seasoning and oregano.
  3. Then let the sauce simmer on low until it’s thickened. Break up tomatoes with a fork while the sauce cooks. (You can add water as needed. Let sauce simmer until ready to put on eggplant slices.)
  4. After 30 minutes, pat the eggplant dry with paper towels. Brush both sides of the eggplant slices lightly with olive oil and sprinkle tops with Italian seasoning. Place eggplant slices on a wire rack over a baking sheet. Roast the eggplant about 25 minutes, but “not so long that the slices become mushy and lose their shape” as Julia says.
  5. While the eggplant roasts, combine Parmesan with mozzarella. After 25 minutes or when eggplant pieces are done, remove eggplant from the oven and turn oven setting to broil. Spread a few tablespoons of sauce on the top of each eggplant slice, sprinkle with thin basil slices and top with cheese blend. Put pizzas under the broiler until the cheese is melted and slightly browned.
DSC_3951a
We are still harvesting salad greens, spinach and arugula from the greenhouse.
DSC_3918a
Cooking down the roasted tomatoes.
DSC_3919a
Putting the cooked tomato sauce through a food mill makes a smoother sauce and eliminates most seeds.
DSC_3911a
Doesn’t look like the stuff in a bottle, but it is the best tasting tomato juice you will find.
DSC_3932a
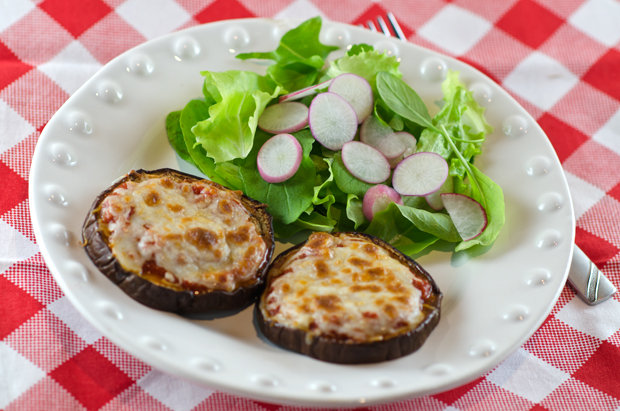
Served with a simple salad of baby greens and radishes from the garden, eggplant pizzas make a delicious light lunch.


October 21, 2013 Toasted Farro with Pickled Carrots and Runny Eggs

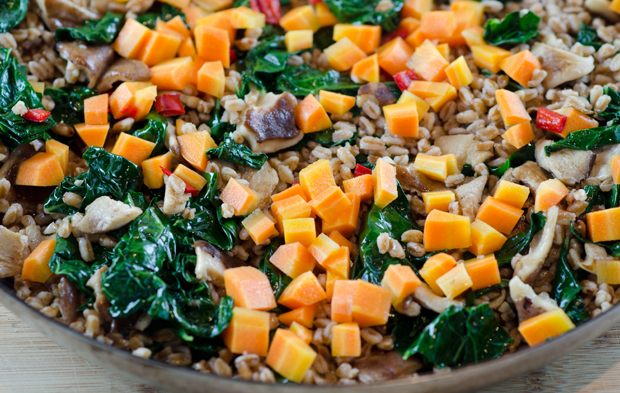
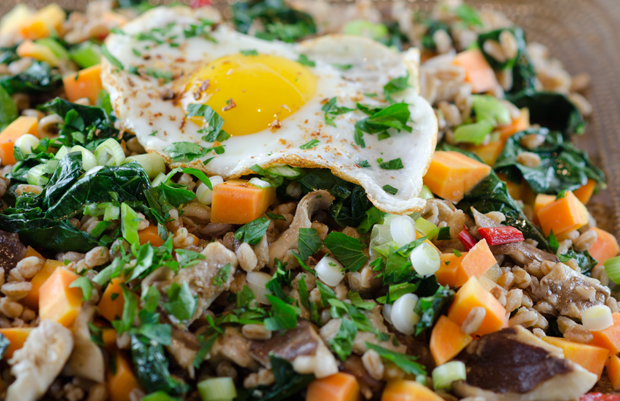
DSC_3529a October brings more changes to the garden. The last of the tomatoes, peppers and eggplants have been harvested. A new planting of lettuces and greens are ready for salads. Root vegetables: beets, carrots and turnips are large enough to pull from the ground. Both varieties of kale we grow, Cavolo Nero, also known as Lacinato, and Red Russian will provide us with greens for months to come. Another selection from the Giardini (“gardens”) section of the menu from Ava Gene’s restaurant in Portland inspired me from the September issue of Bon Appetit, Fried Farro with Pickled Carrots and Runny Eggs.

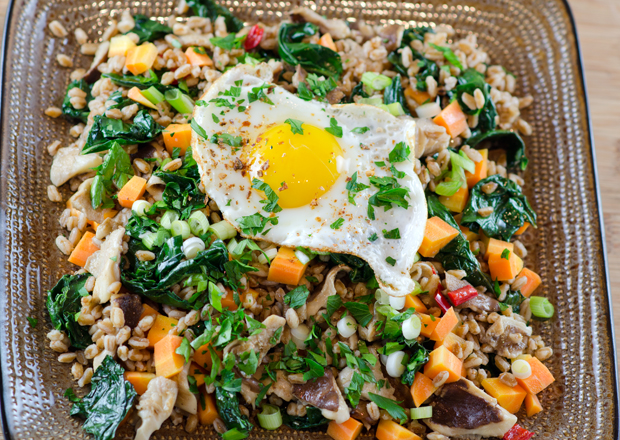
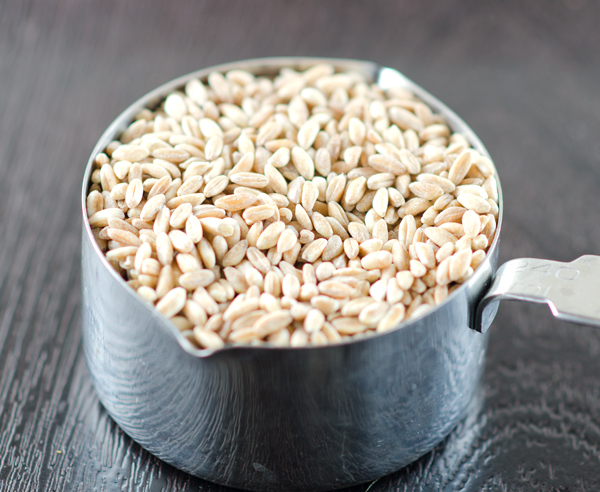
In this dish, toasted farro is combined with spicy quick-pickled carrots, exotic mushrooms and earthy kale and topped with a runny egg. Farro is an ancient grain that I wrote in greater detail in a post last year. The recipe calls for browning the farro grains before cooking, enhancing the nutty flavor. The grain in this dish is semi-pearled farro, I was only able to find pearled farro. Pearling removes the inedible hull that surrounds the grain, but it also removes the nutritious germ and bran. Pearled farro will cook a bit quicker than the semi pearled. If you can’t find farro in your store, I think barley or cracked wheat could substitute. Just remember that farro is often translated from Italian into English as “spelt”. Spelt is not farro and will take more than twice as long to cook.

We have been growing kale long before it became a fad and on the menu at every trendy restaurant. In fact the other night it became an ingredient in the Quick fire Challenge on Top Chef. Dana Cowin, editor in chief at Food and Wine magazine included kale, along with bacon, smoked items and runny eggs in a list of “trends that are done”. Sorry Dana, kale is more than a trend for us. We were enjoying it before the masses discovered it and will continue to enjoy it for years to come. In fact it won’t be in it’s prime until after the first frost.

Maitake or hen of the woods mushrooms add a meaty dimension to the dish. Though I have used them many times before, I was not able to source maitakes in our local supermarkets. Maitakes are often called hens in the wood mushrooms because they grow in clusters that resemble the feathers of a chicken.  I substituted the similar and less expensive, shiitake mushrooms. I harvested carrots from our garden for the pickle with a fresh Serrano chili. The pickled carrots are very good, don’t forget to add the pickling liquid to the final dish, it adds yet another layer of flavor.

One ingredient was new to me, colatura. At first glance the word looks like coloratura, a soprano with a very nimble and high vocal range. My Google search thought I was looking for coloratura too. However, colatura, like it’s Asian counterparts, nam pla and nuoc man, is a sauce made from anchovies. In this case, anchovies are layered with sea salt in wooden barrels or plastic tubs. The fish are pressed down with a weighted lid.  Over time the fish lose their liquid and mix with the salt. The liquid drips through a hole in the tub and collects in another container.  The word colatura is from the Italian “colare“, to drip. It is said to be milder and more complex than the Asian anchovy based sauces. Since colatura is $16 for a 100ml  bottle and currently out of stock at Amazon, I think my first taste of colatura can wait.

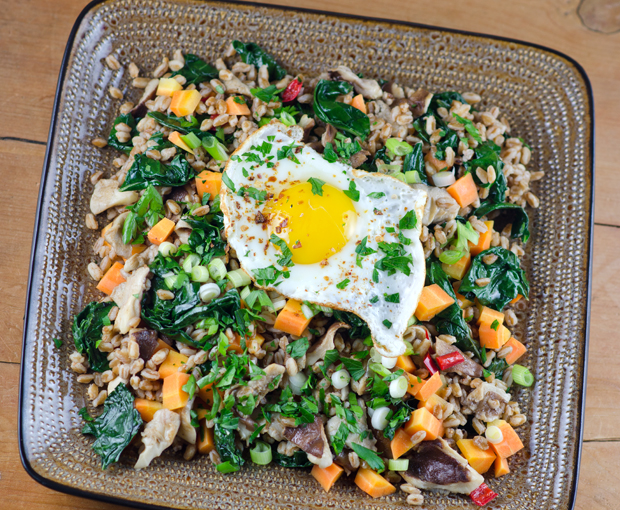
I did see maitakes at my local farmers market this weekend.  They were five dollars a quarter pound, shiitakes, a little cheaper at  four dollars a quarter pound. The finished dish, even with all my substitutions, was very good. It was a great side dish with chicken, minus the egg it would be a great picnic dish and a great vegetarian entrée. DSC_3537a Toasted Farro with Pickled Carrots and Runny Eggs

Bon Appetit Sept 2013 -recipe from Ava Gene’s restaurant

Makes 6 servings

Ingredients

  • 2 medium carrots, peeled, chopped
  • 1 Serrano chile, seeded and coarsely chopped
  • 1/2c white wine vinegar
  • 1t sugar
  • 1t kosher salt (plus some more)
  • 5T olive oil, divided, you will be using it to separately cook the farro, kale, mushroom and the runny egg
  • 1 cup farro (pearled or semi pearled)
  • 2 garlic cloves, chopped, one is cooked with the farro, the other with the kale
  • 6oz shiitake mushrooms, torn into 1″ pieces
  • 1/2 bunch Tuscan kale, center ribs removed, torn into 1″ pieces
  • 1T anchovy sauce ( I used nam pla) nuoc nam or colatura are accepted choices
  • 1/2c fresh flat-leaf parsley leaves
  • 2 large eggs
  • 2 scallions, thinly sliced
  • Crushed red pepper flakes

Directions

  1. Place carrots and chile in a small heatproof bowl. Bring vinegar, sugar, 1t salt and 1/2 cup water to a boil in a small saucepan. Stir to dissolve the sugar and salt. Pour over the carrots and chiles, let sit for at least 30 minutes. When ready to use, drain carrots and reserve the pickling liquid.
  2. While carrots are pickling, heat 1T oil in a medium saucepan over medium high heat. Add farro and half of the garlic and cook, stirring constantly until the farro is dark brown, 8 to 10 minutes. Add 4 cups water and bring to a boil. Gently boil farro for 20-25 minutes for semi pearled, slightly less time if pearled. It should be tender but still firm to the bite. Drain well and let cool.
  3. Heat 1T oil in a large skillet over medium high heat. Add mushrooms and cook, tossing often, until soft and just starting to brown, 5-7 minutes. Transfer mushrooms to a plate.
  4. Add 2T oil to the same pan, cook remaining garlic and kale until the kale is wilted, about 4 minutes. Add the fish sauce, farro, mushrooms and pickled carrots to the pan. Cook, tossing often until everything is warmed through. Season to taste with salt, fresh ground pepper and pickling liquid. Top with parsley.
  5. Heat remaining 1T oil in a small nonstick skillet over medium high heat. Crack eggs into skillet and fry until egg whites are set but yolks are still soft and runny, about 3 minutes.
  6. Top salad with eggs and scallions, season with red pepper flakes. Just before serving, break up eggs and mix into farro.
DSC_3504a
Tuscan kale thrives in the cooler temperatures of autumn.
DSC_3509a
Carrots just harvested from the garden.
DSC_3518a
Farro grains almost look like barley.
DSC_3522a
Kale, stemmed and washed, cut into 1″ pieces.
DSC_3525a
In the sauté pan, without the eggs and fish sauce, a dish even vegans could love!

DSC_3534a

September 3, 2013 Eggplant Caponata revisited

DSC_2138a


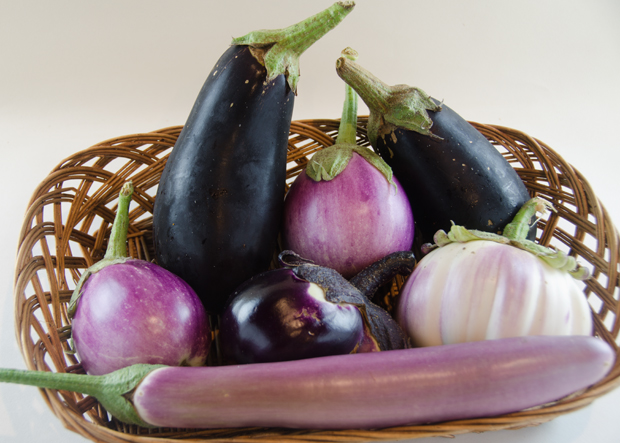
Summer is berry season and each month brings a new arrival. June is time for plump juicy strawberries. July brings succulent raspberries and blueberries. August brings one of my favorite berries, eggplant. A berry? you say. First, the members of the nightshade family, tomatoes, pepper and eggplants to name just a few, are actually fruit, not vegetables. Botanically speaking, fruit are seed bearing structures that develop from the ripened ovaries of flowers. But eggplant are not just any old fruit, they are considered berries because they are indehiscent which means they do not sprout open when ripe. With these technicalities aside, there are two burning questions that most people have when it comes to eggplant; should I salt or not? and are there male and female eggplants?

DSC_2012a
A round up of the varieties of eggplant we grow.


Young eggplants, picked fresh from the garden or purchased at the farmers market will not need salting. They will have thinner skin and fewer seeds. The bitterness originates in the seeds which contains nicotinic alkaloids. Did I mention tobacco is another member of the nightshade family? So the larger the eggplant, the greater the likelihood of it having more seeds. Salting, also known as degorging, is good for drawing out excess liquid from the eggplant so that it doesn’t absorb as much oil in the cooking process, but it is only successful in masking bitterness.

The male vs. female eggplant was a tale that even I fell victim to. I was surprised at the number of websites that propose the theory of male and female eggplants as fact. The story goes that a dash-shaped slit on the bottom of the fruit indicates a female eggplant and a deep round indent indicates a male. The male eggplant reportedly has fewer seeds and is more desirable. It’s debunking time again. Fruit, like eggplants develop from the female flower on the plant but have no sex of their own.

So, how do you choose the best eggplant?  Look for eggplant that have smooth, bright, shiny skin. When you press on the skin it should spring right back. Select eggplant that are heavy for their size, indicating younger fruit. The calyx, the green leaves at the stem end should be fresh and green, not dried out and brown.

Our garden in the month of August yields an abundance of the nightshade family, tomatoes, peppers and eggplants. While our tomato harvest is better than last year, this has proven to be not the best year for eggplants and peppers. I wanted to take advantage of the eggplants we did grow and make one of our favorites, caponata.

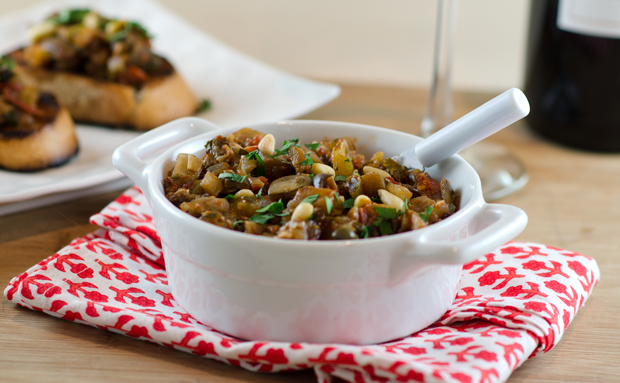
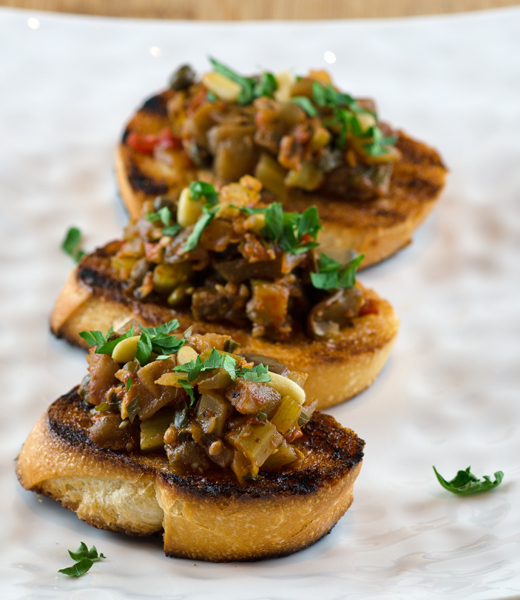
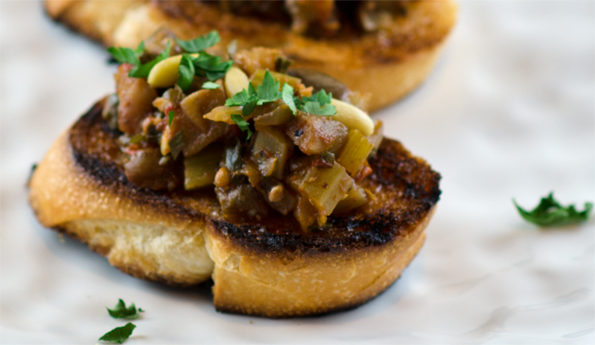
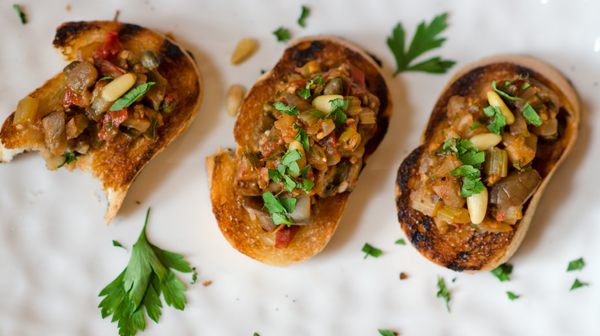
I posted a different recipe for caponata last year, this is one from my catering days.  A great room temperature dish, caponata always tastes better the second day, after the flavors had the chance to meld. It is an agro dolce, a sweet and sour dish from Sicily that shows the influence of North African flavors on the region. Serve on grilled baguette slices and garnish with toasted pine nuts and chopped flat leafed parsley.

DSC_2117a


Eggplant Caponata

Serves 6-8 as a side dish

Ingredients

  • 1/3c olive oil
  • 3c diced eggplant
  • 1 1/2c chopped onion
  • 1c thinly sliced celery
  • 2c chopped tomatoes
  • 3T minced garlic
  • 2T tomato paste
  • 1/4c red wine vinegar
  • 1c sliced green or black olives
  • 1/3c capers, well drained
  • 1 or 2 anchovies, drained and chopped
  • 1T sugar
  • 1/2t crushed red pepper flakes
  • 1/2c minced flat leafed parsley
  • Kosher salt and freshly ground black pepper
DSC_2065a
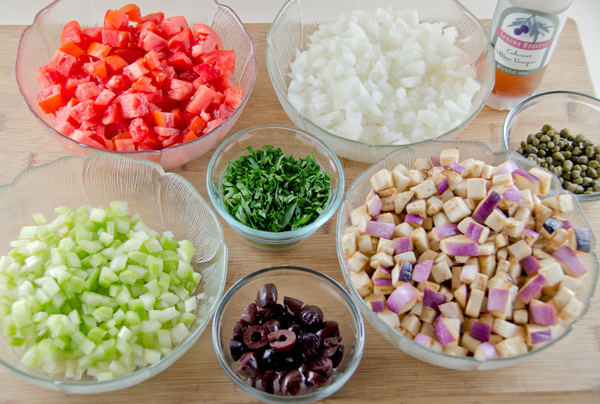
A lot of chopping but the dish comes together quickly after that.

DSC_2069a


Directions

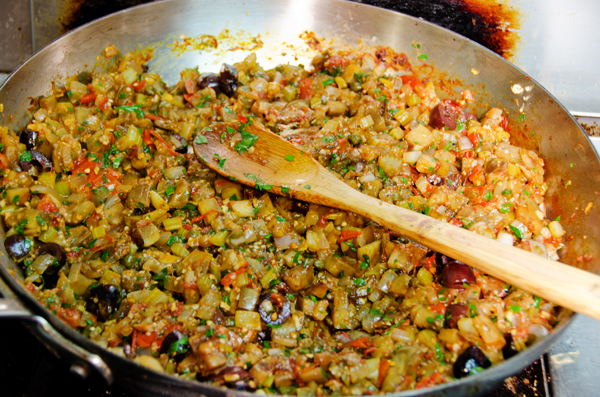
  1. Heat the olive oil in a large skillet. Add the eggplant and sauté until somewhat soft, 3-4 minutes. Add the onions, celery, tomatoes and garlic and cook for another 10-12 minutes, stirring occasionally.
  2. Remove from the heat, add the remaining ingredients and toss lightly. Refrigerate until ready to serve, preferably the next day. Bring to room temperature before serving.

DSC_2131a

DSC_2122aDSC_2145a-copy

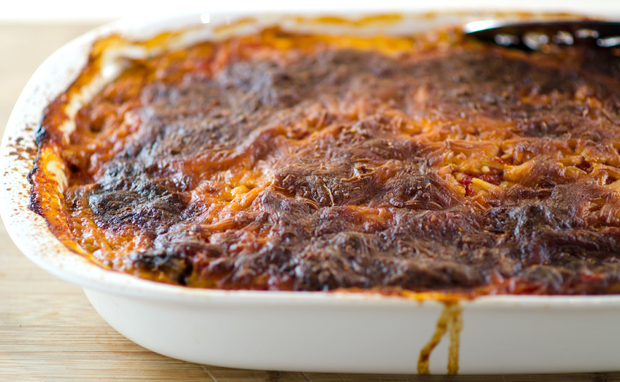
August 22, 2013 Zucchini Lasagna

DSC_1857a

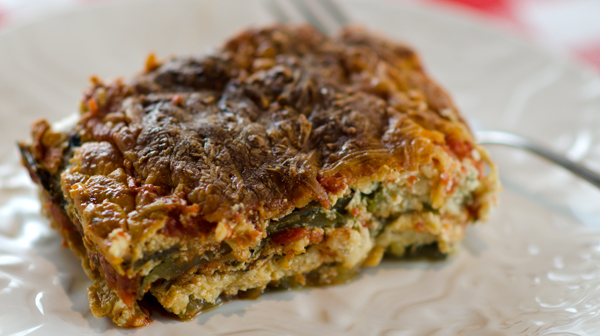
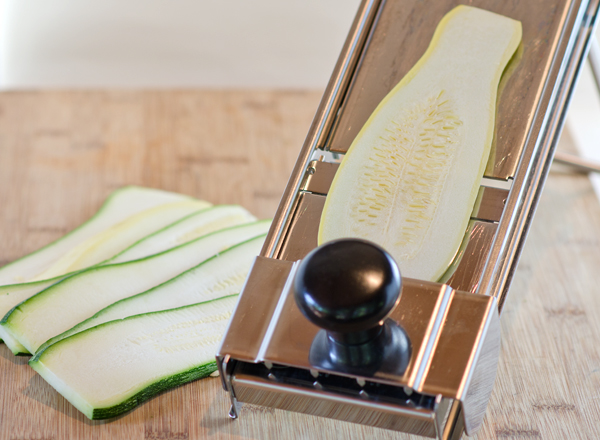
When you grow big zucchini, make zucchini lasagna. In this recipe, zucchini or yellow squash “noodles” replace the usual pasta. I cut the zucchini in half lengthwise first so that I would have a flat surface to work with. A mandoline works best here. In case you didn’t know, a mandoline, also spelled mandolin is a hand operated kitchen tool with adjustable blades that produces uniform slices. They can cost anywhere from about  two hundred dollars for a professional stainless steel style model all the way down to less than twenty dollars for a plastic model. The more expensive models will slice, julienne and waffle cut, the less expensive ones just slice. Whatever model you choose, use the hand/finger guard when you run the food against the blade, believe me, I speak from personal experience.  If you have steady hands and no slicer, use a sharp knife and be sure to use a cutting board to stabilize the squash to ensure even slices. Since zucchini is 95% water it is best to precook it to reduce excess moisture that will end up in your finished dish. Some of the recipes I saw suggested parboiling, sautéing, but I found that grilling worked well for me. My version is totally vegetarian. If you want something more substantial, add ground beef, turkey or sausage to your sauce. Just like regular lasagna, it tastes even better the next day, if it lasts that long!

DSC_1993a


Zucchini Lasagna

Serves four to six

Ingredients

  • 3-4 long zucchini/yellow squash
  • 4 c thick tomato sauce
  • 1 15 oz container of regular or low-fat ricotta cheese
  • 3 lightly beaten eggs
  • 2 T fresh chopped basil
  • 2 T fresh chopped flat leaf parsley
  • 1 t dried oregano
  • Kosher salt and fresh ground pepper to taste
  • 1 ½ c grated Parmesan cheese or other similar grated cheese
  • 1 lb grated mozzarella cheese

Directions

  1. Preheat oven to 350° F. Place baking rack in the lower position.
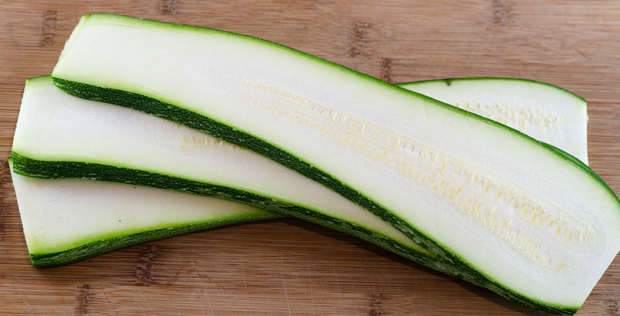
  2. Cut squash into ¼ inch thick slices, to fit the pan lengthwise, if your squash is shorter, just orient the slices in the opposite direction, just be sure they cover the pan.  You should have enough slices to make three layers.
  3. Heat a grill pan or an outdoor grill to medium high heat. Brush both sides of the slices lightly with olive oil.
  4. Grill squash slices on both sides so that they have grill marks, 3-5 minutes each side. Squash should be cooked but not falling apart.
  5. In a medium bowl, combine the ricotta, eggs, parsley, basil, oregano and a cup of the Parmesan cheese. Reserve the rest for the top layer.
  6. In a 9×13 glass or ceramic dish, spoon a thin layer of sauce on the bottom of the pan.
  7. Place the first layer of squash over the sauce. Spoon a third of the ricotta mixture over the squash. Sprinkle with a third of the mozzarella cheese. Repeat the layers two more times, sauce, “noodles” ricotta, ending with the mozzarella cheese and reserved Parmesan from step four.
  8. Bake for one hour, rotating pan half way through cooking time. Let lasagna rest for at least a half hour before serving.
DSC_1844a
I used my Matfer mandolin slicer, a gift many years ago to get neat uniform slices.
DSC_1976a
Slices should be 1/4″ thick
DSC_1850a
Use the grill or a grill pan to slightly cook the zucchini.
DSC_1998a
Fresh zucchini with tomato sauce, delicious!

DSC_1982a

July 30, 2013 Middle Eastern Party Side Dishes

DSC_1071a

Every good meal deserves some delicious and interesting side dishes and our Middle Eastern feast was no exception. I combined some past favorites with new additions.

Every Middle Eastern country seems to have their own variation of an eggplant dip, baba ghanoush (also spelled ghanouj) is the Lebanese variety of this classic. This dish, often referred to as eggplant caviar is smooth, creamy and smoky. Char your eggplants first over a grill or a gas stove top to give it’s classic smoky flavor. The creamy eggplant flesh is combined with tahini (sesame seed paste), fragrant cumin and tart fresh squeezed lemon juice. Whether purple, white, speckled, fat and round or long and thin, choose eggplant that have firm, taut exteriors with unblemished glossy skin. So what does baba ghanoush mean? Middle Eastern cooking authority, Clifford Wright states the phrase “baba ghanoush” is untranslatable. Everyone agrees that baba is the Arabic word for an endearing form of the word father, think daddy… So Wright’s premise is that the eggplant is the “daddy” of the Arabic vegetable kingdom. Ghanoush, well that’s another story. I have seen everything from cute, coquettish, to spoiled or pampered. Could the originator of this classic been a privileged sultan? We may never know….

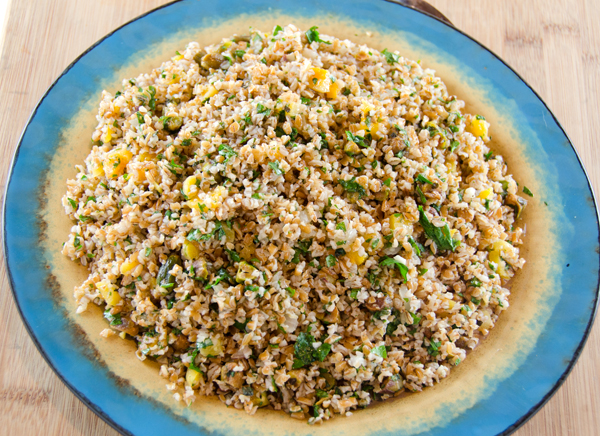
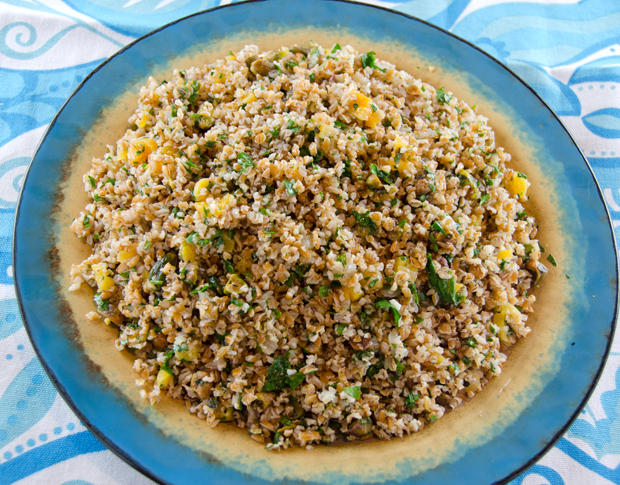
Correctly stated, tabbouleh is a Lebanese herb salad with bulgur and not a bulgur salad with herbs. My second side dish is similar to, but not tabbouleh since it does start out with copious amounts of  garden fresh parsley, mint and cilantro combined with bulgur wheat.  This recipe swaps out the traditional tomatoes and cucumbers for tangy sweet apricots and delicately nutty pistachios. Bulgur is whole wheat grain that has been cracked and sifted into four sizes ranging from fine to coarse. It is sometimes referred to as cracked wheat, but that is a misnomer. It differs from cracked wheat since bulgur has been partially cooked by parboiling or steaming. Cracked wheat is uncooked wheat that is dried and coarsely cracked, preserving the bran and germ layers. Bulgur cooks in half the time of cracked wheat.  Bulgur is a nutritional powerhouse, high in fiber, protein, iron, magnesium and B vitamins. Perfect as a take along for picnics and potlucks, bulgur salad with apricots and pistachios could become a main dish with the addition of chicken or shrimp. To properly eat your bulgur salad, scoop it up with a leaf of romaine lettuce, not with a pita or fork and knife.

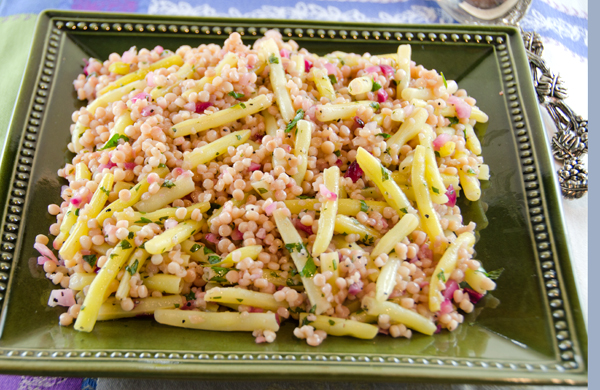
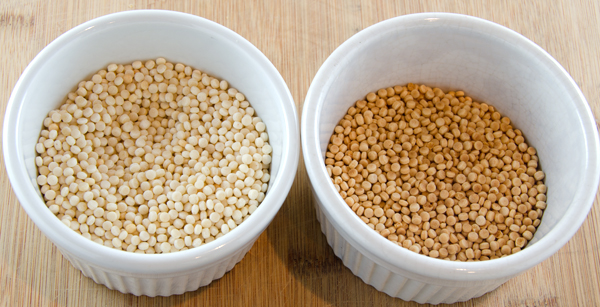
Israeli couscous is a subject I covered extensively last summer in this post. Pearled or Israeli couscous, like regular couscous is a whole grain made with semolina or wheat flour. It has a slightly chewy texture. In this recipe, Israeli or pearled couscous is combined with the garden’s first of the season yellow beans and pickled red onions. Toasting the grains before cooking gives them a nutty flavor. I found it is best to drain the pickled onion before adding to other ingredients to prevent the vinegar from overwhelming the dish. The pickled red onions will turn your couscous pink. One thing is certain, I have found no “written in stone” cooking proportions of Israeli couscous to water or broth, but I have found that 2 to 1, liquid to Israeli couscous works for me, otherwise the couscous retains too much liquid and doesn’t mix well with the other ingredients.

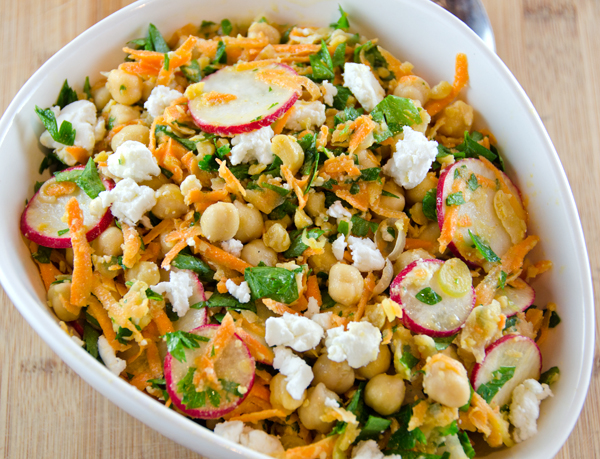
Chickpeas are a staple of Middle Eastern cuisine and the base for two of the classics, hummus and falafel. Chickpea, carrot and parsley salad took advantage of our carrot and radish harvest and made a colorful side with our meal.  Fresh cooked chickpeas are a revelation. The first time I had them was as a part of a Valentine’s day dinner my dear husband cooked for me many years ago. I’m not saying that canned are bad, in most instances I prefer the convenience of canned. Just cook them sometime to appreciate the wonderful nutty flavor of fresh chickpeas.
DSC_1082a Chickpea, Carrot and Parsley Salad Serves 4-6

from Fine Cooking magazine

Ingredients

  • 2c chickpeas, drained and rinsed
  • 1c loosely packed coarsely chopped fresh flat leaved parsley
  • 1/2c sliced radishes
  • 1/4c chopped scallions
  • 3T fresh lemon juice
  • 1t ground coriander
  • 1t ground cumin
  • Kosher salt and fresh ground pepper
  • 6T extra virgin olive oil
  • 1/3c crumbled feta cheese
  • 1/3c toasted pine nuts

Directions

  1. Mash 1/2c chickpeas into a coarse paste with a potato masher or wooden spoon.
  2. Toss in the remaining chickpeas, parsley, carrots, radishes and scallions. Stir to combine.
  3. Whisk together the lemon juice, spices, 1/2t salt and a generous grind of pepper. Whisk ingredients while adding the olive oil in a slow steady stream. Pour over the salad and toss gently. Season to taste with salt and pepper. Top with feta cheese and pine nuts and serve.

DSC_1064a Israeli Couscous, Yellow Bean and Pickled Red Onion Salad

Serves six

Adapted slightly from Fine Cooking magazine

Ingredients

  • 1/2c red onion in small dice
  • 1/4c red wine vinegar
  • 1T granulated sugar
  • Kosher salt
  • 3/4lb yellow or green beans trimmed and cut into 1/2″ pieces\
  • 1/2c pearled or Israeli couscous
  • 1c water or broth
  • 2T coarsely chopped fresh flat-leafed parsley
  • 2T extra-virgin olive oil
  • Freshly ground black pepper
DSC_1021a
Untoasted and toasted pearled or Israeli couscous.

Directions

  1. Put the onions in a bowl. In a small saucepan, bring the vinegar, sugar and 1/2T salt to a boil. Pour the mixture over the onions and let sit for 20 minutes. Drain and reserve liquid.
  2. Bring a medium saucepan of well salted water to a boil over high heat and cook the beans until crisp tender, about 4-5 minutes. Drain beans in a colander.
  3. Toast the couscous in a dry skillet stirring over medium heat until golden brown, about 3-4 minutes. In a small saucepan bring water or broth to a boil. Cook the couscous in the boiling water until tender, about 8-10 minutes. Drain in a colander.
  4. In a medium bowl toss the couscous, beans, onion, parsley and olive oil and toss. Add a little of the reserved vinegar to the salad if desired. Season to taste with salt and pepper and serve.
DSC_1070a Bulgur Salad with Herbs, Pistachios and Apricots

Serves 8 as a side dish

Adapted from Fine Cooking magazine

Ingredients

  • 2c medium bulgur
  • Kosher salt
  • 2/3c plus 2T extra virgin olive oil
  • 1/3c minced shallots
  • 1T minced garlic
  • 1/2c medium chopped dried apricots
  • 1c coarsely chopped fresh flat leafed parsley
  • 1/2c coarsely chopped fresh cilantro
  • 1/2c coarsely chopped fresh mint
  • 1/2c chopped roasted pistachios
  • 1/3c fresh lemon juice
  • Freshly ground black pepper
DSC_1010a
Fresh parsley from the garden that has been washed and spun in a salad spinner. Next I lay them out to further dry on clean cloth dishtowels.
DSC_1013a
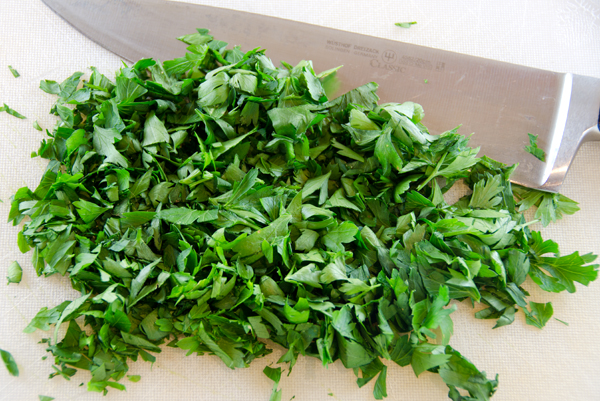
Just a rough chop is needed for the parsley.

Directions

  1. In a large skillet, toast the bulgur over medium heat, stirring constantly with a wooden spoon, until aromatic and a shade darker. Transfer to a bowl.
  2. In a medium saucepan bring 2 cups of water and 1t salt to a simmer over medium high heat.
  3. While you are waiting for the water to come to a simmer, heat 2T oil in the skillet over medium high heat.  Add the shallot and the garlic and cook, stirring until tender, about 3 minutes. Stir in the bulgur, apricots, 1t salt and the now simmering water.
  4. Put a lid on the skillet and remove it from the heat. Let stand until the bulgur is tender and has completely absorbed the liquid, 35-40 minutes. Gently fold in the herbs and pistachios.
  5. In a small bowl, whisk the lemon juice with a 1/4t each salt and pepper. Slowly whisk in the remaining 2/3c olive oil in a slow stream.
  6. Drizzle the salad with the dressing, season to taste with salt and pepper and serve. Salad can be made a day ahead. Bring to cool room temperature before serving. Season to taste with additional salt and pepper if necessary.
DSC_1042a

Baba Ganoush

Serve 6-8 as a side dish

Ingredients

  • 2 large eggplants
  • 5 cloves garlic, minced
  • Kosher salt
  • 1/2c tahini
  • 1/2t ground cumin
  • 1/2c fresh lemon juice
  • 1T extra virgin olive oil
  • Fresh chopped flat leaf parsley

Directions

  1. Preheat oven to 375°F
  2. Char eggplant over a grill or a gas cooktop, turning occasionally until the skin turns black, 5-10 minutes.
  3. Place the eggplants on a baking sheet and bake until very soft, 15-20 minutes. Cool the eggplant and peel the skin.
  4. Place the pulp in a food processor and pulse to make a smooth paste. Add garlic, salt, cumin, tahini and lemon juice to taste and pulse to combine. Season with additional lemon juice or salt if needed.
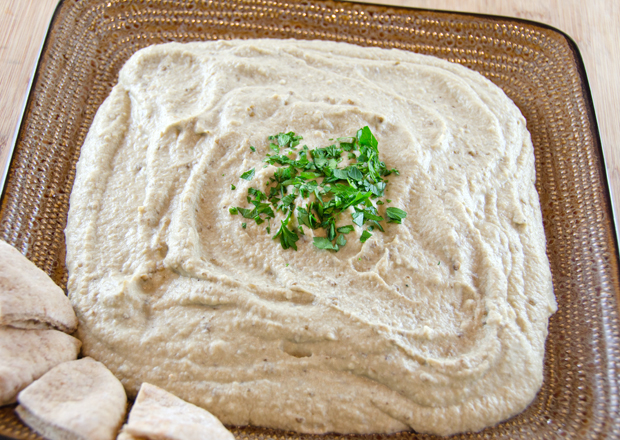
  5. Spread the puree on a plate. Drizzle with additional olive oil if desired and sprinkle with parsley. Serve at room temperature with pita bread.

July 18, 2013 Za’atar-Spiced Beet Dip with Goat Cheese and Hazelnuts

DSC_1054a

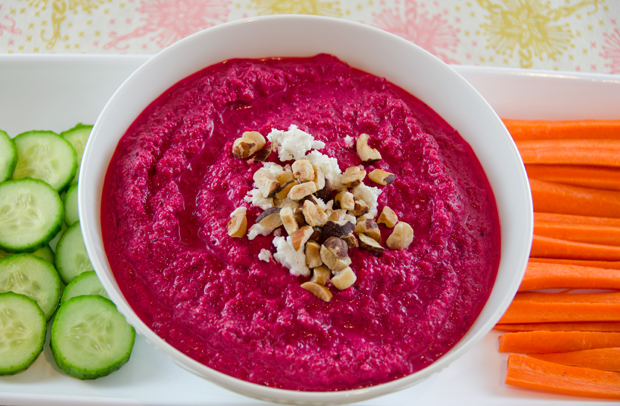
We plant beets in the garden in early spring. The first thinnings are one of the greens in our salads, later the slightly larger thinnings are sautéed with garlic as a side dish. The first harvest of the beets is just about completed and I was pleased to use them in a new way.  We chose a Middle Eastern theme for the Sunday cookout and I learned from popular London chef and cookbook author, Yotam Ottolenghi, that beets have a strong presence in the cuisine in every ethnic group in Jerusalem. My first thoughts went to borscht, the hearty Eastern European soup often identified with the Jewish community made with beets and other root vegetables. In this recipe, Ottolenghi purees them to make the very delicious za’atar spiced beet dip with goat cheese and hazelnuts.

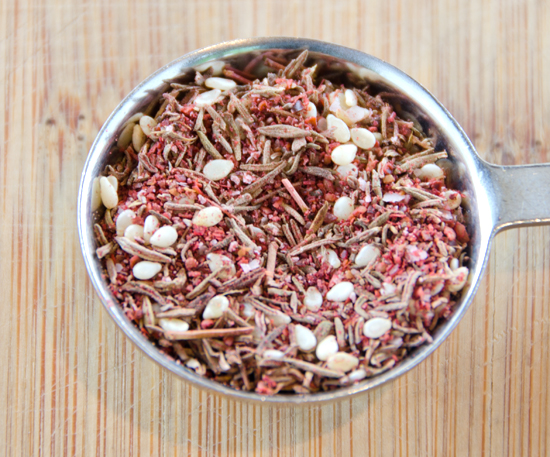
Za’atar is a Middle Eastern spice blend composed of dried thyme, sesame seeds and sumac. Though I’m sure everyone is familiar with the first two, sumac is a spice most of us are not acquainted with. When you say sumac to me, my arms develop a rash and start to itch and my first thoughts turn to poison sumac. Until recently all the “poisons,” oak, ivy and sumac were classified under the genus, Rhus, along with the varieties of sumac that do not cause skin rashes. In recent years the “poisonous three”  were moved to a different genus, Toxicodendron, Latin for the word “poison tree”.

So on to sumac, it was first used by the Romans for it’s sour flavor before the arrival of lemons from Asia.  Sumac is a decorative bush that thrives in the temperate and sub tropical climates of the Middle East and southern Europe. The dark purple berries are dried and ground have a fruity astringent taste. Along with dried thyme, sesame seeds (toasted or not), salt and with the occasional addition of marjoram, oregano or cumin, they compose this versatile, fragrant spice blend.

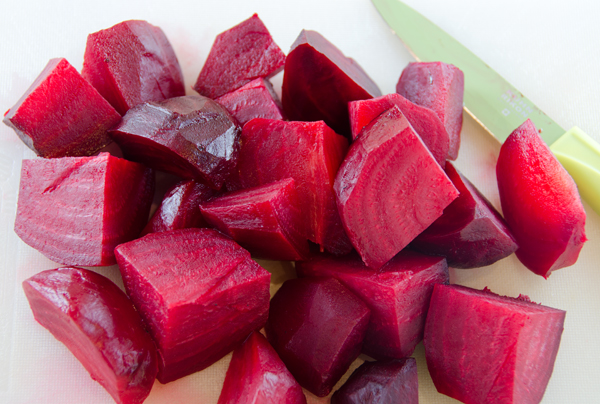
When it comes to cooking beets, my method of choice is always roasting, I think it brings out the sweetness in any root vegetable. Just scrub your beets very well, no need to peel now, cut off the root and stem ends, you can use the greens separately. Take a large piece of heavy duty aluminum foil and place the beets in the center. A sprinkle of salt, a little drizzle of olive oil, wrap them up securely, place on a baking sheet in case of drippings and into a 350°F oven they go. My beets are always different sizes, I check after the first hour and any that can be pierced easily with the tip of a knife are removed from the foil. Then back into the oven for the larger ones until all are ready. Once sufficiently cooled, the skin peels off easily with your now pink fingers. If that is an issue for you, I suggest rubber gloves! The beets are cut into manageable wedges along with garlic, a small hot pepper, I chose a tiny Thai pepper that provided all the heat I wanted, creamy plain non fat Greek yogurt, a little real maple syrup and the za’atar. A sprinkling of toasted hazelnuts and a little goat cheese “gild the lily” and make for a vibrantly colored, delicious dip to enjoy with raw vegetables or pita chips.

DSC_1019a
Up close and personal with za’atar, a Middle Eastern spice blend.

Za’atar-Spiced Beet Dip with Goat Cheese and Hazelnuts

Adapted slightly from Food and Wine Magazine Sept 2012

Makes 3 cups

Ingredients

  • 6 medium beets (1 1/2lbs) trimmed
  • 2 small garlic cloves, minced
  • 1 small red chile, seeded and minced
  • 1c plain Greek yogurt
  • 3T extra-virgin olive oil
  • 1 1/2T pure maple syrup
  • 1T za’atar
  • Salt
  • 1/4c roasted skinned hazelnuts, chopped
  • 2T goat cheese, crumbled
  • Raw vegetables or chips for serving

Directions

  1. Preheat the oven to 350°F. Wrap the beets securely in foil and bake for about an hour, until beets are tender. Let cool slightly.
  2. Peel the beets, cut into wedges and transfer to a food processor. Add the garlic, chile, yogurt and pulse until blended. Add the olive oil, maple syrup and za’atar and puree. Season with salt to taste. Scrape into a wide, shallow bowl. Scatter the hazelnuts and goat cheese on top and serve with raw vegetables or pita chips.
DSC_1007 copy
The root and stem ends of the beet are trimmed before weighing. Yes that is a baby scale!
DSC_1016ajpg
The beets are peeled and cut into wedges before they go into the food processor.
DSC_1052a
The beet dip is delicious with raw vegetables or pita chips.


July 5, 2013 Corn Maque Choux

DSC_0935a

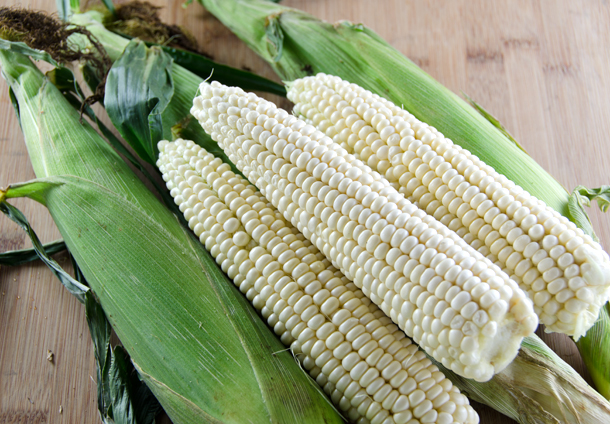
We had a wonderful crab fest last weekend courtesy of Nik. Along with a half bushel of crabs he brought our first fresh corn of the season from the Eastern Shore of Maryland. We love corn and take advantage of the local harvest for as many weeks as it lasts. We even grew corn at one point but it entered our “too much work to warrant growing it” hall of fame along with asparagus and potatoes. It’s been so long since we’ve grown it I almost don’t remember why we stopped. When we grew our own corn, Joe wanted as little time as possible to pass between the harvesting and the cooking. He certainly had a good point there, as soon as corn is cut from the stalk, the sugars begin converting to starch. I just read in Fine Cooking that some varieties will lose 50 percent of their sweetness when left at room temperature for only a few hours. Therefore, if you grow it, you should take advantage of the freshness.  I would fill up a large pot of water on the stove and get it ready for the boil. Then he would run down to the corn patch, harvest the corn, quick shuck the ears and cook it.  A little salt, melted butter, ah perfection!!

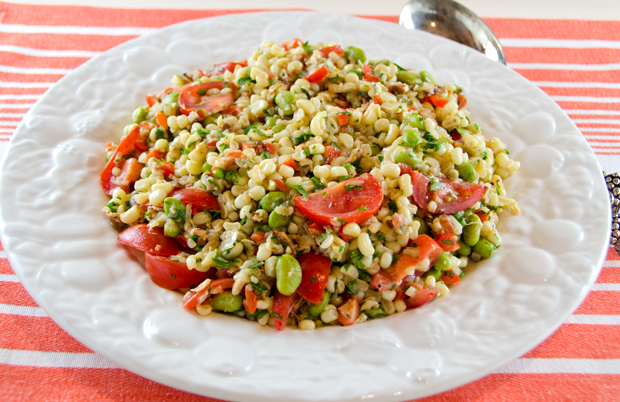
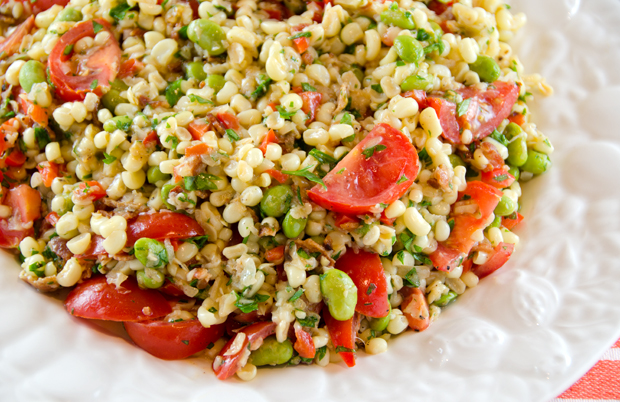
The corn and crabs of Sunday were wonderful and we had about six ears left uncooked. I have made corn pudding and black bean and corn salad with leftover fresh corn in the past, this time I decided on corn maque choux. Maque choux or “smothered corn”  is pronounced “mock shoe” and is a Cajun interpretation of a Native American dish. It is typically a side dish but it can also be the base of entree of shrimp, seared scallops, or chicken.

One of the books I consulted likened maque choux to succotash, a dish of corn kernels, lima beans and sweet peppers. I wanted to add some beans since I didn’t quite have enough corn to make the quantity I desired. Not being a fan of lima beans (both Joe and I have bad childhood memories) I decided edamame would make an excellent substitute for the limas.

Edamame, in case you didn’t know already, are immature soybeans, picked before the “hardening” stage. They are sold both in the pod and shelled, shelled worked out fine for this recipe. Edamame have a sweet, nutty flavor, not dried out and mushy like the canned or frozen limas of years ago.   Frozen corn could be used for this recipe but now is the time to take advantage of the fresh corn that is or will be appearing in your local farmers market.

The best way to remove the kernels from the ears? For me, I first shuck the ears and remove the silk.  To remove the corn from the cob, hold the stem end of the husked ear of corn and rest the tip of the ear on the bottom of a very large shallow bowl. Use a very sharp paring knife to cut off corn kernels and let them fall into the bowl. Be careful to cut just the kernels and not include any of the tough, inedible cob. It’s better, in fact, to leave some kernel behind than to include some cob!  Continue cutting around the ear to remove all kernels. Cutting the kernels into a bowl makes much less mess of splattering corn “milk” and makes it easier to hold the ear at an angle that allows you to cut down around the ear safely.

Considering the low carb, low fat diet everyone seems to following these days, corn, bacon, butter and whole milk put this dish in the category of occasional splurge. But it is also those ingredients that make it a flavorful way to “repurpose” those extra ears from your last cookout.

DSC_0923a
Delicious sweet corn from Maryland.

Corn Maque Choux

Serves 6 as a side dish

Ingredients

  • 5 slices of bacon
  • 1 c of finely chopped onion
  • 2t chopped garlic
  • 4T unsalted butter
  • 4c fresh corn kernels
  • 1c edamame, cooked according to package directions
  • 1/2 finely chopped red pepper
  • 1/4c chicken broth
  • 1/4c whole milk
  • 1c chopped tomato
  • 1/4c finely chopped Italian parsley
  • Kosher salt and fresh ground pepper

Directions

  1. Cook bacon in a large heavy bottomed pot over medium high heat until crisp, about 12 minutes. Transfer to a paper towel lined plate to drain, then coarsely chop.
  2. Add onion to the bacon drippings in the pot and cook until golden and softened, about 10 minutes. Add garlic and cook until fragrant, about 2 minutes. Add butter, corn, and cook for about 8 minutes. Then add edamame and red pepper and cook until heated through, another 3-4 minutes.
  3. Return bacon to pot, add broth and milk and bring to a boil. Reduce heat and simmer until most of the liquid has evaporated, about 3 minutes. Remove from heat and stir in tomato and parsley. Season to taste with kosher salt and freshly ground pepper. Dish can be served warm or at room temperature. Maque choux can be made up to a day ahead and stored in refrigerator; bring to room temperature before serving.
DSC_0931a
Corn, butter, bacon, what’s not to love?

December 22, 2012 Roasted Brussels Sprouts with Brazil Nut Pesto

DSC_7474a

When I was a little girl, my parents received quite a few trays of cookies and other treats at Christmas time from Dad’s co-workers, friends and relatives. These treats were not to be savored until a few days before Christmas. For me, it wasn’t the candy canes, fancy cookies and homemade sweets that tempted me the most, it was the tin of salty mixed nuts that sat inside one gift basket.  Once the lid was open I dove in for my favorites, past the walnuts, cashews, almonds, hazelnuts and red-skinned peanuts, directly to my target, the Brazil nuts. Salty, rich, meaty in flavor, they stuck out like little thumbs.
The “almonds of the Andes”  are grown not only in Brazil but in Bolivia and Peru as well. Found in the Amazon rain forest, Brazil nut trees can reach 150 feet in height and 6 feet in diameter.  The Brazil nut grows inside a dark brown fruit the size and shape of a small coconut.  A pod in the center of the fruit holds 12-24 nuts, packed neatly like orange segments. Harvesters wait for the 4 to 6 pound pods to drop, a potentially hazardous situation.
I didn’t know it at the time but Brazil nuts have amazing health benefits. They are rich in selenium, a trace mineral and antioxidant that has been linked to cancer prevention, mood lifting and immunity support. They are also a good source of vitamin E and mono unsaturated fatty acids, which increases HDL  or “good” cholesterol. Of course, along with that comes a high calorie content, so as with many things, moderation is key.

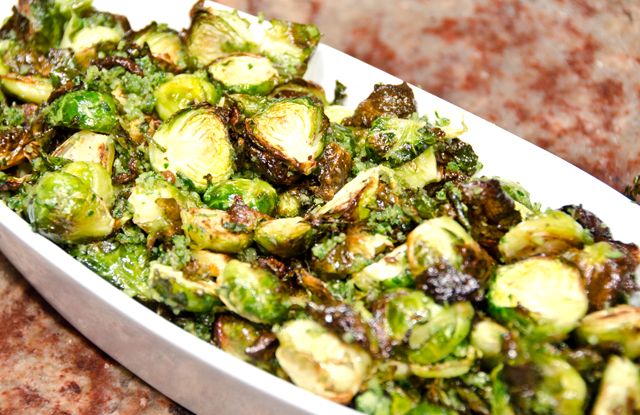
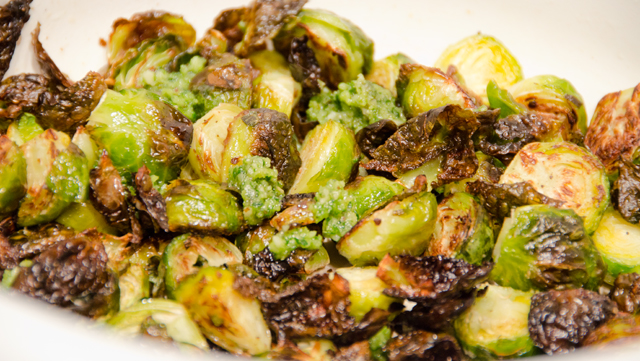
In this version of pesto, flat leaved parsley and just a touch of anisey tarragon take the place of basil. Brazil nuts have a sweet, creamy texture that add a richness to this pesto. I like tossing Brazil nut pesto with roasted vegetables like Brussels sprouts, but it would be equally as good tossed with pasta or topping a fish like salmon.

Roasted Brussels Sprouts with Brazil Nut Pesto

 Ingredients

  • 1/2c coarsely chopped flat-leaved parsley
  • 1/4c Brazil nuts, coarsely chopped
  • 2T water
  • 1T chopped tarragon
  • 1 large clove garlic, chopped
  • 1/2t finely grated lemon zest
  • 5T extra-virgin olive oil
  • 3T freshly grated Parmesan cheese
  • Kosher salt and freshly ground pepper
  • 1 1/2 lb Brussels sprouts, trimmed, cut in half lengthwise

Directions:

  1. Preheat the oven to 500°. In a mini food processor, combine the parsley with the Brazil nuts, water, tarragon, garlic and lemon zest and pulse to a coarse paste. Add 3 tablespoons of the olive oil and the Parmesan and process to a slightly smooth paste. Season with salt and pepper.
  2. On 2 large, rimmed baking sheets, toss the Brussels sprouts with the remaining 2 tablespoons of olive oil and spread in an even layer. Season with salt and pepper. Roast the Brussels sprouts in the center of the oven for 8 minutes. Use a spatula to loosen and move the sprouts around for even roasting. Switch the baking sheets and continue to roast for about 8 minutes longer, or until the sprouts are  browned and crisp-tender. Transfer the Brussels sprouts to a platter, drizzle the pesto on top, toss lightly and serve.
DSC_7356a
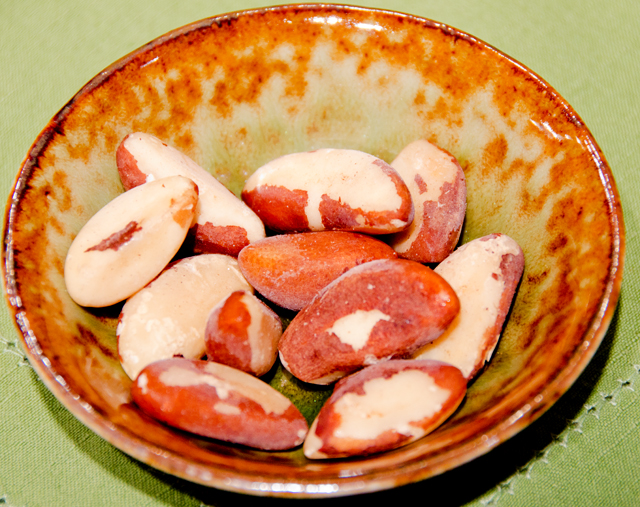
Just a half cup of Brazil nuts is needed in this recipe.
DSC_7362a
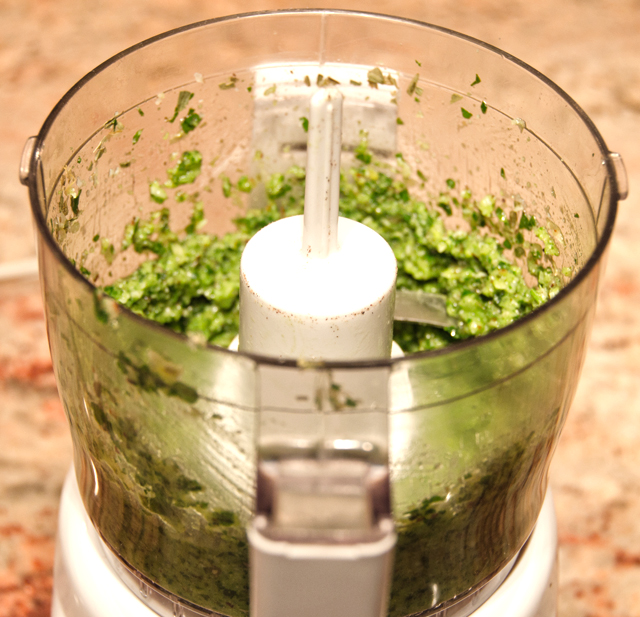
The mini processor is all you need to make a quick batch of pesto.


DSC_7365a
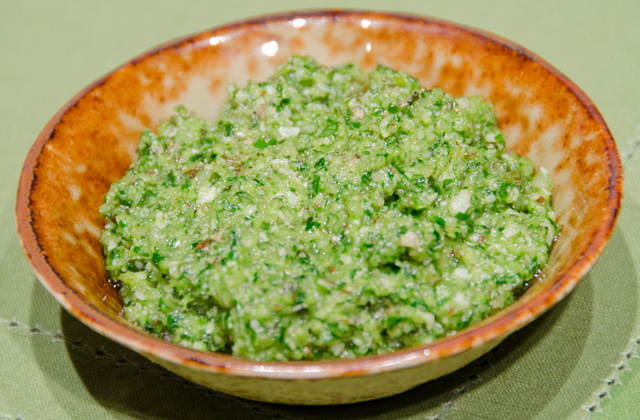
Brazil nut pesto is good with roasted vegetables, fish or pasta.


DSC_7466a
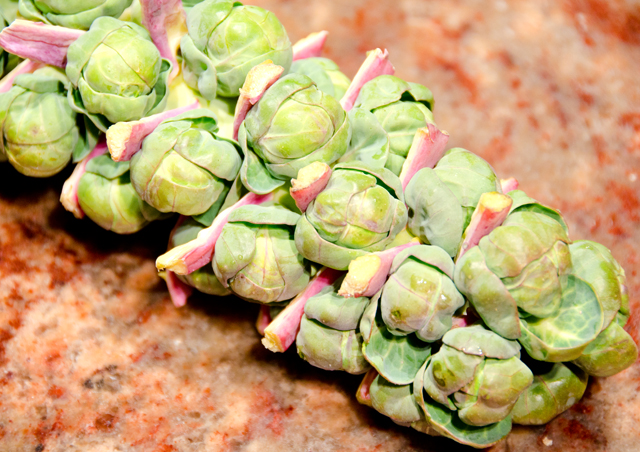
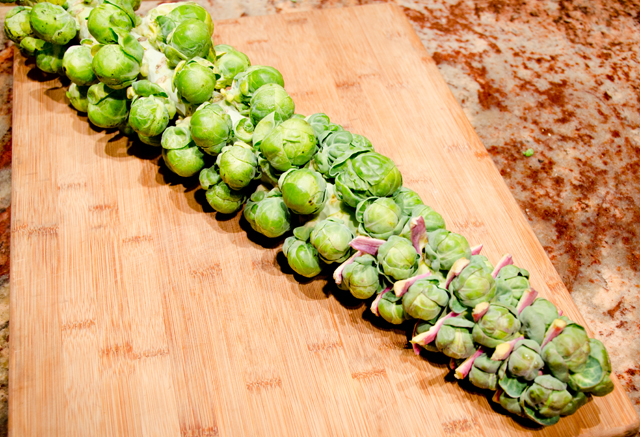
Brussels sprouts grow on stalks that range from 24-48 inches.


 DSC_7468a

 DSC_7436a

October 2, 2012 Borlotti and Green Bean Salad

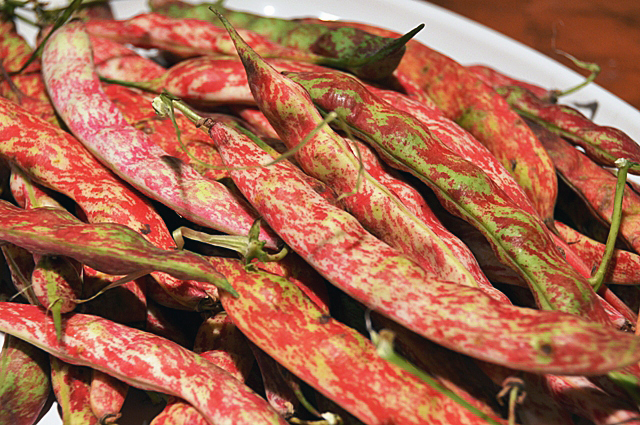
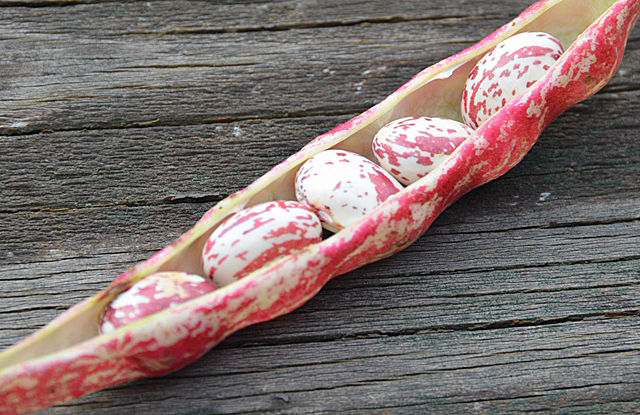
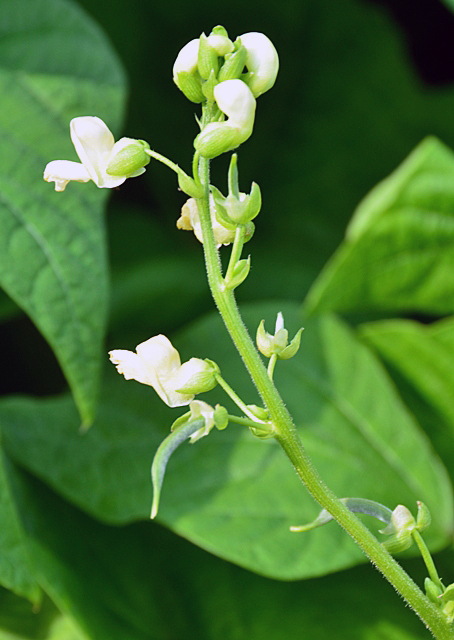
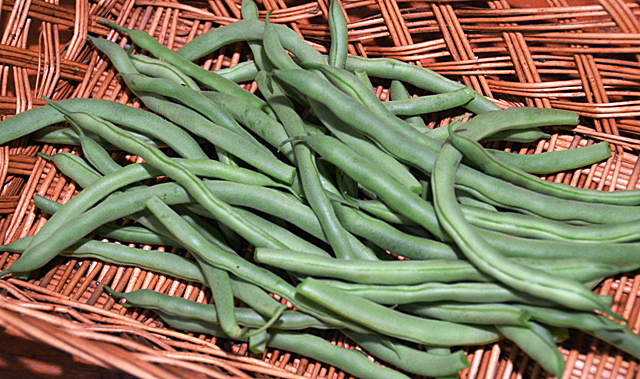
It was six thirty p.m., not even a half hour before the sun would set on this unusually warm early autumn evening. Some of the streaks in the evening sky were almost the same shade of hot pink as the mottled shells of the Borlotti beans I went down to the garden to pick. What I didn’t expect when I went to pick the Borlottis was that some of the second crop of green bush beans Joe planted in August were ready to pick as well. To the visible eye the bush bean plants seemed to have a lot of flowers, but no beans. When I reached my hand down into the plants I found they were full of mature beans, ready for picking.
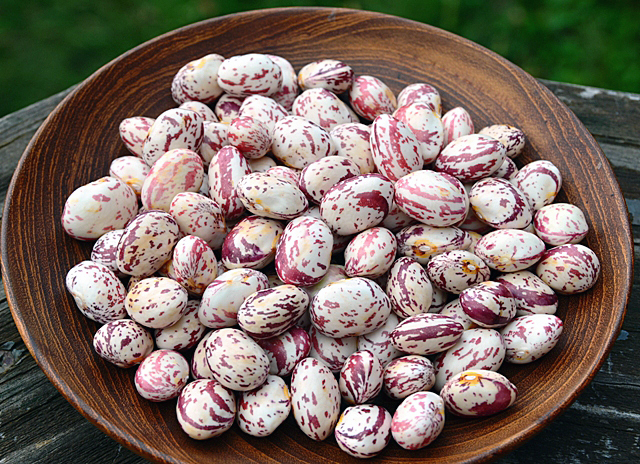
Borlottis are a shelling bean, grown primarily for the seed inside. They are one of the many Italian seed varieties that we have grown for the past two summers.   Green bush and pole beans and yellow wax beans however are grown for their pods. The inedible but colorful pods of the Borlotti beans  add visual interest to the garden, climbing up the trellis, in this case a salvaged frame from an old garden gazebo. The shelled beans are ivory in color with maroon speckles. When cooked they lose their spots and turn a light tan color.
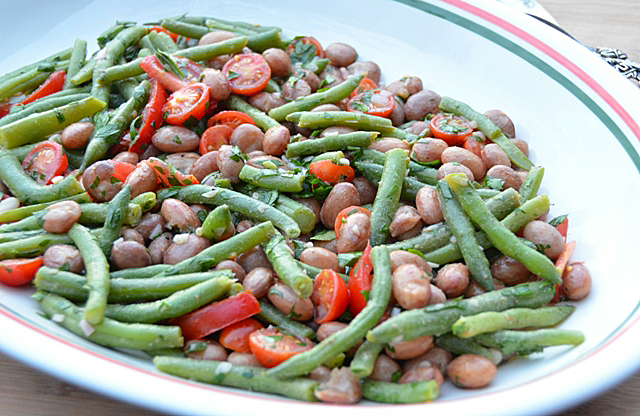
Hailed as a nutritional “superfood” by some doctors and nutritionists, dried beans are an important part of a healthy diet. They are high in antioxidants, fiber, protein and many vitamins. Borlotti beans, also known as cranberry or French horticultural beans, have a nutty flavor and a meaty texture that makes them a delicious addition to soups, stews and salads. Green beans may not be the nutritional powerhouse that shell beans are, but they are low in calories, and a good source of fiber and vitamins A and C. Plus their neutral flavor is appealing to almost everyone. Fresh shelling beans require about twenty to thirty minutes of simmering, not the hours of soaking and cooking that dried beans do.  I decided to combine the borlotti beans and the green beans in a salad along with the last of the garden tomatoes, some garlic, a shallot, fresh herbs and a simple vinaigrette. My two bean salad was the perfect accompaniment for the roasted salmon we had for dinner.

Two Bean Salad

Makes four cups

  • 1/2lb green beans, washed and trimmed
  • 1c freshly hulled cranberry beans
  • 1-2 cups halved cherry tomatoes
  • 1 minced clove garlic
  • 1 minced small shallot
  • 1/4c flat leafed parsley
  • 1T Cabernet wine vinegar (or any good quality red wine vinegar)
  • 1t dijon mustard
  • 2T extra virgin olive oil
  • 1T or more walnut oil
  • Salt and freshly ground pepper

Directions

  1. Bring two large pots of lightly salted water to a boil. Add green beans to one pot, reduce heat to a simmer and cook for 6 to 7 minutes, beans should be tender, not falling apart.  Drain green beans in a colander, then transfer beans to a large bowl.
  2.  In the second pot, add the Borlotti beans, reduce heat to a simmer and cook for 25-30 minutes, until beans are soft, not mushy. In both cases, test an individual bean for doneness. Drain Borlotti beans in a colander and rinse with cool water.
  3. While the Borlotti beans are cooking, make the vinaigrette. Whisk together the red wine vinegar, dijon mustard and olive oil.
  4. Add the warm Borlotti beans to the green beans. Add the garlic, shallot and the tomatoes to the bowl, toss the ingredients. Add vinaigrette to taste. Toss salad again and add about a teaspoon or more of walnut oil to the salad. Add chopped parsley and season to taste with salt and freshly ground pepper. Garnish with miniature basil leaves.
    Borlotti beans in the shell

    Shelled Borlotti beans, too bad they lose their spots when cooked!


    Blossoms and tiny beans were all I saw on the surface.


Green bean harvest

September 25, 2012 Chard Chips and Pickled Chard Stems


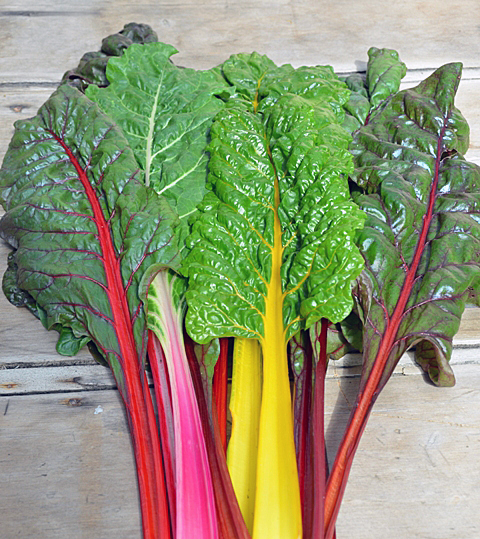
When the new issue of Fine Cooking came last week I was ready to put it aside for a few weeks. The holiday desserts and side dishes looked very tempting, but the beginning of fall was just last Saturday and I am still enjoying cooking as much as I can with the harvest from our garden. As I quickly thumbed through the issue I happened to notice an article that interested me, “What We Are Cooking Now.” Specifically, what really caught my eye were Swiss chard chips. I had heard of kale chips, both the pricey little bags sold in health food stores and the homemade varieties that a friend introduced me to. So why not chard chips? We have three sections of chard of the Bright Lights and Rhubarb variety still producing, so I thought it would be fun to try my hand at this. Since I am a proponent of using both the chard leaves and the stems, I wanted to use the colorful stems in another healthy nibble so a refrigerator pickle seemed to be the best choice here.
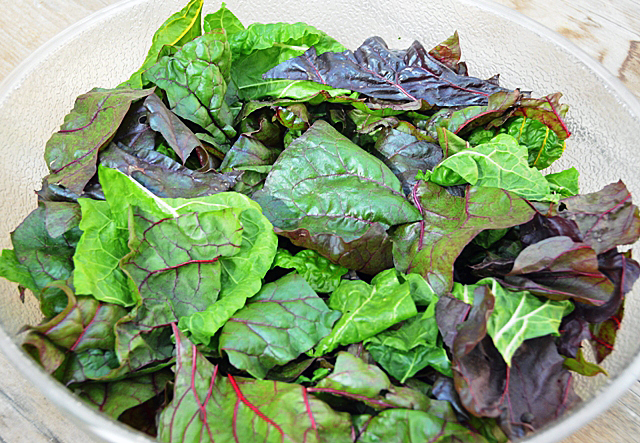
My on-line research revealed many different approaches to making chard chips and after reading them all, came up with my own method. There are certain important things to remember if you are going to make chard chips. Wash the leaves thoroughly, chard leaves are usually very crinkly, and those crevices can be dirty. After washing the leaves, remove the stems, reserve if using. Spin the leaves dry in a salad spinner and use paper towels to remove any excess moisture. Any moisture left on the leaves will cause them to steam, not bake and crisp up. A  “bunch” is a non-specific term, to be exact as possible, I used 25 chard leaves that were about 12-14 inches long after stemming. When in doubt, keep the leaf pieces larger, 2 inch squares approximately. The leaves will break easily when they are dry and too many small pieces will give you chard crumbles or dust.  Place the dry leaf pieces in a large bowl and toss lightly with olive oil and your seasonings of choice. Start with a modest amount, about a tablespoon of oil, you can always add more, it’s not as easy to take it away. I used a little Espelette pepper olive oil, kosher salt, fresh ground pepper, a little garlic powder and a little plain olive oil to taste. I did not grease my baking sheet or use cooling racks to elevate the leaves. I did not crowd or overlap the leaves. I used four large baking sheets in two ovens, racks in the top and the bottom set to 275F on the convection bake setting. The caveat here is, know your own oven, my chips seemed to be ready quicker than most of the recipes I looked at, keep a watchful eye to ensure a crispy, not a burnt chip!
Chard Chips

  • 1 large bunch of chard, 25 leaves, 12-14 inches long
  • Olive oil
  • Seasoning of your choice, I used kosher salt, garlic powder and freshly ground pepper

Directions

  1. Preheat oven to 275F (convection bake). Put racks in the top and bottom of oven.
  2. Wash chard leaves thoroughly in several changes of water. Remove the stems from the leaves, reserve for chard stem pickles.
  3. Dry chard leaves, first in a salad spinner, then remove excess moisture with paper towels. Cut leaves into 2″x2″ pieces, or a size as close as possible, when in doubt, larger is better.
  4. Spread leaves on a large ungreased baking sheet, do not overlap or crowd. My leaves took up four sheets that I baked in two ovens.
  5. Bake chard for six to seven minutes, check to see how the leaves are drying, at this point I loosened the leaves with a spatula and my fingers and rotated the baking sheets, top to bottom and front to back.
  6. Bake for another six to seven minutes, chard should be crisp, not burnt.
Trimmed chard leaves ready to be tossed with olive oil and seasonings


Give the chard leaves enough room to ensure even baking.
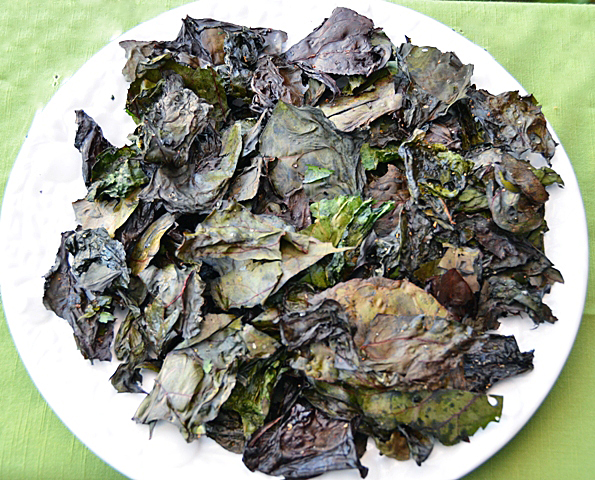
Not the prettiest snack, but certainly tastes good!


Pickled Chard Stems

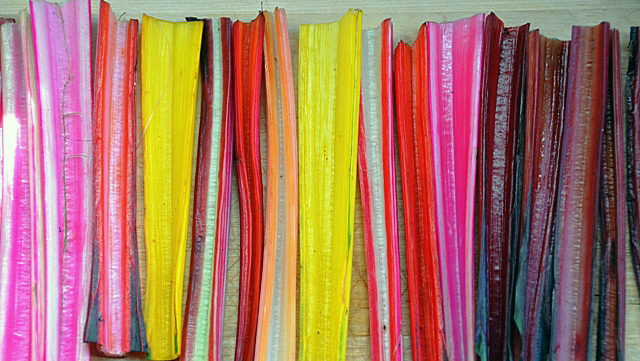
Colorful Bright Lights and Rhubarb chard stems are too pretty to waste.

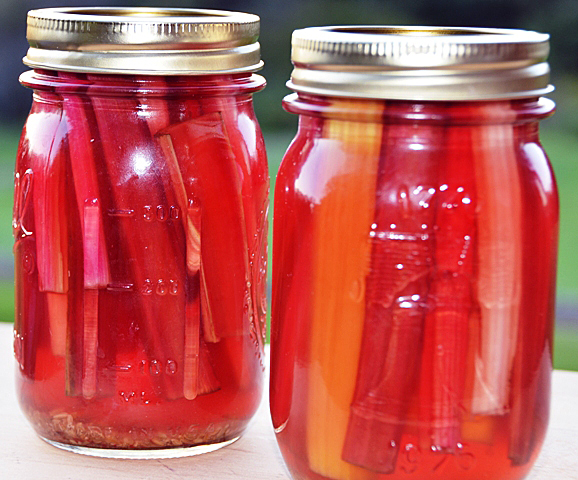
Pickling shows off the brightly colored stems in another healthy nibble. Refresh the stems in some ice water to crisp them up and cut to even lengths to fit your canning jar. I chose pint jars but one cup sized jars would work as well. I used a basic refrigerator pickle recipe and added my own spice blend combination. Allow them to cure in the refrigerator for a few days, after three days they were ready. If your stems are wide, cut them in half lengthwise, there will be less chance for the stems to be stringy.

Quick Chard Pickle

Makes  2 pints

  • 2 pint canning jars and lids
  • Enough chard stems to pack tightly into the jars
  • 2c water
  • 1c rice wine vinegar
  • 1/4c granulated sugar
  • 1/2t cumin seed
  • 1/2t coriander seed
  • 1/2t fennel seed
  • 1 small piece of cinnamon stick about 2″
  • 1/2t pink peppercorns
  • 1/2t white peppercorns

Directions

  1. Sterlize two pint canning jars by washing them in hot soapy water, rinsing and drying them thoroughly. Crush spices in a mortar and pestle or small food processor. Distribute spices evenly between the two jars.
  2. In a medium saucepan bring two cups of water to a boil. Add vinegar, sugar and salt and bring the mixture back to a boil.
  3. Pack the chard stems in the jars as tightly as possible. Using a wide mouth canning funnel, pour the brine over the stems to cover completely. Place lids and bands on the jars and let cool. Refrigerate, chard pickles will be ready in a few hours but at their best in about two days.

    My spice blend ready to crush in the mortar and pestle.
Pickled chard stems ready for the refrigerator. Notice the classic Bicentennial Liberty Bell jar on the right.