October 31, 2015 Homemade Hot Pepper Sauces

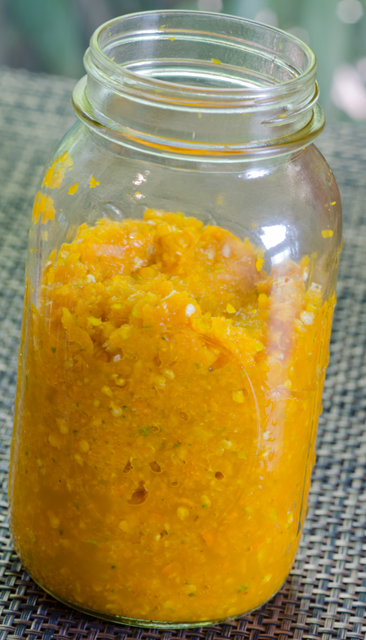
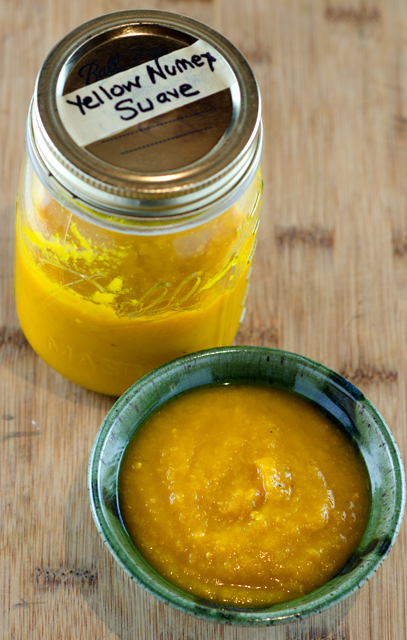
DSC_4979aLast weeks plunge into the deep freeze meant it was time for one final harvest of hot peppers. With a formula that worked and an abundant source of peppers the challenge was to make a few hot sauces using the same method as the sriracha sauce from a few weeks ago. I first tried the NuMex Suave Orange peppers and several days later using green and red pasilla peppers and green poblano peppers. The jars fermented on the back kitchen countertop for about a week. I wasn’t sure what the results would be so my expectations weren’t very high.

To finish, I followed the same procedure for each variety, transferring the chopped chilis to the food processor, adding enough (1/3 to 1/2cup) white vinegar to puree until smooth. I carefully washed out the processor between peppers to keep each type as pure as possible. I strained the mixture through the medium disc of the food mill to eliminate any seeds. I think it’s easier than the mesh strainer and gives the finished product a little texture.

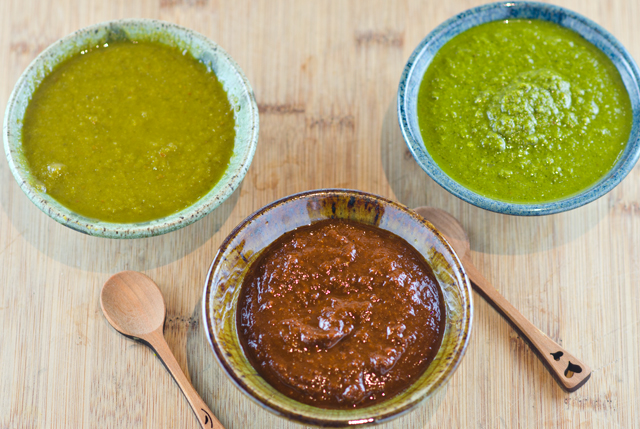
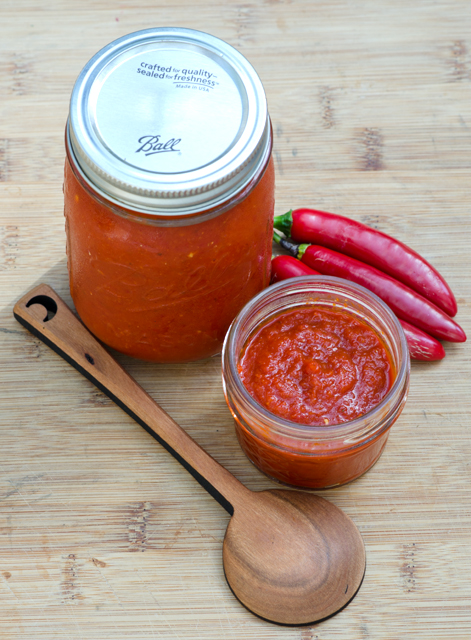
Now for some taste testing. The Numex Suave Orange has the flavor nuances of the habanero that are usually missed because the heat dominates. The sauce has a citrusy flavor with hints of orange and lemon and finishes with a little heat. The green pasilla flavor reminds me of green bell pepper and has a touch of moderate heat. The green poblano has an initial hint of sweetness and finishes with more heat than the green pasilla. I especially like the red pasilla sauce. The color is a deep dark red and the flavor is rich and full but not too hot. I think it would be the perfect addition to a chili recipe.

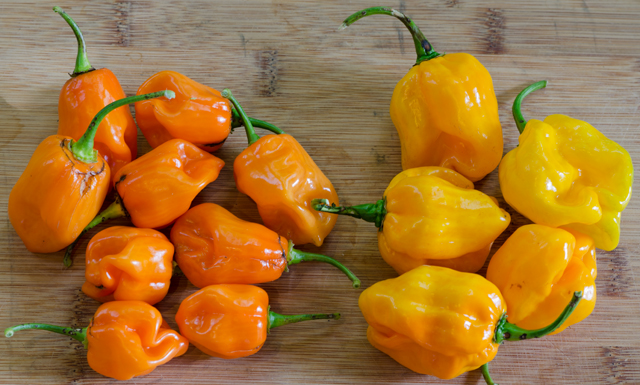
Numex Suave Orange Peppers
DSC_4858a
The habanero peppers on the left measure a tongue burning 100,000 to 300,000 on the Scoville scale while the Numex Suave Orange on the right are a very mild 800!
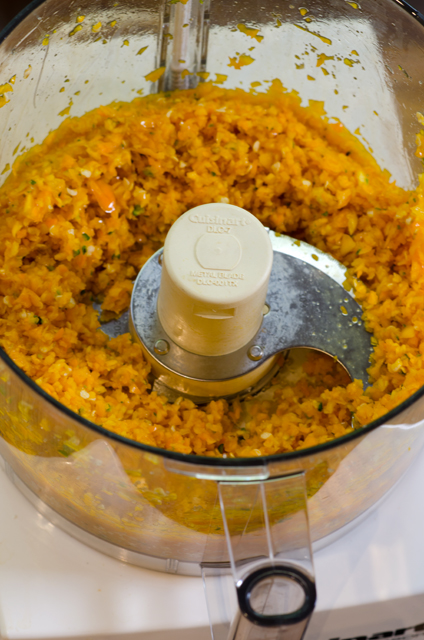
Adding peppers and garlic to the food processor.
Chop the peppers as finely as possible.
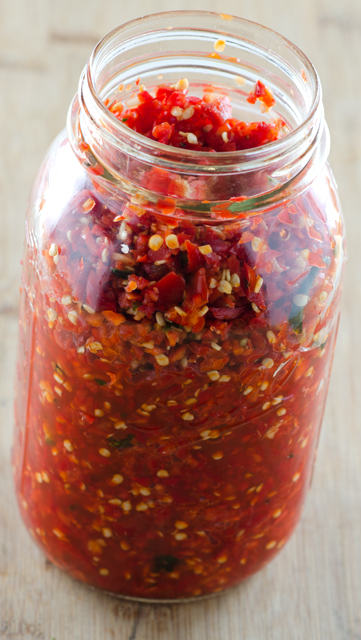
The peppers ferment for about a week.
DSC_4985a
The finished product

October 8, 2015 Homemade Sriracha Sauce

DSC_4847aOver the years I have made my share of homemade condiments.  Joe’s ability to produce an abundant harvest from our garden often has me looking for ways to preserve some of that bounty for the fall and winter months.  I have made my own ketchup, chili sauce and tomato paste from the tomatoes in our garden. Not to mention homemade mustard, jams, chutneys and  preserved lemons. In fact the first cookbook that Joe ever bought me, even before we were married was Better Than Store Bought, a classic to this day for the DIY cook.

The latest to be added to my homemade list is sriracha. As long time fans of Thai cuisine, sriracha has been on our food radar since the early eighties. We love the spicy, garlicky, slightly sweet sauce that was a table condiment at our local Thai restaurant. Back then I would have to travel to local Asian markets to find the thick red sauce that came in a squeeze bottle with a green cap and a rooster on the label. We, and obviously many others, were definitely on to something, over the years the popularity of sriracha has grown by leaps and bounds. Now it can be found in supermarkets everywhere and sriracha flavors products as diverse as popcorn, potato chips, beer and lip balm.

It was first produced in the United States by a Vietnamese immigrant, David Tran, who was unable to find a hot sauce he liked.  He developed and named his sauce after one that he tasted in the Thai southern coastal city of Si Racha, where it was made for dishes served at local seafood restaurants. The success of Mr. Tran’s company Huy Fong Foods, named for the boat that brought him to the United States, is legend. Since 1980 sales of sriracha have increased by 20% a year without paid advertising. Unlike other hot sauces, sriracha is made with fresh chilies, Tran says this is what separates sriracha from the competition. So with a large crop of hot peppers in many varieties, I set out to make my own version of sriracha. I looked at quite a few recipes, some promising sriracha in twenty minutes, that might be fine for some, but I knew that fermentation is one of the steps that makes sriracha unique and since I had the time and an abundant supply of peppers, why take any shortcuts? I chose a recipe from Serious Eats, a blog that is dedicated to “definitive recipes, hard core food science, trailblazing techniques and innovative guides to essential food and drink anywhere and everywhere.” Sounds good to me.

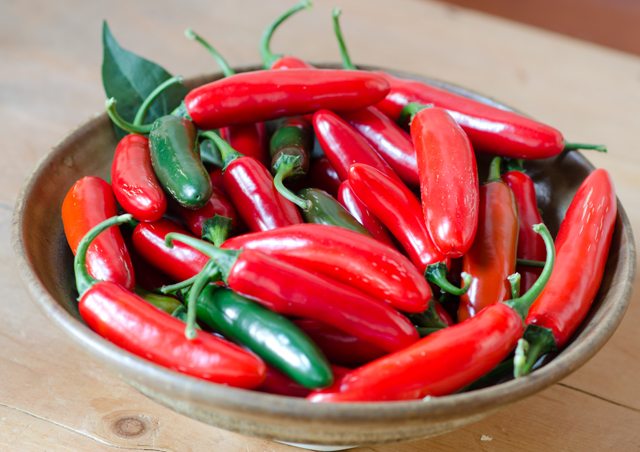
My first consideration was the variety of pepper to use. The Serious Eats recipe used red jalapenos but in one of the reader comments I learned that serranos were the original peppers Huy Fong used to make sriracha until the late nineties. The change to jalapenos was due to production costs. Since I had more than enough serranos, I chose them for my recipe. Since the serrano pepper is hotter than the jalapeno you may want to adjust your recipe accordingly, I didn’t. The peppers are left whole with the stems are snipped with the crown remaining. This brings a floral component to the finished product. As with all hot pepper recipes, take the usual precautions, wear rubber gloves when making the recipe, don’t rub your eyes, and so on. The recipe is very simple with very little handling of the product, peppers, peeled garlic cloves, brown sugar and salt are pulsed to a fine texture in a blender or food processor.

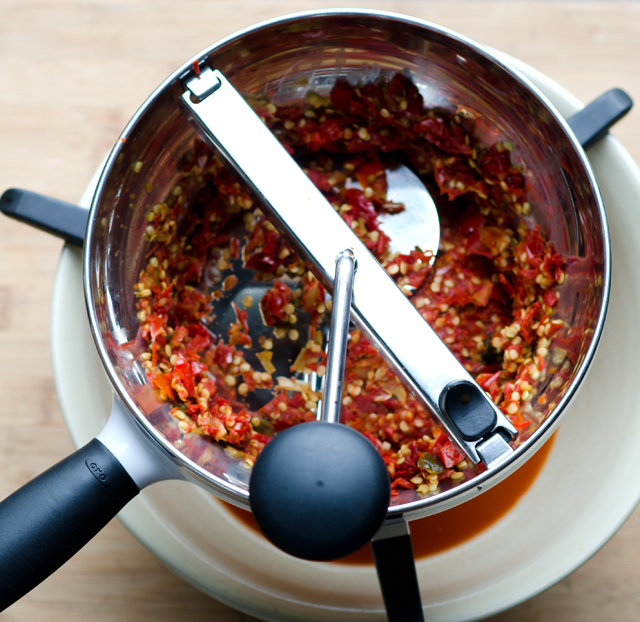
The mixture is transferred to a clean jar, covered and sits at room temperature.  I checked the mixture daily to check for little bubbles forming at the bottom of the jar, indicating fermentation. The recipe indicated that the fermentation would begin in 3-5 days, my peppers only began to ferment after 7 days. I will attribute that to the freshness of my peppers. Since my peppers were picked the day I tried the recipe, they were days fresher than any hot pepper purchased in a grocery store.  My fermentation was complete in 10 days. I carefully transfered the chopped chili mixture to the bowl of a food processor, my blender is too small, added the distilled white vinegar and pureed it until smooth. The recipe suggests transferring the mixture to a mesh strainer over a medium saucepan and using a rubber spatula to push the pulp through. I wasn’t getting a thick enough consistency  so I transferred the peppers to the food mill with a medium disc which gave me a product that resembled sriracha, though a bit more chunky.  The mixture is placed in a saucepan, brought to a boil, then simmered until the sauce clings to the back of a spoon, 5 to 10 minutes. Transfer sauce to clean jars and store in the refrigerator for up to six months.

I am very pleased with the consistency of my sriracha, the food mill made that part of the process much easier than the strainer. Since we have other varieties of hot peppers I may try the same recipe with different peppers.

Just picked serrano peppers for my sriracha sauce.


Sriracha Sauce

Recipe slightly adapted from Serious Eats

Ingredients

  • 1 1/2 lbs red jalapeños (or serranos), stems snipped off, leaving green tops intact
  • 6 cloves garlic, peeled
  • 4 tablespoons light brown sugar
  • 1 tablespoon Kosher salt
  • 1/2 cup distilled white vinegar

Directions

  1. Place peppers, garlic, sugar, and salt in bowl of a food processor fitting with steel blade. Pulse until chilies are very finely chopped, stopping to scrap sides of bowl as necessary. Transfer mixture to a clean jar, cover, and let sit at room temperature.
  2. Check jar each day for fermentation, when little bubbles start forming at bottom of jar, about 3-5 days. Stir contents each day, continuing to let ferment until chilies are no longer rising in volume, an additional 2-3 days.
  3. Transfer chilies to jar of a blender or food processor, add in white vinegar, and puree until completely smooth, 1-3 minutes. Transfer to a mesh strainer set atop of a medium saucepan. Strain mixture into saucepan, using a rubber spatula to push trough as much pulp as possible, only seeded and larger pieces of chilies should remain in strainer. I found that a food mill with the medium disc made this easier.
  4. Bring mixture to a boil, reduce heat, and simmer until sauce thickens and clings to a spoon, 5 or 10 minutes. Transfer to an airtight container and store in refrigerator for up to 6 months.
Pureed peppers, garlic, brown sugar and kosher salt ready to be fermented.
The food mill gave me the consistency that I was looking for.
My finished product was thick even before cooking.

DSC_9193a


July 17, 2015 Pesto for Seasons Without Basil

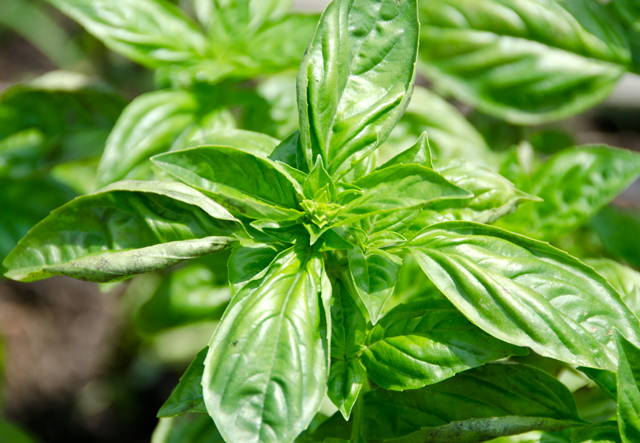
DSC_3686aWhether you’ve grown it from seed or purchased your plants at the local home improvement store, those basil plants in your garden are loving the warm temperatures and rain we have been receiving recently. It’s about now that your basil plants have probably sent out spikes of tiny white flowers. Since basil is a true annual, when allowed to flower the plant will go to seed, the leaves will become bitter and your plant will eventually die off.  Now is the time to begin harvesting basil leaves.

As soon as you see that your basil is flowering, pinch them off so the energy in the plant stays diverted to foliage growth. Cutting back your basil plants regularly  encourages full, bushy plants. To harvest, cut leaves from the top of the plant, pinch out the top of the stem. This should include small new leaves or a flower stalk and a pair of full sized leaves growing below the tip.

My favorite thing to do with the basil harvest is to make pesto. We have pesto with pasta, as a sauce for vegetables or chicken, as a dip, on pizza, the possibilities are limitless. But, at least in our climate, as soon as the first frost comes, basil  is the first victim, the leaves of the plant will turn black and wither. It’s now that you should start preserving that classic taste of summer with freezer pesto.

I have been making this recipe for years now from a classic cookbook of the eighties, Fancy Pantry. Written by former food editor and a three time winner of the Tastemaker award, Helen Witty, Fancy Pantry is a collection of recipes subtitled, “Well preserved, prettily pickled, candied, brandied, potted, bottled, sun dried and otherwise put-by elegant edibles”. My well worn copy attests to it’s usefulness and I recommend it highly.

Mrs Witty attributes this recipe to the late Marcella Hazan. Long before there was Lidia and Mario, there was Marcella.  Marcella Hazan was a cookbook author and authority on Italian cooking. My introduction to Italian cooking came through her classic volume, The Classic Italian Cook Book: The Art of Italian Cooking and the Italian Art of Eating and it’s subsequent follow up, More Classic Italian Cooking. My cookbooks written by Mrs. Hazan fall open naturally now to recipes I used countless times. I appreciated her clear and concise recipes written in a voice that was both warm and encouraging.

Her pesto recipe is quite straightforward; mix all the ingredients, basil, pinenuts, garlic, olive oil and a pinch of salt in a blender. Seal tightly and freeze pesto in one cup jars. The cheese or butter as she suggests, should be added right before using it. Most modern recipes call for just Parmesan cheese in pesto. Marcella points out that in Genoa, where pesto originated, they use equal quantities of Parmesan and a special, mildly tangy sheep’s milk Pecorino cheese from Sardinia .  That cheese was not available to American cooks when the book was written, back in the seventies. I found several online sources that sell it now.  Her solution to the problem then was to use 3 parts Parmesan to 1 part Romano and suggests to adjust this to taste. She states, “a well rounded pesto is never made with all Parmesan or all pecorino”. Point taken.

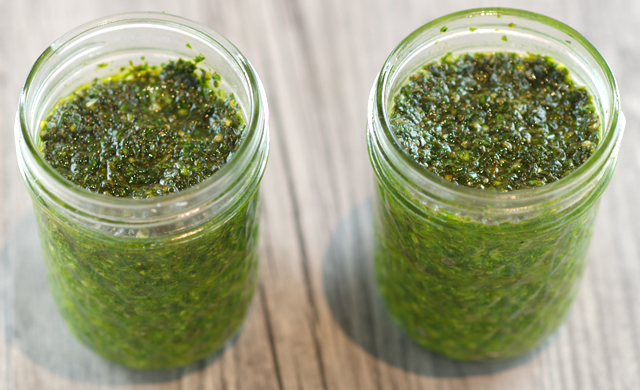
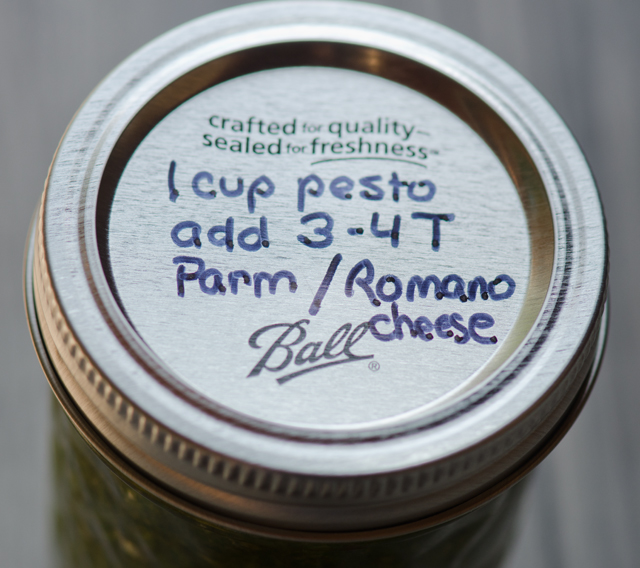
I make my pesto in 2 cup batches and freeze in one cup glass canning jars with the amount of cheese needed to finish the recipe written on the lid. Plastic freezer containers are fine as well. When I purchase any nuts, I buy from bulk containers and store them in the freezer until I am ready to use them. They thaw quickly and freezing nuts prevents them from going rancid quickly. I often substitute walnuts for the pine nuts, since the more delicately flavored Mediterrannean variety are sold at one local market for 12.99 for four ounces! When Marcella was writing her book, the food processor was still years away from being a commonplace kitchen item.  The question for her was whether to make pesto in a blender or with the classic mortar and pestle. She recommends and I concur that everyone should try to make pesto at least once with the mortar and pestle “because of the greater character of the texture and its indubitably richer flavor.”

But Marcella was a practical cook and felt blender pesto was so good that it could be enjoyed “with a clear conscience” whenever there wasn’t time or patience to make pesto in a mortar and pestle. Of course, fresh pesto is always the best but as Marcella said, “since fresh basil has a brief season and pesto keeps quite well in the freezer”, I am going to make enough pesto now to satisfy all those out of season cravings.
DSC_3689a

DSC_3678a

Basil Pesto for the Freezer

Makes about 2 cups

Ingredients

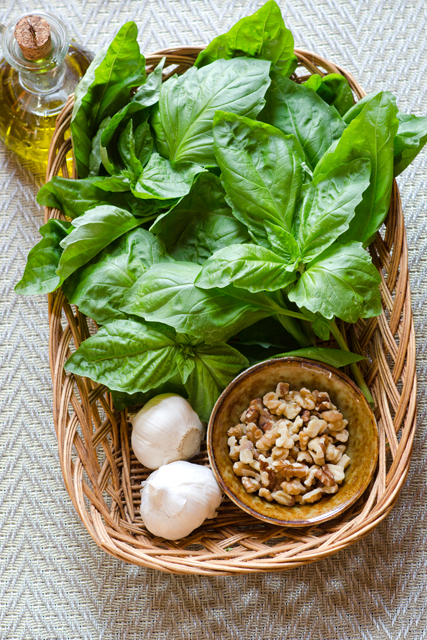
  • Freshly picked basil, rinsed, leaves stripped off and blotted dry, gently packed down to measure 3 cups
  • ¾ to 1 cup of a good quality olive oil
  • 3 large cloves of garlic, or more to taste, peeled and chopped
  • 3T pine nuts or coarsely chopped toasted walnuts
  • ½ to 1 t salt, or to taste
  • At the time of use: Parmesan and Romano cheese

Directions

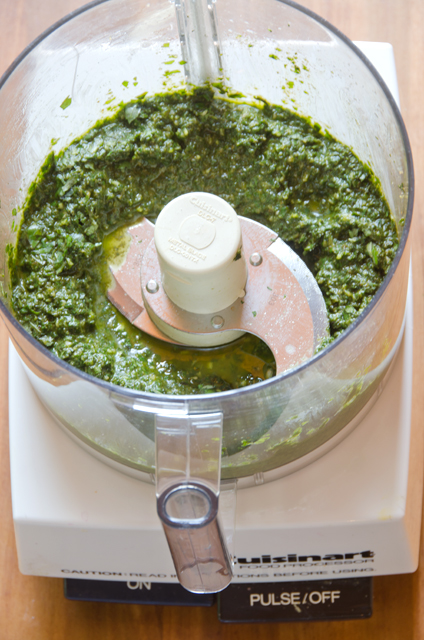
  1. Combine everything except the cheese in the bowl of a food processor or blender. Turn the motor on and off rapidly, scraping down the sides of the container once or twice, to process the pesto to the texture you like, some prefer smooth, others, a fine chopped mixture.
  2. Pack the pesto into small freezer containers such as straight sided half pint canning jars, leaving ½ inch of headroom to permit expansion. Seal the containers and store in the freezer.
  3. To use the pesto: Thaw the amount you’ll need in the refrigerator, if time permits. A cupful is enough for 4-5 servings of pasta. Blend your cheese into the thawed pesto, adding 3-4 tablespoons freshly grated cheese to each cup of sauce. Check the seasoning of the mixture, you may want more salt, depending on the saltiness of the cheese. Use in the recipe of your choice.
DSC_3690a

DSC_8399a

DSC_8366a

DSC_8406a


May 27, 2015 Radish Raita

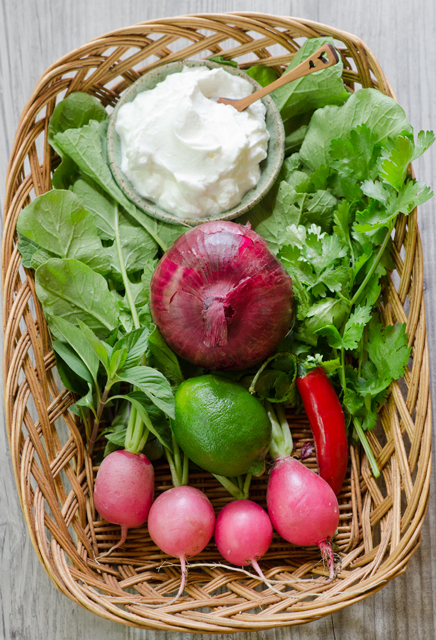
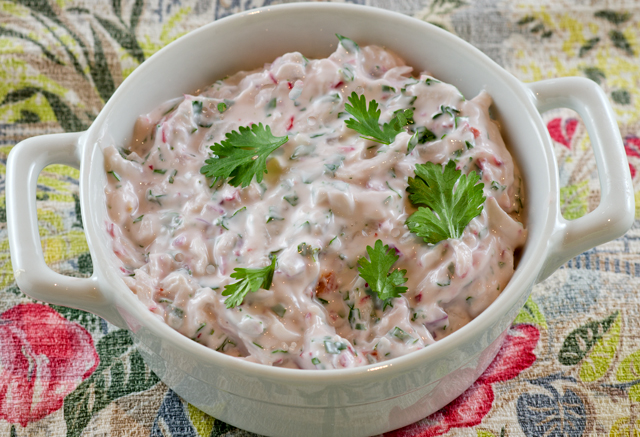
DSC_2740aRaita is a yogurt based condiment or salad, Originating in India, it is served as a cooling counterpoint to spicy stews and curries. It is most commonly made with cucumbers, but I have seen recipes with beets, tomatoes, carrots and even pumpkins! In this recipe from Bon Appetit, crispy and slightly spicy radishes are combined with yogurt, herbs, red onion and a serrano chili.

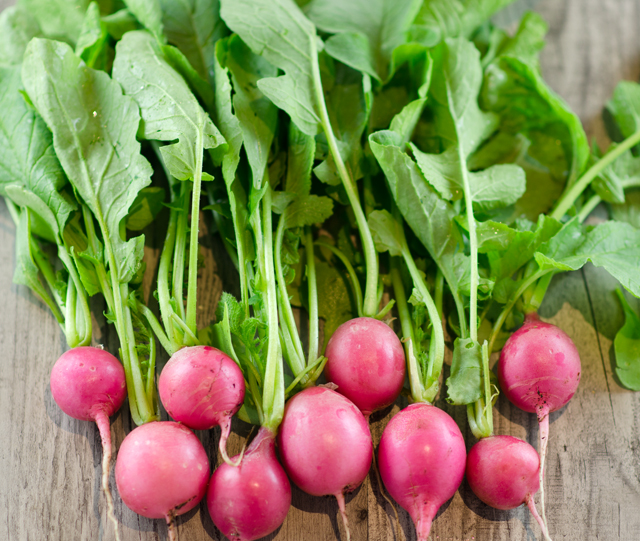
Joe has already put in three separate plantings of radishes and with temperatures anticipated to reach 90 this week, it’s time to pick them before they get very hot and go to seed. Like all root crops, wash radishes well from any dirt that clings to them. This year we started saving the radish tops and use them in our cooked greens. I grated the radishes on a box grater, leave a little of the stem on to spare your fingers from hitting the sharp edge. Alternately you could use a food processor with the shredding disc in place. The recipe calls for a combination of mint and cilantro or just whatever one you prefer. This is good news for cilantro haters.

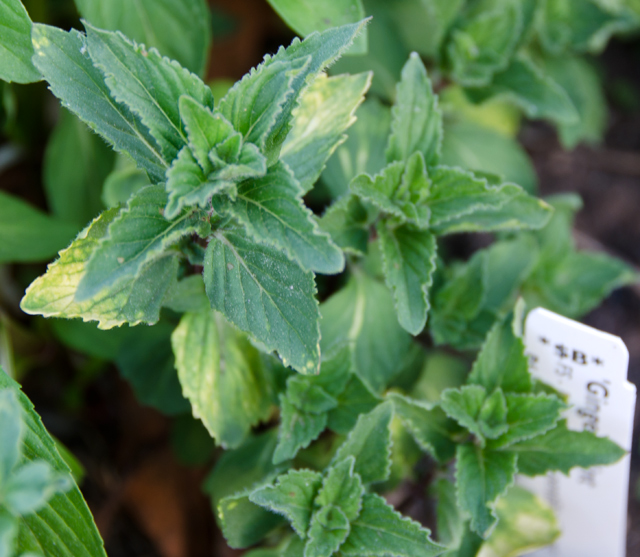
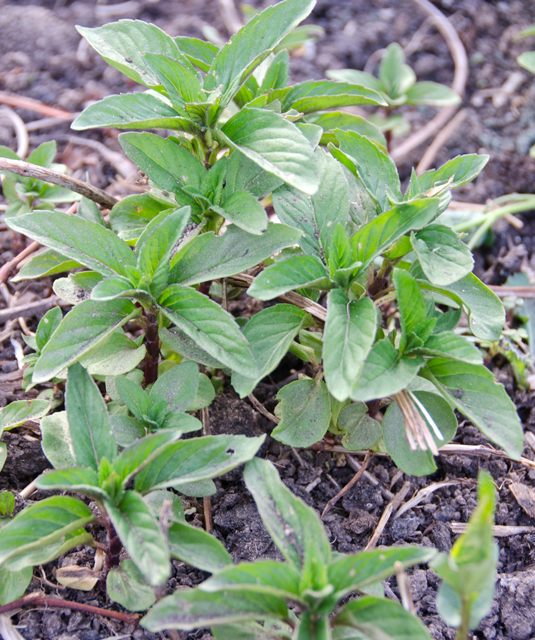
Joe isn’t the biggest fan of mint, most of the mint we grow gets fairly intense and can often overwhelm the other flavors in a dish.  He has given the thumbs up to Vietnamese mint, at least that’s what Well Sweep Herb Farm calls it. It’s botanical name is mentha x gracilis, but when I looked that up it gave the common name of ginger mint, another mint in our garden and one that certainly looks different than the Vietnamese. The mild flavor works well in this recipe.
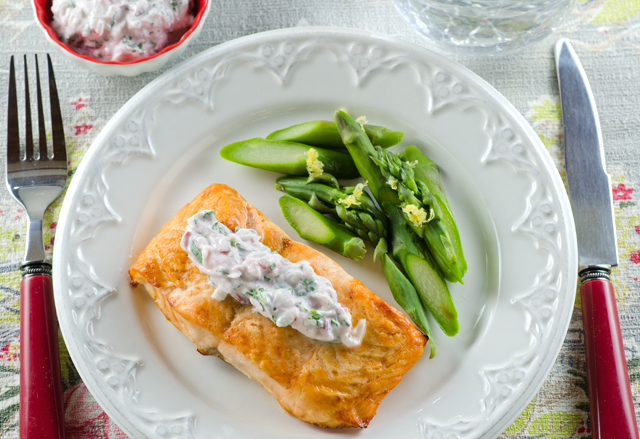
This recipe comes together very quickly.I used standard garden radishes, daikon radishes would make this spicier. If you want to make this just a little bit ahead of the time you are going to use it, combine all the ingredients except the grated radishes.  They should be added at the last minute because if the radishes sit too long in the dish they will make it watery.  I served the radish raita as a topping for salmon. I am sure it work well with other types of fish, or even as a dip for vegetables.

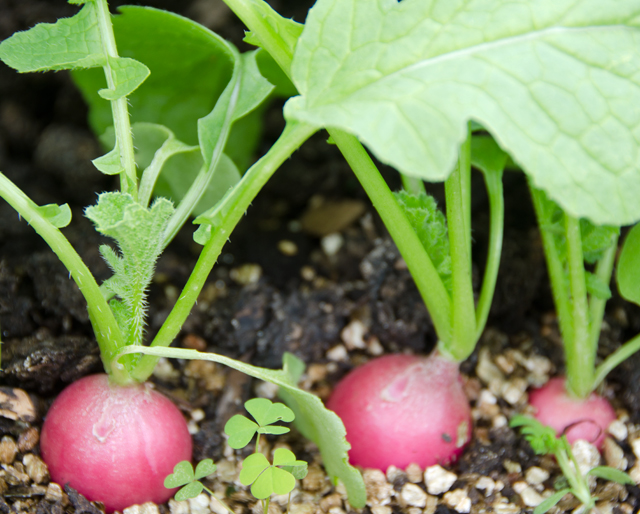
The radishes are literally popping out of the ground.

DSC_2661a

DSC_2717a

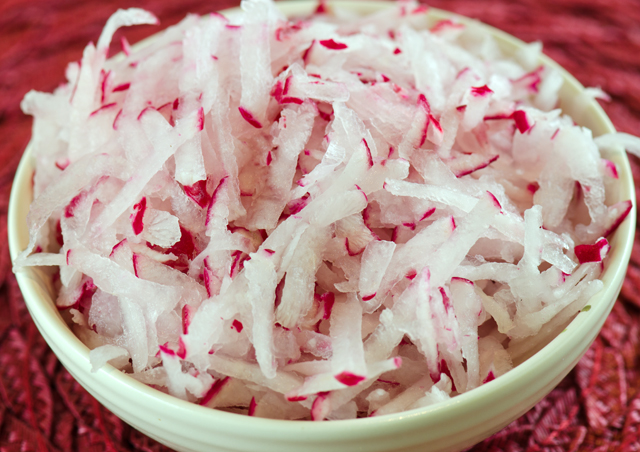
Grated radishes remind me of chopped candy canes!
DSC_2744a
Ginger mint or menthe gentilis
DSC_2605a
Vietnamese mint or mentha gracilis


Radish Raita

Makes 1½ cups

Ingredients

  • 1c plain whole milk or low fat Greek yogurt
  • ½c chopped mint and/or cilantro
  • 1 serrano chile, seeded and finely chopped
  • 2T finely chopped red onion
  • 1T fresh lime juice
  • 1c coarsely grated red radishes
  • Kosher salt and freshly ground black pepper

Directions

  1. Mix together yogurt, mint, chile, onion and lime juice. Gently fold in radishes, season to taste with salt and pepper.

DSC_2726a

April 28, 2015 Salmon Piperade

DSC_2394aMy local big box store always has one bargain that I can never pass up, sweet peppers. Six in a bag, two each of red, yellow and orange, they usually cost about 6.49. Supermarket sweet red peppers occasionally are on sale at a 1.99 per pound but can go as high as 4.99 a pound in the off season. Orange and yellow ones never seem to go on sale. Since we only have access to local and peppers from our garden only two months out of the year, I don’t mind buying them.

The peppers are grown in greenhouses in Canada and have consistent good flavor and texture. I like using them in salads, stuffing them with chili and cooking them on the grill. We had a few left over recently that weren’t grilled and was looking for a way to use them in the next several days. Then I remembered piperade.

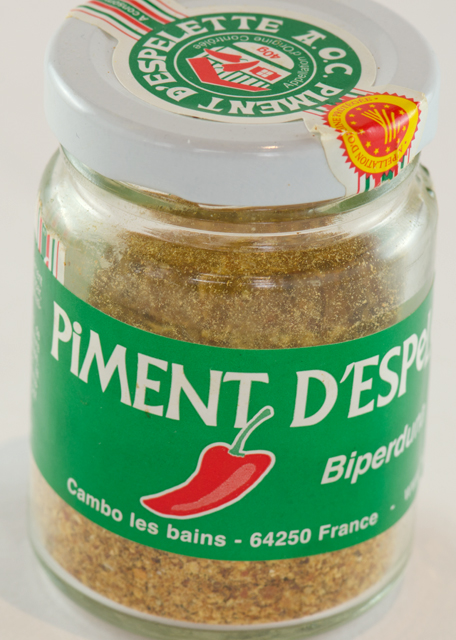
Classic piperade originates from the Basque country in the southwest region of France. It is a versatile preparation that compliments everything from eggs to chicken to fish dishes.  A simple saute of bell peppers, onion and tomato, piperade is enlivened by the addition of piment d’espelette. Piment d’espelette is a pepper native to France in the Basque country. The flavor is fresh and fruity with just a hint of smoky heat.

Piment d’Espelette has AOC (appellation d’origine contrôlée) status. This is a protective designation of origin and means the pepper only comes from a 22 square kilometer region around the town of Espelette. The peppers are harvest by hand, air dried and finished in a kiln. They are sold dried, whole or pulverized into a flaky powder. Since we are not in tomato season I used diced canned tomatoes for this recipe. The once 16 ounce can has shrunk to 14.5 ounces, when will this madness stop? I used Hunts because Cooks Illustrated put them on top of their most recent testing. Their flavor was reported to be fresh, bright and sweet-tart. Sounds good to me.

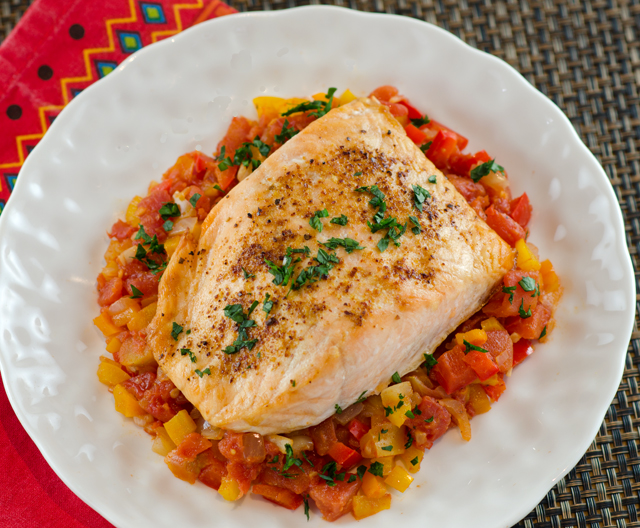
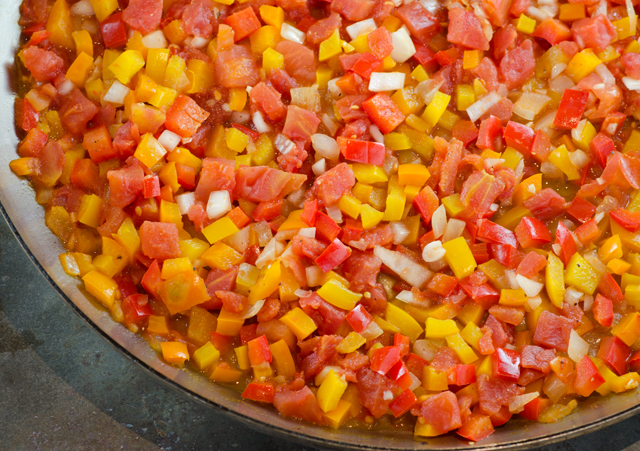
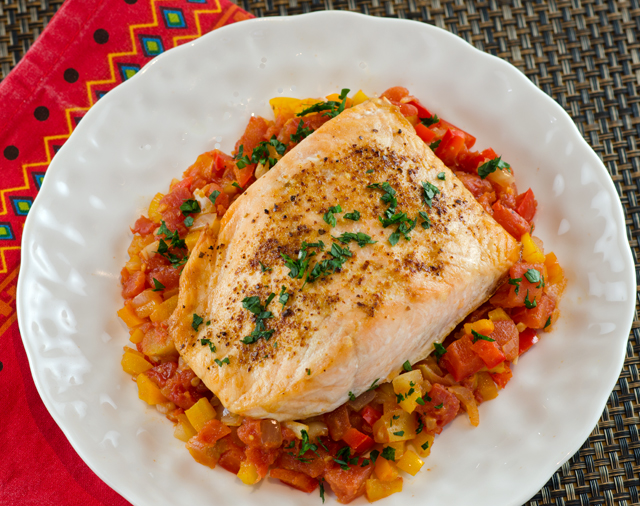
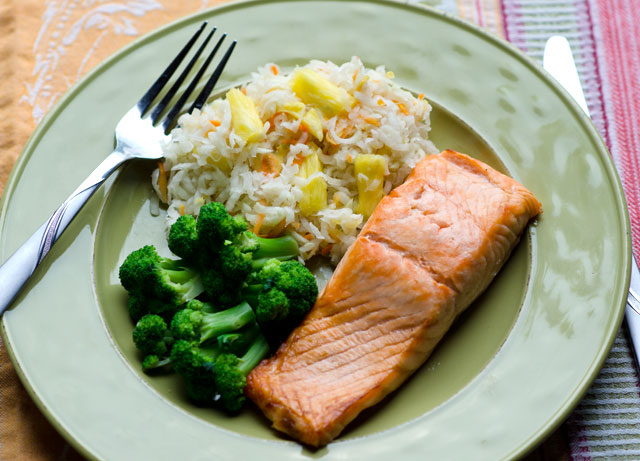
Espelette pepper is sold by specialty grocers and can easily be found on line if you are an intrepid spice hunter like me. If not, substitute smoky paprika or Aleppo pepper with a dash of cayenne pepper. The piperade comes together easily. Saute an onion until translucent, add garlic, peppers and piment d’Espelette. Cook another minute until fragrant then add the tomatoes and their juice. Bring the mixture to a boil, season well and cook slowly for about 45 minutes or until the juices have thickened. Keep piperade warm while you cook the fish. Serve salmon on a bed of piperade and garnish with parsley. Serve leftover piperade with poached or scrambled eggs the next day.

DSC_2386a
I used finely chopped peppers and onion in my preparation.
DSC_2471a
Piment d’Espelette is a protected designation meaning the peppers can only be grown in a specific location.

DSC_2389a

Salmon Piperade

Serves two

Ingredients

  • 1T olive oil, plus 2t for cooking salmon
  • 1 medium onion, diced small
  • 1T finely chopped garlic
  • 1 yellow pepper, diced (about ¾cup)
  • 1 red pepper, diced (about ¾cup)
  • 1 orange pepper, diced (about ¾cup)
  • 1t or to taste, piment d’Espelette, substitute smoky paprika and a dash of cayenne if necessary, additional to sprinkle on fish before baking
  • 1 14.5 ounce can of diced tomatoes
  • Kosher salt and freshly ground black pepper
  • 2 6-ounce boneless skinless salmon fillets
  • 1-2T chopped parsley

Directions

  1. Heat 1 tablespoon of olive oil in a medium sauté pan over medium high heat. When the oil begins to shimmer, add the onion. Cook, stirring frequently until the onion is translucent, about 4-5 minutes.
  2. Add the garlic, peppers and piment d’Espelette. Cook, stirring frequently until fragrant, about 1 minute. Add the tomatoes and their juices, season well with salt and pepper. Bring the mixture to a boil, lower to a simmer, cover and cook slowly for about 45 minutes, stirring every now and then.
  3. Brush salmon fillets with olive oil, season with salt, freshly ground pepper and piment d’Espelette. Cook fish according to your favorite method, this is how we bake our fish. Spoon warm piperade on serving dish, nestle cooked fish on the piperade. Sprinkle with chopped parsley.

DSC_2393a

April 14, 2015 Beet Chutney

DSC_2334a

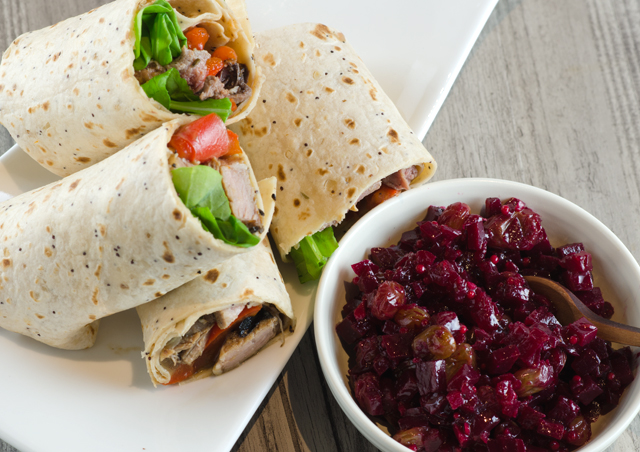
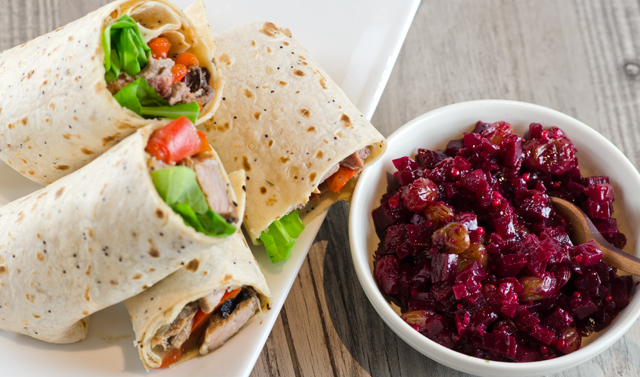
The good thing about cooking a ton of food for a holiday is that chances are, you will have lots of leftovers.  The challenging part is finding ways to repurpose those leftovers into something different and delicious. Smoked turkey was good on a salad, leftover roasted vegetables topped our homemade thin crust pizzas. In previous years I made moussaka with leftover lamb, this year we decided on lamb wraps. In addition to the usual tzatziki sauce that I would serve with lamb, Joe suggested  “something spicy.” I had some ideas but after googling it, found an interesting recipe for beet chutney.

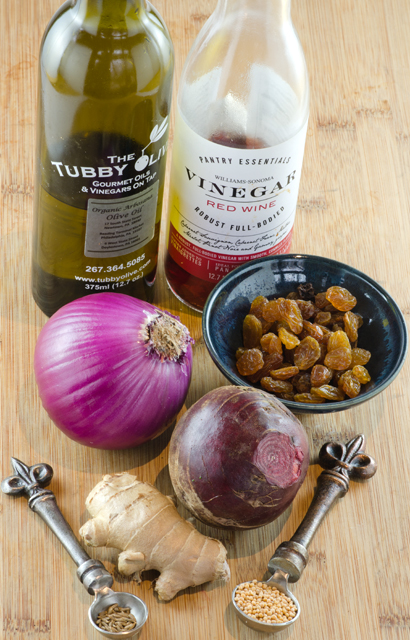
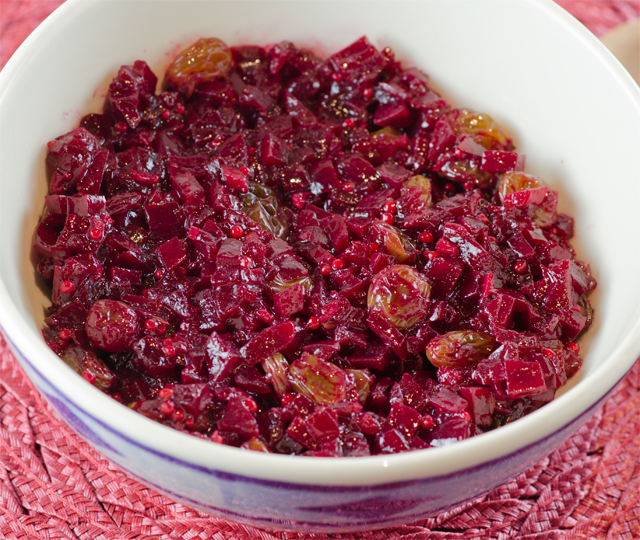
As a beet lover, I enjoy their earthy quality and thought the sweet and sour quality of a chutney would be a nice contrast to the creamy coolness of tzatziki. The chutney comes together quickly and benefits from being made ahead, allowing the flavors to blend together. The recipes calls for a two inch diameter beet, which turned out to be just a little bit less than a cup. Tweak the sweet and sour elements to your own liking. I used golden raisins because that’s what I had on hand, dried cranberries might be nice as well. Dried cranberries would fit the color scheme and would fit right in with a Thanksgiving menu. The chutney would also be good  as a appetizer on top of a cracker spread with goat cheese or Brie.

DSC_2321a

Beet Chutney

Makes about a cup

Ingredients

  • 1/4c olive oil
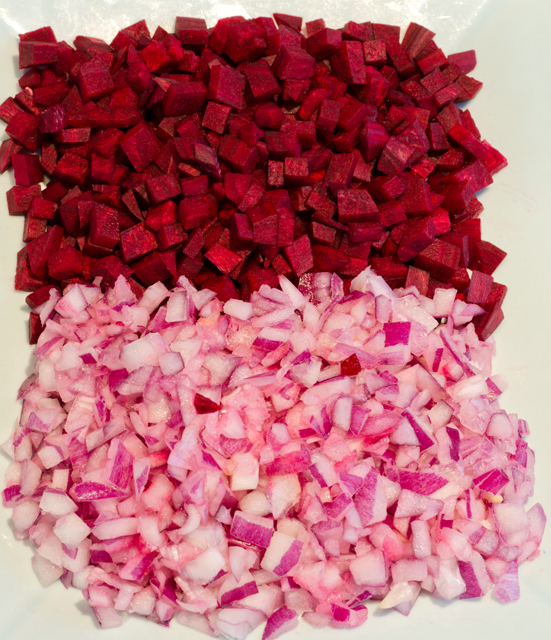
  • 1 ½c red onion
  • 1 2-inch diameter red beet, peeled, cut into ¼ inch cubes
  • ½c water
  • ½c red wine vinegar
  • 3T raisins (I used golden raisins)
  • 3T sugar
  • 2t chopped peeled fresh ginger
  • 1t yellow mustard seeds
  • Pinch of cumin seeds

DSC_2323a

Directions

  1. Heat olive oil in a heavy medium saucepan  over medium heat. Add chopped red onion and beet cubes. Cook until onion is tender but not brown, stirring frequently, about 8 minutes
  2. Add ½c water. Increase heat to high and boil until mixture is thick, about 5 minutes. Add vinegar, raisins, sugar, ginger, mustard seeds, and a pinch of cumin seeds. Reduce heat to medium-low and simmer until beet cubes are tender and the chutney is thick, stirring often, about 10 minutes. Adjust seasonings as needed and season to taste with salt and pepper. Cool.
  3. Can be made 1 week ahead. Cover and chill.

DSC_2327aDSC_2336a


December 22, 2014 Two Dips for Holiday Entertaining


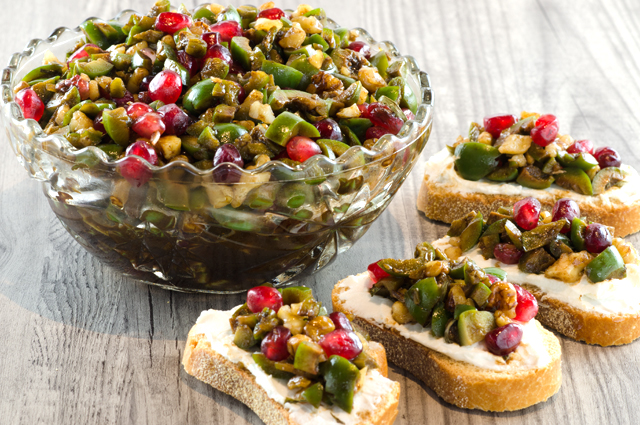
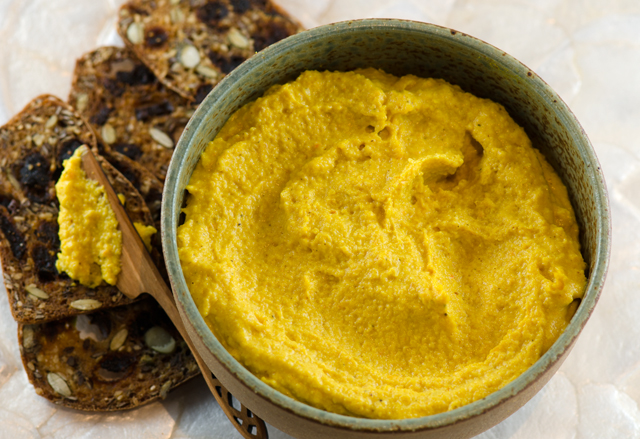
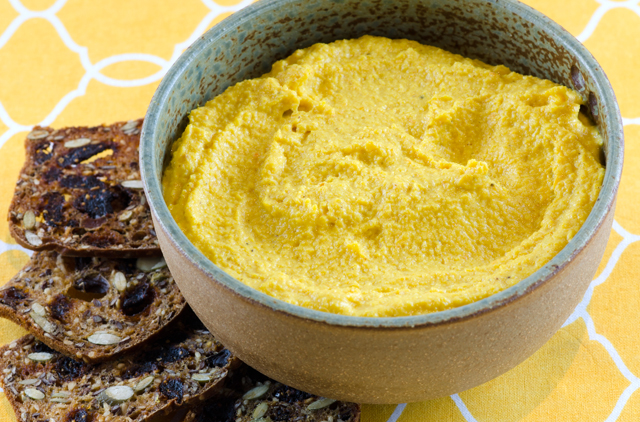
DSC_0253aHere are two new recipes to add to your holiday entertaining repetoire.  Kabocha squash and olive pomegranate walnut dips are unique, flavorful and will take you out of the everyday French onion and spinach dip rut.

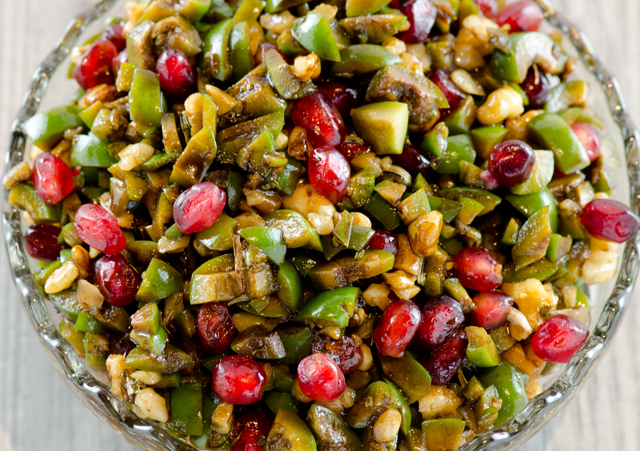
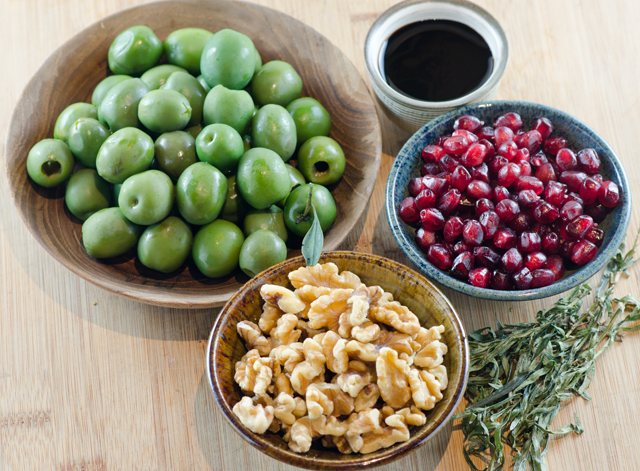
Olive, pomegranate and walnut dip is also known as Zeytoon Parvardeh and originates from the northern Iranian province of Gilan, where fruit, olive and nut trees abound. Pomegranates, in peak season now, are used in two ways, for the crunchy seeds and deliciously tart pomegranate molasses. Pomegranate molasses can be purchased at Middle Eastern markets or if you are feeling a little adventurous, you can make your own by cooking down pomegranate juice with a little lemon juice, much in the same way a balsamic vinegar reduction is made. Olives, another major component in this dish, are pitted and  chopped to about the size of the pomegranate seeds. My choice was a mild buttery Castelvetrano, but any variety that is briny, not bitter will work. Walnuts are traditionally used in this dish but another Middle Eastern favorite, pistachios, would be a good  substitute.

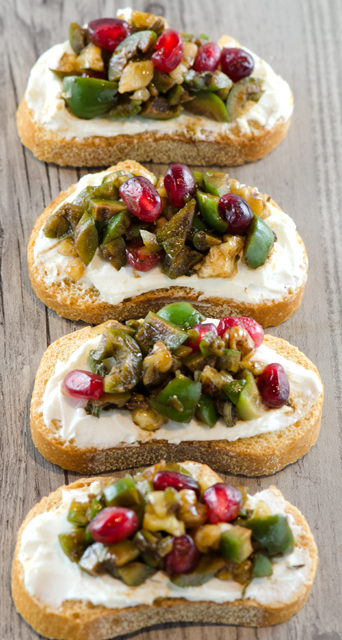
This “dip” has the chunky consistency of a tapenade or a relish and in one instance I saw it referred to as a salad. We used it as a topping for fish and I could see it topping sliced lamb in a pita.  If you chopped the ingredients in a food processor as it was called for in some of the versions of the recipe, it would have more of the consistency of a dip.  Though tarragon compliments the flavors of the ingredients in this dish, some of the more authentic recipes called for mint and a seasoning called golpar or Persian hogweed. Used with vegetarian and bean dishes, it is often incorrectly sold labeled as angelica. Golpar translates to “rose feather” and has been described as fragrant and reminiscent of pepper or cardamom. Sounds like something I will have to seek out in the future.

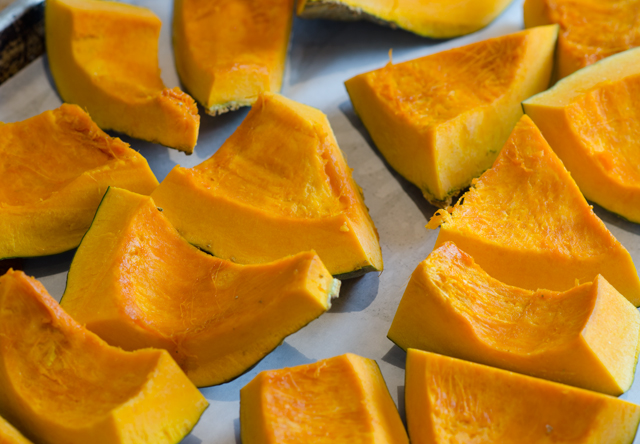
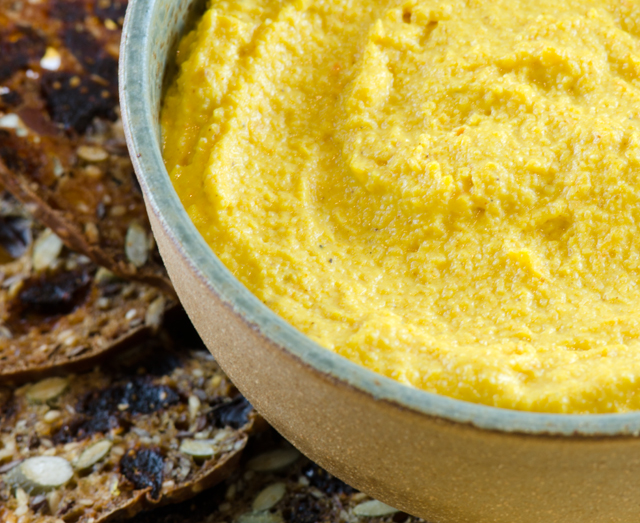
We use winter squash in soups, casseroles and side dishes, why not in a dip? I improvised this recipe with ingredients I had in my kitchen. The honeyed sweetness and custardy texture of kabocha squash is a natural for a dip. The goat cheese brings a little creamy saltiness and contrasts with the heat of the curry powder. Sweet or hot curry powder would work according to your taste.The juice of a lemon brightens all the flavors. Kabocha squash dip is a natural for pita triangles or vegetable crudite.  Serve the olive, pomegranate and walnut dip with crostini that has been topped with a thin layer of chevre.

Green Olive, Walnut and Pomegranate Dip

Makes 2 1/4cups

Ingredients

  • 1/2c walnuts
  • 2c pitted briny green olives, finely chopped
  • 1/2c pomegranate seeds
  • 3T pomegranate molasses
  • 3T finely chopped tarragon
  • 3T extra virgin olive oil
  • 1T red wine vinegar
  • Kosher salt and freshly ground pepper


DSC_0168aDSC_0250aDirections

  1. Preheat oven to 375°F. Spread the walnuts in a pie plate and bake until toasted, 10 minutes. Let cool, then finely chop.
  2. In a bowl, mix the walnuts with the other ingredients and season with salt and pepper to taste. Serve with pita chips, crudité or as a topping for fish.

DSC_0244a


DSC_0266aKabocha Squash Dip

Makes 2 1/2 cups

Ingredients

  • 1 small Kabocha squash
  • 4oz soft goat cheese at room temperature
  • 1/3c tahini
  • 2t or more curry powder (mild, hot, your choice)
  • Juice of one small lemon
  • Half and half or cream to thin out texture
  • Kosher salt and freshly ground pepper

DSC_0149aDSC_0157a

Directions

  1. Preheat oven to 425°F. Cut Kabocha squash into 2″ wedges, place on a baking sheet cut side up and brush lightly with olive oil. Bake squash until tender and browned in spots, about 45 minutes. Check half way through baking to flip the tray around. Let squash cool.
  2. Scrape two packed cups squash from the skin, save any additional squash for another use. Put squash, goat cheese, tahini, curry powder, juice of a lemon in a food processor and pulse until nearly smooth. Add a little cream to thin out, pulse until smooth. Season with salt and pepper and additional curry powder if desired.
  3. Scrape into a bowl and serve with crackers or crudité.

DSC_0261a


DSC_0262a

July 20, 2014 Pickled Coleslaw

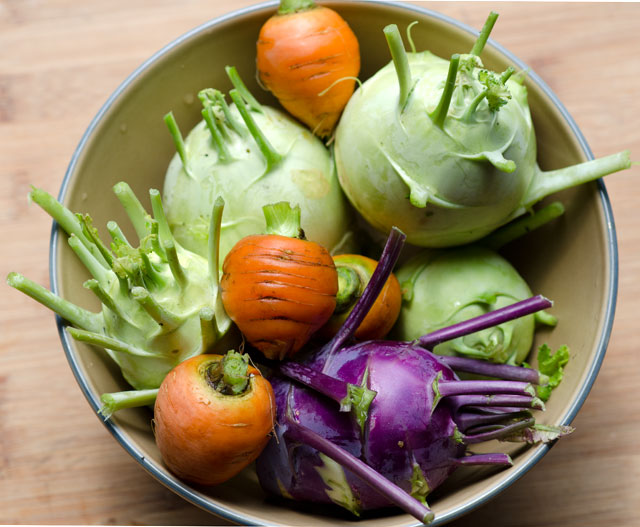
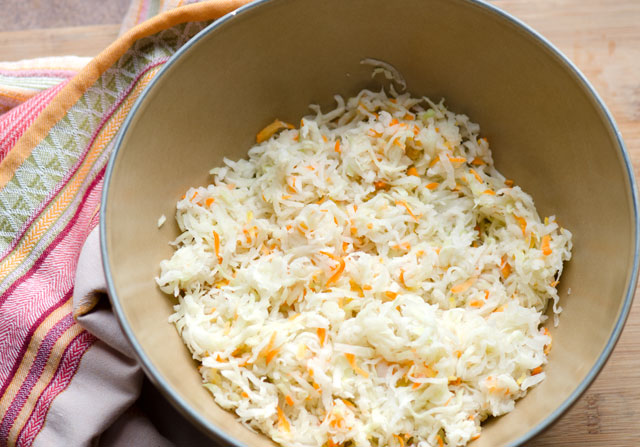
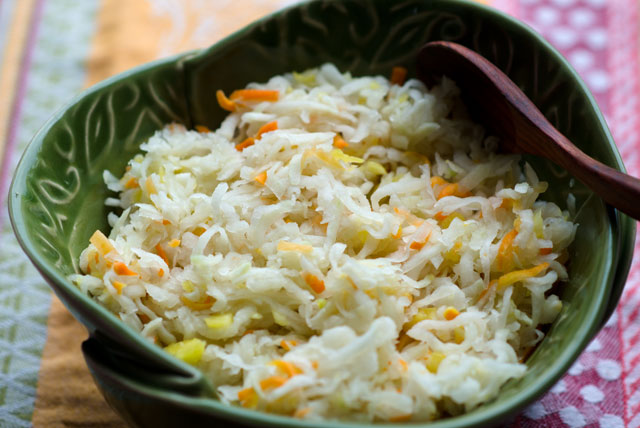
DSC_8207aAnother day, another pickle. This time it’s pickled coleslaw, a way to eliminate the mayo and make it picnic basket friendly. This slaw can be stored in the fridge for up to ten days. The cabbage in this coleslaw is turnip cabbage, or as it is better known, kohlrabi.
Kohlrabi is a member of the Brassica family, like cabbage, broccoli and cauliflower. The  tasty bulbs are low in calories, a good source of calcium, potassium, vitamins A and C and fiber.

Kohlrabi is crunchy, a little bit sweet and can have the spicy kick of a radish or turnip. I peeled and shredded the little space alien looking veggies along with a few carrots in the food processor. Toss the shredded kohlrabi and carrot with some kosher salt to extrude as much water out of them as possible. After about ten minutes, use your hands or wrap in a clean kitchen towel  to squeeze as much water out of the kohlrabi as possible. The less water left behind the crunchier the slaw will be.

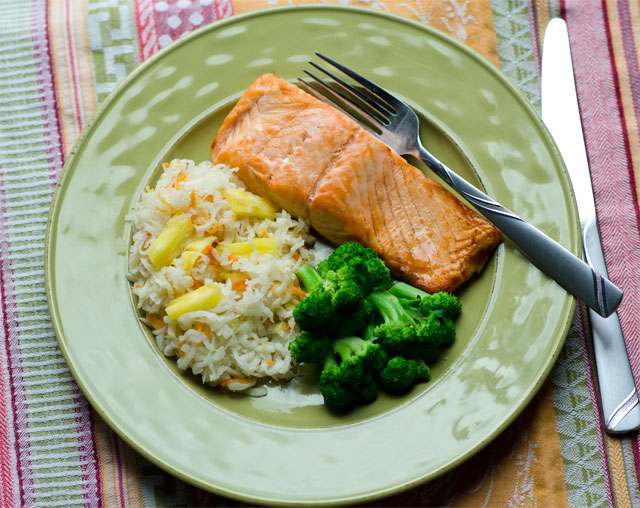
The original recipe called for white vinegar and pineapple juice. I had white balsamic pineapple vinegar and the sweet, slightly tart flavor really complimented the kohlrabi nicely. Add some pineapple chunks just when ready to serve. Goes great with fish, as a taco topping or even with hot dogs!

Pickled Coleslaw

Adapted from Fine Cooking

Makes 2 1/2 quarts

Ingredients

  • 9c shredded kohlrabi
  • 1/2c shredded carrot
  • 2T kosher salt (I use Diamond Crystal, if using Morton, use a little less)
  • 1/4c pineapple balsamic vinegar or white vinegar
  • 3/4c pineapple juice (fresh is best)
  • 1c fresh pineapple in small dice

Directions

  1. Toss the kohlrabi and carrot in a large bowl with the salt. Let sit at room temperature for about ten minutes.
  2. Wring out as much moisture as possible from the vegetables with your hands. Transfer the vegetables to a dry bowl.
  3. Add the vinegar and juice and toss thoroughly. The slaw can be served immediatley or placed in quart jars and refrigerated up to ten days.
  4. Add fresh pineapple right before serving.
DSC_8147a
Kohlrabi and carrots ready for trimming and peeling.
DSC_8154a
Kohlrabi and carrots after being salted and wrung out.
DSC_8206a
Add pineapple right before serving.

DSC_8198a

April 29, 2014 Lemon Cheesecake with Lemon Curd

DSC_6770a

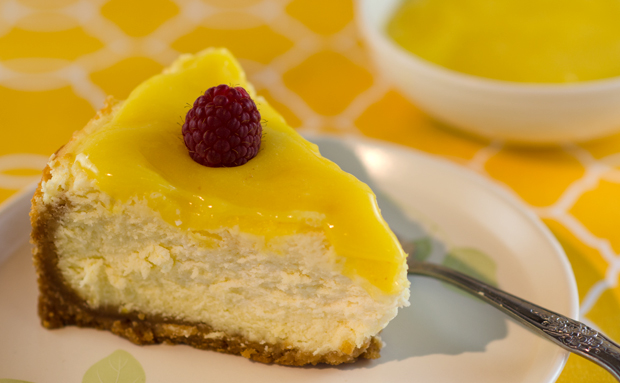
A light lemony cheesecake was the finishing touch for our Easter dinner. This easy to make cheesecake has been a favorite of mine for several years. It is a very simple recipe and always turns out great. It can even be made ahead and frozen, just wrap it very well in several layers of plastic and foil.

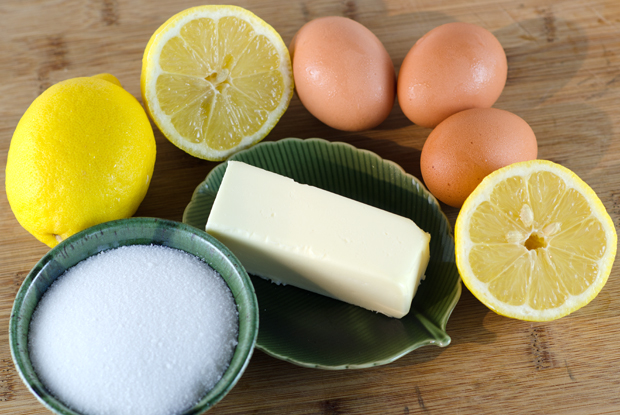
Lemon curd has long been a tea time favorite for topping for scones and shortbread. Here it adds another intense lemony layer to the cheesecake. The ingredients are very basic, eggs, butter, sugar and the zest and juice of lemon.

This lemon curd recipe was a real revelation for me. As a caterer I made countless, probably thousands of miniature lemon and lime curd tarts for dessert tables. The recipe I used for years combined the lemon juice and rind, beaten eggs and sugar in the top of a double boiler. The mixture was cooked slowly over simmering water until thick and shiny, making sure the curd never came to the boiling point. It was a long and tedious process. As careful as you might try to be, there was always the possibility of getting unattractive little white specks of egg in the curd. That meant the additional step of straining the curd and losing some of the product.

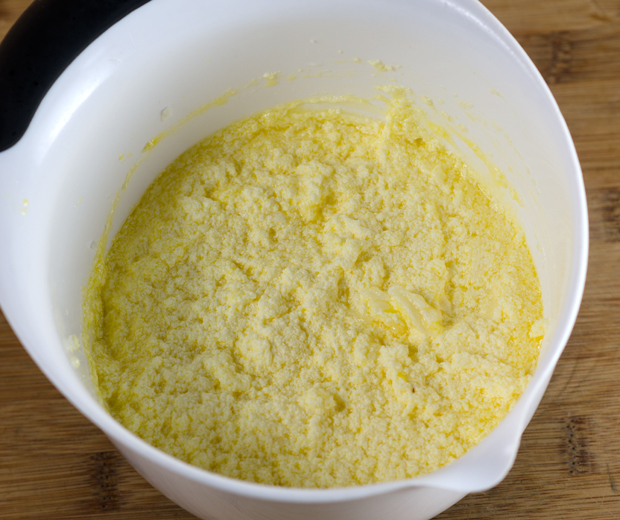
This recipe for lemon curd combines ingredients much in the way when you bake a cake. Room temperature butter and sugar are beaten together until smooth. Next the eggs and the egg yolks are beaten in one at a time. Now the lemon juice is added. Don’t panic, the mixture will appear to be curdled. The butter will start to melt when it’s cooked over low heat and the texture will become silky smooth.  The heat is now raised to medium and the curd is cooked until thickened, about 15 minutes.

Never let the mixture come to a boil. Be sure to get your whisk into every corner of the pan. This is when the curd can overcook if it is not stirred and scraped often.
Why does this method work? The egg proteins are coated in fat from the butter. This prevents them from coagulating into hard bits when the lemon juice is introduced.

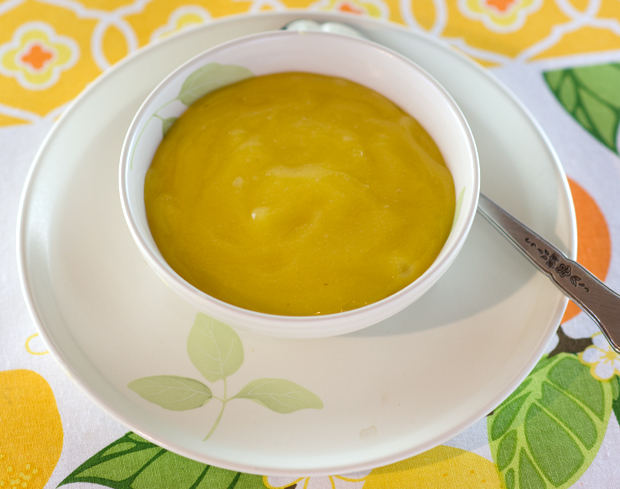
All I know is that it works. The finished product may not seem to be as thick as you want it but it will continue to thicken after it is refrigerated. This easy recipe makes a lemon curd that is silky smooth, rich and creamy with just the right amount of tartness. Another bonus is that it can be frozen, so make a double batch and enjoy it now and later.

DSC_6767a

Lemon Cheesecake

Ingredients

For the crust:
  • 8 oz. vanilla wafers, finely crushed (2 cups of crumbs)
  • 3 T. granulated sugar
  • 7 T unsalted butter, melted
For the filling:
  • 3 8-oz. packages cream cheese, at room temperature
  • 1 c ricotta (regular or low fat)
  • 2 T. all-purpose flour
  • Table salt
  • 1-1/4 c granulated sugar
  • 2 Tbs. finely grated lemon zest
  • 1 Tbs. pure vanilla extract
  • 4 large eggs, at room temperature
For the garnish:
  • 3/4 cup lemon curd

Directions for the crust

  1. Position a rack in the center of the oven and heat the oven to 375°F.
  2. In a medium bowl, stir together the vanilla wafer crumbs and 3 Tbs. granulated sugar. Mix in the melted butter until the crumbs are evenly moist and clump together slightly. Transfer the mixture to a 9-inch spring form pan and press evenly onto the bottom and about 2 inches up the sides of the pan (to press, use plastic wrap or a flat-bottom measuring cup). Bake until the crust is fragrant and slightly darkened, 9 to 12 minutes. Let the pan cool on a rack. Lower the oven temperature to 300°F.

Directions for filling and baking the cheesecake

  1. In a stand mixer fitted with the paddle attachment, beat the cream cheese, ricotta, flour, and a pinch of table salt on medium speed, scraping down the sides of the bowl and the paddle frequently, until very smooth and fluffy, about 5 minutes. Make sure the cheese has no lumps. Add the 1-1/4 cups granulated sugar and continue beating until well blended and smooth.
  2.  Add the lemon zest and vanilla, and beat until blended, about 30 seconds. Add the eggs one at a time, beating just until blended. (Don’t overbeat once the eggs have been added or the cheesecake will puff too much and crack as it cools.) Pour the filling into the cooled crust and smooth the top.
  3. Bake at 300°F until the center jiggles like Jell-O when nudged, 55 to 65 minutes. The cake will be slightly puffed around the edges, and the center will still look moist. Set on a rack and cool completely. Cover and refrigerate until well chilled, at least 8 hours and up to 3 days. The cake can also be frozen at this point for up to 1 month.
  4. To freeze, put the unmolded, cooled cake on a rimmed baking sheet in the freezer, uncovered, until the top is cold and firm; then wrap it in two layers of plastic and one layer of foil. Thaw overnight in the refrigerator.

DSC_6772a

Classic Lemon Curd

From Fine Cooking magazine

Makes about 2 cups

Ingredients

  • 3 oz. (6 Tbs.) unsalted butter, softened at room temperature
  • 1 c sugar
  • 2 large eggs
  • 2 large egg yolks
  • 2/3 c fresh lemon juice
  • 1 t. grated lemon zest

Directions

  1. In a large bowl, beat the butter and sugar with an electric mixer, about 2 min. Slowly add the eggs and yolks. Beat for 1 min. Mix in the lemon juice. The mixture will look curdled, but it will smooth out as it cooks.
  2. In a medium, heavy-based saucepan, cook the mixture over low heat until it looks smooth. (The curdled appearance disappears as the butter in the mixture melts.) Increase the heat to medium and cook, stirring constantly, until the mixture thickens, about 15 minutes. It should leave a path on the back of a spoon and will read 170°F on a thermometer. Don’t let the mixture boil.
  3. Remove the curd from the heat; stir in the lemon zest. Transfer the curd to a bowl. Press plastic wrap on the surface of the lemon curd to keep a skin from forming and chill the curd in the refrigerator. The curd will thicken further as it cools. Covered tightly, it will keep in the refrigerator for a week and in the freezer for 2 months.
DSC_6602a
Sugar, butter, eggs and lemon, the basic ingredients of lemon curd.
DSC_6603a
It looks curdled after mixing but when it’s heated will smooth out to a silky lemon curd.


DSC_6760a
Delicious lemon curd.

November 5, 2013 Barnegat Light Scallops with Butternut Squash Puree and Tomato Jam

DSC_3843a

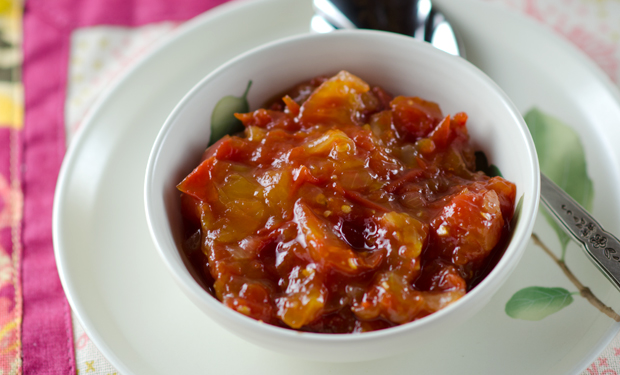
“Use us!” they seemed to call out, well not literally, I haven’t lost my mind yet. But every time I passed the small basket of the “last gasp” tomatoes that hung in there until late October I knew I should use them to commemorate the end of the season. Granted these survivors were not salad worthy, though red and ripe looking on the outside, inside they were a bit pale, even white in some sections. Several weeks ago I had torn out a recipe from the food section of the local newspaper that could fill the bill, Barnegat Light Scallops with Butternut Squash Puree and Tomato Jam. I knew I had the four cups of diced tomatoes needed so that’s where they would go.

Barnegat Light, the distinction of the scallops called for in this recipe, is located at the northern end of Long Beach Island, New Jersey. It’s home to “Old Barney” the second tallest lighthouse in the United States. Barnegat Light is one of the top fishing ports in the United States and home to a fleet of scallopers that bring in over 2 milllion pounds a year. This makes New Jersey the country’s second largest producer of scallops a year, just behind Masschusetts.

Whether your scallops have the Barnegat Light distinction or not, always cook with dry scallops. Dry scallops originate from boats that go out, shuck and ice their haul on board and return to shore the same day, hence the name “day boat”. Wet scallops come from boats that are out to sea for many days at a time.  To preserve their catch, fishermen have to soak their scallops in a solution of sodium tripolyphosphate (aka STP) before they are frozen. STP causes scallops to soak up water before the freezing process. This plumps up the scallop by as much as 30% and increases the before sale weight and also the price you pay. Wet pack scallops will appear plumper and whiter when placed next to their dry counterparts. When cooked, they will exude all the excess slightly soapy tasting water when cooked and will become shrunken and rubbery before they even get to the carmelization stage.

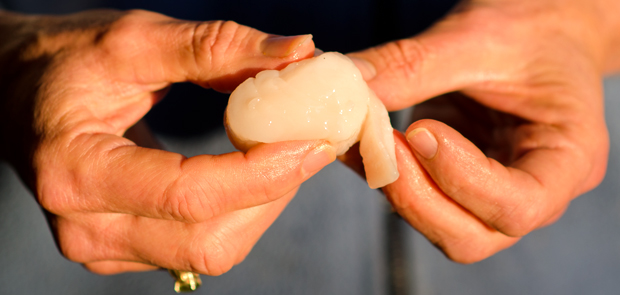
To achieve perfectly caramelized scallops, first pat the scallops dry with paper towels, excess moisture will impede the browning process. Detach the tough abductor muscle from the side of the scallop with your fingers. Season the scallops lightly with salt and pepper. Heat a heavy bottomed pan over high heat for a minute or two. Add a thin film of flavorless oil (canola is my preference) and place the scallops in the hot pan, making sure not to crowd them. If the scallops are too close they will steam, not sear. Leave the scallops to sear undisturbed for two minutes. With tongs, gently lift one up to see if the desired caramelization has been achieved. Flip the scallops and allow them to cook for another 2 to 3 minutes.

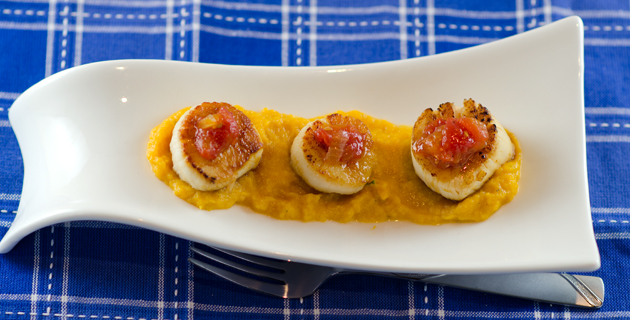
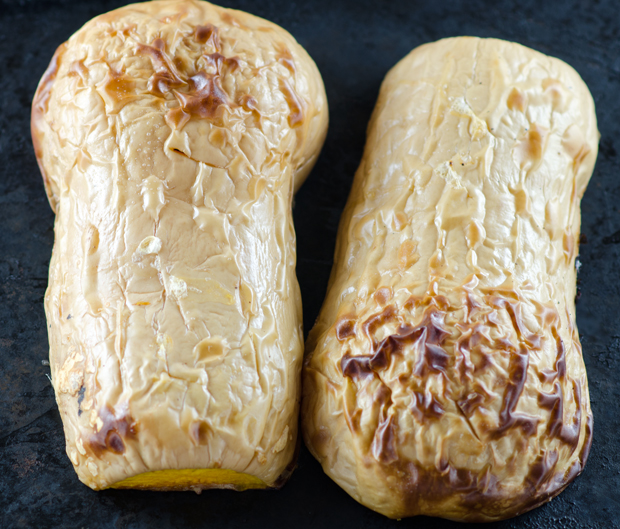
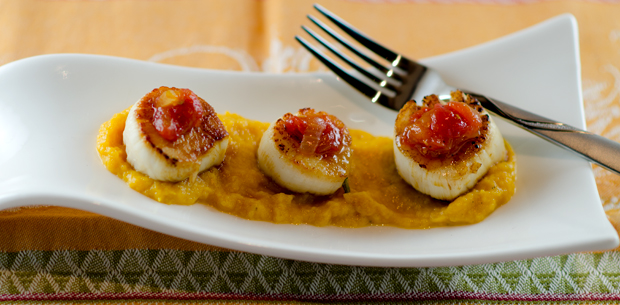
Tis the season for winter squash and they are appearing in abundance at my local farmers market. I just simply cut the squash in half, baked it at 375°F for a half hour. I pureed the squash with a little half and half, a little fresh nutmeg and a sprinkling of sage. Acorn or kabocha squash could easily fill in for the butternut. Cooking them slow and long, I coaxed as much flavor as possible out of my tomatoes. I was quite pleased with the results. Tomato jam would be a good accompaniment to a burger or a grilled cheese sandwich also. The mellow sweetness of the butternut squash complimented the nutty brown crust of the scallops. Inside the scallops were still tender and creamy and the tomato jam added a nice piquancy to the finished dish.

Barnegat Light Scallops with Butternut Squash Puree and Tomato Jam

Ingredients

  • 12 medium sized dry pack scallops
  • 1 medium butternut squash
  • 1/2 to 1 c heavy cream or half and half
  • 1/4t rubbed sage
  • 1/4t freshly ground nutmeg
  • 4c fresh tomatoes, finely diced
  • 1 small sweet onion, finely diced
  • 1c rice wine vinegar
  • 1/2c water
  • 1/2c sugar
  • Kosher salt and freshly ground pepper
  • Canola Oil

Directions

For the squash

  1. Preheat oven to 375°F. Cut squash in half lengthwise. Place cut side down on a baking sheet.
  2. Bake squash for about a half hour or until squash is easily pierced with a knife
  3. Allow the squash to cool slightly. Scoop squash flesh into the bowl of a food processor. Add sage, nutmeg and just enough cream or half and half to make a smooth puree. Transfer puree to a small saucepan and keep warm over low heat, or store until ready to use.

DSC_3793a

For the tomato jam

  1. Combine the tomatoes, onion, vinegar, water and sugar in a nonreactive saucepan, this is when I pull out the Le Creuset. Bring to a boil and reduce to a simmer.
  2. Allow to cook down until thickened, this may vary depending on the water content of the tomatoes. Remove from heat and cool. Season with salt and pepper.

DSC_3802a

For the scallops

DSC_3809ajpg
The small abductor muscle is tough, it is easy to pull off with your fingers.
  1. Remove the small abductor muscle from the side of the scallop. Pat dry with paper towels and season lightly with salt and pepper.
  2. Heat enough oil to film the bottom of a pan large enough to hold the scallops. If you don’t have one pan large enough, cook the scallops in two batches.
  3. When the oil just begins to smoke, carefully place the scallops in the pan, being careful not to crowd them. Sear on each side until golden brown. Time will vary based on your stovetop, but the hotter and quicker the better.

DSC_3820a


To Plate

  1. Place some puree on the bottom of a plate or bowl. Arrange three scallops on top of the puree and garnish with the tomato jam.

DSC_3831a