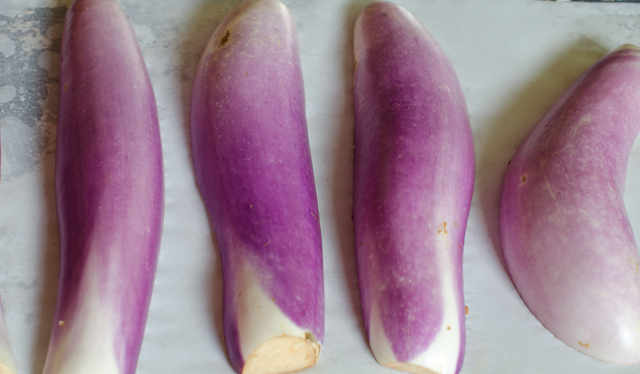
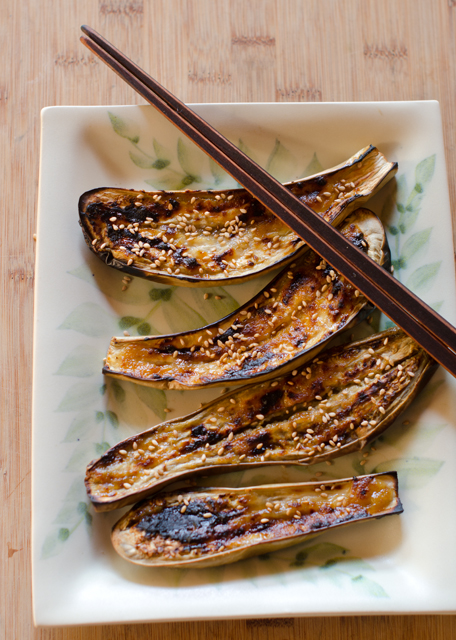
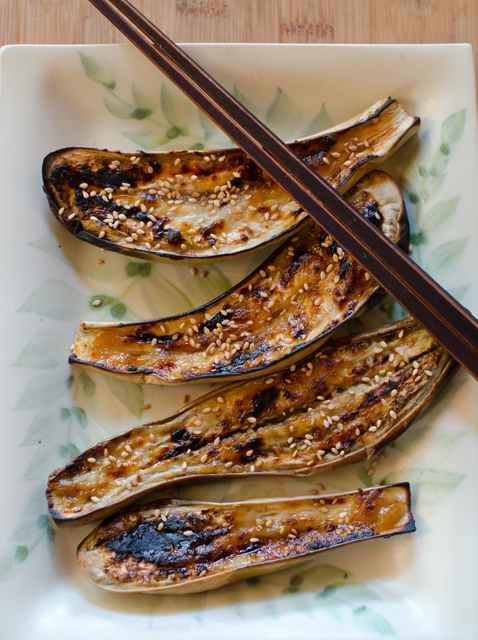
Miso glazed eggplant or nasu dengaku is a classic Japanese dish and sushi bar favorite. It’s an quick and easy preparation this time of year when eggplants are at their peak. Our garden has produced an amazing array of eggplants this summer. From fuchsia to dark purple, beautifully variegated lavender and white to pure white, they have loved our weeks of 90 degree plus temperatures and abundant rain. What we consider to be Asian eggplants are the long slim tapered varieties. Actually, Asian eggplants whether Chinese, Japanese, Thai or Indian can be round or pear shaped, pure white or lime green and as small as an egg. In this dish the creamy flesh of the eggplant is the blank canvas for the umami rich flavors of a sweet, salty and savory glaze.This recipe is quick and easy, but there are a few special ingredients you may not have on hand. Toasted sesame oil, mirin and miso are usually available at most large supermarkets. If you don’t want to buy a bottle of sake just for the two tablespoons in the recipe, substitute dry sherry. The eggplant is sliced down the middle lengthwise and the flesh is salted for a few minutes to draw out any excess moisture. While you are waiting on the eggplants, preheat your oven and line a baking sheet with foil or parchment. Keep the parchment in place with a little non stick spray in the four corners. Lightly brush the baking sheet with toasted sesame oil. This will prevent the eggplant from sticking and adds a rich nutty flavor to the dish.Blot the excess moisture from the eggplants and place cut side down on the baking sheet. While the eggplants are roasting, prepare the glaze. Combine mirin and sake in a very small saucepan, bring to a boil for twenty seconds, then stir in miso and sugar over low heat. Off heat stir in the additional sesame oil. The eggplants are done in about 15 minutes when the skin collapses and the flesh becomes soft Remove the eggplants from the oven and carefully turn them over, cut side up. Adjust the oven rack to it’s highest position and turn on the broiler.Brush the eggplants with the miso glaze and place under the broiler for about 1 minute, be sure to watch carefully! Sprinkle with toasted sesame seeds. Serve hot or at room temperature.
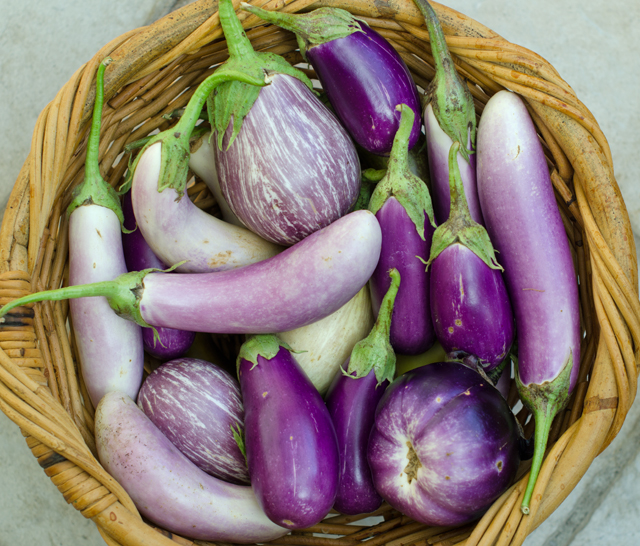
A recent harvest of all the varieties of eggplant we are growing.
Miso Glazed Eggplant
Serves 2-3
Ingredients
1 lb of Japanese eggplants
Kosher salt
1t sesame oil, plus additional for the baking sheet
1 T mirin
1 T sake
2 T white or yellow miso
1 T sugar or honey
Toasted sesame seeds
Directions
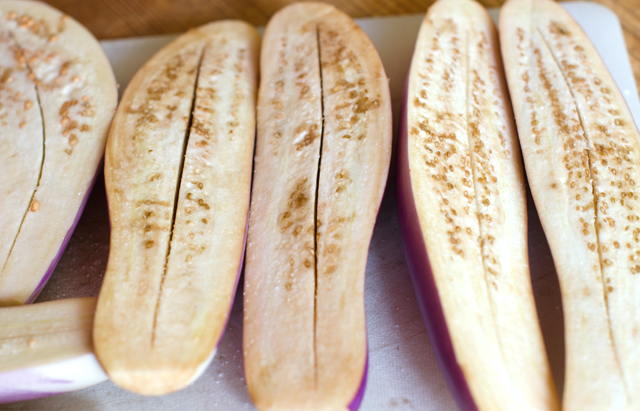
Cut the eggplants in half lengthwise and cut off the stem and calyx. Using the tip of a paring knife, cut an incision down the middle of each half, making sure not to cut through the skin, but cutting down to it. Salt the eggplant lightly and let sit for 10 minutes. Meanwhile preheat the oven to 425°F. Line a baking sheet with foil or parchment and brush it with sesame oil.
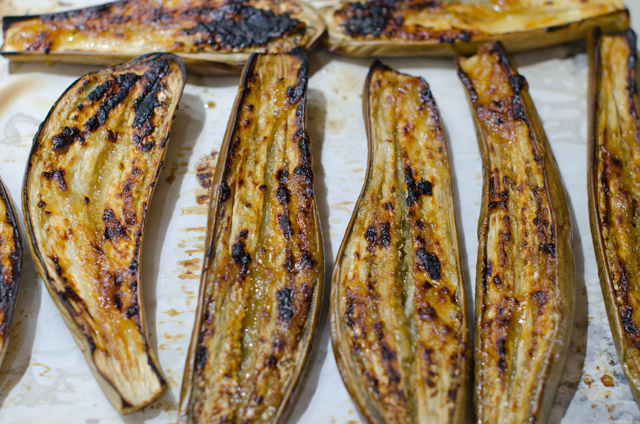
Blot the eggplants with paper towels and place, cut side down, on the baking sheets. Roast for 15 to 20 minutes, until the skin is beginning to shrivel and the flesh is soft. Remove from the oven, carefully turn the eggplants over, and preheat the broiler.
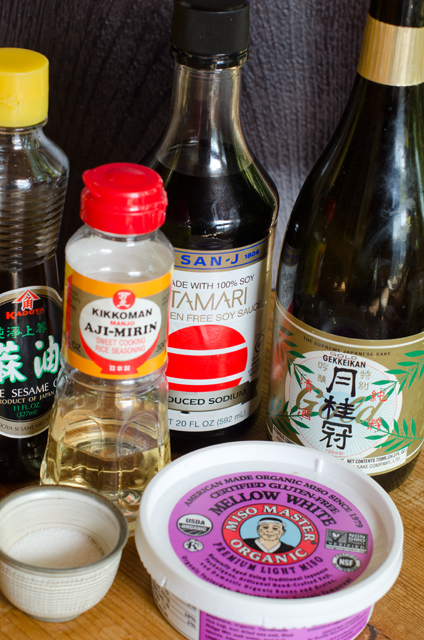
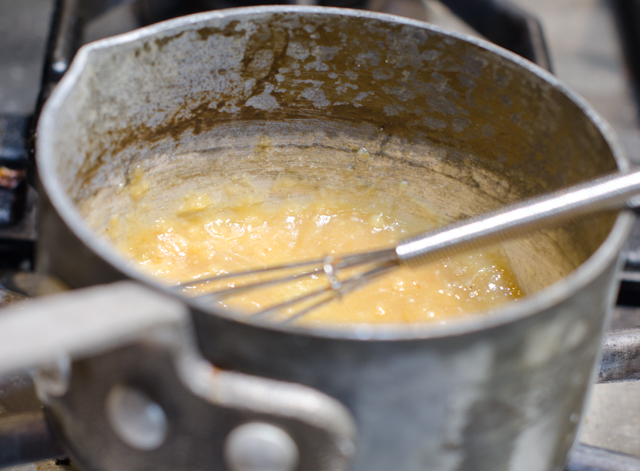
To make the glaze, combine the mirin and sake in the smallest saucepan you have and bring to a boil over high heat. Boil 20 seconds, taking care not to boil off too much of the liquid, then turn the heat to low and stir in the miso and the sugar. Whisk over medium-low heat without letting the mixture boil, until the sugar has dissolved. Remove from the heat and whisk in the sesame oil.
Brush the eggplants with all of the miso glaze. Place under the broiler, about 2 inches from the heat, and broil for about 1 minute, until the glaze begins to bubble and looks shiny. Remove from the heat. Allow to cool if desired or serve hot. Garnish with toasted sesame seeds.
Scoring and salting the eggplants.Ingredients needed for the glaze.
Place the eggplants cut side down on a parchment lined baking sheet.Use your smallest saucepan to make the glaze.Once the eggplant is soft, turn it cut side up. apply the glaze and put the tray under the broiler.
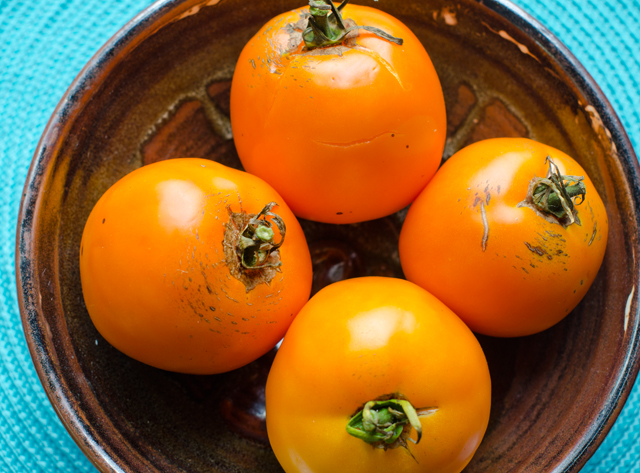
This recipe could also be titled Orange, orange tomato soup. All the recipes I found on line for orange tomato soup included orange juice, but not orange tomatoes. My recipe uses both. Orange tomatoes come in all sizes, from the cherry sized Sun Gold, that you can eat out of hand like candy to the Valencia, an heirloom variety that we are growing this year. Orange tomatoes are less acidic and fruity while still providing a true tomato flavor. Orange tomatoes inspired me to add a little orange juice to the soup to highlight the sweetness of the tomatoes.
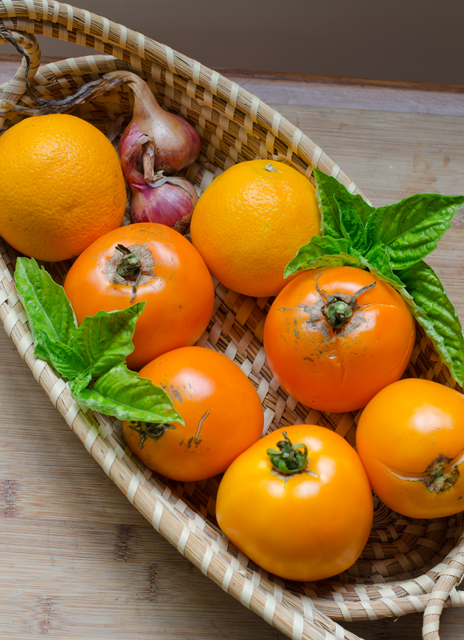
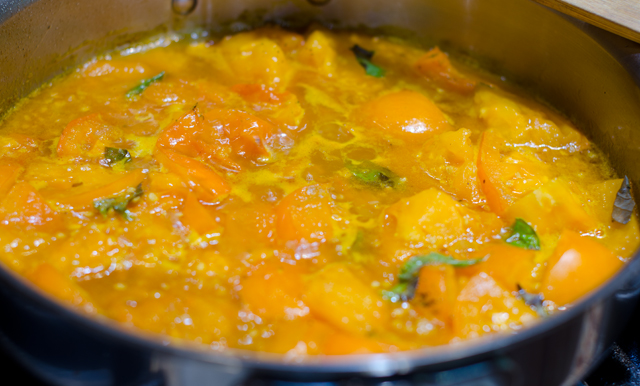
This is a very quick recipe to prepare, begin by melting some butter and olive oil in a large saute pan. Add chopped shallot and carrot and cook until softened. Shallots provide a milder flavor, but a white onion could be substituted. Add cored chopped tomatoes, roughly torn basil leaves, chicken stock and just a touch of maple syrup. Bring to a boil and simmer for 15 minutes.
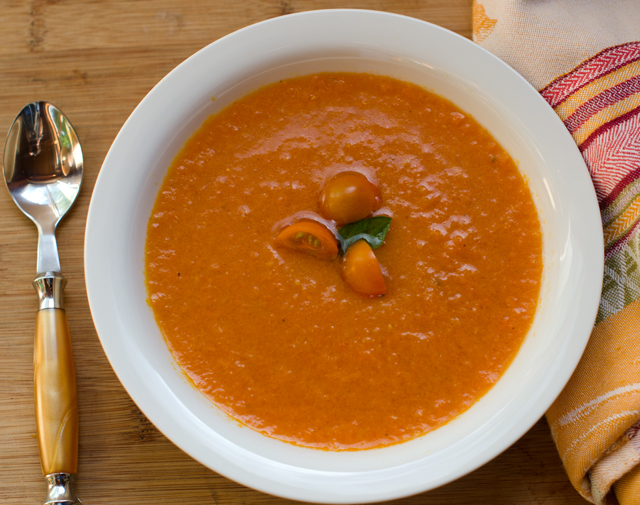
Allow the mixture to cool a bit before transferring to a blender. Blend the soup in two batches. Very hot liquids expand as you blend them so place a kitchen towel over the lid to protect your hands from any soup that might escape the blender. For the finest texture you could put this soup through a food mill. Next, stir in the orange juice, fresh squeezed of course. Cool the soup to room temperature before placing in a covered container in the refrigerator. Chill for at least four hours or overnight to allow the flavors to blend.
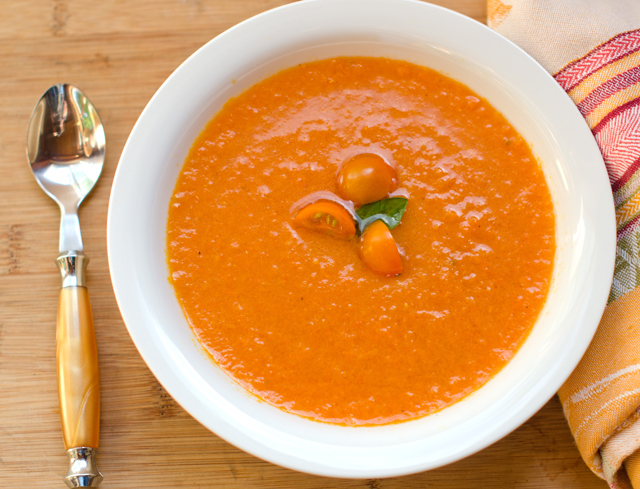
This soup is great for entertaining, it can be made well in advance. It could be dressed up with a seared scallop or a poached shrimp. Serve the soup garnished with some basil leaves and some quartered Sun Gold tomatoes. We enjoyed ours along with a BLT.
Orange Tomato Soup
Serves 4
Ingredients
1/3 c chopped shallots
1/3 c chopped carrot
4 c cored and quartered orange tomatoes
1 T unsalted butter
1 T olive oil
½ c shredded basil leaves
2 c chicken stock
1 T maple syrup
¾ c orange juice
Directions
In a large saute pan melt the butter and olive oil over medium high heat.
Add the shallots and carrot and saute until softened, five to six minutes.
Add chopped orange tomatoes, basil leaves, chicken stock and maple syrup. Bring to a boil, reduce to a simmer and cook for 15 minutes. Allow the soup to cool for at least five minutes before proceeding to the next step.
Working in batches, puree the soup in a blender until smooth. If desired you can also put the soup through a food mill. Put the soup in a bowl and stir in the orange juice. Cool the soup to room temperature. Put the soup in the refrigerator in a covered container and chill for at least four hours or overnight.
Serve garnished with orange cherry tomatoes and a few basil leaves.
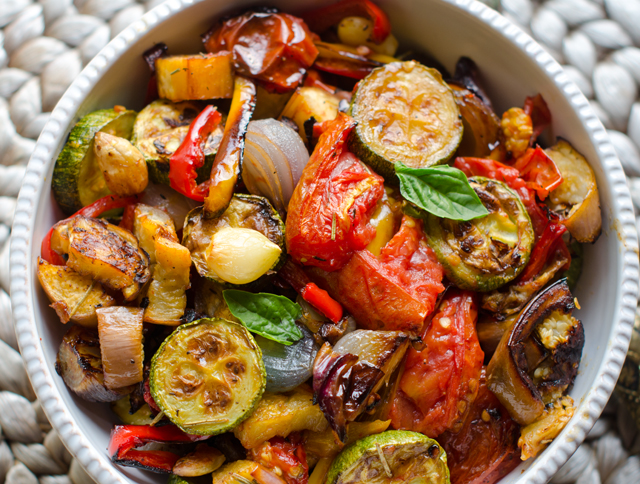
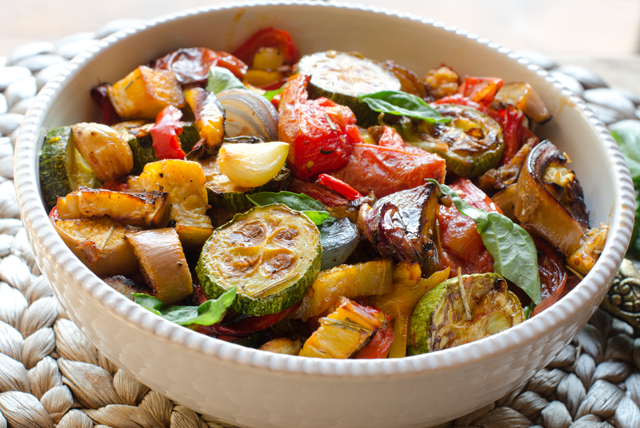
I love recipes that use the bounty of the garden in a single dish and ratatouille accomplishes that in a very delicious way. In case you didn’t know, ratatouille (rat-uh–too-ee), is a summer vegetable stew that had it’s origins in the Provencal city of Nice in southern France. Traditionally, each ingredient, eggplant, zucchini, peppers, onion, garlic and tomatoes, is cooked separately on the stove top and tossed together at the very end. So it’s really a sauté that is presented as a stew.
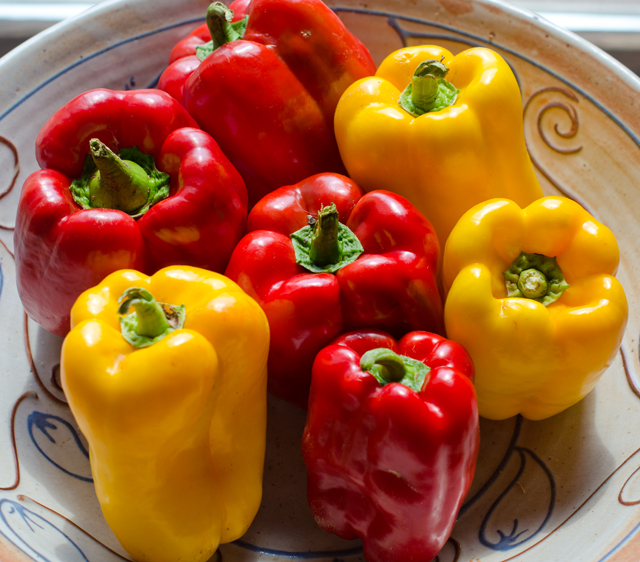
In this version the vegetables are tossed in olive oil and roasted in the oven, eliminating the time cooking over a hot stove. Our red and yellow bell pepper harvest is the earliest I can remember. They must like the hot temperatures and abundant rainfall this year. The orange Valencia peppers are not far behind. I prefer using Chinese or Japanese eggplants for their thin skin and milder flavor. I substituted shallots for onions since our harvest was so plentiful this year. The garlic was also from the garden, a first for us.
Cut the vegetables in similar size so they will get done at the same time. The smaller the cut, the less time it will take to cook. Lightly toss the vegetables with about a half cup of a good quality olive oil. Spread them out evenly over two large baking sheets. Rotate the baking sheets top to bottom and front to back half way through the cooking time. Roasting allows the vegetables to retain their shape and they take on a delicious toasted flavor. Move the cooked vegetables to a large serving bowl and tossed with a basil chiffonade. Chiffonade, translates “made of rags” from the French (of course!). It is a technique for cutting herbs and vegetables into long thin strips, in this case, basil.
Ratatouille can be used in many ways, a side dish, a topping for bruschetta, chicken or fish. We used it as the topping for an impromptu flatbread pizza. It can be served hot or cold and is even better the next day, if it lasts that long.
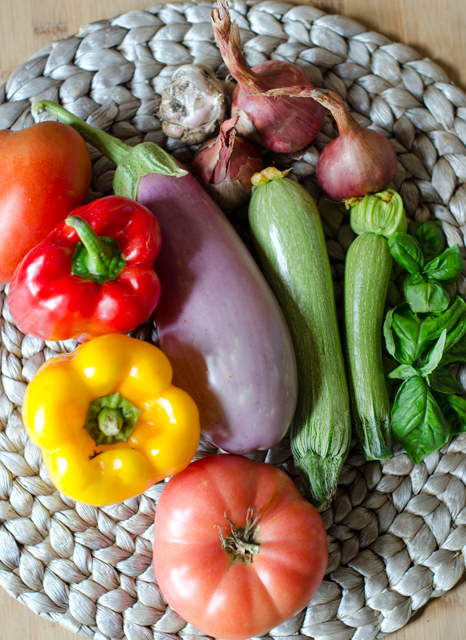
This season is the earliest we have had ripe bell peppers. I guess they really like the hot and rainy weather.Ingredients for the ratatouille, I substituted shallots for onions since Joe just harvested his crop.
Oven Roasted Ratatouille
Serves four (or two very generously)
Ingredients
2 small onions (about 5 oz. each), cut into ¼-inch-thick half-moons
2 bell peppers, red, yellow or orange, cored, seeded and cut into ¼-inch lengthwise strips
Japanese eggplant, about 1 lb, cut crosswise ½ inch thick rounds, then sliced in quarters
1 lb small to medium zucchini, trimmed and cut into ½ inch thick rounds
10 whole cloves garlic, peeled
½ c extra virgin olive oil, and more as needed
1 t chopped fresh rosemary
Kosher salt and freshly ground pepper
1½ lbs medium tomatoes (about 4), cored, and cut into 1/2-inch chunks
¼ c basil cut into a chiffonade
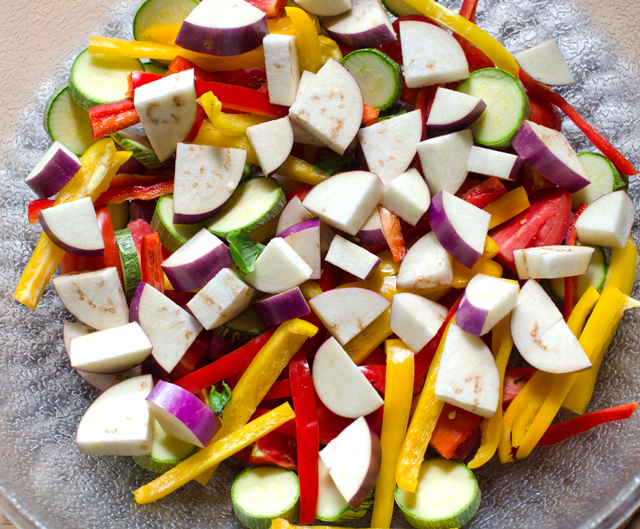
Toss the ingredients in a large bowl with olive oil, salt and pepper.Transfer the vegetables to two large baking sheets.
Directions
Place racks in the top and bottom thirds of the oven. Heat to 400°F. If using convection heat, 375°F.
In a large bowl, toss the onions, peppers, eggplant, zucchini, tomatoes, garlic, olive oil, rosemary, and 1-1/2 tsp. kosher salt and a grind of pepper. Spread the vegetables evenly over two large 12 x 16 sheet pans. Don’t spread the vegetables too thin or they may burn (they shrink a lot as they cook).
Roast, stirring the vegetables a few times and swapping the positions of the pans once, until the vegetables are slightly collapsed or shriveled, starting to brown, and very tender, about 35 minutes for my oven. It could take 10 minutes longer if you are not using convection heat.
Scrape all the vegetables and any juices into a serving bowl. Toss with the basil, taste for seasoning, and serve.
Ratatouille makes a great pizza topping.How could I resist posting a picture of Remy, the star of the movie Ratatouille who presides over my kitchen from his perch above.
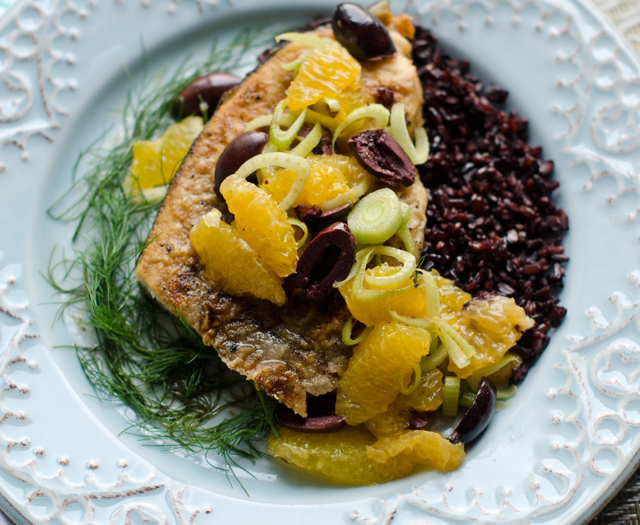
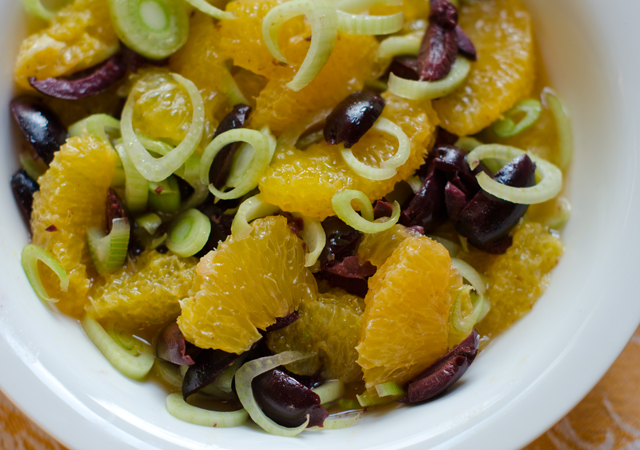
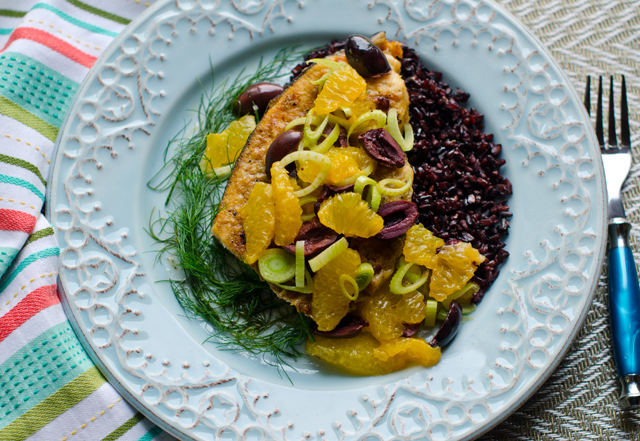
When I am looking for a quick and easy fish entree that comes together in about 15 minutes, swordfish is one of my first choices. I love it’s rich, meaty texture and like to balance it with something that is tart, a bit sweet and a little salty. This palate pleasing salad of oranges, fennel and olives takes it’s inspiration from Sicily.
The orange supremes take some careful knife work but are worth the effort. Using your sharpest pairing knife, trim off the top and bottom of the orange. Rest the orange on one of the cut ends and trim off the peel and pith in large strips, carefully following the contours of the fruit. Cut the segments free from the membrane. Be sure to do this over a bowl to catch all the juices. Squeeze the remaining membrane to capture every last drop of juice. I reduced the juice in a small saucepan to intensify the flavor in the vinaigrette.
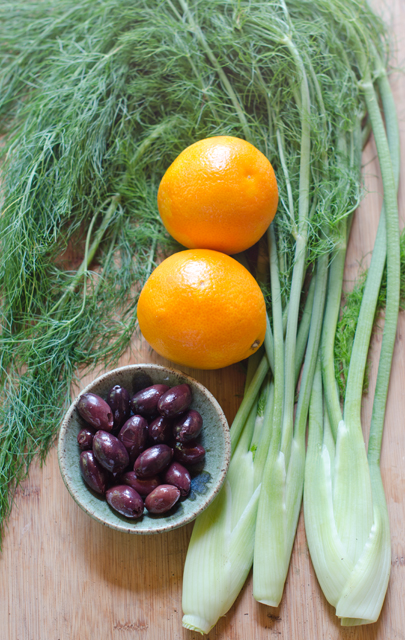
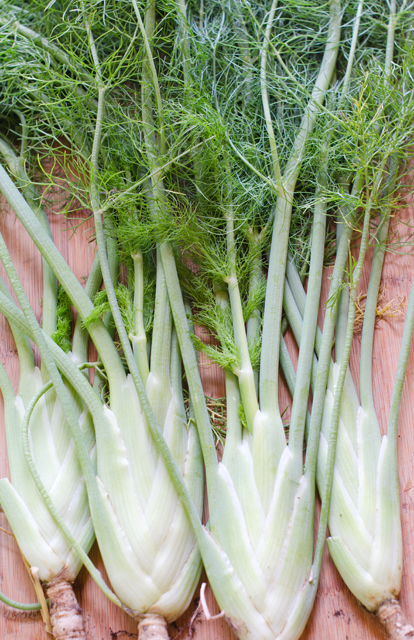
I think fennel is a greatly under used vegetable. Related to carrots, parsley, dill and coriander, it has a crunchy texture and refreshing licoricey flavor popular in Mediterranean cooking. To cut, trim the feathery foliage and stalks off where they meet the top of the bulb. The stalks and foliage can be used as a bed for cooking the fish. Cut the bulb in quarters lengthwise and cut out the core. Slice the sections thinly using a mandoline or a very sharp knife. I used fennel thinnings from the garden. They didn’t have a hard solid core so I used the entire fennel bulb.
Kalamata olives are almond shaped and dark purple in color. They are cured in a red wine vinegar brine that gives them a rich, fruity flavor. They are often found on the Mediterranean bar in many supermarkets. To pit olives, place them on a flat surface and lightly crush with the side of a broad flat chef’s knife. Remove the pit and cut the olives in half lengthwise.
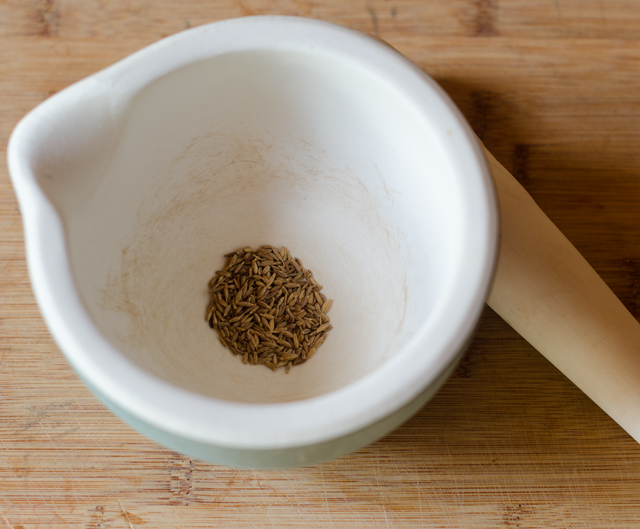
Cumin is one of my favorite spices and toasting cumin seeds really intensifies their flavor. Use a small dry skillet over medium to medium high heat. Keep the pan in constant motion, the seeds will darken and your kitchen will be filled with a warm toasty aroma. Immediately remove them from the pan and transfer to a bowl or a mortar and pestle. Crushing the toasted seeds brings out their flavor even more. If you don’t have a mortar and pestle, put the seeds in a plastic bag and crush them with the bottom of a heavy pan or a rolling pin.
Combine the reduced orange juice, toasted fennel and olive oil. Pour the dressing over the salad ingredients and lightly toss. Serve salad with the fish and garnish the plates with fennel fronds.
Orange, Fennel and Kalamata Olive Salad
Ingredients
1 small to medium fennel bulb
2-3 medium oranges
1//3 c kalamata olives, pitted and cut in half lengthwise
½ t cumin seed
2 T extra virgin olive oil
Kosher salt and pepper to taste
Directions
Cut the fennel in quarters lengthwise, removing the core. Thinly slice the fennel, preferably with a mandoline. You will need 1 cup.
Remove peel and pith from the oranges using a sharp paring knife. Working over a bowl to catch the juice, carefully cut between membranes, to remove segments. Squeeze remaining membrane to extract juice. In a small saucepan reduce the orange juice to two tablespoons. Set aside.
Toast the cumin seed in a small non stick saute pan until fragrant and toasted. Grind toasted cumin seed in a mortar and pestle. In a small bowl combine reduced orange juice, cumin and olive oil, stir together.
In a medium bowl combine the sliced fennel, orange segments, and olives. Pour the dressing over and lightly toss. Season to taste with kosher salt and pepper.
Baby fennel from the garden.
Ingredients
2- 6 oz swordfish steaks
Kosher salt and freshly ground pepper
Wondra flour
1 T each olive oil and unsalted butter
Directions
Preheat oven to 450°F.
Measure steaks using the Canadian method to calculate total cooking time.
Season swordfish steaks with salt and pepper. Dust with Wondra flour.
Heat an oven-proof saute pan over medium high heat.
Melt butter and oil in a saute pan large enough to hold the fish without crowding and small enough to fit in your oven.
Brown swordfish for two minutes on each side.
Move saute pan to oven. Finish in oven, subtracting four minutes from your total cooking time. For example 1″ fish=10 minutes cooking time minus four minutes equals six minutes in the oven.
Using oven mitts, remove from pan from oven, transfer fish to serving plate with spatula. Serve with the orange, fennel and kalamata salad.
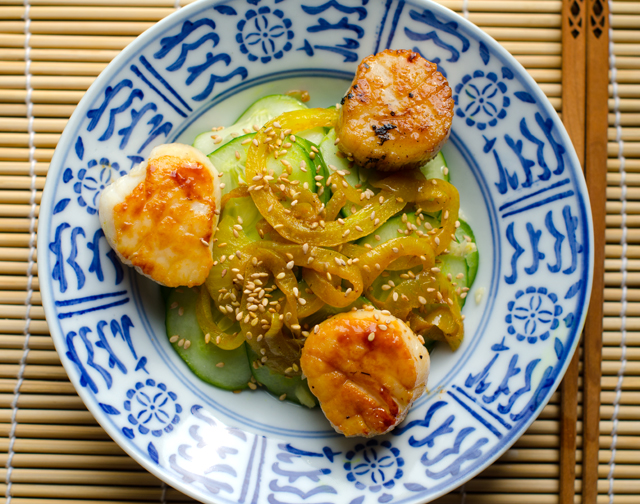
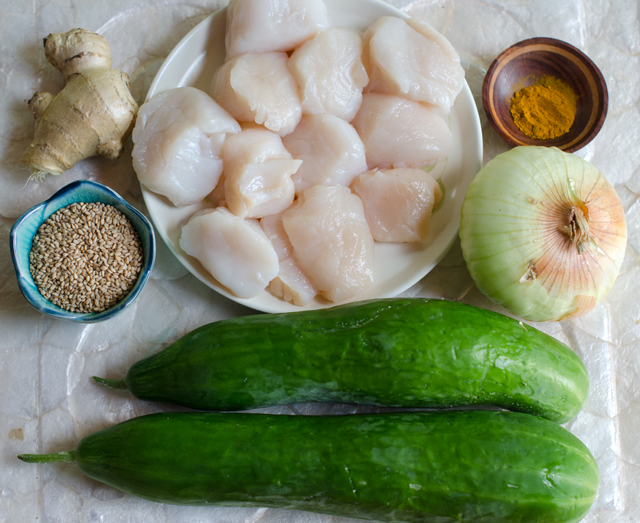
Our current scorching, almost 100 degree temperatures with no end in sight, call for a minimum of time cooking over a hot stove. This recipe, from Mark Bittman’s Minimalist column in the New York Times is just what I was looking for. Ginger cucumber salad with scallops combines sweet buttery scallops with a crisp refreshing cucumber salad.
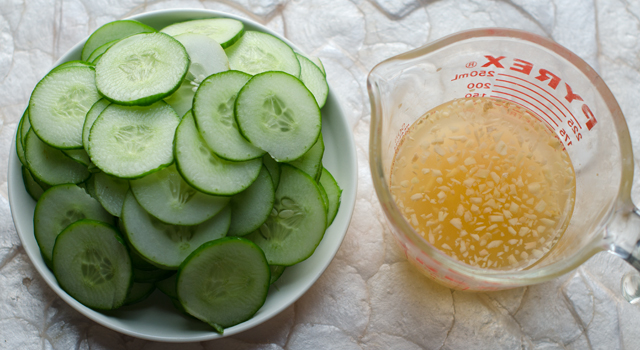
The cucumber salad is very simple and good in it’s own right. To get the thinnest cucumber and onion slices possible, use a mandoline. Since I am using smaller just picked cucumbers from the garden, there is no need to seed them, but I do prefer to peel them and leave strips of green skin. A classic dressing of rice wine vinegar, fresh grated ginger, sugar and salt provides a quick pickle for the cucumber slices. Remember to use plain rice vinegar, seasoned rice vinegar is flavored with sugar, salt and sometimes MSG. Plain rice vinegar is just mildly acidic and allows the cook to choose the amount of seasoning in the dish. A two inch piece of ginger translates into about two tablespoons. That might seem to be a bit too much but it is mellowed out with the other ingredients. If you are not sure, hold back a little and taste first.
While the cucumbers are marinating, preferably in the fridge, sear the scallops. Use a large non stick pan and brush with two tablespoons of a neutral oil, like grapeseed or canola, olive oil would compete (and win) against the delicate flavor of the scallops. When the oil starts to sizzle, add the scallops like the numbers on a clock starting at the top and going around, putting any additional scallops in the middle. If your pan isn’t large enough to cook all the scallops in one batch, divide them into two. Give the scallops room to sear, if they are too close they will steam. Check the first scallop, (twelve o’clock) after two minutes, if there is a nice brown crust, it’s time to flip. Continue checking around the clock until all the scallops are flipped. Repeat the step for the second side, this time moving the finished scallops to a plate.
The remaining oil, thinly sliced onion and turmeric are added to the same pan, no need to wash in between. Turmeric is the spice that gives Indian curries their vibrant color and adds warmth and a slightly bitter taste to dishes. The medical component in turmeric, curcumin, is used to make a wide variety of medicines as an anti inflammatory agent. The addition of turmeric is optional but adds another dimension to the salad.
Don’t skip the toasted sesame seeds, they add their own fragrance and just a little crunch. Stir the sauteed onions into the cucumber salad, top with the scallops and serve.
Seared Scallops with Ginger Cucumber Salad
Serves 2-3
Ingredients
1 ¼ lbs small cucumbers
½ c rice vinegar (not flavored)
2-inch piece of ginger, minced or finely grated
2 T sugar
1 t salt
3 T canola oil
1 lb medium to large scallops
1 medium onion, thinly sliced
½ t ground turmeric
2 T toasted sesame seeds
Directions
Slice cucumbers thinly, a mandolin does the best job, if the cucumbers are large, peel and seed before slicing.
Combine rice vinegar, ginger, sugar and salt and toss with cucumbers. Let stand 30 to 60 minutes.
Put 2 tablespoons oil in a large non stick skillet over medium high heat. When the oil starts to sizzle add the scallops. Sear on first side for two minutes, flip to the other side and sear for about two minutes. Remove scallops to a plate.
Add the remaining oil, then add the onions and turmeric. Cook until the onion softens, about five minutes.
Toast sesame seeds in a small dry skillet until fragrant and brown, three to four minutes. Stir the onions into cucumbers, top with scallops, garnish with sesame seeds and serve.
Seaweed has been a regular part of the Japanese diet for centuries. It is low in calories, fat and cholesterol, a good source of dietary fiber, vitamins and minerals. So why don’t I think of making seaweed salad more often?
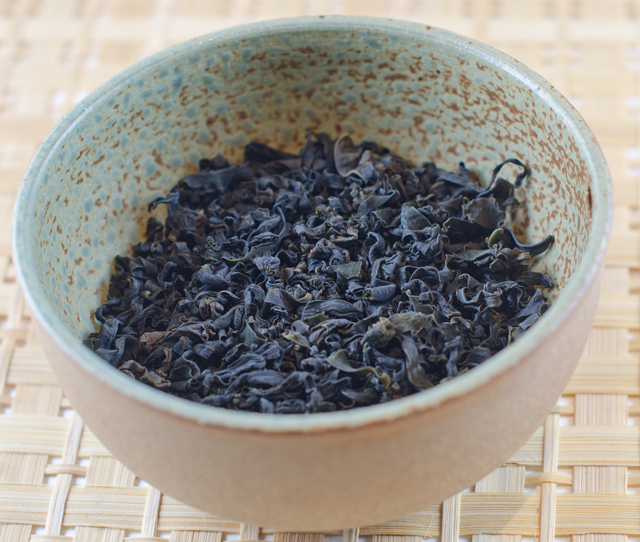
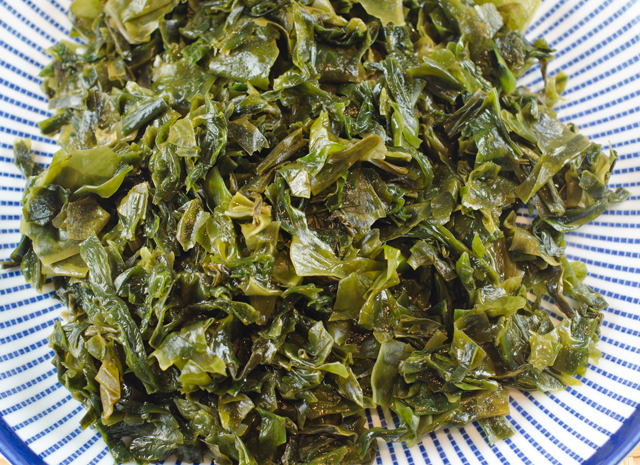
Granted it’s not the most attractive item you will find at your local health food store or Asian market and the word weed makes it sound like something you might toss in the mulch heap. But sea vegetables, as they are also known, make an interesting addition to salads. I have several types in my pantry, nori for rolls, kombu for dashi, the base for miso soup. I chose wakame (wah-ka-may) for this salad. It has a chewy texture and a very mild flavor, a little sweet and a little salty. Not much is needed, an ounce of dried seaweed is enough for a salad to serve four. Dried wakame may not look like much but after soaking, it expands up to six to eight times it’s original size.
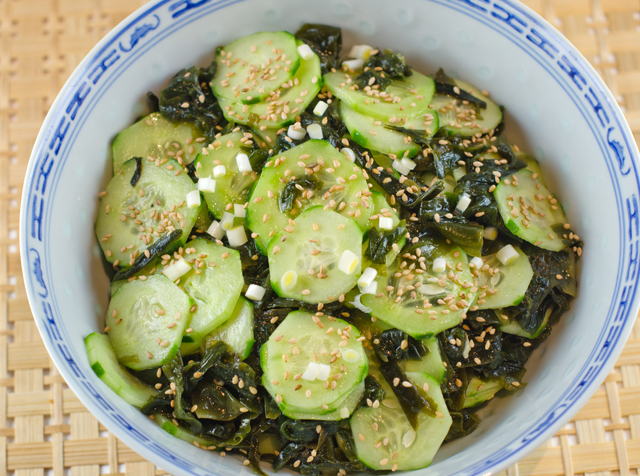
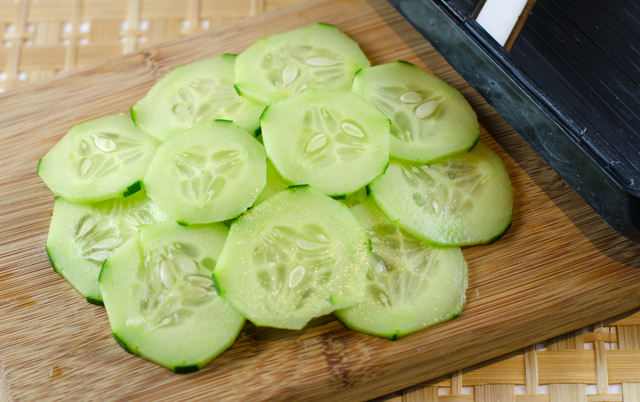
The wakame should not soak any longer than the directions suggest, it will get soggy. Drain well and rinse with cold water. Remove the inedible stem if present. Thinly slice an equal amount of Persian or seedless cucumbers with a mandolin. The simple dressing uses staples from the Japanese pantry, miso, rice vinegar, and mirin. Combine the wakame, scallions and cucumbers in a medium bowl and toss with the dressing. Top with toasted sesame seeds.
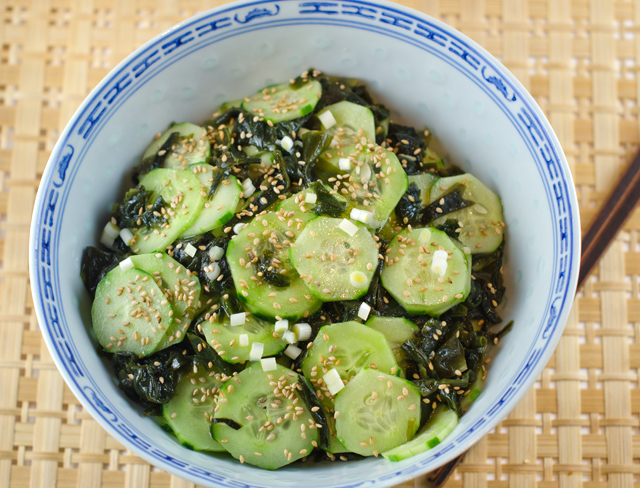
We nibbled on this light, refreshing salad while enjoying the sushi and sashimi dinner Joe prepared last weekend. In Japanese cuisine it is considered a sunomono (vinegar based cold dish). The crunchy cucumber, (fresh from the garden of course) contrasts nicely to the soft chewy texture of the wakame.
Wakame and Cucumber Salad
Serves four
Ingredients
1 ounce dried wakame seaweed
¼ c rice wine vinegar
1 T fresh lime juice
1 T yellow miso paste
1 T freshly grated ginger
1 t honey
1 T mirin
1 T dark sesame oil
1/3 c canola oil
Salt to taste
6 thinly sliced, Persian cucumbers or 1 large seedless cucumber
2 thinly sliced scallions
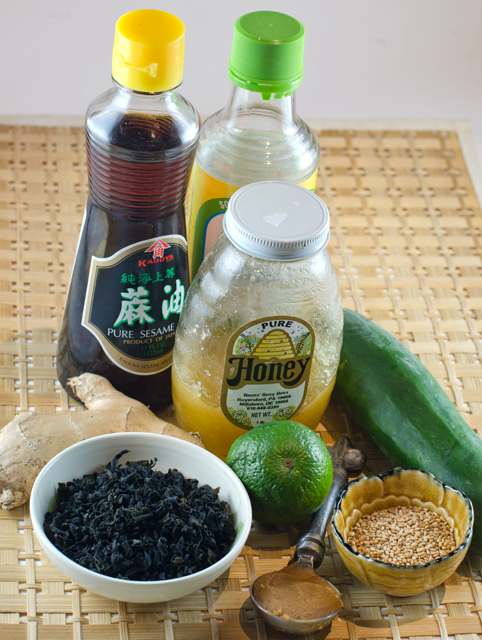
Ingredients for the salad.Dried wakame.Wakame can expand six to eight times it’s size from the dried state.The mandolin gives uniform thin slices, always use the finger guard!
Directions
Soak seaweed in warm water to cover, 5 minutes. Drain, rinse briefly with cool water and drain again. Use a paper towel to blot excess water. Set seaweed aside.
In a medium bowl, whisk together the vinegar, lime juice, miso paste, ginger, honey, mirin, sesame and canola oil.
Add the wakame along with the cucumbers and scallions and toss well.
I was excited to show my friend Leslie the puffed rice I made as a garnish for the Summer Squash Salad in the previous post. Leslie enjoys cooking and trying new things in the kitchen as much as I do. She asked a good question regarding puffed rice that I didn’t have an answer for, why can’t you just make it in a popcorn popper?
I did a little research and learned this. Only varieties of corn with hard, thick hulls can be popped. Popcorn kernels can be puffed or popped with something as simple as a kettle with hot oil and a lid or a popcorn popper that circulates hot air through the kernels. The hard outer shell encases the moisture in the kernel and allows it to be popped without exploding into pieces. Rice lacks this hard outer shell. So you can’t toss some cooked rice in the popcorn popper and expect it to pop.
This recipe doesn’t require much work but does take a bit of time in preparation. Be certain the rice is completely dried out before puffing it in oil. I found that a wok and a fine Chinese strainer was the easiest way to get all the puffed kernels out before they get too brown. It’s an easy recipe and I think you will be pleased with the results.
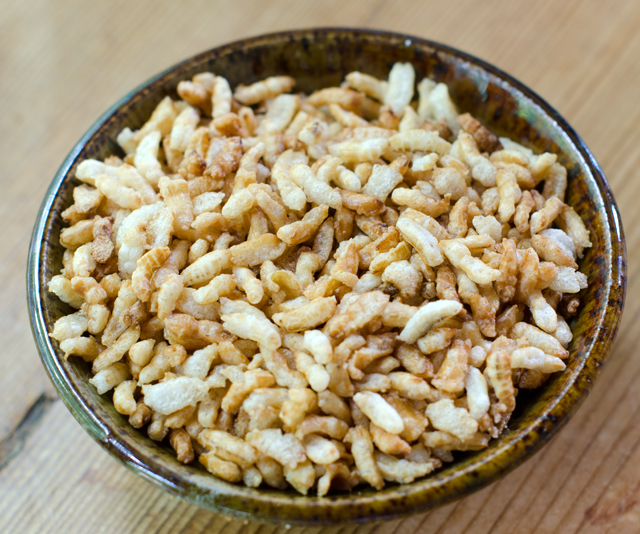
Puffed rice smells great, all warm and toasty. Use it as a salad garnish, out of hand snacking or put your own spin on a crispy rice sweet treat.
Puffed Rice
Makes about 3 cups
Ingredients
1 cup of short grain brown rice
1 ¾ cups of water
a pinch or two of sea salt
several cups of sunflower (or another) high-heat oil
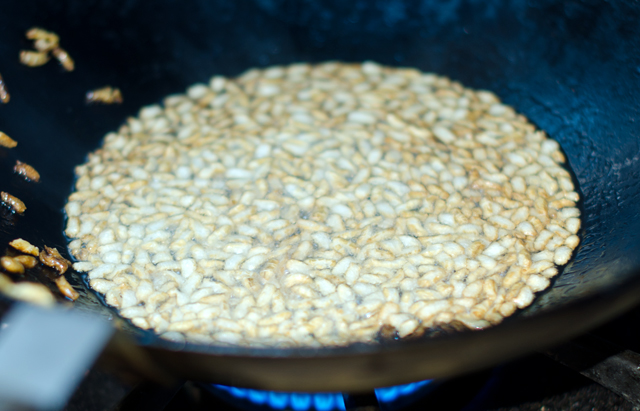
Rice puffing up in the hot oil.This strainer is easy to find in Asian grocery stores and is relatively inexpensive.
Directions
Place the rice, water and salt into a medium saucepan. Bring to a boil, cover, and reduce to a simmer. Cook for 40 minutes. Remove from the heat and let it sit, covered, for another 10 minutes.
Preheat the oven to 250°F.
Spread the rice out evenly onto a large baking sheet. Bake (dehydrate) in the oven for 2 hours. The rice should be dry and hard when it’s done. Place the rice into the fridge to cool off for at least an hour. Or leave it in the oven (turned off of course) overnight to cool.
In a wok add enough oil so that it comes up to about ½” on the side, and heat the oil over medium heat until it’s shimmering, if you have a thermometer 375°F. Test to make sure it’s ready by adding a single piece of rice to the oil. If it sizzles all around the rice kernel, then it’s ready. Add about one quarter to one third of the rice to the pot and cook for ten to twenty seconds, just until the rice puffs up. This happens very quickly, and you do not want to overcook it, otherwise the rice will get too dark and will be too crunchy. Use a fine strainer to remove the rice and place it onto a paper-towel lined plate. Do this until all of the rice is puffed.
My very thoughtful husband gave me two very special gifts for Christmas last year. The first, tickets for the South Beach Food and Wine festival that we attended in February, the second, tickets to the Food and Wine Classic. Held over a mid June weekend in Aspen Colorado for 35 years, the Classic is the nation’s premiere culinary event.
The Classic brings together the world’s foremost authorities on wine and food at over 80 cooking demonstrations and wine seminars. In between the classes and seminars we had time to sample gourmet bites, wines and other libations in the large white tents that made up the grand tasting pavilion. One of our favorite places to stop was to taste the creative offerings of Food and Wine magazine’s “Best New Chefs”. For the past 28 years the best new chefs have showcased the next culinary superstars. At each Grand Tasting, two of the chefs offered up their best bites to a hungry crowd. While pressing through the line to receive their offerings, I made a point to congratulate each one on this significant accomplishment. The July issue of Food and Wine magazine concurrently features an article about the best new chefs and a recipe or two from each one. Occasionally I will try some of these recipes, this year several caught my attention.
Chef Brad Kilgore serves up his “playfully brilliant” dishes at his restaurant,Alterin Miami’s Wynwood neighborhood. Chef Kilgore stated in the article that squash and zucchini are not his favorites, so his goal was to make something great from them. His recipe for Summer Squash with Lemon Curd and Citron Vinaigrette, despite having many steps looked like something I could do and make use of produce from the garden.
Since it can be made three days ahead, my first step was to make the lemon curd. Lemon and lime curd tarts were a regular on the dessert buffets in my catering business. I admit I was a little dubious about lemon curd in a savory preparation. The addition of lemongrass and ginger made this curd unique and the lemon juice was courtesy of our Meyer lemon tree. There is a lemongrass plant in the garden but it was easier to use a few stalks from my supply in the freezer. They come back to room temperature fairly quickly and they are easier to slice when cold. The curd ingredients are put in the blender and blended until smooth. Strain the curd over a fine sieve and press down on the solids to extract as much flavor as possible from the ginger and lemongrass. Put a medium saucepan of water on to simmer and put the curd in a heatproof bowl that is large enough to sit on top of but not in the pan. The bowl shouldn’t be too big but large enough that you can comfortably whisk the curd without sloshing it on the counter top
Whisk constantly for about five minutes until it thickens, the curd should coat the back of a spoon. Remove the pan from the heat and whisk in the butter 1 tablespoon at a time and finish by adding the extra virgin olive oil. Cover the surface of the curd directly with plastic wrap, this will prevent the curd from forming a skin and refrigerate until cold about three hours.
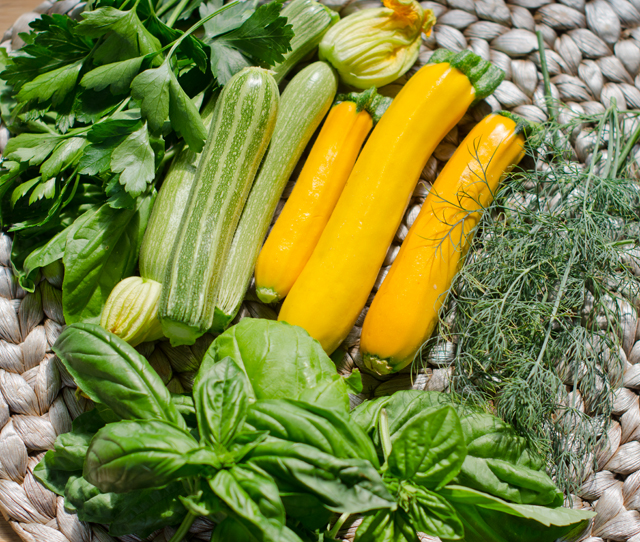
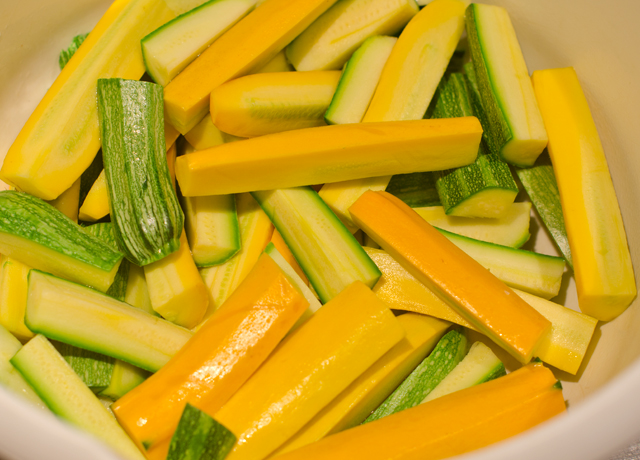
The zucchini herb puree can also be prepared before the salad is assembled. Our source for yellow squash and several varieties of zucchini is from a company called Seeds of Italy. Every summer my intention is to pick them small before they get to the size of a baseball bat but there are always a few that get away from me. Just picked little zucchini actually have a delicate nutty flavor.
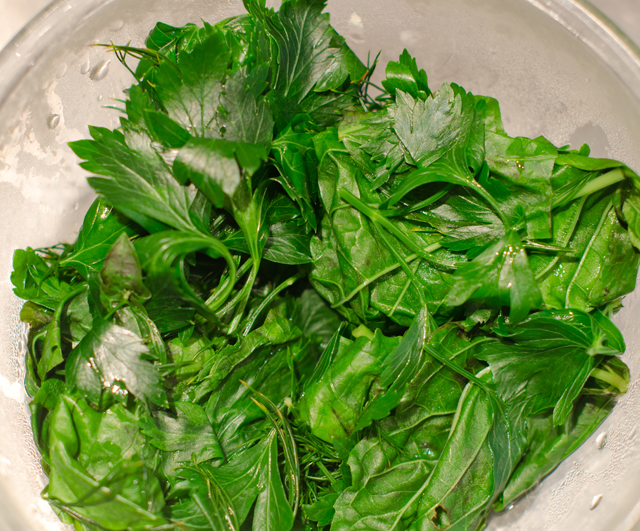
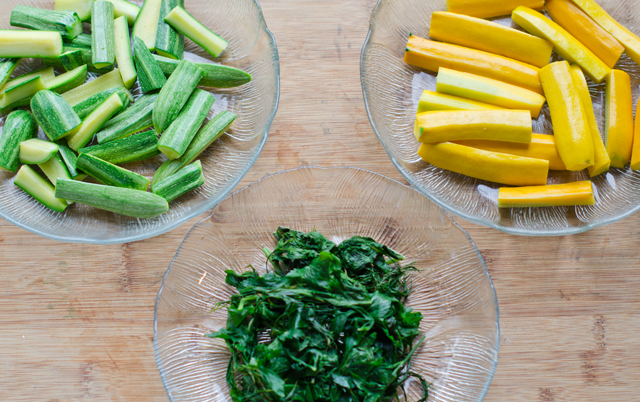
The original recipe called for the squash and zucchini to be seeded which is a good idea if you are buying medium to large sized squash. Since the seed pods in the zucchini and yellow squash that I picked were not fully developed yet I didn’t feel the need to remove the seeds. I picked basil, parsley and dill from the garden for the purée. Blanch the zucchini and squash and the herbs in boiling water for only 30 seconds. Blanching brightens the color of both the squash and the herbs. Immediately transfer them to an ice bath to stop the cooking. Drain them well. Pat the zucchini and squash dry with paper towels. Squeeze all the excess moisture out of the herbs. Set The yellow squash aside and purée the zucchini and the herbs in the blender. Add olive oil and salt to taste.
The vinaigrette is very simple, the acids, lemon juice and white wine vinegar are combined with chopped tarragon and honey, canola and extra virgin olive oil. I love the anisey flavor tarragon brings to any dish.
I read the recipe again to be certain I had all the components to plate it. Dill and tarragon sprigs, check. I added some red shiso leaves too. They grow like mad in the garden and seem to be a chef favorite. Thinly sliced chilies, were also a check. The last garnish had me initially stumped, puffed rice. Did they mean like the cereal? Probably not was my guess.
I found a slightly time consuming but easy way to make it. I cooked a cup of brown basmati rice until it was done, about 40 minutes and let it cool. I preheated my convection oven to 250°F, spread the rice out in a thin layer on a baking sheet and let it dry out for about an hour. I turned the oven off and let the rice dry out overnight. Line several baking sheets with paper towels. The next step is to heat about an inch of cooking oil in a wide pan , I used my wok for this. When the oil reaches 375°F add a kernel of rice, if it puffs up they are ready to go. Add the rice in batches, when it hits the hot oil the rice puffs up in seconds. You should be prepared with a fine mesh strainer to scoop out the puffed kernels before they get too brown. Puffed rice smells great, all toasty, it’s good as a salad garnish or just for munching.
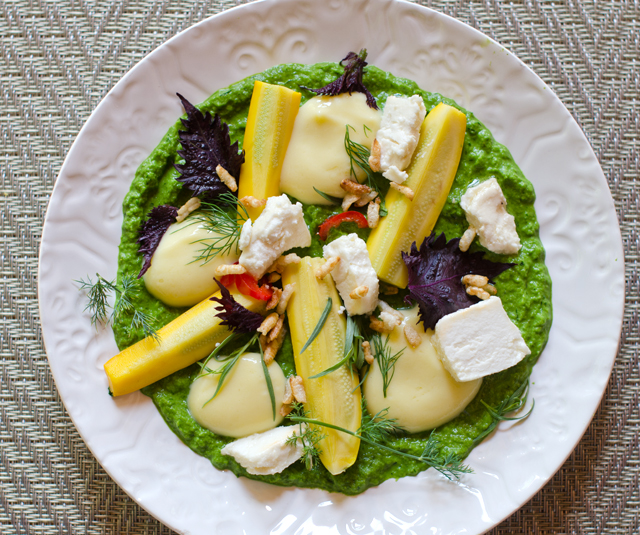
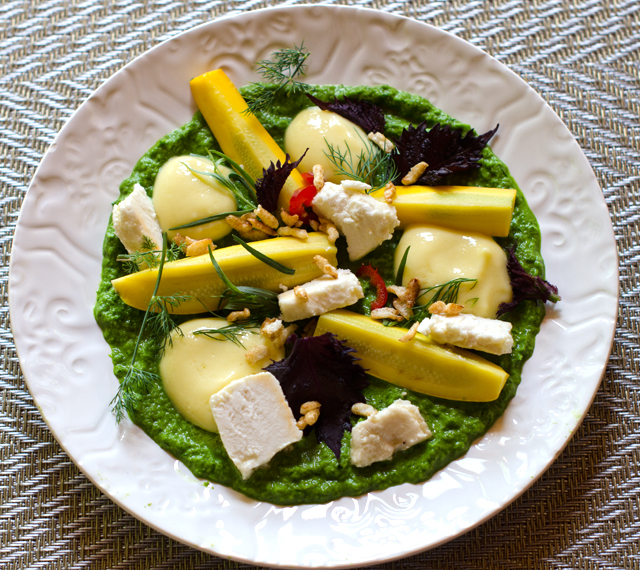
With all components ready, I was ready to assemble the salad. Spread a thin layer of the zucchini herb purée on each plate. Dollop a little of the curd on the purée. Toss the yellow squash with some of the vinaigrette and season with salt. Arrange a few pieces of squash on the plates along with the marinated cheese. Garnish with herbs, chilies and puffed rice.
Joe declared the salad delicious and over the top, a unique combination of flavors and textures. On first glance this recipe looks very “cheffy” Lots of special steps and components, usually enough to scare the average home cook away. Obviously it’s not something you would whip up after work on a week night. But the steps are manageable, the curd, puree and vinaigrette can all be done ahead. It was a wonderful salad, beautiful, very unique, a wonderful combination of flavors and textures. Hmm, guess that’s why he’s a best new chef.
I was also interested to read that Chef Kilgore makes all of the desserts at his restaurant, that’s not typical of most head chefs. The lemon curd infused with lemongrass and ginger was very good. I have some left over from the salad and will serve it with some of our fresh blueberries that should be ready to harvest this weekend. The zucchini herb puree I had leftover made a good sauce for salmon and would work for poached chicken too. I’m certain I will be making it again this summer. The puffed rice was a bit of a revelation and fun to do. It makes an interesting addition to a salad and just for munching too.
Summer Squash Salad with Lemon Curd and Citron Vinaigrette
Serves four
Ingredients for the lemon curd
1/3 c fresh lemon juice
3 large eggs
2½ T sugar
1 T thinly sliced lemongrass, tender inner bulb only
2 t minced peeled fresh ginger
4 T unsalted butter, cut into tablespoons and at room temperature
½ T extra virgin olive oil
Ingredients for the lemon curd.
Directions for the lemon curd
In a blender, combine lemon juice, eggs, sugar, lemongrass and ginger and blend until smooth. Strain the mixture through a fine sieve into a medium heatproof bowl, pressing on the solids.
Place the bowl over, not in, a saucepan of barely simmering water. Cook the curd, whisking constantly until the curd is thick enough to coat the back of a spoon, 5-7 minutes.
Remove the bowl from the heat and whisk the butter in until incorporated, then whisk in the olive oil. Press a sheet of plastic wrap on the surface of the curd and refrigerate until cold.
Ingredients for the zucchini-herb purée
8 oz yellow squash, quartered lengthwise, seeded if necessary and cut into 3″ pieces
5 oz zucchini, quartered lengthwise, seeded if necessary and cut into 3″ pieces
½ c each, basil, parsley and dill
2 T extra virgin olive oil
Kosher salt
Ingredients for the zucchini herb puree.
Directions for the zucchini herb purée
In a medium saucepan of salted boiling water, blanch the squash and zucchini for 30 seconds; using a slotted spoon, transfer to an ice bath to cool completely. Blanch the herbs until wilted, about 30 seconds. Drain and transfer to an ice bath to cool. Drain the squash, zucchini and herbs; pat the squash and zucchini dry and squeeze excess water out of the herbs.
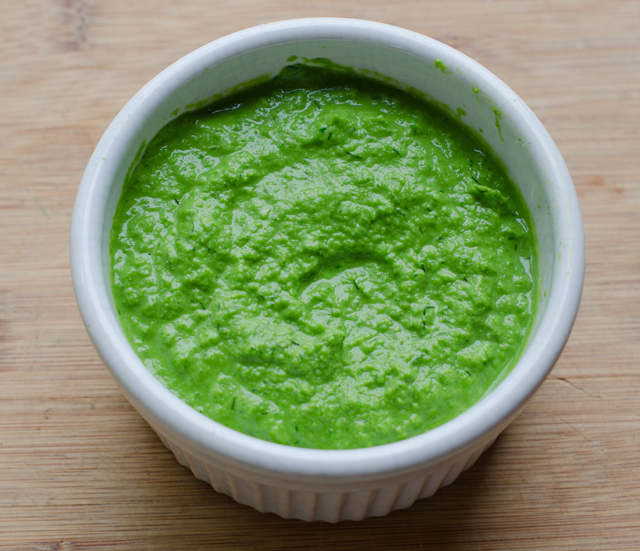
Reserve the yellow squash in a small bowl. In a blender, purée the zucchini with the herbs and a half a cup of water until smooth. With the machine on, add the half cup of olive oil. Season to taste with salt.
Didn’t need to seed these zucchini and yellow squash.Plunge into ice water after blanching for thirty seconds.It brightens their color.Squeeze the herbs dry .Ready to blend.The final product.
Ingredients for the vinaigrette
2 T fresh lemon juice
2 t white wine vinegar
1 T chopped tarragon
¼ t honey
¼ c canola or grapeseed oil
2 T extra-virgin olive oil
Kosher salt
Tarragon in the garden after the rain.Ingredients for the vinaigrette.
Directions for the vinaigrette
In a small bowl combine the lemon juice, vinegar, tarragon and honey. Gradually whisk in both of the oils until emulsified. Season the vinaigrette with salt.
Final assembly of the salad
4 oz marinated sheep or goat’s milk cheese, cut into small chunks for serving
Small tarragon, dill, shiso, or other herb sprigs
Thinly sliced chilies
Puffed rice
Spread a thin layer of the zucchini purée on 4 small plates. Dollop a few small teaspoons of the lemon curd on the puree. Toss the squash with 2 tablespoons of the vinaigrette and season with salt. Reserve remaining vinaigrette for another use. Arrange three pieces of squash on each plate along with some of the marinated cheese. Garnish the salads with the herb sprigs, chilies and puffed rice.
I loved making puffed rice!
Probably the most unique salad I’ve ever made/tried. 2 thumbs up!
He’s back, Christopher Kimball that is. The bespectacled and bow tied co founder of America’s Test Kitchen and editor in chief of Cooks Illustrated, Kimball left both posts last November over a contract disagreement.
Accepting no advertising, Cooks Illustrated has been the authority for developing well tested, (sometimes over 100 times!) absolute best recipes for everything imaginable for almost 25 years. I have been a huge fan of Cooks Illustrated from day one and have saved every issue. Although I use recipes from many sources I always return to CI for its foolproof results. Fortunately for his devoted followers, Mr Kimball is back on the culinary scene with his new project, Milk Street Kitchen. Named for the street in Boston where the company is located, Milk Street will house offices for a new magazine and other media content, a retail cooking school and a studio where a new PBS show will be filmed.
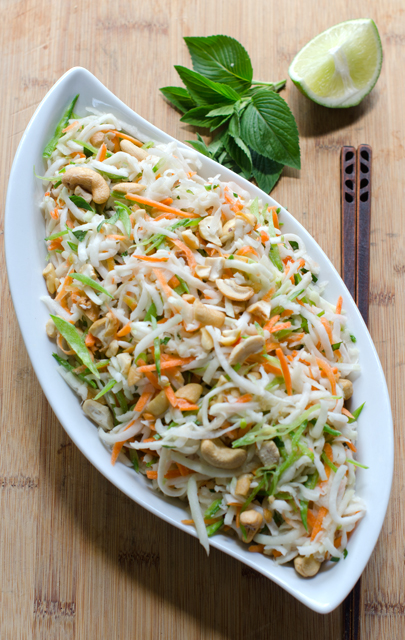
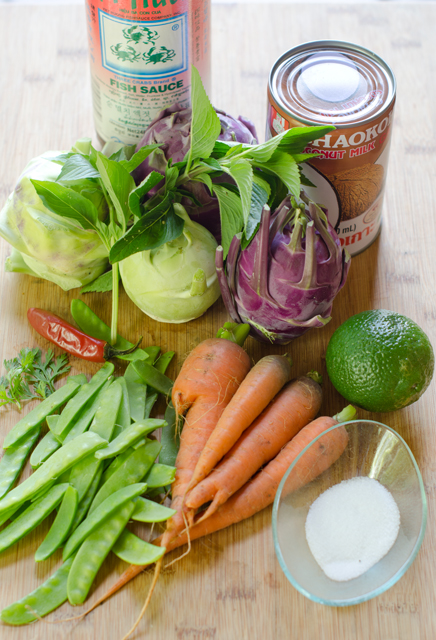
I received the first email newsletter from Milk Street Kitchen this past week. This recipe from the newsletter, Thai Coleslaw, looked like a perfect fit for what I have been harvesting from the garden this week. I made some changes to the slaw ingredients. I substituted kohlrabi for the napa cabbage, carrots for the radishes and since our first crop of cilantro has died off, lime basil. The last of the snow peas make an appearance in this slaw as well.
What gives the slaw a Thai flair is the dressing. It combines lime juice, sugar, a serrano chili and coconut milk. To get the most juice from a fresh lime, microwave it for a few seconds to get the juices flowing. After I cut the fruit in half I score the sections to further loosen things up a bit. One average sized lime gave me a little more than the 3 tablespoons I needed.
Coconut milk has been a staple in my pantry since we discovered our love for Thai food over thirty years ago. Look for canned coconut milk found in the Asian section of your supermarket. This is not to be confused with the dairy-free milk substitute or cream of coconut, an ingredient in piña coladas. There are many brands on the market these days, my favorite is still Chaokoh. With all canned coconut milk, shake the can well before opening since the fat and the liquid separate. Fish sauce is another ingredient that gives this dish a southeast Asian touch. It is extracted from the fermentation of fish, usually anchovies, that are salted. The amber colored liquid give a unique depth of flavor to many dishes, including this slaw. A serrano pepper, seeded and minced, gives the right amount of heat to the dressing.
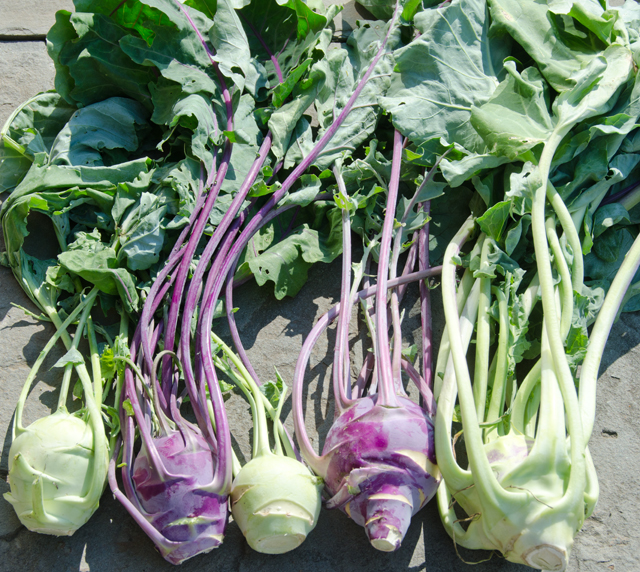
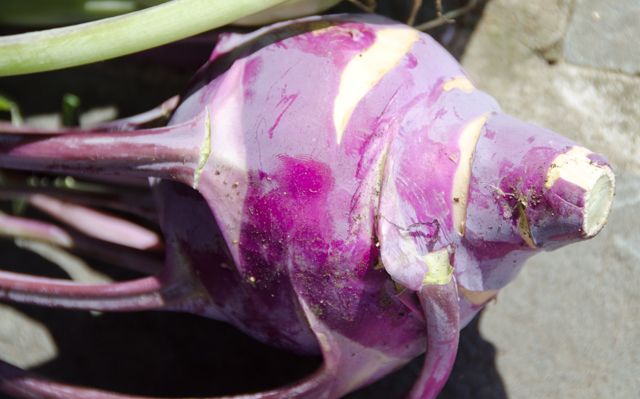
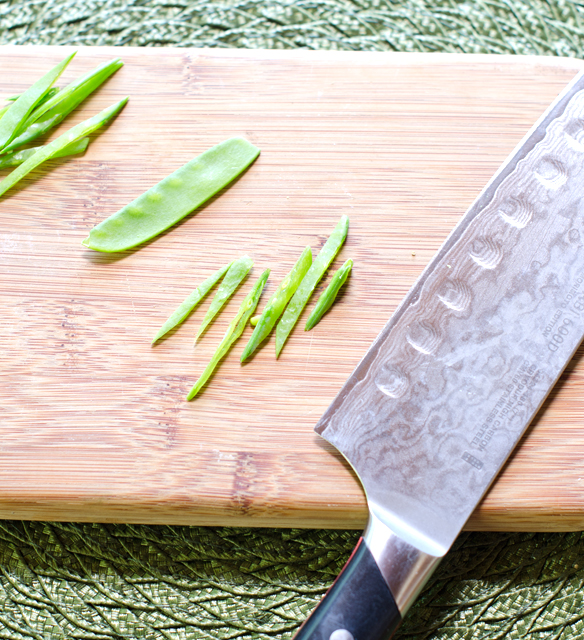
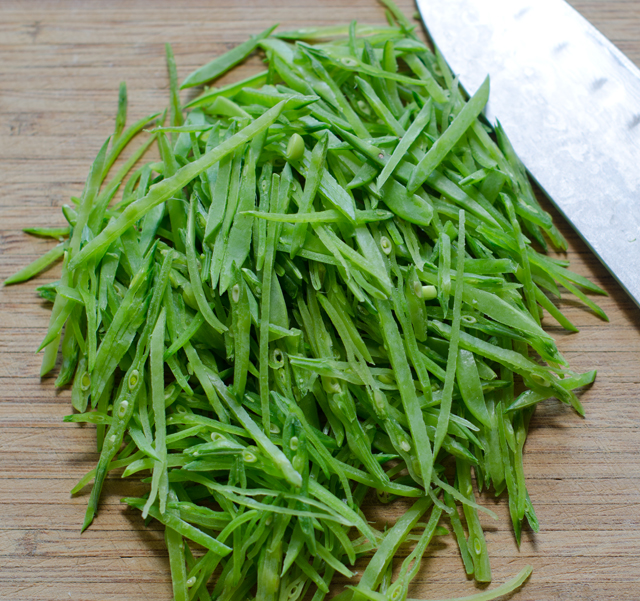
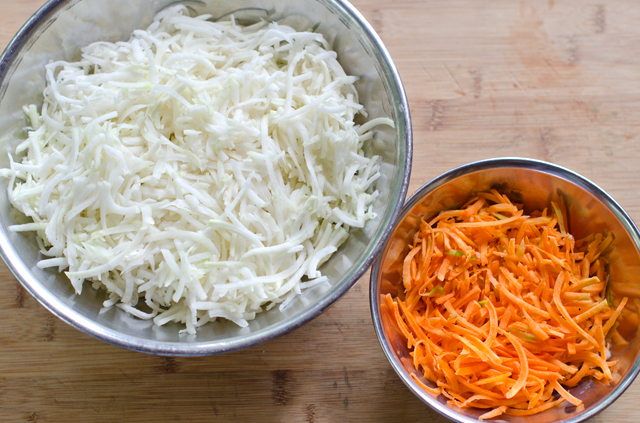
Kohlrabi gets it’s name from a German word, kohl-cabbage (as in coleslaw) and rabe-turnip. It has a milder flavor than either of those vegetables, the best description I read was that it tastes like broccoli stems. Kohlrabi is not a root vegetable since the bulbous part grows above the ground and is studded and topped with leaves that resemble those on a broccoli plant. The vegetable “minion” was a good substitute for the crisp and crunchy napa cabbage. Shredded carrots and julienned snow peas (last of the season) added more color and crunch. The radishes originally called for in the salad won’t be back until the fall garden.
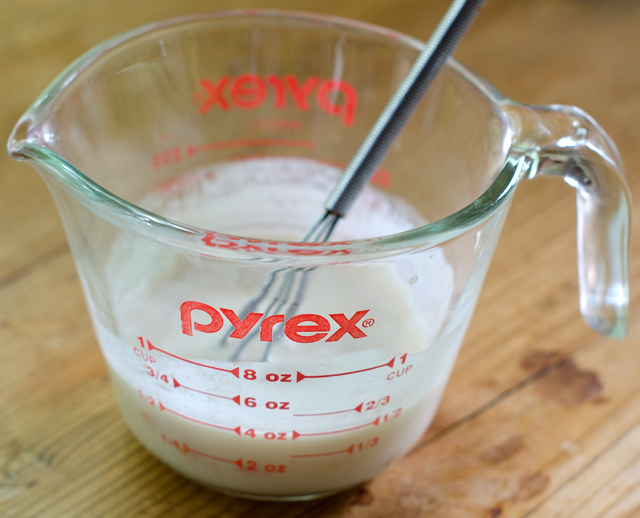
With the exception of the coconut milk, combine the dressing ingredients in a liquid measuring cup, let sit for ten minutes. The fresh serrano is cooked in the lime juice and mellows out it’s flavor. Stir in the coconut milk. Combine the kohlrabi, carrots, snow peas and herbs in a large bowl. Pour the dressing over and toss until well combined. Stir in the cashews and serve. It’s a delicious alternative with pork barbecue.
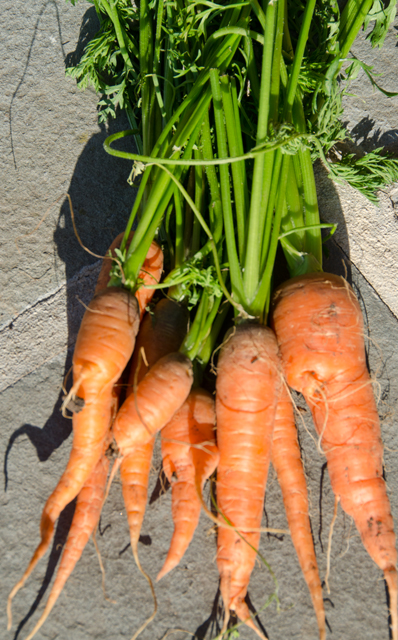
We grow both green and purple kohlrabi.
Maybe not the prettiest, but I love fresh carrots from the garden.Ready to go!Snow peas are julienned on the diagonal.Finished product.Shredding the kohlrabi and carrots is easy in the food processor.Combining the dressing ingredients.
Thai Coleslaw
Serves 4-6
Ingredients
3 tablespoons lime juice
4 teaspoons sugar
1 tablespoon fish sauce
1 medium serrano chili, seeded and minced
5 tablespoons coconut milk
8 cups shredded kohlrabi or napa cabbage
2 cups shredded carrots
4 ounces sugar snap peas, strings removed and thinly sliced
½ cup chopped basil (I used lime) or cilantro
¼ cup coarsely chopped fresh mint
½ cup roasted, salted cashews, coarsely chopped
Directions
In a liquid measuring cup, combine the lime juice, sugar, fish sauce and chili. Let sit for 10 minutes. Whisk in the coconut milk until combined.
In a large bowl, combine the kohlrabi, carrots, peas, basil or cilantro and mint. Add the dressing and toss until evenly coated. Stir in the cashews and serve.
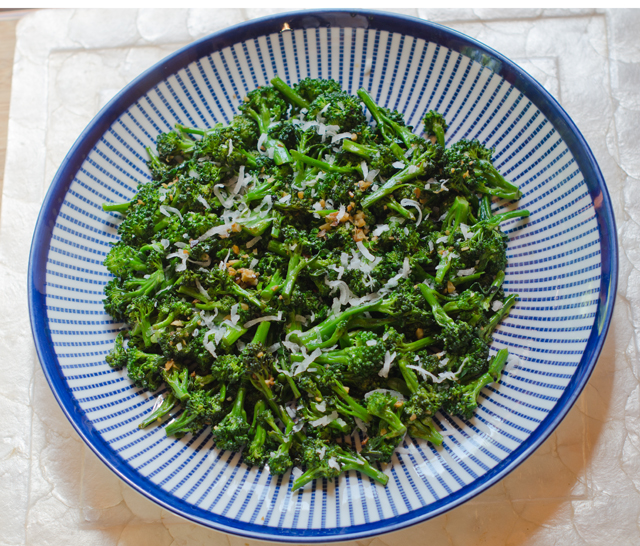
Broccoli and sweetened coconut shreds? Let’s just say I was as much curious as I was dubious about this recipe. My curiosity won out in the end and discovered I liked this easy and flavorful side dish.
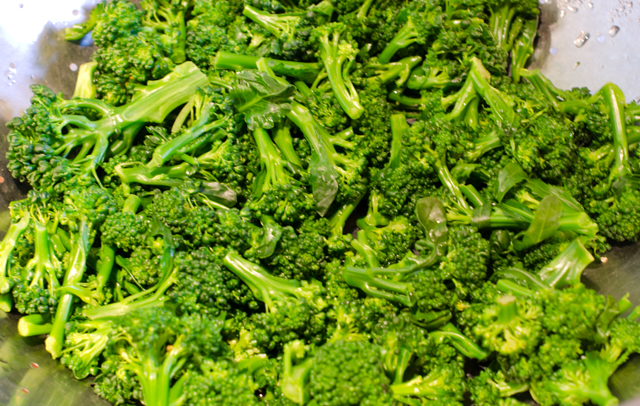
Broccoli florets are blanched in boiling salted water for a few minutes until crisp-tender. The florets are removed from the pot and shocked in a ice water bath. This stops the cooking process and preserves the bright green color. Drain the broccoli and dry well with paper towels. If the broccoli is too wet it will water down the dressing.
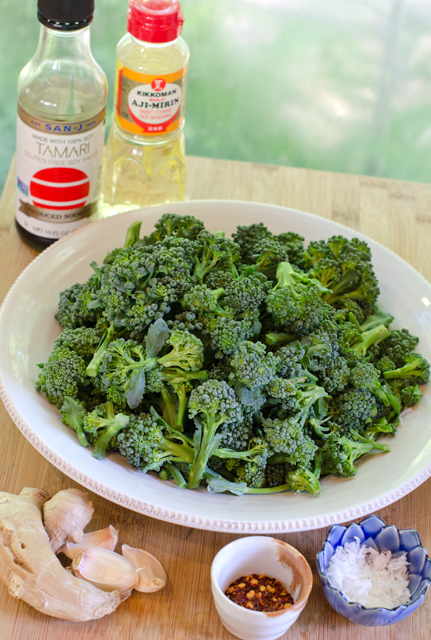
Aromatics, garlic, ginger and a pinch of spicy red pepper flakes are sautéed in a neutral oil until fragrant. Toss in the broccoli to coat and season with salt and pepper. Tamari and mirin are added to the pan and reduced to make a easy sauce. Tamari is a soy sauce that is made without wheat and has a milder and richer taste compared to regular soy sauce. Low sodium soy sauce could also be used in this recipe. Mirin, like sake, is a rice wine but with a higher sugar and lower alcohol content. The sweet flavor of mirin is a nice contrast to a saltier sauce like soy or tamari.
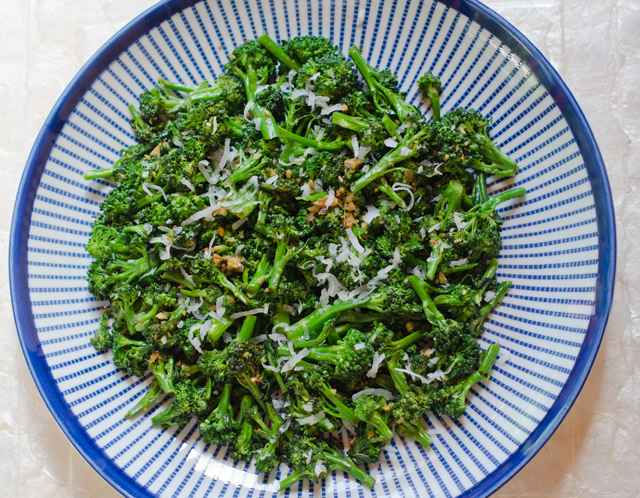
Reduce the liquid by half, then remove the broccoli to a serving platter. The sauce left behind in the pan is poured over the broccoli and the coconut shreds are sprinkled on top. I found the coconut added another dimension of flavor and was balanced out nicely by the sweet and salty sauce.
Shock the blanched broccoli to preserve the bright green color.
Asian Broccoli with Coconut
Serves 4
Ingredients
1 lb bite sized broccoli florets
1 T canola oil
2 cloves garlic, minced
1 T minced fresh ginger
Dash of red pepper flakes
Kosher salt and freshly ground black pepper
2 T tamari soy sauce
1 T mirin
1 T sweetened coconut flakes
Directions
Bring water to a boil in a 6-quart pot over high heat. Add florets and bring back to a boil. Cook until just tender 2-3 minutes
Remove broccoli with a slotted spoon to an ice water bath and let sit until cool, 5 minutes. Drain the broccoli and dry well on paper towels.
Heat oil in a 12-inch sauté pan over medium heat. Sauté garlic, ginger and red pepper flakes until fragrant, 1 minute. Gently toss in the broccoli to coat in the oil. Season with ¾ teaspoon of salt and pepper to taste.
Add the soy and mirin. Gently toss broccoli until liquid is reduced by half and broccoli is warmed through, 2-3 minutes. Remove broccoli to a medium serving platter. Pour soy over broccoli. Sprinkle shredded coconut over top.
 Miso glazed eggplant or nasu dengaku is a classic Japanese dish and sushi bar favorite. It’s an quick and easy preparation this time of year when eggplants are at their peak. Our garden has produced an amazing array of eggplants this summer. From fuchsia to dark purple, beautifully variegated lavender and white to pure white, they have loved our weeks of 90 degree plus temperatures and abundant rain. What we consider to be Asian eggplants are the long slim tapered varieties. Actually, Asian eggplants whether Chinese, Japanese, Thai or Indian can be round or pear shaped, pure white or lime green and as small as an egg. In this dish the creamy flesh of the eggplant is the blank canvas for the umami rich flavors of a sweet, salty and savory glaze.