August 23, 2014 Chilled Buttermilk Cucumber Soup

DSC_8646a
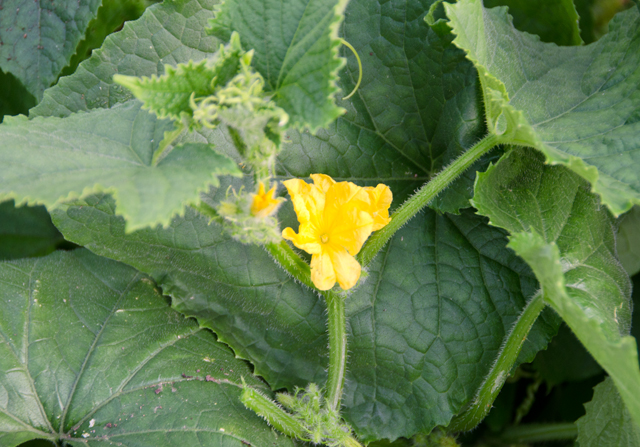
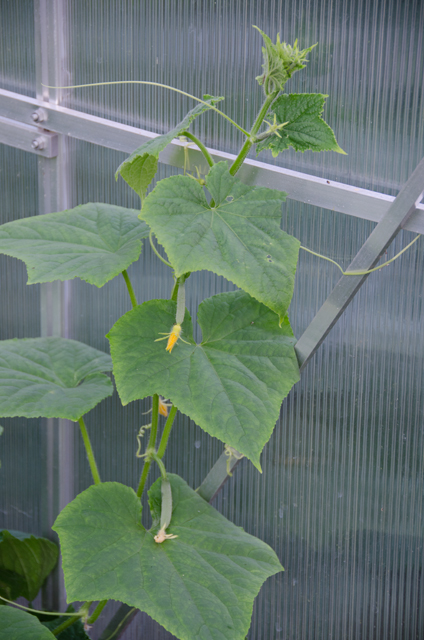
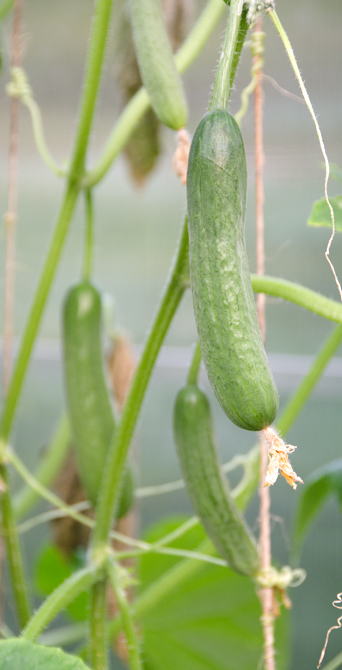
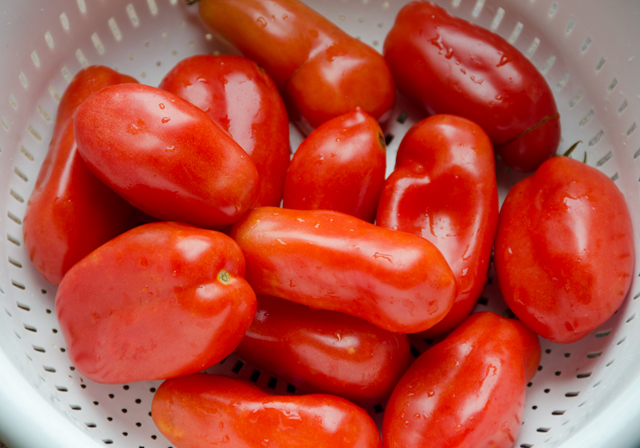
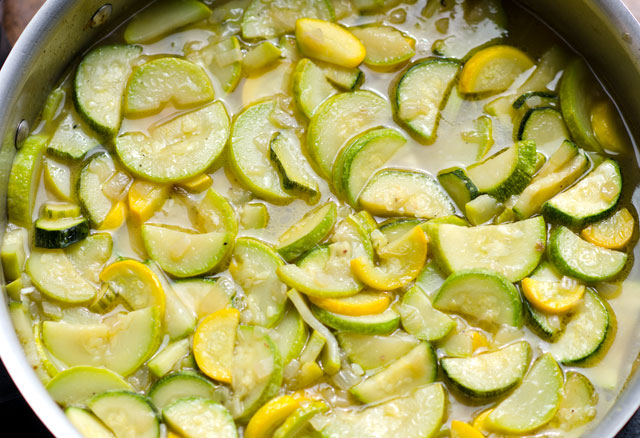
I can’t remember a year when we have had such a prolific crop of cucumbers! We are growing two varieties this year, Bush Champion and Baby Persian. The Bush Champion has a compact growing habit. Ours are in the greenhouse area of the garden but are also suitable for patio and container gardening. The Baby Persian variety is growing up a trellis in the greenhouse. The term “baby” refers to the size when it is best to pick them, 4 to 6 inches. Of course, like many cucumbers, they will continue to grow larger than this. Hence the need to be diligent in picking to get them at their best.

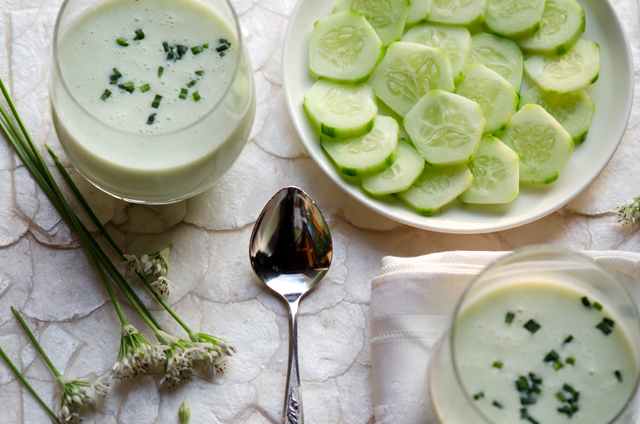
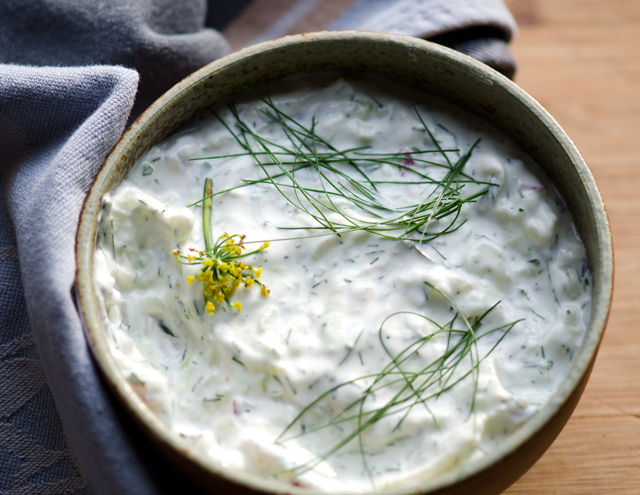
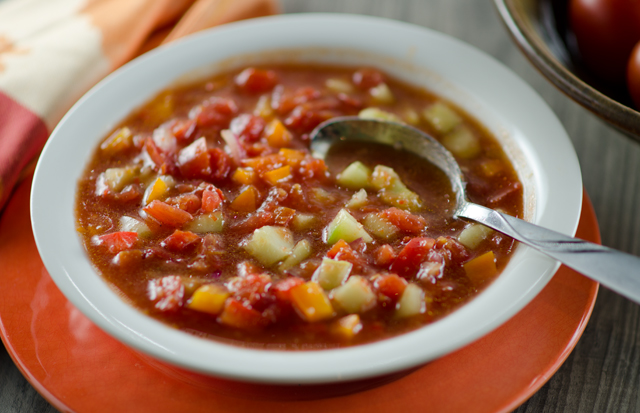
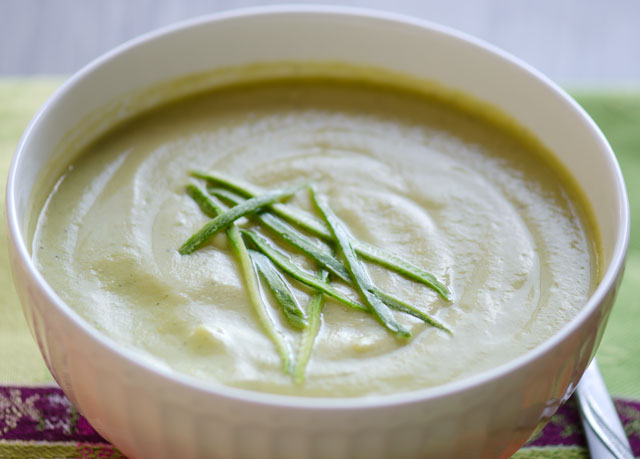
Along with tzatziki sauce, I have been making lots of cold cucumber soup. Buttermilk cucumber soup is crisp and cool from the cucumbers, celery and shallots bring depth of flavor and buttermilk and sour cream provide a refreshing tang.  This no cook soup comes together in minutes, the only appliance you need is a blender.

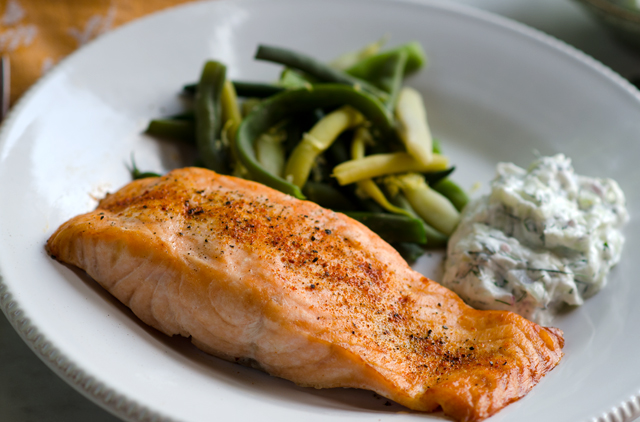
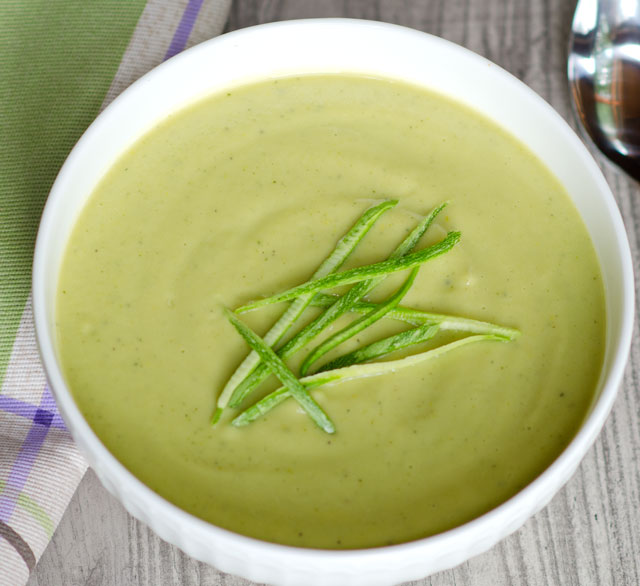
Simply add rough chopped cucumber, celery, shallots, olive oil, buttermilk and sour cream to the bowl and blend until smooth. Force the soup through a fine strainer for the smoothest texture.  Chill for at least an hour, longer if possible to blend the flavors. Add a little crabmeat or cooked shrimp for a more substantial dish. A simple garnish of chopped garlic chives and you have a cool and delicious treat for summer dining.

DSC_8635a

Chilled Buttermilk Cucumber Soup

Ingredients

  • 1 1/2 ­lb. cucumbers, peeled, seeded, and cut into chunks
  • 2 medium celery stalks, roughly chopped
  • 1 small shallot, coarsely chopped
  • 2T extra-virgin olive oil
  • Kosher salt and freshly ground pepper
  • 1/2 c sour cream (low fat is fine)
  • 1/2 ­c buttermilk
  • Freshly ground black pepper
  • Chopped chives, to garnish

Directions

  1. In a blender, purée the cucumber, celery, shallots, olive oil, and 1 tsp. kosher salt until smooth.
  2. Strain through a medium-mesh sieve into a large bowl, pressing on the solids to extract as much liquid as possible.
  3. Whisk in the sour cream and buttermilk and season to taste with kosher salt and freshly ground black pepper. Refrigerate until chilled, at least 1 hour. Serve drizzled with olive oil and garnished with chives.
Make Ahead Tips

You can make this soup up to 2 days ahead.

DSC_8657a
Bush Champion cucumbers grow close to the ground. That little blossom will grow into a cuke soon!
DSC_8655a
Tiny Persian cucumbers growing up the trellis.
DSC_8656a
Almost the right size for picking.

DSC_8643a

August 19, 2014 Tzatziki Sauce

DSC_8546aIt’s a deliciously creamy sauce or dip based on yogurt, cucumbers and dill, and yes the Greeks do have a word for that, tzatziki. Pronounced in English, zat-zee-key, it is a traditional Greek “meze” or something to whet the appetite. I serve it with chicken, fish and vegetables. Tzatziki is also great as a sauce with gyros or wraps.

Until the last several years, you would have needed to drain the yogurt for several hours before proceding with the recipe. With the advent of Greek yogurt, that step is eliminated. “Greek style” yogurt is strained to remove the whey, the watery part. The term “Greek” is not regulated and some yogurts are thickened with cornstarch and milk protein concentrates. Read the label, Greek yogurt should contain only milk and live active cultures. In Greece, sheep’s milk yogurt is traditionally used in tzatziki, I have read that it is sweeter and richer than cow or goat’s milk yogurt. If you are using regular yogurt it needs to be drained in a fine mesh sieve or cheesecloth for about four hours to obtain the thicker texture of Greek yogurt.

Grated cucumber, garlic, dill and sometimes mint are added to the yogurt base. Peel and seed the cucumber before grating. I use a teaspoon to make one long scoop down the middle to eliminate the seeds. Keep the cucumber in halves, they are large enough to shred on a box grater without hurting  your fingers. Put the shredded cucumber in a strainer over a bowl and sprinkle a little salt on it. This will drain out some of the excess liquid. I squeeze out the rest of the liquid by putting the cucumber in a clean cloth dishtowel and wringing it out. Alternately, squeeze the cucumber in your hands. This is an important step to ensure the sauce does not become watery.

The dill and mint should be fresh and if I am adding mint I will wait until right before serving since just picked mint can overwhelm the dish. Tzatziki is a versatile sauce that combines the slightly sour tang of yogurt along with the cool refreshing flavors of cucumber, dill and mint. It’s a great addition to your summer menus.

Tzatziki Sauce

Makes about two cups

Ingredients

  • 1-1/2 c plain whole or 2% milk yogurt, preferably Greek
  • 2 medium cloves garlic, finely chopped
  • 3/4 c peeled, seeded, and grated cucumber
  • 1 T fresh lemon juice
  • 2 t chopped fresh dill
  • 2t finely chopped mint (optional)
  • 2 t extra-virgin olive oil

Directions

  1. Put the cucumber in a colander over a bowl and lightly sprinkle with salt. After a half hour wrap the cucumber in a clean cloth dishtowel and squeeze as much liquid out of it as you can. Alternately, squeeze the liquid out with your hands.
  2. Add the chopped garlic, cucumber, lemon juice, dill, and olive oil to the yogurt mixture. Stir to blend and season to taste with salt. Cover and chill for at least 4 hours before serving.
Make Ahead Tips

The dip can be made up to a day ahead.

DSC_8611a

August 17, 2014 Tomato Gazpacho

DSC_8572aSummertime in a bowl, liquid salad, just two of the descriptive names for that summer favorite, gazpacho. Our tomatoes are finally starting to ripen along with a healthy crop of cucumbers. I think I read about fifty recipes and finally settled on my own combination of vegetables. I used some purchased tomato juice, but as the tomatoes from the garden become more plentiful, I will use them to make my own juice.
I skipped the traditional stale bread and went very easy on the olive oil. I did use my best Spanish sherry vinegar for this refreshing soup that originated in the Andalusian province of southern Spain. I didn’t blanch, peel or seed any of the vegetables. I did hand chop them for uniformity of size and blended just a little bit of them to enhance the tomato juice base. Flavorful vine ripened tomatoes are key to this recipe. It’s also a good time to use your not so perfect specimens that won’t make it in your tomato salad. The peppers in my gazpacho were purchased, but it won’t be long before I will be picking them from the garden. A jalapeno pepper is nice also to add a little extra heat.
Make gazpacho a day ahead if possible. The flavor only gets better from sitting overnight in the fridge.
Full of sun ripened flavor and packed with nutrients, this low fat chilled vegetable soup is the perfect refreshment for hot summer days.

Tomato Gazpacho

Serves six

Ingredients

  • 3 1/2c plum tomatoes, cored and cut into 1/4 inch dice
  • 1/2c finely chopped red onion, soaked in ice water for 15 minutes and drained
  • 2c cucumbers, peeled, seeded and cut into 1/4 inch dice
  • 1 1/2c bell pepper cut into 1/4 inch dice
  • 1 small clove of garlic, chopped finely
  • 2c tomato juice
  • 1/4c sherry vinegar
  • 2T flavorful extra virgin olive oil
  • 3-4 dashes of green Tabasco sauce
  • 1T  Worcestershire sauce
  • Kosher salt and fresh ground pepper

Directions

  1. Place tomatoes, onion, cucumber, pepper and garlic in a bowl
  2. Add the tomato juice, vinegar, olive oil, Tabasco and Worcestertshire sauce. Season with kosher salt and freshly ground pepper.
  3. Transfer two cups of the mixture to a blender or food processor and pulse the machine on and off to coarsely puree the contents. Return the pureed mixture to the bowl and stir to combine. Refrigerate for at least six hours or preferably overnight before serving.
DSC_8532a
Vine ripened tomatoes either from the farmers market or your own garden make this a special treat.
DSC_8536a
Ingredients, chopped and ready to go.

DSC_8564a

July 27, 2014 Braised Swiss Chard with Raisins, Olives and Capers

DSC_8313aMove over broccoli, step aside tomatoes, the research has been completed and the new ranking of the powerhouse fruits and vegetables is in. Researchers at William Patterson University in conjunction with the CDC did a study of 41 fruits and vegetables ranking them by the 17 critical nutrients they contain. The foods were scored by their content of fiber, potassium, protein, calcium, folate and important vitamins. Following watercress and Chinese cabbage is our bronze medal winner, Swiss chard. Chard is a good source of vitamins K, A and C as well as potassium, iron and fiber.

We have been long time fans of chard, it is our choice for a cooked green in the summer after the heat causes our spinach plants to bolt. I think many people shy away from chard because it has two distinct parts, the leaves and the stems that need to be cooked separately. Many recipes avoid the stems but that is unfortunate since the stems can add texture and color to the dish. Two of the varieties we grow, Rhubarb, has bright red stems and Bright Lights has stems in almost neon shades of pink, yellow and orange. Although they will fade a bit, I prefer to simmer the stem sections in broth or water to maintain optimum color. Remember to cook chard in a non reactive pan, like spinach it will discolor if cooked in aluminum or unlined iron.

This preparation is one of our favorites that we have enjoyed for years. The earthy assertive flavor of chard combines nicely with Mediteranean flavors of garlic, capers, olives and raisins. I like to plump raisins in warm water for just a few minutes before adding to the recipe. I cut the stems of the chard into slightly smaller pieces than most recipes call for, the stems will cook quicker and will retain their color.

Farmers markets will be your best source for chard this time of year. Wash well in several changes of water. For a more detailed explanation about the preparation and cooking of chard, please look at this post.

As for the rankings, the word powerhouse equals nutrient density. Higher ranking foods provided more nutrients per calorie. Watercress scored a perfect 100, chard not far behind with 89.27. Broccoli and tomatoes? 34.89 and 20.37 respectively, reason enough to add chard to your diet.

ADSC_8174

Braised Swiss Chard with Raisins, Olives and Capers

Serves four

Ingredients

  • 2lbs chard, washed, leaves and stems separated
  • 11/2c chicken or vegetable stock (water is okay too)
  • 1T olive oil
  • 1T capers, rinsed
  • 2t chopped garlic
  • 1/4c raisins (dark or golden)
  • 1/4c chopped Kalamata olives
  • 1/8t red pepper flakes (or to taste)
  • Kosher salt and freshly ground pepper
  • 2T toasted pine nuts
DSC_8293a
A very attractive “mis en place”.

Directions

  1. Cut the chard stems away from the leaves. Cut chard leaves into rough slices and set aside. Cut stems into 1/2 inch pieces. Combine stems in a large non reactive saute pan with stock and bring to a simmer. Simmer over low heat for about 8-10 minutes until softened. Check an individual stem piece to see if it is at your desired doneness. With a slotted spoon, transfer to a bowl and keep warm.
  2. Add the olive oil, capers, garlic, raisins, olives, red pepper flakes to the saute pan. Bring to a simmer and add the reserved chard leaves, in batches if necessary. Cover the pan and cook for 2 minutes, or until wilted. Uncover the pan and continue to simmer over low heat until the leaves are tender, 8-10 minutes. Add the reserved stems and toss with the ingredients in the pan. Increase the heat to evaporate any remaining liquid. Season with salt and pepper. Transfer to a serving dish and sprinkle with toasted pine nuts.
DSC_4492a
The neon colored stems of Bright Lights chard.

DSC_8305a

July 22, 2014 Silky Zucchini Soup

DSC_8246a

A fellow shopper and I were comparing notes as we waited in line at the farmers market. “I don’t like zucchini,” she commented. I didn’t have the chance to ask her, but I am always curious to know what exactly it is that makes someone dislike a certain food. Is it the taste, the texture, the smell, did they suffer through a poor preparation of it, or perhaps a bad childhood memory?
Zucchini, in many recipes is the canvas for the flavors of what is cooked with it, garlic, basil, tomatoes, cheese. I can understand someone disliking seedy, watery baseball bat sized zucchini that is tasteless and pulpy. But just picked small to medium zucchini have a light delicate flavor and a nutty quality to them. Maybe zucchini is not a nutritional powerhouse but it is low in calories and contains folate, potassium and vitamin A.

Zucchini is at the forefront of this recipe courtesy of Grant Achatz, a surprisingly low-tech offering from one of the masters of molecular gastronomy. We had the pleasure of enjoying a multiple course meal at his restaurant, Alinea, on a trip to Chicago several years ago. No need for a refractor or an immersion circulator to master this quick and very simple recipe. This pale green soup with dark green flecks has a creamy silky taste that belies the fact that the only dairy in the soup is one tablespoon of butter. Since the flavor of the zucchini is the star, choose homegrown or farmers market zucchini. The recipe is vegetarian but could be made vegan just by replacing the butter with olive oil. Good both hot or cold, garnish the soup simply with finely shredded zucchini.

DSC_8216a
The daily harvest at the peak of zucchini season.

Silky Zucchini Soup

Serves 4

Ingredients

  • 1T unsalted butter
  • 2T extra virgin olive oil
  • 1 small onion, chopped
  • 1 clove of garlic, thinly sliced
  • Kosher salt and pepper
  • 1 1/2lbs zucchini, halved lengthwise and sliced 1/4 inch thick
  • 2/3c vegetable stock or low sodium vegetable broth
  • Julienned raw zucchini for garnish

Directions

  1. Melt the butter and olive oil in a large saucepan. Add the onion and garlic, season with salt and pepper. Cook over moderately low heat, stirring frequently, until softened, 7 to 8 minutes.
  2. Add the zucchini and cook, stirring frequently, until softened, about 10 minutes.
  3. Add the stock and 1 1/2 cups of water and bring it to a simmer; cook until the zucchini is very soft, about 10 minutes.
  4. Working in two batches, puree the soup in a blender until it’s silky smooth. Return the soup to the saucepan and season with salt and pepper. Serve the soup hot or chilled, garnished with julienned zucchini.
DSC_8223a
Sauté zucchini until softened, about ten minutes.
DSC_8225a
Add stock and water, bring to a simmer and cook until the zucchini is soft, about ten minutes.

DSC_8233a

July 13, 2014 Pickled Beets and Pickled Beet Hummus

DSC_8128aPoor maligned beets! With descriptors like, they taste like dirty socks, mud and even wood, it’s no wonder they have a bad rap to overcome. Unlike former president George H.W. Bush who disliked broccoli, our current president is on the record as a beet hater, thus they are not grown in the White House garden.  Well all I am saying is “give beets a chance!”
Over the last few years I have developed a growing affection for beets.  In addition to the traditional Detroit Dark Red we have been growing the candy striped Chiogga (kee-oh-ja) and the bright orange-yellow Golden beet.We grow small crops of a row or two in succession all throughout the season. Beets pulled fresh from the garden have a sweet, rich and yes, earthy flavor.

I like to take small beets and either julienne or thinly slice them raw for salads. Roasted beets are good either sliced or cut in wedges on a bed of baby greens with orange supremes, goat cheese and toasted walnuts.
This summer I found myself with too many beets to use in a short amount of time. I decided to pickle some so they can be enjoyed over the course of several weeks. Pickling, simply put, is a way of preserving in a vinegar or brine mixture. The acid in the vinegar slows bacterial growth and the beets keep in the refrigerator for several weeks.

I chose a recipe from Fine Cooking magazine that used both red wine and red wine vinegar. As with any recipe, use a red wine as well as a red wine vinegar that you would be happy to drink and cook with on their own. A word of warning, red beets will stain your fingers, if you want to avoid that, wear disposable gloves when working with them. They taste great right away and even better once they have a chance to chill in the fridge. You can enjoy them on their own or add a few along with their liquid to brighten up a hummus recipe. Don’t forget, the beet greens are good to eat. Remove any large stems, blanch in boiling water for about 2-3 minutes, Drain well and saute in olive oil with some chopped garlic and red pepper flakes.

DSC_8111aDSC_8118a

Wine Pickled Beets

Makes about 1 1/2 quarts

Ingredients

  • 2 lb. trimmed red beets (about 5 medium)
  • 1 cup dry red wine, such as Cabernet Sauvignon
  • 3/4 cup red wine vinegar
  • 1/2 cup fresh orange juice
  • 1/4 cup granulated sugar
  • 4 whole allspice berries
  • 2 whole cloves
  • 1 tsp. kosher salt

Directions

  1. Put the beets in a 4-quart pot, add water to cover, and bring to a boil. Turn the heat down and simmer until the beets are crisp-tender, 20 to 25 minutes. Drain and set aside until cool enough to handle.
  2. Peel and halve the beets. Slice crosswise 1/4 inch thick and distribute among three 1-pint jars or other sealable nonreactive containers.
  3. In a 2- to 3-quart nonreactive saucepan, bring the wine, vinegar, orange juice, sugar, allspice, cloves, and salt to a simmer over medium heat, stirring until the sugar dissolves, 3 to 5 minutes.
  4. Pour the liquid over the beets to cover. Let sit, uncovered, at room temperature for 2 hours to cool and pickle the beets. Serve, or cover and refrigerate until ready to serve.
Make Ahead Tips

The pickles can be refrigerated in a covered container for up to 6 weeks

DSC_8137a

July 8, 2014 Borlotti and Green Bean Salad

DSC_8039a-copyOur beans, both pole and bush varieties, are still a few weeks away from being ready to harvest so I couldn’t resist the green beans I spotted at the farmers market. The shelling beans we are growing are months away from being ready to harvest but I still had some left from last season.  I combined the green beans from the farmers market along with our dried borlotti beans for a simple bean salad.

Borlotti beans, labeled by the source we use, Seeds of Italy as Borlotto, are also known as cranberry beans and the very serious moniker, French Horticultural beans. They are an attractive addition to the garden. Their bright magenta colored pods with white streaks give a hint to the creamy white beans with cranberry red spots that wait inside.

Borlotti are a shelling bean which means the outer pod is inedible and must be removed. They can be used fresh, or dried for later storage. They have a wonderful nutty flavor and a creamy texture. Shelling beans need a long time to dry out. I learned that the hard way. The first year we had them, I thought they were sufficiently dry and stored them in canning jars. Much to my dismay, weeks later when I went to use them I discovered they were moldy. I learned my lesson from this and now allow sufficient time and space to achieve a totally dried bean. A dehydrator could speed up this process.

Some recipes call for only a few hour soak before proceeding with a recipe. I always try to soak dried beans overnight for the best results. In this case, one cup of dried beans became two and a half cups of soaked beans. After the soak drain and rinse the beans before proceeding with the recipe. The pretty spots on the beans are gone as soon as you cook them and they turn a pinkish brown color. Nothing can compare to the flavor of fresh cooked beans, they are sweet, creamy and delicious. If you have time restraints and choose to use canned beans, I prefer Goya beans as a substitute in this recipe.  Add chopped basil just before serving for the freshest taste.

DSC_6642a

Borlotti and Green Bean Salad

Serves six

Ingredients

  • 1 cup dried large  beans, I used Borlotti, well rinsed and soaked overnight
  • Several sprigs fresh thyme
  • 1 large clove garlic, smashed and peeled
  • 1 small yellow onion, cut in half
  • 1 small carrot, cut into several pieces
  • Kosher salt
  • 1 large shallot, finely chopped
  • 2 salt-packed anchovies, filleted (or 4 oil-packed anchovy fillets), rinsed, patted dry, and finely chopped
  • 3 T. red-wine vinegar
  • Freshly ground black pepper
  • 1/2 c extra-virgin olive oil
  • 1 lb. small tomatoes cut into quarters
  • 1 lb. green beans, trimmed and cut into pieces if large
  • 1/2 cup chopped fresh basil

Directions

  1. In a deep, heavy-based pot, cover the beans with 6 to 8 cups cold water. Add the thyme, garlic, onion, carrot, and 1 tsp. salt. Bring to a boil over high heat. Reduce the heat to a gentle simmer, skimming any foam that rises to the surface. Cover and cook until the beans are tender, about 90 minutes; let cool in the broth.
  2. In a large bowl, combine the shallot, anchovies, vinegar, 1/2 tsp. salt, and 1/4 tsp. pepper. Whisk in the olive oil until well combined. Drain the white beans and add them and the tomatoes to the bowl. Toss to coat the vegetables well with the dressing. Let stand at room temperature for 2 to 4 hours.
  3. Cook the green beans in a large pot of boiling salted water until tender, about 5 minutes. Drain and spread on a paper towels to cool. When ready to serve, add the cooled green beans to the white beans and then the basil, tossing well after each addition. Taste and add salt and pepper if needed.
DSC_6772a
A bowl of freshly shelled Borlotti beans.
DSC_8032a
The beans are almost three times their size after an overnight soaking.
DSC_8033a
Combine the drained beans with onion, garlic, carrot and a few sprigs of thyme.

DSC_8049

December 15, 2013 Green Beans with Parsley Pesto

DSC_4089a


Thanksgiving evening, the turkeys and the side dishes were out and we were ready to serve dinner buffet style from the kitchen. Then I noticed it, the double steamer basket and a small container next to it. I forgot, also read, “got too busy” to make the green bean dish I had prepped ahead. Not that we would miss it. After slurping down Chesapeake Bay oysters, butternut squash soup with cider cream, homemade breads, a salad of baby greens and spinach from Joe’s greenhouse, we were ready for the main event. Turkeys, roasted, grilled and smoked, roasted vegetables, yam casserole, stuffing, zucchini, no one would starve for certain. The green beans could wait for another day.

We grow both pole and bush style beans. Green beans, yellow or wax beans and purple beans are in abundance courtesy of the garden from July to early September. Green beans are not in season now so I bought the skinny “haricot verts” that would cook quickly in the steamer basket. Always looking for a new twist on the beans, a recipe from Food and Wine magazine would fit the bill. Green beans with parsley lemon pesto sounded like a great way to feature the beautiful flat leafed parsley still thriving in the greenhouse. Like most people, when you say pesto I immediately think basil. This is a recipe for winter months without basil and combines toasted pine nuts with parsley, garlic, lemon and olive oil. The dish comes together fairly easy, the pesto can be made a day ahead and then tossed with the steamed beans.

Pine nuts are the edible seed of a pine cone. Every pine tree produces seeds but less than a third of the varieties produce seeds that are large and flavorful enough to eat. To say pine nuts are expensive would be an understatement. I read that Italian pine nuts have been going for as much as 60 to 120 dollars a pound due to bug infestations and weather conditions. The small container of Italian pine nuts I purchased was weighed by the quarter pound, by the pound I estimated them to cost about thirty eight dollars. Even Chinese pine nuts have gone up in price. If you decide to purchase Italian pine nuts for any dish  just be sure they are out of harm’s way so they don’t become someone’s late night snack. Walnuts or almonds would be a more reasonably priced alternative and just as flavorful. The amount of pesto is enough for four pounds of green beans, I only cooked a pound of beans because we had quite a few side dishes. Leftover pesto could be tossed with pasta or used as a spread on a turkey sandwich.

DSC_6633a


Green Beans with Parsley Pesto

Serves 6-8 as part of a buffet

Ingredients

  • 1/2 cup pine nuts
  • 2 cups flat-leaf parsley leaves
  • 1 garlic clove, crushed
  • 1 teaspoon finely grated lemon zest
  • 1 tablespoon fresh lemon juice
  • 1/4 cup extra-virgin olive oil
  • Kosher salt
  • Freshly ground pepper
  • 1 lb. green beans (I prefer using the thinner haricot verts)
  • Lemon wedges, for serving

Directions

  1. In a small skillet, toast the pine nuts over moderate heat, tossing, until golden, about 5 minutes; transfer to a food processor and let cool completely.
  2. Add the parsley, garlic, lemon zest and lemon juice to the food processor and pulse until the parsley is very finely chopped. With the machine on, gradually add the olive oil and process until the pesto is nearly smooth. Season with salt and pepper and scrape into a large bowl.
  3. Put a steamer basket in the bottom of a pot. Fill the pot with 1 inch of water, add salt and bring to a boil. Add the green beans, cover and steam until bright green and crisp-tender, 8 to 10 minutes. Drain the beans and transfer to the large bowl. Toss with enough pesto to coat and season with salt and pepper; serve with lemon wedges.
Make Ahead The pesto can be refrigerated overnight. Bring to room temperature before tossing with the beans.
DSC_5254aDSC_4079a

November 17, 2013 Eggplant “Pizzas”

DSC_3935a


Joe’s not so little greenhouse set out in the garden extended our growing season for some vegetables to the latest date ever. When he brought in the last of the peppers and eggplants on Sunday I knew I needed to find a special way to use them to commemorate the end of their growing season. The peppers, for the most part were transformed into one of his favorites, stuffed peppers and for the eggplant I turned to a recipe from Julia Child.

In her 1975 cookbook, From Julia Child’s Kitchen, among personal anecdotes  and recipes for Caesar Salad (yes, Mr. Caesar Cardini actually made this tableside for a young Julia and her family), consommés, stews and apple charlotte is this gem. Tranches d’aubergine a l’italienne might put off the average cook, but eggplant pizzas, now that’s something we can all relate to. The recipe made a second appearance as miniature eggplant pizzas in her 1989 work and one of my favorite go-to cookbooks, The Way to Cook.

The classic pear shaped variety of eggplant like Black Beauty works best here. I began by cutting the eggplants crosswise into 3/4 inch planks, the skin was relatively thin so I left it on.Then I salted the slices on both sides to extract excess liquid. This is a step I would skip in the summer when the eggplants are at their freshest and not very seedy. I let the eggplants sit for about a half hour and started my sauce.

The day before I defrosted two quart bags of my roasted tomatoes, a 28 ounce can of plum tomatoes or a store bought sauce can substitute here. Step one for me is to pour off the liquid that accumulates in the bag, a little lagniappe for the chef. It’s definitely not the prettiest, but it is the best tasting tomato juice you will ever try. I sautéed one finely chopped onion and two chopped cloves of garlic until softened but not brown, about five minutes. Then the tomatoes and the rest of the liquid are added to the pan, breaking up the larger chunks of tomatoes with the back of a wooden spoon. When the tomatoes have cooked down sufficiently, I put them through a food mill to strain out most of the seeds. This results in a smoother sauce.

The eggplant slices are patted dry and lightly brushed with olive oil. I baked the eggplant slices on a wire rack over a baking sheet so that both sides would cook evenly. As Julia says “not so long that the slices become mushy and lose their shape”. After twenty five minutes I removed the baking sheet from the oven and now set the oven to broil. I covered the slices with a generous coating of tomato sauce and sprinkled a combination of mozzarella and grated Parmesan. The “pizzas” are now returned to the oven until the cheese is melted and slightly browned. Julia suggests these as part of a vegetarian combination or arranged around a main event, be it an omelet, a steak or a roast lamb.

Eggplant pizzas would make a good snack or a light lunch with a salad. A recipe that’s vegetarian, low carb and gluten free, as always “Our Lady of the Ladle“, Julia was ahead of her time.


Julia Child’s Eggplant Pizzas

Ingredients

  • 2  large eggplants (about 1 lb. each)
  • 1T salt, for drawing water out of eggplant
  • 2T olive oil for brushing eggplant before roasting
  • 2 t Italian seasoning, for sprinkling on eggplant before roasting
  • 1/3 c freshly grated Parmesan
  • 1/3 c finely grated low-fat mozzarella

Sauce Ingredients

  • 1T olive oil
  • 1 small onion, finely chopped (about 1 cup)
  • 2 large garlic cloves, very finely chopped
  • 1 28 oz. can of plum tomatoes (or use 3 cups peeled and diced fresh tomatoes)
  • 1/2 t Italian seasoning
  • 1/4 t dried oregano

Directions

  1. Cut eggplant into 3/4 inch thick slices. Place eggplant pieces on a double layer of paper towels and sprinkle both sides generously with salt. Let the eggplant sit with the salt on it for about 30 minutes to draw out the liquid. (After the eggplant sits for 15 minutes, turn on the oven to 375°F.
  2. Make the tomato sauce while the eggplant sits. Heat 1 tablespoon of olive oil and sauté the onion and garlic just until it becomes softened and fragrant.   Add the diced tomatoes, Italian seasoning and oregano.
  3. Then let the sauce simmer on low until it’s thickened. Break up tomatoes with a fork while the sauce cooks. (You can add water as needed. Let sauce simmer until ready to put on eggplant slices.)
  4. After 30 minutes, pat the eggplant dry with paper towels. Brush both sides of the eggplant slices lightly with olive oil and sprinkle tops with Italian seasoning. Place eggplant slices on a wire rack over a baking sheet. Roast the eggplant about 25 minutes, but “not so long that the slices become mushy and lose their shape” as Julia says.
  5. While the eggplant roasts, combine Parmesan with mozzarella. After 25 minutes or when eggplant pieces are done, remove eggplant from the oven and turn oven setting to broil. Spread a few tablespoons of sauce on the top of each eggplant slice, sprinkle with thin basil slices and top with cheese blend. Put pizzas under the broiler until the cheese is melted and slightly browned.
DSC_3951a
We are still harvesting salad greens, spinach and arugula from the greenhouse.
DSC_3918a
Cooking down the roasted tomatoes.
DSC_3919a
Putting the cooked tomato sauce through a food mill makes a smoother sauce and eliminates most seeds.
DSC_3911a
Doesn’t look like the stuff in a bottle, but it is the best tasting tomato juice you will find.
DSC_3932a
Served with a simple salad of baby greens and radishes from the garden, eggplant pizzas make a delicious light lunch.


September 3, 2013 Eggplant Caponata revisited

DSC_2138a


Summer is berry season and each month brings a new arrival. June is time for plump juicy strawberries. July brings succulent raspberries and blueberries. August brings one of my favorite berries, eggplant. A berry? you say. First, the members of the nightshade family, tomatoes, pepper and eggplants to name just a few, are actually fruit, not vegetables. Botanically speaking, fruit are seed bearing structures that develop from the ripened ovaries of flowers. But eggplant are not just any old fruit, they are considered berries because they are indehiscent which means they do not sprout open when ripe. With these technicalities aside, there are two burning questions that most people have when it comes to eggplant; should I salt or not? and are there male and female eggplants?

DSC_2012a
A round up of the varieties of eggplant we grow.


Young eggplants, picked fresh from the garden or purchased at the farmers market will not need salting. They will have thinner skin and fewer seeds. The bitterness originates in the seeds which contains nicotinic alkaloids. Did I mention tobacco is another member of the nightshade family? So the larger the eggplant, the greater the likelihood of it having more seeds. Salting, also known as degorging, is good for drawing out excess liquid from the eggplant so that it doesn’t absorb as much oil in the cooking process, but it is only successful in masking bitterness.

The male vs. female eggplant was a tale that even I fell victim to. I was surprised at the number of websites that propose the theory of male and female eggplants as fact. The story goes that a dash-shaped slit on the bottom of the fruit indicates a female eggplant and a deep round indent indicates a male. The male eggplant reportedly has fewer seeds and is more desirable. It’s debunking time again. Fruit, like eggplants develop from the female flower on the plant but have no sex of their own.

So, how do you choose the best eggplant?  Look for eggplant that have smooth, bright, shiny skin. When you press on the skin it should spring right back. Select eggplant that are heavy for their size, indicating younger fruit. The calyx, the green leaves at the stem end should be fresh and green, not dried out and brown.

Our garden in the month of August yields an abundance of the nightshade family, tomatoes, peppers and eggplants. While our tomato harvest is better than last year, this has proven to be not the best year for eggplants and peppers. I wanted to take advantage of the eggplants we did grow and make one of our favorites, caponata.

I posted a different recipe for caponata last year, this is one from my catering days.  A great room temperature dish, caponata always tastes better the second day, after the flavors had the chance to meld. It is an agro dolce, a sweet and sour dish from Sicily that shows the influence of North African flavors on the region. Serve on grilled baguette slices and garnish with toasted pine nuts and chopped flat leafed parsley.

DSC_2117a


Eggplant Caponata

Serves 6-8 as a side dish

Ingredients

  • 1/3c olive oil
  • 3c diced eggplant
  • 1 1/2c chopped onion
  • 1c thinly sliced celery
  • 2c chopped tomatoes
  • 3T minced garlic
  • 2T tomato paste
  • 1/4c red wine vinegar
  • 1c sliced green or black olives
  • 1/3c capers, well drained
  • 1 or 2 anchovies, drained and chopped
  • 1T sugar
  • 1/2t crushed red pepper flakes
  • 1/2c minced flat leafed parsley
  • Kosher salt and freshly ground black pepper
DSC_2065a
A lot of chopping but the dish comes together quickly after that.

DSC_2069a


Directions

  1. Heat the olive oil in a large skillet. Add the eggplant and sauté until somewhat soft, 3-4 minutes. Add the onions, celery, tomatoes and garlic and cook for another 10-12 minutes, stirring occasionally.
  2. Remove from the heat, add the remaining ingredients and toss lightly. Refrigerate until ready to serve, preferably the next day. Bring to room temperature before serving.

DSC_2131a

DSC_2122aDSC_2145a-copy