May 1, 2016 Smoked Salmon and Spinach Frittata

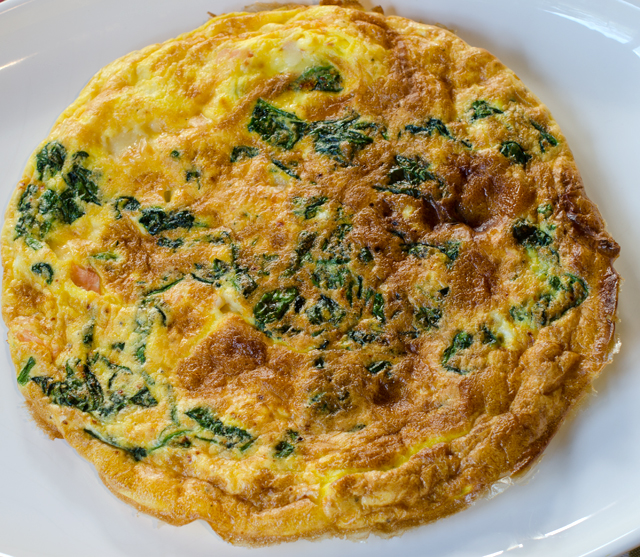
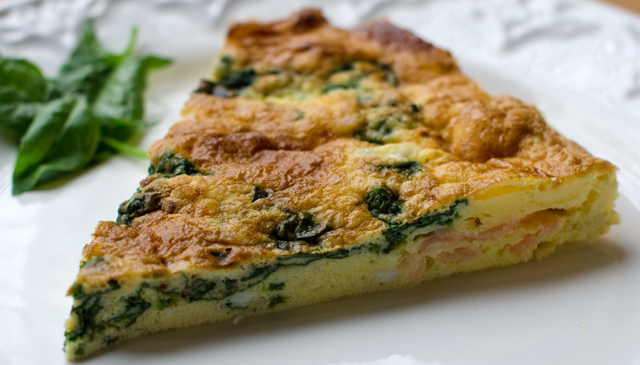
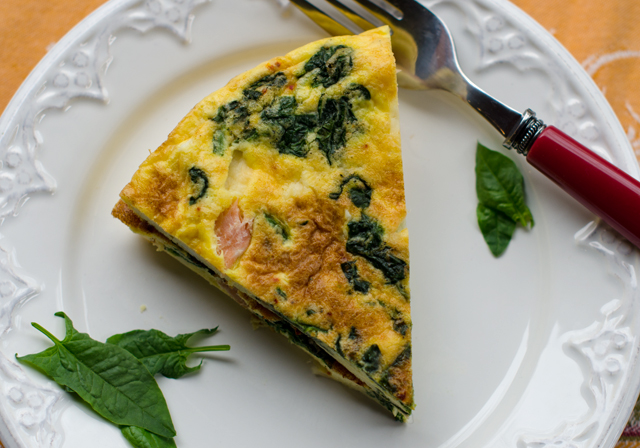
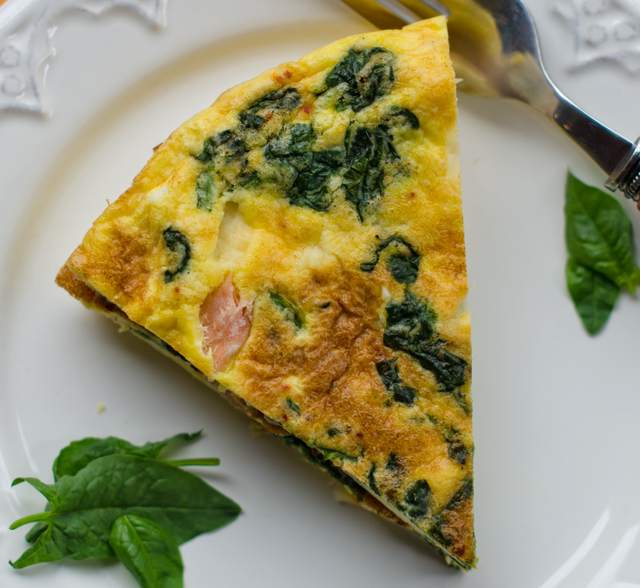
DSC_6759aSpinach again, this time combined with eggs, cheese and smoked salmon to make a frittata. Quick to make, they are as good at breakfast as they are as an impromptu supper. Once again, I used the basic recipe of a frittata from Cooks Illustrated, for broccoli rabe and sun dried tomatoes. substituting the spinach and smoked salmon.

A large oven proof non stick skillet is a must for making this recipe, check first that it fits in your oven. Be sure to have a pot holder draped over the oven door so you are not tempted to touch the handle with your bare hands. I learned that lesson the hard way many years ago. Sauté the spinach just enough to wilt it down, then add garlic and Aleppo pepper, a favorite ingredient of mine. Small cubes of cheese are added to the eggs, for this recipe I like a Jarlsberg or a Havarti with dill.

The eggs are cooked for a short time on the stove top. Add the smoked salmon when the eggs are setting up on the bottom before they go in the oven. Once the frittata is spotty brown and puffed, remove it from the oven. Allow it to sit for 5 minutes, the residual heat will finish the cooking. Loosen the frittata from the pan with a spatula and move it to a platter or cutting board for serving.

DSC_6760a

Smoked Salmon and Spinach Frittata

Ingredients

  • 12 large eggs
  • 3 T half and half or heavy cream
  • Kosher salt and freshly ground black pepper
  • 2 t olive oil
  • 3-4 c spinach, large stems removed
  • 1 medium clove garlic minced
  • ¼ t Aleppo pepper or paprika
  • ¾ c cheese cut into small cubes, Jarlsberg or Havarti with dill
  • ½ c smoked salmon chopped into pieces

DSC_6742a

Directions

  1. With oven rack in the upper middle position, heat broiler. Whisk eggs, half and half, a dash of salt and pepper in a medium bowl until well combined. Set aside.
  2. In a non stick 12″ oven safe skillet heat oil until shimmering. Add the spinach and cook until wilted, 2-3 minutes. Add garlic and pepper flakes and cook until fragrant, 30 seconds or so.
  3. Stir cheese into the eggs; add egg mixture into the skillet and cook, using spatula to stir and scrape the bottom of the skillet. Large curds will form but the mixture will still seem somewhat wet, about 2 minutes. Shake skillet to distribute eggs evenly; cook without stirring for 30 seconds to set the bottom. Sprinkle smoked salmon pieces evenly over the surface of the frittata.
  4. Slide skillet under broiler and broil until the frittata has risen and the surface puffs and turns spotty brown, three to four minutes. Remove skillet from the oven and let stand 5 minutes to finish cooking.
  5. Using a spatula, loosen frittata from the skillet and slide onto a platter or cutting board. Cut into wedges and serve.

DSC_6744a

DSC_6748a

DSC_6756a

April 26, 2016 Spinach and Mushroom Quesadillas with Tomatillo Salsa

DSC_6739a

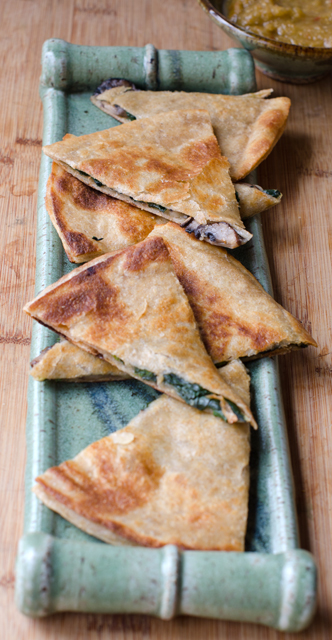
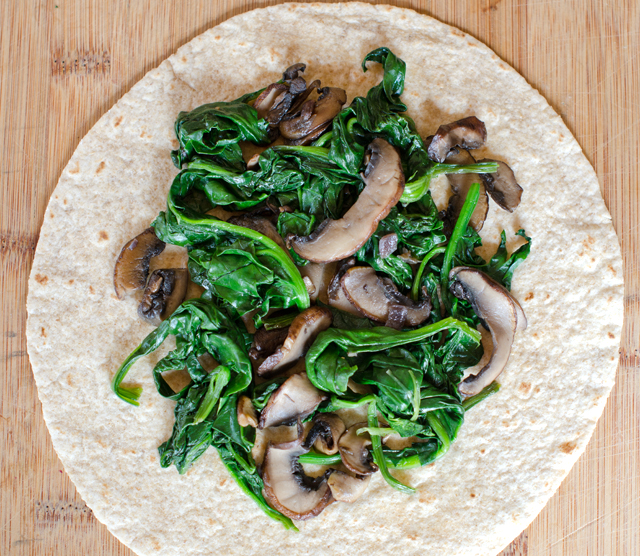
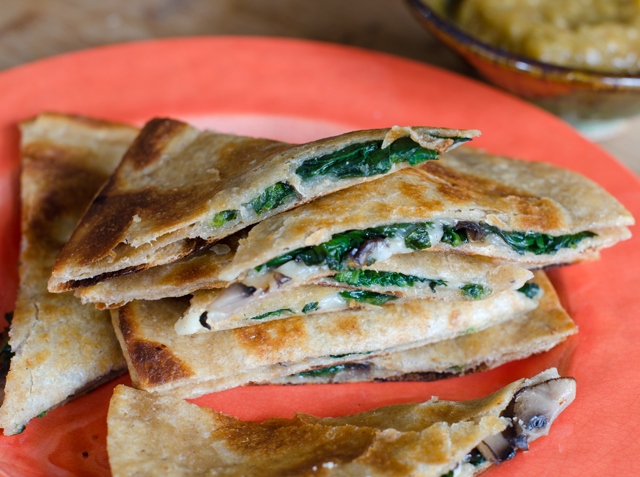
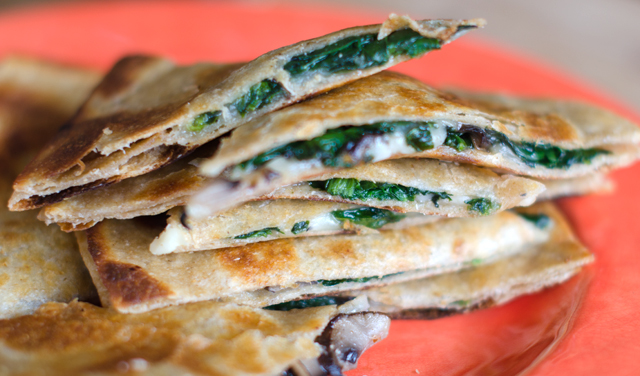
Still inspired by an abundance of, you guessed it, spinach, I was looking for yet another way to use our bounty. Inspiration this time came to me in the form of a quesadilla. Crispy on the outside and melted and creamy inside, spinach adds a healthy component to this popular dish. Quesadillas are easy and delicious any time of day, as a quick snack, lunch, even for breakfast. To accompany the quesadillas I made a simple tomatillo salsa.

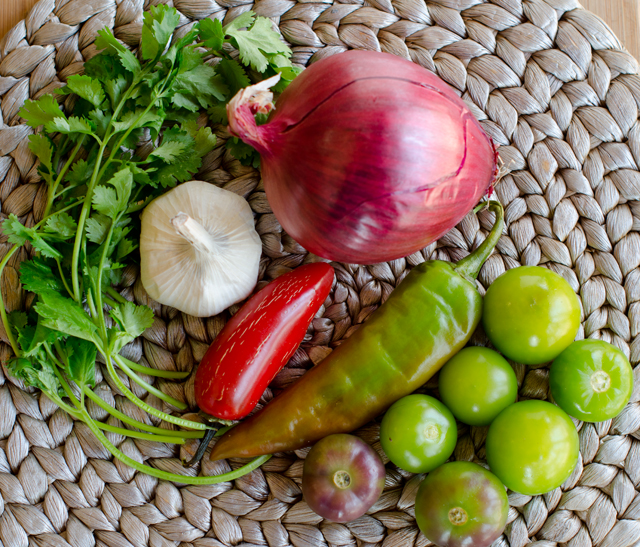
With the exception of the cilantro and garlic, the ingredients for the tomatillo salsa came straight from our freezer. Preparing tomatillos for the freezer is easy, I remove the papery husks and freeze them whole and raw in quart bags. A previously frozen tomatillo will not hold up to roasting but are fine in raw preparations like this. The Numex Joe E. Parker pepper used in this recipe is an Anaheim style pepper with a long slender shape and mild heat. We have an interesting variety of frozen hot peppers from gardens past,  milder ones like Joe E Parker and poblanos to hotter ones, cayenne, jalapeno, serrano and Thai hot. The surprising thing is that freezing them does not diminish their heat in the least. When a recipe calls for several hot peppers, I start with one, it is much easier to add heat than to take it away.

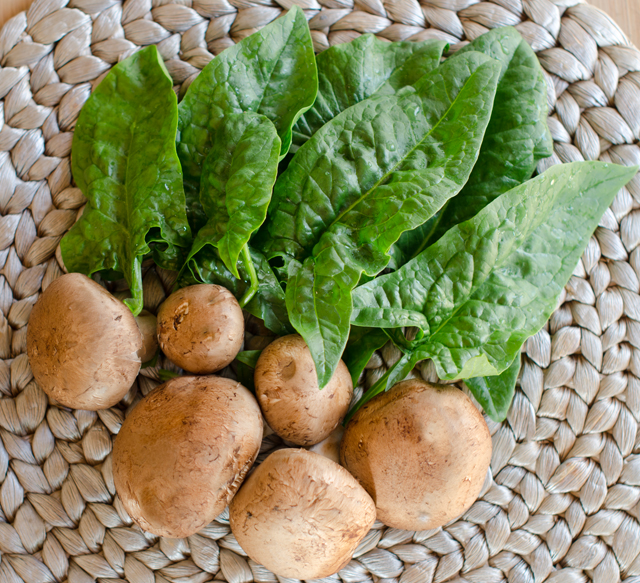
As always, picking the spinach takes more time than most of the steps in the recipe. The filling is easy to make and used twelve cups of fresh spinach, a real plus for me. If you don’t have an abundance of spinach in your garden, use bagged baby spinach. The slightly more assertive flavor of cremini mushrooms compliments the spinach nicely.

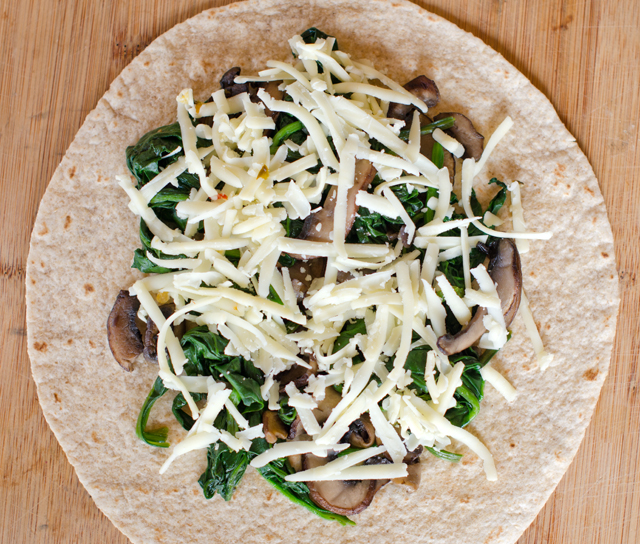
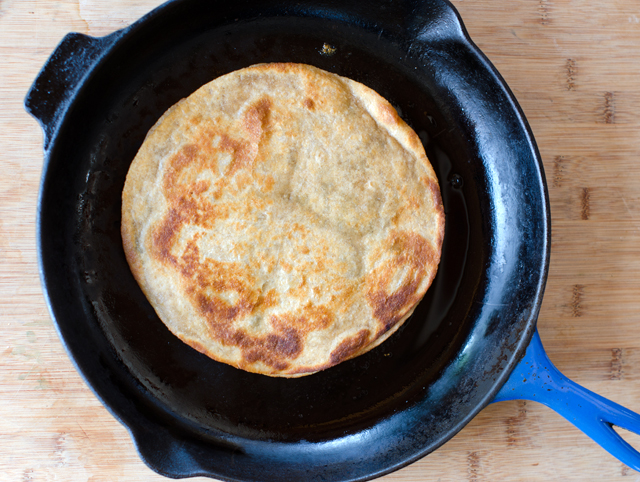
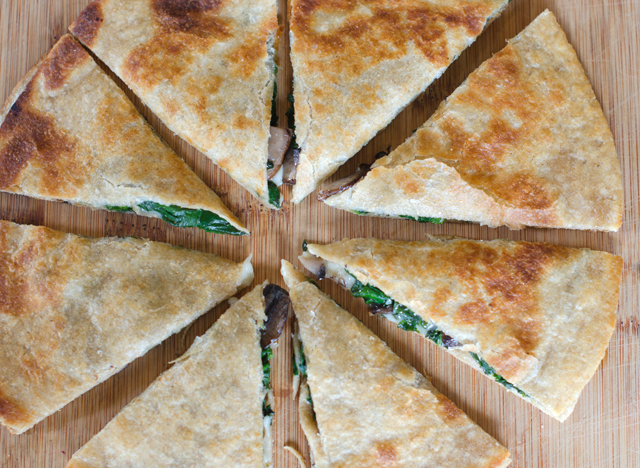
The options for cheese are endless. I used pepper jack and cheddar cheese, a good melting cheese is important here. Choose a large heavy bottom skillet to cook quesadillas. Just a light brushing of oil in the pan is all that’s necessary to brown the tortilla and keeps it from getting greasy. You can either fold one tortilla in half or stack one on top of another. I press lightly on the quesadilla in the pan to allow the cheese to melt a bit and hold the layers together before it is flipped.  The pizza wheel is the perfect tool to cut it into portions. Finished quesadillas can be held in an oven on low heat for 20 minutes.

Spinach and Mushroom Quesadillas

Makes four 8″ quesadillas

Ingredients for the filling

  • 1½ T olive oil or bacon drippings
  • 8 oz mushrooms, button or cremini, stemmed and sliced
  • 2-3 cloves garlic, finely chopped
  • ¼ c finely chopped red onion
  • 12 c spinach, large stems removed

DSC_6706a

Directions for the filling

  1. In a large skillet heat the oil or bacon drippings over medium high heat.
  2. Add the mushrooms, stirring constantly, until they begin to brown.
  3. Add the onion and garlic and continue cooking, stirring frequently until it looks translucent.
  4.  Add the spinach by the handful, wilting it before adding more, until it is all used.  Do not overcook.  Season with salt to taste.

Ingredients for assembling the quesadillas

  • Eight 8″ soft tortilla or taco shells, I used whole grain
  • Olive Oil
  • 1½-2 c grated cheese, I used a combination of pepper jack and cheddar

DSC_6712a

DSC_6715a

Directions for assembling and cooking the quesadillas

  1. Preheat oven to 180°F.
  2. Place four tortillas on two baking sheets, divide evenly the spinach and mushroom filling and the grated cheese between them.
  3. Top with the four remaining tortillas and lightly press to seal.
  4. Place a 12″ heavy bottomed skillet over medium high heat.  Brush the skillet lightly with olive oil.
  5. Place the quesadillas in the skillet one at a time, pressing down lightly but firmly and cook for about 3 minutes on each side. You can peek by lifting up with a spatula to see if it is getting golden brown. Transfer the cooked quesadillas to a baking sheet and keep warm in the oven, lightly covered with foil.
  6. Slice each quesadilla into 6-8 wedges, a pizza cutter works well here, and serve hot with tomatillo salsa or your own favorite.

DSC_6719a

DSC_6723a

DSC_6733a


Tomatillo Salsa

Ingredients

  • 3 cloves garlic, peeled
  • 1 jalapeno pepper, stemmed and seeded and quartered
  • 1 Numex pepper, stemmed and seeded and quartered
  • ¼ c roughly chopped red onion
  • 1 lb tomatillos, husked, rinsed and cut into quarters
  • ¾ c loosely packed, lightly chopped cilantro

DSC_6702a

Directions

  1. With a food processor or blender running, drop in the garlic cloves one at a time letting each piece get finely chopped before adding the next. Add the peppers, onion,  tomatillos and cilantro and process until smooth.

DSC_6731a


April 10, 2016 Spinach Soup with Middle Eastern Spices

DSC_6651aSpring made an early entrance this year, but it’s not quite sure if it wants to stick around permanently yet. One day it’s rainy and seasonably warm, the next we are anticipating wet snow that will bring a coating to possibly an inch to grassy surfaces.

The occasional warm day we’ve been having is causing the spinach in the greenhouse to bolt, that is, go to seed. It ‘s time to pick as much as possible, so recipes that use mass quantities of spinach look good to me. This recipe for spinach soup with middle eastern spices uses a pound and a half of fresh spinach. That translates into approximately 18 cups of spinach, and I say, bring it on!

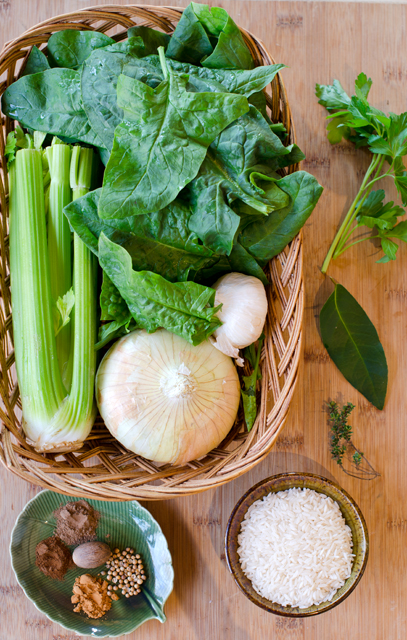
Cookbook author and New York Times food columnist Martha Rose Shulman got her inspiration for this soup from a Syrian pan cooked spinach recipe. The warming spices, clove, allspice, nutmeg, cinnamon and coriander are a pleasing contrast to the sweet, mild flavor of freshly picked spinach.

To start, saute a medium chopped onion and celery in a Dutch oven. I checked with the NOA, National Onion Association and they say a medium onion equals about 1 cup chopped onion. When the vegetables soften, add a few cloves of chopped garlic and cook until fragrant. Add stock, rice, bouquet garni and a generous pinch of salt. Bring the mixture to boil and simmer for 30 minutes. This infuses the broth with flavor and cooks the rice which thickens the soup. Remove the bouquet garni and add the spices and the spinach. It is best to add the spinach in batches to the hot broth, continue to add more until it is all wilted. Cover and cook for five minutes, no longer. The spinach should retain it’s bright green color, any longer it could turn gray.

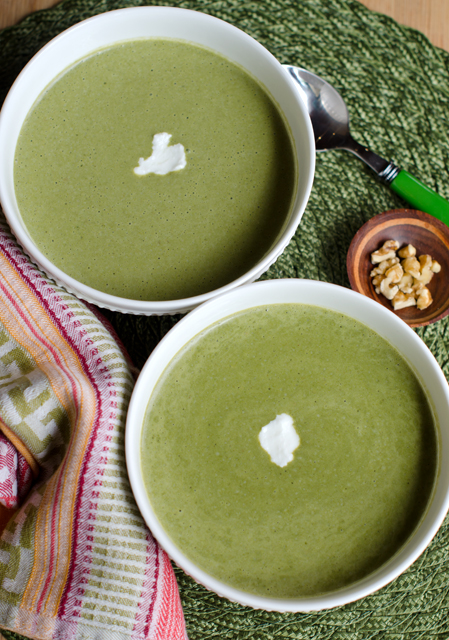
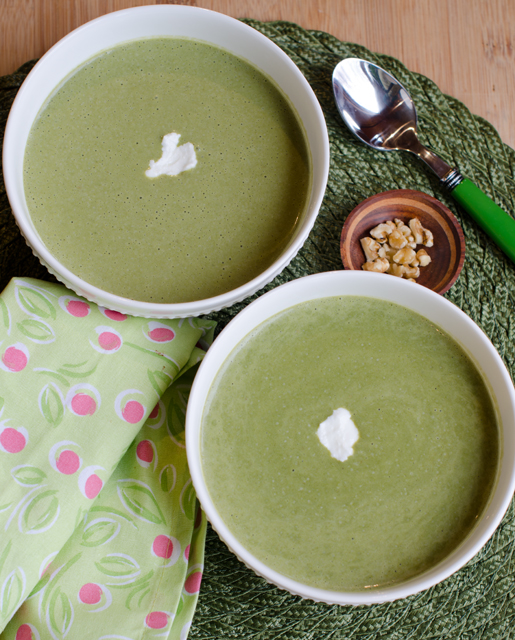
Puree the soup in batches in a blender or blend in the pot with an immersion blender. The final touch is the addition of some tangy yogurt, half is blended into the soup and the rest is a garnish for each bowl. Sprinkle a few chopped walnuts on top before serving. I served it hot but I think it would be good cold as well.

DSC_6459a

Spinach Soup with Middle Eastern Spices

Makes 4-6 servings

Ingredients

  • 1T extra virgin olive oil
  • 1 medium onion, chopped
  • 1/3 c finely diced celery
  • Salt to taste
  • 2 garlic cloves, minced
  • ¼ to ½c medium grain rice
  • 6 c chicken or vegetable stock
  • Bouquet garni of a few sprigs parsley and thyme and a bay leaf
  • 1 ½ lbs fresh spinach, washed thoroughly, large stems removed
  • ¼t ground allspice
  • 1/8 t ground cloves
  • 1/8 t freshly ground nutmeg
  • ¼ t ground cinnamon
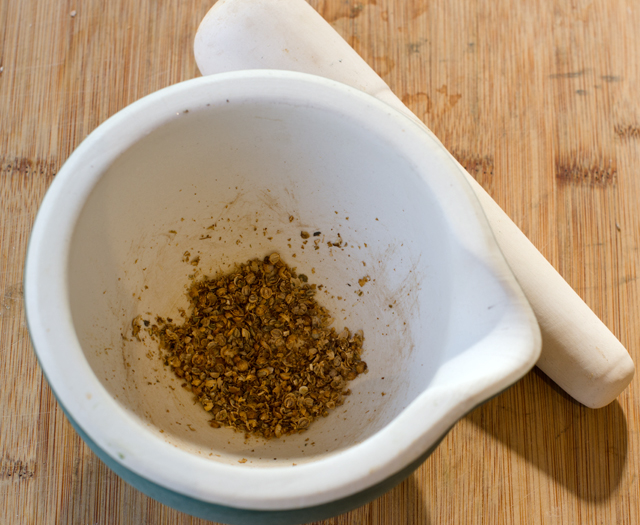
  • 1t coriander seeds, lightly toasted and ground
  • Kosher salt and freshly ground pepper
  • 2 c Greek yogurt (low or full fat)
  • ¼ c chopped walnuts to garnish

DSC_6628a

DSC_6632a

Directions

  1. Heat the olive oil in a large heavy soup pot or Dutch oven. Add the chopped onion and celery and cook until tender, about 5 minutes. Add the garlic and a pinch of salt and cook until garlic is fragrant, about 1 minute.
  2. Add the stock, rice, bouquet garni and salt to taste and bring to a boil. Reduce heat to a simmer, cover and cook for 30 minutes.
  3. While the stock is simmering you will have time to measure out the spices and toast and grind the coriander.
  4. After the stock has simmered, remove the bouquet garni. Add the spices and add the spinach in batches, wilting it as you go. Cover and simmer for 5 minutes. Spinach should still retain its bright color.
  5. Puree the soup in batches in a blender. Be sure to not to overfill and hold down the lid tightly. Alternately you could puree the soup in the pot with a hand blender. Stop at this step if you are not serving the soup immediately.
  6. Return the soup to the pot and heat through, stirring occasionally.  Whisk half of the yogurt into the soup and season to taste with salt and pepper.
  7. Serve the soup with a swirl of yogurt and garnish with chopped walnuts.

DSC_6640a

March 24, 2016 Spinach and Roasted Garlic Hummus

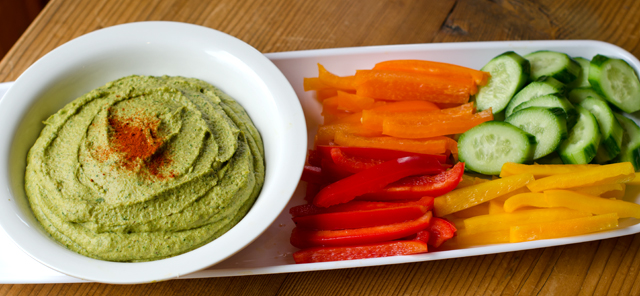
DSC_6542aWhen I am looking for a snack, hummus is a healthy choice I feel good about adding to my shopping cart. But the truth is, it’s takes just minutes to make my own, and it’s healthier (no additives), tastier and cheaper too. The word hummus in Arabic means chickpea so strictly speaking, hummus is the term for a chickpea dip. Hummus bi tahini means chickpeas with tahini, a paste of ground sesame seeds.  Whether you add tahini or not, a basic hummus includes garlic, lemon juice, olive oil and salt.

One of my favorite food memories is a chickpea soup Joe made for me one Valentine’s Day. I absolutely love the sweet nutty flavor of freshly cooked chickpeas and in a perfect world I would always use them when I make hummus. However, dried chickpeas need to be soaked overnight, drained the next day and cooked for 1-3 hours, depending on freshness. I don’t always have time for that and the delayed gratification it requires.

However if you have the time, substitute one half the quantity of dried beans for the canned. The standard 15 ounce can of chickpeas drained is about 9 ounces or 1 ½ cups of beans. This translates into 4.5 ounces of dried beans or ¾ cup. Many cooks add a pinch of baking soda to tenderize dried beans to both the soaking and cooking water. The United States dried bean council (of course there’s one!) points out that it destroys part of the thiamine (aka vitamin B 1), making the amino acids less digestible and negatively affects the nutritional value. I’ll leave that heavy decision up to you.

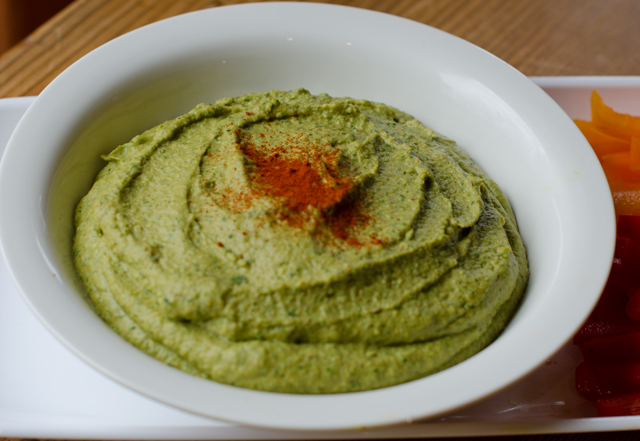
A basic hummus recipe is easy and delicious and just the jumping off point for countless variations. I have previously shared a beet hummus recipe, this time I added fresh spinach and roasted garlic to the recipe.

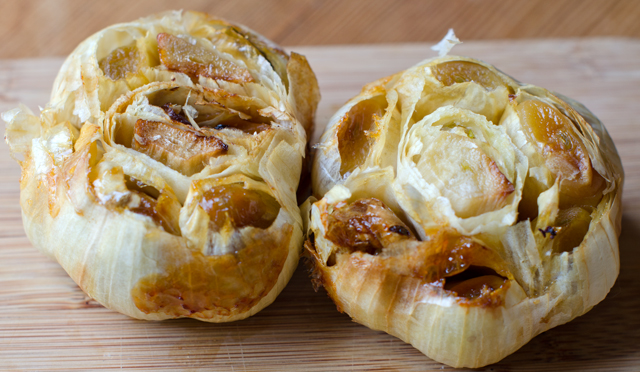
If you are not already roasting garlic cloves, you should. It takes more time to get your oven up to temperature than in does to get this kitchen staple together. The first time I roasted garlic I winged it but I am pleased to say my uninformed guess was pretty much on target. This is the basic recipe; cut about the top quarter off each head of garlic with a sharp knife to expose all the cloves. Slowly pour olive oil over each head, letting it soak into and around the cloves. Wrap the prepared heads of garlic in foil and bake in a 425°F oven. Start checking the garlic at the 45 minute mark. The finished cloves should be soft, golden and slightly protruding from the skins. I always roast more than what I need, it will keep in the fridge for about a week, that is if it lasts that long. You can also freeze roasted garlic for several months.

Everything goes into the food processor or blender, except the reserved chickpea liquid. I added three cloves of roasted garlic to my basic hummus recipe, along with three loosely packed cups of spinach leaves. I added a half teaspoon each of some appropriate dried herbs, cumin, for it’s smoky flavor, smoked paprika also brings smokiness and a little heat. Sumac is the herb you may not be familiar with, it has a fruity astringent taste, milder than a lemon. I shared more background on it in this post. It is readily available from several of the herb and spice mail order sights.

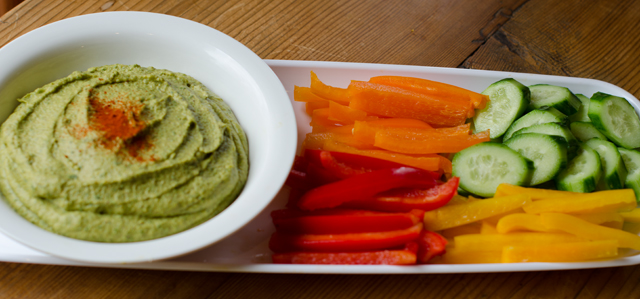
Add the additional bean liquid to get it completely smooth and holds it’s shape. Taste and add more salt if needed. Transfer mixture into a serving dish. Garnish with a dash of olive oil and a sprinkle of smoked paprika. Serve at room temperature.

DSC_6534a

DSC_6538a

Spinach and Roasted Garlic Hummus

Makes about 2 cups

Ingredients

  • 1-15 ounce can garbanzo beans (chickpeas) drained and liquid reserved
  • 3-4 c spinach leaves, large stems removed
  • 1/3 c tahini
  • 3 T fresh squeezed lemon juice
  • 3-4 cloves roasted garlic, or to your taste
  • ½ t salt, and more to taste
  • 1 t each cumin, sumac and smoked paprika
  • 1-2 T extra virgin olive oil
  • A dusting of smoked paprika for the topping

DSC_6536aDirections

  1. Add all the ingredients to your food processor or blender. Pulse, adding additional bean liquid as needed to get the hummus completely smooth.
  2. Taste and add salt if desired.
  3. Scoop into a serving bowl and sprinkle top with smoked paprika and a little olive oil if desired.
  4. Serve with the dippers of your choice.

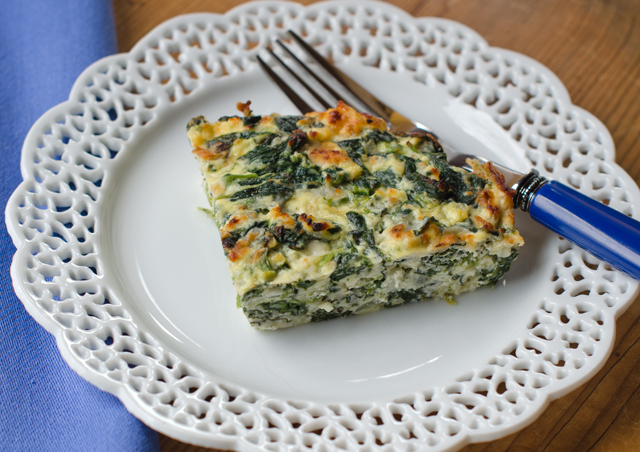
March 17, 2016 Spinach Pie

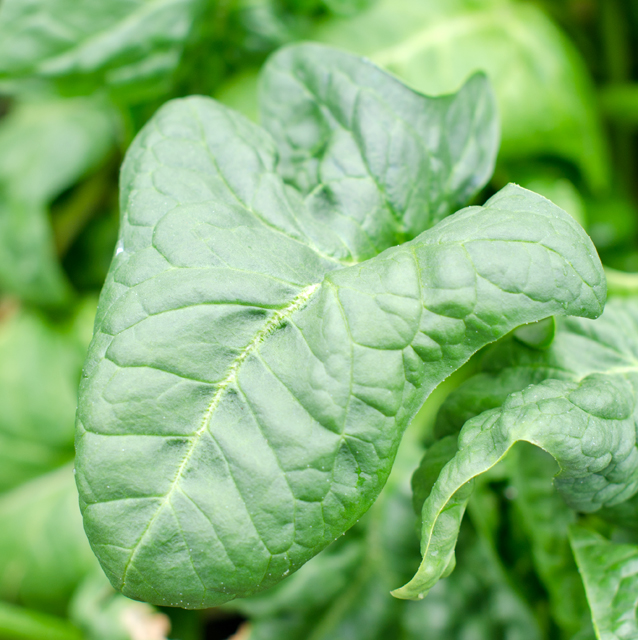
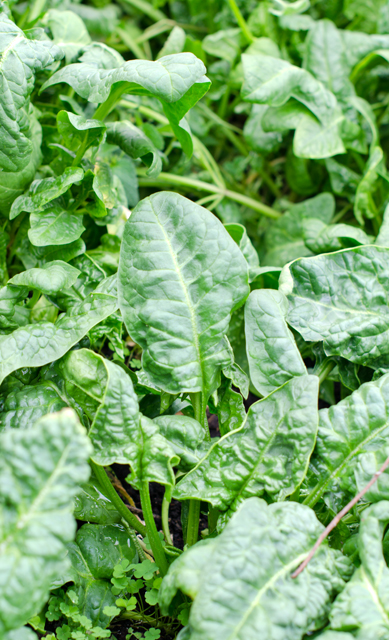
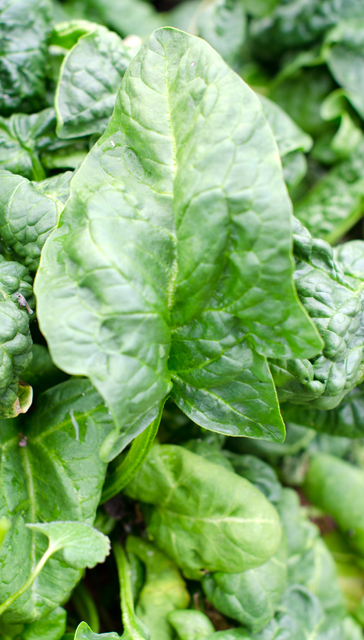
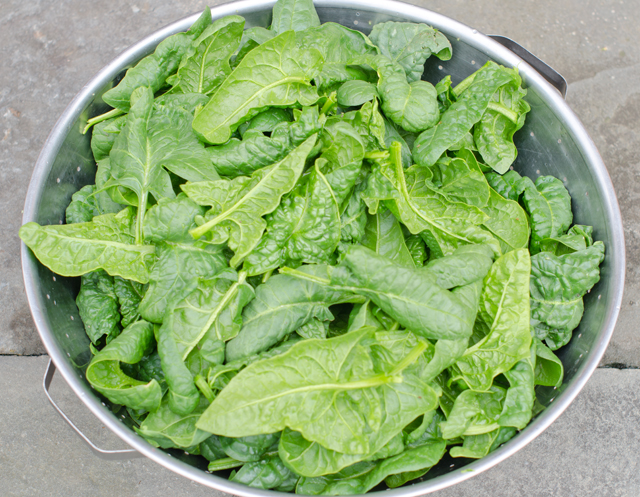
DSC_6530aFor once it looks like the groundhog was right, winter is over. Last week’s tease of highs in the 80’s has now settled back into a mostly rainy week with temperatures in the 50’s and 60’s. Spring arrives this weekend and it’s time to head back to the garden. Our garden’s first offering is spinach. Planted as a fall crop, it wintered over nicely in the greenhouse . It’s not the delicate baby spinach that you would want in a salad, but larger, very crinkly spinach, perfect for cooked dishes. I will attest that is still sweet and flavorful, after nibbling on some stems when I picked a large colander full today.

I found this recipe for Spinach Pie on the Epicurious website from a book called Irish Country Cooking, quite appropriate since St. Patrick’s Day is today. My choice was further confirmed when I read the author’s comment that three generations of her family have enjoyed this dish and this recipe was often made to use up her father’s seasonal harvest of spinach.

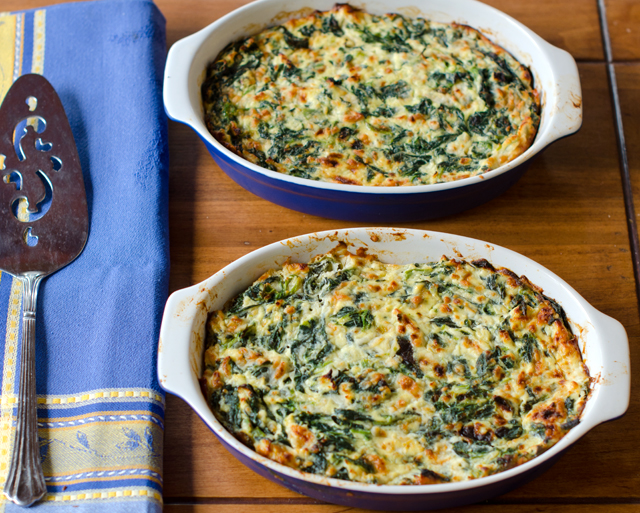
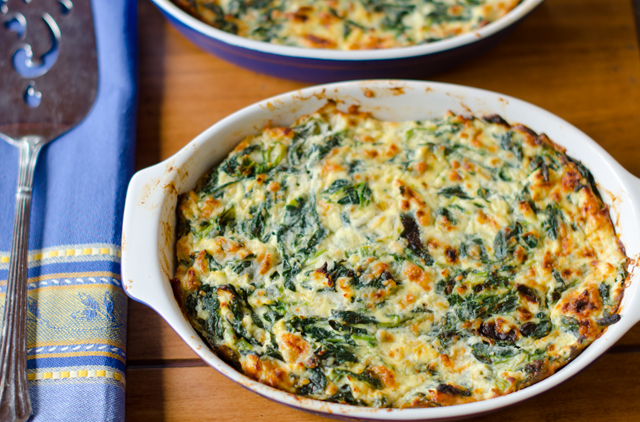
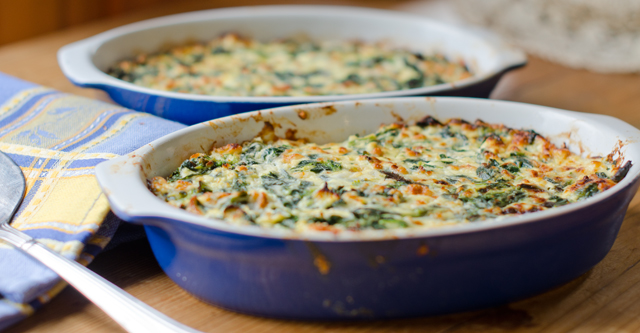
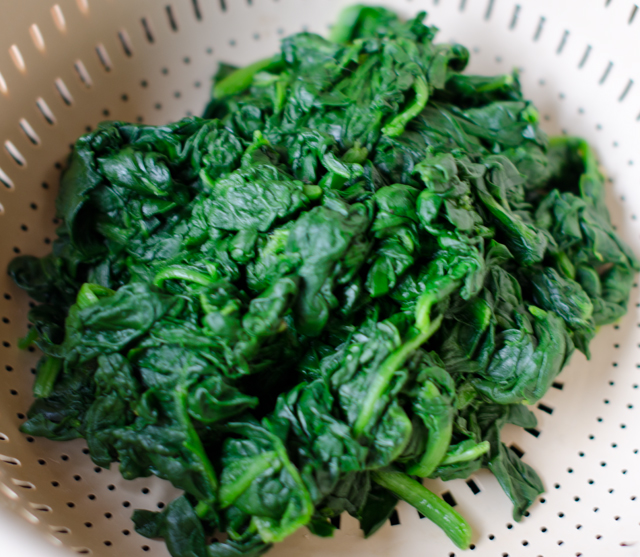
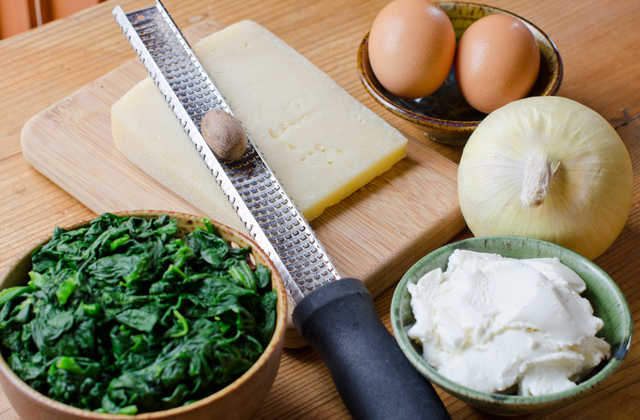
It takes a lot of spinach to make a pound, twelve cups to be exact. When that spinach is cooked down it will yield about a cup. Wash spinach in a large sink in several exchanges of cold water, those crinkles can hide a lot of dirt and debris. Remove any large stems and trim away any discolored leaves. The recipe called for steaming the spinach, I chose to cook it down in batches in a non stick skillet, which was just as easy. Drain spinach in a colander or better yet squeeze in your hands to remove excess moisture. Roughly chop spinach and in a large bowl combine with onion, beaten eggs and the cheeses. Mix well to be certain the spinach is mixed thoroughly with the other ingredients. Transfer this mixture to a quiche dish or individual dishes. If you like it could even be made in a crust. Different cheeses could be substituted as long as they have the same texture, cheddar for the mozzarella, I substituted ricotta for the cottage cheese. The addition of some chopped smoked salmon or a little crumbled sausage would be nice too.  A 10 ounce container of frozen spinach, thawed and well drained can be substituted for the fresh spinach.

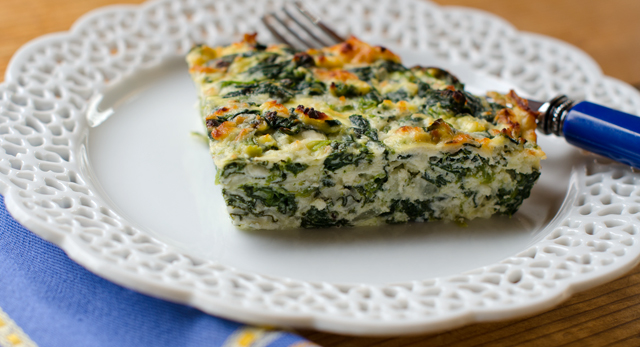
Spinach pie is appropriate at any meal, breakfast, a light luncheon entree, a side at dinner. You could also bake this in a rectangular baking dish and cut it into small squares as an hors d’oeuvre. I barely made a dent into the spinach that’s in the greenhouse so it looks like I will be making this again in the weeks to come.

DSC_6460a

DSC_6462a

DSC_6485a

DSC_6490a

Spinach Pie

Ingredients

  • 1 lb 4 oz spinach, washed or a 10 ounce container of frozen chopped spinach, thawed and well drained of excess liquid
  • 1 medium onion, finely chopped
  • 2 eggs, beaten
  • 10 oz ricotta or cottage cheese (regular or low fat)
  • 10 oz freshly grated Parmesan cheese
  • Kosher salt and freshly ground pepper to taste
  • ¼ t freshly ground nutmeg

DSC_6515a

Directions

  1. Preheat oven to 350°F, 325°F if using convection heat
  2. Wilt the spinach in a large non stick saute pan with the water that is still clinging to the leaves, drain well and roughly chop.
  3. In a large bowl, mix the cooked spinach with the onion, beaten eggs and cheeses. Be sure that the spinach is thoroughly combined with the other ingredients. Season the mixture with salt, pepper and nutmeg.
  4. Transfer mixture to one or several smaller baking dishes that have been coated with non stick spray. Bake in preheated oven for 25 to 30 minutes.

DSC_6520a

DSC_6523a

DSC_6526a

DSC_6533a

October 13, 2015 End of Summer Green Gazpacho

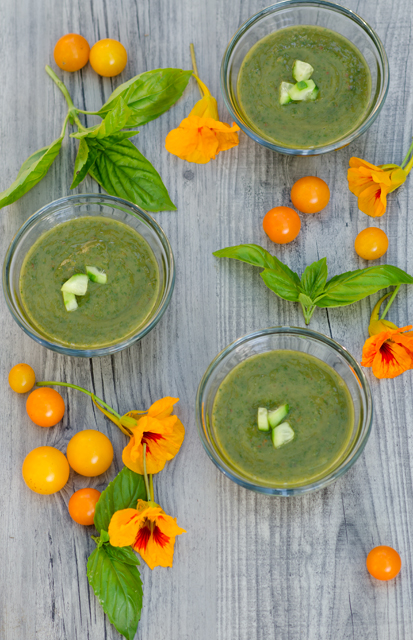
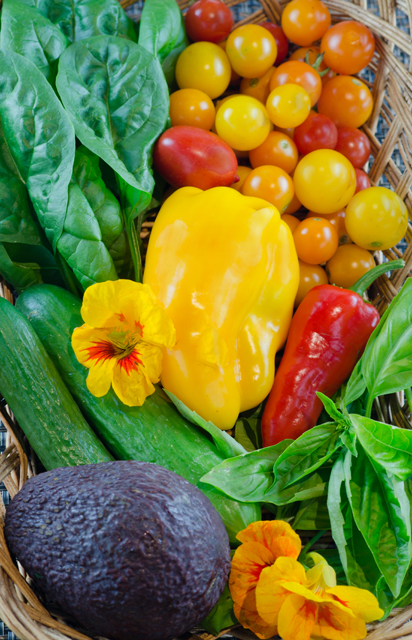
DSC_4896aSummer was officially over several weeks ago and the first touch of frost was on our lawn Sunday. That doesn’t mean the garden is giving up yet. There are still some tomatoes, peppers, both sweet and hot, eggplants and herbs ready for the picking.The tomatoes may not be the prettiest, but they are certainly the sweetest.  Joe has planted a large crop of spinach and salad greens in the garden greenhouse that we will enjoy for several months to come. After a week of indulging in Denver’s finest cuisine it was time to get back on the healthy eating track. What better way to use some of  these ingredients than in a cold refreshing green gazpacho?

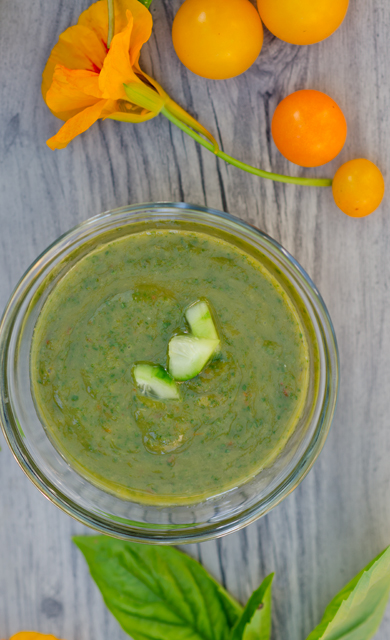
Gazpacho by definititon is a liquid salad that originated from the southern Spanish region of  Andalusia. The name possibly originated from the Latin word “caspa” meaning fragments, alluding to the small pieces in gazpacho. You can make this as chunky or as smooth as you choose. I love the addition of avocados in our nightly salad with dinner and had a few extra ripe ones to give this soup a creamy texture. I used the bounty of our garden and the addition of a cucumber for it’s crisp sweetness. Give this soup several hours to chill and the flavors to blend.

Substitutions  are permitted, watercress for the spinach, that will bring a spicy kick to the soup.  Cilantro can sub for the basil, add a touch of Tabasco if you don’t have a fresh hot pepper, I would be happy to share.  I always stock up on vinegars at The Tubby Olive and used their Alfoos Mango in my soup, love them in our vinaigrettes too. If you don’t  have a fruit vinegar, use white wine vinegar and a touch of honey. A little chopped cucumber as garnish gives a little crunch and since our nasturtiums are still in bloom I couldn’t resist adding a few for their vibrant color and spiciness.

DSC_4913a

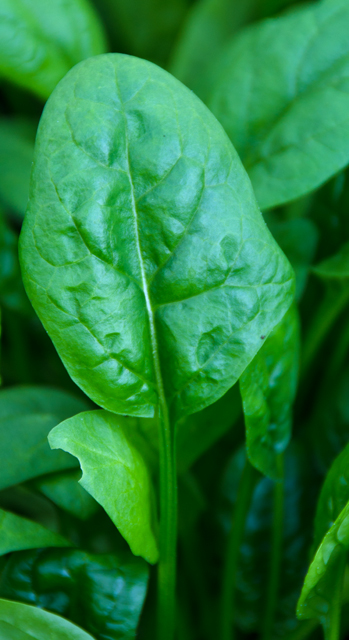
A new crop of spinach in the garden greenhouse is ready for harvest.


End of Summer Green Gazpacho

Makes about 4 cups

  • 2 medium tomatoes or 12-15 small tomatoes
  • 3-4 small cucumbers peeled and cut into chunks
  • 1 avocado, flesh cut into large chunks
  • ½c basil leaves
  • ½c flat leafed parsley leaves
  • ½ to 1 whole hot pepper, jalapeno or serrano
  • 1 sweet pepper, seeded, stemmed and cut into chunks
  • 2c packed baby spinach leaves
  • 2 cloves garlic, finely chopped
  • 2-3T fruity balsamic vinegar (I used Mango from Tubby Olive)
  • Cold water to blend
  • Kosher salt and freshly ground pepper
  • Water as needed
  • 1T extra virgin olive oil

Directions

  1. Reserve ½ cup cucumber chunks and chop finely.
  2. Combine the tomatoes, cucumbers, avocado, basil, hot pepper and sweet pepper, spinach, garlic and balsamic vinegar with cold water as needed in the bowl of a food processor or blender. Process until smooth adding more water as necessary to achieve a smooth texture. Taste and season with salt, pepper and more vinegar if desired.
  3. Refrigerate until cold, pour into bowls and garnish with cucumber chunks.

DSC_4906a

September 23, 2015 End of Summer Eggplant Soup

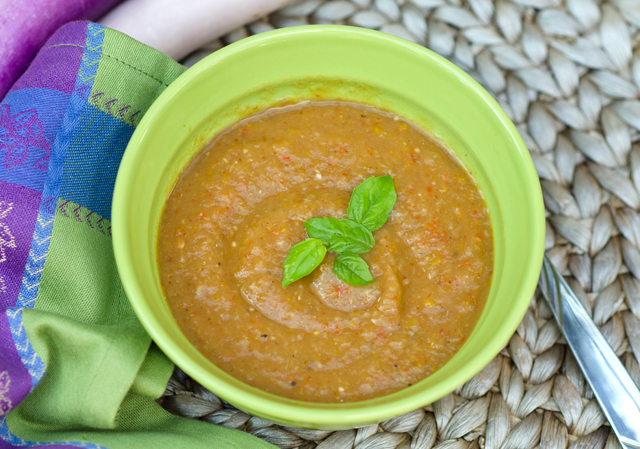
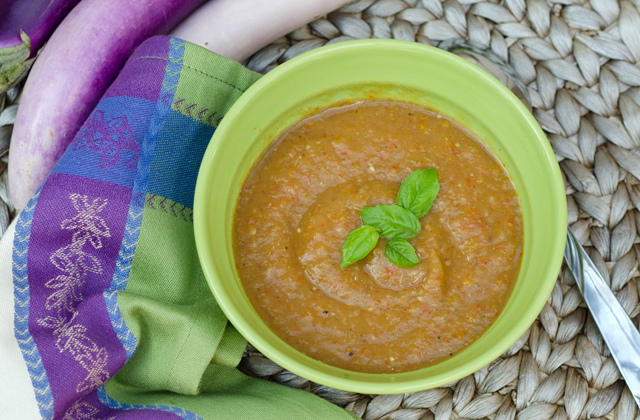
DSC_4242aEven though the temperatures are still in the eighties, fall is rapidly approaching and  it’s time to say goodbye to our summer vegetables. What better way to use them now and enjoy them later than in an end of summer eggplant soup. Another good reason to have soup on hand was the stomach virus that Joe and I suffered through last week. Nothing tastes better when you are on the road to recovery is a nutritious soothing soup.

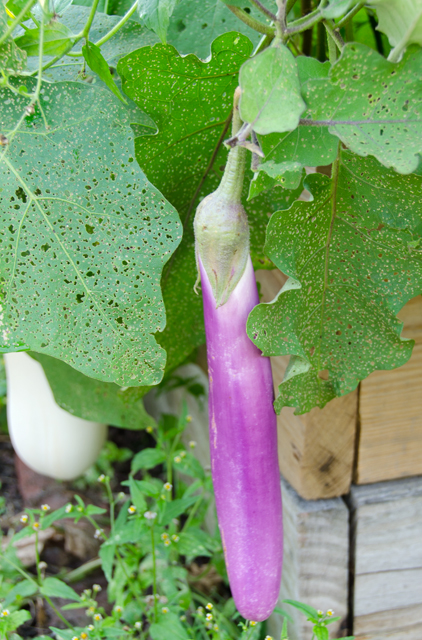
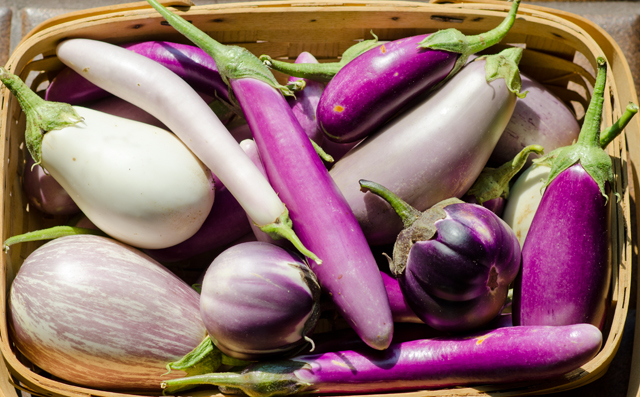
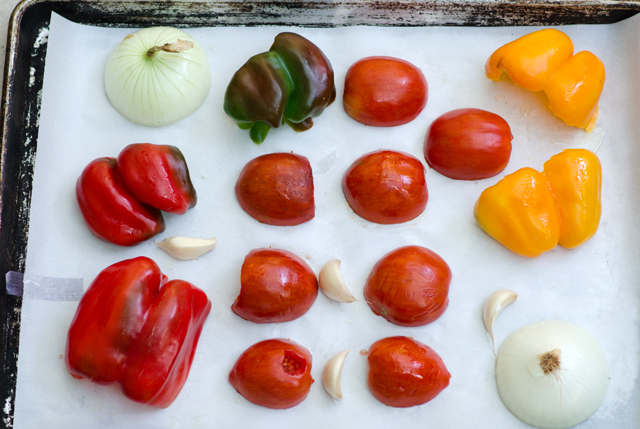
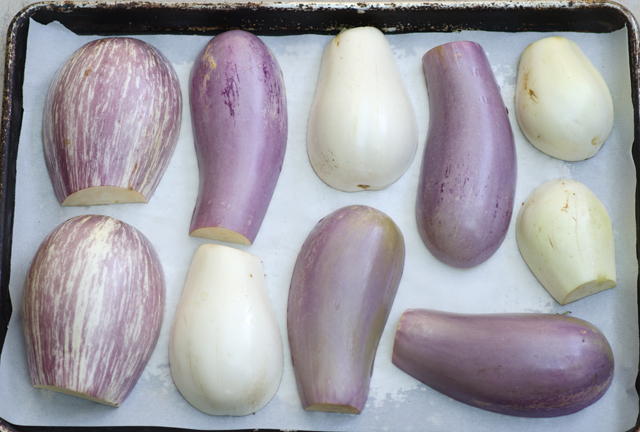
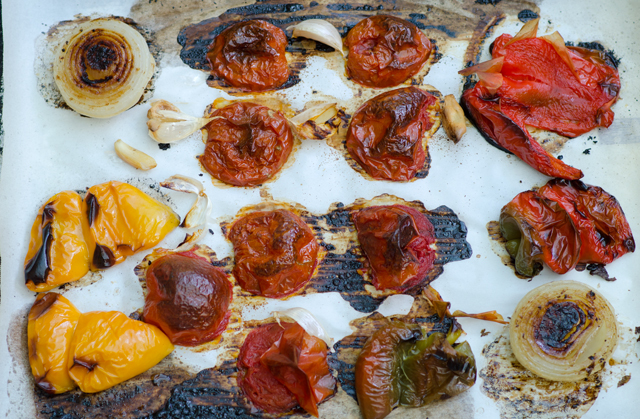
I am still picking eggplants, peppers and tomatoes, but not in the same quantities as a few weeks ago. The days are getting shorter and even though the days are warm, the nights are definitely cooler. After an afternoon pick yesterday I came back with quite a nice variety of eggplants, several peppers and a few tomatoes.   This is the type of recipe you could make differently every time, depending on what is still there for the picking. I wanted to make this as easy as possible so I decided to roast the vegetable first before combining them in a soup. Carrying over on the easy concept, I lined the baking trays with parchment to make clean up a snap. I cut the eggplants in half and lightly brushed the cut edge with olive oil and sprinkled with salt and pepper.  On the second large baking sheet I added several tomatoes, peppers, an onion and some unpeeled garlic cloves, brushed everything with olive oil, and sprinkled on kosher salt and freshly ground pepper.

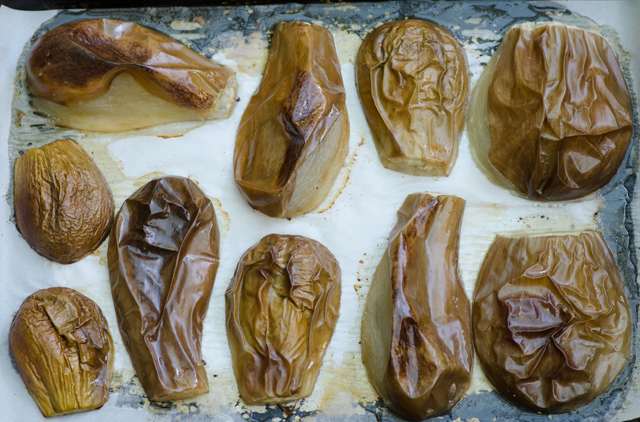
I decided on a 375°F oven, the temperature we use when oven roasting vegetables. I checked the tray with the tomatoes, peppers, garlic and onion first, they were done in about 12-15 minutes, getting a nice toasty brown. The eggplants took a little longer, they are done when the skins start to collapse. Once cooled, it’s easy to separate the flesh from the skin. Squeeze the garlic from the skins and roughly chop the onion. I pureed the vegetables in the food processor in batches. Because some of my eggplants were seedy I put the puree through a food mill with a medium disc. Pour the finished puree into a stockpot. I added ground cumin, coriander, salt, freshly ground black pepper and a touch of cayenne. Add chicken or vegetable stock to thin out the consistency. Make some to enjoy now and freeze some for the cold winter months.

DSC_4181a

Late summer harvest of eggplants.

DSC_4230a

Place vegetables on a parchment lined baking sheet.


The skin easily peels off the peppers and tomatoes. Roughly chop the onion.
Eggplants are ready when they start to collapse. The flesh separates from the skins.


End of Summer Eggplant Soup
Serves: 6

Ingredients

  • 3 ½lb eggplant, any type, halved lengthwise
  • 2 red or yellow bell peppers, or any combination, halved and cored
  • 3-4 tomatoes, halved and cored
  • 1 small onion peeled and halved
  • 4 garlic cloves
  • Olive oil
  • Kosher salt and freshly
  • ½t ground cumin
  • ½t ground coriander
  • 3-4 cups chicken or vegetable stock
  • Basil leaves as garnish

Directions

  1. Preheat oven to 375°F.
  2. Line two large baking pans with parchment paper.  Brush cut side of eggplant with olive oil, sprinkle with salt and pepper and arrange cut side down in one layer on baking sheet. On the second sheet,  arrange tomatoes, bell peppers, garlic, and onions, cut side down, in a single layer. Brush with olive oil and sprinkle with salt and freshly ground pepper. Bake vegetables until eggplant and bell peppers have a slight char on their skins. Check at 15 minutes, as garlic may need to come out earlier so that it doesn’t burn. Let cool until ready to handle. Remove skins as much as possible.
  3. Working in batches, pulse vegetables in a food processor, you can either roughly chop or take them down to a puree. If necessary, put the mix through a food mill.  Transfer vegetables to a large stockpot and add broth and spices. Cook for 15-20 minutes over medium heat, stirring occasionally.
  4. Adjust seasonings to taste.
  5. Serve garnished with basil leaves

DSC_4239a


September 14, 2015 Mixed Beans with Peanuts, Ginger and Lime

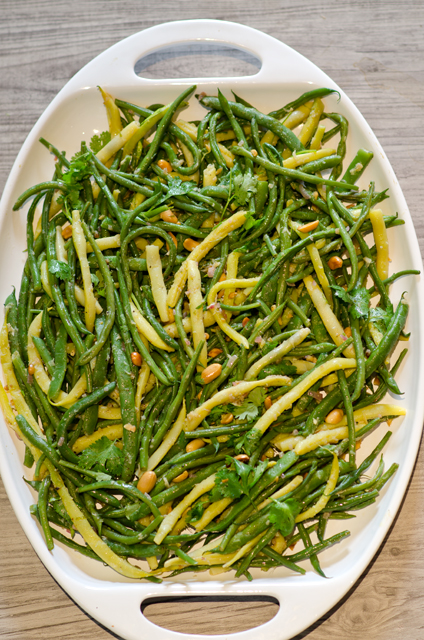
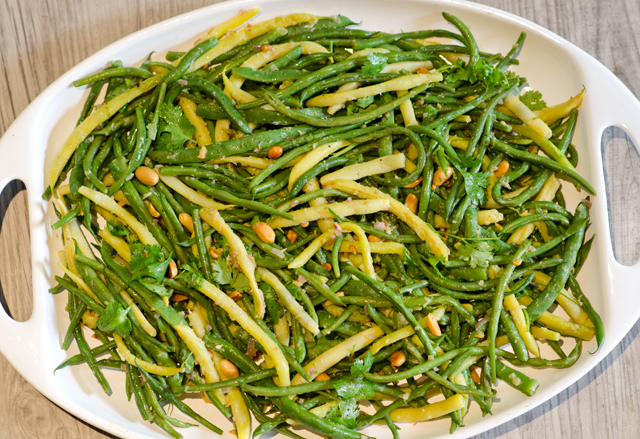
DSC_4200aThis is another bean salad from Jerusalem born, London based chef and cookbook author Yotam Ottolenghi, this time with a decidedly Asian twist. An assortment of fresh green and yellow beans are tossed in a dressing that includes two ingredients that would have seemed exotic and difficult to access ten years ago,  lemongrass and kaffir lime leaves. Our love for Thai cooking was the reason we started growing them many years ago but with increased demand they have gone mainstream and now are readily available to the home cook.

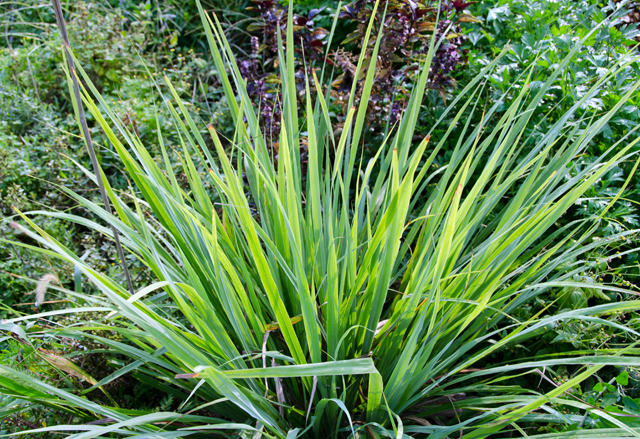
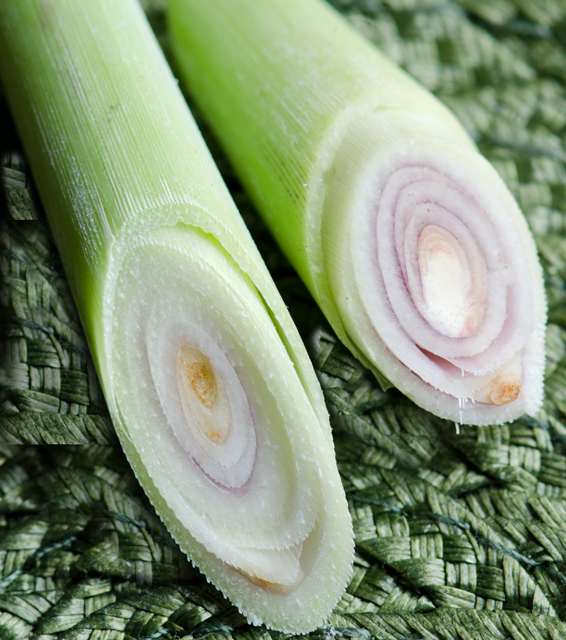
Lemongrass is a tall tropical grass native to South and Southeastern Asia.  Our lemongrass plant grows happily outdoors from June to late September forming a tall bushy plant, about 3 feet tall and 5 feet wide.  Since it is only hardy in zones 9-10, which translates to south Florida, Joe digs the plant out, cuts it back severely and it winters indoors. There it’s only predator is our Golden Retriever Cody, who likes to nibble on the leaves when he thinks no one is looking.  Lemongrasss has long sharp pale green leaves at the top and a brownish pink bulbous portion at the stem end. It has a mild citrus flavor with a floral aroma. If you don’t grow your own, the best lemongrass (and the cheapest too) is found in Asian markets. To use, cut off the woody tops with a chef’s knife and peel off the first tough layer of the bulb end. Now it is ready to slice into rounds or as in this recipe, grated with a microplane.

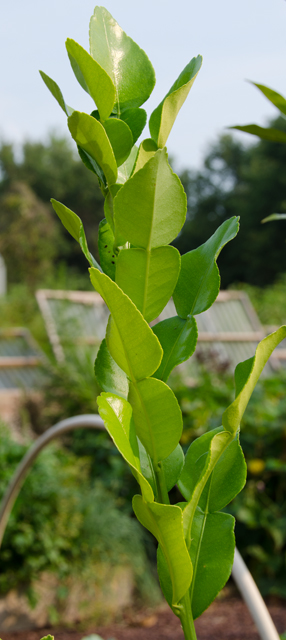
Our Kaffir lime trees are also summer visitors to the garden. The leaf of the kaffir lime tree has a sweet citrusy fragrance and is a key ingredient in Thai cooking. Kaffir lime leaves are not to be confused with the leaves from a standard lime tree. The leaf of the kaffir lime looks like a double spade.  It is thick and glossy on top with a matte underside and a tough spine in the middle. When using in recipes they can either be used whole, seasoning a soup or stew or chopped very finely, as in this salad. If you are chopping it up, remove the spine first. Fresh and dried leaves are available, only use fresh leaves in this salad.

Bring a large pot of generously salted water to a rolling boil. Cook each type of bean you are using separately, the thin filet beans will only take about 2 minutes, larger beans take longer. I use a large chopstick to make sure all the beans are submerged in the water and I removed the beans as the batches were done with a Chinese strainer or spider as it is also known. This allows you to remove more beans with one scoop.  Transfer the cooked beans to a bowl filled with ice water. Cool, drain and pat dry so the beans will absorb more of the dressing.

Next, the shallot is cooked until tender and the aromatics, ginger, lemongrass, garlic and coriander, are added. Transfer the shallot mixture to a large bowl that will be large enough to toss the beans. I wasn’t quite sure why you would need to sauté the already roasted peanuts, but they pick up the residual flavor from the shallot mixture and take on a toasty fragrance. Kaffir lime leaves, lime zest and juice, sugar, salt and oil are whisked into the shallot mixture. The kaffir lime leaves must be fresh and must be sliced as thinly as possible in this salad. If you don’t have access to them, don’t let that stop you from making this recipe, just add a little more regular lime peel and juice. The final step is to add the beans, toasted peanuts and cilantro to the large bowl, toss the beans in the dressing and season everything again with salt and pepper. The final dish is garnished with chopped peanuts and more cilantro.


Lemongrass plant does very well in the garden in summer but will be brought in before the first frost.
Cross section of a lemongrass stalk.
Kaffir lime tree with double spaded leaves.


Mixed Beans with Peanuts, Ginger and Lime

from Bon Appetit

Serves six

Ingredients

  • 2lb. assorted snap beans, green, wax, filet, Romano etc.
  • ½t kosher salt plus additional
  • 5T olive oil, divided
  • 1/3c finely chopped shallot
  • 1 1″ piece ginger, peeled and finely grated
  • 1 lemongrass stalk, tough outer layers removed, finely grated on a Microplane
  • 2 garlic cloves, finely grated
  • ½t ground coriander
  • Freshly ground black pepper
  • 1/3c roasted salted peanuts
  • 3 kaffir lime leaves, very finely chopped
  • 1t finely grated lime zest
  • 3T fresh lime juice
  • ¼t sugar
  • 1/3c packed cilantro leaves with tender stems, plus more for serving

Directions

  1. Working in batches by type, cook beans in a large pot of boiling salted water until crisp tender, 4-5 minutes per batch. Transfer with a strainer to a large bowl of ice water. Cool, drain and pat dry.
  2. Heat 1T oil in a small skillet over medium heat and cook shallot, stirring occasionally under tender, about 3 minutes. Add ginger, lemongrass, garlic and coriander and cook until very fragrant, about 1 minute. Transfer  to a large bowl and season with salt and pepper.
  3. Heat 1T oil in same skillet over medium high. Cook peanuts, tossing often until golden brown and fragrant, about 2 minutes. Transfer to paper towels; let cool, then coarsely chop. Set aside 1T peanut for final presentation.
  4. Whisk kaffir lime leaves, lime zest, lime juice, sugar, ½t salt and remaining 3T oil into shallot mixture. Add beans, remaining peanuts, and 1/3c cilantro and toss to coat; season with salt and pepper. Serve topped with more cilantro and reserved peanuts.

DSC_4198a


September 1, 2015 Mixed Bean Salad

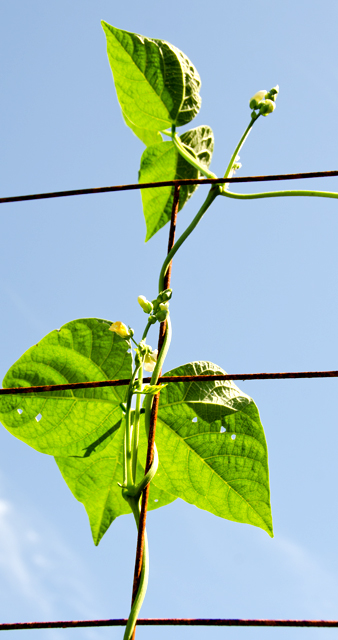
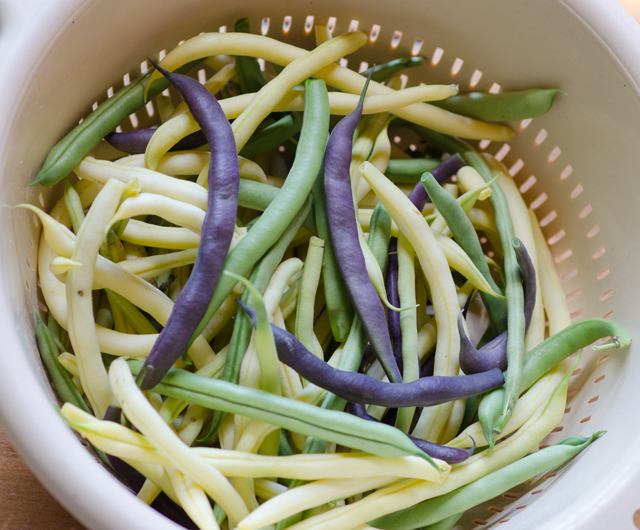
DSC_4130aString or snap beans are in season from mid summer to early autumn and we have had a steady stream of them since the middle of July. Joe grows both pole and bush varieties.  Pole bean plants fare best when they are given support to grow, like a trellis or a teepee while bush beans grow on their own without added support. The bush beans were the first to produce, followed by the later maturing pole beans and now the bush beans are producing again. The crop this year has been quite successful and at times, overwhelming. I froze quart bags of blanched beans for fall and winter days when I will miss being able to pick them fresh. I even pickled a few jars of the very slim and straight filet beans.

In the cooler months we serve them hot, simply seasoned with garlic and thyme, but in the summer I like to serve them along side grilled vegetables in a cold salad. My latest inspiration, Mixed Bean Salad  came from Yotam Ottolenghi and Sami Tamimi’s cookbook, Jerusalem. Jerusalem won the IACP cookbook of the year in 2013 and was the 2013 James Beard award winner for the best international cookbook. The recipes are very approachable, not too “cheffy” and introduces the reader to the vibrant multicultural cuisine of that city.

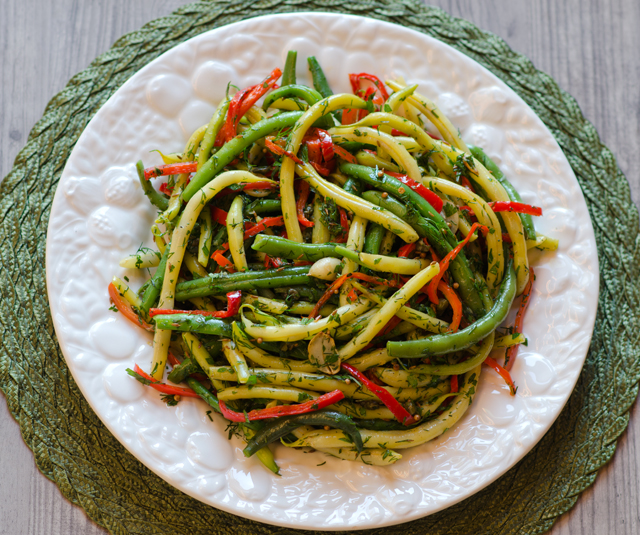
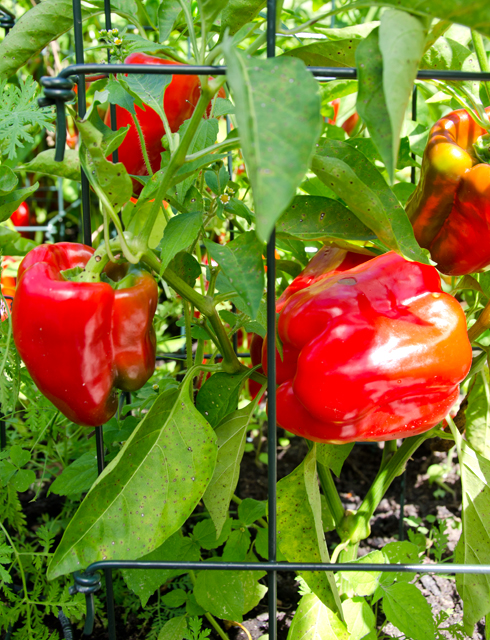
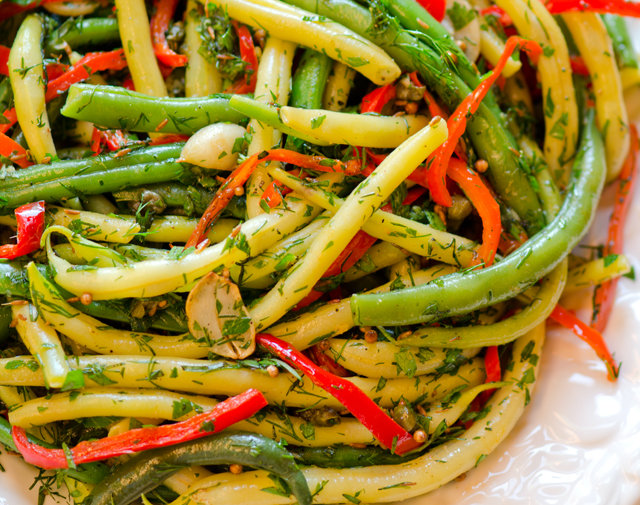
The “mixed” in the mixed bean salad refers to the combination of green and yellow beans paired with red pepper strips. Mr Ottolenghi likes yellow beans for their tenderness and the look they bring to the dish.  This is the best time of year to find them at the farmers markets and we have no shortage here. If you are making this and yellow bean are not available, substitute all green beans.

In his introduction to the recipe, Mr Ottolenghi states that string beans are symbolic of the Jewish New Year but he didn’t indicate how, so I did a little research of my own. Beans are mentioned in the Talmud as “ruviah” and are symbolic because their Hebrew name sounds like the Hebrew “to increase” and indicates a desire for increased blessings in the new year. Reminds me of the symbolism of foods associated with Chinese New Year.

Begin the recipe by blanching the beans until tender crisp. Look for beans that are relatively the same size in diameter so they will cook in the same amount of time. If you are not sure if the beans are ready, test one for doneness before draining the pot. Roast red pepper strips that have been tossed in olive oil until they are tender. They make a beautiful contrast to the green and yellow beans.  Next step are the aromatics, lightly toasted garlic, then capers that bring a salty element and their own unique texture. Rinse the capers well and dry them, careful when you add them to the oil, they will spit, so you might want to use a spatter screen. Cumin and coriander seeds are bloomed in the olive oil to best bring out their aromas and flavor.   Pour the warm dressing over the beans and pepper strips and toss. Green onions, herbs, lemon peel, salt and pepper are the next addition to the dish.

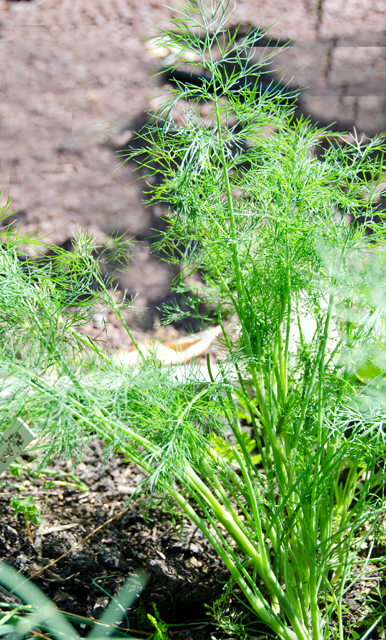
The original recipe calls for 2/3 cup chervil, not an easy or common ingredient for the home chef.  I have never seen it sold in the supermarket or even at our local farmers market for that matter.  We have an abundance of it that comes up from seed in the early spring and bolts as soon as the weather gets hot.  He suggests a substitute combination that everyone has access to, dill and parsley.

I will not mislead you, this is not a salad you can whip together in 15 minutes, but it is certainly worth making. Step one for me is a trip to the garden for beans, peppers and herbs.  It is very important for your ingredients to be “mis en place” ready to go so the warm dressing will thoroughly season the beans and peppers. I have had my cookbook only two weeks and I have made this salad twice and plan on making it again for a Labor Day picnic. I think that constitutes a winning recipe.

DSC_4114a

DSC_4125a

Dill in the garden.
Dill in the garden.


Mixed Bean Salad

From the Jerusalem Cookbook

Ingredients

  • 1¼ lbs. mixed green and yellow beans
  • 2 medium sweet red peppers, cut lengthwise into ¼ inch strips
  • 4T olive oil-1T for the peppers, 3T for the salad
  • 3 cloves garlic, thinly sliced
  • 6T capers, drained, rinsed and patted dry
  • 1t cumin seed
  • 2t coriander seed
  • 4 green onions, thinly sliced
  • 1/3 c each, roughly chopped tarragon, dill and shredded parsley.
  • Grated zest of one lemon
  • Kosher salt and freshly ground pepper

DSC_4111a

Directions

  1. Preheat the oven to 450°F.
  2. Bring a large pot of lightly salted water to a boil. Add the beans to the pot and cook for 4-5 minutes, take a bean out at this point to check doneness. It should be cooked through but still be “toothsome”. When done, immediately drain in a colander and refresh the beans with very cold water. Drain well, pat them dry with a towel and place in a large bowl.
  3. Toss the pepper strips with a teaspoon of olive oil, then spread them out on a baking sheet. Bake for five minutes or until tender. Add pepper strips to the bowl of cooked beans.
  4. Heat the remaining 3 tablespoon olive oil in a small saucepan. Add the garlic and cook for 30 seconds; add the capers (be on guard for spatters) and fry for 15 seconds. Add the cumin and coriander seeds and continue frying for another 15 seconds. The garlic slices should be golden by now. Remove pan from the heat and pour this over the bowl of beans and pepper strips. Toss and add the green onions, herbs, lemon zest, salt and pepper to taste.
  5. You may serve immediately or refrigerate up to one day. Just remember to bring the salad back to room temperature before serving.

DSC_4134a


August 20, 2015 Cucumber, Basil and Peanut Salad

DSC_4048aThese days Joe is bringing in more cucumbers than I know what to do with them. I’m really not complaining, the season is short and I am using them in as many salads and cold soups as I can find recipes. Native to India, cucumbers require 70°F plus soil and air temperatures to grow but have a relatively short time from sowing to harvest. He has had great success growing them in the greenhouse that is situated in the garden. That environment provides just slightly warmer temperatures.
Since cucumbers are 96% water they are happiest when watered on a consistent basis. A well watered cucumber vine will produce the sweetest fruit. We stick with two varieties that produce well, Persian and Bush Champion. Persian cucumbers are small, about 6 inches long and 3/4 inch diameter with smooth edible skin and undeveloped seeds. They are the perfect size for pickling, if that is your inclination. Bush Champions are a bush variety that take one third of the space and are also suitable for containers.

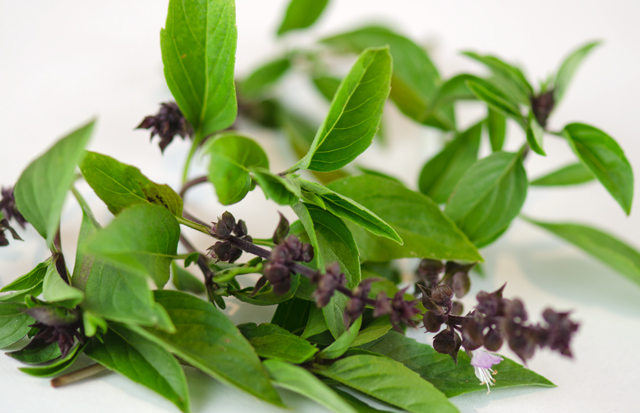
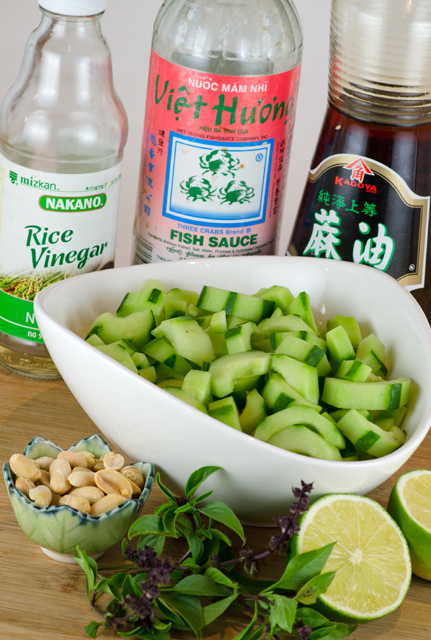
One of my all time favorite cucumber salads to make is a Thai cucumber salad.  Light and crunchy, it is quick and easy to make, combining sweet, spicy and tangy flavors. The dressing draws most of it’s ingredients from the Asian pantry. Seasoned rice vinegar is either made from sake or by adding salt and sugar to regular white rice vinegar and is an easy boost to the sweet, salty and tangy elements of a dish. Plain rice wine vinegar is a bit more versatile and could be substituted. Just remember to adjust the seasonings accordingly. Whether you call it nam pla, nuoc nam or patis, fish sauce is made from the liquid drained from fermented anchovies and is a flavor enhancer like salt or soy sauce. A little goes a long way here. I am partial to the Three Crabs brand that is readily available in Asian markets. Sesame oil was one of the first exotic ingredients to grace our kitchen. Be sure to look for toasted sesame oil. It is dark in color and has a very intense aroma and flavor. Use Thai basil in this salad if you can find it. The beautifully named Siam Queen is one of the varieties we grow. The plant is more compact in apppearance than the standard Italian basil with smaller bright green leaves. There are clusters of purple flowers at the top of the plant. It has an intense licorice aroma and flavor.

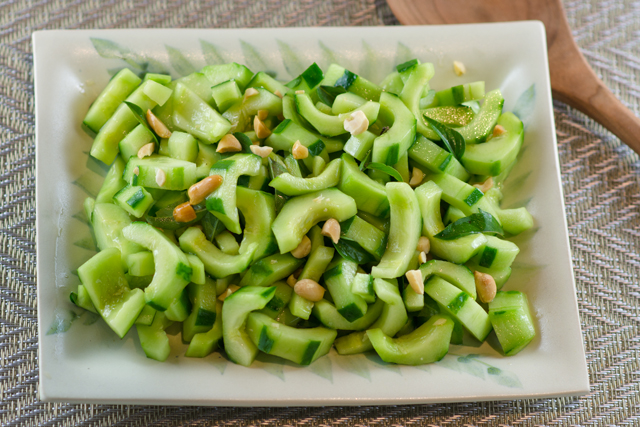
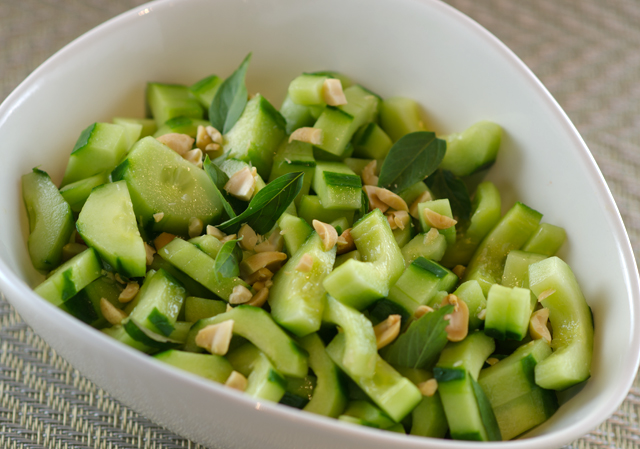
To make the salad, add the rice vinegar, sesame oil, lime juice and fish sauce to a large bowl. Peel about 1½ lbs cucumbers, I leave a little skin on for color contrast. Slice in half lengthwise, scoop out the seeds and slice diagonally into crescents. Peeling the cucumber allows the flavors of the dressing to be absorbed right into the flesh. Add cucumbers, basil and peanuts to the bowl, toss and serve. So simple to make, refreshing Thai cucumber salad is as much a natural next to a grilled satay as it is with your standard picnic fare.
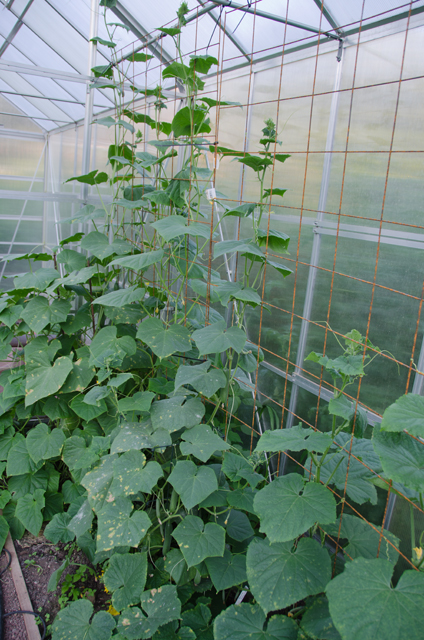
Cucumber vines in the greenhouse.
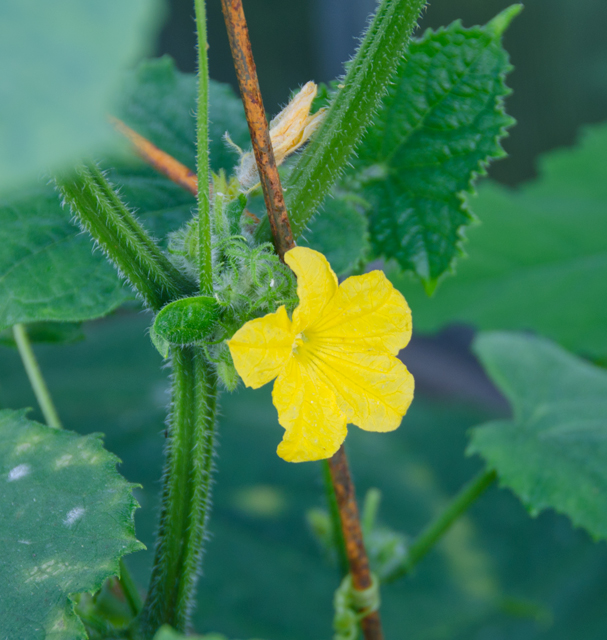
This little flower is the beginning of a cucumber.
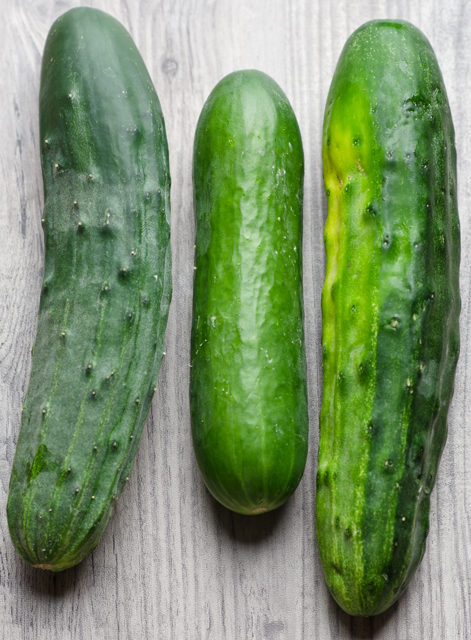
Persian cucumber in the middle, flanked by the spiny Bush Champions.

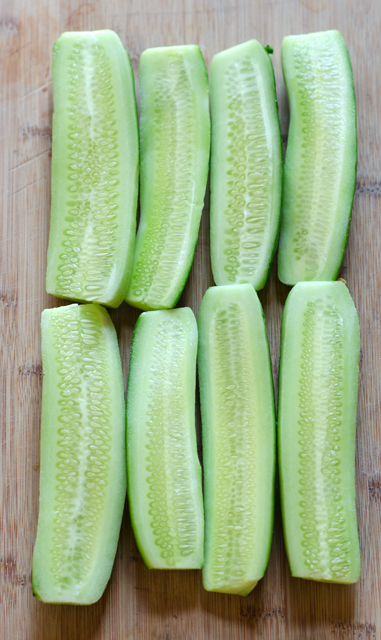
I removed the seeds for this salad but really didn't need to.

Beautiful Siam Queen basil.

DSC_4042a

Cucumber, Basil and Peanut Salad

Adapted from Fine Cooking magazine

Serves six

Ingredients

  • 3T seasoned rice vinegar
  • 1t Asian sesame oil
  • 1t fresh lime juice
  • 1t fish sauce
  • 1½lb cucumbers
  • ¼c torn basil leaves (Thai is preferred)
  • ¼c coarsely chopped salted peanuts

Directions

  1. In a large bowl, mix the first four ingredients.
  2. Peel cucumbers (I like to leave small strips of skin for contrast), slice in half lengthwise. Scoop out the seeds and slice diagonally into ¼ inch crescents.
  3. Add the cucumbers, torn basil and peanuts to the bowl with the vinaigrette, toss and serve.
DSC_4047a