October 8, 2013 Carrot and Beet Slaw with Pistachios and Raisins

DSC_2269a

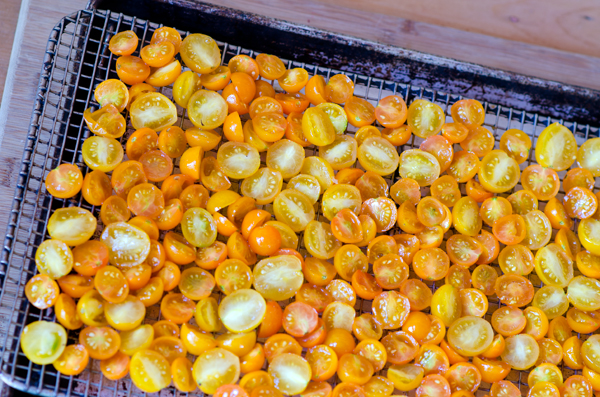
When do tomatoes become more than tomatoes? When they become tomato raisins.

While waiting for mom at the hairdressers, I perused the September issue of Martha Stewart Living magazine.  The article on the Good Things page titled “Extend the Tomato Season” caught my eye. Two of the ideas, tomato confit and crushed tomatoes were both tried and true methods of preservation I had used in the past. Another option, tomato paste, I had made years ago and didn’t have the time or attention to attempt this day.  Ginger candied tomatoes was the recipe that inspired me.  For years I have made oven dried and sun dried tomatoes. What made this recipe unique was the addition of sugar and a little ginger before the drying process. After a quick pick, I rinsed and halved the tomatoes with a small serrated knife, which makes for a neater cut.  In a large bowl I gently tossed the tomatoes with about 1/2t ginger and since Sun Gold tomatoes are already quite sweet, just a light sprinkling of sugar  I placed the tomatoes on a cooling rack, cut side up over a baking sheet. The tomatoes were dried at a low setting, 180°F in convection mode until appropriately shriveled, in my case, 3 1/2 hours, I checked every half hour or so and rotated the sheet occasionally. I was very pleased with the results. Chewy, sweet, but not too sweet and a bit gingery.

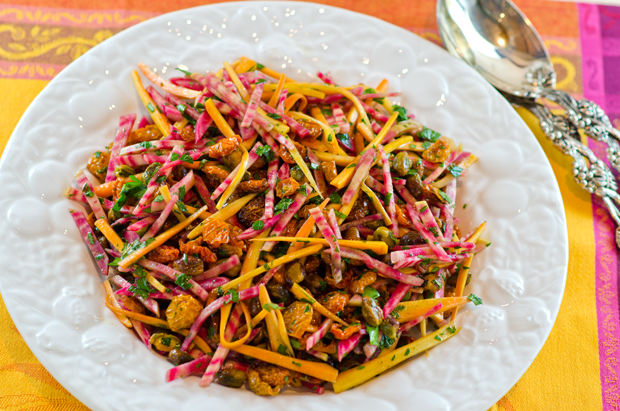
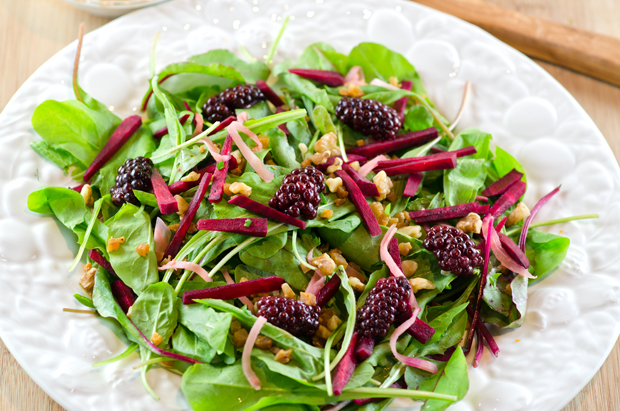
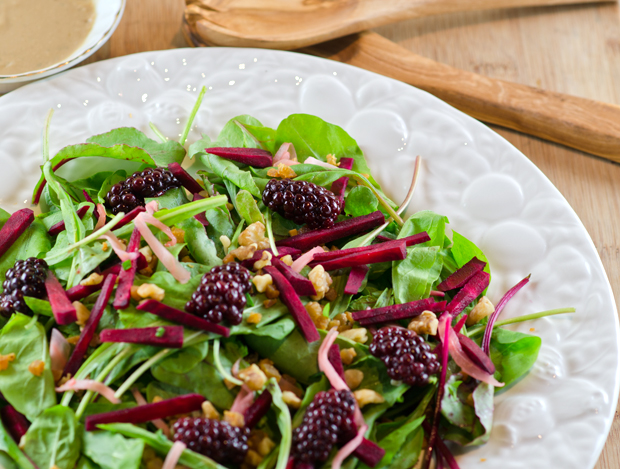
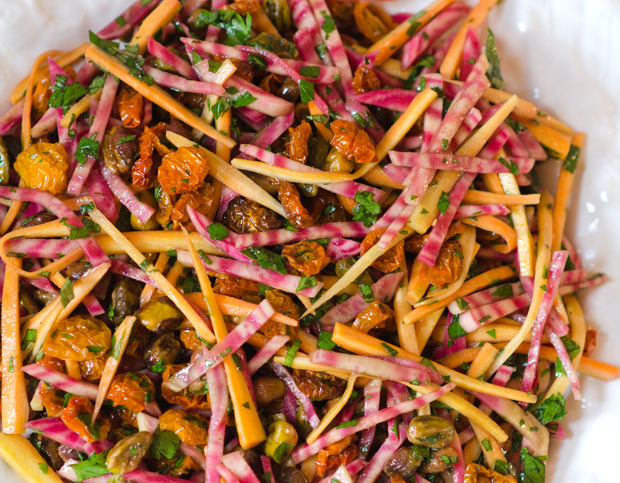
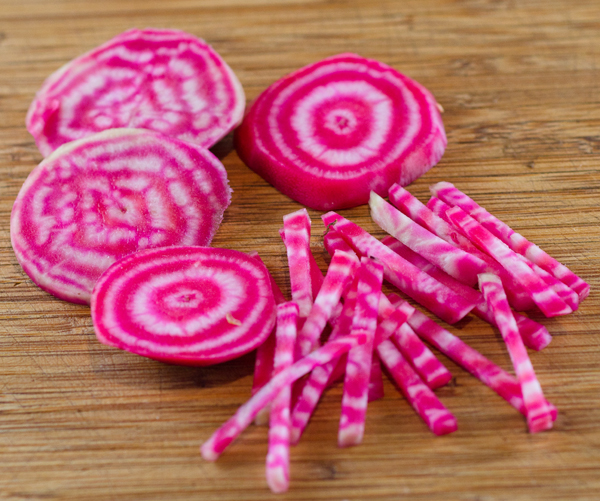
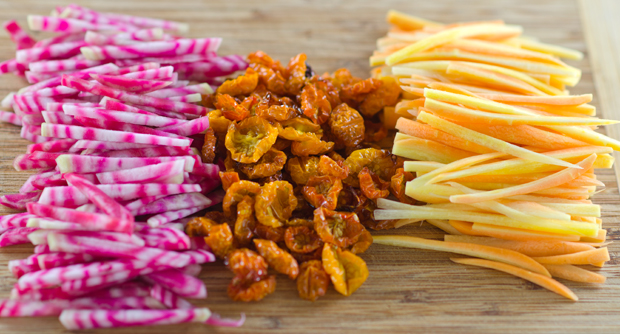
Now, how to use them? September’s issue of Bon Appetit supplied the answer. September’s issue featured restaurant and drinks editor, Andrew Knowlton’s Hot 10 list of America’s best new restaurants. Ava Gene’s a trattoria in Portland Oregon is a champion of what they call “green thumb cuisine”. In addition to hearty dishes like lamb ragu with pasta and wood grilled pork they offer a flavorful Giardini “gardens” section in their menu. One of their recipes, colorful carrot and beet slaw would use produce I had just harvested from the garden. This recipe provided a way to showcase colorful Chiogga beets also referred to as Candy Cane or Bulls Eye beets.  The pink and white stripes that often bleed and fade out when cooked would stay nice and bright when julienned and raw. I julienned the beets and carrots by hand but a julienne cutter on a mandoline or food processor would speed up the process. Shredding the vegetables on a box grater would give the slaw a more rustic appearance. I used pistachios since I already had them on hand but walnuts or hazelnuts would be a good substitute. I noticed that the original recipe on the Ava Gene menu, celeriac was also included. That would make an interesting addition or even julienned baby turnips or kohlrabi.  My tomato raisins worked perfectly in this recipe, adding their own special character, giving just a hint of ginger to the dish. The slaw has a pleasant balance of sweetness, a little heat from the red pepper flakes and acidity from the lemon juice and vinegar.

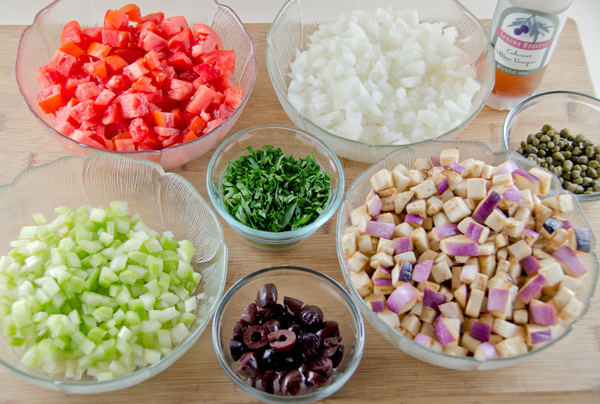
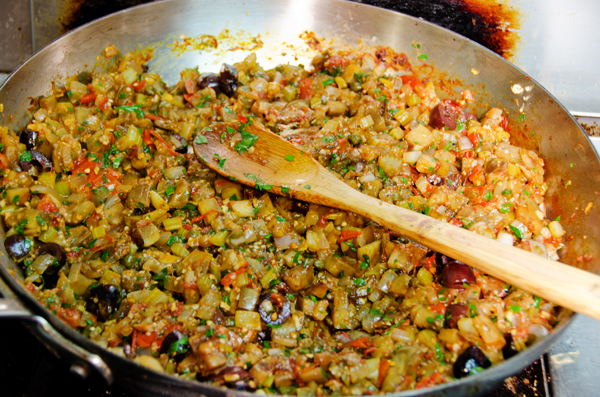
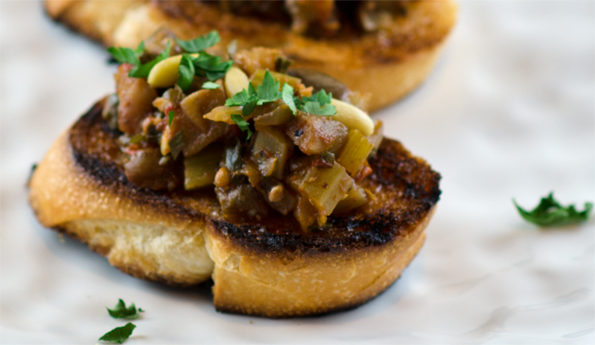
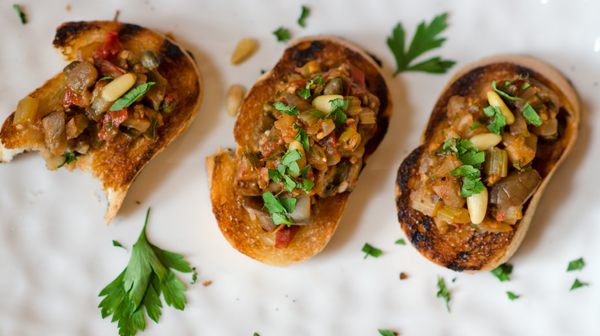
Now what to do with the other bag of to-ma-sins? Another recipe in the September issue from the restaurant Fat Rice, calls for a half cup of golden raisins. Hmmm….

DSC_2214a
Sun Gold tomatoes are placed cut side up on a rack over a baking sheet.
DSC_2251a
Chiogga beets are an interesting and colorful addition to this dish.
DSC_2259a
Julienned beets and carrots along with my “tomasins”, ready to add to the slaw. They really do look like golden raisins!


Carrot and Beet Slaw with Pistachios and Raisins

Ava Gene’s, Portland Oregon one of Bon Appetit magazine’s “Hot Ten”

Ingredients

  • 3/4c salted raw pistachios
  • 2 garlic cloves crushed
  • 1/4c white wine or rice vinegar
  • 1lb carrots, peeled and julienned
  • 1lb beets, peeled and julienned
  • 1/2c fresh flat leafed parsley leaves
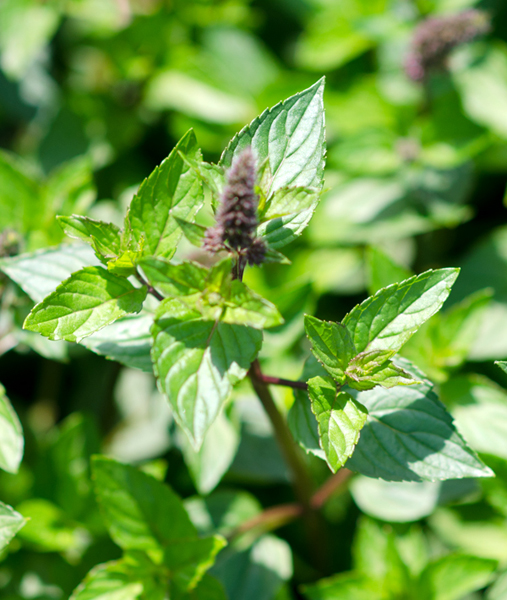
  • 1T chopped fresh mint leaves
  • 3T fresh lemon juice
  • 1/4t crushed red pepper flakes
  • Kosher salt and fresh ground pepper
  • 1/3c extra virgin olive oil

Directions

  1. Preheat oven to 375°F. Spread pistachios out on a small rimmed baking sheet; toast stirring occasionally until golden brown, 6-8 minutes. Let the pistachios cool then coarsely chop them.
  2. Combine garlic, raisins and vinegar in a large enough bowl to hold the salad, let the mixture set for one hour.
  3. Remove the garlic from the raisin mixture, discard the garlic. Add carrots, beets and pistachios, parsley, mint. lemon juice and red pepper flakes. Season with salt and freshly ground pepper. Toss to combine. Add oil and toss gently. Taste and correct seasonings as needed.

DSC_2267a

September 14, 2013 Yellow Tomato Soup

DSC_2187a


The tomatoes in our garden come in every color of the rainbow. We are growing red ones like the Brandywine, Big Mama and Bloody Butcher, orange ones like the Mandarin, Amana and Sun Gold, Green Zebras that remain green when ripe, and even a tomato that is named Rainbow, it has a yellowish orange flesh with streaks of bright red.

One of the most interesting tomatoes we grow is the Garden Peach. True to it’s name, the fruits are small, about 3 ounces, yellow in color with a peachy pink blush when ripe. The skin of the Garden Peach is light and fuzzy, reminiscent of a peach. That slight blush sometimes carries over to the tomatoes’ flesh. They are an heirloom tomato, more than fifty years old and an indeterminate variety, Garden Peaches will produce fruit throughout the tomato season. Their simple sweet flavor is a contrast to the bright acidity in red varieties.

Garden Peach is crack resistant and stores well. It produces fruit up to the first frost and many gardeners bring in the last of their crop to ripen on kitchen counter tops. Maybe I’ll remember to do that this year!

Many of our tomato plants have been quite prolific this year. I have been roasting and freezing countless bags of tomatoes to be made into sauces, chilis and soups. We will enjoy them when the weather turns cold and we are missing the vibrant flavor that only a fresh tomato can bring. Since we have a bumper crop of Garden Peaches along with other yellow varietals, I decided to make some of  them into a soup. The sweetness of the yellow tomatoes contrasts nicely with the smoky bacon and the spiciness of the chiles in adobo sauce. The addition of heavy cream is good, but not really necessary. You can substitute half and half or low fat sour cream with good results. It will last several days in the refrigerator but I made several batches to freeze so that we can enjoy this delicious soup on chilly autumn evenings.

DSC_2196a-copy


Yellow Tomato Soup

Makes 6-8 cups

Ingredients

  • 2 1/2 c chopped onion
  • 6 bacon slices, chopped
  • 6-8 c chopped yellow tomatoes
  • 3 cloves garlic, minced
  • 1/2 c dry Sherry
  • 3 c chicken stock or low sodium chicken broth
  • 1-2 t minced canned chipotle chiles
  • 1 t dried oregano
  • 1/2 c cup heavy cream (if desired) you can substitute half and half or low fat sour cream

Directions

  1. Sauté onion and bacon in a heavy large pot over medium-high heat until onion is tender and beginning to brown, about 12-15 minutes.
  2. Add tomatoes and garlic and simmer until tomatoes are tender and juicy, stirring occasionally, about 20 minutes. Add sherry and simmer another 5 minutes.
  3. Add stock and simmer until mixture is reduced to about 6 cups, 15 minutes or so.
  4. Stir in chipotle chiles and dried oregano. Working in batches, puree soup in blender.
  5. If freezing, pack soup in freezer containers, refrigerate until thoroughly chilled. Then transfer to freezer. If serving immediately, return to pot and stir until heated through, add cream if desired.
  6. Season to taste with salt and pepper and serve.
DSC_2079a
The Garden Peach variety is yellow with a pinkish peach blush.
DSC_2087a
I used about 8 cups of yellow tomatoes in this recipe.
DSC_2210a
The sweet flavor of yellow tomatoes contrasts nicely with smoky bacon and spicy chipotles in adobo.

DSC_2206a

September 8, 2013 Anise Hyssop Ice Cream

DSC_2170a


Herbal ice creams are a delicious way to capture the flavors of summer. I can’t let the season go by without making one of my favorite treats, sweet licorice flavored anise hyssop ice cream.

Anise hyssop is indigenous to North America and has been used for many years by Native Americans as a medicinal cure for everything from bad breath to a “dispirited heart”. The name can be misleading, it doesn’t belong to the same genus as anise or hyssop, though it smells like anise and it’s flower and stem are similar to hyssop. Anise hyssop belongs to the mint family, it’s botanical name is Agastache foeniculum and is sometimes referred to as licorice mint.

The plant can grow to 3 feet tall with beautiful blue-violet 4 to 6 inch spikes reminiscent of the flowers of a lavender plant. We have been growing anise hyssop for many years. The plants are a colorful addition to our herb garden and the blossoms attract both butterflies and bees. The plants die back in the winter, some plants will come back in the spring while others reseed themselves. The leaves are surprisingly sweet, the sweetest leaves are the ones closest to the blossoms.

The flowers and stems can be used in various infusions. Try infusing a simple syrup with anise hyssop for poaching summer fruit or in milk or cream for a crème brulee or a custard sauce. It’s blossoms can add a touch of sweetness to a fruit salad. It makes a tea with natural sweetness either hot or iced.  I have always used anise hyssop on it’s own in making ice cream but it could be combined with summer fruits like apricots, nectarines or peaches for a refreshing treat.   As with all herbal ice creams, the milk and some of the cream are first heated and then the anise hyssop sprigs are pushed under the surface of the liquid. The milk and cream mixture infuse off heat, an hour is sufficient to achieve the fullest flavor. I chose to make custard style ice cream that requires tempering eggs and produces a richer ice cream. An easier choice would be a Philadelphia style ice cream that is just made with cream and milk.

Anise Hyssop Ice Cream

Made with the Fine Cooking Recipe Maker

Makes one quart

Ingredients

  • 2c heavy cream
  • 1c whole milk
  • 3/4c granulated sugar
  • Table salt
  • 6 4-inch anise hyssop sprigs, with flower buds if possible
  • 5 large egg yolks
  • 1t vanilla extract or vanilla paste

DSC_2163a

Directions

  1. In a medium saucepan, mix 1 cup of the cream with the milk, sugar and a pinch of salt.  Warm the cream mixture over medium-high heat, stir occasionally, until the sugar dissolves and tiny bubbles begin to form around the edge of the pan, 4-5 minutes.
  2. Stir anise hyssop sprigs into warmed mixture. Cover and remove the pan from the heat and let sit for 1 hour. After 1 hour, taste and let sit longer if you desire a stronger flavor.
  3. Prepare an ice bath by filling a large metal bowl with several inches of ice water. Set a smaller metal bowl in the ice water. This will help the custard to cool quickly. Set a fine strainer over the smaller bowl.
  4. Whisk the egg yolks in a medium bowl.
  5. Rewarm the cream mixture over medium high heat until tiny bubbles begin to form around the edges of the pan, 3-4 minutes. In a steady stream, pour half the warm cream mixture into the egg yolks, whisking constantly to prevent the eggs from curdling.
  6. Pour the egg mixture back into the saucepan and cook over low heat. Stir constantly and scrape the bottom of the pan with a heat proof spatula until the custard thickens slightly. The custard will be thick enough to coat a spoon and hold a line drawn through it with a finger. An instant read thermometer will read 175°F to 180°F. It is important to remove the custard immediately from the heat at this point to prevent it from curdling. Immediately strain the custard into the cold cream in the ice bath. Press firmly on the anise hyssop in the strainer with the spatula to extract as much flavor as possible.
  7. Cool the custard to below 70°F by stirring it over the ice bath. Stir the vanilla extract or paste into the cooled custard.
  8. Refrigerate the custard until completely chilled, at least 4 hours or overnight. Freeze the custard in your ice cream maker according to manufacturer’s directions. Transfer the ice cream to an air-tight container for 4 hours and up to a week before serving.
DSC_1841a
Infusing the milk and cream with anise hyssop leaves and blossoms.
DSC_1823
Both butterflies and bees love anise hyssop!

DSC_1817aDSC_2163a

September 3, 2013 Eggplant Caponata revisited

DSC_2138a


Summer is berry season and each month brings a new arrival. June is time for plump juicy strawberries. July brings succulent raspberries and blueberries. August brings one of my favorite berries, eggplant. A berry? you say. First, the members of the nightshade family, tomatoes, pepper and eggplants to name just a few, are actually fruit, not vegetables. Botanically speaking, fruit are seed bearing structures that develop from the ripened ovaries of flowers. But eggplant are not just any old fruit, they are considered berries because they are indehiscent which means they do not sprout open when ripe. With these technicalities aside, there are two burning questions that most people have when it comes to eggplant; should I salt or not? and are there male and female eggplants?

DSC_2012a
A round up of the varieties of eggplant we grow.


Young eggplants, picked fresh from the garden or purchased at the farmers market will not need salting. They will have thinner skin and fewer seeds. The bitterness originates in the seeds which contains nicotinic alkaloids. Did I mention tobacco is another member of the nightshade family? So the larger the eggplant, the greater the likelihood of it having more seeds. Salting, also known as degorging, is good for drawing out excess liquid from the eggplant so that it doesn’t absorb as much oil in the cooking process, but it is only successful in masking bitterness.

The male vs. female eggplant was a tale that even I fell victim to. I was surprised at the number of websites that propose the theory of male and female eggplants as fact. The story goes that a dash-shaped slit on the bottom of the fruit indicates a female eggplant and a deep round indent indicates a male. The male eggplant reportedly has fewer seeds and is more desirable. It’s debunking time again. Fruit, like eggplants develop from the female flower on the plant but have no sex of their own.

So, how do you choose the best eggplant?  Look for eggplant that have smooth, bright, shiny skin. When you press on the skin it should spring right back. Select eggplant that are heavy for their size, indicating younger fruit. The calyx, the green leaves at the stem end should be fresh and green, not dried out and brown.

Our garden in the month of August yields an abundance of the nightshade family, tomatoes, peppers and eggplants. While our tomato harvest is better than last year, this has proven to be not the best year for eggplants and peppers. I wanted to take advantage of the eggplants we did grow and make one of our favorites, caponata.

I posted a different recipe for caponata last year, this is one from my catering days.  A great room temperature dish, caponata always tastes better the second day, after the flavors had the chance to meld. It is an agro dolce, a sweet and sour dish from Sicily that shows the influence of North African flavors on the region. Serve on grilled baguette slices and garnish with toasted pine nuts and chopped flat leafed parsley.

DSC_2117a


Eggplant Caponata

Serves 6-8 as a side dish

Ingredients

  • 1/3c olive oil
  • 3c diced eggplant
  • 1 1/2c chopped onion
  • 1c thinly sliced celery
  • 2c chopped tomatoes
  • 3T minced garlic
  • 2T tomato paste
  • 1/4c red wine vinegar
  • 1c sliced green or black olives
  • 1/3c capers, well drained
  • 1 or 2 anchovies, drained and chopped
  • 1T sugar
  • 1/2t crushed red pepper flakes
  • 1/2c minced flat leafed parsley
  • Kosher salt and freshly ground black pepper
DSC_2065a
A lot of chopping but the dish comes together quickly after that.

DSC_2069a


Directions

  1. Heat the olive oil in a large skillet. Add the eggplant and sauté until somewhat soft, 3-4 minutes. Add the onions, celery, tomatoes and garlic and cook for another 10-12 minutes, stirring occasionally.
  2. Remove from the heat, add the remaining ingredients and toss lightly. Refrigerate until ready to serve, preferably the next day. Bring to room temperature before serving.

DSC_2131a

DSC_2122aDSC_2145a-copy

August 27, 2013 Chocolate Mint Sorbet

DSC_2055a

When given a choice between ice cream and sorbet, nine times out of ten I am going to opt for ice cream. But when the frozen treat is made with rich dense chocolate and cool refreshing mint I will be the first to make my choice sorbet.

Sorbet, by definition is a frozen dessert that contains no dairy or eggs. Most of the time it is made with a fruit base, but in this recipe, chocolate, in the form of semi or bittersweet chunks and cocoa powder bring an unexpected creamy smoothness to the frozen treat.

Making sorbet is relatively easy. It starts with a syrup that combines the simplest of ingredients, granulated sugar and water. The typical one to one ratio of many simple syrups is increased in this recipe to more than three to one (water to chocolate) because of the addition of sweetened chocolate to the syrup. If you chose to use unsweetened chocolate the syrup should be sweeter. The two are brought to a boil, taken off the heat and infused with sprigs of mint.

DSC_1879a
Mint with blossoms.


Mint is one of the easiest herbs to grow and we have many varieties in our garden. It is a perennial (meaning it will come up every year) and can quickly become invasive. Either choose an area in the garden where you don’t mind if it spreads or plant mint in containers. I chose spearmint for my sorbet, it has a milder, sweeter flavor than the more robust flavor of peppermint. Mint can be quite intense so taste your syrup after it has steeped a bit. A half hour is usually my stopping point. The mint should bring a refreshing flavor and never overwhelm the mixture. Strain the simple syrup, I like to do this several times to ensure no particles of mint are left behind. Return the syrup to a simmer add the chopped chocolate and cocoa powder and whisk until smooth. Choose a good quality chocolate for your sorbet since it will be the star of the dish. In a 2008 taste test with a large selection of brands, Cooks Illustrated recommended both Callebaut and Ghirardelli, the later having a wider distribution in many supermarkets.

Whisk the mixture until smooth. Refrigerate until thoroughly chilled, overnight works best. Be sure to stir the mixture before adding it to the ice cream maker.  If you don’t own an ice cream maker you can still make this dessert. Place the mixture in a shallow wide stainless steel pan and place in the freezer for several hours until set. Remove the pan from the freezer and puree the almost frozen mixture in a food processor. Return this mixture to the pan, cover and freeze several hours before serving. The texture will be more grainy, like a granita, but just as delicious. Let the sorbet stand at room temperature for about ten minutes to soften before scooping. So when you crave something cold and minty with some satisfying richness, try this delicious treat.

DSC_2052a

Chocolate Mint Sorbet

Makes 5 cups

Ingredients

  • 3/4c granulated sugar
  • 3c water
  • 6 4-inch sprigs of peppermint, spearmint or chocolate mint
  • 6 oz premium bittersweet or semisweet chocolate, chopped
  • 1/2c unsweetened cocoa powder

Directions

  1. Bring the sugar and water to a boil in a medium saucepan. Add the mint, cover, and remove from the heat and steep for 30 minutes. Strain and return the syrup to the saucepan.
  2. Return the syrup to a simmer. Add the chocolate and cocoa, remove the pan from the heat and whisk until smooth. Refrigerate until thoroughly chilled. Freeze in an ice cream maker according to manufacturer’s directions.
DSC_2037a
Infusing mint into the simple syrup.
DSC_1880a
After straining the mixture, add both chocolates and whisk thoroughly.

DSC_2057a

August 26, 2013 Curried Yellow Squash Soup

DSC_2026a

It’s around this time of year when the output of garden produce really starts to sneak up on us. The mounting pile of zucchini/yellow squash were calling out to me again. Joe was “looking forward” (not!) to yet another trip to the dentist. Not certain of the state his mouth would be in when he got home, I decided to make a curried summer squash soup. No chewing required!

Curried summer squash soup gets it’s heat from Thai curry paste. A paste, as opposed to a curry powder is made up of mostly wet ingredients. A Thai cookbook I have lists fourteen different recipes for curry paste. Green curry paste is a combination of aromatic herbs such as lemongrass, galangal, kaffir lime and gets its color from fresh green chilis. Red chili paste uses dried red chilis.  We grow many of the uniquely Thai ingredients and someday should make my own but I decided on the convenience of a jarred variety.

Since green curry paste is considered the hottest, add it to your own taste. Start with a half teaspoon and go from there. We like a little heat so I used a whole tablespoon.

This recipe is very simple. I peeled the bumpy skin and removed the seeds from the squash.  Just a little chopping, sautéing and into the blender for a spin. It’s equally good hot or cold. The mild nutty flavor of the squash pairs nicely with the heat of the curry paste. Top with a dollop of sour cream and a sprinkling of cilantro for a creamy warming summer taste treat.

DSC_2019a

Curried Yellow Squash Soup

Adapted from a recipe in Bon Appetit

Serves four

Ingredients

  • 3T vegetable oil
  • 4c chopped yellow squash (zucchini would be fine also)
  • 3/4 c chopped onion
  • 1/2t to 1T Thai green curry paste
  • Kosher salt and freshly ground pepper
  • 3 1/2c low sodium chicken broth
  • Sour cream
  • Cilantro sprigs

Directions

  1. In a medium saucepan heat 3T vegetable oil over medium high heat.
  2. Add squash, onion and curry paste. Season with kosher salt and freshly ground pepper to taste. Cook until tender, 8-10 minutes.
  3. Add chicken broth and bring to a boil. Reduce heat and simmer until the squash is tender, 25-30 minutes.
  4. Puree the soup in a blender until smooth. Taste to correct seasonings.
  5. Serve soup warm or cold, topped with sour cream and cilantro sprigs.
DSC_1955a
Summer squash of different sizes.
DSC_1962a
I like to remove the seeds before chopping them.
DSC_1964a
Two large squash made four generous cups of cubed squash.
DSC_1965a
Saute squash and onion in a saucepan.
DSC_1980a
The squash becomes silky smooth in the blender.
DSC_2033a
Delicious warm or cold.


August 22, 2013 Zucchini Lasagna

DSC_1857a

When you grow big zucchini, make zucchini lasagna. In this recipe, zucchini or yellow squash “noodles” replace the usual pasta. I cut the zucchini in half lengthwise first so that I would have a flat surface to work with. A mandoline works best here. In case you didn’t know, a mandoline, also spelled mandolin is a hand operated kitchen tool with adjustable blades that produces uniform slices. They can cost anywhere from about  two hundred dollars for a professional stainless steel style model all the way down to less than twenty dollars for a plastic model. The more expensive models will slice, julienne and waffle cut, the less expensive ones just slice. Whatever model you choose, use the hand/finger guard when you run the food against the blade, believe me, I speak from personal experience.  If you have steady hands and no slicer, use a sharp knife and be sure to use a cutting board to stabilize the squash to ensure even slices. Since zucchini is 95% water it is best to precook it to reduce excess moisture that will end up in your finished dish. Some of the recipes I saw suggested parboiling, sautéing, but I found that grilling worked well for me. My version is totally vegetarian. If you want something more substantial, add ground beef, turkey or sausage to your sauce. Just like regular lasagna, it tastes even better the next day, if it lasts that long!

DSC_1993a


Zucchini Lasagna

Serves four to six

Ingredients

  • 3-4 long zucchini/yellow squash
  • 4 c thick tomato sauce
  • 1 15 oz container of regular or low-fat ricotta cheese
  • 3 lightly beaten eggs
  • 2 T fresh chopped basil
  • 2 T fresh chopped flat leaf parsley
  • 1 t dried oregano
  • Kosher salt and fresh ground pepper to taste
  • 1 ½ c grated Parmesan cheese or other similar grated cheese
  • 1 lb grated mozzarella cheese

Directions

  1. Preheat oven to 350° F. Place baking rack in the lower position.
  2. Cut squash into ¼ inch thick slices, to fit the pan lengthwise, if your squash is shorter, just orient the slices in the opposite direction, just be sure they cover the pan.  You should have enough slices to make three layers.
  3. Heat a grill pan or an outdoor grill to medium high heat. Brush both sides of the slices lightly with olive oil.
  4. Grill squash slices on both sides so that they have grill marks, 3-5 minutes each side. Squash should be cooked but not falling apart.
  5. In a medium bowl, combine the ricotta, eggs, parsley, basil, oregano and a cup of the Parmesan cheese. Reserve the rest for the top layer.
  6. In a 9×13 glass or ceramic dish, spoon a thin layer of sauce on the bottom of the pan.
  7. Place the first layer of squash over the sauce. Spoon a third of the ricotta mixture over the squash. Sprinkle with a third of the mozzarella cheese. Repeat the layers two more times, sauce, “noodles” ricotta, ending with the mozzarella cheese and reserved Parmesan from step four.
  8. Bake for one hour, rotating pan half way through cooking time. Let lasagna rest for at least a half hour before serving.
DSC_1844a
I used my Matfer mandolin slicer, a gift many years ago to get neat uniform slices.
DSC_1976a
Slices should be 1/4″ thick
DSC_1850a
Use the grill or a grill pan to slightly cook the zucchini.
DSC_1998a
Fresh zucchini with tomato sauce, delicious!

DSC_1982a

August 20, 2013 An August Summer Salad

DSC_1807a

That purplish red in your salad mix back in the eighties used to be red cabbage, there’s a good chance now your salad mix is called mesclun and the slightly crunchy burgundy red component is radicchio. Placed side by side, red cabbage and radicchio might look alike with their shiny smooth leaves and tight heads but that is where the similarities end.

Radicchio (pronounced rah DEE kee oh) is a member of chicory family that also includes endive, escarole and frisee. Originally cultivated and imported from the Veneto region of Italy, it is widely grown domestically by both commercial and home gardeners. Once again, we get our seeds from a company, Seeds of Italy. We have grown both the Treviso that produces heads that grow taller, much like a Romaine lettuce and the Verona that produces a rounder more compact head reminiscent of Bibb lettuce.

Our mid summer planting of radicchio will eventually yield tight magenta red heads with bright white ribs when the cooler temperatures of fall arrive. The initial growth is bright green, a little bit fuzzy, already displaying it’s characteristic bitter flavor. A good way of introducing reluctant palates to bitter greens is to pair them with contrasting flavors. Combining bitter greens with sweet, salty and acidic ingredients is a good way of taming their flavor and balancing out the bitterness. Since I needed to thin out both beet greens and radicchio I combined the bitter greens of the radicchio with the milder beet green.

Tangy pickled blackberries were an interesting addition to this salad. A recent recipe for them in Food and Wine magazine intrigued me enough to make a few pints from berries I picked up at the farmers market. I wasn’t sure where I would use them, perhaps with some thick juicy pork chops, but this salad seemed like the perfect opportunity to try them out. The sweet and sharp flavor of the berries contrasted nicely with the radicchio.  Crisply cooked cubes of pancetta provided a fatty and salty contrast.  A little bit of finely julienned pickled ginger and sweet earthy raw beets gave color, texture and yet another flavor element. The final touch, a dressing made with blackberry ginger balsamic vinegar, olive oil and a little Boursin cheese to provide a creamy element. A totally improvised and very flavorful way to use our baby greens.

DSC_1910a
These baby radicchio plants look nothing like the mature plants of the fall.


Radicchio and Beet Green Salad

Serves two

Ingredients

  • 1/2c creamy herb cheese (like Boursin)
  • 2 1/2T balsamic vinegar (I used a blackberry ginger balsamic)
  • 1T water
  • 1/3c extra virgin olive oil
  • 4-5 cups of baby beet and radicchio greens
  • 1/4c diced pancetta, cooked until crispy
  • 1/2c finely julienned raw beets
  • 2T finely julienned pickled ginger
  • 1/4c pickled blackberries (recipe follows) you could also substitute fresh black or blueberries
  • Kosher salt and freshly ground black pepper

Directions

  1. In a small food  processor, pulse the cheese with the vinegar, water and olive oil until the dressing is smooth. Season with salt and freshly ground pepper to taste.
  2. Place beet and radicchio greens on a serving platter, top with julienned beets, pancetta and pickled ginger. Toss with enough dressing to lightly coat, there will be some left over. Sprinkle blackberries on top. Finish with a grind of pepper.

DSC_1921a


Spiced and Pickled Blackberries

Makes 4 1/2 cups

Ingredients

  • 8 black peppercorns
  • 3 allspice berries
  • 2 juniper berries
  • One 1/2-inch piece of ginger, thinly sliced
  • 1 small bay leaf
  • 2c red wine vinegar
  • 2c water
  • 6T sugar
  • 3T kosher salt
  • 1 shallot, quartered lengthwise
  • 1 sprig fresh thyme
  • 18 ounces fresh blackberries

Directions

  1. In a mortar, lightly crush the peppercorns with the allspice, juniper berries, ginger and bay leaf. Transfer to a medium saucepan and add the vinegar, water, sugar, salt, shallot and thyme. Bring just to the boil, stirring to dissolve the sugar and the salt. Let the brine cool completely.
  2. Strain the brine into clean glass jars and add the blackberries. Cover and refrigerate for at least a week before serving.
  3. Pickled blackberries can be refrigerated for up to 3 months.

DSC_1802a


August 13, 2013 Shaved Squash Salad with Sunflower Seeds

DSC_1778a

On rainy days like today that cute little zucchini that you decided to leave on the vine for just one more day will now resemble a baseball bat when you go to the garden to look for it tomorrow. Don’t get me wrong, I love zucchini. I dream of zucchini in the winter and bemoan that I have to pay $1.29 or more a pound for a vegetable I had buckets of only a few months ago. Our current glut of zucchini/yellow squash called for a new recipe. This summer we have gone the usual route and sautéed them with garlic and basil, cut large ones like spaghetti and tossed them with pesto and even breaded and fried them, a throwback, and might I say a delicious one, from Joe’s childhood.

I decided as a change of pace this time to serve zucchini raw or crudo as the Italians say. Which is quite apropos since many of the summer squash varieties we grow are from Italian varieties.  One of the characteristics I appreciate about some Italian varieties is that they grow longer, not fatter if they are left on the vine for a longer period of time. I use a special peeler for the zucchini spaghetti-like noodles that I toss with pesto, this recipe requires nothing fancier than an everyday vegetable peeler. Wash and trim the ends from your squash. Our yellow variety has a bumpy skin that I peel off first and discard. It’s easy to make several flat planes to peel off thin ribbons of squash. Just stop peeling before you get to the seeds.

The recipe called for some torn basil leaves. To intensify the lemon flavor in the salad, I harvested some of our Mrs. Burns’ lemon basil. It was first grown by, surprise, Mrs. Burns in southwest New Mexico as early as the 1920’s. Mrs. Burns’ is an heirloom variety (grown prior to 1940) that is taller and has larger leaves than other lemon basil varieties. Mrs. Burns’ lemon basil is also known for it’s intense lemon fragrance and flavor.

The tender squash ribbons are combined with some creamy and salty feta and summer squashes’ most frequent companion, basil. Though the Mrs. Burns variety has larger leaves that most lemon basil varieties, they are still small enough to add whole leaves to the dish. The salad is tossed with a simple dressing of fresh lemon juice and a flavorful olive oil and topped with crunchy sunflower seeds. The salad is light with a satisfying crunch. It’s quick to assemble and visually pleasing, especially if you use both yellow and green squash. Try other combinations with the ribbons, halved cherry tomatoes and some Parmesan, corn and avocado, the possibilities are limitless. A different and healthy way to use the bounty of the garden at it’s peak.

DSC_1789a

Shaved Summer Squash with Sunflower Seeds

Bon Appetit August 2013

Serves four

Ingredients

  • 2 large or 4 medium zucchini and/or yellow squash
  • 2T fresh lemon juice
  • 2T extra virgin olive oil
  • Kosher salt and freshly ground pepper
  • 1/4 to 1/3c  crumbled feta
  • 1/4 c basil leaves, torn if large, left whole if very small
  • 2T salted, roasted sunflower seeds

Directions

  1. Shave squash lengthwise with a vegetable peeler, stopping before you get to the seeds.
  2. Toss squash ribbons with lemon juice and olive oil. Season with salt and pepper.
  3. Top with feta, basil leaves and sunflower seeds.
DSC_1777a
A sharp vegetable peeler is all you need to make the squash ribbons.
DSC_1796a
Mrs. Burns’ lemon basil
DSC_1790a
Mrs. Burns’ son, Barney, was one of the founders of Native Seeds/SEARCH and introduced this heirloom variety to growers everywhere.

DSC_1785a

August 11, 2013 Roasted Beet, Beet Green and Peach Salad

DSC_1445a

This salad celebrates the beginning of one beet crop, the harvest of another and beautiful local peaches from the farmers market.

In the last several years we have discovered the advantages of succession planting. Succession planting means that with some shorter season crops, like salad greens, beets and carrots, we plant fewer rows at one time but we do multiple plantings throughout the growing season for a continuous harvest. Our most recent planting of beets is the fifth of the season, this works well for us since we are only feeding ourselves, friends and family with the vegetables we grow.

Beet “seeds” are actually a dried fruit or a seed cluster that is made up of 2-6 seeds. So if you only planted one beet seed, you would still get several plants. The first thinning can occur when the seedlings are about 2 inches in height leaving the healthiest plants to mature. Snip the greens with scissors at soil level so as not to disturb the remaining plants. This will allow the remaining plants to gain more water, sunlight and nutrients from the soil. If you don’t thin, you will get all tops (unless that’s what you wanted) and there will not be enough space for the roots to develop into healthy round beets. We do a second thinning when the greens are a little bit larger. Some of those greens can still be used in salads, the larger greens are best sautéed with a little garlic, olive oil, salt and pepper. Beets are in the same family as spinach and chard and the greens share a similar mild flavor.

So what is the difference between red and yellow beets? Beats me! Now could I resist that one? Other than the fact that they don’t “bleed” like red beets, the only other difference is their flavor is a bit milder than the red varieties.

Roasting beets in foil brings out their sweet, earthy flavor and is the easiest and neatest way to cook them. If you are roasting both red and golden beets wrap them separately so the colors won’t bleed together. Scrub your beets well, no need to peel at this point, cut or snap off the top and trim the root end.  Place them on a sheet of heavy foil, top with a splash of olive oil, salt and pepper and maybe a sprig of thyme. My beets are rarely uniform in size, so I start checking them in 45 minutes. Beets that are easily pierced with a tip of a knife are ready. Once the beets are sufficiently cooled, the skins slip off easily.

Both yellow and white fleshed peaches are in season now at our local farmers market.  The standard yellow peach we are all familiar with has deep yellow skin with a vibrant red or pink blush and yellow flesh. White fleshed peaches have grown in popularity since the 1980’s when heartier varieties were developed that could be shipped to markets. The skin of the white peach is pale and pink with pale flesh and in the case of these peaches, tinged with vibrant red. White peaches are sweeter than their tarter yellow counterparts and are best enjoyed fresh, not cooked.

In this salad I combined the last of current beet harvest with the delicate baby greens of our most current planting along with sweet white peaches, creamy goat cheese and some toasted walnuts. The peach flavor was even more enhanced with a vinaigrette made with a peach balsamic vinegar from The Tubby Olive. A white wine vinegar combined with a touch of sweetness from honey or agave sweetener could substitute.

DSC_1460ajpg


Roasted Beet, Beet Green and Peach Salad

Ingredients

  • 3 small beets, roasted and cut into wedges
  • Olive oil, kosher salt and freshly ground pepper
  • 2 peaches, pitted and sliced
  • 6 ounces mixed greens- I used beet thinnings, any combination of baby greens will do
  • 1/4c peach or white wine vinegar
  • 3/4c extra virgin olive oil
  • 1 t  Dijon mustard
  • 1 t honey or agave sweetener, if using white wine vinegar
  • 1/3 to ½ cup blue or goat cheese, crumbled
  • ¼ cup walnuts, toasted and chopped

Directions

  1. Preheat oven to 425° degrees F.
  2. Wash and scrub the beets well.
  3. Place beets on a large piece of aluminum foil, season with a splash of olive oil and a little salt and pepper then fold the foil into a packet. Place the foil on a cookie sheet to catch any drippings and roast 45 minutes or until tender when poked with the tip of a knife. Allow beets to cool 15 minutes. Once cool, peel the skins off using your fingers or a paring knife (they should come off easily).
  4. Slice the beets into wedges and set aside.
  5. In a small bowl, whisk together the vinegar, oil, mustard, and honey until completely combined.
  6. In a large salad bowl, add the mixed greens and toss with desired amount of dressing.
  7. Add the peach slices, roasted beets and toss again.
  8. Serve salad with roasted walnuts and crumbled cheese on top.
DSC_1375a
The most recent harvest of golden beets.
DSC_1496a_edited-1
Beet greens ready to harvest for a salad.
DSC_1420a
Roasted golden beets, the skin peels off quite easily.

DSC_1434a