January 27, 2018 Sausage, Kale and Chickpea Soup

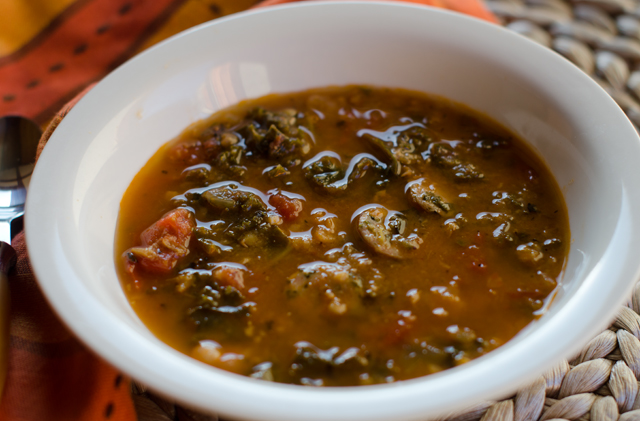
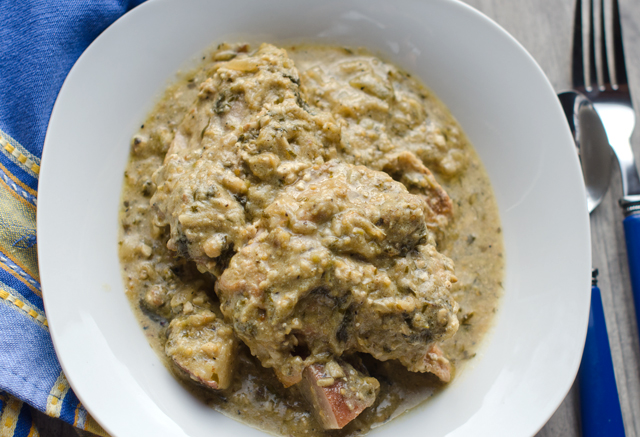
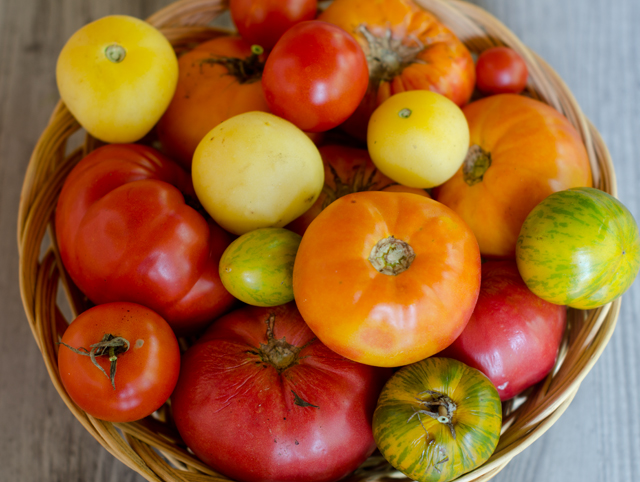
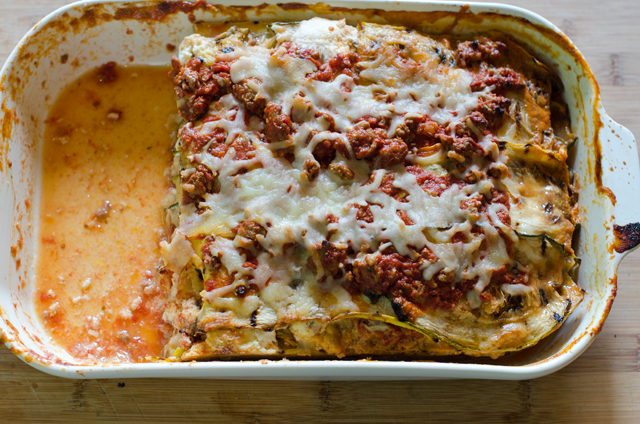
Nothing fancy here, just an easy satisfying soup for a cold winter night. It’s hearty and healthy as well. You can swap out ingredients to suit your own taste. Spicy sausage for the chicken, spinach for kale, cannelini beans for the chickpeas etc. I added the red lentils because they cook quickly and give body to the soup.Make this a day ahead because we all know soups like this taste better the second day. Shred a little Parmesan on top and pair with an arugula and radicchio salad, some crusty bread for a quick satisfying meal.

Sausage, Kale and Chickpea Soup

Serves 4-6

Ingredients

  • 2 T olive oil
  • 1 medium onion, finely chopped
  • 3-4 cloves of garlic, minced
  • ½ t smoked paprika
  • 1 t ground cumin
  • ½ t ground coriander
  • ¼ t sumac
  • 4 c low sodium chicken or vegetable broth
  • 1 (14.5-ounce) can of fire roasted diced tomatoes
  • 1/3 c red lentils
  • ½ t dried thyme
  • 2 bay leaves
  • Kosher salt and freshly ground pepper to taste
  • 1 (14.5-ounce) can chickpeas, drained and rinsed
  • 8 ounces of fully cooked chicken sausage, cut into 1-inch pieces
  • 4-5 cups chopped kale

Directions

  1. In a Dutch oven, heat olive oil over medium high heat. Add the onions and cook, stirring occasionally until soft, about 5 minutes. Add the garlic and spices and cook, stirring occasionally so the garlic doesn’t get brown, about 2 minutes more.
  2. Add broth, diced tomatoes, lentils, thyme, salt and pepper and bring to a boil. Cover the pot and simmer for 15 minutes. Add the chickpeas and cook for 10 more minutes.
  3. Remove the bay leaves and pour 2-3 cups of the soup, depending how thick you want it, into a bowl and purée with a hand blender until smooth. Return the puréed soup to the pot and stir.
  4. Add sausage and kale and simmer until the kale is wilted and the soup is hot.
  5. Ladle soup into bowls and serve.

January 13, 2018 Herbed Ricotta Zucchini Ravioli


Normally I wouldn’t share a recipe for zucchini in the middle of January, but this time I had to make an exception. I am always looking for new ways to prepare for the buckets of zucchini that our garden produces every summer, so I had to try out this recipe I saw on The Chew, “Herby” Ricotta Zucchini Ravioli. In this recipe, very thinly shaved zucchini slices take the place of pasta and are filled with a herbed ricotta filling.

The zucchini could be sliced on a mandoline, but to simplify things, a Y peeler works just as well. Remove the first strip of skin, then a few more slices until you have a flat surface. Make slices down the length of the zucchini until you reach the seedy core. Look for medium length zucchini. I found that strips 5-6 inches long and 1½ inches wide were the right size to accommodate a generous tablespoon of the filling. Place the slices on baking trays lined with paper towels and lightly salt to draw out any excess liquid.

The filling is very simple, ricotta cheese with an egg, grated Parmesan and seasonal herbs. Fresh ricotta is always best but one without preservatives is a good second choice. Drain the ricotta in a fine strainer to draw out excess liquid then squeeze it out in cheesecloth to make it as dry as possible. There aren’t any fresh herbs in the garden on this very cold January day, but Joe has brought some into the conservatory. For this recipe I used parsley, thyme and a little dried oregano. Let the ricotta herb mixture sit for 10 to 15 minutes to allow the flavors to blend.

Now it’s time to make the bundles. Put enough tomato sauce on the bottom of your prepared pan to lightly coat it. Blot any excess liquid from the zucchini. On a clean work surface, lay two strips of zucchini so that they slightly overlap lengthwise. Lay two more noodles on top perpendicular to the first two strips, it should look like a plus sign. Place a generous tablespoon at the intersection where the strips meet. Starting with the bottom strips, fold them over the center, repeat with the second set of strips. Place the ravioli seam side down in the prepared baking dish and repeat with remaining zucchini strips until you fill the baking dish. Top with sauce and sprinkle with shredded mozzarella cheese. Bake for about 25 minutes, take out of the oven and sprinkle on the remaining Parmesan.

The verdict? Joe and I both thought they were delicious and didn’t feel cheated with the zucchini wrapper. As Chew co host Clinton Kelly said,” this is an amazing alternative to pasta.” The calorie savings are pretty amazing too with regular ravioli coming in at 785 calories while the zucchini ravioli is 260 calories! The portion size wasn’t mentioned though. This is not the best dish for the freezer. Zucchini is 95% water so I think this dish would best be served fresh. This is a great meatless dish whether for lunch, dinner or as a side. Pesto would be a good addition to the ricotta filling and a cheesy Alfredo sauce could take the place of the tomato sauce. Can’t wait until summer to try these with zucchini from the garden and my own variations.

Drain the ricotta in a fine mesh sieve for a half hour.


Wrap the ricotta in cheesecloth and squeeze out any excess moisture.

Using a Y peeler, slice the zucchini into long thin strips.
Combine the ricotta, beaten egg, herbs, spices and cheese.
Slightly overlap 2 strips of zucchini and overlap two more strips, forming a plus sign.
Place a generous tablespoon of filling where the strips intersect.
Fold the bottom strips over the filling.
Fold in the other 2 strips to the center to completely enclose the filling.

Add the ravioli, seam side down to a baking dish lightly coated with tomato sauce.
Top with additional sauce.
Top with mozzarella cheese and bake .


Herby Ricotta Zucchini Ravioli

Serves 4

Ingredients

  • Olive oil for greasing the baking dish
  • 2 c ricotta – whole milk or part skim
  • 4-5 medium zucchini
  • 1/3 c plus 2 T grated Parmesan (divided)
  • 1 large egg
  • ¼ c fresh herbs, finely chopped (parsley, thyme, chives etc.)
  • ¼ t freshly grated nutmeg
  • 2 cloves garlic, peeled and finely minced
  • 2 ½ c tomato sauce-homemade or your favorite store brand
  • 1 c shredded mozzarella
  • Basil chiffonade for garnish
  • Kosher salt and freshly ground pepper to taste
  • Cheesecloth – that will be used with the ricotta

Directions

  1. Preheat the oven to 375°F.  Lightly grease a 8×12 baking dish with olive oil.
  2. Place a fine mesh sieve over a medium bowl and add the ricotta. Set aside and allow to sit for 30 minutes.
  3. Using a Y vegetable peeler, slice the zucchini lengthwise into thin strips, avoiding the seedy core. Place strips on a paper towel lined baking sheet, lightly sprinkle with salt and set aside.
  4.  In a medium bowl, add ricotta, 1/3 c Parmesan, egg, chopped herbs, nutmeg and garlic. Season with salt and pepper and stir until fully combined. Set aside for 10 minutes to let the flavors combine.
  5. Blot excess moisture off zucchini slices. On a work space, overlap 2 strips of zucchini and then overlap 2 additional strips on top and across the first 2 strips, forming a cross shape.
  6. Using a spoon or cookie scoop, place a generous tablespoon of the ricotta mixture into the center of the zucchini formation.
  7. Fold the bottom layer of the zucchini strips over the filling and into the center so that they are overlapping. Fold in the other two strips to the center so that the filling is completely enclosed. Repeat process with remaining filling and zucchini.
  8. In prepared baking dish, spread ½ cup sauce evenly over the bottom. Place zucchini seam-side down. Pour remaining sauce over zucchini. Top with remaining Parmesan and mozzarella. Transfer to oven and bake for 20 to 25 minutes, until zucchini is al dente.
  9. Garnish  with basil and serve.

November 18, 2017 Curried Butternut Squash Soup


A reluctant fall has finally settled in and made itself at home in Bucks County. We have experienced our first killing frost, officially ending the growing season. One of the last survivors of the garden is the kale. Cold weather just seems to make it sweeter. I have a sinkful soaking right now, reviving it for tonight’s dinner. We also have a wheelbarrow full of butternut squash in the garage that was harvested before the frost.

Fortunately butternut squash stores well in a cool basement, so I will be able to use it through to next spring. I cube and roast it to add to our green salads, butternut squash lasagna is a new favorite, and of course, soup. Smooth and silky butternut squash soup is a cold weather favorite. I have shared several recipes for butternut squash on this blog but this is the original, the recipe I have been making for over thirty years.

When I first discovered my love for cooking one of the first cookbooks in my library was The Silver Palate cookbook. Silver Palate’s recipe for curried butternut squash soup was a constant on our Thanksgiving table for many years. This velvety rich soup has just the right combination of sweet, tart and spicy and was met with rave reviews from friends and family alike.

Begin the recipe by sautéing chopped onions and curry powder in sweet (unsalted) butter. If your curry powder has been sitting in the back of your spice cabinet for longer than you can remember, it’s time to invest in a new jar. There is no one formulation for curry powder and each variety can have different component spices in differing amounts. For this soup the best choice is sweet curry powder. It will give you a wide range of flavors without too much heat. One large onion yielded the two cups I needed. The covered pan will allow the onions to cook slowly,  give them a stir every five minutes or so to keep them from sticking to the pan.

While the onion is cooking, peel and cube the butternut squash. The medium-large squash I used weighed in at 3.3 lbs and yielded about 6 cups of peeled, cubed squash. Add squash cubes, apple and chicken stock, bring to a boil and cook until squash and apples are tender. Purée the soup in a food processor or blender. Return the soup to the pot, add apple juice or cider and season with salt and pepper. Serve piping hot with a garnish of a tangy freshly grated green apple.

Over the years this recipe this soup has become less of a project for the home cook. Don’t feel like chopping a large unwieldy squash? You can buy peeled and chopped squash at most grocery stores. Does the thought of straining and pouring hot soup into a blender make you just a little nervous? An immersion blender eliminates this step. If you make this soup ahead of time, cool it and store in the fridge.  When you reheat the soup you may thin to thin it out a bit with a little more stock.

The most amazing thing about this recipe is you have made a rich, creamy soup without a drop of cream or milk. Perfect for the holidays or great alongside a sandwich of leftover turkey.

The primary players.
A three pound squash yielded about 6 cups of cubes.
Simmering on the stove top.
I pureed my soup in the food processor but a blender or immersion blender works too.

Curried Butternut Squash Soup

Serves six

Ingredients

  • 4 T unsalted butter
  • 2 c finely chopped onions
  • 4-5 t sweet curry powder
  • 3 lb butternut squash
  • 2 tart apples, peeled, cored and chopped
  • 3 c chicken stock
  • 1 c apple juice or cider.
  • kosher salt and freshly ground pepper to taste
  • 1 shredded unpeeled tart apple (garnish)

Directions

  1.  Melt the butter in a 5 quart Dutch oven. Add chopped onions and curry powder and cook, covered, over low heat until onions are tender, about 25 minutes.
  2. While the onions are cooking peel the squash, scrape out the seeds and chop the flesh into 1″ cubes.
  3. When the onions are tender, pour in the stock, add squash and apples, and bring to a boil. Reduce heat and simmer, partially covered, until squash and apples are very tender, about 25 minutes.
  4. Pour the soup through a strainer, reserving the liquid, and transfer the solids to a bowl of a food processor. Add 1 cup of the cooking stock and process until smooth.
  5. Return the puréed soup to the pot and apple juice and the remaining cooking liquid, about 2 cups, until the soup is of the desired consistency.
  6. Season to taste with salt and pepper, simmer briefly to heat through, and serve immediately, garnished with shredded apple.

October 6, 2017 Dehydrated Asian Pears

In addition to the gardens, we have a small orchard that includes a pear, apple, persimmon, Asian pear and most recently, fig trees. We are usually so busy harvesting from the garden that the orchard is all but forgotten and most of the fruit that falls from the trees goes to the deer. The persimmons are Cody’s special treat, I can honestly say I don’t understand that at all. The Asian pear is the most productive of the trees and this year I wanted to find a different way to use the fruit. Several years ago I canned about a half dozen jars of Asian pear chutney, this time I was looking for something new. My inspiration came at the local farmers market. A local orchard was selling dehydrated apples. Why not Asian pears?

The task at hand now was to pick the pears. Some were accessible by hand, for the pears that were higher up the tree I needed a different approach. I turned to the aptly named fruit picker, a wire basket attached to a long pole. There are bent prongs at the top of the basket that allow you to pull the fruit off the branch. The bottom of the basket is cushioned with foam to prevent the fruit from bruising.

The Ball canning book states that drying food is easy but may require some trial and error. Various factors, the quality of the produce, drying methods, pretreatment techniques and climate can all affect the finished product. So it is necessary to follow the general guidelines and then make the necessary adjustments.

Successful home dehydration depends on three factors: heat, enough to force out moisture but not enough to cook the food, dry air, to absorb the released moisture and air circulation, to move the moisture away.

I started by washing and drying just a few pears, since this was just a test batch. I don’t own a dehydrator, but the lowest heat on our convection oven is 140°F, only 5 degrees higher than the recommended temperature of 135°F. I lined two large half-sheet pans (18″ x 13″) with parchment and began slicing the pears. Since the Asian pears from our tree were relatively small, I wanted to maintain the largest piece possible. I cut the pears in half lengthwise through the core and removed any blemishes. I discovered a melon baller was the right tool to scoop out the core.

To peel or not to peel? That was the next question and for the first batch I decided not to. Another step that is optional is dipping. Dipping the fruit in diluted lemon juice prevents oxidation, which turns the fruit brown. I sliced the fruit with a sharp knife, about an quarter of an inch slice and spaced them evenly on the baking trays. I baked them in the convection oven for 5 hours, rotating the trays half way through the drying process. Then I turned the oven off and left the trays in the oven overnight. I was very pleased with the results. Most of  the pieces look like slices of a mushroom cap and I will continue not peeling them. Asian pears are super sweet and drying them intensifies the sweetness. The consistency should be pliable, not crisp with no moisture pockets. Your time may vary, so check frequently. Great for snacking, store the pear chips in quart bags in the fridge and freezer.

Using the fruit picker.
Success!


Dehydrated Asian Pears

 Makes 70-80 pieces

Ingredients

  • 4-5 Asian pears
  • Dipping solution of 1 c lemon juice to 1 qt water to prevent oxidation  (if desired)

Directions

  1. Place oven racks in upper and lower positions. Preheat convection oven to the lowest setting possible, 140°F in my case.
  2. Line two half sheet pans with parchment paper.
  3. Wash and dry pears, peel if desired. Remove any blemishes. Cut the pears in half lengthwise. Remove the stem and core. I found a melon baller worked well. Slice pears with a mandolin or sharp knife into ¼ inch pieces.
  4. Soak fruit in dipping solution if desired, no longer than 10 minutes. Drain before drying well with paper towels.
  5. Evenly space out the slices on the baking trays and dehydrate for about 5-6 hours. Leave in turned off oven overnight. The slices should be pliable and chewy with no moisture pockets.
  6. Store in plastic quart bags in the refrigerator or freezer.

September 24, 2017 Braised Chicken Thighs with Tomatillo Sauce

When is a tomato not a tomato? When it’s a tomatillo. Yes, their aliases include Mexican husk tomato and “tomato verde” and both tomatillos and tomatoes are members of the nightshade family, but that’s where the similarities end.

Years ago tomatillos were one of those “let’s try this and see” additions to the garden. I certainly wasn’t familiar with the sprawling bushy plants that first produce lots of leaves and little yellow flowers. These flowers eventually turn into bright green papery Chinese lanterns. The tomatillo grows inside this husk and when the fruit is mature, the husk dries out and turns a tan color and the tomatillo splits the husk open. Under that husk they look like hard little green tomatoes. They have a bright fresh flavor, a little citrusy and herbal. I have used them for salsa verde and a  chicken tomatillo soup. This time I wanted to use tomatillos in a sauce for braised chicken thighs. I found my inspiration from Mexican cooking authority, Rick Bayless. His recipe for a braised pork loin in tomatillo sauce could be adapted for chicken so I knew I would be getting the direction I needed.

Start the dish by making the tomatillo sauce or salsa, remember, salsa is the Spanish word for sauce. Turn the broiler to high and move the oven rack to the highest position.Remove the papery husks from the tomatillos and rinse off the sticky residue, that residue is a natural deterrent to insects. In this case it took 28 tomatillos to make a pound. Put them on a foil lined baking sheet, stem side down so they won’t roll around as much. It is a good idea to double up on the baking sheets so they won’t buckle under the broiler from the heat. Add one green jalapeno to the sheet and broil until the tomatillos are roasted, even blackened in spots and very soft. Transfer everything, including the juices to a blender and process until smooth. Set the sauce aside while you brown the chicken.

In a 4-5 quart Dutch oven, brown the chicken pieces. You will need to do this in batches, the chicken should be golden brown, not stewed. Rick instructs that you use either all white meat (breast) or all dark (thighs) because the cooking times will be different, I find that dark meat holds up better to the braising process. After the meat is browned it is removed to a plate. No need to rinse the pot, now it’s time to finish off the sauce.

Return the Dutch oven to medium heat and cook the onion and garlic. Raise the temperature to medium high and add the tomatillo puree. Cook until it is dark green and thickened, this concentrates the flavors of the sauce.  A little water thins out the sauce, Rick feels the addition of stock would make the sauce too rich. Now is the time to add some heavy or sour cream if desired. It lightens up the sauce and I liked it with the chicken. Add some fresh cilantro or the more traditional purslane also known as verdolagas in Mexico. I will definitely try that when purslane makes an appearance in the garden again. Nestle the chicken pieces in the sauce, put the lid on and cook in the oven for thirty minutes.

Potatoes add an earthy element to the dish. Parboil some red potatoes while the chicken is cooking, close to the end of the cooking they are nestled in the sauce between the chicken pieces. Serve the chicken topped with sauce with some potatoes on the side. The end result is a rich, warm satisfying dish and the perfect transition from summer to fall cooking.

Tomatillo on the vine, not ready for picking yet.

Ripe green and purple tomatillos.

It took 28 tomatillos to make a pound.
Roast tomatillos until soft and blackened in spots. Make sure the juices go in the blender too.
Blended tomatillos.
Chicken thighs are browned, then nestled in the tomatillo sauce.

Braised Chicken Thighs in Tomatillo Sauce

Serves 4-6

Ingredients

  • 1 lb fresh tomatillos
  • 1 medium jalapeno pepper
  • Kosher salt and fresh ground pepper
  • 8 medium skin on, bone in chicken thighs, 2½ to 3 lbs
  • 1½ T olive oil
  • 1 medium onion, finely sliced
  • 3 cloves of garlic, peeled and finely chopped’
  • 1/3 c chopped cilantro
  • A little crema or heavy cream if desired
  • 1¼ lbs red skinned potatoes, scrubbed and quartered

Directions

  1. Roast the tomatillos and chile on a baking sheet four inches below a very hot broiler until darkly roasted, even blackened in spots, about 5 minutes. Flip them over and roast on the other side for another 4-5 minutes. Tomatillos should be splotchy black and the chile soft and cooked through.
  2. Cool a bit then transfer everything, including the juices that have accumulated on the tray to a blender. Process until smoothly pureed.
  3. Set a 4-5 quart Dutch oven over medium heat, when the oil is hot add chicken pieces skin side down. It is best to do this in batches, you want the chicken to brown, not stew. Brown the chicken on the first side for 5 minutes, then turn over and brown on the other side. Remove the chicken pieces to a plate and keep warm.
  4. In the same Dutch oven over medium heat, add the onion and cook, stirring regularly, until golden, about 7 minutes. Stir in the garlic and cook a minute longer. Raise the heat to medium heat and when the oil is sizzling, add the tomatillo puree all at once. Stir until it is darker and noticeably thicker. Add 1 ½ cups of water and the cilantro. If you desire a mellower sauce add about a ½ cup cream or sour cream to the sauce. Taste and season with a little salt. Stir the sauce well to combine.
  5. Heat oven to 325°F. Nestle the chicken pieces in the warm sauce, cover the pot and set in the oven. Cook for 30 minutes.
  6. While the chicken is cooking, simmer the potatoes in a pan of salted water to cover until tender, about 10 minutes. Drain and set aside.
  7. When the chicken has cooked for thirty minutes, nestle the cooked potatoes into the sauce around the meat. Recover and cook for another 5-10 minutes.
  8. Serve the chicken and potatoes with the sauce over it.

September 17, 2017 Salmon with Heirloom Tomato Scampi Sauce

It’s still officially summer for another week or so but it’s easy to see that fall is in the air. We haven’t experienced a ninety degree day in several weeks and the days are sadly growing shorter. The tomatoes are making their last gasp, maybe not quite tomato salad worthy but still so much more flavorful than anything a supermarket might have to offer.

This recipe, courtesy of Top Chef season two semi-finalist, Sam Talbot uses a combination of heirloom tomatoes, garlic, shallots, capers and fresh basil. The original recipe used sea bass but I substituted salmon with excellent results.

Scampi is the Italian word for a hard shell prawn or langoustine. Prized in the Mediterranean, they are pink in color and more closely related to lobsters. The traditional method of scampi preparation in Italy is to saute them with garlic, onion, olive oil and white wine. Italian American chefs adapted the preparation using more readily available shrimp. The dish was called shrimp scampi, as in “shrimp prepared in the style of scampi” and the name stuck.

This is a scampi sauce in the broadest sense of the term, it does have garlic, onion, in this case shallots, olive oil and white wine. It also includes celery, which gives some textural difference, briny capers and fennel seed that adds just a hint of anise.

Heirloom tomatoes aren’t necessarily part of a scampi preparation either but they are a nice addition to this dish. Some of the varieties Joe grew this year included Garden Peach, Marvel Stripe, Cherokee Purple and both Red and Green Zebra, just to name a few. Heirloom tomatoes are open pollinated; pollen is carried by natural mechanisms like bees or wind. Heirlooms are varieties that are capable of producing seed that produce seedlings like the parent plant. In agriculture, the word “heirloom” doesn’t have a precise definition but usually refers to varieties that are at least 50 years old.

As always, we cook our fish according to the Canadian fisheries method. Popularized by legendary chef, James Beard, it is very simple and quite foolproof. Measure your fillet at the thickest part, one inch of thickness equals ten minutes of cooking time at 450°F. If you prefer your fish a bit translucent, deduct a minute or so off the cooking time.


An assortment of late season heirloom tomatoes.

Salmon with Heirloom Tomato Scampi Sauce

 Ingredients

  • 3 T extra virgin olive oil
  • 6 cloves of garlic, finely chopped
  • 2 shallots, finely diced
  • 1 T fennel seeds, toasted in a dry skillet
  • 4 celery ribs, sliced ¼ inch thick
  • 1 T drained, chopped capers
  • ¼ c dry white wine
  • 1 T red wine vinegar
  • Grated zest and juice of 1 medium lemon
  • 3 lbs mixed heirloom tomatoes, cut in wedges
  • 1 cup tightly packed hand-torn fresh basil leaves
  • 1½ lbs salmon filet, cut into 4 six ounces portions

Directions for the Sauce

  1. In a large skillet, heat the oil over medium high heat. Add the garlic, shallots, and fennel seeds and cook, stirring frequently, until the shallots are translucent about 2 minutes.
  2. Add the celery and capers and cook until the celery has softened, about 2 minutes.
  3. Add the wine to the pan and cook until it is reduced by half, about 1 minute. Add the vinegar, lemon zest and juice, tomatoes and basil and cook for 1 to 2 minutes to incorporate the flavors and heat the tomatoes through.

Directions for the fish

  1. A half hour before cooking bring the fish out to bring it to room temperature. Adjust oven rack to the middle position and preheat to 450°F.
  2. Measure fish at the thickest part of the fillet with a ruler, one inch of thickness equals about 10 minutes of cooking time. Evenly space fish fillets in a lightly oiled baking pan and transfer pan to the preheated oven. Bake for the designated time.
  3. Serve the salmon fillets topped with tomato scampi.

August 11, 2017 Green Beans and Cucumbers with Miso Dressing

I couldn’t bear to do it, smash the cucumbers and green beans as called for in this recipe that is. This very easy and flavorful dish from the June issue of Bon Appetit uses a technique popular in many Asian countries. Smashing the cukes and beans with a cleaver or a rolling pin tenderizes them and makes lots of nooks and crannies for the dressing to permeate. But not with the first green beans and cucumbers from the garden this season. Maybe in a week or two but for now I will use a more traditional approach. This recipe is quite similar to pau huang gua, a Sichuan cucumber salad, typically served with rich spicy food.

Start the recipe by peeling the cucumber, I like to leave a small strip of skin for color contrast. Chop into bite sized pieces and toss with a little salt to draw out excess moisture. The beans were an interesting addition, the original recipe in Bon Appetit didn’t call for cooking them, I presume they thought dressing them would do the job of tenderizing them. I chose to blanch the beans for just a few minutes to make them crisp-tender and ready to absorb the dressing.

The dressing couldn’t be easier, the ginger, garlic and serrano pepper are all grated, a Microplane makes quick work of that. Combine these ingredients with white miso, rice vinegar, olive and sesame oil. Miso is a fermented soybean paste traditionally used in Japanese cooking. White miso will provide a more delicate flavor, switch in a red miso for a stronger and saltier flavor. You will find miso in the refrigerated section of Asian grocery and health food stores.

Place the well-drained cucumbers and green beans in a bowl and toss with some of the dressing, just enough to coat the vegetables. You will have more than enough, which is a good thing. Toss sautéed eggplant and zucchini with halved cherry tomatoes with the dressing for another version of this dish.

Cucumber vines in the greenhouse, circa 2015.
Joe is growing both bush and pole beans.

Green Beans and Cucumbers with Miso Dressing

Serves 4

Ingredients

  • 3 Persian cucumbers or 1 English hothouse cucumber
  • Kosher salt
  • 1 lb green beans, stems trimmed
  • 1 1½ piece ginger, peeled and finely grated
  • 1 serrano or Fresno chile, finely grated
  • 1 garlic clove, finely grated
  • 1/3 c unseasoned rice vinegar
  • ¼ c white miso
  • ¼ c olive oil
  • ½ t toasted sesame oil
  • Toasted sesame seeds and scallions or thinly sliced shallots for serving

Directions

  1. Peel cucumbers and chop into bite-sized pieces. Toss with a pinch of salt in a medium bowl. Let sit to allow salt to penetrate.
  2. Bring a medium sized pan of water to a boil with a pinch of salt. Add beans and cook until just tender, 3-4 minutes. Drain beans in a colander.
  3. Whisk ginger, chile, garlic, vinegar, miso, olive and sesame oils in a medium bowl until smooth.
  4. Transfer the beans to a bowl for serving and toss with the dressing. Drain cucumbers well and add to the bowl, toss again. Top beans and cucumbers with toasted sesame seeds and scallions.
Toss cucumber chunks with a pinch of salt to extract excess water.
The beans I used were just picked, blanching them for a few minutes tenderizes them and brings out their flavor.
The original recipe used scallions, I used shallots from our garden.


Aug 1, 2017 Zucchini Lasagna with Meat Sauce

Gardeners, let’s face it, we’ve all done it. You watch that cute little zucchini you’ve been nurturing along for several days, waiting for the moment when it’s about eight to ten inches long, bright green with mottled white striping and the blossom still attached, ready for picking. But life isn’t perfect, it rains for several days and you didn’t make it out to the garden and now that cute little zucchini is the size of a miniature baseball bat. Don’t despair, there are ways to still use them, zucchini lasagna is one of my favorites.

Zucchini lasagna “noodles” replace regular pasta for this delicious dish. I first cut the zucchini in half lengthwise so that I have a flat surface to cut my noodles. A mandolin is always my first choice for even uniform slices. If you weren’t aware, a mandolin, isn’t just a music instrument. It is a hand-operated kitchen tool with adjustable blades that in addition to making julienne and waffle cuts, makes uniform slices. Whatever model you choose, use the hand/finger guard, I speak from personal experience.  You can also go low tech and use a very sharp knife with a cutting board to stabilize your slices. I make my slices to fit the baking dish lengthwise, if you are using shorter zucchini, it’s fine to cut them the other way, making sure they fit your dish.

Zucchini is 95% water so before you assemble the lasagna it is important to precook it so less moisture ends up in your finished dish. Suggested methods I’ve seen include broiling, sauteing and parboiling. I like cooking them in the grill pan, it gives added flavor to the zucchini and the slices have a nice finished look. Cooking the slices on an outdoor grill would make the process even faster. Cook more slices than you think you may need to allow for breakage.

This dish can be made in stages, make the meat sauce one day, slice and cook the zucchini the next, then assemble. Just like regular lasagna, it tastes even better the next day, if it lasts that long!

Don’t forget the yellow squash , they work in this recipe too.

Zucchini Lasagna with Meat Sauce

Serves 6-8

Ingredients

Ingredients

  • 3-4 or more large zucchini, sliced 1/8″ thick
  • Extra virgin olive oil for brushing zucchini
  • 1 lb lean ground turkey or beef
  • 1 ½ t kosher salt
  • 1 T olive oil
  • 1 c finely chopped onion
  • 2 cloves minced garlic
  • 1 quart plain tomato sauce ( I used homemade)
  • 2 T tomato paste
  • 2 t dried oregano
  • ¾ t freshly ground black pepper
  • 1 ½ c part skim ricotta cheese
  • ½ c finely grated Parmesan
  • 1 large egg
  • 4 c shredded mozzarella cheese

Directions

  1. Preheat oven to 375°F and place baking rack in the lower position.
  2. Make zucchini lasagna “noodles”. Cut squash into 1/8″ thick slices using a sharp knife or mandolin.  If your squash is long they should fit the pan lengthwise, if you have shorter squash, orient the slices in the opposite direction. You should have enough slices to do four to five layers with a few extra pieces for good measure.
  3. Heat a grill pan or an outdoor grill to medium high heat. Brush both side of the slices lightly with olive oil.
  4. Grill the zucchini slices on both sides so they have grill marks, 3-5 minutes for the first side, a little less for the second side. Squash should be cooked but not falling apart. Line up the grilled zucchini slices on a paper towel lined baking sheet to absorb excess moisture.
  5. Heat a large saute pan over medium high heat and add 1 tablespoon olive oil. When the pan is hot add the onion and cook until onion is softened but not browned, 4-5 minutes. Lower the temperature if necessary. Add the garlic and cook another minute. Add the ground meat and season to taste with salt. Brown the meat, breaking it up as you cook it.
  6. Slowly pour in the tomato sauce and stir it into the meat. Bring to a boil and immediately reduce heat to medium. Add tomato paste, oregano, salt and pepper. Simmer on low, stirring occasionally for about 40 minutes. Cover and set aside.
  7. In a medium bowl combine ricotta, Parmesan and egg. Mix well.
  8. Assemble the lasagna. Lightly oil or spray a 9 x 12 glass or ceramic baking dish.
  9. Spread a light layer of the tomato sauce on the bottom of the pan. Layer zucchini slices over to cover. Spread one-third of the ricotta mixture over the zucchini and top with a cup of the mozzarella. Repeat the layers two more times, sauce, “noodles”, ricotta mixture topped with mozzarella. Top with noodles and the remainder of the sauce. Cover the baking dish tightly with foil and bake for 30 minutes. Uncover the foil and bake for an additional 20 minutes to dry up excess liquid. Sprinkle the last cup of mozzarella over the top and bake until melted, about 15 minutes. Let lasagna rest for a half hour to allow it to firm up and make for easier slicing.
Slices made with my stainless steel mandolin, a gift from many years ago, I have other inexpensive ones too.

Zucchini slices cooked in the grill pan.

Meat sauce to cover the bottom of the baking dish.

Grilled zucchini slices to cover.

A layer of cheese.
Another layer of zucchini noodles. Repeat the process with the sauce.
The finished product.

Delicious!

July 15, 2017 Tomato Salads

This is a space to record Joe’s creative tomato salads throughout the summer. The pictures won’t always be the best since they are taken in the kitchen. Just a way to commemorate these wonderful salads.

July 10 salad – Sun Gold, Gold Nugget and Super Sweet tomatoes, raspberries, purple basil, mozzarella with peach vinegar and blood orange olive oil.

July 12 – Sun Gold tomatoes, ricotta and purple basil with peach vinegar and blood orange olive oil.

July 15 – Super Sweet 100’s, Sun Gold, Gold Nugget, Snow Cherry, Chocolate Cherry, Fourth of July, mozzarella, purple basil, raspberries, blueberries, Cascadian raspberry vinegar, Persian lime oil.

July 16 – Brandywine, Sun Gold, Super Sweet, Gold Nugget, Snow Cherry, Chocolate Cherry, purple basil, mozzarella, ricotta, Parmesan, purple basil, Cascadian raspberry vinegar, Persian lime oil.

July 17 – Fourth of July, Gold Nugget, Snow Cherry, Super Sweet, burrata, Persian cucumbers, purple basil, Cascadian raspberry vinegar, Persian lime oil.

August 14

August 16

August 17

April 19, 2017 Avocado and Cabbage Slaw

Suvir Saran’s first restaurant, Devi was awarded a coveted Michelin star for his critically acclaimed Indian cuisine. He closed Devi in 2012, and more recently opened Tapestry, in May of 2016. The cuisine at Tapestry had a more global focus interpreted with an Indian viewpoint. Unfortunately Tapestry closed in March of this year after being open for only ten months in spite of positive reviews. The problem according to Mr Saran was “high rents and low covers”. I never had the opportunity to visit the restaurant, but Food and Wine magazine provided a recipe from Tapestry for Avocado and Cabbage Slaw in their January issue.

What gives this slaw its unique flavor is the addition of chaat masala. It is a sand colored spice blend, predominately flavored with dried mango powder, also known as amchoor, black salt and asefetida. It is a traditional accompaniment to a fruit snack, often sold by street vendors, phal-ki-chaat, four or five fruit selections sprinkled with fresh lime juice and chaat masala.

The avocado and cabbage slaw is a reimagining of the traditional snack. This time, crunchy colorful cabbage, creamy avocados and juicy tomatoes take the place of the fruit. Chaat masala is part of the dressing that includes lime juice, honey, fresh ginger, fish sauce, spicy sriracha, cilantro and mint. You could make your own chaat masala, some of the ingredients, cumin and coriander seed are accessible in any supermarket, others, dried mango, asafoetida powder, would require an online trip to an Indian grocer. I purchased my chaat masala on Amazon. It has a very pleasant light spicy fragrance and includes thirteen spices.

We enjoyed the salad, the chaat masala made it unique but never having the original dish I think we were at a disadvantage. I will have to try the fruit salad to make a comparison.

Avocado and Cabbage Slaw

Serves six

Ingredients

  • 3 T fresh lime juice
  • 2 T honey
  • 1 T peeled and finely grated fresh ginger
  • 2 t sriracha
  • 2 t Asian fish sauce
  • 1 t white wine vinegar
  • ¾ t chaat masala
  • ¼ t ground cumin
  • kosher salt and freshly ground pepper
  • 1 lb green and/or red cabbage, cored and finely shredded
  • 6 scallion, light green and white parts only, thinly sliced
  • 1 pint cherry or grape tomatoes
  • ½ c cilantro leaves, finely chopped
  • ¼ c mint leaves finely chopped
  • 2 Hass avocadoes-peeled, pitted, and diced, plus more for serving
  • 1 c roasted, salted cashews, chopped, plus more for garnish
  • Microgreens for garnish

Directions

  1. In a large bowl whisk the first eight ingredients until well combined. Season with salt and pepper.
  2. Add the cabbage, scallions, tomatoes, chopped cilantro and mint, diced avocado and 1 cup of chopped cashews. Toss to coat. Garnish with avocado slices, chopped cashews and microgreens.