November 18, 2017 Curried Butternut Squash Soup


A reluctant fall has finally settled in and made itself at home in Bucks County. We have experienced our first killing frost, officially ending the growing season. One of the last survivors of the garden is the kale. Cold weather just seems to make it sweeter. I have a sinkful soaking right now, reviving it for tonight’s dinner. We also have a wheelbarrow full of butternut squash in the garage that was harvested before the frost.

Fortunately butternut squash stores well in a cool basement, so I will be able to use it through to next spring. I cube and roast it to add to our green salads, butternut squash lasagna is a new favorite, and of course, soup. Smooth and silky butternut squash soup is a cold weather favorite. I have shared several recipes for butternut squash on this blog but this is the original, the recipe I have been making for over thirty years.

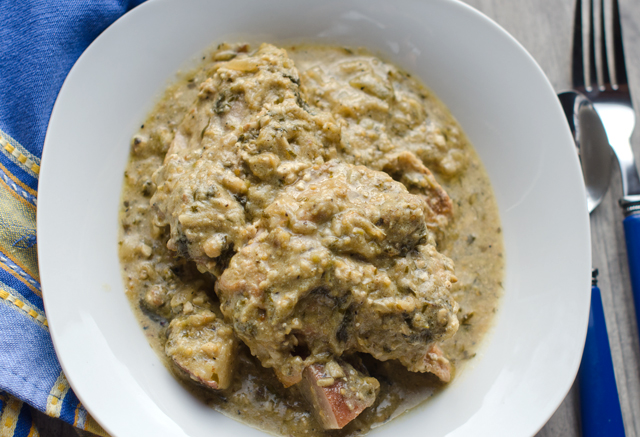
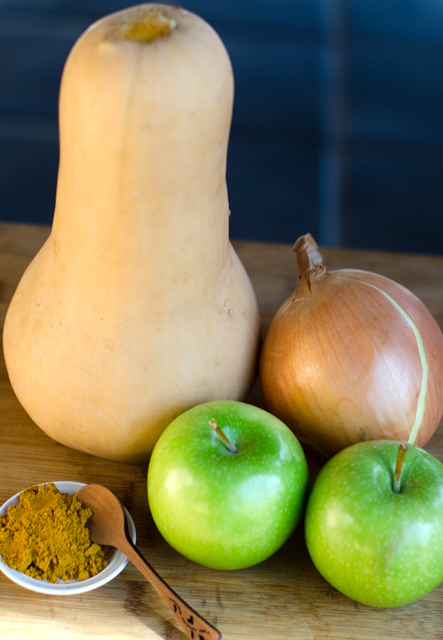
When I first discovered my love for cooking one of the first cookbooks in my library was The Silver Palate cookbook. Silver Palate’s recipe for curried butternut squash soup was a constant on our Thanksgiving table for many years. This velvety rich soup has just the right combination of sweet, tart and spicy and was met with rave reviews from friends and family alike.

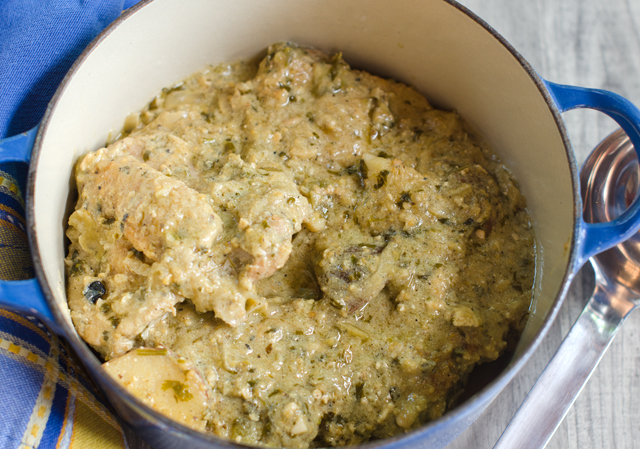
Begin the recipe by sautéing chopped onions and curry powder in sweet (unsalted) butter. If your curry powder has been sitting in the back of your spice cabinet for longer than you can remember, it’s time to invest in a new jar. There is no one formulation for curry powder and each variety can have different component spices in differing amounts. For this soup the best choice is sweet curry powder. It will give you a wide range of flavors without too much heat. One large onion yielded the two cups I needed. The covered pan will allow the onions to cook slowly,  give them a stir every five minutes or so to keep them from sticking to the pan.

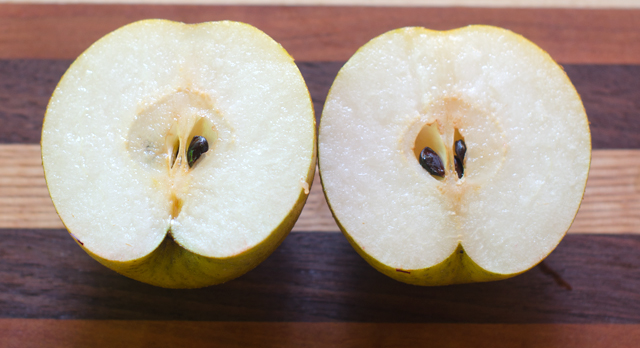
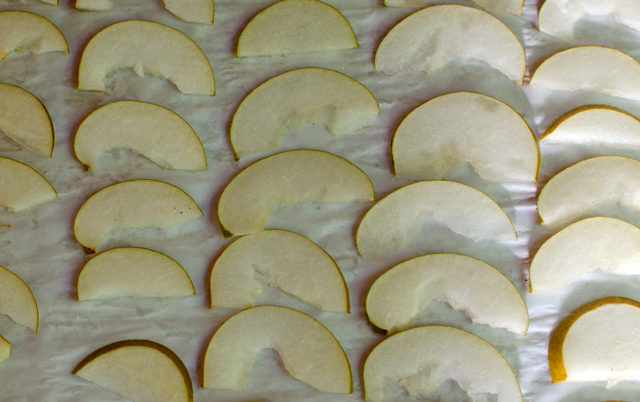
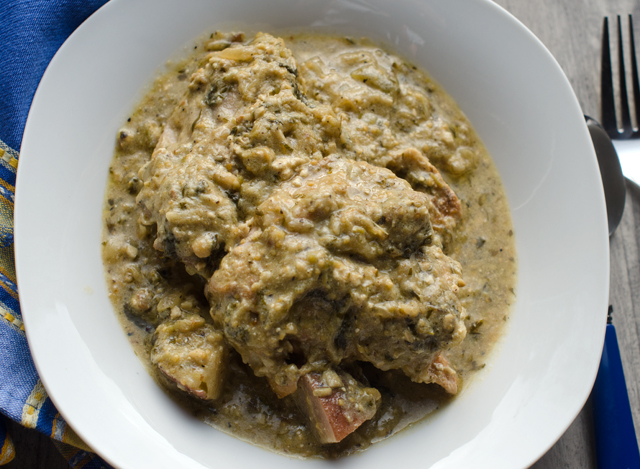
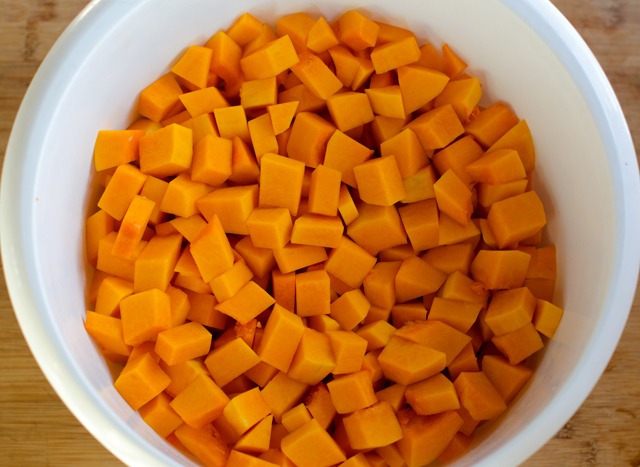
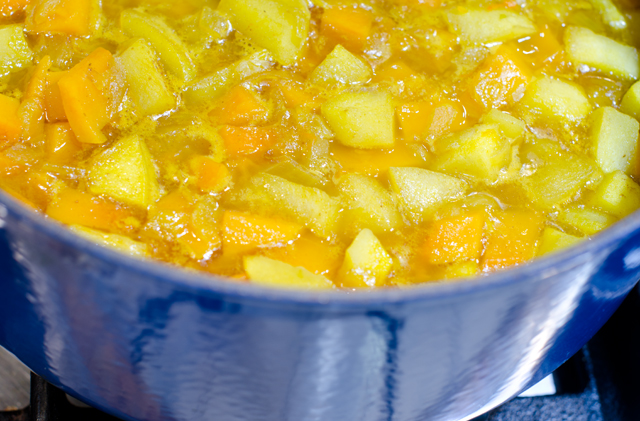
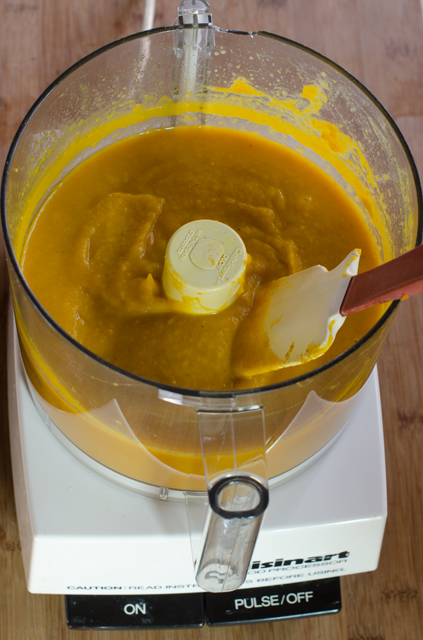
While the onion is cooking, peel and cube the butternut squash. The medium-large squash I used weighed in at 3.3 lbs and yielded about 6 cups of peeled, cubed squash. Add squash cubes, apple and chicken stock, bring to a boil and cook until squash and apples are tender. Purée the soup in a food processor or blender. Return the soup to the pot, add apple juice or cider and season with salt and pepper. Serve piping hot with a garnish of a tangy freshly grated green apple.

Over the years this recipe this soup has become less of a project for the home cook. Don’t feel like chopping a large unwieldy squash? You can buy peeled and chopped squash at most grocery stores. Does the thought of straining and pouring hot soup into a blender make you just a little nervous? An immersion blender eliminates this step. If you make this soup ahead of time, cool it and store in the fridge.  When you reheat the soup you may thin to thin it out a bit with a little more stock.

The most amazing thing about this recipe is you have made a rich, creamy soup without a drop of cream or milk. Perfect for the holidays or great alongside a sandwich of leftover turkey.

The primary players.
A three pound squash yielded about 6 cups of cubes.
Simmering on the stove top.
I pureed my soup in the food processor but a blender or immersion blender works too.

Curried Butternut Squash Soup

Serves six

Ingredients

  • 4 T unsalted butter
  • 2 c finely chopped onions
  • 4-5 t sweet curry powder
  • 3 lb butternut squash
  • 2 tart apples, peeled, cored and chopped
  • 3 c chicken stock
  • 1 c apple juice or cider.
  • kosher salt and freshly ground pepper to taste
  • 1 shredded unpeeled tart apple (garnish)

Directions

  1.  Melt the butter in a 5 quart Dutch oven. Add chopped onions and curry powder and cook, covered, over low heat until onions are tender, about 25 minutes.
  2. While the onions are cooking peel the squash, scrape out the seeds and chop the flesh into 1″ cubes.
  3. When the onions are tender, pour in the stock, add squash and apples, and bring to a boil. Reduce heat and simmer, partially covered, until squash and apples are very tender, about 25 minutes.
  4. Pour the soup through a strainer, reserving the liquid, and transfer the solids to a bowl of a food processor. Add 1 cup of the cooking stock and process until smooth.
  5. Return the puréed soup to the pot and apple juice and the remaining cooking liquid, about 2 cups, until the soup is of the desired consistency.
  6. Season to taste with salt and pepper, simmer briefly to heat through, and serve immediately, garnished with shredded apple.

October 17, 2016 Slow Cooker Chicken Thighs with Leeks and Mushrooms

Several rows in our garden are always reserved for leeks. It all started years ago with the classic book, Crockett’s Victory Garden, a month by month guide to all things (well most) gardening. It was in those pages Joe set his eyes on them for the first time, leeks that looked like they could almost double as baseball bats, actually they were Crockett’s exact words. It inspired him to give leeks a try. In addition, as cooking enthusiasts in the eighties, finding leeks in the supermarket was often futile, or if they had them, very expensive and not that good.. So growing leeks was a logical conclusion.

Leeks are a cool season vegetable that require 120 to 170 days to harvest. Joe starts them indoors and transplants them in the garden anytime after the last frost. At that point the leeks look like skinny blades of grass. He plants them closer together than they should be, so that we have thinnings that can be used like scallions before the mature leeks are ready. We will harvest most of them in the fall but some will winter over until early spring.

Even though we haven’t had much of a stretch of fall weather and it may get up to 80°F today, I am craving the stews and braises that are a natural in the cooler weather. In this dish versatile chicken thighs are slow cooked on top of a bed of leeks and mushrooms. The mild onion flavor of leeks pairs nicely with the savory earthy flavor of the mushrooms.

If you choose to brown the chicken first as I did, pat the chicken pieces dry with paper towels. This helps keep the chicken from steaming instead of searing. You can also substitute chicken leg quarters for the thighs, that’s the thigh and the leg in one portion. Boneless skinless thighs are another option, add those directly to the slow cooker without browning. I chose bone in and skin on for better flavor. I like the skin on and browned, it protects the chicken during the cooking process and makes for a more attractive presentation. You don’t even have to eat the skin if you don’t want to.

It has been stated countless times but is worth repeating. Do not rinse chicken, it just splashes bacteria all over you, your countertops and any other food that is nearby. The heat from cooking is enough to kill any bacteria that are present on the chicken.

The recipe is very simple, you can serve the chicken with the leeks and mushrooms as-is or after removing the chicken, thicken up the sauce a bit. I ladled out some of the broth and stirred in a little flour to thicken it up and added a little sour cream and half and half to make a more substantial sauce. Serve with white basmati rice to absorb all the juices.

A row of leeks.
Not quite baseball bat size but still fine.

Slow Cooker Chicken Thighs with Leeks and Mushrooms

Serves 4-6

Ingredients

  • 3 lbs skin on and bone in chicken thighs
  • 1 T olive oil
  • 4 c assorted sliced mushrooms, white, shiitake, cremini
  • 3 c leeks white and pale green parts only, halved lengthwise, washed well to remove any dirt and sliced thinly
  • 1½ T fresh thyme leaves
  • 1½  T minced fresh sage leaves
  • Kosher salt and fresh ground pepper to taste
  • 2/3 c dry white wine (Chardonnay or Burgundy)
  • 2/3 c chicken broth (homemade or low sodium canned)
  • 1 T all-purpose flour
  • 1/3 c sour cream
  • 1-2 T half and half or heavy cream

Directions

  1. Heat a large non stick skillet over medium high heat.
  2. Pat dry the chicken thighs well with paper towels. Season with kosher salt.
  3. Add olive oil to skillet and add chicken thighs skin side down. Do not crowd, this  should be done in batches. Cook skin side down for three minutes then flip to other side and cook for an additional two minutes. Remove to a plate.
  4. Place the mushrooms, leeks, thyme and sage to the slow cooker. Season with a  little salt and some fresh ground pepper.
  5. Nestle the chicken pieces on top of the vegetables and pour the wine and broth  around them.
  6. Cover and cook on low for six hours. If desired, at the end of cooking remove the chicken pieces to a platter and keep warm. Ladle out about a cup of the broth into a glass measuring cup. Whisk in a tablespoon of flour to thicken and stir in sour cream and half and half or heavy cream. Stir this back into the slow cooker taste and add more salt and pepper as desired. Serve chicken and sauce over rice.
Leeks, mushrooms and herbs into the slow cooker first.
Place chicken on top.
Serve with rice to sop up the juices.

October 9, 2017 Arugula Salad with Pears, Beets, Blue Cheese and Walnuts

The vegetable garden doesn’t end at our house just because summer is over. Joe’s new crop of salad greens, planted in the greenhouse are ready to be harvested. I typically use a variety of greens in our salad but this time I let arugula take the starring role. Nutty and just slightly peppery arugula is combined with a finely sliced Chiogga beet also courtesy of the fall garden, creamy blue cheese, walnuts and some of the Asian pear slices that I made in the last post.

Fall is a good time to get in another crop of some root crops like radishes, turnips and beets. Along with the salad greens, the root vegetables prefer cooler temperatures. This year has been tough, summer like heat and humidity has stayed around well into October (I’m not complaining) and it has affected the plantings, especially the radishes. I’ve started to harvest some beets while they are still small and sweet for salads.

I especially like the Chiogga (kee-OH-gee-uh) beet for its deep pink and white spirals, it adds a pretty pop of color to an otherwise dull salad. I like them raw, shaved as thinly as possible on a mandolin. The sweet earthy flavor contrasts nicely with the arugula. Blue cheese and toasted walnuts are always a natural with arugula. I chose a buttermilk blue that is described as tangy yet mellow. It has a creamy taste and texture and doesn’t overwhelm the other elements of the salad.

The dehydrated Asian pear slices I made in the last post are great for snacking, and for a bite of fruity sweetness in salads like this one. Dehydrating intensified the already sweet pears.The pears resemble mushroom slices so they would be quite a surprise for an unaware diner biting into one. If you didn’t make the dehydrated pear slices, substitute a thinly slice fresh Asian pear.

I dressed this salad with a simple vinaigrette using a Tubby Olive Gravenstein apple white balsamic vinegar with a good extra virgin olive oil with just a touch of walnut oil. You could substitute a white balsamic vinegar with just a touch of honey.

Arugula Salad with Pears, Beets, Blue Cheese and Walnuts

Serves two

Ingredients

  • 2 T white balsamic vinegar or Gravenstine apple balsamic
  • 1 t Dijon mustard
  • ½ t honey (not needed if using apple balsamic)
  • 4 T extra virgin olive oil
  • 1 T walnut oil
  • kosher salt and freshly ground pepper
  • 4 large handfuls arugula (about 12 ounces)
  • ¼ c dried Asian pear pieces or 1  ripe pear, cored and sliced thin
  • 1 small beet, scrubbed and trimmed, sliced very thinly on a mandolin
  • 3 ounces soft blue cheese, crumbled

Directions

  1. In a small bowl, whisk together the balsamic vinegar, mustard, and honey. Gradually pour in the olive and walnut oils, and continue whisking  until the dressing has emulsified. Season with salt and pepper.
  2. Divide the arugula between plates. Top with the beet slices, walnuts, sliced pear and blue cheese, then drizzle with vinaigrette.


October 6, 2017 Dehydrated Asian Pears

In addition to the gardens, we have a small orchard that includes a pear, apple, persimmon, Asian pear and most recently, fig trees. We are usually so busy harvesting from the garden that the orchard is all but forgotten and most of the fruit that falls from the trees goes to the deer. The persimmons are Cody’s special treat, I can honestly say I don’t understand that at all. The Asian pear is the most productive of the trees and this year I wanted to find a different way to use the fruit. Several years ago I canned about a half dozen jars of Asian pear chutney, this time I was looking for something new. My inspiration came at the local farmers market. A local orchard was selling dehydrated apples. Why not Asian pears?

The task at hand now was to pick the pears. Some were accessible by hand, for the pears that were higher up the tree I needed a different approach. I turned to the aptly named fruit picker, a wire basket attached to a long pole. There are bent prongs at the top of the basket that allow you to pull the fruit off the branch. The bottom of the basket is cushioned with foam to prevent the fruit from bruising.

The Ball canning book states that drying food is easy but may require some trial and error. Various factors, the quality of the produce, drying methods, pretreatment techniques and climate can all affect the finished product. So it is necessary to follow the general guidelines and then make the necessary adjustments.

Successful home dehydration depends on three factors: heat, enough to force out moisture but not enough to cook the food, dry air, to absorb the released moisture and air circulation, to move the moisture away.

I started by washing and drying just a few pears, since this was just a test batch. I don’t own a dehydrator, but the lowest heat on our convection oven is 140°F, only 5 degrees higher than the recommended temperature of 135°F. I lined two large half-sheet pans (18″ x 13″) with parchment and began slicing the pears. Since the Asian pears from our tree were relatively small, I wanted to maintain the largest piece possible. I cut the pears in half lengthwise through the core and removed any blemishes. I discovered a melon baller was the right tool to scoop out the core.

To peel or not to peel? That was the next question and for the first batch I decided not to. Another step that is optional is dipping. Dipping the fruit in diluted lemon juice prevents oxidation, which turns the fruit brown. I sliced the fruit with a sharp knife, about an quarter of an inch slice and spaced them evenly on the baking trays. I baked them in the convection oven for 5 hours, rotating the trays half way through the drying process. Then I turned the oven off and left the trays in the oven overnight. I was very pleased with the results. Most of  the pieces look like slices of a mushroom cap and I will continue not peeling them. Asian pears are super sweet and drying them intensifies the sweetness. The consistency should be pliable, not crisp with no moisture pockets. Your time may vary, so check frequently. Great for snacking, store the pear chips in quart bags in the fridge and freezer.

Using the fruit picker.
Success!


Dehydrated Asian Pears

 Makes 70-80 pieces

Ingredients

  • 4-5 Asian pears
  • Dipping solution of 1 c lemon juice to 1 qt water to prevent oxidation  (if desired)

Directions

  1. Place oven racks in upper and lower positions. Preheat convection oven to the lowest setting possible, 140°F in my case.
  2. Line two half sheet pans with parchment paper.
  3. Wash and dry pears, peel if desired. Remove any blemishes. Cut the pears in half lengthwise. Remove the stem and core. I found a melon baller worked well. Slice pears with a mandolin or sharp knife into ¼ inch pieces.
  4. Soak fruit in dipping solution if desired, no longer than 10 minutes. Drain before drying well with paper towels.
  5. Evenly space out the slices on the baking trays and dehydrate for about 5-6 hours. Leave in turned off oven overnight. The slices should be pliable and chewy with no moisture pockets.
  6. Store in plastic quart bags in the refrigerator or freezer.

September 24, 2017 Braised Chicken Thighs with Tomatillo Sauce

When is a tomato not a tomato? When it’s a tomatillo. Yes, their aliases include Mexican husk tomato and “tomato verde” and both tomatillos and tomatoes are members of the nightshade family, but that’s where the similarities end.

Years ago tomatillos were one of those “let’s try this and see” additions to the garden. I certainly wasn’t familiar with the sprawling bushy plants that first produce lots of leaves and little yellow flowers. These flowers eventually turn into bright green papery Chinese lanterns. The tomatillo grows inside this husk and when the fruit is mature, the husk dries out and turns a tan color and the tomatillo splits the husk open. Under that husk they look like hard little green tomatoes. They have a bright fresh flavor, a little citrusy and herbal. I have used them for salsa verde and a  chicken tomatillo soup. This time I wanted to use tomatillos in a sauce for braised chicken thighs. I found my inspiration from Mexican cooking authority, Rick Bayless. His recipe for a braised pork loin in tomatillo sauce could be adapted for chicken so I knew I would be getting the direction I needed.

Start the dish by making the tomatillo sauce or salsa, remember, salsa is the Spanish word for sauce. Turn the broiler to high and move the oven rack to the highest position.Remove the papery husks from the tomatillos and rinse off the sticky residue, that residue is a natural deterrent to insects. In this case it took 28 tomatillos to make a pound. Put them on a foil lined baking sheet, stem side down so they won’t roll around as much. It is a good idea to double up on the baking sheets so they won’t buckle under the broiler from the heat. Add one green jalapeno to the sheet and broil until the tomatillos are roasted, even blackened in spots and very soft. Transfer everything, including the juices to a blender and process until smooth. Set the sauce aside while you brown the chicken.

In a 4-5 quart Dutch oven, brown the chicken pieces. You will need to do this in batches, the chicken should be golden brown, not stewed. Rick instructs that you use either all white meat (breast) or all dark (thighs) because the cooking times will be different, I find that dark meat holds up better to the braising process. After the meat is browned it is removed to a plate. No need to rinse the pot, now it’s time to finish off the sauce.

Return the Dutch oven to medium heat and cook the onion and garlic. Raise the temperature to medium high and add the tomatillo puree. Cook until it is dark green and thickened, this concentrates the flavors of the sauce.  A little water thins out the sauce, Rick feels the addition of stock would make the sauce too rich. Now is the time to add some heavy or sour cream if desired. It lightens up the sauce and I liked it with the chicken. Add some fresh cilantro or the more traditional purslane also known as verdolagas in Mexico. I will definitely try that when purslane makes an appearance in the garden again. Nestle the chicken pieces in the sauce, put the lid on and cook in the oven for thirty minutes.

Potatoes add an earthy element to the dish. Parboil some red potatoes while the chicken is cooking, close to the end of the cooking they are nestled in the sauce between the chicken pieces. Serve the chicken topped with sauce with some potatoes on the side. The end result is a rich, warm satisfying dish and the perfect transition from summer to fall cooking.

Tomatillo on the vine, not ready for picking yet.

Ripe green and purple tomatillos.

It took 28 tomatillos to make a pound.
Roast tomatillos until soft and blackened in spots. Make sure the juices go in the blender too.
Blended tomatillos.
Chicken thighs are browned, then nestled in the tomatillo sauce.

Braised Chicken Thighs in Tomatillo Sauce

Serves 4-6

Ingredients

  • 1 lb fresh tomatillos
  • 1 medium jalapeno pepper
  • Kosher salt and fresh ground pepper
  • 8 medium skin on, bone in chicken thighs, 2½ to 3 lbs
  • 1½ T olive oil
  • 1 medium onion, finely sliced
  • 3 cloves of garlic, peeled and finely chopped’
  • 1/3 c chopped cilantro
  • A little crema or heavy cream if desired
  • 1¼ lbs red skinned potatoes, scrubbed and quartered

Directions

  1. Roast the tomatillos and chile on a baking sheet four inches below a very hot broiler until darkly roasted, even blackened in spots, about 5 minutes. Flip them over and roast on the other side for another 4-5 minutes. Tomatillos should be splotchy black and the chile soft and cooked through.
  2. Cool a bit then transfer everything, including the juices that have accumulated on the tray to a blender. Process until smoothly pureed.
  3. Set a 4-5 quart Dutch oven over medium heat, when the oil is hot add chicken pieces skin side down. It is best to do this in batches, you want the chicken to brown, not stew. Brown the chicken on the first side for 5 minutes, then turn over and brown on the other side. Remove the chicken pieces to a plate and keep warm.
  4. In the same Dutch oven over medium heat, add the onion and cook, stirring regularly, until golden, about 7 minutes. Stir in the garlic and cook a minute longer. Raise the heat to medium heat and when the oil is sizzling, add the tomatillo puree all at once. Stir until it is darker and noticeably thicker. Add 1 ½ cups of water and the cilantro. If you desire a mellower sauce add about a ½ cup cream or sour cream to the sauce. Taste and season with a little salt. Stir the sauce well to combine.
  5. Heat oven to 325°F. Nestle the chicken pieces in the warm sauce, cover the pot and set in the oven. Cook for 30 minutes.
  6. While the chicken is cooking, simmer the potatoes in a pan of salted water to cover until tender, about 10 minutes. Drain and set aside.
  7. When the chicken has cooked for thirty minutes, nestle the cooked potatoes into the sauce around the meat. Recover and cook for another 5-10 minutes.
  8. Serve the chicken and potatoes with the sauce over it.

September 17, 2017 Salmon with Heirloom Tomato Scampi Sauce

It’s still officially summer for another week or so but it’s easy to see that fall is in the air. We haven’t experienced a ninety degree day in several weeks and the days are sadly growing shorter. The tomatoes are making their last gasp, maybe not quite tomato salad worthy but still so much more flavorful than anything a supermarket might have to offer.

This recipe, courtesy of Top Chef season two semi-finalist, Sam Talbot uses a combination of heirloom tomatoes, garlic, shallots, capers and fresh basil. The original recipe used sea bass but I substituted salmon with excellent results.

Scampi is the Italian word for a hard shell prawn or langoustine. Prized in the Mediterranean, they are pink in color and more closely related to lobsters. The traditional method of scampi preparation in Italy is to saute them with garlic, onion, olive oil and white wine. Italian American chefs adapted the preparation using more readily available shrimp. The dish was called shrimp scampi, as in “shrimp prepared in the style of scampi” and the name stuck.

This is a scampi sauce in the broadest sense of the term, it does have garlic, onion, in this case shallots, olive oil and white wine. It also includes celery, which gives some textural difference, briny capers and fennel seed that adds just a hint of anise.

Heirloom tomatoes aren’t necessarily part of a scampi preparation either but they are a nice addition to this dish. Some of the varieties Joe grew this year included Garden Peach, Marvel Stripe, Cherokee Purple and both Red and Green Zebra, just to name a few. Heirloom tomatoes are open pollinated; pollen is carried by natural mechanisms like bees or wind. Heirlooms are varieties that are capable of producing seed that produce seedlings like the parent plant. In agriculture, the word “heirloom” doesn’t have a precise definition but usually refers to varieties that are at least 50 years old.

As always, we cook our fish according to the Canadian fisheries method. Popularized by legendary chef, James Beard, it is very simple and quite foolproof. Measure your fillet at the thickest part, one inch of thickness equals ten minutes of cooking time at 450°F. If you prefer your fish a bit translucent, deduct a minute or so off the cooking time.


An assortment of late season heirloom tomatoes.

Salmon with Heirloom Tomato Scampi Sauce

 Ingredients

  • 3 T extra virgin olive oil
  • 6 cloves of garlic, finely chopped
  • 2 shallots, finely diced
  • 1 T fennel seeds, toasted in a dry skillet
  • 4 celery ribs, sliced ¼ inch thick
  • 1 T drained, chopped capers
  • ¼ c dry white wine
  • 1 T red wine vinegar
  • Grated zest and juice of 1 medium lemon
  • 3 lbs mixed heirloom tomatoes, cut in wedges
  • 1 cup tightly packed hand-torn fresh basil leaves
  • 1½ lbs salmon filet, cut into 4 six ounces portions

Directions for the Sauce

  1. In a large skillet, heat the oil over medium high heat. Add the garlic, shallots, and fennel seeds and cook, stirring frequently, until the shallots are translucent about 2 minutes.
  2. Add the celery and capers and cook until the celery has softened, about 2 minutes.
  3. Add the wine to the pan and cook until it is reduced by half, about 1 minute. Add the vinegar, lemon zest and juice, tomatoes and basil and cook for 1 to 2 minutes to incorporate the flavors and heat the tomatoes through.

Directions for the fish

  1. A half hour before cooking bring the fish out to bring it to room temperature. Adjust oven rack to the middle position and preheat to 450°F.
  2. Measure fish at the thickest part of the fillet with a ruler, one inch of thickness equals about 10 minutes of cooking time. Evenly space fish fillets in a lightly oiled baking pan and transfer pan to the preheated oven. Bake for the designated time.
  3. Serve the salmon fillets topped with tomato scampi.

September 7, 2017 Green Bean Salad with Cherry Tomatoes, Feta and Parsley

Whether you call them snap beans, green beans or string beans, our garden has produced a steady stream since early July. Joe plants both bush and pole beans and not just green beans. We grow purple beans that look pretty on the vine but as soon as you plunk them in a pot of boiling water, they turn a dark green color. This is due to a plant pigment, anthocyanin, that deteriorates in high temperatures. If you want to preserve the bean’s  purple color, choose a crisp young bean that doesn’t require cooking.

Yellow or wax beans also add color to the garden. According to Cook’s Illustrated, yellow beans are just green beans bred to have none of the chlorophyll pigment that gives the green bean its color.

Snap beans are low in calories, a good source of fiber and vitamins A and C. Their grassy, nutty flavor is appealing to just about everyone. In the cooler months we are most likely to do a warm preparation of beans with garlic and thyme. In the summer I like to blanch them and make a green bean salad. This combination is a creation of my own and a dish I have made countless times this summer.

I start with approximately a pound of beans. I wash and stem the beans and sort out any that are significantly fatter and or older. Bring a large pot of water that has been well salted to the boil and add the large beans first. I give them an extra minute or two to cook. Then I add the rest of the beans and start my timer at a generous four minutes. I taste (careful, it will be hot) one bean, and if I can bite through with no resistance, they are done. If not, set the timer for another minute, then taste again. Drain the beans in a colander and rinse with cool water. Spread the beans out on dish towels to let the excess moisture evaporate.

In a large bowl combine the beans, chopped parsley and tomatoes. A bite-sized cherry tomato works best here, cutting them in half makes them easier to eat. I have used different varieties over the summer. On this particular day I used a white cherry tomato. They aren’t really white but a very pale yellow. Toss the ingredients with the vinegar and oil. Next add the feta and tamari almonds. My preference is French feta, it is milder (less salty) in flavor and creamier in texture. Tamari almonds bring a umami flavor and a pleasant crunch. Season to taste with salt and pepper. Serve immediately, leftovers taste great the next day.

Green Bean Salad with Cherry Tomatoes, Feta and Parsley

Serves four

Ingredients

  • 1 lb green beans, washed, stemmed and trimmed into 2-3 inch pieces, can be wax or purple beans also
  • 15-20 small tomatoes, halved
  • 1/3 c finely chopped parsley
  • 1/3 c crumbled feta (I prefer French feta in this salad)
  • 1/3 c tamari almonds
  • 3 T grapefruit or another light balsamic vinegar
  • 6 T olive oil
  • Kosher salt and freshly ground pepper

Directions

  1. Bring a large pot of lightly salted water to a boil. Add the beans, bring back to the boil and turn back the heat to a simmer and cook beans for 4 ½ minutes. Test one bean to be sure they are tender. Drain in a colander and rinse with cool water.
  2. In a bowl large enough to toss the ingredients comfortably, add the beans, tomatoes and chopped parsley. Toss with the oil and vinegar. Add feta and tamari almonds and toss again.  Season well with salt and pepper and serve immediately.

August 31, 2017 Moussaka for a Crowd

For the past 20+ years I have made this version of moussaka every summer when we have an abundance of eggplants. It can be made in one large (very large) dish to serve a crowd. I spread it out into three casserole dishes, one for now, two for the freezer. It doesn’t fit the category of quick and easy but it can be done in steps over the course of two days. First, slice the eggplant and while you are baking it, make the meat sauce. Refrigerate these two components overnight. The next day, prepare the bechamel sauce, grate the Parmesan, assemble the casseroles and bake. A traditional moussaka is made with ground lamb, but if you don’t like lamb, or your supermarket doesn’t carry it, substitute lean ground beef or turkey. Like many hearty casseroles, it tastes even better the next day. Serve it with, you guessed it, a Greek salad.

Eggplants in all shapes and sizes.
I take most of the skin off the eggplant , leaving narrow strips.
Line up slices on a foil lined baking sheet for baking.
The rich meat sauce with red wine and fragrant cinnamon.


Eggplant Moussaka

Serves 15 to 18

Ingredients

  • 5 lb eggplant, strips of skin removed, cut crosswise into ½” slices
  • 6 T olive oil, divided
  • 2 ½ lb ground lamb, turkey or beef
  • 5 large onions, chopped fine
  • ½ cup minced fresh parsley leaves
  • 2-6 ounce cans tomato paste
  • 3 c dry red wine
  • 1 ½ T cinnamon
  • 1 T salt
  • Freshly ground black pepper to taste
  • 1 ½ c dry bread crumbs
  • 1 ½ c freshly grated Parmesan

For the topping

  • 1 stick (½ cup) unsalted butter
  • ½ c all-purpose flour
  • 6 c milk (low-fat is fine)
  • 2 T freshly grated nutmeg
  • 5 large eggs, lightly beaten
  • 1-15 oz container ricotta cheese
The components for the creamy bechamel sauce.


Directions

  1. Preheat oven to 425°F. On baking sheets covered with oiled aluminum foil arrange the eggplant slices in one layer, brush them lightly with 4 T of the oil and bake them, covered with foil in batches in the middle of the oven for 30 minutes.
  2. While the eggplant is baking, in a large heavy skillet cook the ground meat over medium heat , stirring and breaking up the lumps, until it is no longer pink. With a slotted spoon transfer it to paper towels to drain, discard the fat remaining in the skillet.
  3. In the skillet cook the onions in the remaining 2 T oil over medium high heat, stirring until softened, stir in the meat, the parsley, the tomato paste, the wine, the cinnamon, salt and pepper. Simmer the mixture, stirring occasionally, for about twenty minutes or until thickened slightly.
  4. Sprinkle 2 T of the bread crumbs over the bottom of an oiled roasting pan, 16 by 10 by 2 ½ inches, arrange one layer of the eggplant slices next. Spread one third of the meat mixture on top of the eggplant and sprinkle it with one third of the Parmesan and one third of the remaining bread crumbs.
  5. Layer the remaining eggplant slices, meat mixture, Parmesan, and bread crumbs in the same manner, starting with the eggplant and ending with the bread crumbs.
  6. For the topping: In a heavy saucepan melt the butter over moderately low heat, and the flour, and cook the roux, whisking for 3 minutes. Add the milk in a stream, whisking, and whisk in the nutmeg, salt and pepper to taste.  Bring the mixture to a boil, whisking, and simmer it, stirring until it is thickened, 3 to 5 minutes. Let the mixture cool slightly and whisk in the eggs and ricotta.
  7. Pour the topping evenly over the moussaka and bake in the middle of the oven for 45 minutes, or until the top is golden. Let it stand for 10 minutes before serving.
First a layer of fine bread crumbs.
Then a layer of cooked eggplant.
Meat sauce and a sprinkling of Parmesan cheese.
Repeat layers and top with the creamy bechamel.
And it comes out like this.
Delicious!


August 21, 2017 Stir Fried Shrimp with Eggplant and Cashews

It’s a great time of year to try out some new eggplant recipes. Whether from the farmers market, your local CSA or your own garden, freshly harvested eggplants are at their best. Our garden has produced an amazing array of colorful eggplants this summer. Bright fuchsia Asian Bride, slender dark violet Farmer’s Long, pure white Charming, beautifully variegated Listada de Gandia, all the varieties we have harvested this year have thin skin and minimal seeds.

During the eggplant season I have time to revisit the classics, eggplant Parmesan, caponata, moussaka and to look for new ways to serve this versatile vegetable that’s actually a fruit, but I digress. Stir fry recipes are quick and relatively easy, so why not shrimp and eggplant? Cook’s Illustrated magazine tests recipes countless times to understand how they work and in turn, offer the best version. So I knew I could try their recipe for stir fried shrimp with garlic, eggplant and cashews with confidence.

In perfecting this recipe they discovered several things that make this recipe stand out.

Soaking the shrimp for 30 minutes in salt, oil and aromatics yields a deeply flavored and tender finished product. The salt enters the flesh, allowing the shrimp to stay juicy. The oil picks up the flavor of the aromatics, in this case garlic, and distributes it over the shrimp. They also address the issue of the typical home stove that lacks the high heat of restaurant burners. This problem is solved by cooking the components of the dish in batches and trading in the wok for a skillet to ensure maximum surface area for even cooking.

As with all stir fry dishes, everything should be ready and portioned out when you start the recipe. Soak the shrimp in the seasoned brine. Whisk the sauce together next. My personal trick here is when you are making a sauce with both wet and dry ingredients I measure out the dry ingredients first since they will not stick to the measuring spoon, like soy sauce does.

The components of the dish are cooked in batches. First, the eggplant and scallion greens are cooked until lightly browned and transferred to a bowl. Next in are the aromatics, thinly sliced garlic and scallions. Cook until browned, don’t burn that garlic! To the aromatics, add in the shrimp. The shrimp are cooked to a light pink on both sides, then the sauce is added to the pan. Raise the heat to high to thicken the sauce and finish cooking the shrimp. The eggplant is returned to the skillet and tossed, ready to absorb the flavors of the sauce.

I made some changes to the original recipe. I used one tablespoon of sugar instead of two in the sauce, the oyster sauce adds its own sweetness. I also used more eggplant than called for since it cooks down considerably.  Serve with white or brown rice, this is a dish that is quick to execute and quite delicious.

A recent harvest of all the varieties of eggplant we are growing.

Stir Fried Shrimp with Eggplant and Cashews

adapted from Cooks Illustrated

Serves 4

  • 6 medium garlic cloves, 1 minced or pressed through garlic press, 5 thinly sliced 
  • 1 pound extra-large (21-25) shrimp, peeled, deveined, and tails removed 
  • 3 T vegetable oil 
  • ½ t table salt 
  • 2 T soy sauce (I use low-sodium Tamari)
  • 2 T oyster sauce 
  • 2 T dry sherry or Shaoxing wine
  • 1 T sugar 
  • 1  T toasted sesame oil
  • 1 T white vinegar (I use rice vinegar)
  • 1/8 t red pepper flakes 
  • 2 t cornstarch 
  • 6 large scallions, greens cut into 1-inch pieces and whites sliced thin 
  • ½ c cashews, unsalted 
  • 1 medium eggplant (about 3/4 pound), cut into 3/4-inch dice 

Directions

  1. Combine minced garlic with shrimp, 1 tablespoon vegetable oil, and salt in a medium bowl. Let shrimp marinate at room temperature 30 minutes.  Depending on your particular brown rice (regular, instant, etc.) start your rice as appropriate.
  2. Meanwhile, whisk soy sauce, oyster sauce, sherry, sugar, sesame oil, vinegar, red pepper flakes, and cornstarch in small bowl. Combine sliced garlic with scallion whites and cashews in another small bowl.  Heat 1 tablespoon oil in 12-inch nonstick skillet or a wok over high heat until just smoking. Add eggplant and cook, stirring frequently, until lightly browned, 3 to 6 minutes. Add scallion greens and continue to cook until scallion greens begin to brown and eggplant is fully tender, 1 to 2 minutes longer. Transfer vegetables to medium bowl.
  3. Heat remaining tablespoon oil to now-empty skillet/wok. Add cashew mixture and cook, stirring frequently, until just beginning to brown, about 30 seconds. Add shrimp, reduce heat to medium-low, and cook, stirring frequently, until shrimp are light pink on both sides, 1 to 1½ minutes. Whisk soy sauce mixture to recombine and add to skillet/wok.  Return to high heat and cook, stirring constantly, until sauce is thickened and shrimp are cooked through, 1 to 2 minutes. Return vegetables to skillet, toss to combine, and serve.

August 11, 2017 Green Beans and Cucumbers with Miso Dressing

I couldn’t bear to do it, smash the cucumbers and green beans as called for in this recipe that is. This very easy and flavorful dish from the June issue of Bon Appetit uses a technique popular in many Asian countries. Smashing the cukes and beans with a cleaver or a rolling pin tenderizes them and makes lots of nooks and crannies for the dressing to permeate. But not with the first green beans and cucumbers from the garden this season. Maybe in a week or two but for now I will use a more traditional approach. This recipe is quite similar to pau huang gua, a Sichuan cucumber salad, typically served with rich spicy food.

Start the recipe by peeling the cucumber, I like to leave a small strip of skin for color contrast. Chop into bite sized pieces and toss with a little salt to draw out excess moisture. The beans were an interesting addition, the original recipe in Bon Appetit didn’t call for cooking them, I presume they thought dressing them would do the job of tenderizing them. I chose to blanch the beans for just a few minutes to make them crisp-tender and ready to absorb the dressing.

The dressing couldn’t be easier, the ginger, garlic and serrano pepper are all grated, a Microplane makes quick work of that. Combine these ingredients with white miso, rice vinegar, olive and sesame oil. Miso is a fermented soybean paste traditionally used in Japanese cooking. White miso will provide a more delicate flavor, switch in a red miso for a stronger and saltier flavor. You will find miso in the refrigerated section of Asian grocery and health food stores.

Place the well-drained cucumbers and green beans in a bowl and toss with some of the dressing, just enough to coat the vegetables. You will have more than enough, which is a good thing. Toss sautéed eggplant and zucchini with halved cherry tomatoes with the dressing for another version of this dish.

Cucumber vines in the greenhouse, circa 2015.
Joe is growing both bush and pole beans.

Green Beans and Cucumbers with Miso Dressing

Serves 4

Ingredients

  • 3 Persian cucumbers or 1 English hothouse cucumber
  • Kosher salt
  • 1 lb green beans, stems trimmed
  • 1 1½ piece ginger, peeled and finely grated
  • 1 serrano or Fresno chile, finely grated
  • 1 garlic clove, finely grated
  • 1/3 c unseasoned rice vinegar
  • ¼ c white miso
  • ¼ c olive oil
  • ½ t toasted sesame oil
  • Toasted sesame seeds and scallions or thinly sliced shallots for serving

Directions

  1. Peel cucumbers and chop into bite-sized pieces. Toss with a pinch of salt in a medium bowl. Let sit to allow salt to penetrate.
  2. Bring a medium sized pan of water to a boil with a pinch of salt. Add beans and cook until just tender, 3-4 minutes. Drain beans in a colander.
  3. Whisk ginger, chile, garlic, vinegar, miso, olive and sesame oils in a medium bowl until smooth.
  4. Transfer the beans to a bowl for serving and toss with the dressing. Drain cucumbers well and add to the bowl, toss again. Top beans and cucumbers with toasted sesame seeds and scallions.
Toss cucumber chunks with a pinch of salt to extract excess water.
The beans I used were just picked, blanching them for a few minutes tenderizes them and brings out their flavor.
The original recipe used scallions, I used shallots from our garden.