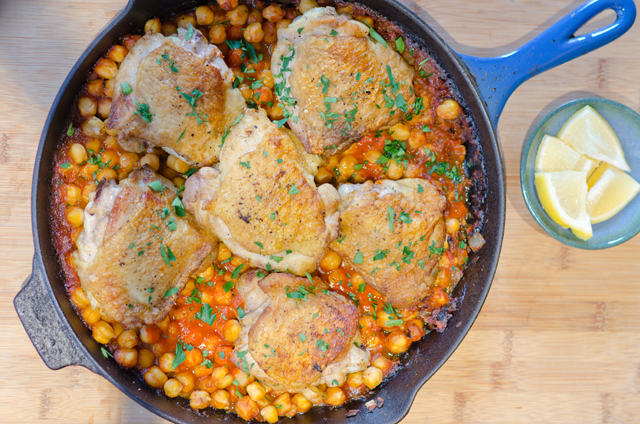
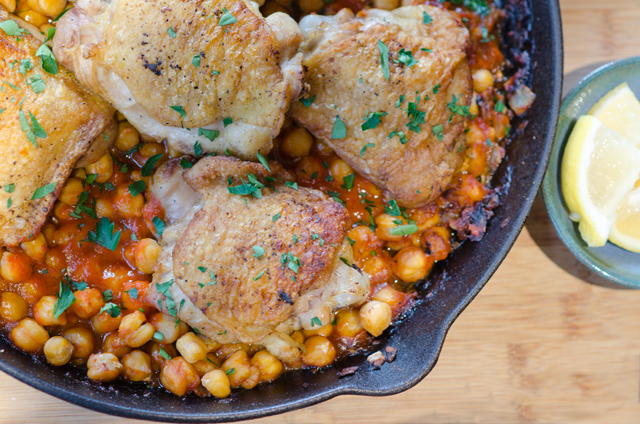
November 4, 2016 Pan Roasted Chicken with Harissa and Chickpeas

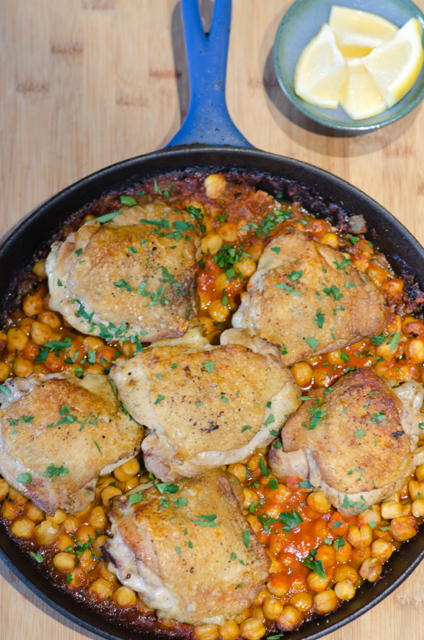
dsc_8239aI’ve been putting the harissa I made back in September to good use with this recipe that combines browned chicken thighs and chickpeas with a tomato broth infused with onion, garlic and harissa. Harissa is a spicy garlicky condiment native to the cuisines of the northwest African countries of Algeria, Tunisia and Morocco. The recipe varies by country, ethnicity and even neighborhood. My recipe for harissa included fresh sweet and chile peppers, fragrant spices like coriander, cumin and caraway, dried mint, lemon, garlic and olive oil. You can add some to bring an unexpected kick to a tomato sauce, toss with roasted vegetables, stir into hummus or make this middle eastern inspired chicken dish.

I love cooking chicken thighs for a week night dinner. They are not temperamental like the boneless skinless chicken breast that has its brief moment of juiciness, then dries out and disappoints when held for any length of time. Chicken thighs, no matter what preparation you choose, will wait patiently in a warm oven if dinner is delayed. A combination of chicken thighs and legs works well in this recipe also.

Begin this preparation by finding the correct pan. You will need a heavy bottomed, oven proof skillet that fits comfortably in your oven. No plastic handles please, many skillets are marked oven proof on the bottom. Keep a pot holder over the oven door lest you forget and touch the very hot handle with your unprotected hands. I know because I have done it. Preheat the oven to 425°F or as I do, 400°F for convection cooking. Heat the oil over medium high heat and swirl the pan around to evenly distribute the oil. Salt and pepper the chicken pieces and add skin side down to the hot skillet. You may need to do this step in two batches. If you crowd the chicken it will steam, not brown. Brown the chicken on the first side for about five minutes, or until golden and crisp, resist peeking too soon or the skin may tear. Turn on the other side and cook an additional four to five minutes. Add all the browned chicken pieces to a plate and keep warm. Empty all the drippings from the pan except about a tablespoon full into a small metal bowl or glass measuring cup. Hot oil will eat right through that empty plastic yogurt container you considered using and then you will have the additional clean up of hot drippings on your countertop.

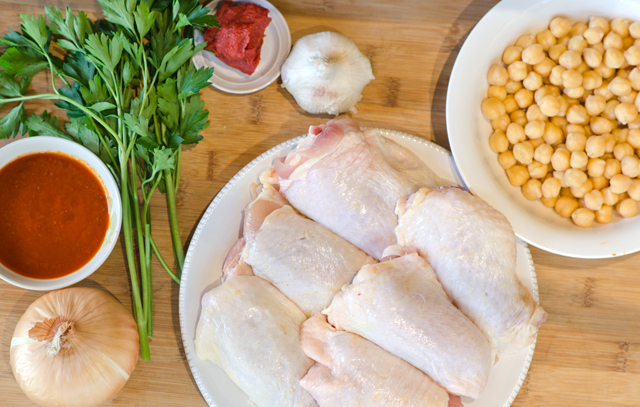
Add onion and garlic to your now empty skillet, cook, stirring often until softened, about 3 minutes. Add tomato paste and cook, stirring until it begins to darken, about 1 minute. Add the chick peas, harissa and chicken broth and bring the pan to a simmer. As much as I love fresh chickpeas, canned ones are fine for this recipe. They soak up the flavors in this dish and take on a nutty quality. Harissa, can be found in different forms. I’ve seen a powdered version that needs to be reconstituted, a jarred version, a paste in a tube and one that comes in the kind of container hummus comes in. Whatever version you buy or make, it is important to taste it before adding it to the dish. The recipe calls for a quarter cup of harissa and even though the other ingredients round out the flavor a bit, it is best to hold back if you think it will make the dish too spicy. It’s easier to add more at the end of the cooking time.

I have made this recipe several times on a weeknight which classifies it as a keeper for me. I like the fact that it doesn’t have a lot of ingredients, and most are pantry staples. Since it is finished in the oven, you have time to make a salad or cook a vegetable while the chicken cooks. I have added vegetables when the dish goes in the oven,  for me, end of season baby eggplants, I think quartered Brussels sprouts or small florets of cauliflower would work as well.

dsc_8232a

Pan Roasted Chicken with Harissa and Chickpeas

Serves 4

Ingredients

  • 1 T olive oil
  • 3 lb bone in chicken thighs (6-8 thighs)
  • Kosher salt and freshly ground pepper
  • 1 small onion, chopped
  • 3 cloves garlic, finely chopped
  • 2 T tomato paste
  • 2 15-oz. cans chickpeas, rinsed
  • ¼ c or more to taste harissa paste
  • ½ c low sodium chicken broth
  • ¼ c chopped fresh flat leaf parsley

Directions

  1. Preheat oven to 425°F. Heat oil in a large ovenproof skillet over medium high heat.  Season chicken with salt and pepper. Working in 2 batches, cook until browned, about 5 minutes per side; transfer to a plate.
  2. Pour off all but 1 T drippings from the pan. Add onion and garlic; cook, stirring often, until softened, about 3 minutes. Add tomato paste and cook, stirring, until beginning to darken, about 1 minute. Add chickpeas, harissa and broth; bring to a simmer.
  3. Nestle chicken, skin side up, in chickpeas; transfer skillet to oven. Roast until the chicken is cooked through, 20-25 minutes. Top with parsley and serve with lemon wedges for squeezing over.
dsc_8243a

dsc_8246a

August 5, 2016 Swordfish Steaks with Orange, Fennel and Kalamata Olive Salad

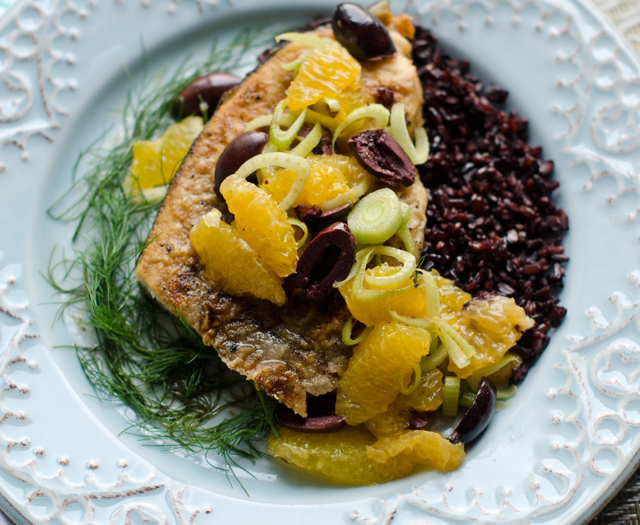
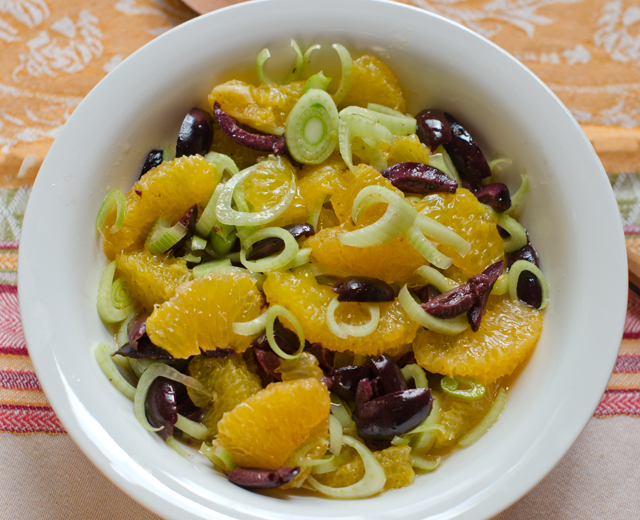
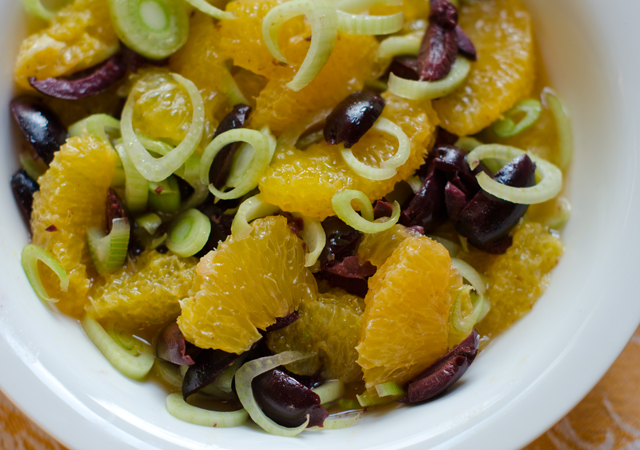
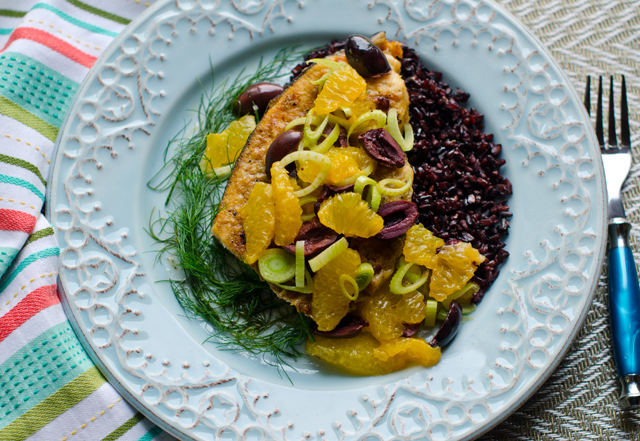
DSC_7633aWhen I am looking for a quick and easy fish entree that comes together in about 15 minutes, swordfish is one of my first choices. I love it’s rich, meaty texture and like to balance it with something that is tart, a bit sweet and a little salty. This palate pleasing salad of oranges, fennel and olives takes it’s inspiration from Sicily.

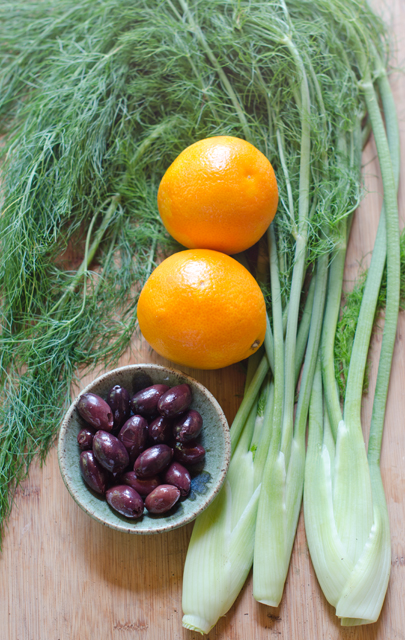
The orange supremes take some careful knife work but are worth the effort. Using your sharpest pairing knife, trim off the top and bottom of the orange. Rest the orange on one of the cut ends and trim off the peel and pith in large strips, carefully following the contours of the fruit. Cut the segments free from the membrane. Be sure to do this over a bowl to catch all the juices. Squeeze the remaining membrane to capture every last drop of juice. I reduced the juice in a small saucepan to intensify the flavor in the vinaigrette.

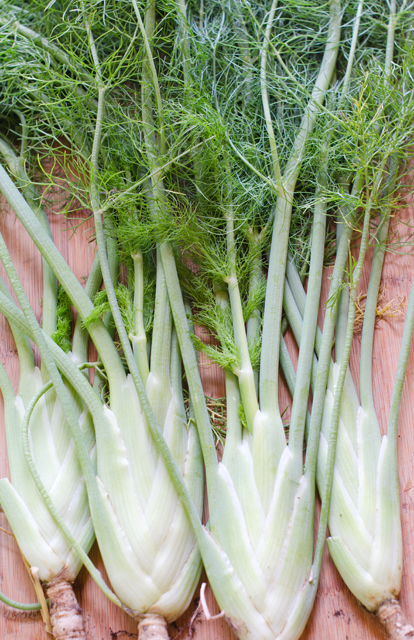
I think fennel is a greatly under used vegetable. Related to carrots, parsley, dill and coriander, it has a crunchy texture and refreshing licoricey flavor popular in Mediterranean cooking. To cut, trim the feathery foliage and stalks off where they meet the top of the bulb. The stalks and foliage can be used as a bed for cooking the fish. Cut the bulb in quarters lengthwise and cut out the core. Slice the sections thinly using a mandoline or a very sharp knife. I used fennel thinnings from the garden. They didn’t have a hard solid core so I used the entire fennel bulb.

Kalamata olives are almond shaped and dark purple in color. They are cured in a red wine vinegar brine that gives them a rich, fruity flavor. They are often found on the Mediterranean bar in many supermarkets. To pit olives, place them on a flat surface and lightly crush with the side of a broad flat chef’s knife. Remove the pit and cut the olives in half lengthwise.

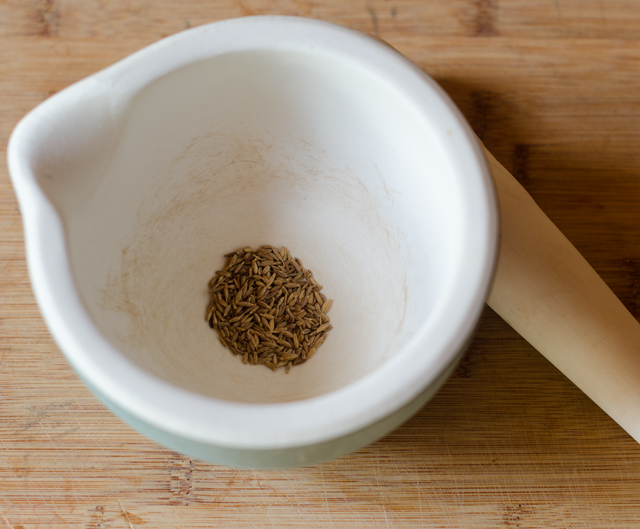
Cumin is one of my favorite spices and toasting cumin seeds really intensifies their flavor. Use a small dry skillet over medium to medium high heat. Keep the pan in constant motion, the seeds will darken and your kitchen will be filled with a warm toasty aroma. Immediately remove them from the pan and transfer to a bowl or a mortar and pestle. Crushing the toasted seeds brings out their flavor even more. If you don’t have a mortar and pestle, put the seeds in a plastic bag and crush them with the bottom of a heavy pan or a rolling pin.

Combine the reduced orange juice, toasted fennel and olive oil. Pour the dressing over the salad ingredients and lightly toss. Serve salad with the fish and garnish the plates with fennel fronds.

DSC_7602aOrange, Fennel and Kalamata Olive Salad

Ingredients

  • 1 small to medium fennel bulb
  • 2-3 medium oranges
  • 1//3 c kalamata olives, pitted and cut in half lengthwise
  • ½ t cumin seed
  • 2 T extra virgin olive oil
  • Kosher salt and pepper to taste

DSC_7606a

Directions

  1. Cut the fennel in quarters lengthwise, removing the core. Thinly slice the fennel, preferably with a mandoline. You will need 1 cup.
  2. Remove peel and pith from the oranges using a sharp paring knife. Working over a bowl to catch the juice, carefully cut between membranes, to remove segments. Squeeze remaining membrane to extract juice. In a small saucepan reduce the orange juice to two tablespoons. Set aside.
  3. Toast the cumin seed in a small non stick saute pan until fragrant and toasted. Grind toasted cumin seed in a mortar and pestle. In a small bowl combine reduced orange juice, cumin and olive oil, stir together.
  4. In a medium bowl combine the sliced fennel, orange segments, and olives. Pour the dressing over and lightly toss.  Season to taste with kosher salt and pepper.
DSC_7598a
Baby fennel from the garden.
DSC_7608a

Ingredients

  •  2- 6 oz swordfish steaks
  • Kosher salt and freshly ground pepper
  • Wondra flour
  • 1 T each olive oil and unsalted butter

Directions

  1. Preheat oven to 450°F.
  2. Measure steaks using the Canadian method to calculate total cooking time.
  3. Season swordfish steaks with salt and pepper. Dust with Wondra flour.
  4. Heat an oven-proof saute pan over medium high heat.
  5. Melt butter and oil in a saute pan large enough to hold the fish without crowding and small enough to fit in your oven.
  6. Brown swordfish for two minutes on each side.
  7. Move saute pan to oven. Finish in oven, subtracting four minutes from your total cooking time. For example 1″ fish=10 minutes cooking time minus four minutes equals six minutes in the oven.
  8. Using oven mitts, remove from pan from oven, transfer fish to serving plate with spatula. Serve with the orange, fennel and kalamata salad.

DSC_7614a

DSC_7631a

July 28, 2016 Ginger Cucumber Salad with Scallops

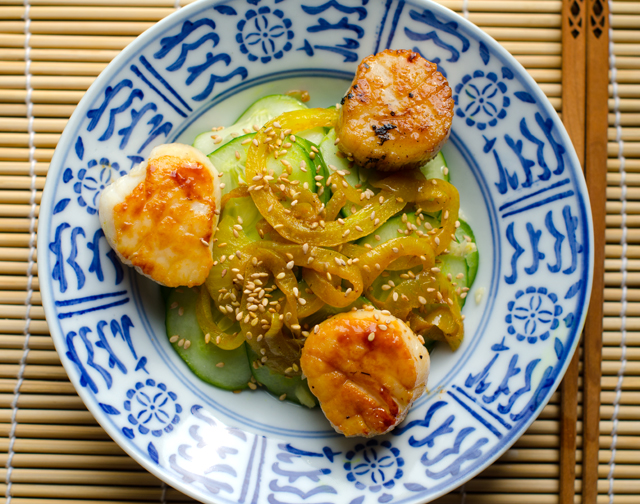
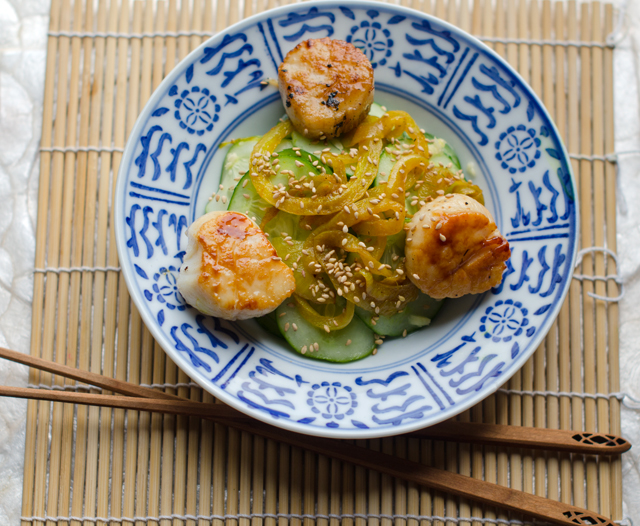
DSC_7580aOur current scorching, almost 100 degree temperatures with no end in sight, call for a minimum of time cooking over a hot stove. This recipe, from Mark Bittman’s Minimalist column in the New York Times is just what I was looking for. Ginger cucumber salad with scallops combines sweet buttery scallops with a crisp refreshing cucumber salad.

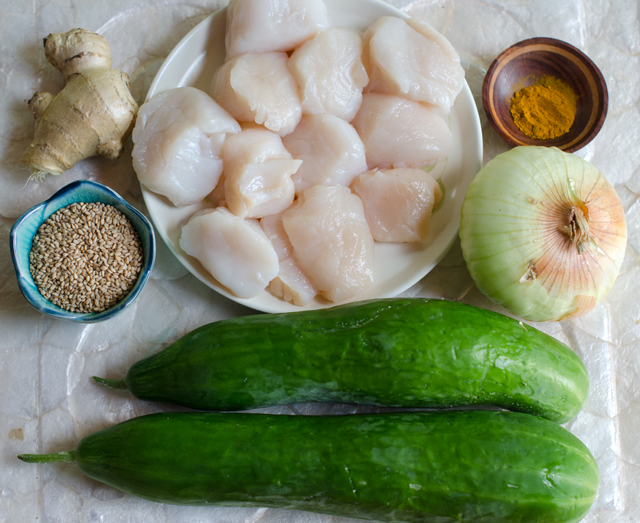
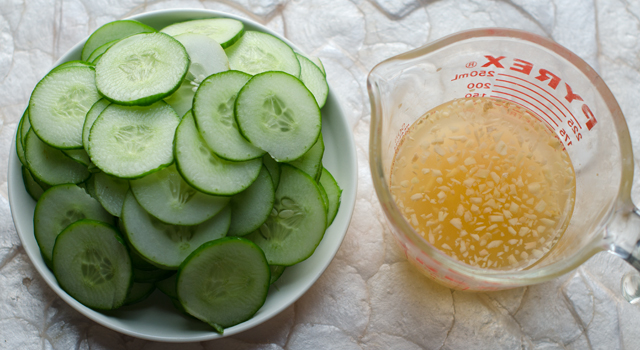
The cucumber salad is very simple and good in it’s own right. To get the thinnest cucumber and onion slices possible, use a mandoline. Since I am using smaller just picked cucumbers from the garden, there is no need to seed them, but I do prefer to peel them and leave strips of green skin. A classic dressing of rice wine vinegar, fresh grated ginger, sugar and salt provides a quick pickle for the cucumber slices. Remember to use plain rice vinegar, seasoned rice vinegar is flavored with sugar, salt and sometimes MSG. Plain rice vinegar is just mildly acidic and allows the cook to choose the amount of seasoning in the dish. A two inch piece of ginger translates into about two tablespoons. That might seem to be a bit too much but it is mellowed out with the other ingredients. If you are not sure, hold back a little and taste first.

While the cucumbers are marinating, preferably in the fridge, sear the scallops. Use a large non stick pan and brush with two tablespoons of a neutral oil, like grapeseed or canola, olive oil would compete (and win) against the delicate flavor of the scallops. When the oil starts to sizzle, add the scallops like the numbers on a clock starting at the top and going around, putting any additional scallops in the middle. If your pan isn’t large enough to cook all the scallops in one batch, divide them into two. Give the scallops room to sear, if they are too close they will steam. Check the first scallop, (twelve o’clock) after two minutes, if there is a nice brown crust, it’s time to flip. Continue checking around the clock until all the scallops are flipped. Repeat the step for the second side, this time moving the finished scallops to a plate.

The remaining oil, thinly sliced onion and turmeric are added to the same pan, no need to wash in between. Turmeric is the spice that gives Indian curries their vibrant color and adds warmth and a slightly bitter taste to dishes. The medical component in turmeric, curcumin, is used to make a wide variety of medicines as an anti inflammatory agent. The addition of turmeric is optional but adds another dimension to the salad.

Don’t skip the toasted sesame seeds, they add their own fragrance and just a little crunch. Stir the sauteed onions into the cucumber salad, top with the scallops and serve.

Seared Scallops with Ginger Cucumber Salad

Serves 2-3

Ingredients

  • 1 ¼ lbs small cucumbers
  • ½ c rice vinegar (not flavored)
  • 2-inch piece of ginger, minced or finely grated
  • 2 T sugar
  • 1 t salt
  • 3 T canola oil
  • 1 lb medium to large scallops
  • 1 medium onion, thinly sliced
  • ½ t ground turmeric
  • 2 T toasted sesame seeds

DSC_7572a

DSC_7573a

Directions

  1. Slice cucumbers thinly, a mandolin  does the best job, if the cucumbers are large, peel and seed before slicing.
  2. Combine rice vinegar, ginger, sugar and salt and toss with cucumbers. Let stand 30 to 60 minutes.
  3. Put 2 tablespoons oil in a large non stick skillet over medium high heat. When the oil starts to sizzle add the scallops. Sear on first side for two minutes, flip to the other side and  sear for about two minutes. Remove scallops to a plate.
  4. Add the remaining oil, then add the onions and turmeric. Cook until the onion softens, about five minutes.
  5. Toast sesame seeds in a small dry skillet until fragrant and brown, three to four minutes. Stir the onions into cucumbers, top with scallops, garnish with sesame seeds and serve.

DSC_7576a

May 27, 2016 Sauteed Chicken Breasts with Tomato Basil Sauce with Capers

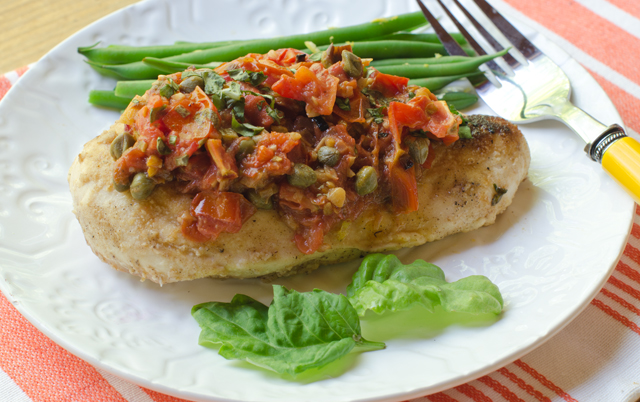
DSC_6957aBoneless skinless chicken breasts, the little black dress of dinnertime. A sautéed chicken breast with a simple sauce can make a delicious quick dinner or has the potential to turn into a dried out disaster. So it is very important to learn how to cook them properly. I’d like to share the method I’ve learned via Cooks Illustrated magazine that will provide excellent results every time.

The most important ingredient and foundation of the dish is the chicken. I use a chicken that is antibiotic and hormone free and not injected with water or other additives. My favorite brand is Bell and Evans, a little more expensive but definitely makes for a much better finished product.

The original recipe, written in 1993 called for the chicken to be rinsed under cool water. Research now shows that washing poultry can increase the risk of cross contaminating something else in your kitchen, the sink, countertops, utensils etc. So it’s best just to pat the chicken dry. The flour will adhere better and any bacteria on the surface of the chicken will be killed when you cook it.

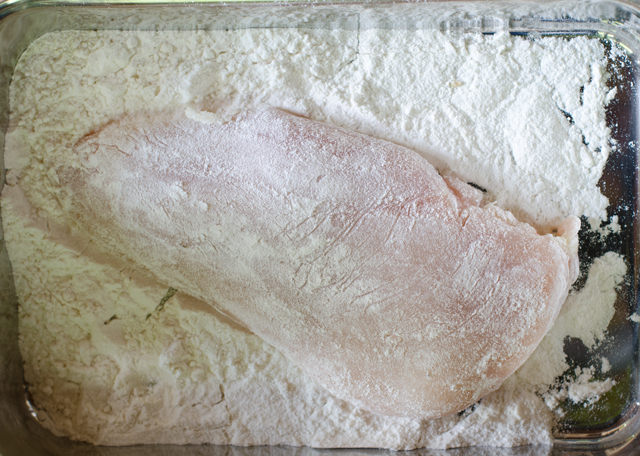
Remove any fat, gristle or small pieces of bone from the chicken breasts. If the tenderloin is still attached, remove for another use. The chicken breast needs to be dried thoroughly on all surfaces with paper towels. Salt and pepper then lightly flour both sides of the breast before cooking. The flour produces a moisture barrier so the fat spits less and the chicken develops a browned crispy crust.

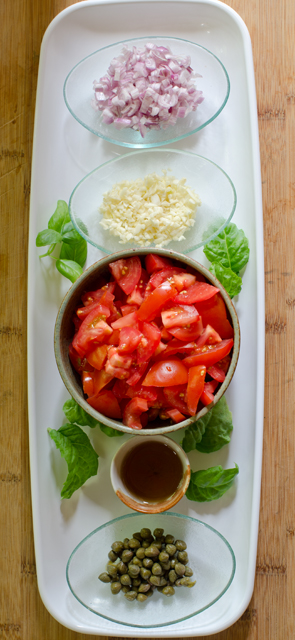
When you are ready to make the recipe, the whole procedure takes less than 10 minutes. It’s important to have all the ingredients, including the components for the sauce ready to go. The French have a phrase for it, mise en place. I have all the ingredients measured out in small bowls in the fridge until it’s time to cook. The only thing I would wait to do until the last minute would be to dry the chicken breasts. There is only a quarter cup of flour to coat four pieces of chicken and have found I use less than half of it. If you are gluten-free you could substitute a combination of rice flour and cornstarch or a nut flour. Working with one cutlet at a time dip it into the flour and evenly coat.

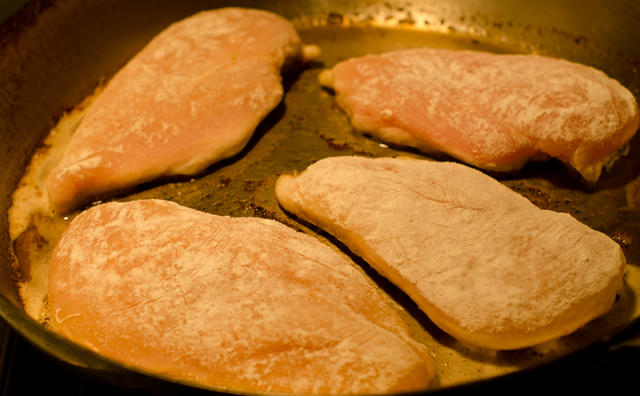
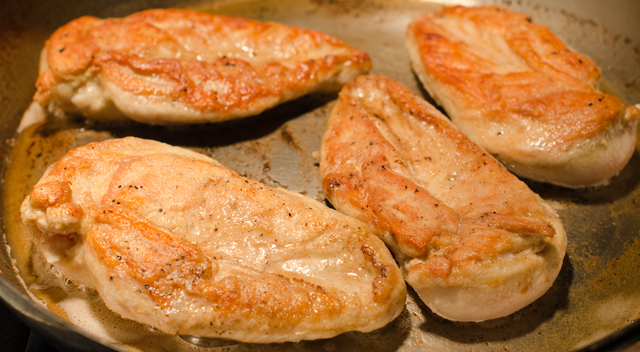
Turn your oven to the lowest setting or turn on the heat lamp above your stove. I have a commercial style cook top and have found I need to use a little more oil and butter to cook the chicken breasts than the original recipe. Place the chicken breasts tenderloin side down in the sizzling oil and butter combination. Set your timer for four minutes. Flip them over and cook on the second side for about three minutes, move to a plate and keep warm.

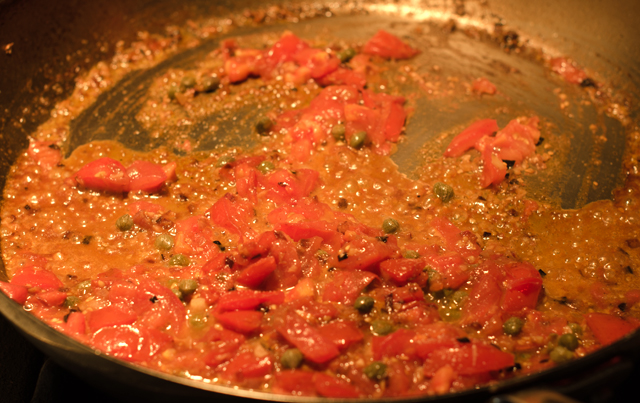
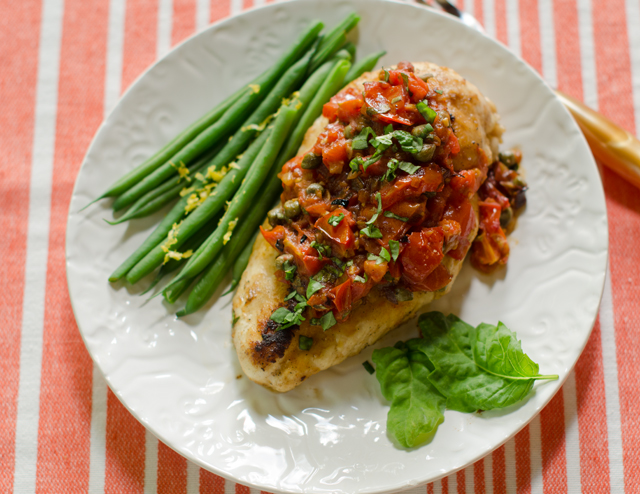
Add shallots to the pan, and sauté until soft, next add the garlic and tomatoes and cook until the tomatoes are juicy. When I am not using tomatoes from our garden I like Campari tomatoes. They have an excellent texture (read not mealy) with the right balance of acid and sweetness. They are considered a cocktail tomato, a little bigger than a cherry tomato but smaller and rounder than a plum.  The original recipe called for seeding the tomatoes, I chose to skip that time consuming step. Add the wine or vermouth and the capers and boil until the sauce is thickened. Stir in chopped basil and salt and pepper to taste. The result? A chicken breast that is nicely browned on the outside with a tender and juicy interior with a delicious and easy sauce to accompany it.

DSC_6936a
Sauce ingredients ready.
Lightly flour each cutlet.
Add chicken to pan.
Add chicken to pan.
DSC_6943a
Flip chicken after four minutes.
Sauce ingredients come together quickly


Sauteed Chicken Breasts with Tomato Basil Sauce with Capers

Serves Four

Ingredients

  • 4 boneless skinless chicken breasts (about 1½ to 1¾ lbs)
  • Kosher salt and freshly ground pepper
  • ¼ c all purpose flour
  • 2 T unsalted butter
  • 2 T vegetable oil

Directions for cooking the chicken

  1. Dry the chicken thoroughly with paper towels and sprinkle 1 teaspoon salt and ½ teaspoon pepper on both sides of the cutlet.
  2. Measure flour into a pie plate or similar container. Working with one cutlet at a time, press both sides into flour.
  3. Heat butter and oil in a 9 inch or larger heavy skillet until the butter has foamed and has just started to take on color.  Place the cutlets in the skillet, tenderloin side down.
  4. Keep the skillet on medium high heat, reducing heat if it starts to smoke. Saute the cutlets for 4 minutes on the first side,  using tongs, turn to the other side.  Cook for 3 minutes then remove cutlets to a plate and keep warm in an oven on the lowest setting or under a heat lamp.

Ingredients for the tomato basil sauce

  • 1/3 c shallots
  • 2 T chopped garlic
  • 2 c chopped tomatoes
  • ¼ c dry white wine or vermouth
  • 2 T capers, drained
  • 2 T shredded basil leaves

Directions for the tomato basil sauce

  1. Without discarding the fat, place skillet over medium heat. Add shallots and saute until softened, about 1 minute. Stir in garlic and then the tomatoes. Increase heat and cook, stirring frequently until the tomatoes have broken down and become juicy, about 2 minutes.
  2. Add wine, capers and any chicken juices from the plate. Boil sauce until it thickens, stir in herbs and season to taste with salt and pepper. Serve immediately.

DSC_6950a

DSC_6957a


May 14, 2016 Wood Planked Halibut with Herb Salad

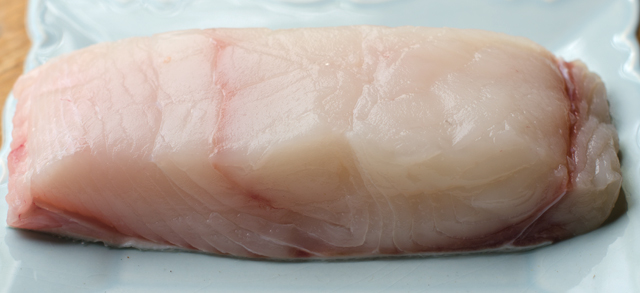
DSC_6927aThe creamy pinkish-white halibut I purchased at my favorite seafood store, Heller’s was the perfect match for a recipe on Friday’s episode of The Chew. The episode, tied in for Mother’s Day was titled, “Kitchen wisdom, things you learn from your mother about cooking”. This recipe shared by Michael Symon was not so much about things you learn from your mother, but treating your mom with a dinner she would be more likely to order out at a restaurant but probably wouldn’t want to cook at home

The recipe for wood planked halibut with herb salad sounded interesting and a bit different than how I usually prepare halibut. Michael chose halibut because it is in season and reasonably priced. Cod would be a good substitute.  We have been using the cedar plank method of cooking for several years now but have only used it with salmon. I thought the delicate flavor of the halibut would be complemented nicely by the cedar.

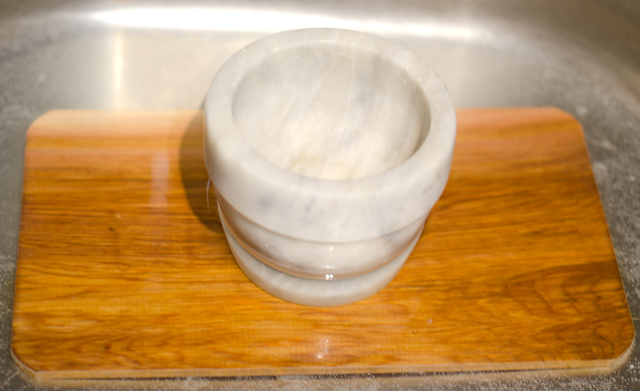
The first step in the recipe is to soak the wood planks, he was using three for three pounds of fish. Wood planks are becoming more readily available in grocery stores, many times they are set up with the barbecue displays. Most of the ones I have seen are cedar. Chef Symon said he was using an oak plank. Be sure to soak your plank for several hours, even overnight. You will need something to weight it down so it doesn’t float to the top, I use a heavy marble mortar. While you are soaking one plank for dinner that night, soak a second along with it, wrap it in foil and store it in the freezer for the next time. Michael said to soak it in salt water to season the underside of the fish,

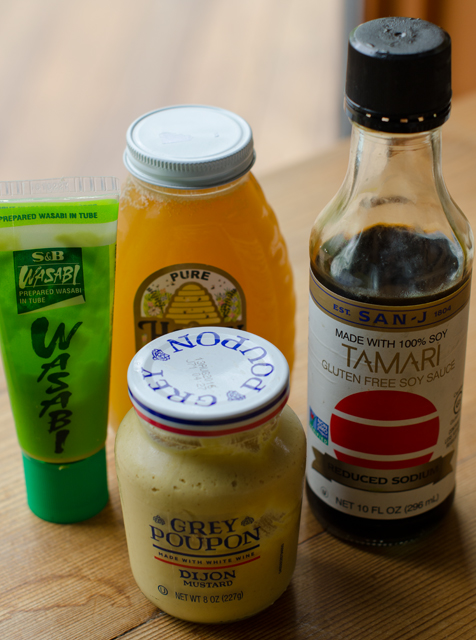
The first discrepancy in the recipe came with the proportions for the glaze. The online recipe called for quarter cup of soy sauce a tablespoon of hot Chinese mustard and 2 tablespoons of honey. On the television program, chef Symon said to use equal parts of each. That’s straight from the chef’s mouth so that’s how I followed the recipe.

The online recipe called for 3 pounds of fish, by my estimates, that could serve 6 to 8 people depending on portion size. The online recipe stated it served four, those are pretty healthy portion sizes. I had a little less than a pound to serve two people, so I cut back on the glaze accordingly. Chinese mustard is the condiment in little packets you might have stuffed in the butter keeper in your refrigerator. Unfortunately I didn’t have any and couldn’t find any in my local supermarket. So I added about a quarter teaspoon of wasabi to some Dijon mustard. You can adjust the heat to your own liking, or skip the wasabi completely. Whisk the ingredients together, put half in a bowl to glaze the fish before cooking and the other half in a bowl as a finishing glaze.

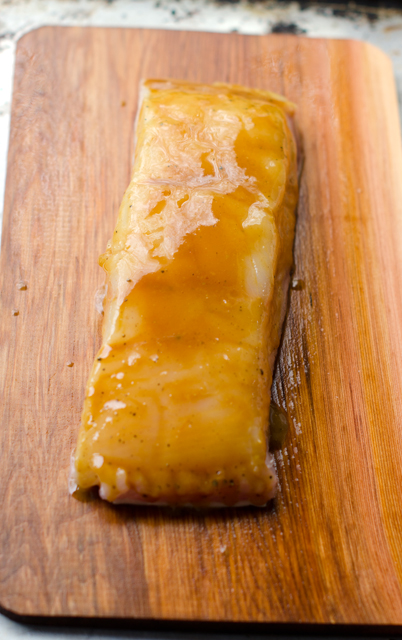
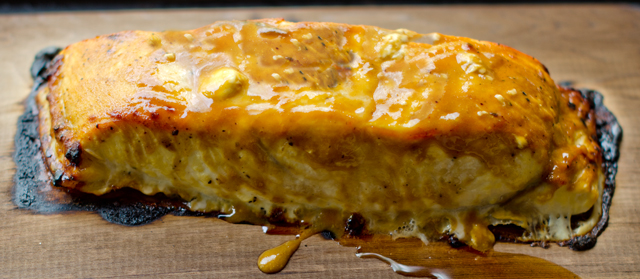
Season the halibut with salt-and-pepper on both sides, if you don’t like to see black specks on your white fish, use white pepper instead. Place the fish, skin side down on the plank. Michael puts his fish on a foil lined baking tray for easy clean up. Joe, who is the resident fish cooker, put our well soaked board directly on the oven rack. . Brush the first half of the glaze on the fish. This is where discrepancy number three comes in. The online written recipe states to cook the fish for 30 minutes. On the TV program, Chef Symon says it cooks in about 8 minutes or 5 under the broiler! Where is the truth here? We rely on the Canadian fisheries method of cooking fish which estimates the total cooking time of any fish to be 10 minutes (maybe even a little less ) for every inch of thickness, measuring at the thickest part at 450°F.

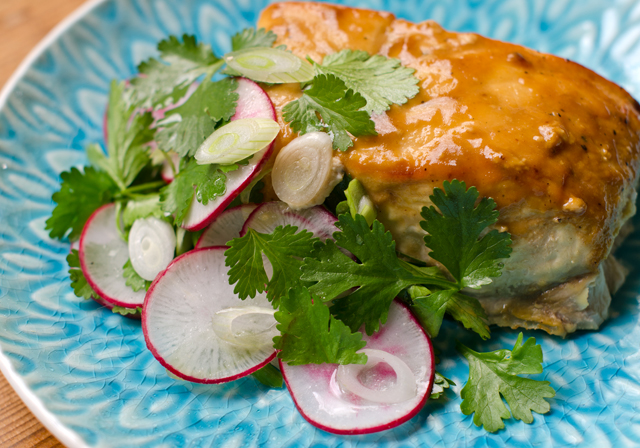
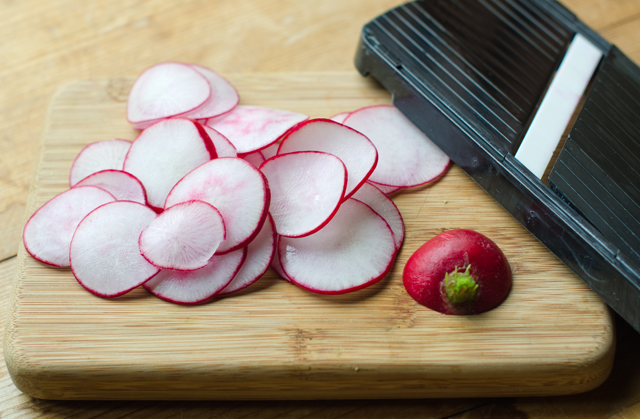
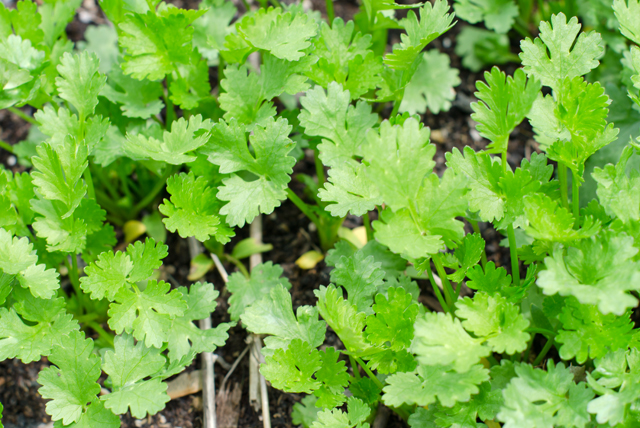
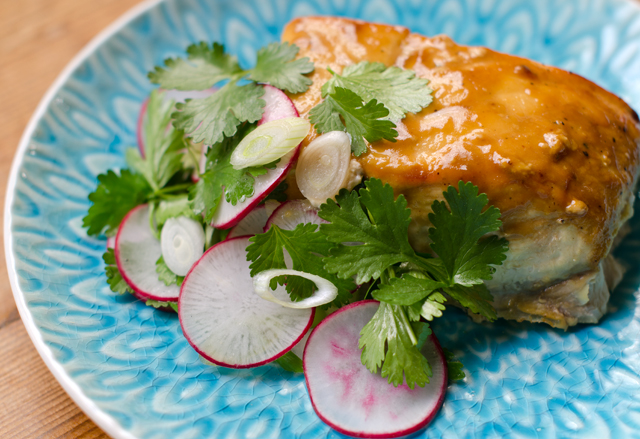
While the fish is cooking, you will have time to make the herb salad. It’s a combination of thinly sliced radishes, cilantro, and scallions tossed with lime juice and extra-virgin olive oil. We just finished our first crop of radishes and there’s lots of cilantro coming up “wild” in the circle garden. Don’t despair cilantro haters, Michael said any soft herb (as opposed to one that is woody,  like rosemary) could be used. That would include parsley, dill and chervil. The amount of herb salad for the online recipe feeding four people/three pounds of fish was a reasonable portion for two so scale up the recipe if you are cooking a larger quantity of fish.

I would definitely make this recipe again, the wood smoke lightly permeates the fish and the kitchen, an added bonus. The glaze is easy, using mostly pantry ingredients. Michael Symon also pointed out that this method for cooking fish could be easily done on the grill, an added bonus for the summer months to come.

DSC_6900a
Soak the wood plank for several hours or overnight. Just be sure it doesn’t float to the top!
DSC_6911a
Fresh halibut from Alaska.
DSC_6902a
Ingredients for the marinade.


DSC_6914a
Half of the marinade is brushed on before it goes in the oven.
DSC_6908a
While the fish is cooking, make the herb salad. I sliced the radishes as thinly as possible on a mandolin.
DSC_6898a
Cilantro comes up in our garden on it’s own. If you don’t like cilantro, use parsley.
DSC_6915a
Brush the remaining glaze over the fish after cooking.

Wood Planked Halibut with Herb Salad

Serves 2

Ingredients

  • 2 T tamari or soy sauce
  • 2 T dijon style mustard
  • ¼t wasabi from a tube, more or less to taste
  • 2 T honey
  • 12-16 oz halibut
  • 1 c  thinly shaved radish
  • ½ c cilantro leaves
  • ½ c scallions, sliced thinly on the diagonal
  • 3 T olive oil
  • ½ lime juiced
  • 1 cedar plank submerged in cold water for 2 hours and up to overnight
  • Kosher salt and freshly ground black pepper

Directions

  1.  Preheat oven to 450°F Line a baking sheet with foil and place the plank on it.
  2.  In a medium sized bowl add the soy, mustard, wasabi and honey. Mix until smooth.  Divide the glaze evenly into two bowls.
  3. Season the halibut on both sides with salt and freshly ground pepper. Place on the plank. Brush the contents of the first bowl evenly over the fish. Measure the fish at it’s thickest point to calculate the amount of time it needs to cook. The Canadian fisheries method of cooking fish is ten minutes per inch, measuring at the thickest part of the fillet, start checking at eight minutes, halibut is a fish that “puffs up” when cooked so a little additional time may be needed. Don’t overcook,  fish still continues to cook after you take it off the heat. Remove fish from oven and brush with additional glaze.
  4. While the fish is cooking add radishes, scallions and cilantro to a medium bowl. Season with salt and pepper. Add olive oil and lime juice, toss to combine.
  5. Serve halibut with herb salad.

DSC_6925a

May 1, 2016 Smoked Salmon and Spinach Frittata

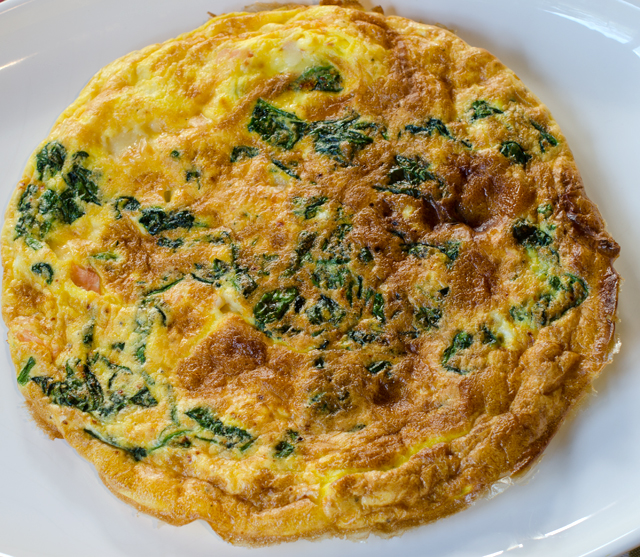
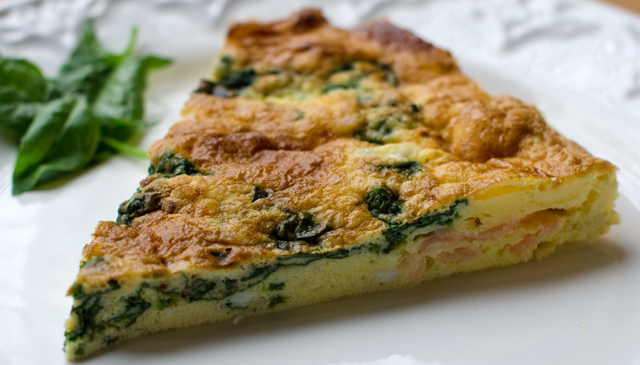
DSC_6759aSpinach again, this time combined with eggs, cheese and smoked salmon to make a frittata. Quick to make, they are as good at breakfast as they are as an impromptu supper. Once again, I used the basic recipe of a frittata from Cooks Illustrated, for broccoli rabe and sun dried tomatoes. substituting the spinach and smoked salmon.

A large oven proof non stick skillet is a must for making this recipe, check first that it fits in your oven. Be sure to have a pot holder draped over the oven door so you are not tempted to touch the handle with your bare hands. I learned that lesson the hard way many years ago. Sauté the spinach just enough to wilt it down, then add garlic and Aleppo pepper, a favorite ingredient of mine. Small cubes of cheese are added to the eggs, for this recipe I like a Jarlsberg or a Havarti with dill.

The eggs are cooked for a short time on the stove top. Add the smoked salmon when the eggs are setting up on the bottom before they go in the oven. Once the frittata is spotty brown and puffed, remove it from the oven. Allow it to sit for 5 minutes, the residual heat will finish the cooking. Loosen the frittata from the pan with a spatula and move it to a platter or cutting board for serving.

DSC_6760a

Smoked Salmon and Spinach Frittata

Ingredients

  • 12 large eggs
  • 3 T half and half or heavy cream
  • Kosher salt and freshly ground black pepper
  • 2 t olive oil
  • 3-4 c spinach, large stems removed
  • 1 medium clove garlic minced
  • ¼ t Aleppo pepper or paprika
  • ¾ c cheese cut into small cubes, Jarlsberg or Havarti with dill
  • ½ c smoked salmon chopped into pieces

DSC_6742a

Directions

  1. With oven rack in the upper middle position, heat broiler. Whisk eggs, half and half, a dash of salt and pepper in a medium bowl until well combined. Set aside.
  2. In a non stick 12″ oven safe skillet heat oil until shimmering. Add the spinach and cook until wilted, 2-3 minutes. Add garlic and pepper flakes and cook until fragrant, 30 seconds or so.
  3. Stir cheese into the eggs; add egg mixture into the skillet and cook, using spatula to stir and scrape the bottom of the skillet. Large curds will form but the mixture will still seem somewhat wet, about 2 minutes. Shake skillet to distribute eggs evenly; cook without stirring for 30 seconds to set the bottom. Sprinkle smoked salmon pieces evenly over the surface of the frittata.
  4. Slide skillet under broiler and broil until the frittata has risen and the surface puffs and turns spotty brown, three to four minutes. Remove skillet from the oven and let stand 5 minutes to finish cooking.
  5. Using a spatula, loosen frittata from the skillet and slide onto a platter or cutting board. Cut into wedges and serve.

DSC_6744a

DSC_6748a

DSC_6756a

April 26, 2016 Spinach and Mushroom Quesadillas with Tomatillo Salsa

DSC_6739a

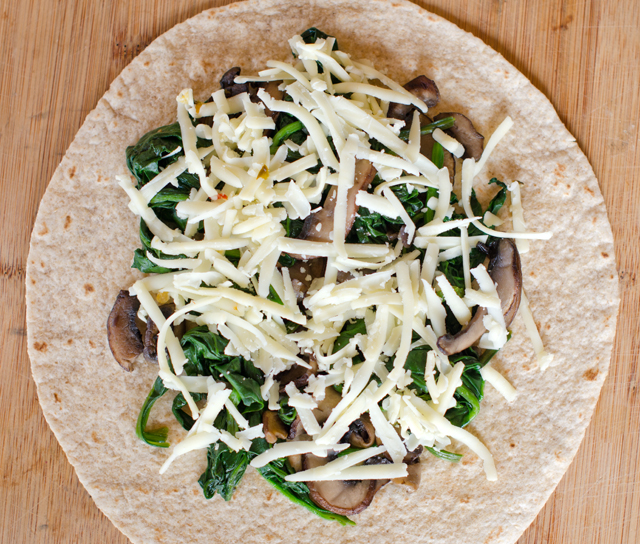
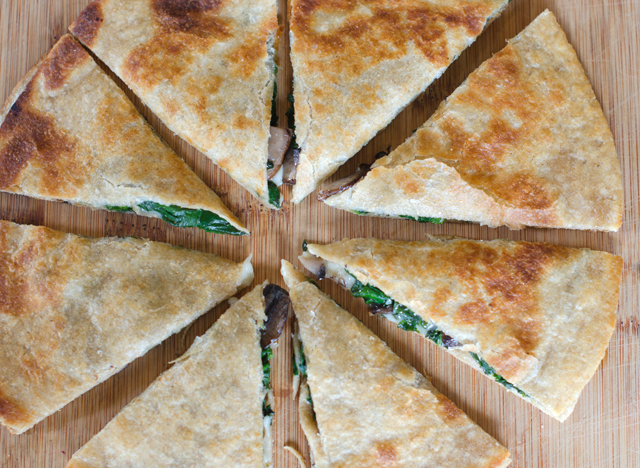
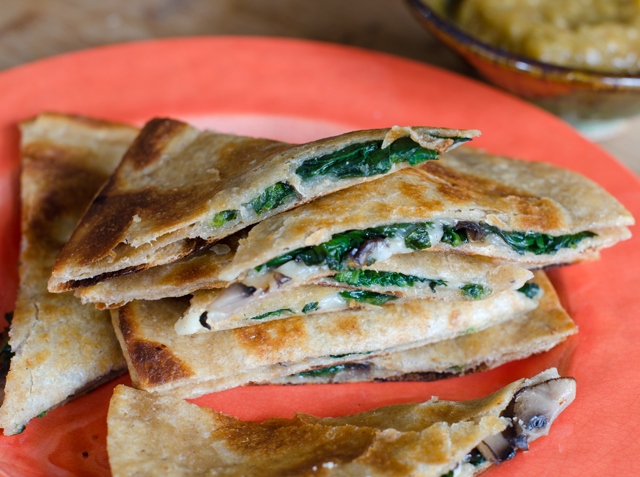
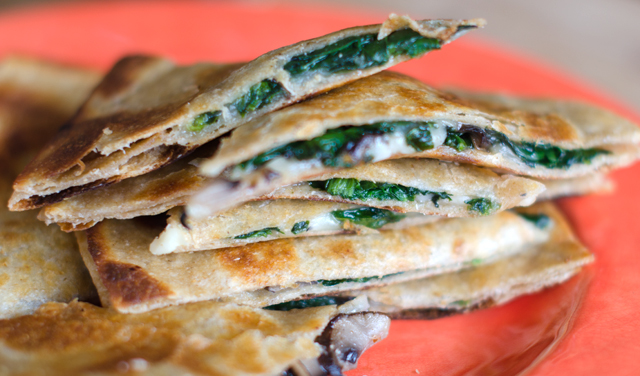
Still inspired by an abundance of, you guessed it, spinach, I was looking for yet another way to use our bounty. Inspiration this time came to me in the form of a quesadilla. Crispy on the outside and melted and creamy inside, spinach adds a healthy component to this popular dish. Quesadillas are easy and delicious any time of day, as a quick snack, lunch, even for breakfast. To accompany the quesadillas I made a simple tomatillo salsa.

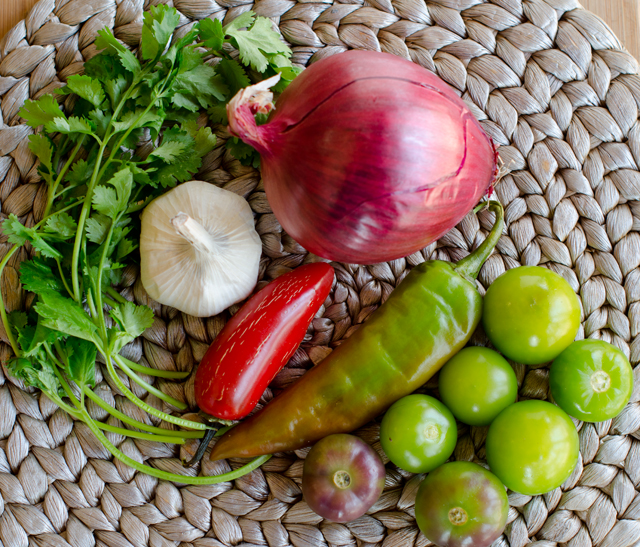
With the exception of the cilantro and garlic, the ingredients for the tomatillo salsa came straight from our freezer. Preparing tomatillos for the freezer is easy, I remove the papery husks and freeze them whole and raw in quart bags. A previously frozen tomatillo will not hold up to roasting but are fine in raw preparations like this. The Numex Joe E. Parker pepper used in this recipe is an Anaheim style pepper with a long slender shape and mild heat. We have an interesting variety of frozen hot peppers from gardens past,  milder ones like Joe E Parker and poblanos to hotter ones, cayenne, jalapeno, serrano and Thai hot. The surprising thing is that freezing them does not diminish their heat in the least. When a recipe calls for several hot peppers, I start with one, it is much easier to add heat than to take it away.

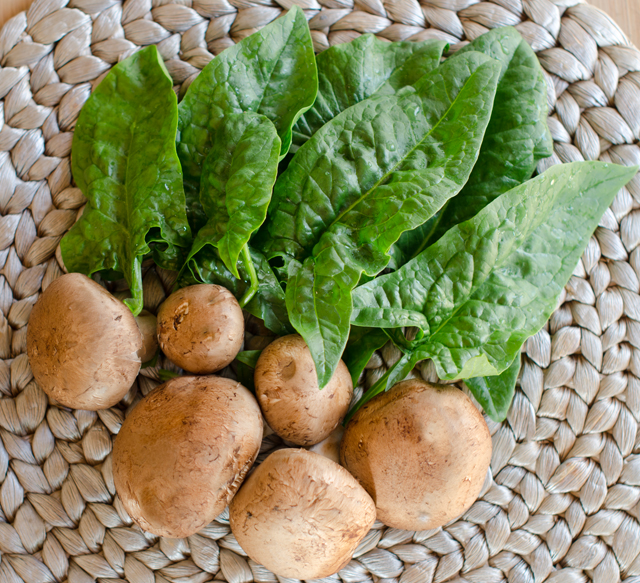
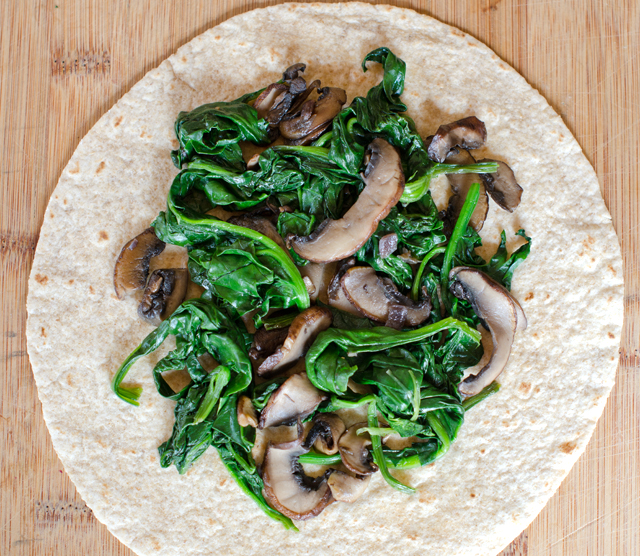
As always, picking the spinach takes more time than most of the steps in the recipe. The filling is easy to make and used twelve cups of fresh spinach, a real plus for me. If you don’t have an abundance of spinach in your garden, use bagged baby spinach. The slightly more assertive flavor of cremini mushrooms compliments the spinach nicely.

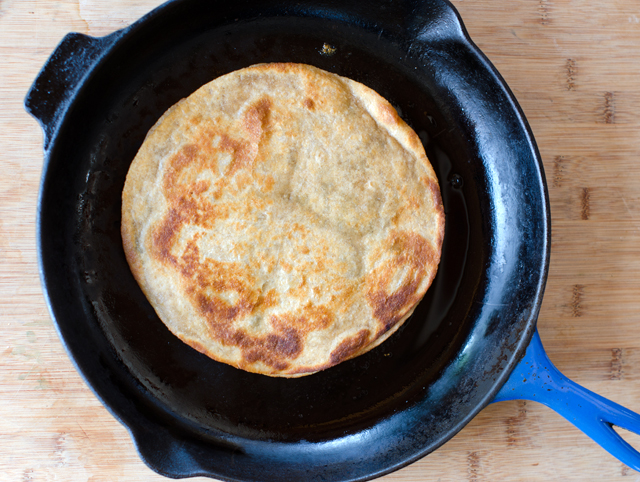
The options for cheese are endless. I used pepper jack and cheddar cheese, a good melting cheese is important here. Choose a large heavy bottom skillet to cook quesadillas. Just a light brushing of oil in the pan is all that’s necessary to brown the tortilla and keeps it from getting greasy. You can either fold one tortilla in half or stack one on top of another. I press lightly on the quesadilla in the pan to allow the cheese to melt a bit and hold the layers together before it is flipped.  The pizza wheel is the perfect tool to cut it into portions. Finished quesadillas can be held in an oven on low heat for 20 minutes.

Spinach and Mushroom Quesadillas

Makes four 8″ quesadillas

Ingredients for the filling

  • 1½ T olive oil or bacon drippings
  • 8 oz mushrooms, button or cremini, stemmed and sliced
  • 2-3 cloves garlic, finely chopped
  • ¼ c finely chopped red onion
  • 12 c spinach, large stems removed

DSC_6706a

Directions for the filling

  1. In a large skillet heat the oil or bacon drippings over medium high heat.
  2. Add the mushrooms, stirring constantly, until they begin to brown.
  3. Add the onion and garlic and continue cooking, stirring frequently until it looks translucent.
  4.  Add the spinach by the handful, wilting it before adding more, until it is all used.  Do not overcook.  Season with salt to taste.

Ingredients for assembling the quesadillas

  • Eight 8″ soft tortilla or taco shells, I used whole grain
  • Olive Oil
  • 1½-2 c grated cheese, I used a combination of pepper jack and cheddar

DSC_6712a

DSC_6715a

Directions for assembling and cooking the quesadillas

  1. Preheat oven to 180°F.
  2. Place four tortillas on two baking sheets, divide evenly the spinach and mushroom filling and the grated cheese between them.
  3. Top with the four remaining tortillas and lightly press to seal.
  4. Place a 12″ heavy bottomed skillet over medium high heat.  Brush the skillet lightly with olive oil.
  5. Place the quesadillas in the skillet one at a time, pressing down lightly but firmly and cook for about 3 minutes on each side. You can peek by lifting up with a spatula to see if it is getting golden brown. Transfer the cooked quesadillas to a baking sheet and keep warm in the oven, lightly covered with foil.
  6. Slice each quesadilla into 6-8 wedges, a pizza cutter works well here, and serve hot with tomatillo salsa or your own favorite.

DSC_6719a

DSC_6723a

DSC_6733a


Tomatillo Salsa

Ingredients

  • 3 cloves garlic, peeled
  • 1 jalapeno pepper, stemmed and seeded and quartered
  • 1 Numex pepper, stemmed and seeded and quartered
  • ¼ c roughly chopped red onion
  • 1 lb tomatillos, husked, rinsed and cut into quarters
  • ¾ c loosely packed, lightly chopped cilantro

DSC_6702a

Directions

  1. With a food processor or blender running, drop in the garlic cloves one at a time letting each piece get finely chopped before adding the next. Add the peppers, onion,  tomatillos and cilantro and process until smooth.

DSC_6731a


March 13, 2016 Salmon “Bulgogi” with Bok Choy and Mushrooms

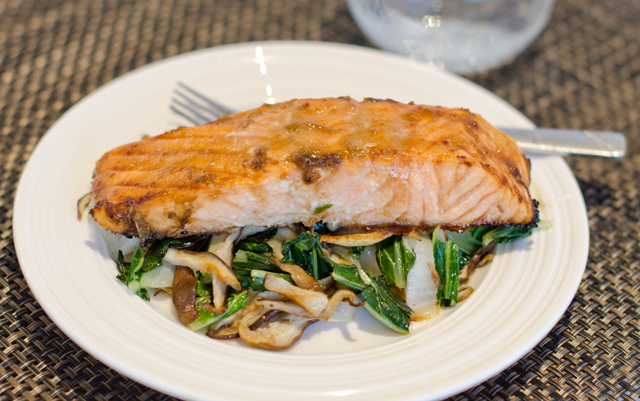
DSC_6398aI am always on the look out for new and interesting recipes. I have a large collection of notebooks containing them, with recipes I have tried or hope to try in the future. Some recipes I try once, others, a couple of times and there are the ones that become regulars in the dinner rotation. Salmon bulgogi is a recipe I found many years ago in Bon Appetit, and one I make quite often. A very flavorful combination of spicy, salty and sweet, it delivers maximum flavor and requires minimal effort.

Bul means fire and gogi means meat in Korean and refers to cooking marinated meat over an open flame, typically thinly sliced beef. In this recipe, heart healthy salmon replaces the beef.

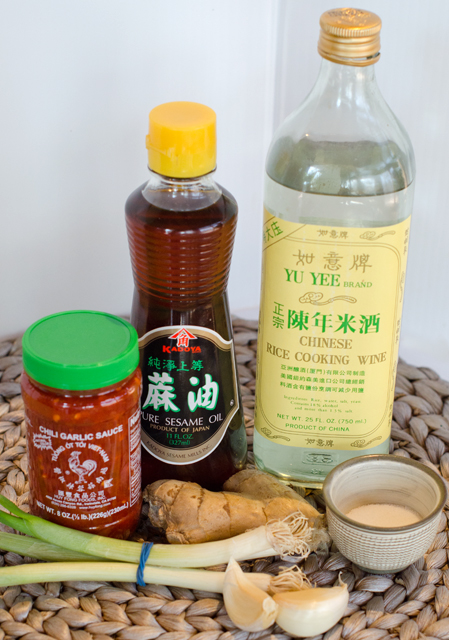
Since we have an extensive Asian pantry I usually have most of the marinade components on hand. The eight ingredients, garlic, green onions, soy sauce, rice vinegar, fresh ginger, sugar, sesame oil and chili garlic sauce are blended in a mini processor and spooned over the salmon. The original marinade was too salty for my taste so I cut the amount of soy sauce in half. Look for dark sesame oil when making this recipe. Pressed from deeply toasted seeds, it has a very concentrated flavor and a little goes a long way. A common ingredient in the bulgogi marinade, Asian pear, is used to tenderize the beef but not necessary for the salmon.

Don’t confuse chili garlic sauce with sriracha. Chili garlic sauce is chunky, not smooth and has a more pronounced garlicky flavor. Sambal oelek, a common table condiment in Asian restaurants, looks the same as chili garlic sauce. Sambal oelek is made from chilis preserved with vinegar and salt and does not contain garlic. Now that it is more widely available, it might be interesting to substitute gochujang, the Korean hot sauce made from chile peppers, glutinous rice, fermented soybeans and salt.

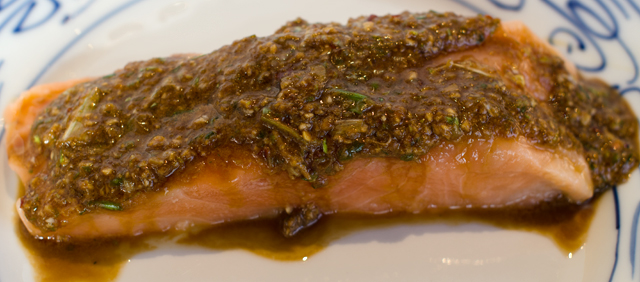
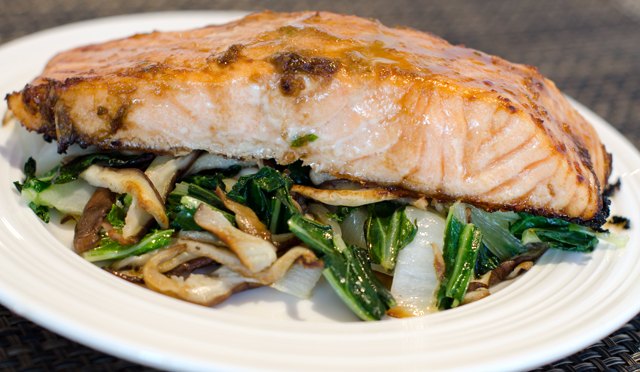
Marinade the fish for five minutes, I have left it on for up to a half hour. The original recipe calls for skinless fillets, we prefer to leave the skin on. Leaving the skin on makes for an easy transfer from pan to plate, plus Joe likes the crispy salmon skin. Scrape off as much of the marinade as you can and transfer the fish to a baking dish. In a small saucepan, bring the marinade to a boil and set aside. It’s not so much a glaze, it’s a bit chunky which is fine, unless you prefer to strain it and discard the solids. While the fish is roasting, stir fry the bok choy and mushrooms. The original recipe just adds a little pressed garlic to the mix, this time Joe added a little of my homemade sriracha sauce and a dash of yuzu juice to brighten the flavors. In season we will use baby bok choy or another Asian green from the garden. Divide the vegetables between the plates and top with salmon. Spoon the marinade over the fish and serve.

Salmon Bulgogi with Bok Choy and Mushrooms

Serves four

Ingredients

  • Two large garlic cloves, peeled and divided
  • 1/3 c chopped green onions
  • 2-3 T low sodium soy sauce
  • 1 T Chinese rice wine or dry Sherry
  • 1 ¾-inch cube peeled ginger
  • 2 t sugar
  • 1 t Asian sesame oil
  • 1 t chili garlic sauce
  • 4 6 oz center cut salmon fillets
  • 1 T peanut oil
  • 1 large bok choy, cut crosswise into ½ inch wide strips (about 7 cups)
  • 4 oz fresh shiitake mushrooms, stemmed and caps sliced
The marinade ingredients, minus the soy sauce.
A mini processor makes it easy to combine the marinade ingredients.
DSC_6369a
Five minutes is all it takes to marinade the fish.

Directions

  1. In a mini processor, blend one clove of garlic with the next 7 ingredients. Arrange salmon in a baking dish and spoon marinade over the fish. Let marinade for 5 minute and up to one half hour.
  2. Preheat oven to 450°F. Arrange the fish with some of the marinade still clinging in a shallow baking dish. Transfer the marinade from the first dish to a small saucepan. Roast fish according to the Canadian fisheries method, which equates about one inch of the thickest part of the fish to 10 minutes of cooking time.
  3. Bring marinade to a boil; set aside and reserve for glaze.
  4. Heat oil in a large non-stick skillet over high heat. Add bok choy and mushrooms, using a garlic press, press in one garlic clove. Stir fry until mushrooms are tender and the bok choy is wilted, about 4-5 minutes, season with salt and pepper.
  5. Divide vegetables among the plates. Top with salmon and brush with glaze.

DSC_6388a

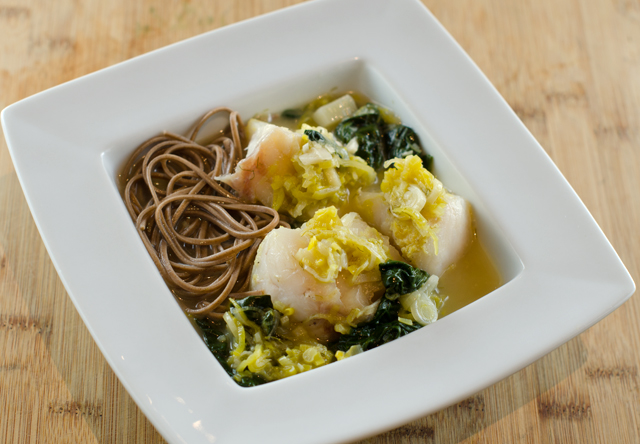
March 3, 2016 Lemon-Ginger Poached Grouper with Leeks and Spinach

DSC_5982aFish is on the menu three to four nights a week at our house and I am always looking for new and healthy ways to prepare it. This Asian influenced light main course from Fine Cooking is both easy to prepare and delicious enough for company.

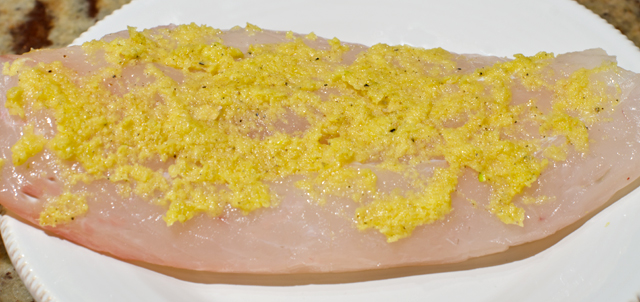
Originally the recipe called for halibut, but since it can be quite expensive (over thirty dollars a pound) any mild tasting firm fleshed fish will work. Our choice was grouper but sea bass or cod would also be a good substitute. The recipe begins with a simple but flavorful rub of ginger, garlic, and lemon. A microplane makes it easy to grate all three. Lightly pat this mixture on one side of the fish. The fish is added to a simmering broth that is enhanced with sauteed leeks and lemon juice. Add any additional stock needed to almost cover the fillets. Poaching ensures a moist flavorful fish. Transfer the cooked fish to shallow bowls and keep warm. The spinach, mint and scallions are quickly wilted in the broth. I confess I didn’t use the mint, Joe is not a big fan and I would only use some of the milder mint that we grow.

While the fish is cooking, you will have time to cook the soba noodles. Soba is both the Japanese word for buckwheat and the noodle made with buckwheat flour. They have a delicate texture and a nutty flavor. Soba can also be flavored with everything from green tea to wild yam. Years ago when I was first experimenting with Japanese recipes it took a special trip to the Asian market to find soba, now they are available in most grocery stores.  Soba noodles are usually eaten cold, but in this recipe they are great warm for sopping up the broth.
.

Lemon-Ginger Poached Halibut with Leeks and Spinach

Serves four

Ingredients

  • 2 t finely grated fresh ginger
  • 1 t finely grated garlic
  • Finely grated zest and the juice of one lemon
  • 2 T plus 1 t extra-virgin olive oil
  • Kosher salt and freshly ground black pepper
  • Four 1-inch thick skinless fillets of a firm fleshed white fish (halibut, grouper, sea bass etc.)
  • 2 medium leeks, white and light green parts only, halved lengthwise, rinsed well and thinly sliced
  • 3 c lower salt chicken broth or vegetable broth; more as needed
  • Water- to cook the soba noodles
  • Soba noodles, a handful or a wrapped portion per per person
  • 4 c lightly packed spinach leaves, rinsed
  • ¼ c roughly chopped fresh mint
  • ¼ c thinly sliced scallions

Directions

  1. In a small bowl, mix the ginger, garlic, lemon zest, 1 tsp of the olive oil, 1 tsp salt and ½ tsp pepper. Pat the mixture evenly over one side of the fish. Put a large pot of water on to cook the noodles, do not add salt to the water. Bring water to a boil.
  2. In a 10-inch straight sided saute pan, heat the remaining 2 Tbs. oil over medium heat. Add the leeks and saute, stirring constantly, until softened, about 5 minutes.
  3. Add the broth and 1 Tbs. of the lemon juice. Cover and bring to a simmer over high heat.
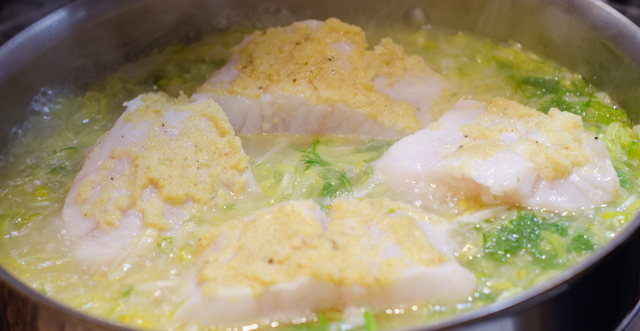
  4. Arrange the fish lemon-ginger side up in a single layer on top of the leeks. If necessary add more broth until the fillets are almost but not completely submerged. Cover and turn the heat to low. Gently simmer until the fish is cooked through, 8 to 10 minutes.
  5. While the fish is  cooking, add the soba noodles to the boiling water and give them a quick stir so they all go underwater. Cook the noodles uncovered for 6-8 minutes, they should be slightly al dente. Drain the noodles into a colander and rinse with cold water to remove excess starch.
  6. With a slotted spatula, transfer the fish to shallow bowls and keep warm.
  7. Add the spinach, mint and scallions to the broth and stir until slightly wilted, about 1 minute.
  8. Season to taste with more lemon juice, salt and pepper. Ladle the vegetables and broth around the fish, add the noodles to the bowl and serve.
DSC_5971a
A rub of ginger, garlic, lemon and olive oil is patted on one side of the fish.
DSC_5976a
Poaching the fish in a chicken broth that is enhanced with leeks and lemon juice.

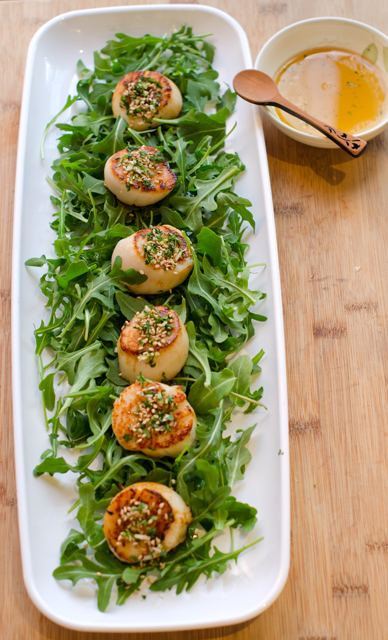
January 21, 2016 Scallop Salad with Gremolata and Asian Vinaigrette

DSC_5726aThis is a twist on a recipe in the latest issue of Fine Cooking. In the Fine Cooking version, the scallops were tossed in a mixtue of citrus and Asian ingredients for a quick marinade. I wanted to make mine a salad so I patted the scallops dry, seared them and the marinade ingredients became the basis for an easy vinaigrette.
I love scallops for a quick meal and the jumbo sea scallops at Heller’s Seafood this week were pristine and just perfect. Wherever you shop, look for dry scallops. Wet scallops are soaked in a preservative phosphate solution. The solution preserves and whitens the scallops and causes them to absorb more water. So when you cook wet scallops they don’t brown as well or not at all because of the extra liquid. They can also have a soapy taste. Dry scallops are shucked and shipped packed on ice with no preservatives.  Therefore they have a shorter shelf life and are fresher when you buy them. Dry scallops come with a higher price tag, but they are fresher and you are not paying for water weight.

It’s fairly easy to tell the difference, wet scallops are bright white because of the phosphate solution and dry scallops are ivory or pinkish. Don’t hesitate to sniff them, the scallops should smell like the ocean.  When in doubt, ask, and if they don’t know, run! You shouldn’t be shopping there anyway.

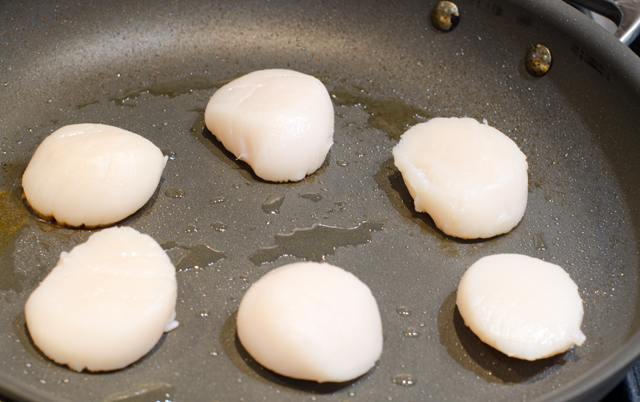
Prepare scallops by first removing the tough abductor muscle, it peels off easily. Then I pat them dry on both sides with paper towels. I coat a non-stick skillet with a neutral oil (vegetable or canola). Be sure that your skillet will hold the scallops without crowding them, you want to sear, not steam them. I turn the heat up to high and wait for the first sizzle. I add the scallops to the pan in a clockwise fashion with any extras in the middle. That way I know what scallop has cooked the longest. Now is the hard part, cook the scallops without moving them until a little peek (lift up the spatula a bit) shows a deep golden crust. Be sure not to overcook, you want the middle to stay tender and sweet.  Two to three minutes per side will do.

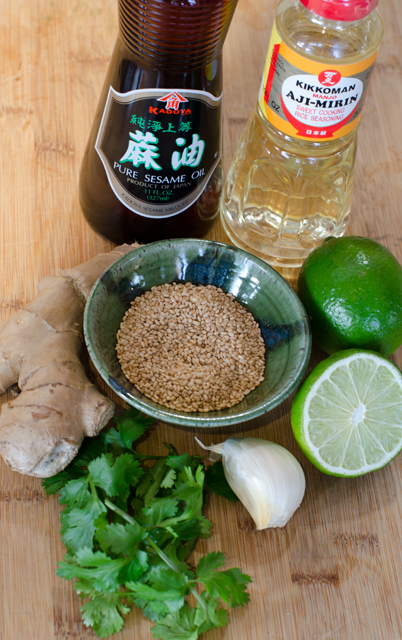
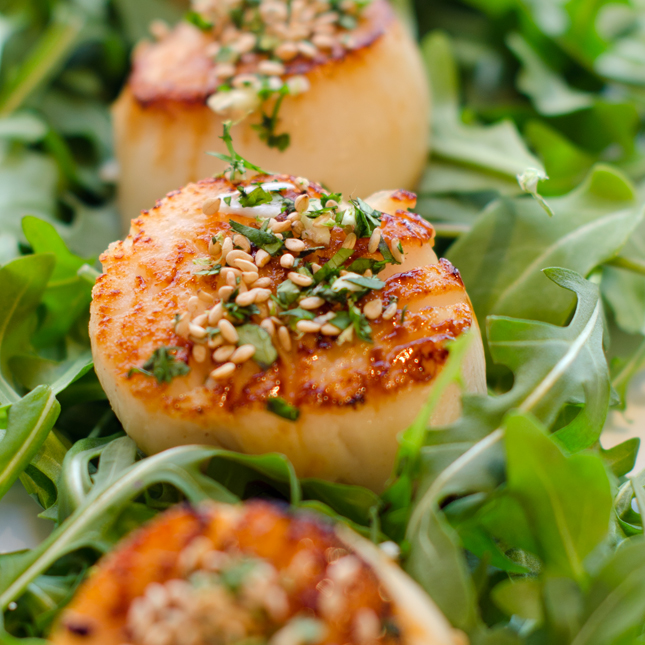
Gremolata is made from parsley, garlic and lemon zest and is the traditional topping for braised veal shank or osso buco. This version takes on a definite Asian flair using cilantro, garlic, sesame seeds and lime zest. These flavors harmonize perfectly with the sweet scallops. The marinade for the scallops included mirin, lime juice, ginger and sesame oil. In case you didn’t know, mirin is a type of rice wine, like sake but mirin is sweet and has a higher alcohol content. When you are looking for sesame oil it should be the dark variety. Both mirin and dark sesame oil are readily available in the Asian section of the supermarket.  I used these flavors with a little additional honey to dress my salad greens with. I chose baby arugula, but a spring mix or baby spinach would work well too.

This dish comes together quickly, both the gremolata and the vinaigrette are easy to make. It is just important to take the time to cook the scallops correctly. This recipe can be doubled and is perfect for a first course or part of a small plates dinner.

DSC_5720a

DSC_5721a
Don’t crowd the pan, give the scallops room to brown, too close and they will steam.

Scallop Salad with Gremolata and Asian Vinaigrette

Serves 2

Ingredients for the scallops

  • ½ to ¾lb dry packed sea scallops (about 6)
  • A neutral cooking oil, canola for example
  • Salt and freshly ground pepper

Directions for cooking the scallops

  1. Remove the tough abductor muscle from the side of each scallop (some scallops are sold with the muscle already removed). If you feel any grit on the scallops, rinse them under cold water. Pat the scallops dry with paper towels; surface moisture impedes browning.
  2. Heat a 10- or 12-inch nonstick skillet over medium-high heat for 1 to 2 minutes. Add the oil and heat until quite hot. Pat the scallops dry once more and put them in the pan in a single, uncrowded layer. Season with salt and pepper and let sear undisturbed until one side is browned and crisp, 2 to 3 minutes. Using tongs, turn the scallops and sear until the second side is well browned and the scallops are almost firm to the touch, 2 to 4 minutes.
  3. Take the pan off the heat, transfer the scallops to a plate, and set them in a warm spot while you finish the other components of the recipe.

Ingredients for the sesame cilantro gremolata

  • ¼c finely chopped cilantro
  • 1T toasted sesame seeds
  • 2t finely chopped garlic
  • 1t lime zest

Directions for the sesame cilantro gremolata

  1. In a small bowl, combine the cilantro, sesame seeds, garlic and lime zest. Set aside.

Ingredients for the dressing

  • 3T mirin
  • 1t grated ginger
  • 2t fresh lime juice
  • 1t honey (or more to taste)
  • 3T sesame oil

Directions for the dressing

  1. In a small bowl whisk all the ingredients together. Set aside

Final Assembly of the salad

Ingredients

  • 4-5 cups of baby arugula, spring mix or baby spinach

Directions

  1. Place the greens in one medium or individual salad plates.
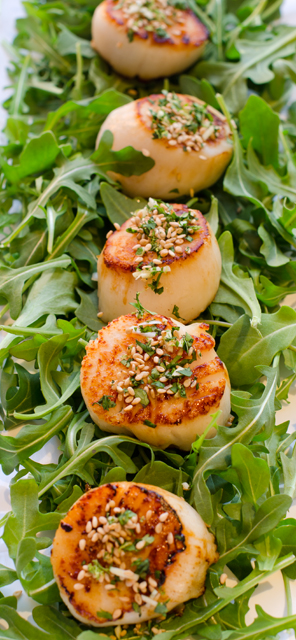
  2. Top with seared scallops
  3. Sprinkle gremolata on the scallops.
  4. Dress greens and scallops lightly with dressing.
  5. Serve immediately.

DSC_5731a

DSC_5735a