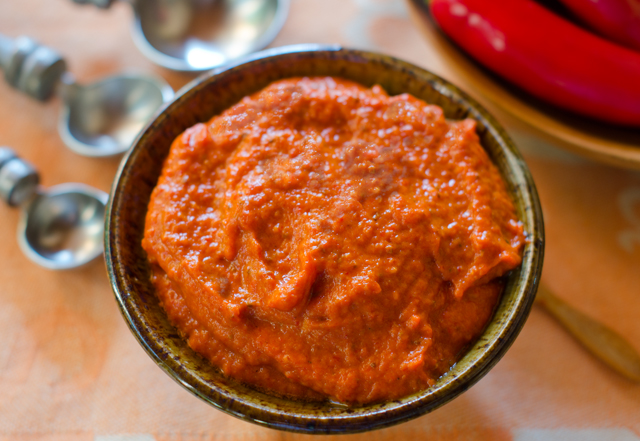
September 15, 2016 Harissa

dsc_7983aThe challenge facing us in late summer/early fall is preserving the harvest.  A prime example is hot peppers. In tropical climates they thrive as perennials and can grow for many years. It would be great if I could just walk down to the garden in January to pick a few fresh jalapenos. But given the fact that January temperatures where we live are below freezing and pepper plants prefer a daytime temperature of 65-80°F, it won’t be happening anytime soon . So it is necessary to find methods of preservation now to enjoy them later while the peppers are at their peak. Every year I freeze whole peppers, dry them, make chili flakes, pickle jalapenos, I’m even making sriracha now, but a new method is always welcome.
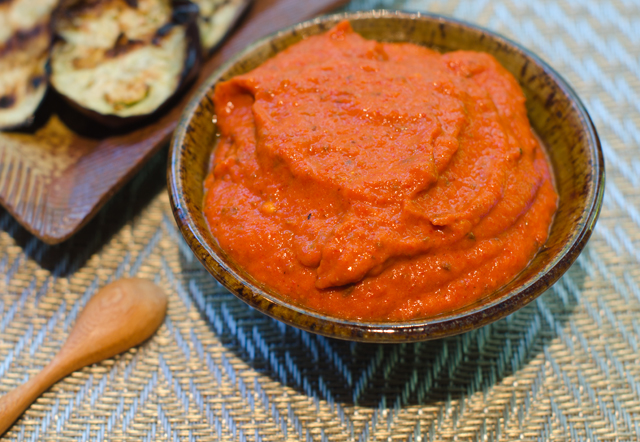
A very simple recipe I found for eggplant, another garden stalwart, suggested topping grilled slices with prepared harissa and yogurt. In the past I purchased harissa in a jar or a tube at the middle eastern stand at the local farmers market. This time I decided to see if this was something I could make myself. Harissa, is a garlicky spicy condiment found in the Northwest African countries of Algeria, Morocco and Tunisia. It can be used as a condiment for meat or fish, roasted vegetables, stirred into soups and stews and served alongside couscous. Think sriracha with more complexity. It’s ingredients can include roasted peppers, garlic, chile peppers of all varieties, fragrant spices such as coriander, cumin and caraway, dried mint, lemon and olive oil. There is no one master recipe for harissa. The ingredients in harissa vary by country, ethnicity, even neighborhood. You can adjust the heat by the number and type of chilies you use, just remember, harissa is supposed to be hot.

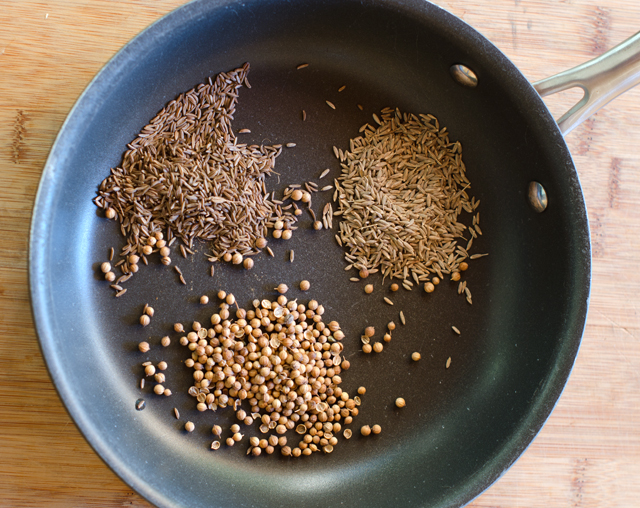
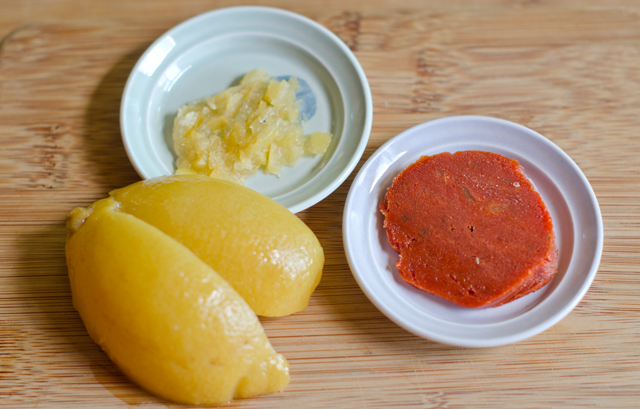
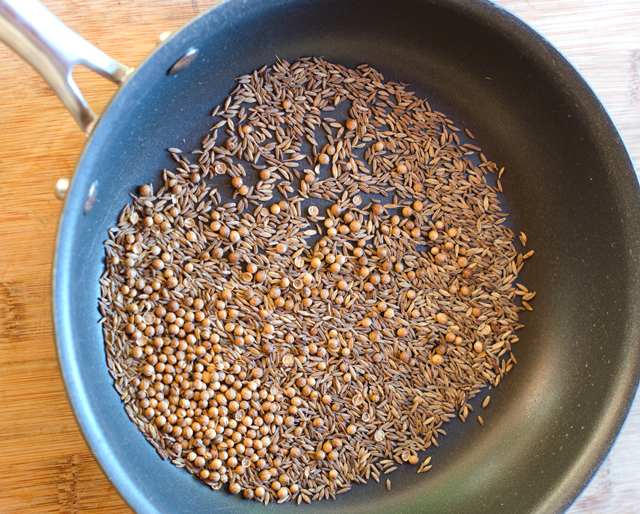
My recipe is a little different from most since I used fresh hot peppers, not dried ones that need to be reconstituted. This meant using double the amount of peppers. I used one red bell pepper, four mild poblano peppers and a mix of jalapeno, cayenne and ancho. I added a little tomato paste for sweetness, preserved lemon peel with just a little juice, chopped garlic, smoked paprika and an aromatic spice blend. I think the spice blend is what really gives this dish its unique flavor. Whole spices, coriander, cumin and caraway are toasted in a small skillet until the fragrance fills your kitchen. I find it easiest to grind them in a mortar and pestle, a mini food processor doesn’t quite give the consistency you are looking for.

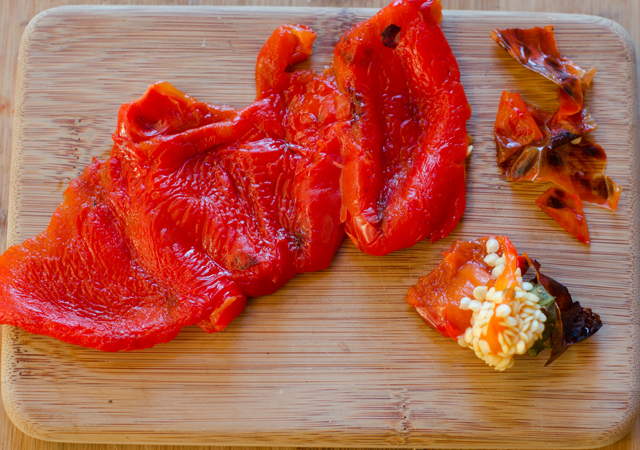
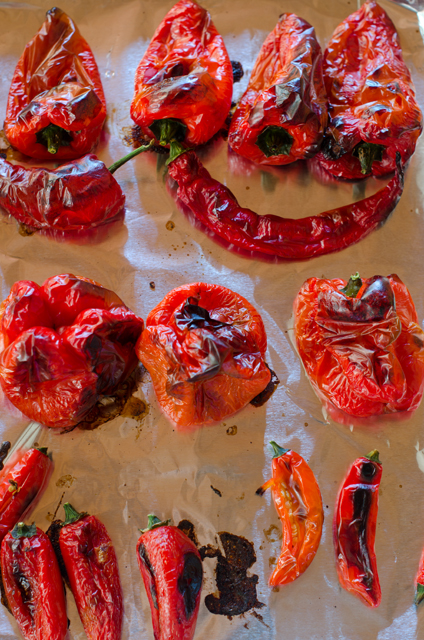
All the peppers need to be charred to remove the skin. I did this in a hot oven, turning occasionally to blacken all the sides. I put the charred peppers in a bowl and covered it tightly with plastic wrap to steam the peppers. It is important for to wear rubber gloves when removing the skin, seeds and stem from the hot peppers. Conventional wisdom for years has said that the hottest part of the pepper is the seeds. A recent study however has shown that even though the seeds pack some heat, it’s actually the placenta, the white tissue that holds the seeds that is the source of the most heat. As you peel the peppers put them into piles, no heat, some heat and hottest. That way you can hold back on some of the hottest peppers until you are certain the sauce will be palatable for you.

Combine the chilies, toasted spices, garlic, salt and other optional ingredients in a food processor. With the food processor running, slowly drizzle in the olive oil until you have a smooth, thick paste. Scrape down the sides occasionally. Taste, now is the time to add that extra pepper if desired. As I said before, harissa is supposed to be hot. Season to taste with salt and pepper. Transfer harissa to clean jars, top with a thin layer of olive oil and store in the refrigerator for several weeks. Since I freeze pesto I may try to see if harissa can be frozen too.

As a postscript, the harissa received immediate approval from Joe who topped cucumber slices with harissa as an after work snack.
dsc_7947a
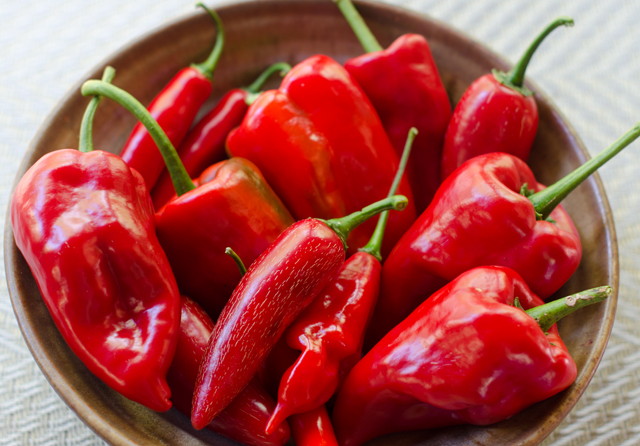
A harvest of both bell and hot peppers.

Harissa

Makes 2 cups

Ingredients

  • 1 medium bell pepper
  • 8 to 10 ounces fresh chili peppers of varying heat, poblano, ancho, jalapeno, cayenne
  • 2 t cumin seed
  • 2 t coriander seed
  • 2 t caraway seed
  • 3 to 4 cloves of peeled garlic
  • 1 T tomato paste
  • 1 t preserved lemon peel
  • 1 t juice from preserved lemon
  • 1 t smoked paprika
  • Kosher salt and fresh ground black pepper to taste
  • 3-4 T extra virgin olive oil

Directions

  1. Preheat oven to 425°F.Line a baking sheet with foil. Place all the peppers on the baking sheet and roast for 10 minutes.
  2. Turn the smaller peppers over and roast for another 10 minutes, until the skins are blackened. Remove them to a bowl. Turn the bell and poblano peppers over and roast for another 10-15 minutes, until the skins are blackened.
  3. Remove all the peppers to the bowl and tightly cover with plastic wrap to steam the skin.
  4. Place the cumin, coriander and caraway seed into a dry skillet over medium heat. Toast until seeds have darkened a bit and have become fragrant.
  5. Pour toasted seeds into the bowl of a mortar and pestle. Crush seeds to a powder.
  6. Using rubber gloves to protect your hands, stem, skin and seed the peppers.
  7. Place the peppers (hold back a few hot ones if you are concerned), toasted seeds, garlic, tomato paste, preserved lemon peel and juice, smoked paprika into the bowl of a food processor. Pulse to combine the ingredients, scraping down the sides.
  8. With the food processor running, add the olive oil in a steady stream until you have a smooth, thick paste. Taste, add salt and pepper to your liking and pulse in the extra peppers if desired.
  9. Transfer harissa to clean jars and top with a thin layer of olive oil. Store in the refrigerator for several months.
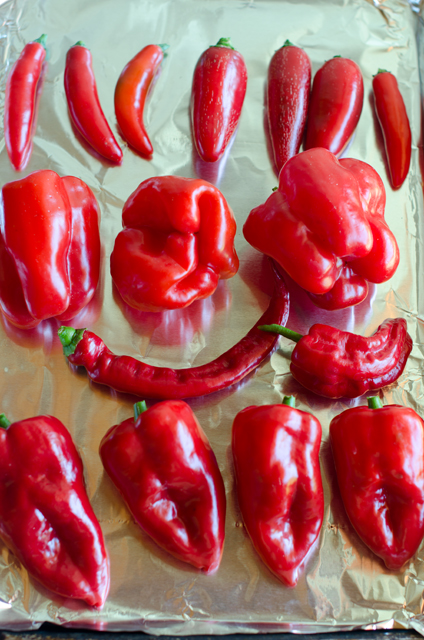
Place the peppers on a foil lined baking sheet for easy clean up.

dsc_7952a

Cumin, coriander and caraway seeds are toasted in a dry pan.

dsc_7956a

Pulverize the seeds in a mortar and pestle or spice grinder. Smells great.
dsc_7962a
Stem, seed and skin the peppers. Be sure to wear gloves to protect your hands from the hot peppers.
 

dsc_7965a
I added some preserved lemon peel and tomato paste.
Everything is combined in the food processor.
Everything is combined in the food processor. Add olive oil to make a thick paste.

dsc_7974a

August 31, 2016 Miso Glazed Eggplant (Nasu Dengaku)

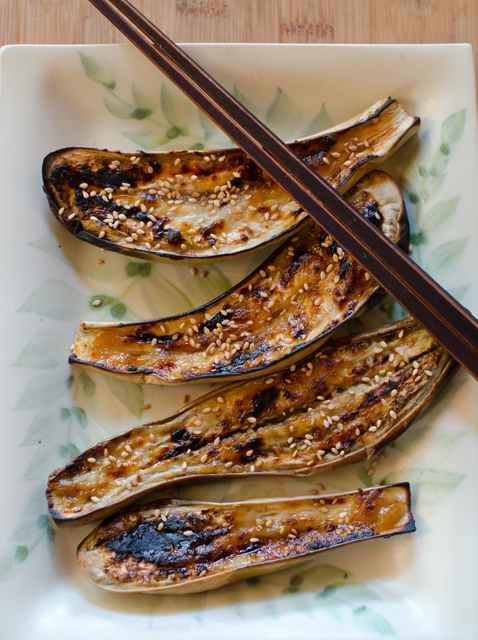
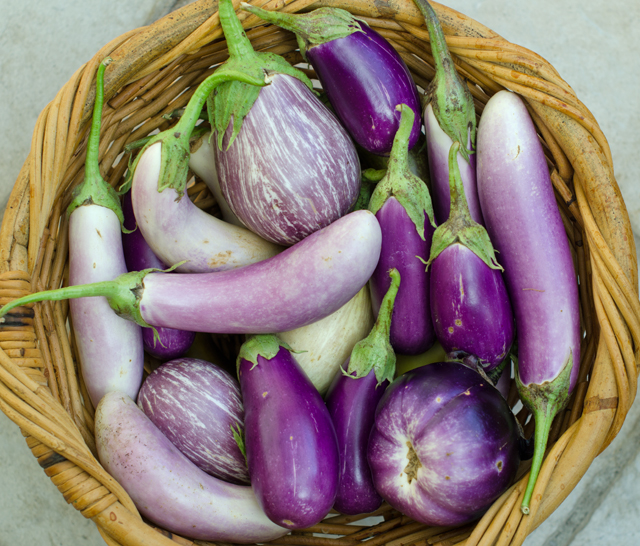
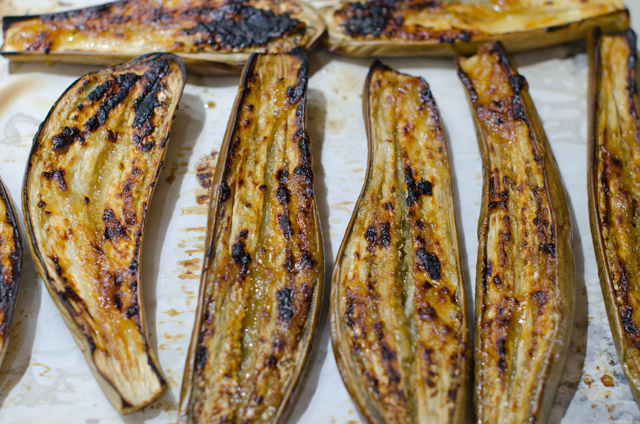
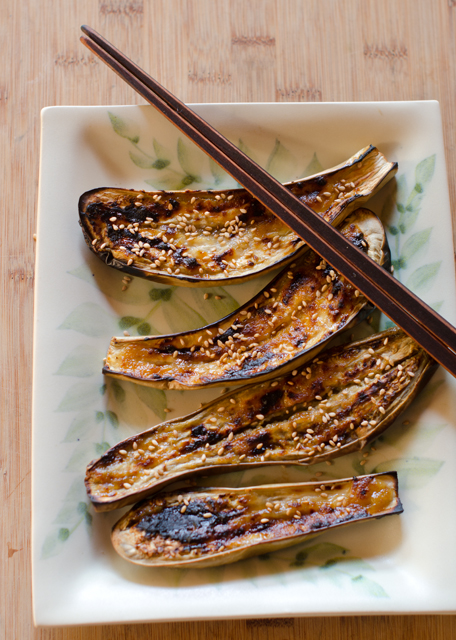
DSC_7877aMiso glazed eggplant or nasu dengaku is a classic Japanese dish and sushi bar favorite. It’s an quick and easy preparation this time of year when eggplants are at their peak. Our garden has produced an amazing array of eggplants this summer. From fuchsia to dark purple, beautifully variegated lavender and white to pure white, they have loved our weeks of 90 degree plus temperatures and abundant rain. What we consider to be Asian eggplants are the long slim tapered varieties. Actually, Asian eggplants whether Chinese, Japanese, Thai or Indian can be round or pear shaped, pure white or lime green and as small as an egg. In this dish the creamy flesh of the eggplant is the blank canvas for the umami rich flavors of a sweet, salty and savory glaze.
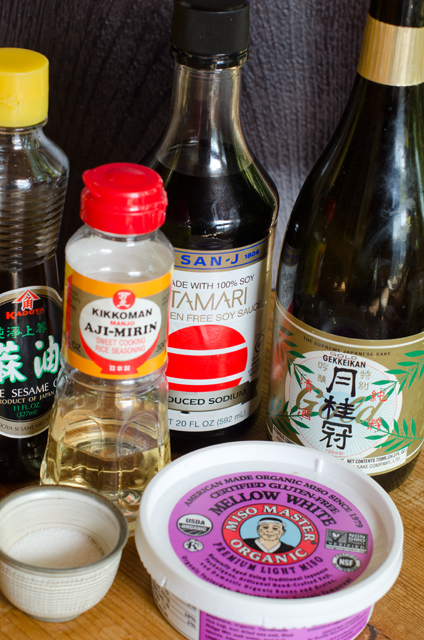
This recipe is quick and easy, but there are a few special ingredients you may not have on hand. Toasted sesame oil, mirin and miso are usually available at most large supermarkets. If you don’t want to buy a bottle of sake just for the two tablespoons in the recipe, substitute dry sherry. The eggplant is sliced down the middle lengthwise and the flesh is salted for a few minutes to draw out any excess moisture. While you are waiting on the eggplants, preheat your oven and line a baking sheet with foil or parchment. Keep the parchment in place with a little non stick spray in the four corners. Lightly brush the baking sheet with toasted sesame oil. This will prevent the eggplant from sticking and adds a rich nutty flavor to the dish.
Blot the excess moisture from the eggplants and place cut side down on the baking sheet. While the eggplants are roasting, prepare the glaze. Combine mirin and sake in a very small saucepan, bring to a boil for twenty seconds, then stir in miso and sugar over low heat. Off heat stir in the additional sesame oil. The eggplants are done in about 15 minutes when the skin collapses and the flesh becomes soft Remove the eggplants from the oven and carefully turn them over, cut side up. Adjust the oven rack to it’s highest position and turn on the broiler.Brush the eggplants with the miso glaze and place under the broiler for about 1 minute, be sure to watch carefully! Sprinkle with toasted sesame seeds. Serve hot or at room temperature.

A recent harvest of all the varieties of eggplant we are growing.

Miso Glazed Eggplant

Serves 2-3

Ingredients

  • 1 lb of Japanese eggplants
  • Kosher salt 
  • 1 t sesame oil, plus additional for the baking sheet
  • 1 T mirin
  • 1 T sake
  • 2 T white or yellow miso
  • 1 T sugar or honey
  • Toasted sesame seeds

Directions

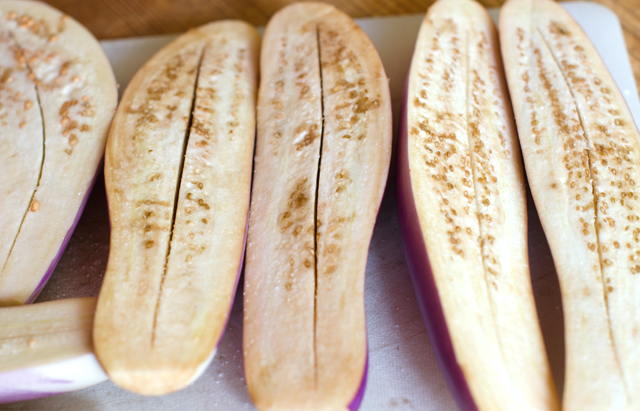
  1. Cut the eggplants in half lengthwise and cut off the stem and calyx. Using the tip of a paring knife, cut an incision down the middle of each half, making sure not to cut through the skin, but cutting down to it. Salt the eggplant lightly and let sit for 10 minutes. Meanwhile preheat the oven to 425°F.  Line a baking sheet with foil or parchment and brush it with sesame oil.
  2. Blot the eggplants with paper towels and place, cut side down, on the baking sheets. Roast for 15 to 20 minutes, until the skin is beginning to shrivel and the flesh is soft. Remove from the oven, carefully turn the eggplants over, and preheat the broiler.
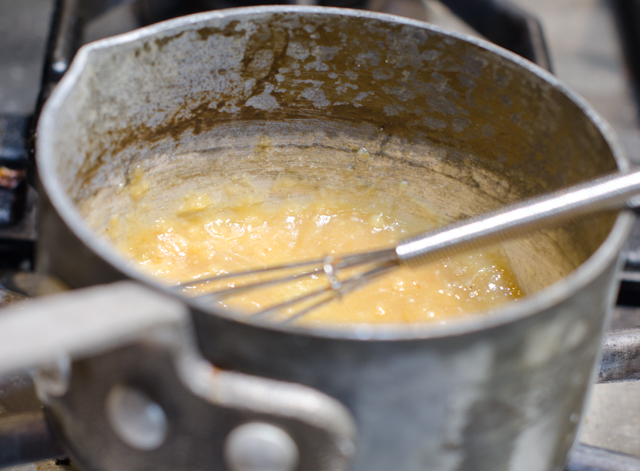
  3. To make the glaze, combine the mirin and sake in the smallest saucepan you have and bring to a boil over high heat. Boil 20 seconds, taking care not to boil off  too much of the liquid, then turn the heat to low and stir in the miso and the sugar. Whisk over medium-low heat without letting the mixture boil, until the sugar has dissolved. Remove from the heat and whisk in the sesame oil.
  4. Brush the eggplants with all of the miso glaze. Place under the broiler, about 2 inches from the heat, and broil for about 1 minute, until the glaze begins to bubble and looks shiny. Remove from the heat. Allow to cool if desired or serve hot. Garnish with toasted sesame seeds.
DSC_7854a
Scoring and salting the eggplants.
DSC_7858a
Ingredients needed for the glaze.


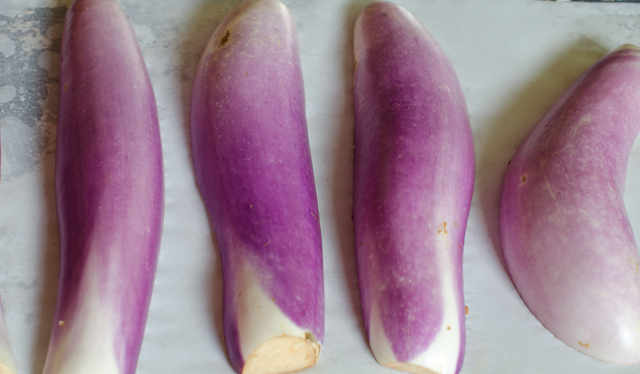
Place the eggplants cut side down on a parchment lined baking sheet.
Use your smallest saucepan to make the glaze.
Once the eggplant is soft turn it cut side up. apply the glaze and put the tray under the broiler.
Once the eggplant is soft, turn it cut side up. apply the glaze and put the tray under the broiler.

DSC_7874a

August 20, 2016 Orange Tomato Soup

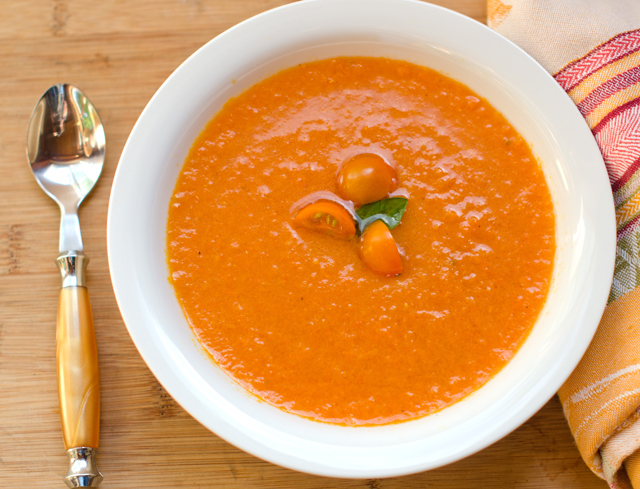
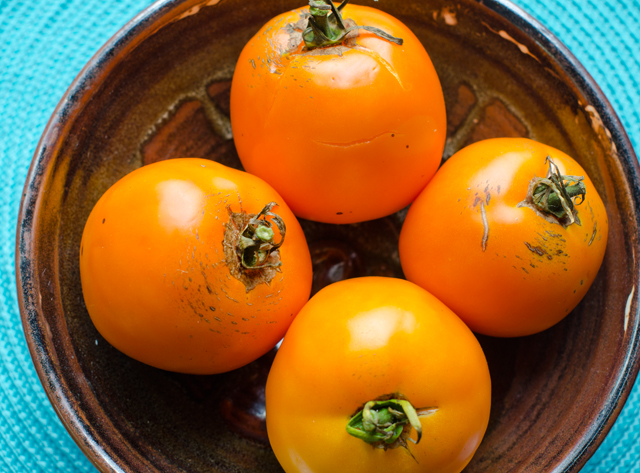
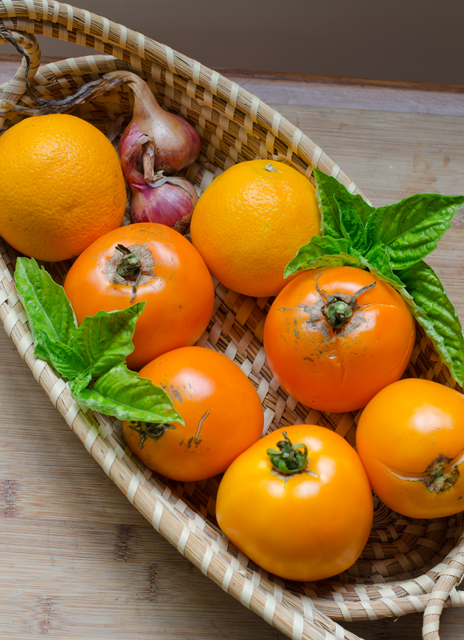
DSC_7773-copyaThis recipe could also be titled Orange, orange tomato soup. All the recipes I found on line for orange tomato soup included orange juice, but not orange tomatoes. My recipe uses both. Orange tomatoes come in all sizes, from the cherry sized Sun Gold, that you can eat out of hand like candy to the Valencia, an heirloom variety that we are growing this year. Orange tomatoes are less acidic and fruity while still providing a true tomato flavor. Orange tomatoes inspired me to add a little orange juice to the soup to highlight the sweetness of the tomatoes.

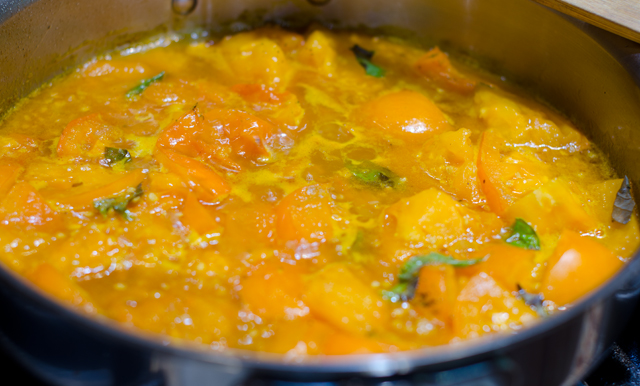
This is a very quick recipe to prepare, begin by melting some butter and olive oil in a large saute pan. Add chopped shallot and carrot and cook until softened. Shallots provide a milder flavor, but a white onion could be substituted. Add cored chopped tomatoes, roughly torn basil leaves, chicken stock and just a touch of maple syrup. Bring to a boil and simmer for 15 minutes.

Allow the mixture to cool a bit before transferring to a blender. Blend the soup in two batches. Very hot liquids expand as you blend them so place a kitchen towel over the lid to protect your hands from any soup that might escape the blender. For the finest texture you could put this soup through a food mill. Next, stir in the orange juice, fresh squeezed of course. Cool the soup to room temperature before placing in a covered container in the refrigerator. Chill for at least four hours or overnight to allow the flavors to blend.

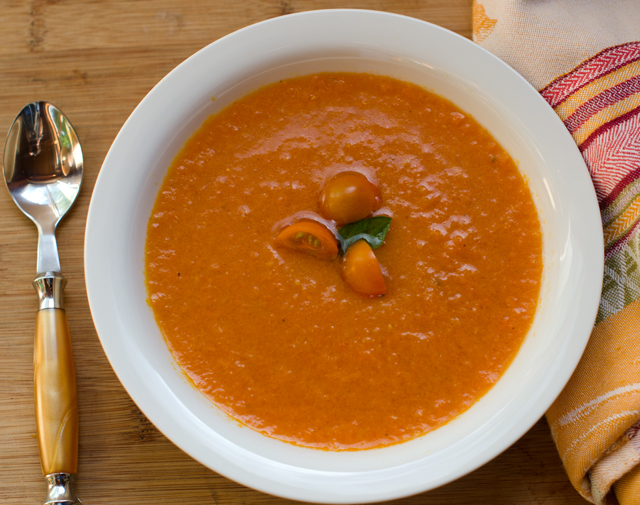
This soup is great for entertaining, it can be made well in advance. It could be dressed up with a seared scallop or a poached shrimp. Serve the soup garnished with some basil leaves and some quartered Sun Gold tomatoes. We enjoyed ours along with a BLT.

DSC_7755a


Orange Tomato Soup

Serves 4

Ingredients

  • 1/3 c chopped shallots
  • 1/3 c chopped carrot
  • 4 c cored and quartered orange tomatoes
  • 1 T unsalted butter
  • 1 T olive oil
  • ½ c shredded basil leaves
  • 2 c chicken stock
  • 1 T maple syrup
  • ¾ c orange juice

DSC_7763a

DSC_7769a

Directions

  1. In a large saute pan melt the butter and olive oil over medium high heat.
  2. Add the shallots and carrot and saute until softened, five to six minutes.
  3. Add chopped orange tomatoes, basil leaves, chicken stock and maple syrup. Bring to a boil, reduce to a simmer and cook for 15 minutes. Allow the soup to cool for at least five minutes before proceeding to the next step.
  4. Working in batches, puree the soup in a blender until smooth. If desired you can also put the soup through a food mill.  Put the soup in a bowl and stir in the orange juice. Cool the soup to room temperature. Put the soup in the refrigerator in a covered container and chill for at least four hours or overnight.
  5. Serve garnished with orange cherry tomatoes and a few basil leaves.

DSC_7772a

July 28, 2016 Ginger Cucumber Salad with Scallops

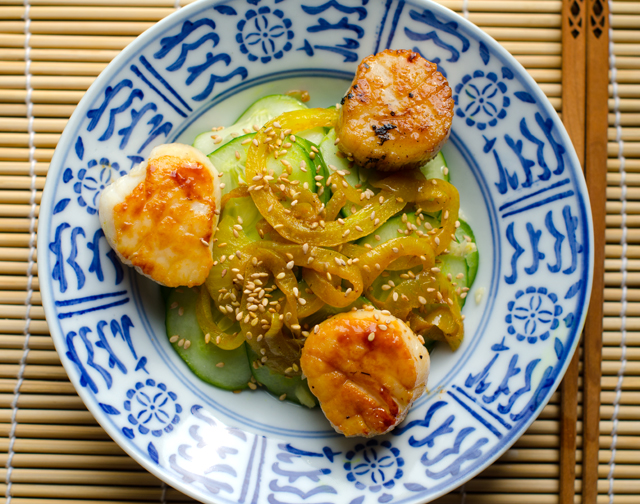
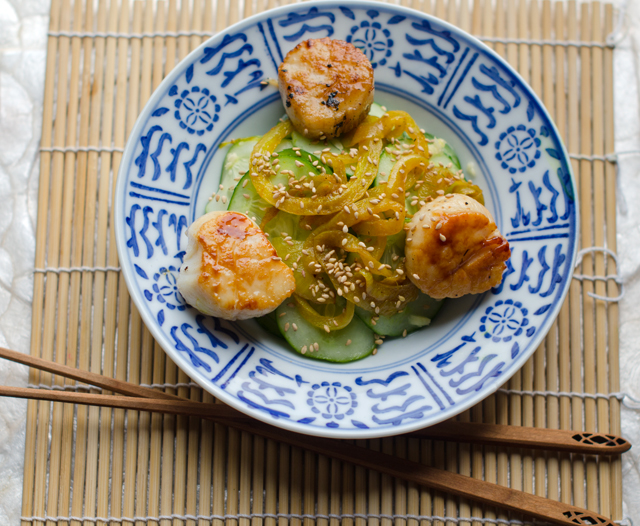
DSC_7580aOur current scorching, almost 100 degree temperatures with no end in sight, call for a minimum of time cooking over a hot stove. This recipe, from Mark Bittman’s Minimalist column in the New York Times is just what I was looking for. Ginger cucumber salad with scallops combines sweet buttery scallops with a crisp refreshing cucumber salad.

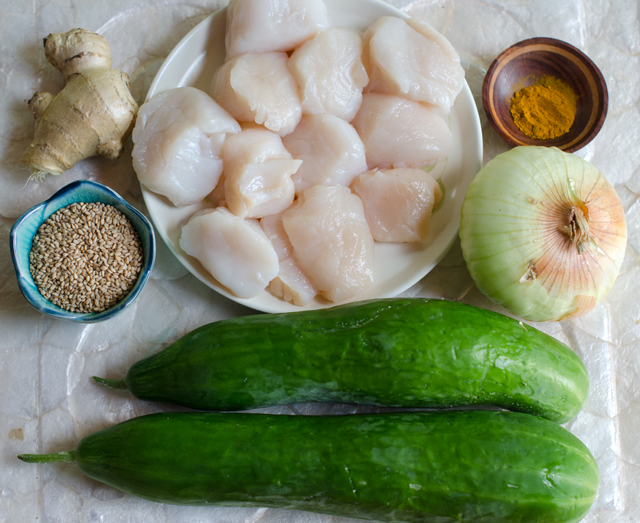
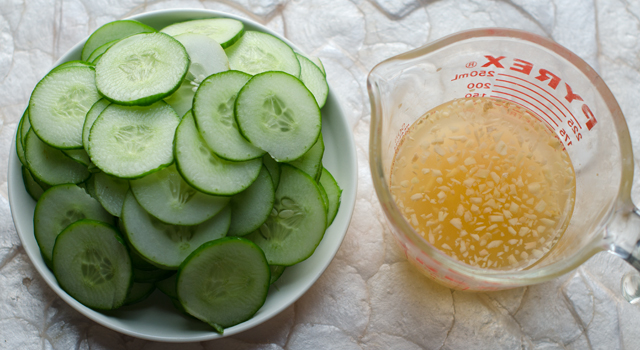
The cucumber salad is very simple and good in it’s own right. To get the thinnest cucumber and onion slices possible, use a mandoline. Since I am using smaller just picked cucumbers from the garden, there is no need to seed them, but I do prefer to peel them and leave strips of green skin. A classic dressing of rice wine vinegar, fresh grated ginger, sugar and salt provides a quick pickle for the cucumber slices. Remember to use plain rice vinegar, seasoned rice vinegar is flavored with sugar, salt and sometimes MSG. Plain rice vinegar is just mildly acidic and allows the cook to choose the amount of seasoning in the dish. A two inch piece of ginger translates into about two tablespoons. That might seem to be a bit too much but it is mellowed out with the other ingredients. If you are not sure, hold back a little and taste first.

While the cucumbers are marinating, preferably in the fridge, sear the scallops. Use a large non stick pan and brush with two tablespoons of a neutral oil, like grapeseed or canola, olive oil would compete (and win) against the delicate flavor of the scallops. When the oil starts to sizzle, add the scallops like the numbers on a clock starting at the top and going around, putting any additional scallops in the middle. If your pan isn’t large enough to cook all the scallops in one batch, divide them into two. Give the scallops room to sear, if they are too close they will steam. Check the first scallop, (twelve o’clock) after two minutes, if there is a nice brown crust, it’s time to flip. Continue checking around the clock until all the scallops are flipped. Repeat the step for the second side, this time moving the finished scallops to a plate.

The remaining oil, thinly sliced onion and turmeric are added to the same pan, no need to wash in between. Turmeric is the spice that gives Indian curries their vibrant color and adds warmth and a slightly bitter taste to dishes. The medical component in turmeric, curcumin, is used to make a wide variety of medicines as an anti inflammatory agent. The addition of turmeric is optional but adds another dimension to the salad.

Don’t skip the toasted sesame seeds, they add their own fragrance and just a little crunch. Stir the sauteed onions into the cucumber salad, top with the scallops and serve.

Seared Scallops with Ginger Cucumber Salad

Serves 2-3

Ingredients

  • 1 ¼ lbs small cucumbers
  • ½ c rice vinegar (not flavored)
  • 2-inch piece of ginger, minced or finely grated
  • 2 T sugar
  • 1 t salt
  • 3 T canola oil
  • 1 lb medium to large scallops
  • 1 medium onion, thinly sliced
  • ½ t ground turmeric
  • 2 T toasted sesame seeds

DSC_7572a

DSC_7573a

Directions

  1. Slice cucumbers thinly, a mandolin  does the best job, if the cucumbers are large, peel and seed before slicing.
  2. Combine rice vinegar, ginger, sugar and salt and toss with cucumbers. Let stand 30 to 60 minutes.
  3. Put 2 tablespoons oil in a large non stick skillet over medium high heat. When the oil starts to sizzle add the scallops. Sear on first side for two minutes, flip to the other side and  sear for about two minutes. Remove scallops to a plate.
  4. Add the remaining oil, then add the onions and turmeric. Cook until the onion softens, about five minutes.
  5. Toast sesame seeds in a small dry skillet until fragrant and brown, three to four minutes. Stir the onions into cucumbers, top with scallops, garnish with sesame seeds and serve.

DSC_7576a

June 8, 2016 Spinach, Strawberry, Snow Pea and Radish Salad

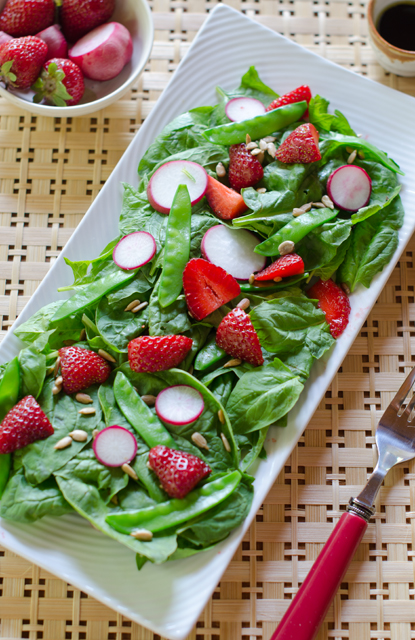
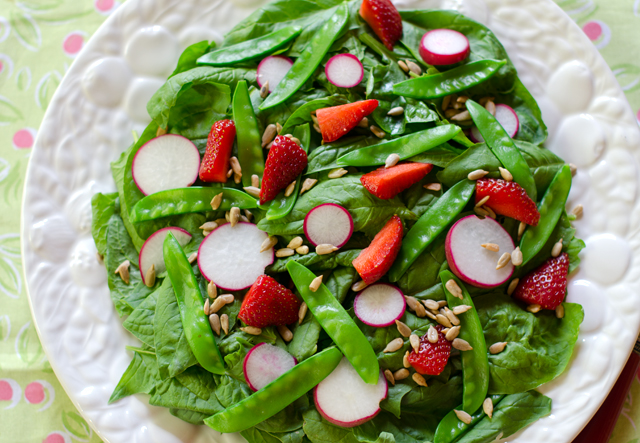
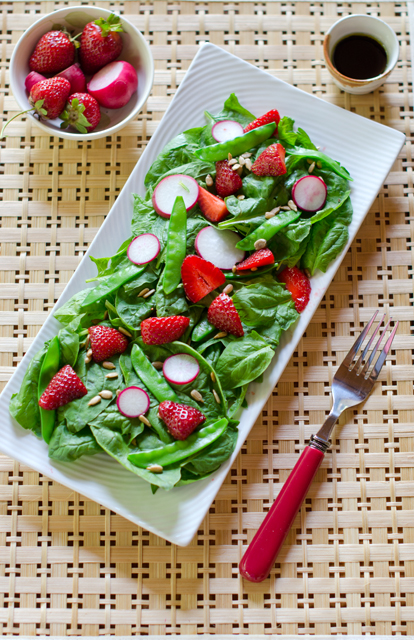
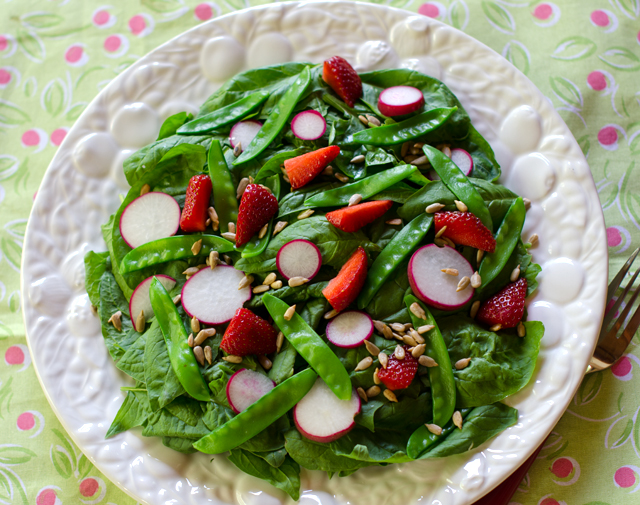
DSC_7109aThe vegetable garden, now that summer is fast approaching,  is about creating recipes for fruit and vegetables that are harvested at the same time. That was the  inspiration for this spinach, snow pea, strawberry, and radish salad.

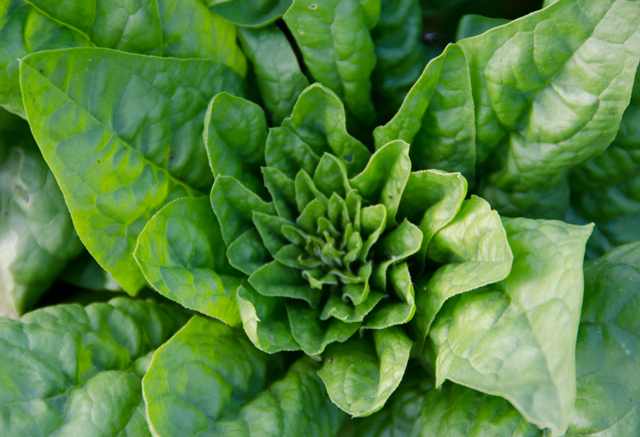
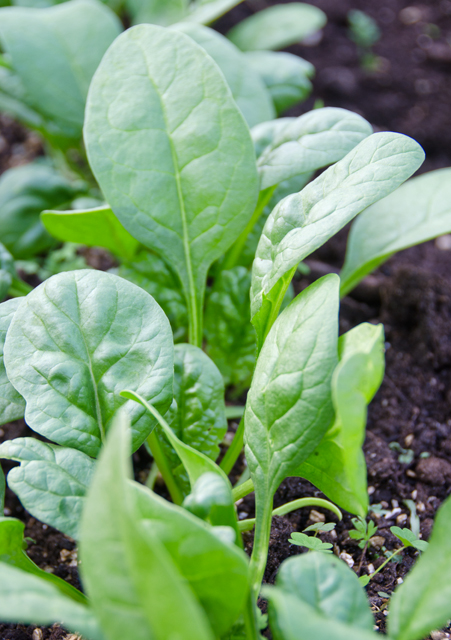
It was time to make one last spinach salad before the plants go to seed. I snipped the smallest leaves off the bolting plants before pulling them out. Joe will plant spinach again in the fall when the cooler temperatures return.

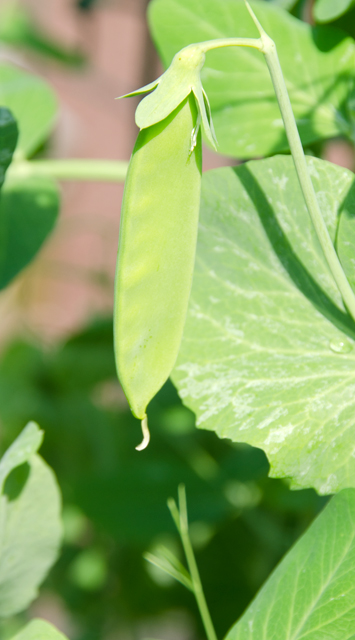
I  pick about a quart of snow peas each day. Their season is short and the warm temperatures of last week were less than ideal for them. This week promises to be cooler and as usual they will be with us until the end of June.

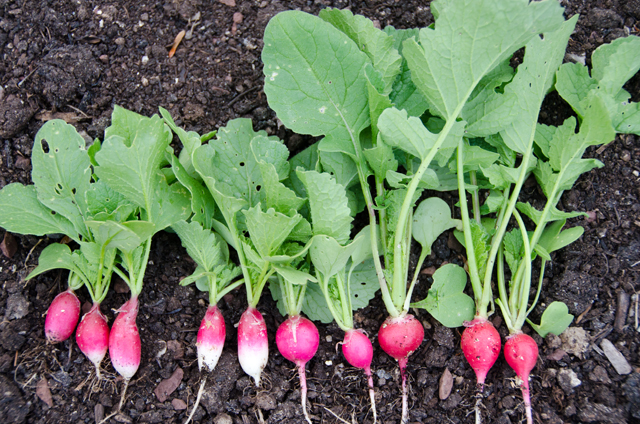
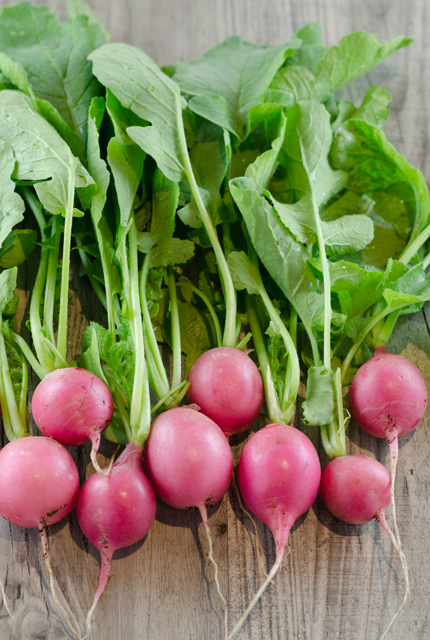
Since they grow quickly, Joe does consecutive plantings of radishes so they aren’t all ready to harvest at once. A new crop emerges in about 3 weeks. They are another vegetable that prefers cool weather, summer heat renders them woody and hot. I picked small radishes, thinning out a row, allowing the ones left behind a few more days to mature.

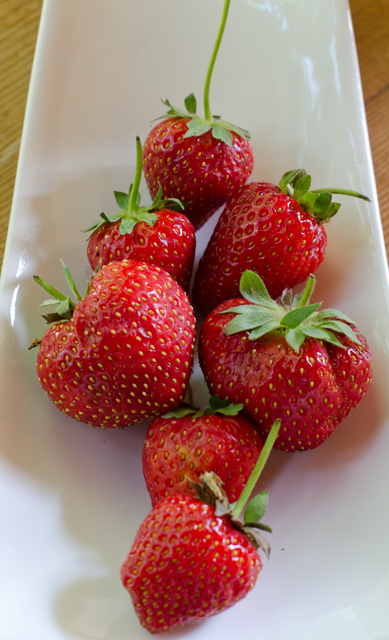
Our strawberry patch is in it’s third season now and is doing better than ever. I spent some time cleaning out the weeds this past weekend that seem to take over if given the opportunity. Fresh strawberries are delicious. We even get a second crop at the end of summer.

A strawberry vinaigrette is the perfect complement to this salad. For the dressing I combined garlic, Dijon mustard, strawberry balsamic vinegar, a touch of honey and extra-virgin olive oil.

When making of salad be sure to use a bowl that gives you plenty of room to combine the ingredients. Start by tossing the spinach lightly with dressing to coat and then add some strawberries, peas and radishes and toss again.  I leave the rest of them to top the salad. That way you can be certain that the last person served doesn’t get all the heavier ingredients that sink to the bottom of the bowl.

DSC_7101a

Spinach, Strawberry, Snow Pea and Radish Salad

Serves two 

Ingredients

For the vinaigrette

  • 1 small clove garlic, minced
  • 3 T balsamic vinegar (strawberry works nicely here)
  • ½-1 t honey
  • 1 t Dijon mustard
  • ½ c extra virgin olive oil
  • Salt and freshly ground pepper

For the salad

  • 6 c baby spinach
  • 1 c strawberries, hulled, halved and sliced
  • 1 c snow peas, strings removed
  • 3-4 medium radishes, sliced thin
  • ¼ c toasted sunflower seeds

DSC_2901a

DSC_2601aDSC_7027aDSC_7118aDSC_7727aDSC_7499aDSC_2666aDirections

  1. In a small bowl, combine the vinegar, mustard, and garlic. Add the oil in a slow steady stream, whisking constantly. Season with salt and pepper to taste.
  2. Add the snow peas to a small pot of boiling water, count to ten, remove from heat and drain well in a colander. Pat dry and let cool.
  3. Place the spinach in a large bowl and toss with some of the vinaigrette and taste. Add about half of the other ingredients, toss again, adding more of the dressing if necessary. Top individual salads with the remaining ingredients. Season each portion to taste with freshly ground black pepper. Reserve remaining vinaigrette for a later use.

DSC_7102a

DSC_7095a

June 1, 2016 Broccoli and Butternut Squash Salad

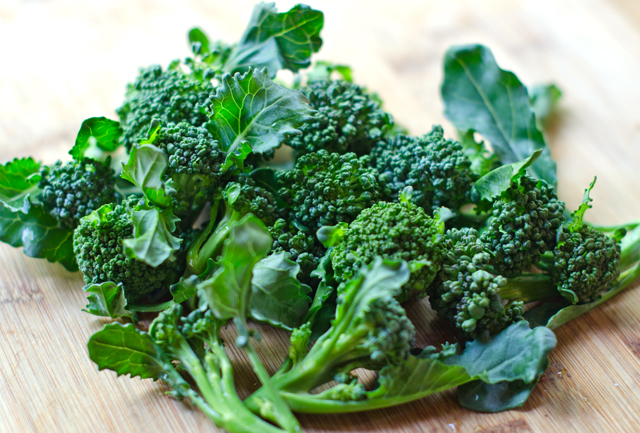
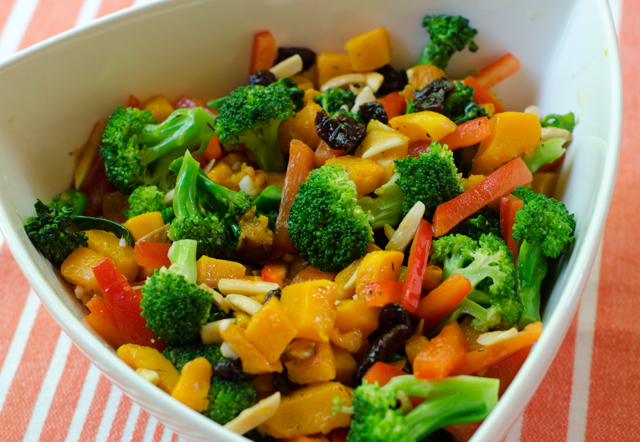
DSC_7045aWe always leave room for a large row of broccoli plants in the garden. But somehow this year, Joe forgot to buy broccoli seeds. We remedied that by purchasing “starts”, small broccoli plants from the garden center at the Home Depot. They are very healthy plants. They took well to transplanting and we’ve encountered no cabbage worm problem this year. But something wasn’t right. Normally, broccoli plants have form one large head in the center. After the center head is harvested, it produces additional side growth for a few more weeks. This year the plants produced no center head but a reasonable amount of side growth.

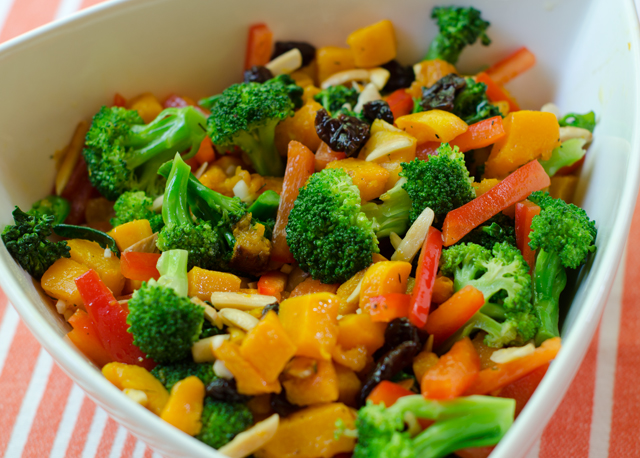
I did a little research and there is a good possibility that the plants were subject to “buttoning” before we bought them. They could have been exposed to cold temperatures (35-50°F) for several days. Other possible stressors include insufficient water, a lack of nitrogen, excessive salt in the soil, pests or disease. I guess the moral of the story is to plant as much as you can from seed, that way you can be certain your plants have been nurtured properly. That said, we still have some broccoli and I created this healthy salad from some of those side shoots plus other ingredients in my kitchen, butternut squash, red pepper, dried cherries and slivered almonds.

Toss butternut squash cubes with olive oil, salt and pepper. Spread them out on a baking sheet and bake in a 375°F oven. Toss them occasionally on the baking sheet to ensure even browning on all sides. Squash cubes shrink, the four cups you start with will yield about 2 1/2 cups of finished product. Even though the broccoli I used was picked that day, I prefer to blanch it for thirty seconds to brighten the color and bring out it’s flavor.  After you drain it in a colander,  plunge the broccoli into an ice bath. This will stop the hot broccoli cooking and prevent it from turning limp and watery.  After it has cooled down, place the florets on a clean kitchen towel to dry.

You could just add plain nuts to the recipe, but toasting them really brings out the flavor. Add the nuts to a skillet large enough to stir or toss them in, depending how brave you are. Cooking over medium high heat, keep the nuts moving at all times to ensure even toasting and no burnt spots. Toasting brings out some of their oil and makes the kitchen smell great! Any nut will work, walnuts, pecans even sunflower seeds.

I had several types of dried fruit in the kitchen and decided that dried cherries would add a tangy sweet element to the dish. I made a vinaigrette with Sicilian Lemon White Balsamic from The Tubby Olive. It has a pleasant acidity with a bright crisp lemon flavor. I combined it with a few tablespoons of their Roasted Almond Oil and finished it with some extra virgin olive oil. Toss the broccoli florets, squash cubes and pepper strips with some of the dressing. Add the cherries and almonds and toss again, adding dressing if necessary. Veggies exude their own liquid, so be judicious in adding the vinaigrette. Refrigerate the salad for several hours to bring out the flavors. Taste before serving, adding any additional dressing, salt and pepper. It’s a colorful, healthy and very flavorful salad.

Little broccoli shoot hiding between the leaves.
DSC_7036a
Broccoli side growth, just as good for this salad.
DSC_7041a
Very colorful ingredients.

Broccoli and Butternut Squash Salad

Serves four

Ingredients

  • 4 c broccoli florets
  • 1 medium butternut squash, peeled, seeded and cut into 1″ cubes, about 4 cups
  • Extra virgin olive oil
  • Kosher salt and freshly ground pepper
  • 1 c red pepper strips, 2″ x ½” from one small pepper
  • ½c slivered almonds
  • ½c dried cherries
  • ¼c Sicilian Lemon balsamic vinegar
  • 1 small clove garlic, chopped
  • Pinch of dried thyme
  • 2 T Roasted almond oil
  • ¼c extra virgin olive oil

Directions

  1. Preheat oven to 375°F.
  2. In a large bowl, toss butternut squash cubes with 1-2 tablespoons of extra virgin olive oil and sprinkle with salt and pepper. Spread out evenly on a baking sheet.
  3. Place in the preheated oven and bake for 16-20 minutes, tossing occasionally to be certain squash gets browned on all sides. Let cool to room temperature.
  4. Fill a large pot with water and a pinch of salt and bring to a boil. Put a colander large enough to accommodate the broccoli in the sink.
  5. Have an ice bath (bowl with water and ice at the ready. Plunge the broccoli in the boiling water and count to 30. Immediately drain the broccoli in the colander then transfer it to the ice bath to stop the cooking.
  6. Drain the broccoli when it has cooled a bit and place broccoli florets on a clean dishcloth to dry them off a bit.
  7. Toast almonds in a medium dry skillet over medium high heat. Keep them constantly moving to ensure even coloring. They will exude some of their oil  and they smell great. Remove from the pan and cool.
  8. In a small bowl, combine the lemon balsamic, garlic, thyme and oils.  Stir to combine. Season with salt and pepper.
  9. Place the butternut squash, broccoli and pepper strips in a large bowl and toss with some of the dressing. Add the dried cherries and almonds and toss again, add a little more dressing if needed. Chill before serving.

DSC_7046a

April 10, 2016 Spinach Soup with Middle Eastern Spices

DSC_6651aSpring made an early entrance this year, but it’s not quite sure if it wants to stick around permanently yet. One day it’s rainy and seasonably warm, the next we are anticipating wet snow that will bring a coating to possibly an inch to grassy surfaces.

The occasional warm day we’ve been having is causing the spinach in the greenhouse to bolt, that is, go to seed. It ‘s time to pick as much as possible, so recipes that use mass quantities of spinach look good to me. This recipe for spinach soup with middle eastern spices uses a pound and a half of fresh spinach. That translates into approximately 18 cups of spinach, and I say, bring it on!

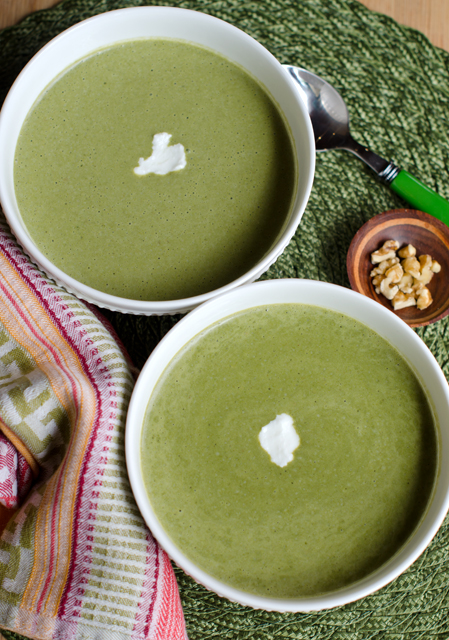
Cookbook author and New York Times food columnist Martha Rose Shulman got her inspiration for this soup from a Syrian pan cooked spinach recipe. The warming spices, clove, allspice, nutmeg, cinnamon and coriander are a pleasing contrast to the sweet, mild flavor of freshly picked spinach.

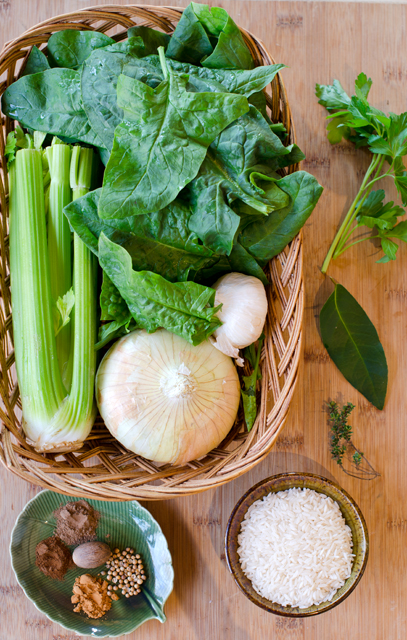
To start, saute a medium chopped onion and celery in a Dutch oven. I checked with the NOA, National Onion Association and they say a medium onion equals about 1 cup chopped onion. When the vegetables soften, add a few cloves of chopped garlic and cook until fragrant. Add stock, rice, bouquet garni and a generous pinch of salt. Bring the mixture to boil and simmer for 30 minutes. This infuses the broth with flavor and cooks the rice which thickens the soup. Remove the bouquet garni and add the spices and the spinach. It is best to add the spinach in batches to the hot broth, continue to add more until it is all wilted. Cover and cook for five minutes, no longer. The spinach should retain it’s bright green color, any longer it could turn gray.

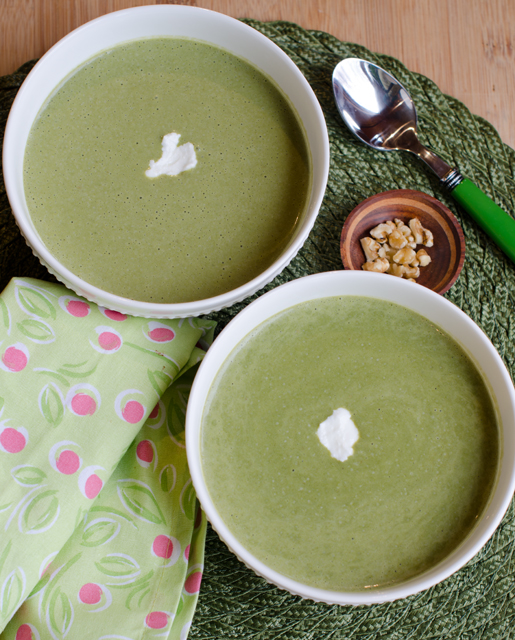
Puree the soup in batches in a blender or blend in the pot with an immersion blender. The final touch is the addition of some tangy yogurt, half is blended into the soup and the rest is a garnish for each bowl. Sprinkle a few chopped walnuts on top before serving. I served it hot but I think it would be good cold as well.

DSC_6459a

Spinach Soup with Middle Eastern Spices

Makes 4-6 servings

Ingredients

  • 1T extra virgin olive oil
  • 1 medium onion, chopped
  • 1/3 c finely diced celery
  • Salt to taste
  • 2 garlic cloves, minced
  • ¼ to ½c medium grain rice
  • 6 c chicken or vegetable stock
  • Bouquet garni of a few sprigs parsley and thyme and a bay leaf
  • 1 ½ lbs fresh spinach, washed thoroughly, large stems removed
  • ¼t ground allspice
  • 1/8 t ground cloves
  • 1/8 t freshly ground nutmeg
  • ¼ t ground cinnamon
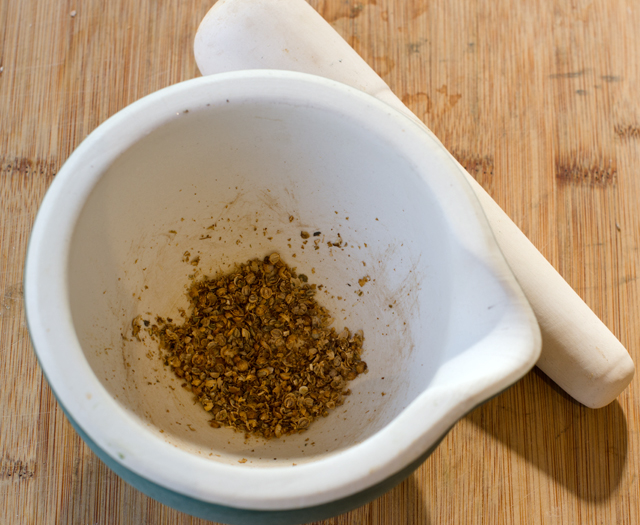
  • 1t coriander seeds, lightly toasted and ground
  • Kosher salt and freshly ground pepper
  • 2 c Greek yogurt (low or full fat)
  • ¼ c chopped walnuts to garnish

DSC_6628a

DSC_6632a

Directions

  1. Heat the olive oil in a large heavy soup pot or Dutch oven. Add the chopped onion and celery and cook until tender, about 5 minutes. Add the garlic and a pinch of salt and cook until garlic is fragrant, about 1 minute.
  2. Add the stock, rice, bouquet garni and salt to taste and bring to a boil. Reduce heat to a simmer, cover and cook for 30 minutes.
  3. While the stock is simmering you will have time to measure out the spices and toast and grind the coriander.
  4. After the stock has simmered, remove the bouquet garni. Add the spices and add the spinach in batches, wilting it as you go. Cover and simmer for 5 minutes. Spinach should still retain its bright color.
  5. Puree the soup in batches in a blender. Be sure to not to overfill and hold down the lid tightly. Alternately you could puree the soup in the pot with a hand blender. Stop at this step if you are not serving the soup immediately.
  6. Return the soup to the pot and heat through, stirring occasionally.  Whisk half of the yogurt into the soup and season to taste with salt and pepper.
  7. Serve the soup with a swirl of yogurt and garnish with chopped walnuts.

DSC_6640a

March 17, 2016 Spinach Pie

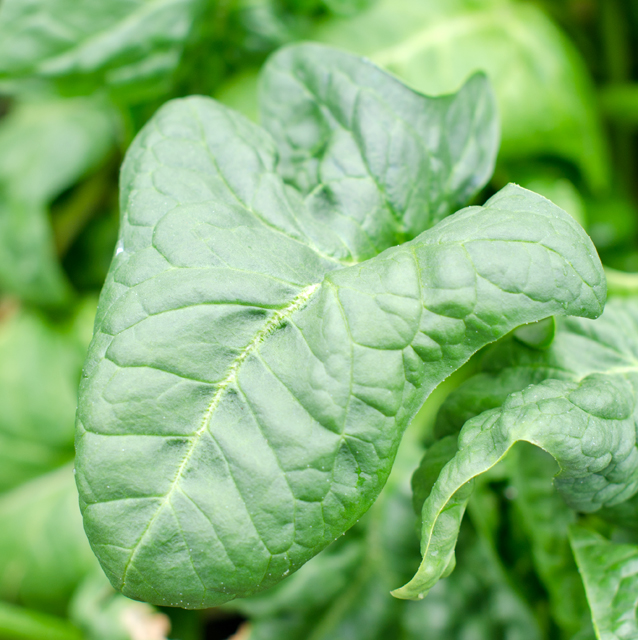
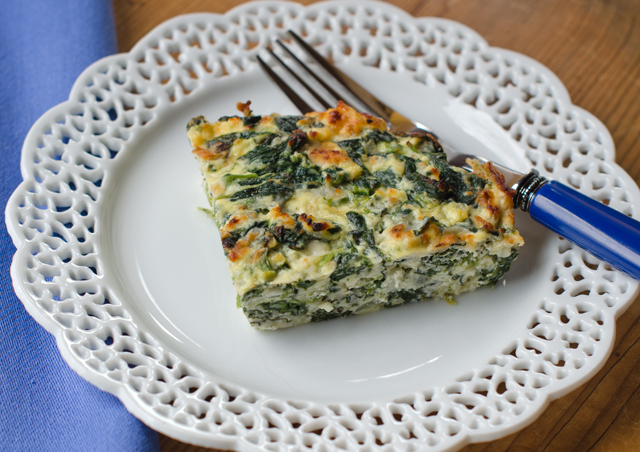
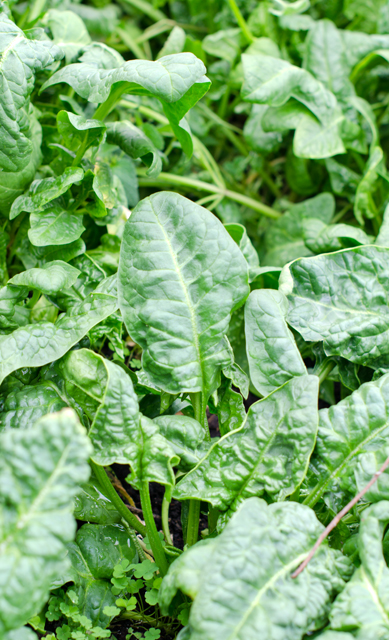
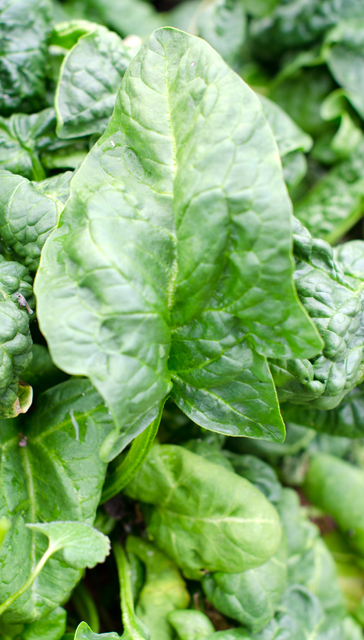
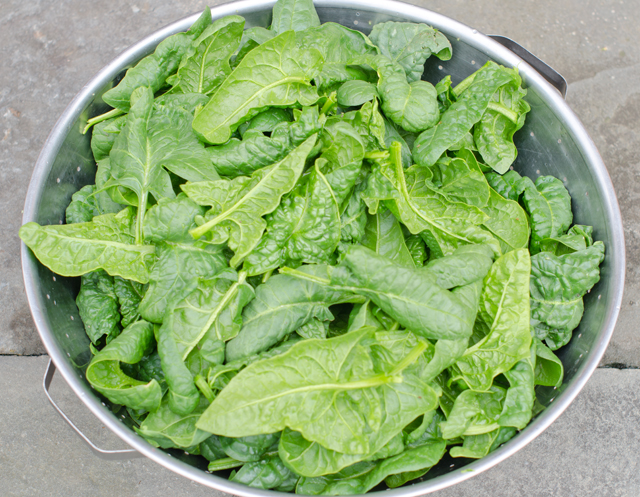
DSC_6530aFor once it looks like the groundhog was right, winter is over. Last week’s tease of highs in the 80’s has now settled back into a mostly rainy week with temperatures in the 50’s and 60’s. Spring arrives this weekend and it’s time to head back to the garden. Our garden’s first offering is spinach. Planted as a fall crop, it wintered over nicely in the greenhouse . It’s not the delicate baby spinach that you would want in a salad, but larger, very crinkly spinach, perfect for cooked dishes. I will attest that is still sweet and flavorful, after nibbling on some stems when I picked a large colander full today.

I found this recipe for Spinach Pie on the Epicurious website from a book called Irish Country Cooking, quite appropriate since St. Patrick’s Day is today. My choice was further confirmed when I read the author’s comment that three generations of her family have enjoyed this dish and this recipe was often made to use up her father’s seasonal harvest of spinach.

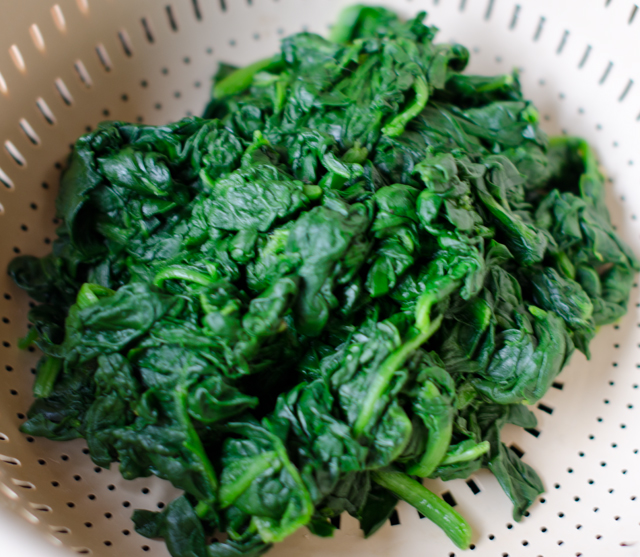
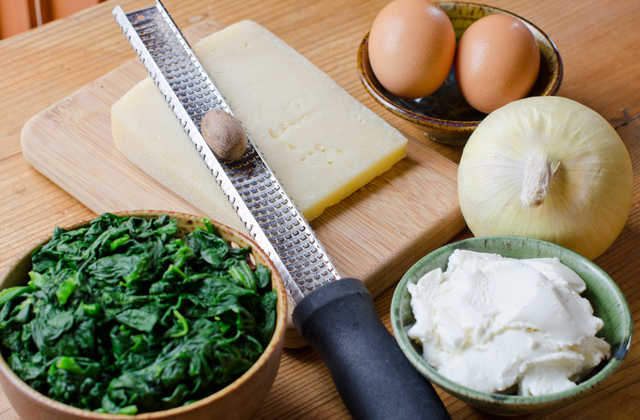
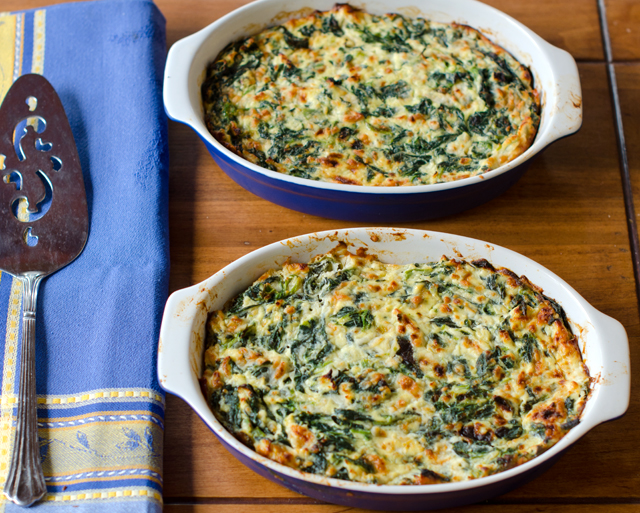
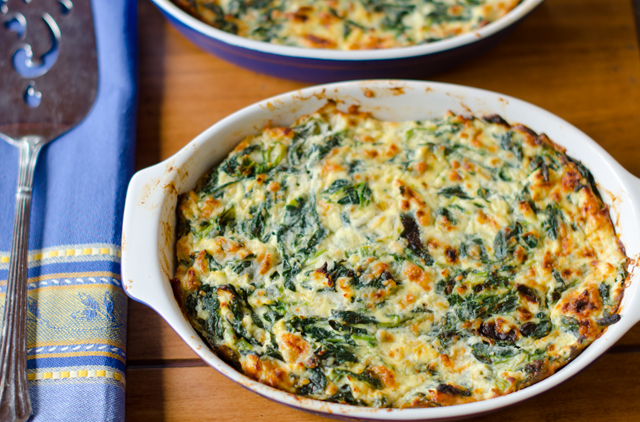
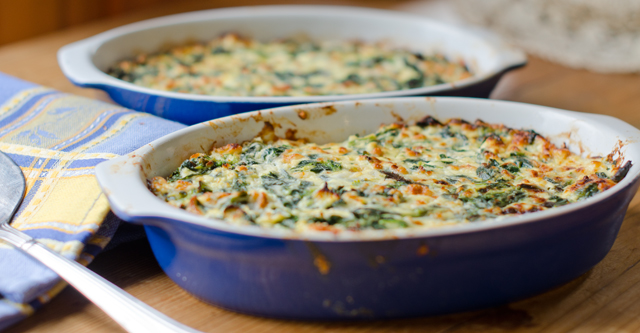
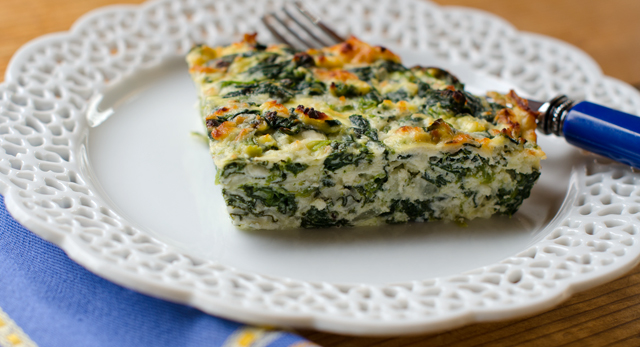
It takes a lot of spinach to make a pound, twelve cups to be exact. When that spinach is cooked down it will yield about a cup. Wash spinach in a large sink in several exchanges of cold water, those crinkles can hide a lot of dirt and debris. Remove any large stems and trim away any discolored leaves. The recipe called for steaming the spinach, I chose to cook it down in batches in a non stick skillet, which was just as easy. Drain spinach in a colander or better yet squeeze in your hands to remove excess moisture. Roughly chop spinach and in a large bowl combine with onion, beaten eggs and the cheeses. Mix well to be certain the spinach is mixed thoroughly with the other ingredients. Transfer this mixture to a quiche dish or individual dishes. If you like it could even be made in a crust. Different cheeses could be substituted as long as they have the same texture, cheddar for the mozzarella, I substituted ricotta for the cottage cheese. The addition of some chopped smoked salmon or a little crumbled sausage would be nice too.  A 10 ounce container of frozen spinach, thawed and well drained can be substituted for the fresh spinach.

Spinach pie is appropriate at any meal, breakfast, a light luncheon entree, a side at dinner. You could also bake this in a rectangular baking dish and cut it into small squares as an hors d’oeuvre. I barely made a dent into the spinach that’s in the greenhouse so it looks like I will be making this again in the weeks to come.

DSC_6460a

DSC_6462a

DSC_6485a

DSC_6490a

Spinach Pie

Ingredients

  • 1 lb 4 oz spinach, washed or a 10 ounce container of frozen chopped spinach, thawed and well drained of excess liquid
  • 1 medium onion, finely chopped
  • 2 eggs, beaten
  • 10 oz ricotta or cottage cheese (regular or low fat)
  • 10 oz freshly grated Parmesan cheese
  • Kosher salt and freshly ground pepper to taste
  • ¼ t freshly ground nutmeg

DSC_6515a

Directions

  1. Preheat oven to 350°F, 325°F if using convection heat
  2. Wilt the spinach in a large non stick saute pan with the water that is still clinging to the leaves, drain well and roughly chop.
  3. In a large bowl, mix the cooked spinach with the onion, beaten eggs and cheeses. Be sure that the spinach is thoroughly combined with the other ingredients. Season the mixture with salt, pepper and nutmeg.
  4. Transfer mixture to one or several smaller baking dishes that have been coated with non stick spray. Bake in preheated oven for 25 to 30 minutes.

DSC_6520a

DSC_6523a

DSC_6526a

DSC_6533a

October 31, 2015 Homemade Hot Pepper Sauces

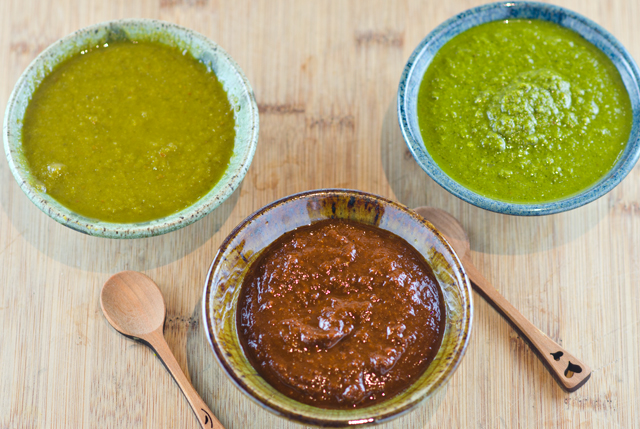
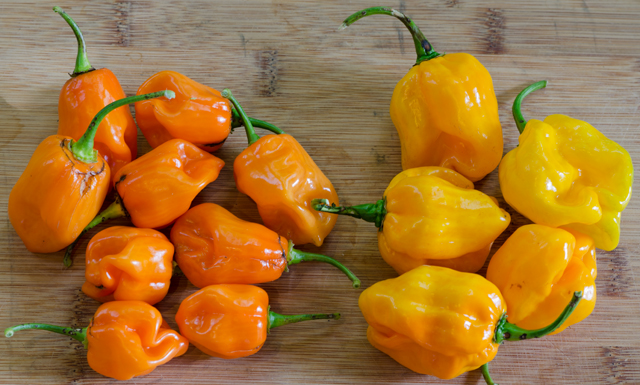
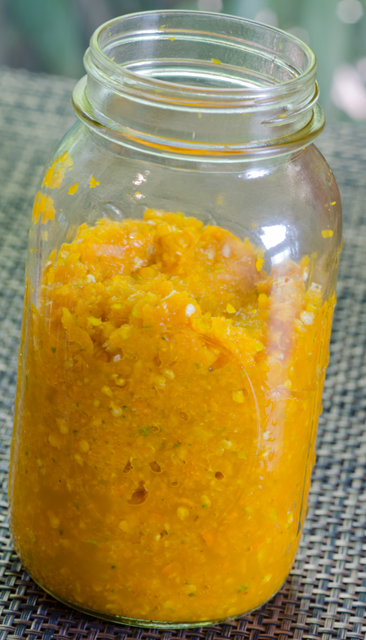
DSC_4979aLast weeks plunge into the deep freeze meant it was time for one final harvest of hot peppers. With a formula that worked and an abundant source of peppers the challenge was to make a few hot sauces using the same method as the sriracha sauce from a few weeks ago. I first tried the NuMex Suave Orange peppers and several days later using green and red pasilla peppers and green poblano peppers. The jars fermented on the back kitchen countertop for about a week. I wasn’t sure what the results would be so my expectations weren’t very high.

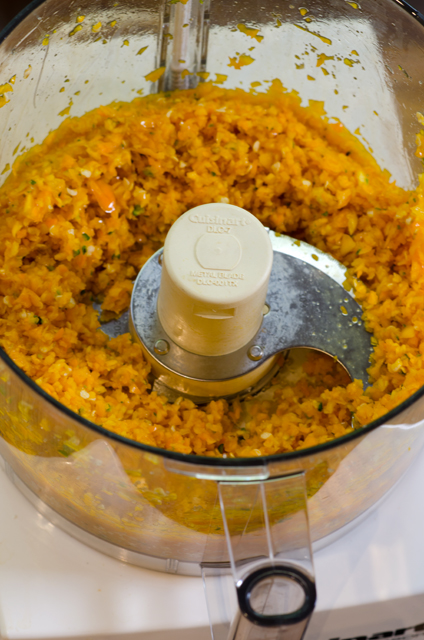
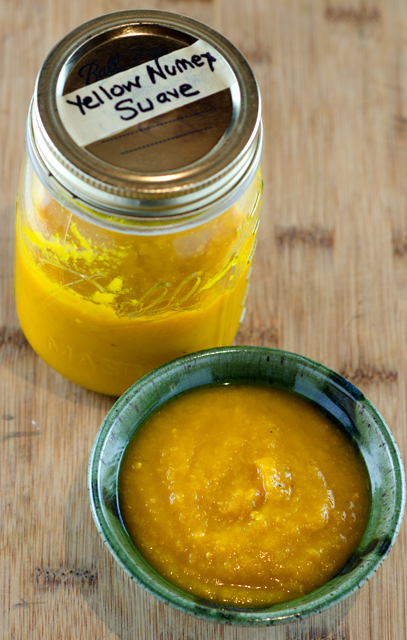
To finish, I followed the same procedure for each variety, transferring the chopped chilis to the food processor, adding enough (1/3 to 1/2cup) white vinegar to puree until smooth. I carefully washed out the processor between peppers to keep each type as pure as possible. I strained the mixture through the medium disc of the food mill to eliminate any seeds. I think it’s easier than the mesh strainer and gives the finished product a little texture.

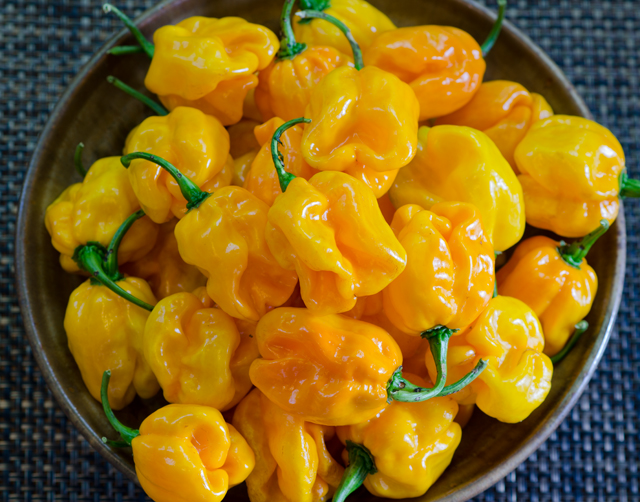
Now for some taste testing. The Numex Suave Orange has the flavor nuances of the habanero that are usually missed because the heat dominates. The sauce has a citrusy flavor with hints of orange and lemon and finishes with a little heat. The green pasilla flavor reminds me of green bell pepper and has a touch of moderate heat. The green poblano has an initial hint of sweetness and finishes with more heat than the green pasilla. I especially like the red pasilla sauce. The color is a deep dark red and the flavor is rich and full but not too hot. I think it would be the perfect addition to a chili recipe.

Numex Suave Orange Peppers
DSC_4858a
The habanero peppers on the left measure a tongue burning 100,000 to 300,000 on the Scoville scale while the Numex Suave Orange on the right are a very mild 800!
Adding peppers and garlic to the food processor.
Chop the peppers as finely as possible.
The peppers ferment for about a week.
DSC_4985a
The finished product

October 13, 2015 End of Summer Green Gazpacho

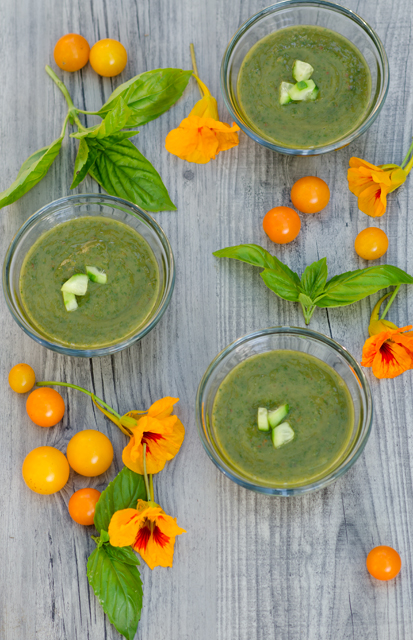
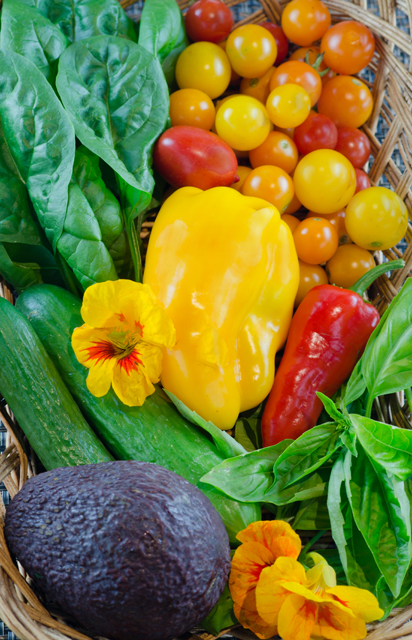
DSC_4896aSummer was officially over several weeks ago and the first touch of frost was on our lawn Sunday. That doesn’t mean the garden is giving up yet. There are still some tomatoes, peppers, both sweet and hot, eggplants and herbs ready for the picking.The tomatoes may not be the prettiest, but they are certainly the sweetest.  Joe has planted a large crop of spinach and salad greens in the garden greenhouse that we will enjoy for several months to come. After a week of indulging in Denver’s finest cuisine it was time to get back on the healthy eating track. What better way to use some of  these ingredients than in a cold refreshing green gazpacho?

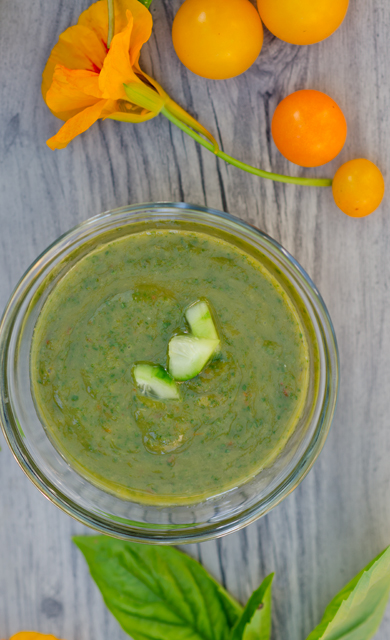
Gazpacho by definititon is a liquid salad that originated from the southern Spanish region of  Andalusia. The name possibly originated from the Latin word “caspa” meaning fragments, alluding to the small pieces in gazpacho. You can make this as chunky or as smooth as you choose. I love the addition of avocados in our nightly salad with dinner and had a few extra ripe ones to give this soup a creamy texture. I used the bounty of our garden and the addition of a cucumber for it’s crisp sweetness. Give this soup several hours to chill and the flavors to blend.

Substitutions  are permitted, watercress for the spinach, that will bring a spicy kick to the soup.  Cilantro can sub for the basil, add a touch of Tabasco if you don’t have a fresh hot pepper, I would be happy to share.  I always stock up on vinegars at The Tubby Olive and used their Alfoos Mango in my soup, love them in our vinaigrettes too. If you don’t  have a fruit vinegar, use white wine vinegar and a touch of honey. A little chopped cucumber as garnish gives a little crunch and since our nasturtiums are still in bloom I couldn’t resist adding a few for their vibrant color and spiciness.

DSC_4913a

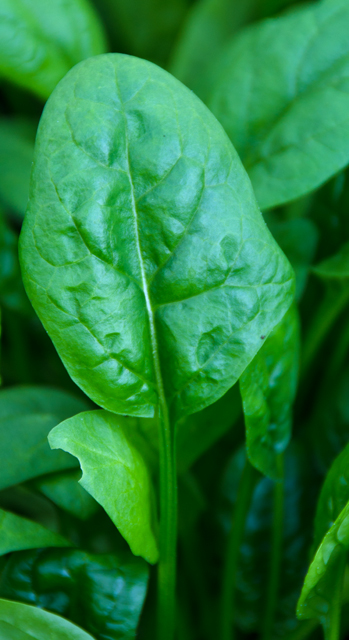
A new crop of spinach in the garden greenhouse is ready for harvest.


End of Summer Green Gazpacho

Makes about 4 cups

  • 2 medium tomatoes or 12-15 small tomatoes
  • 3-4 small cucumbers peeled and cut into chunks
  • 1 avocado, flesh cut into large chunks
  • ½c basil leaves
  • ½c flat leafed parsley leaves
  • ½ to 1 whole hot pepper, jalapeno or serrano
  • 1 sweet pepper, seeded, stemmed and cut into chunks
  • 2c packed baby spinach leaves
  • 2 cloves garlic, finely chopped
  • 2-3T fruity balsamic vinegar (I used Mango from Tubby Olive)
  • Cold water to blend
  • Kosher salt and freshly ground pepper
  • Water as needed
  • 1T extra virgin olive oil

Directions

  1. Reserve ½ cup cucumber chunks and chop finely.
  2. Combine the tomatoes, cucumbers, avocado, basil, hot pepper and sweet pepper, spinach, garlic and balsamic vinegar with cold water as needed in the bowl of a food processor or blender. Process until smooth adding more water as necessary to achieve a smooth texture. Taste and season with salt, pepper and more vinegar if desired.
  3. Refrigerate until cold, pour into bowls and garnish with cucumber chunks.

DSC_4906a