December 15, 2013 Green Beans with Parsley Pesto

DSC_4089a


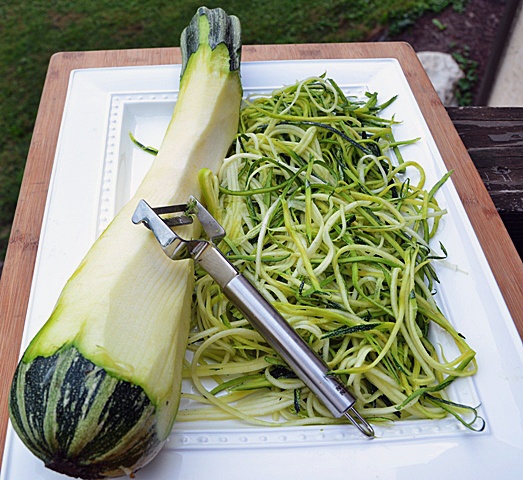
Thanksgiving evening, the turkeys and the side dishes were out and we were ready to serve dinner buffet style from the kitchen. Then I noticed it, the double steamer basket and a small container next to it. I forgot, also read, “got too busy” to make the green bean dish I had prepped ahead. Not that we would miss it. After slurping down Chesapeake Bay oysters, butternut squash soup with cider cream, homemade breads, a salad of baby greens and spinach from Joe’s greenhouse, we were ready for the main event. Turkeys, roasted, grilled and smoked, roasted vegetables, yam casserole, stuffing, zucchini, no one would starve for certain. The green beans could wait for another day.

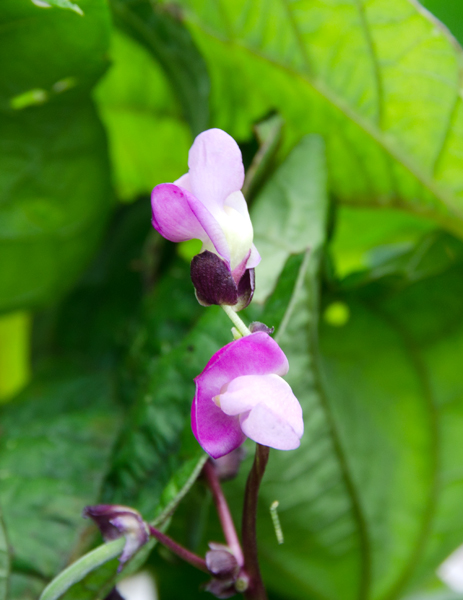
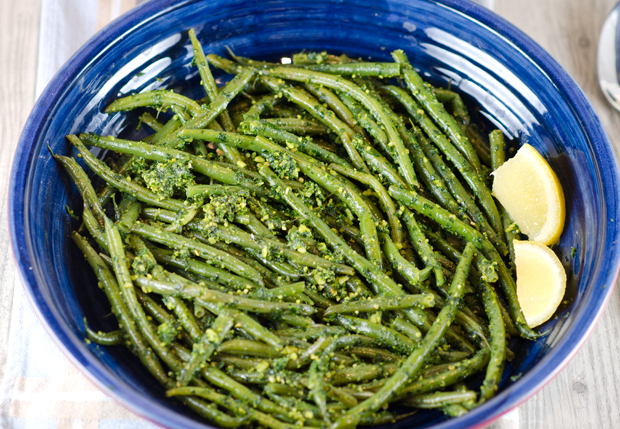
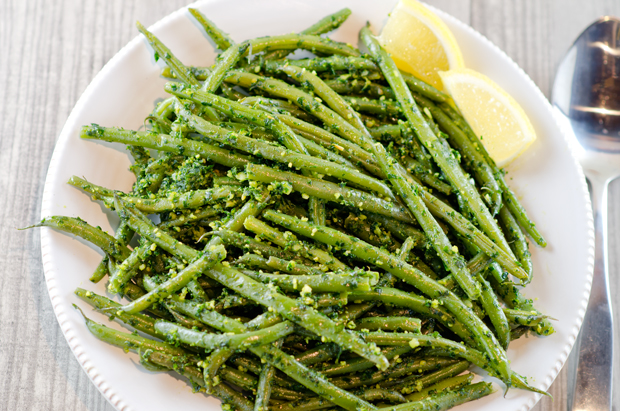
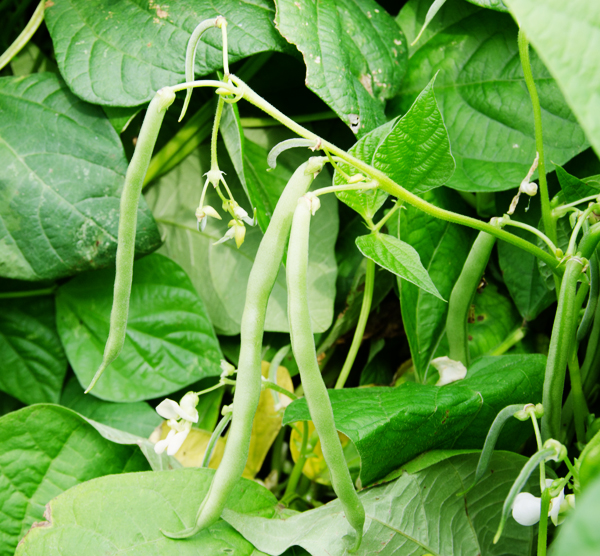
We grow both pole and bush style beans. Green beans, yellow or wax beans and purple beans are in abundance courtesy of the garden from July to early September. Green beans are not in season now so I bought the skinny “haricot verts” that would cook quickly in the steamer basket. Always looking for a new twist on the beans, a recipe from Food and Wine magazine would fit the bill. Green beans with parsley lemon pesto sounded like a great way to feature the beautiful flat leafed parsley still thriving in the greenhouse. Like most people, when you say pesto I immediately think basil. This is a recipe for winter months without basil and combines toasted pine nuts with parsley, garlic, lemon and olive oil. The dish comes together fairly easy, the pesto can be made a day ahead and then tossed with the steamed beans.

Pine nuts are the edible seed of a pine cone. Every pine tree produces seeds but less than a third of the varieties produce seeds that are large and flavorful enough to eat. To say pine nuts are expensive would be an understatement. I read that Italian pine nuts have been going for as much as 60 to 120 dollars a pound due to bug infestations and weather conditions. The small container of Italian pine nuts I purchased was weighed by the quarter pound, by the pound I estimated them to cost about thirty eight dollars. Even Chinese pine nuts have gone up in price. If you decide to purchase Italian pine nuts for any dish  just be sure they are out of harm’s way so they don’t become someone’s late night snack. Walnuts or almonds would be a more reasonably priced alternative and just as flavorful. The amount of pesto is enough for four pounds of green beans, I only cooked a pound of beans because we had quite a few side dishes. Leftover pesto could be tossed with pasta or used as a spread on a turkey sandwich.

DSC_6633a


Green Beans with Parsley Pesto

Serves 6-8 as part of a buffet

Ingredients

  • 1/2 cup pine nuts
  • 2 cups flat-leaf parsley leaves
  • 1 garlic clove, crushed
  • 1 teaspoon finely grated lemon zest
  • 1 tablespoon fresh lemon juice
  • 1/4 cup extra-virgin olive oil
  • Kosher salt
  • Freshly ground pepper
  • 1 lb. green beans (I prefer using the thinner haricot verts)
  • Lemon wedges, for serving

Directions

  1. In a small skillet, toast the pine nuts over moderate heat, tossing, until golden, about 5 minutes; transfer to a food processor and let cool completely.
  2. Add the parsley, garlic, lemon zest and lemon juice to the food processor and pulse until the parsley is very finely chopped. With the machine on, gradually add the olive oil and process until the pesto is nearly smooth. Season with salt and pepper and scrape into a large bowl.
  3. Put a steamer basket in the bottom of a pot. Fill the pot with 1 inch of water, add salt and bring to a boil. Add the green beans, cover and steam until bright green and crisp-tender, 8 to 10 minutes. Drain the beans and transfer to the large bowl. Toss with enough pesto to coat and season with salt and pepper; serve with lemon wedges.
Make Ahead The pesto can be refrigerated overnight. Bring to room temperature before tossing with the beans.
DSC_5254aDSC_4079a

August 22, 2013 Zucchini Lasagna

DSC_1857a

When you grow big zucchini, make zucchini lasagna. In this recipe, zucchini or yellow squash “noodles” replace the usual pasta. I cut the zucchini in half lengthwise first so that I would have a flat surface to work with. A mandoline works best here. In case you didn’t know, a mandoline, also spelled mandolin is a hand operated kitchen tool with adjustable blades that produces uniform slices. They can cost anywhere from about  two hundred dollars for a professional stainless steel style model all the way down to less than twenty dollars for a plastic model. The more expensive models will slice, julienne and waffle cut, the less expensive ones just slice. Whatever model you choose, use the hand/finger guard when you run the food against the blade, believe me, I speak from personal experience.  If you have steady hands and no slicer, use a sharp knife and be sure to use a cutting board to stabilize the squash to ensure even slices. Since zucchini is 95% water it is best to precook it to reduce excess moisture that will end up in your finished dish. Some of the recipes I saw suggested parboiling, sautéing, but I found that grilling worked well for me. My version is totally vegetarian. If you want something more substantial, add ground beef, turkey or sausage to your sauce. Just like regular lasagna, it tastes even better the next day, if it lasts that long!

DSC_1993a


Zucchini Lasagna

Serves four to six

Ingredients

  • 3-4 long zucchini/yellow squash
  • 4 c thick tomato sauce
  • 1 15 oz container of regular or low-fat ricotta cheese
  • 3 lightly beaten eggs
  • 2 T fresh chopped basil
  • 2 T fresh chopped flat leaf parsley
  • 1 t dried oregano
  • Kosher salt and fresh ground pepper to taste
  • 1 ½ c grated Parmesan cheese or other similar grated cheese
  • 1 lb grated mozzarella cheese

Directions

  1. Preheat oven to 350° F. Place baking rack in the lower position.
  2. Cut squash into ¼ inch thick slices, to fit the pan lengthwise, if your squash is shorter, just orient the slices in the opposite direction, just be sure they cover the pan.  You should have enough slices to make three layers.
  3. Heat a grill pan or an outdoor grill to medium high heat. Brush both sides of the slices lightly with olive oil.
  4. Grill squash slices on both sides so that they have grill marks, 3-5 minutes each side. Squash should be cooked but not falling apart.
  5. In a medium bowl, combine the ricotta, eggs, parsley, basil, oregano and a cup of the Parmesan cheese. Reserve the rest for the top layer.
  6. In a 9×13 glass or ceramic dish, spoon a thin layer of sauce on the bottom of the pan.
  7. Place the first layer of squash over the sauce. Spoon a third of the ricotta mixture over the squash. Sprinkle with a third of the mozzarella cheese. Repeat the layers two more times, sauce, “noodles” ricotta, ending with the mozzarella cheese and reserved Parmesan from step four.
  8. Bake for one hour, rotating pan half way through cooking time. Let lasagna rest for at least a half hour before serving.
DSC_1844a
I used my Matfer mandolin slicer, a gift many years ago to get neat uniform slices.
DSC_1976a
Slices should be 1/4″ thick
DSC_1850a
Use the grill or a grill pan to slightly cook the zucchini.
DSC_1998a
Fresh zucchini with tomato sauce, delicious!

DSC_1982a

September 25, 2012 Chard Chips and Pickled Chard Stems


When the new issue of Fine Cooking came last week I was ready to put it aside for a few weeks. The holiday desserts and side dishes looked very tempting, but the beginning of fall was just last Saturday and I am still enjoying cooking as much as I can with the harvest from our garden. As I quickly thumbed through the issue I happened to notice an article that interested me, “What We Are Cooking Now.” Specifically, what really caught my eye were Swiss chard chips. I had heard of kale chips, both the pricey little bags sold in health food stores and the homemade varieties that a friend introduced me to. So why not chard chips? We have three sections of chard of the Bright Lights and Rhubarb variety still producing, so I thought it would be fun to try my hand at this. Since I am a proponent of using both the chard leaves and the stems, I wanted to use the colorful stems in another healthy nibble so a refrigerator pickle seemed to be the best choice here.
My on-line research revealed many different approaches to making chard chips and after reading them all, came up with my own method. There are certain important things to remember if you are going to make chard chips. Wash the leaves thoroughly, chard leaves are usually very crinkly, and those crevices can be dirty. After washing the leaves, remove the stems, reserve if using. Spin the leaves dry in a salad spinner and use paper towels to remove any excess moisture. Any moisture left on the leaves will cause them to steam, not bake and crisp up. A  “bunch” is a non-specific term, to be exact as possible, I used 25 chard leaves that were about 12-14 inches long after stemming. When in doubt, keep the leaf pieces larger, 2 inch squares approximately. The leaves will break easily when they are dry and too many small pieces will give you chard crumbles or dust.  Place the dry leaf pieces in a large bowl and toss lightly with olive oil and your seasonings of choice. Start with a modest amount, about a tablespoon of oil, you can always add more, it’s not as easy to take it away. I used a little Espelette pepper olive oil, kosher salt, fresh ground pepper, a little garlic powder and a little plain olive oil to taste. I did not grease my baking sheet or use cooling racks to elevate the leaves. I did not crowd or overlap the leaves. I used four large baking sheets in two ovens, racks in the top and the bottom set to 275F on the convection bake setting. The caveat here is, know your own oven, my chips seemed to be ready quicker than most of the recipes I looked at, keep a watchful eye to ensure a crispy, not a burnt chip!
Chard Chips

  • 1 large bunch of chard, 25 leaves, 12-14 inches long
  • Olive oil
  • Seasoning of your choice, I used kosher salt, garlic powder and freshly ground pepper

Directions

  1. Preheat oven to 275F (convection bake). Put racks in the top and bottom of oven.
  2. Wash chard leaves thoroughly in several changes of water. Remove the stems from the leaves, reserve for chard stem pickles.
  3. Dry chard leaves, first in a salad spinner, then remove excess moisture with paper towels. Cut leaves into 2″x2″ pieces, or a size as close as possible, when in doubt, larger is better.
  4. Spread leaves on a large ungreased baking sheet, do not overlap or crowd. My leaves took up four sheets that I baked in two ovens.
  5. Bake chard for six to seven minutes, check to see how the leaves are drying, at this point I loosened the leaves with a spatula and my fingers and rotated the baking sheets, top to bottom and front to back.
  6. Bake for another six to seven minutes, chard should be crisp, not burnt.
Trimmed chard leaves ready to be tossed with olive oil and seasonings


Give the chard leaves enough room to ensure even baking.
Not the prettiest snack, but certainly tastes good!


Pickled Chard Stems

Colorful Bright Lights and Rhubarb chard stems are too pretty to waste.

Pickling shows off the brightly colored stems in another healthy nibble. Refresh the stems in some ice water to crisp them up and cut to even lengths to fit your canning jar. I chose pint jars but one cup sized jars would work as well. I used a basic refrigerator pickle recipe and added my own spice blend combination. Allow them to cure in the refrigerator for a few days, after three days they were ready. If your stems are wide, cut them in half lengthwise, there will be less chance for the stems to be stringy.

Quick Chard Pickle

Makes  2 pints

  • 2 pint canning jars and lids
  • Enough chard stems to pack tightly into the jars
  • 2c water
  • 1c rice wine vinegar
  • 1/4c granulated sugar
  • 1/2t cumin seed
  • 1/2t coriander seed
  • 1/2t fennel seed
  • 1 small piece of cinnamon stick about 2″
  • 1/2t pink peppercorns
  • 1/2t white peppercorns

Directions

  1. Sterlize two pint canning jars by washing them in hot soapy water, rinsing and drying them thoroughly. Crush spices in a mortar and pestle or small food processor. Distribute spices evenly between the two jars.
  2. In a medium saucepan bring two cups of water to a boil. Add vinegar, sugar and salt and bring the mixture back to a boil.
  3. Pack the chard stems in the jars as tightly as possible. Using a wide mouth canning funnel, pour the brine over the stems to cover completely. Place lids and bands on the jars and let cool. Refrigerate, chard pickles will be ready in a few hours but at their best in about two days.

    My spice blend ready to crush in the mortar and pestle.
Pickled chard stems ready for the refrigerator. Notice the classic Bicentennial Liberty Bell jar on the right.


August 3, 2012 Zucchini “Pasta”

Gardeners, we’ve all done it. You are diligent at first picking zucchini from your garden. For days you happily pluck small to medium zucchini off the vines, sometimes with the blossoms still attached. Then it happens, you get busy doing other things, it rains for several days or you just simply forget. Those compact little fruits are now the size of a major league baseball bat. Well, before you make one more loaf of zucchini bread or sneak it down to the compost pile, I have another idea.

I make something I refer to as “zucchini pasta”. Kuhn-Rikon, a Swiss cookware company has a tool that makes short work of over-sized zucchini. The stainless steel julienne peeler moves effortlessly down the length of the squash. Steady the zucchini with one hand, start at the top, press the teeth of the peeler into the flesh and pull down. You will have the finest Julienne imaginable in no time. Just stop soon enough to avoid the seedy interior. Although all varieties of zucchini work well with this preparation, I especially like the Italian variety Striato d’Italia which translates Italian stripe. When this variety gets bigger, it doesn’t get as fat as other zucchini, it gets longer, making for longer capellini pasta-like shreds. Put your strands into a bowl and separate any that stick together with your fingers. I like to slightly wilt the strands in a saute pan with some olive oil but  they could  be used raw. I like to toss the “pasta” with some pesto and sometimes I will add halved cherry tomatoes, either raw or cooked slightly. You could also pair it with a cooked tomato sauce or just about anything you like on regular pasta.  Don’t just use the julienne peeler for zucchini. Shred carrots and jicama for a slaw or beets for a salad. The possibilities are limitless.

The longest zucchini in this picture is 22 inches!

The julienne peeler makes short work of this zucchini.

Use your fingers to separate any strands that stick together.


July 12, 2012 Swiss Chard


Let’s begin with two misconceptions regarding chard. Swiss chard is not from Switzerland, but the botanist who named it in the nineteenth century was, and named it for his homeland.  Second, it is pronounced chard, not shard. I can understand why the mistake can occur. Chardonnay, a wine grape varietal, is referred to in a shorthand kind of way  by many people (moi included) as “shard”. The “ch” is pronounced “sh” in French, like chalet. Also a shard is a sharp piece of glass, not something one would consume.

Chard is from the Latin and the French for the word “thistle”. However, chard is not a member of the thistle family but belongs to the beet family.  Chard is cultivated for the leaves and stems of the plants, not the roots.  It is the cooked green of choice in the summer months in our house. We grow many varieties that are as pretty to look at as they are nutritious for you. Varieties like Rhubarb with its bright red stems and Bright Lights with its neon pink, orange and yellow stems give beautiful accents of color in the garden. Chard is a nutritional powerhouse with vitamins K, A and C, and is  a good source of potassium, iron and fiber.

European cooks are partial to chard stems discarding the leafy part and in America most cooks use the leaf and discard the stem. I take advantage of both the stems and the leaves .  The tiniest leaves are an interesting addition to salad mixes. When using larger leaves, the stems need to be separated from the leaves to cook both parts correctly. This is a recipe with the gardener in mind. If you don’t grow your own, your local farmer’s market is a good source for chard. Supermarket chard looks sad for the most part and wouldn’t make a chard lover out of anyone.

Swiss Chard with Garlic

Serves 4-6

Ingredients

  • 1 large bunch of chard
  • Kosher salt and fresh ground pepper
  • Low sodium chicken broth
  • Extra virgin olive oil
  • Several cloves of garlic, peeled and chopped

Directions

  1. Trim the bottoms of the stems and wash chard in several changes of water
  2. Cut the stems from the leaves. Chop stems into 1/2 to 1 inch pieces. Cut leaves into 1 to 2 inch ribbons. Stacking leaves on top of leaves and stems in an even row  makes the task go quicker.
  3. Bring a large pot of well-salted water to a boil. Add chard stems and blanch for 4-5 minutes. The timing will depend on how thick you cut the stems and how soft you want them to be. Remove stems from water with a slotted spoon or spider. Add a little more water to the pot if necessary and keep at a boil.
  4. Add chard leaves in batches and blanch until wilted, 2-3 minutes. Drain in a large colander. Squeeze out excess liquid when cool enough to handle.
  5. Heat a tablespoon or so of extra virgin olive oil in a large skillet over medium high heat for about a minute. Add stems and toss gently to coat. Add wilted chard leaves and stir often, until tender, adding a little chicken broth if the mixture seems too dry. Push chard to one side of pan, add a little more olive oil, add garlic to pan and saute garlic until golden, another minute or two.
  6. Serve warm. Cooked chard could be added to a frittata or omelet as well.


Crinkly rhubarb chard leaf with bright red stem.

Soak chard leaves in several changes of water. Dirt will sink to the bottom when you lift the leaves out. Drain chard in a colander.


Trim the bottom of the chard leaves. Cut the leaf away from the stalks, I prefer using scissors or a small serrated knife. Chop leaves in 1-2 inch ribbons. Stacking the leaves speeds the process along.

Chop stalks into 1/4 to 1/2 inch pieces.


Always cook more chard than you think you will need. This large bowl cooked down to this.


As you can see from the measuring cup, some of the color leaches out during the blanching process but they remain predominately red.


Saute the stems and leaves together and finish with a little chopped garlic.  A flavorful extra virgin olive oil will really enhance the flavors in this dish.


May 25,2012 Stir Fry of Bok Choy and Shiitake Mushrooms


Mature bok choy in the garden.

Bok choy, bak choy, choy sum, however you name it we enjoy this Chinese vegetable year round. From the garden in the spring and again in the fall, first in it’s baby stage as thinnings all the way to the mature heads that finish out the season. In the off months I go to the Asian markets to purchase Shanghai Bok Choy, the smaller heads that we prefer. Bok choy always makes an appearance as a side dish at our Chinese New Year dinner.
Bok choy is from the Cantonese dialect literally meaning “white vegetable”. Low in calories and high in vitamins A, C and K as well as calcium and iron, it is classifed as a brassica or cabbage. It’s flavor is definitely not “cabbagy”, it is light, crisp and delicate. If you don’t  grow your own, choose bok choy that is unblemished and firm to the touch.  This recipe helped us to use up our first planting of bok choy, with many more rows to come.

Stir Fry of Bok Choy and Shiitake Mushrooms

Serves 6

  • 2lbs bok choy-if large, leaves cut in half lengthwise
  • 3/4lb shiitake mushrooms, cleaned and caps sliced thinly
  • 4T oyster sauce
  • 1/4c lower-salt chicken broth
  • 1T cornstarch
  • 1T Asian sesame oil
  • Peanut oil for stir frying
  • 3 large cloves garlic-sliced thinly
  • 2T fresh ginger peeled and cut into thin matchsticks

    Bok choy leaves washed, trimmed, ready to be blanched.


Directions

  1. Blanch large bok choy leaves in a large pot of boiling water until the white stems are softened, but not limp,  drain in colander.
  2. Combine the oyster sauce, chicken broth, cornstarch and sesame oil in a small bowl. Whisk well to dissolve the cornstarch.
  3. In a large wok, heat a tablespoon or so of  peanut oil over medium-high heat. The wok is ready when a drop of water sizzles on contact. Add bok choy and cook tossing frequently with 2 wooden spoons or tongs until stems are softened and slightly browned, about 5-6 minutes. Add shiitake mushrooms and stir fry for one minute. Add garlic and ginger and cook, stirring constantly until aromatics are tender, fragrant and starting to brown, about 2 minutes.
  4. Add sauce to wok and use spoons or tongs to mix with the vegetables. Simmer until the sauce is reduced and thickened, about 2 minutes. Serve immediately.

    All ingredients must be ready to go for a stir fry.


Thinning out the sauce with a little chicken stock.

February 15, 2012 Strange-Flavor Eggplant

A dish that I have to make every year for the Chinese New Year celebration is strange-flavor eggplant. It is Joe’s absolute favorite and I must admit, because it is a dish that benefits from being made several days in advance, I occasionally forget to put it out with all the other side dishes.

Strange flavor eggplant was made famous by the late Chinese scholar, chef and restaurant owner, Barbara Tropp. I have enjoyed reading and cooking many dishes from both her books, The Modern Art of Chinese Cooking and China Moon, named for her Chinese bistro. It is in China Moon, that she shares the recipe for Strange Flavor Eggplant in a chapter entitled, “Nuts, Pickles and Nibbles”.  Ms Tropp says of strange flavor, “a classic name  for a series of Chinese dishes that typically employ a mixture of vinegar, sugar and chili, this is strange as in “wonderful, unique or ineffable”. Fushcia Dunlop in her book “Land of Plenty” describes strange-flavor as one of the 23 flavors of Sichuan. “It is the harmonious mixing of salty, sweet, numbing, hot, sour, fresh-savory and fragrant notes,” she states.

The flavor is not so strange, but quite addictive. The texture is reminiscent of eggplant caviar, it can be eaten as a side vegetable or as a dip, as she suggests with garlic croutons. Hopefully this summer  I will remember to make strange flavor when our garden is producing copious amounts of eggplant.

The cooked eggplants remind me of deflated balloons!

The eggplants were easy to peel, be sure to let them cool first!

Cooking the eggplant with the sauce and aromatics

This year the strange-flavor eggplant made it to the table!

An assortment of beautiful eggplant from a previous season’s garden.

Strange-Flavor Eggplant from the China Moon Cookbook

She says this will keep in the refrigerator for up to a week, but it never lasts that long for us! I usually make a double batch.

Ingredients

  • 1 to 1 1/4 pounds large eggplant (Italian or globe)
  • 2 Tablespoons corn or peanut oil
  • 1/2 teaspoon sesame oil
  • thinly sliced green and white scallion rings for garnish

Aromatics

  • 1 tablespoon finely minced garlic
  • 1 tablespoon finely minced fresh ginger
  • 1/4 cup thinly sliced green and white scallion rings
  • 1/4 to 1/2 teaspoon dried red chili flakes

Sauce

  • 3 tablespoons soy sauce
  • 3 tablespoons packed brown sugar
  • 1 teaspoon unseasoned Japanese rice vinegar
  • 1 tablespoon hot water

Preheat the oven to 475F. Position the rack in the center position.

  1. Prick the eggplant well in several places with a fork or the tip of a sharp knife and remove the leaves. Bake on a baking sheet, turning once, until fork-tender, 20 to 40 minutes, depending on the size.
  2. While still warm, remove the stem end and the peel, scraping off and retrieving any pulp. Chop up the pulp and process the pulp and any thick baking juices in a food processor or blender until nearly smooth.
  3. Combine the aromatics in a small dish. Combine the sauce ingredients in a small bowl, stir to dissolve the sugar.
  4. Heat a wok or large heavy skillet over high heat until hot enough to evaporate a bead of water on contact. Add 2 tablespoons corn oil, swirl to glaze the pan, reduce heat to medium high. When hot enough to foam a scallion ring, add the aromatics and stir-fry until fragrant, about 15 seconds, adjusting the heat so they sizzle without scorching.  Add the sauce ingredients and stir until simmering. Then add the eggplant, stir well to blend, and heat through.  Remove from heat and adjust seasonings accordingly. Stir in sesame oil.
  5. Allow to cool, stirring occasionally. It will achieve fullest flavor if the eggplant is refrigerated overnight. Serve at room temperature with a sprinkling of scallions.