December 2, 2012 Potato Rosemary Bread with Roasted Garlic


 I have always loved to make bread. Not that I was always good at it, in fact many of my first loaves were less than stellar. Armed with my Betty Crocker and Good Housekeeping cookbooks, I made multiple attempts at white, wheat and whole grain breads. My biggest problem was yeast, or my lack of success in proofing it. The loaves would turn out flat and leadened, thrown outside as crumbs for the birds. My father used to say, the birds wouldn’t even eat my bread, it was too heavy to fly away with! I am happy to say that my tenacity paid off and have made many delicious loaves since those days. 

 I have a sizable collection of books dedicated to breads in my cookbook library. One of my favorites is The Bread Bakers Apprentice authored by Peter Reinhart, former professional baker and current baking instructor at Johnson and Wales University. The first half of the book is set up like a well written text book. In this section he examines bread making through mastering the twelve stages of baking.  Reinhart’s desire is to empower his readers not to be dogmatic but to follow the “spirit of the law”; bakers who understand their options and thus will be able to bring about their desired outcomes. The second half are the recipes or formulas as he refers to them, with accompanying beautiful photography.
 
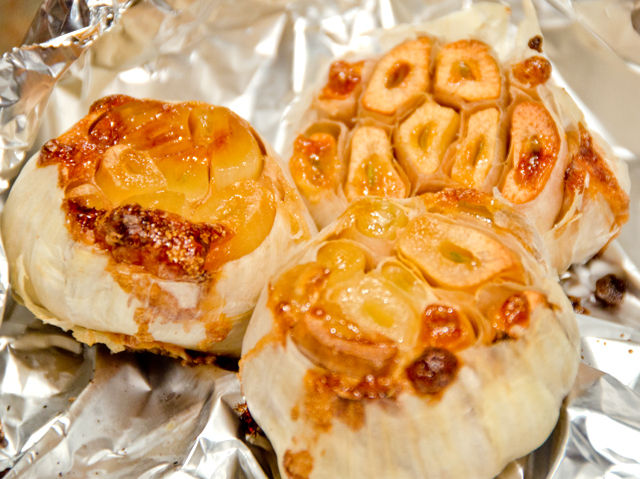
It was a cup of leftover mashed potatoes that inspired me to make his Potato Rosemary bread for Thanksgiving dinner.  The bread is a two day process. The first day, the biga is made, a preferment of bread flour, water and yeast that rises once and ferments overnight in the refrigerator. The second day the biga is mixed into the other ingredients to make a delcious fragrant loaf. Scented with fresh rosemary, the potatoes give the bread a soft, tender texture and the optional roasted garlic gives it an extra dimension of flavor. The roasted garlic is easy to do. My method is to cut enough of the tops off of the garlic to expose the cloves. Place the garlic on a sheet of aluminum foil large enough to wrap them in. Drizzle a little olive oil over the cloves, wrap them up and bake in a 375F oven for about 45 minutes. The fragrant toasty brown cloves will easily slip out of their skins. Potato rosemary bread is a fantastic recipe that will complement your dinner table on any occasion.
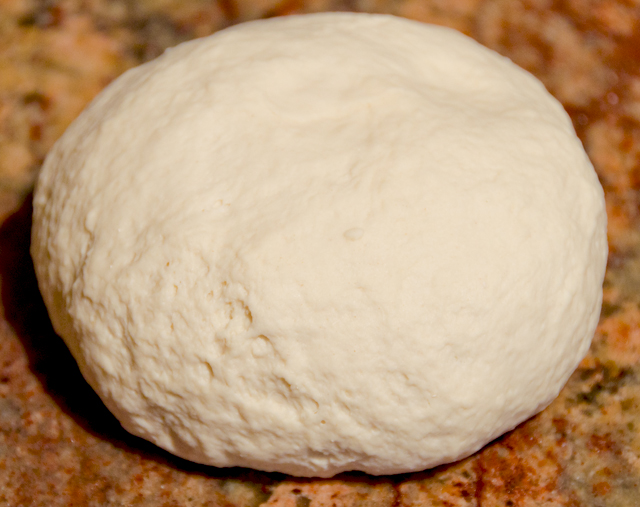
 

Biga, is the Italian version of a preferment. It improves the flavor and structure of the bread.


Roasted garlic adds another dimension of flavor.


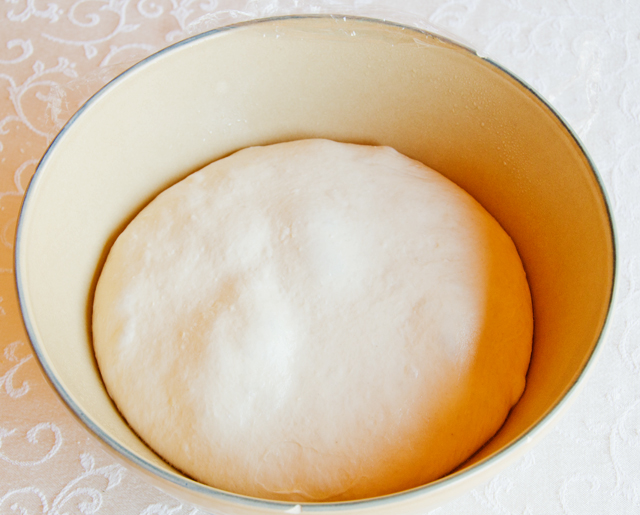
The biga after a rise and an overnight ferment in the refrigerator.
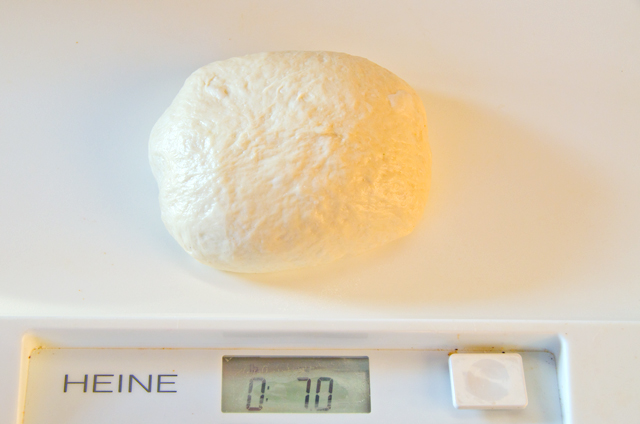
Seven ounces of the biga go into this recipe. Refrigerate or freeze the remainder for another use.


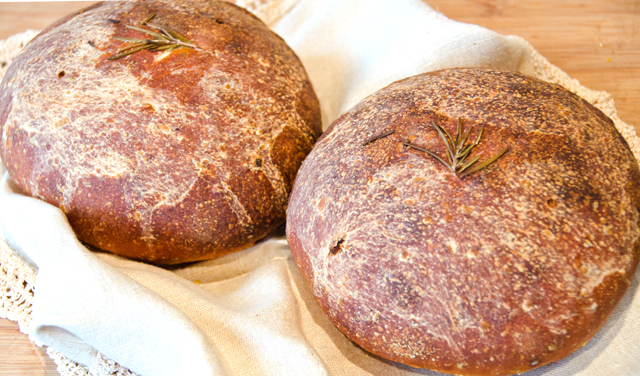
The bread is shaped into two round loaves or boules and placed on a parchment lined baking sheet dusted with cornmeal.
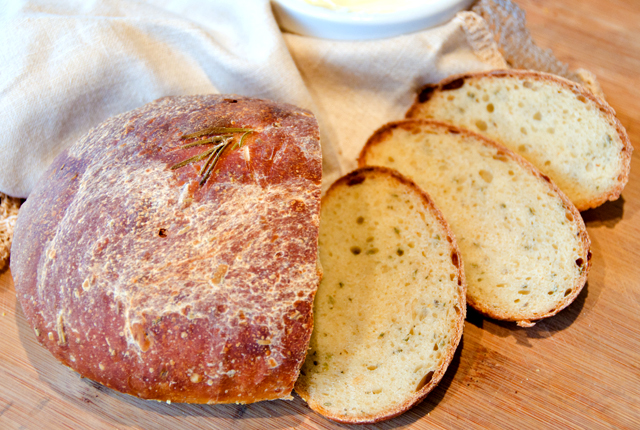
Allow the finished loaves to cool for at least an hour before serving.

 Potato Rosemary Bread
from The Bread Baker’s Apprentice by Peter Reinhart

Days to make: 2
Day 1: 2 1/2 to 4 hours biga.
Day 2: 1 hour to de-chill biga; 12 minutes mixing; 4 hours fermentation, shaping and proofing; 20 to 45 minutes baking.

Ingredients for the biga

  • 2 1/2c unbleached bread flour
  • 1/2t  instant yeast
  • about 1c  of water at room temperature

 Ingredients for the bread

1 1/4c  Biga
3 c plus 2T unbleached bread flour
1 1/2 t salt
1/2 t black pepper, coarsely ground (optional)
1 1/4 teaspoons Instant yeast
1 c mashed potatoes
1 T olive oil
2 T coarsely chopped fresh rosemary
3/4 c plus 2T to 1c water, at room temperature (or warm if the potatoes are cold)
4T coarsely chopped roasted garlic
Semolina flour or cornmeal for dusting
Olive oil for brushing on top

Biga

Directions

  1. Stir together the flour and yeast in a 4-quart bowl (or the bowl of an electric mixer). Add the water, stirring until everything comes together and makes a coarse ball (or mix on low speed for 1 minute with the paddle attachment). Adjust the flour or water, according to need, so that the dough is neither too sticky nor too stiff. (It´s better to err on the sticky side, as you can adjust easier during kneading.)
  2. Sprinkle some flour on the counter and transfer the dough to the counter. Knead for 4 to 6 minutes (or mix on medium speed with the dough hook for 4 minutes), or until the dough is soft and pliable, tacky but not sticky. The internal temperature should be 77° to 81°F.
  3. Lightly oil a bowl and transfer the dough to the bowl, rolling it around to coat it with oil. Cover the bowl with plastic wrap and ferment at room temperature for 2 to 4 hours, or until it nearly doubles in size.
  4. Remove the dough from the bowl, knead it lightly to degas, and return it to the bowl, covering the bowl with plastic wrap. Place the bowl in the refrigerator overnight. You can keep this in the refrigerator for up to 3 days, or freeze it in an airtight plastic bag for up to 3 months.

Dough

Directions

  1. Remove the biga from the refrigerator 1 hour before you plan to make the bread and weigh out the portion you need, the above recipe makes more than twice that amount. Refrigerate or freeze the remainder for another recipe. 
  2. Stir together the flour, salt, black pepper, and yeast into a 4-quart mixing bowl (or the bowl of an electric mixer). Add the biga pieces, mashed potatoes, oil, rosemary and 3/4 cup plus 2 tablespoons water. Stir with a large spoon (or mix on low speed with the paddle attachment) for 1 minute, or until the ingredients form a ball. Add more water, if neccesary, or more flour, if the dough is too sticky.
  3. Sprinkle flour on the counter, transfer the dough to the counter, and begin to knead (or mix on medium speed with the dough hook). Knead for about 10 minutes (or 6 minutes by machine), adding more flour if needed, until the dough is soft and supple, tacky but not sticky. It should register 77° to 81°F. Flatten the dough and spread the roasted garlic over the top. Gather the dough into a ball and knead it by hand for 1 minute (you will probably have to dust it with flour first to absorb the moisture from the garlic). Lightly oil a large bowl and transfer the dough to the bowl, rolling it around to coat it with oil. Cover the bowl with plastic wrap.
  4. Ferment at room temperature for about 2 hours, or until the dough doubles in size.
  5. Remove the dough from the bowl and divide it into 2 equal pieces. Shape each of the pieces into a boule. Line a sheet pan with baking parchment and dust lightly with semolina flour or cornmeal. Place the dough on the parchment, separating the pieces so that they will not touch, even after they rise. Mist the dough with spray oil and cover loosely with plastic wrap.
  6. Proof at room temperature for about 2 hours or until the dough doubles in size.
  7. Preheat the oven to 400°F with the oven rack on the middle shelf. Remove the plastic from the dough and lightly brush the bread with olive oil. You don´t need to score this bread, but you can if you prefer.
  8. Place the pan in the oven. Bake for 20 minutes, then rotate the pan 180 degrees for even baking. The loaves will take 35 to 45 minutes total to bake. The loaves will be a rich golden brown all around, and the internal temperature should register at least 195°F and make a hollow sound when thumped at the bottom. If the loaves are fully colored but seem too soft, turn off the oven and let them bake for an additional 5 to 10 minutes to firm up.
  9. Remove the finished loaves from the oven and cool on a rack for at least 1 hour before serving.
November 24, 2012 Cranberry Chutney

I have a library of hundreds of cookbooks and food magazines from thirty years of cooking, entertaining and catering. Some hold a fonder place in my heart than others. The Silver Palate and Frog Commissary cookbooks are in their second copy after falling apart from years of constant use. Another book that holds a special place for me is Betty Rosbottom’s Cooking School Cookbook. My copy is dog-eared and stained from years of constant use. Her creative recipes were a constant source of inspiration for daily meals, entertaining and in developing my own menus in my fledgling years as a caterer. As someone who doesn’t normally make fancy cakes, I was even inspired to make her chocolate ribbon cake and chocolate apricot pecan torte, both featured on the cover of Bon Appetit. One of the recipes in the Cooking School Cookbook I have been making for years ironically isn’t hers but another cooking teacher, Shirley Rubenstein.  It’s a tangy sweet cranberry chutney that is a part of our Thanksgiving and Christmas table. Chutney, simply put, is a condiment, a mixture of chopped fruit, vinegar, spices and sugar cooked into a chunky spread. This chutney is delicious with turkey dinner and the leftover turkey sandwich your enjoy the next day. It’s also a good accompaniment to soft cheeses and crackers. Perfect as a hostess gift, it will keep for several weeks, refrigerated in an air tight container.

Shirley’s Cranberry Chutney

Ingredients

  • 1 c water
  • 1 c sugar
  • 2 cups fresh cranberries
  • 2 T cider vinegar
  • 1/2 c golden raisins
  • 1/4 c slivered almonds
  • 1 T light brown sugar
  • 1/4 t ground ginger
  • 1/2 t finely chopped garlic

Directions

  1.  Combine the water and sugar in a heavy 3 quart saucepan over medium high heat. Stir to dissolve the sugar and then bring to a boil without stirring.
  2. Add all the remaining ingredients. Boil very slowly, stirring occasionally, until fairly thick, 5 minutes or longer.
  3. Allow the chutney to cool, then cover and refrigerate. Chutney keeps well in the refrigerator, for several weeks.

Makes about 2 cups.

November 19, 2012 Turkey Meatloaf

In anticipation of  “superstorm” Sandy several weeks ago it was time to consolidate the freezers so that only one would be needed to hook up to the generator. That’s when we discovered an abundance of ground turkey that I wrapped in individual packages. The generator kept the turkey and everything else in the freezer nice and cold for the four days we were without power but it was about time to use the turkey up.
A broken foot has put me in a cast and off my feet for now so Joe has ably taken over the cooking. When he asked for suggestions on how to use it, I immediately thought of turkey meatloaf. I was craving a little comfort food at that time.  Not that I knew of a good recipe but I remembered another delicious meatloaf than included ground beef, pork and chopped prunes he made back in January at his mother’s request. My goal was to find a recipe that specifically called for ground turkey. A short search on Epicurious brought me to a recipe from Gourmet magazine from January 2003.  Positive reviews from 92% of four hundred and seventy five reviewers couldn’t be wrong, obviously a recipe worth trying.

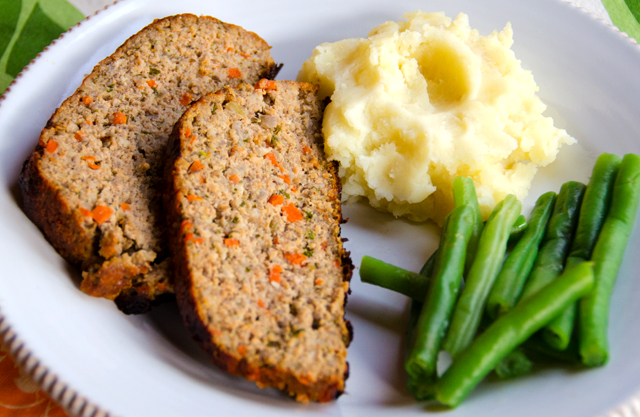
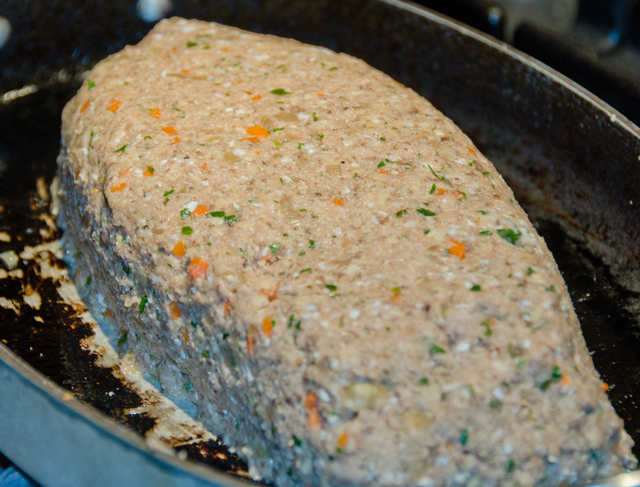
Ground turkey and a generous amount of vegetables combine to make this a flavorful meatloaf. The only time consuming part of the recipe is chopping the vegetables. Make sure you give yourself a little time in your preparation for the cooked vegetables to cool before adding in the ground turkey. We substituted Japanese-style panko bread crumbs for the white bread. Panko are flakes, not crumbs and they lend a light airiness to the mix. Cremini mushrooms also known as “baby bellas” add an extra depth of meaty flavor, texture and moistness to the meatloaf. Feel free to substitute other varieties of mushrooms. Instead of cooking it in a loaf pan, Joe formed the meatloaf in a long oval and baked it in a small roasting pan.  The meatloaf reached the desired end temperature in less time than originally stated in the recipe. An instant read thermometer is key here.  The top, painted with some ketchup and the flecks of orange from the carrot make this more colorful than your average meatloaf.  We have enjoyed this meatloaf twice now in the past two weeks.

Turkey Meatloaf

Gourmet January 1993

 Ingredients
 
  • 1 1/2 c finely chopped onion
  • 1 T minced garlic
  • 1 t olive oil
  • 1 medium carrot, cut into 1/8-inch dice
  • 3/4lb cremini mushrooms, trimmed and very finely chopped in a food processor (feel free to experiment with other varieties)
  • 1 t  Kosher salt
  • 1/2 t freshly ground black pepper
  • 1 1/2 t Worcestershire sauce
  • 1/3 c finely chopped fresh Italian parsley
  • 1/4 c plus 1T ketchup
  • 1 c Panko bread crumbs
  • 1/3 c 1% milk
  • 1 whole large egg, lightly beaten
  • 1 large egg white, lightly beaten
  • 1 1/4 lb ground turkey

Directions

  1. Preheat oven to 400°F.
  2. Cook onion and garlic in oil in a 12-inch nonstick skillet over moderate heat, stirring, until onion is softened, about 2 minutes.
  3. Add carrot and cook, stirring, until softened, about 3 minutes. Add mushrooms, 1/2 teaspoon salt, and 1/4 teaspoon pepper and cook, stirring occasionally, until liquid mushrooms give off is evaporated and they are very tender, 10 to 15 minutes.
  4. Stir in Worcestershire sauce, parsley, and 3 tablespoons ketchup, then transfer vegetables to a large bowl and cool.
  5. Stir together panko crumbs and milk in a small bowl and let stand 5 minutes. Stir in egg and egg white, then add to vegetables.
  6. Add turkey and remaining 1/2 teaspoon salt and 1/4 teaspoon pepper to vegetable mixture and mix well with your hands. (Mixture will be very moist.)
  7. Form into a 9- by 5-inch oval loaf and place in a lightly greased roasting pan and brush meatloaf evenly with remaining 2 tablespoons ketchup. Bake in middle of oven until thermometer inserted into meatloaf registers 170°F, 50 to 55 minutes.
  8. Let meatloaf stand 5 minutes before serving.
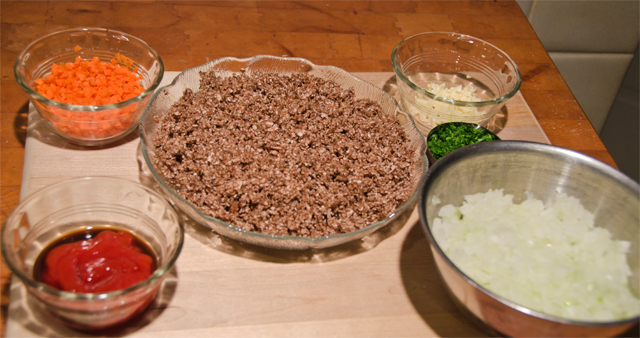
    Vegetable mis en place for the meatloaf.
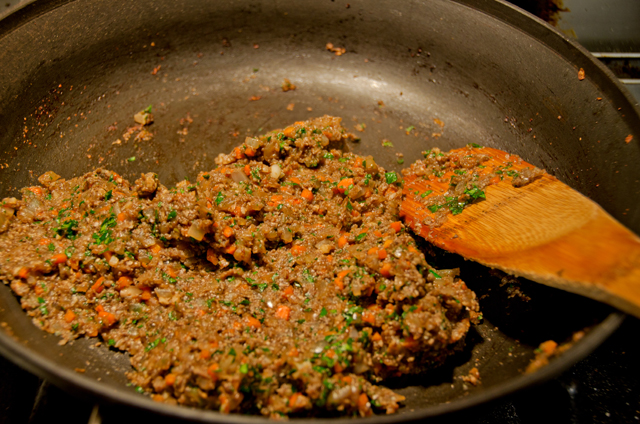
    Saute the vegetables and allow them to cool before adding to the ground turkey.


    Joe chose a free-form oval in a small roasting pan rather than the loaf pan.

November 12, 2012 Cinnamon Swirl Bread


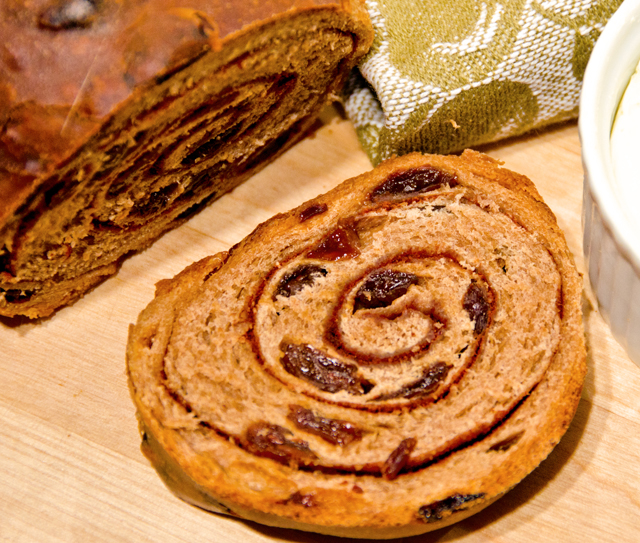
Nothing makes a house smell more warm and inviting than the aromas that fill the kitchen when fresh bread is baking. Even more so when that bread is redolent of the sweet and spicy fragrance of cinnamon. This recipe from Fine Cooking for cinnamon raisin swirl bread tastes as good as it smells. A tender lightly spiced dough is studded with raisins and filled with a swirl of cinnamon sugar. I made this bread on a Tuesday evening to share with my Wednesday morning Bible study friends. We were having brunch, as we often do, to commemorate the start of a new study and a new year. A Facebook post of the sliced bread on a Tuesday night received seventeen positive comments by the next morning.
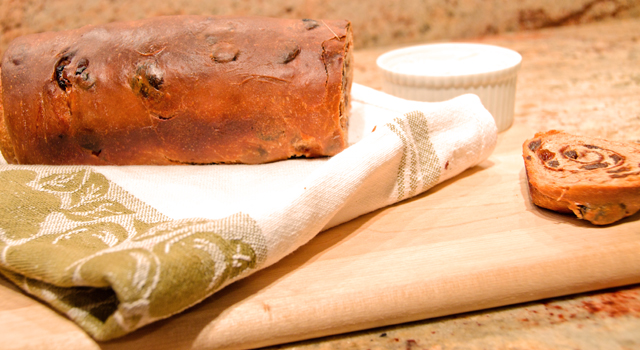
Homemade bread like this merits some homemade butter. I have been making it since my catering days, both plain and fruit butters to accompany mini muffins and quick breads.  It’s very easy to do, all you need is some heavy cream and a food processor. Pour the cream in the bowl of a food processor fitted with the metal blade. Turn on the processor and let it go to work. In about 4-5 minutes the liquid (which is buttermilk) will separate from the milk solids and you will have butter.  The yield will be about one half the amount of cream used, so one cup of cream will result in a half cup of butter. For the best results be sure to use cream that is not ultra pasteurized or has fillers. The butter can be embellished with a little salt or a little jam to make a fruit butter. Be patient and wait until the bread cools before slicing. Any leftovers, if you have any, would make wonderful French toast or bread pudding.  

Cinnamon Swirl Raisin Bread

Makes 2 loaves

Ingredients

For the bread

  • 2 cups dark raisins
  • light-flavored oil to grease the bowl (such as canola or grape seed)
  • 4 cups unbleached, all-purpose flour plus more for dusting (King Arthur is my choice)
  • 2T sugar
  • 2T cinnamon
  • 2 1/4t  instant yeast
  • 2 t fine sea salt
  • 3/4c water at room temperature
  • 1/2 cup whole milk
  • 1 large egg
  • 5T unsalted butter, softened, 3T for the bread, 2T to brush the finished loaves, plus more to grease the pans

For the Cinnamon sugar swirl

  • 4T cinnamon
  • 4T sugar
  • 2T unsalted butter

Directions

  1. Plump up the raisins. Put them in a large measuring cup or bowl and add enough hot water to cover them. Allow to sit for five minutes and then drain them.
  2. In the large bowl of a stand mixer fitted with the paddle attachment, combine the flour, the sugar and cinnamon, the yeast, and salt. Mix until well combined. Add the milk, egg, 3 tablespoons of the butter, and 3/4 cup room temperature water. Mix until well combined, until the dough comes together. Change over to the dough hook and continue to mix until the dough is smooth and slightly sticky. Add the raisins to the dough and gently knead in by hand.
  3. For the first rise: Turn the dough out onto a well-floured surface, roll it into a ball. Clean the bowl you were just using, lightly oil it, and put the dough in the oiled bowl. Cover loosely with plastic wrap and let sit at room temperature until the dough looks slightly puffy, about 30 minutes.
  4. For the second rise: On a well-floured surface, use your hands to flatten and spread the dough out until it’s about 3/4 inch thick. Fold the dough in half from top to bottom, then in half again from left to right. Return the dough to the bowl, cover, and let sit until it has risen slightly, about 30 minutes more.
  5. For the third rise: Lightly grease two 8″ x 4″ loaf pans with butter. In a small bowl, combine the remaining 4T each of cinnamon and sugar; set aside. Melt 2T butter in a small saucepan or a microwave; set aside.
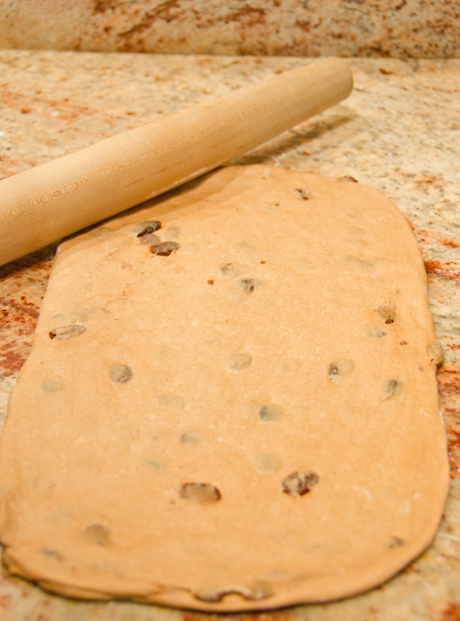
  6. On a lightly floured surface, divide the dough in half and use a rolling pin to shape each half into an 8 1/2 x 16 inch rectangle that is 1/4 inch thick. Use a pastry brush to spread the melted butter on the dough. Sprinkle the cinnamon sugar mixture evenly over both rectangles.
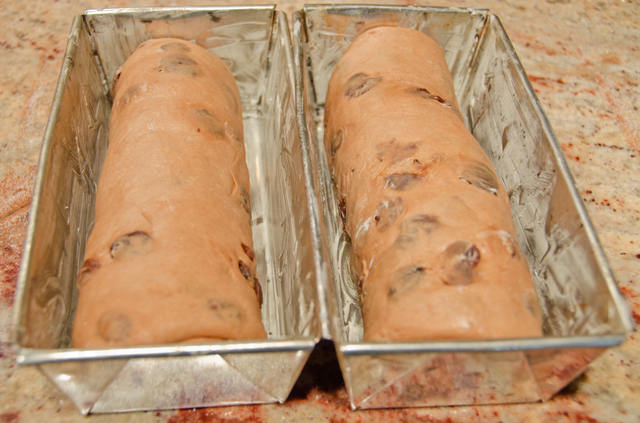
  7. Starting from the short side, gently roll each rectangle into an 8-1/2-inch-long cylinder. Put the cylinders in the pans, seam side down. Cover loosely with plastic wrap. Let rest at room temperature about 60-90 minutes. The dough will spring back when lightly poked.
  8. Bake: Position a rack in the center of the oven and heat the oven to 375°F. Bake the loaves, rotating and swapping the positions of the pans halfway through baking, until dark brown and hollow-sounding when thumped on top and an instant-read thermometer inserted in the center of the loaves registers about 190°F, 30 to 35 minutes. Transfer the loaves in their pans to a rack.  
  9. Melt the remaining butter and use it to brush the tops of the loaves. When cool enough to handle, tip the loaves out onto the rack to finish cooling. Try and wait before slicing into the bread!
  10. Bread will stay fresh in an airtight container for five days, if you can make it last that long.
 

Rolling out the dough.


Cinnamon raisin loaves before their final rise.


November 6, 2012 Crispy Braised Chicken Thighs with Olives, Lemon and Fennel


Our Sunday dinners are often inspired by the recipes in Thomas Keller’s cookbook, Ad Hoc at Home. Ad Hoc is Keller’s casual dining restaurant with menus inspired by the family-style meals that feed his staff. It is a coffee table sized book full of recipes featuring Keller’s home-style recipes and beautiful food photography.  However, this is one book not to leave on your table to collect dust.  Our family has enjoyed his recipes from this book for short ribs, beef stroganoff and roasted chicken with root vegetables to name a few.  Unlike most cookbooks where I pick and choose recipes, this is one that I have read cover to cover. The recipes are well suited for the enterprising home cook and filled with tips and techniques for success from master chef Keller.

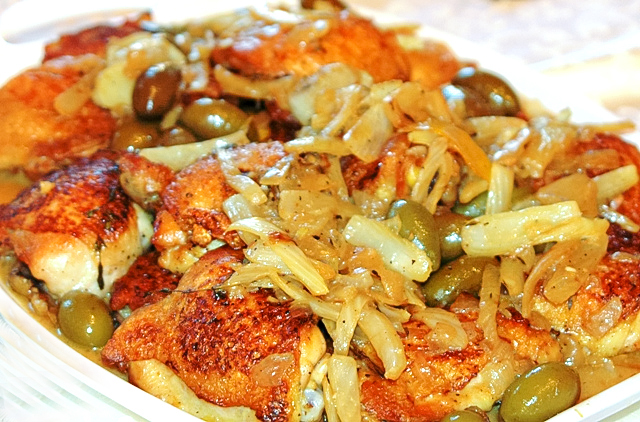
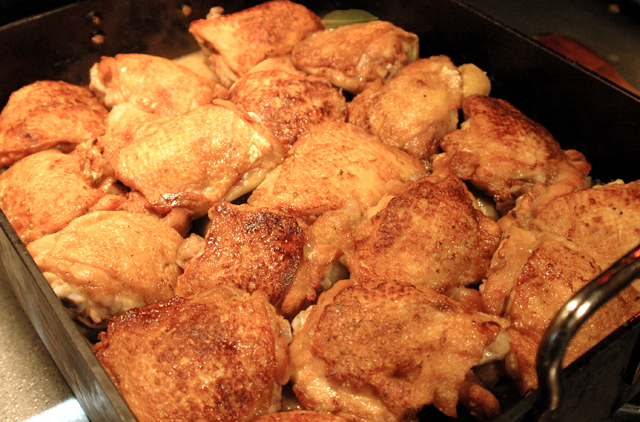
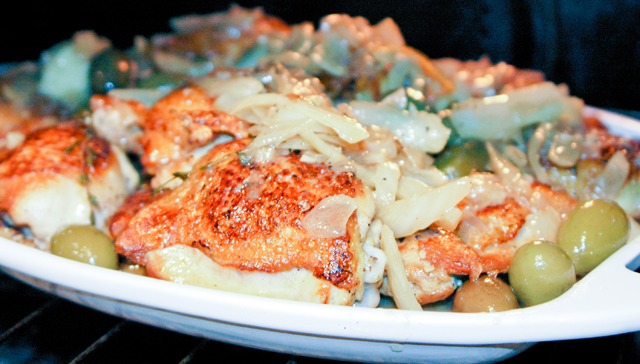
Crispy braised chicken thighs with olives, lemon and fennel is an easy satisfying dish.  In this recipe, flavorful bone-in chicken thighs are first browned then braised along with olives, fennel, onion, lemon zest and red pepper flakes.  Keller avoids the usual rubbery chicken skin that can occur with braises by briefly broiling the skin at the end of the cooking time. So you have a winning combination of tender succulent meat and crispy skin. The combination of delicate sweet fennel, salty olives and refreshing lemon take this recipe in a definite Mediterranean direction. The only ingredient you may have difficulty in finding are the Ascolane olives. I actually prefer the juicy briny Ceringolas and have no problem finding them at the Wegmans olive bar. I made one and a half times the recipe to allow for leftovers and take home meals.

Crispy Braised Chicken Thighs with Olives, Lemon, and Fennel

Serves 6

Ingredients

  • 3 fennel bulbs
  • 12 chicken thighs
  • Kosher salt
  • Canola oil
  • 1 cup coarsely chopped onion
  • 1 tablespoon finely chopped garlic
  • 1/4 cup dry white wine, such as Sauvignon Blanc
  • 1 cup Ascolane or other large green olives, such as Cerignola
  • 1/4 teaspoon red pepper flakes
  • 4 fresh or 2 dried bay leaves
  • 4 strips lemon zest – removed with a vegetable peeler
  • 8 thyme sprigs
  • 1 cup lower sodium chicken stock
  • About 1/3 cup flat-leaf parsley leaves

Directions

  1. Cut off fennel stalks. Trim bottom of bulbs and peel back the layers until you reach the core; reserve the core for another use. Discard any bruised layers, and cut the fennel into 2-by-1/2-inch batons. You need 3 cups fennel for this recipe; reserve any remaining fennel for another use.
  2. Preheat oven to 375 degrees. Set a cooling rack on a baking sheet.
  3. Season chicken thighs on both sides with salt. Heat some canola oil in a large ovenproof saute pan or roasting pan that will hold all the thighs in one layer over medium-high heat. Add thighs skin-side down and brown on the skin side, about 4 minutes. Turn thighs over and cook for about 1 minute to sear the meat. Transfer to the cooling rack.
  4. Reduce heat to medium-low, add onion to the pan, and cook for 1 1/2 minutes. Add garlic and cook for 1 minute. Cook, stirring often, until onion is translucent, about 5 minutes. Stir in fennel, turn heat up to medium, and cook, stirring often, until fennel is crisp-tender, about 10 minutes.

  5. Pour in wine and simmer for about 2 minutes to burn off alcohol. Stir in olives, red pepper flakes, bay leaves, lemon zest, and thyme, then pour in chicken stock. Increase heat, bring liquid to a simmer, and cook until fennel is tender, about 1 minute.

  6. Taste the stock and season with salt as needed. Return chicken to the pan skin-side-up, in a single layer. When the liquid returns to a simmer, transfer to the oven and cook for about 20 minutes, until chicken is cooked through.

  7. Turn on the broiler, and put the pan under the broiler for a minute or two to crisp and brown the skin. Remove from oven, and transfer to a serving platter. Garnish with parsley leaves.

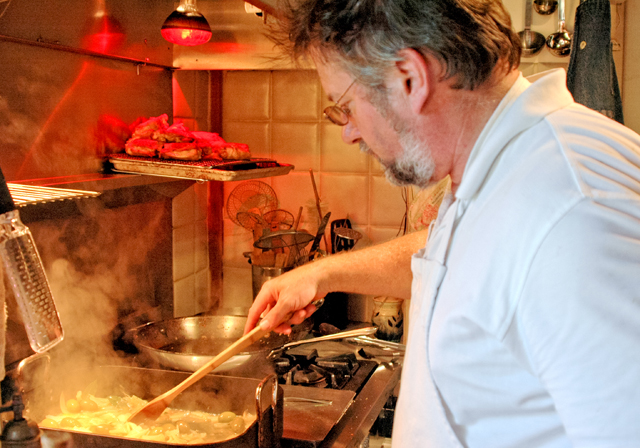
    The chicken thighs are first browned then put aside while the vegetables are cooked in the chicken fat.


Saute the vegetables before adding the chicken thighs back in.


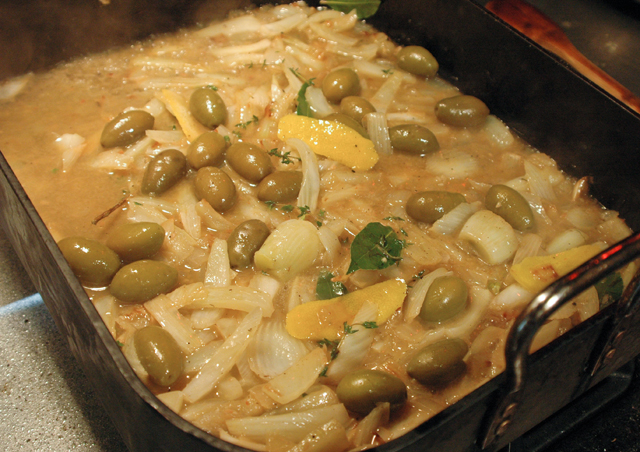
A delcious combination of fennel, sweet onion, Ceringola olives and lemon peel are a good compliment to the chicken thighs.

October 28, 2012 Halibut with Mushrooms, Leeks and Clams


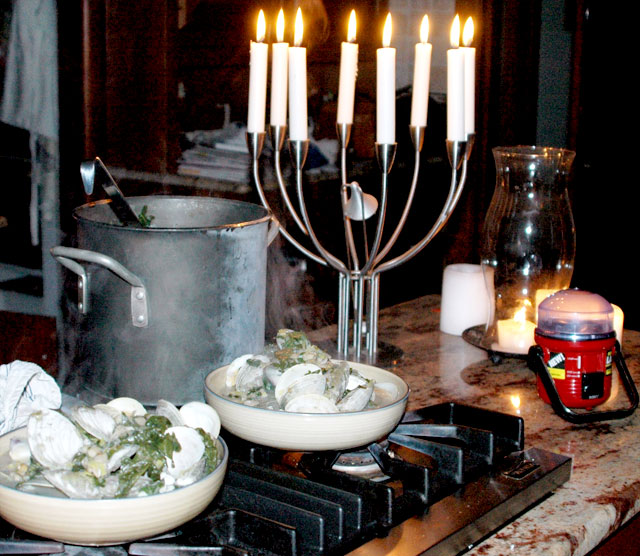
A romantic candlelit/flashlit dinner.
It was a cold and snowy day and night. October 2011 brought some of the most unusual weather we have ever seen. I prepared for a weekend of cooking. I shopped Friday and planned for a Sunday supper of osso buco and saffron risotto for our family and halibut with clams and mushrooms for Joe and myself Saturday evening. When I got up Saturday morning the skies were gray and laden with moisture. The storm started as a cold rain but by about nine thirty a.m. changed over to snow that allegedly wasn’t supposed to occur until much later that afternoon.
Joe made a mad dash to take down the outdoor canopies but they were covered with snow before he could put them away. Trees and power lines quickly became burdened with the weight of a heavy wet snow. As with many local weather events, this was given a name, “snowtober”.
I decided to get a head start on some kitchen prep and Joe, anticipating the need for our generators headed to his favorite hardware store, Finkles for some parts. Then it happened, the power went out for fifteen minutes, then back on for ten, off again, on again, then finally off. A call to PECO confirmed my suspicions, we were going to be without power for a long time. Prep for tomorrow’s osso buco was put aside for now.
 
Thanks to my mom we have an unusually large collection of flashlights and lanterns that really come in handy when the power is out. Our kitchen cooktops are powered with propane. So dinner, lights on or not, would still go on. Candelabras, flashlights and lanterns aimed at our workstations, we prepped leeks and mushrooms.
 
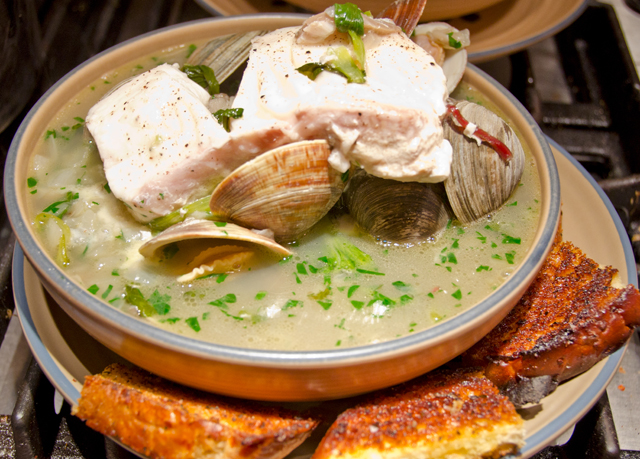
Halibut with leeks, mushrooms and clams has become a favorite weekend dinner of ours. In the course of a year I try many new recipes. Many just once, others like this become part of our regular dinner rotation. It is elegant and deceptively easy. Delicately flavored halibut is combined with briny clams, mellow sweet leeks and earthy mushrooms. I am always making additions and substitutions to the recipe, sweet onions for the leeks, mussels for the clams. Halibut can be expensive, another firm fleshed white fish such as monkfish or Chilean sea bass would be a good choice. Sometimes we add spinach or kale to make this a heartier dish.
 
Dinner was delicious and was the best part of the weekend. The power came on the next morning, only to go out again that afternoon. The osso buco would have to wait for another weekend. Almost exactly one year later, we are waiting to see the path of hurricane Sandy. This storm isn’t going to bring snow, but heavy rain and wind. Generators are at the ready and our flashlights have fresh batteries. Our food shopping trip will include a stop at our favorite seafood market so that we will be ready for whatever the weather will bring. 
 

An early “winter wonderland” that lasted a day or so.
 
 Braised Halibut with Leeks, Mushrooms, and Clams

Serves 3-4

Ingredients

  • 3 tablespoons butter
  • 2 large leeks, white and light green parts thinly sliced
  • 1 clove garlic, minced
  • 2 cups chicken or clam broth
  • 1 pound fresh halibut, skin removed (preferably wild)
  • 2 dozen little neck clams, well-scrubbed
  • 4c thinly sliced oyster or hen-of-the-woods mushrooms
  • the zest of one lemon
  • 1 tablespoon freshly chopped parsley
  • Kosher salt and freshly ground black pepper

Directions

  1. Melt the butter over medium heat in a large 5 1/2 quart Dutch oven  with a lid. Add the mushrooms, garlic clove, and leeks; season lightly with salt and pepper. Cook until softened, but not browned, 6-8 minutes. Add the broth, raise the heat to medium high, and bring to a boil.
  2. Season the halibut with salt and pepper. Nestle the fish and the clams in the skillet. Bring the broth back to a boil, cover tightly, and reduce heat to low. Cook gently until the fish is just cooked through and the clams have opened, about 7 minutes. If all of the clams are not open, remove the fish and the opened clams and continue cooking until the remaining clams open, another 2-3 minutes. Discard any clams that have not opened by this time. Stir in the lemon zest and sprinkle with the parsley.
  3. Serve the fish and clams in a shallow bowl topped with the delicious broth and vegetables.
    Cody is up for whatever the weather brings!


This is what it looked like around 10:30 AM that day. The snow wasn’t supposed to start until late in the afternoon!!


Same dish on a different day.

October 27, 2012 Cedar Planked Salmon


Getting my husband to try new cooking techniques isn’t always the easiest thing to do. If I can convince him to try something new once and then he embraces it, I know I have found something worthwhile.  The convincing was easy with the rib roast cooked like a steak. I just showed him the YouTube video of chef-author Adam Perry Lang cooking it on the Jimmy Kimmel program. What guy (or gal for that matter..) could resist pounding a rib roast with a baseball bat to increase the cooking surface area of the meat? It was a big hit at our house this summer and successfully repeated a few weeks ago.
Last summer I wanted to try cooking salmon on cedar planks. Since we love the flavor that a wood fire brings when we cook turkey or chicken on our outdoor smoker, why not infuse some cedar smoke into some delicious salmon fillets? I bought the planks, introduced him to the concept and recipe and we were cooking.
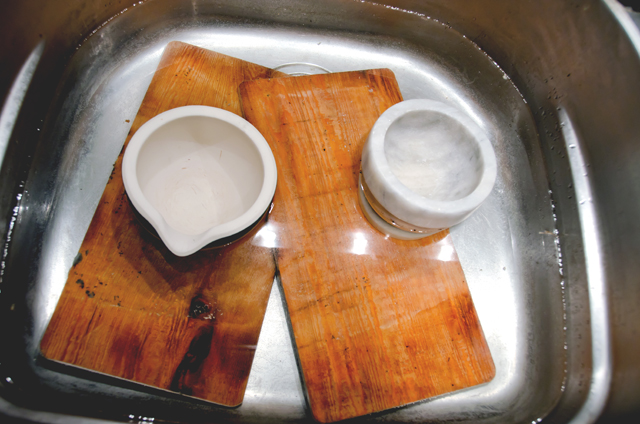
Cooking on wood planks certainly isn’t new.  It is a technique that was pioneered by Native Americans who roasted both fish and game on aromatic cedar planks. Cedar planks are available everywhere these days from supermarkets to specialty cooking stores. Just be certain not to buy planks that have been treated with chemicals, like those from a home improvement store. Your planks will need to be soaked before using for several hours or overnight so they don’t burn on the grill. Some recipes soak the planks in cider, wine or sake, but that could be an expensive proposition considering the amount of liquid needed to submerge the planks. I soak my planks in one of our sinks using heavy marble and ceramic mortars to weigh them down. 
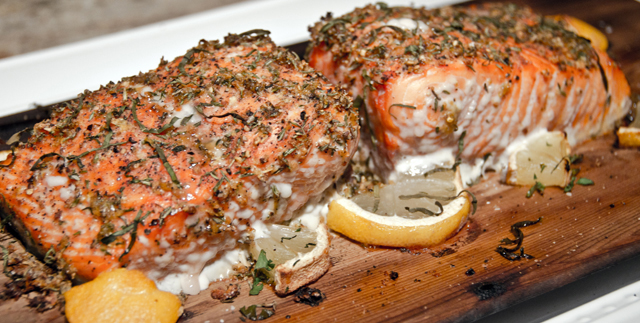
We chose Copper river salmon, which is available fresh from May to September. As with all salmon, Copper river is loaded with Omega 3 oils and recommended by the American Heart Association. Omega 3 oils help reduce heart disease and lower cholesterol.  I season my fish with a dry rub before grilling to enhance the flavor. Cedar planked salmon is excellent on its own with a squeeze of lemon or served with a sauce. I have served it with both a horseradish sour cream sauce and herbed salsa verde. What is the white stuff that your salmon may exude? Protein, albumin to be exact. It occurs more often in salmon with a high fat content. It is definitely safe to eat but can be wiped off for aesthetic reasons.
Cedar planks can be reused. Wash the used planks with warm water, clean off any debris with a soft bristle brush and allow to air dry. Don’t use soap because the board may absorb it and affect the flavor it gives off.  I wrap my used planks in plastic wrap and store them in the freezer. Don’t reuse if the planks are excessively charred, cracked or split. 

Salmon prepped and ready for the grill.


Cedar Planked Salmon
Serves four

Ingredients

Salmon Rub

  • 1 Tbs. grated lemon zest, minced
  • 1T dried lemon peel
  • 1 1/2tsp. chopped fresh thyme
  • 1 tsp. granulated or brown sugar
  • 1/8t cayenne pepper
  • Kosher salt and freshly ground black pepper
  • About 1/2c lemon basil cut in a chiffonade
  • 1 1/2 to 2lbs salmon filets cut into 6-8oz portions, skin on and pin bones removed
  • 1-2 T olive oil
  • 1 lemon, cut into thin slices
  • Food safe cedar planks
Soak cedar planks for several hours or overnight.


Directions
Cedar Planks
Soak the cedar planks in water to cover for at least two hours and up to overnight.  Drain the planks.
Salmon preparation

  1. In a small bowl, with a fork, combine the fresh and dried lemon zest, thyme, sugar, cayenne pepper, 1 1/2 tsp. salt, and 1 Tbs. pepper. Rub the salmon fillets on both sides with olive oil and then set each fillet portion skin side down on the planks.
  2. Sprinkle the fillets with the lemon herb mixture, dividing it evenly. Gently rub the seasoning into the fillets. Sprinkle the chiffonade of lemon basil over the fish. Place the lemon slices around the fish. Let stand at room temperature while the grill heats.
  3. Prepare a gas or charcoal grill fire for indirect cooking with high heat: On a gas grill, heat all burners on high; then turn off all but one burner just before cooking the salmon; on a charcoal grill, bank the coals to two opposite sides of the grill. Arrange the planks over the cooler part of the grill, positioning them so that the thickest part of the fish is closest to the heat source. Allow space between the planks to allow heat and air to flow. Cover the grill and cook until the thickest part of each fillet registers about 135°F on an instant-read thermometer, 20 to 35 minutes depending on the thickness of the fillets. The planks may smoke a bit (this is fine) and will become very aromatic.
  4.  Fillets should  rest on the planks for 5 to 10 minutes before serving.  Serve as is or with the sauce of your choice.
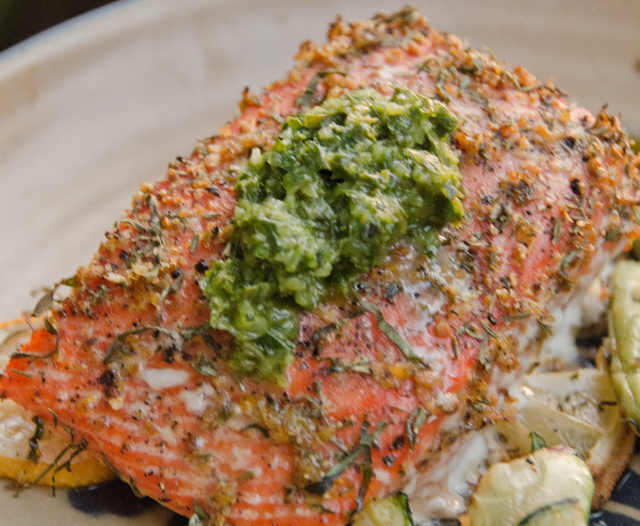
    Salmon served with an herbed salsa verde and wax beans from the garden.


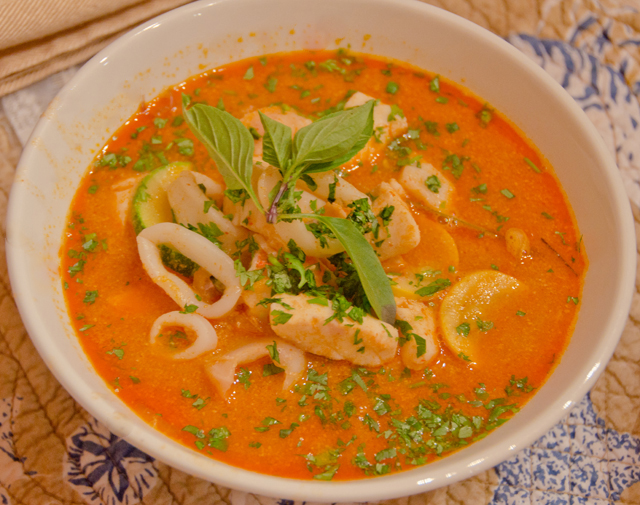
October 22, 2012 Thai Curry with Scallops and Calamari


Fall is definitely making its mark this week, the leaves are turning, mornings are chilly and tonight, for one night only they say, temperatures are going down below freezing. That means a mad scramble to bring all the tender plants, hibiscus, bay and citrus trees, inside to the warmth of the conservatory. We enjoy our tropical plants outdoors in the summer but the reality of fall reminds us that this is not their home. These plants not only provide us with their beauty but often add a unique touch to our cooking.  Lemongrass, a favorite nibble of our golden retriever, Cody, adds a subtle citrusy hint to our Thai dishes.

Our love of Thai food started many years ago at Siam, a little storefront restaurant in Lambertville, New Jersey,  Growing Thai basil, chilis, lemongrass and coriander brings authentic flavors to our recipes.   Although specialty produce items such as lemongrass and kefir lime leaves are available in the produce section of many supermarkets these days, having these plants in your home allows you more spontaneity in menu planning.

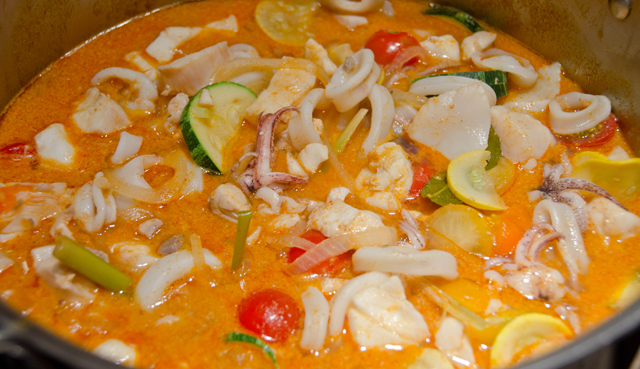
Such was the case with this impromptu dinner we made in August. Two days earlier, scallops and calamari were a part of my birthday dinner with friends and family.  Now the leftover seafood and some fresh garden vegetables would be part of a delicious sweet and spicy curry. We love the complex flavors in Thai cooking and this recipe is no exception. I used the Thai Curry recipe maker in Fine Cooking as a starting point. You “drag and drop” ingredients into the recipe bowl to personalize the dish to your liking.  Each recipe combines coconut milk, meat or fish, assorted vegetables, herbs and spices with red, yellow, green or Panang curry paste.

Curry paste is quite different than curry powder.  Curry powder, mostly known in Indian cooking, is a blend of dry ingredients that can include up to twenty different ground spices, herbs and seeds. Curry paste is “wet”, made from fresh, not dried ingredients. Curry pastes come in a variety of colors and heat and may include fresh chilis, lemongrass, ginger, galangal, shallots, kefir lime, shrimp paste and peanuts. The red chili paste I used in this recipe is a blend of red chilis, coriander, garlic, shallots, galangal and shrimp paste. It is hot but not terribly so and the sweetness of  the coconut milk in this recipe mellows out the chilis. A quick weeknight supper, perfect with some fragrant jasmine rice or rice noodles to sop up the juices.


Thai Curry with Scallops and Calamari
created with the Fine Cooking Recipe Maker

Serves 4

Ingredients

  • 1 (13.5- to 14-oz.) can coconut milk, my favorite brand is Chaokoh
  • 1/4 cup red curry paste
  • 1 cup lower-salt chicken broth, or homemade chicken or vegetable broth
  • 2 Tbs. light brown sugar or light brown palm sugar; more as needed
  • 1 tsp. fish sauce; more as needed-I like the Three Crabs brand, available in most Asian markets
  • 6 whole fresh kefir lime leaves (or substitute 1 tsp. finely grated lime zest)
  • 1/2 lb. squid tubes cut into 1/2″ thick rings, tentacles cut into bite-sized pieces
  • 1 c zucchini, sliced 1/4″ thick
  • 1 c yellow squash sliced 1/4″ thick
  • 1/2 lb. scallops, outer muscle removed
  • 1 c halved cherry tomatoes
  • 1/4 c loosely packed chopped fresh cilantro
  • Thai basil sprigs and lime wedges for garnish

Directions

  1. Before opening, shake can of coconut milk to redistribute the solids that accumulate at the top of the can.
  2.  Over medium heat, in a 3- to 4-quart saucepan or wok, simmer 1/2 cup of the coconut milk, stirring occasionally, until reduced by about half, 3 to 5 minutes. It will get very thick and shiny and may or may not separate; either is fine.
  3.  Add the curry paste, whisk well, and cook, continuing to whisk, for 1 minute. Whisk in the broth, sugar, fish sauce, lime leaves, and remaining coconut milk. Bring to a simmer over medium-high heat.
  4.  After 2 minutes, add the calamari, zucchini and yellow squash and continue to simmer, adjusting the heat as necessary.
  5.  After 1 minute, add the scallops and continue to simmer. After another minute, add the cherry tomatoes and continue to simmer until everything is tender and cooked through, about 1 more minute.
  6.  Remove the curry from the heat. Season to taste with more sugar and fish sauce, and stir in the cilantro. Transfer to a serving bowl or serve from the pot. Remove the lime leaves or tell your guests to eat around them. Garnish with lime wedges and basil sprigs.
     

October 15, 2012 Pear Pie with Dried Cherries and Brown Sugar Streusel


I am not a pie maven, I will bestow that title on my friend Kathy who can whip up a pie to complement your menu at a moment’s notice. One of my favorites is her classic double crusted apple pie with an amazingly flaky crust. That being said, I do make the occasional pie. From the failures and successes with pie crusts I have experimented with over the years I have found two favorites. One is a crust from Cooks Illustrated that uses vodka in place of water. 80 proof vodka is 60% water and 40% alcohol. It makes an easy to roll crust and alcohol does not promote the formation of gluten which results in tough crusts. Don’t worry about your friends becoming tipsy, the alcohol evaporates in the baking process so it helps the crust stay flaky and tender. The other crust recipe I use is from Fine Cooking. It is an all butter crust that is made by hand. You, the baker, control the size of the butter pieces in the flour, also resulting in a flaky crust. Obviously, flaky is what we are going for when it comes to pie crusts. All I know is that I will not make a crust on a humid day or a day that I am rushed for time, remember I am not a pie maven.

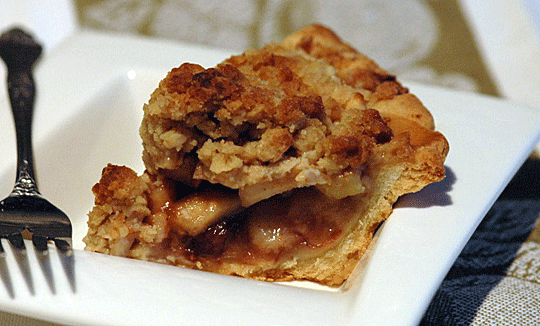
 The pear streusel pie is one that has become a favorite in my fall baking rotation. I love the combination of sweet juicy pears, and tart dried cherries, I am certain that other tart dried fruit like cranberries or blueberries would work as well. Use your best spices, I used freshly grated Penzey’s nutmeg and Korintje cinnamon which they describe as, “strong as China cinnamon but smoother and not as nippy.” Some important things to note if you make this pie. The recipe makes a great deal of pear filling, mound it up in the crust, it will cook down, any juices that run over will be caught by the baking pan. Press the streusel topping into the pears to keep it from falling off.  The crust for the pie is blind baked which just means it is pre baked to prevent the bottom of the pie from getting soggy. The pie is delicious on its own but even better with a scoop of homemade vanilla or cinnamon ice cream.

Pear Pie with Dried Cherries and Brown Sugar Steusel

Serves 8

Ingredients

For the streusel

  • 1c unbleached all purpose flour
  • 1/2c old fashioned rolled oats
  • 1/2c packed light brown sugar
  • 1/4t table salt
  • 8T (1 stick) unsalted butter, melted

For the filling

  • 3lbs ripe Anjou or Bartlett pears, peeled and cored, cut lengthwise into 8 wedges and then cut crosswise into 1/2inch slices, about 7 cups
  • 1 1/2T fresh lemon juice
  • 2/3c granulated sugar
  • 1/4c unbleached all purpose flour
  • 1/4t table salt
  • 1t cinnamon
  • 1/8t freshly ground nutmeg
  • 3/4c dried cherries, coarsely chopped
  • 1 blind baked  9″ pie crust of your choice

Directions

  1. Position a rack in the center of the oven, set a heavy duty rimmed baking sheet on the rack and heat the oven to 350F.
  2. Make the streusel. In a medium bowl combine the flour, oats, sugar and salt. Blend the butter into the flour mixture using your fingers. The mixture will be moist. Set aside.
  3. Make the filling. In a large bowl, toss the pears with the lemon juice. In a small bowl, whisk the sugar, flour, salt, cinnamon and nutmeg. Add this mixture to the pears and toss well to combine. Stir in the dried cherries.
  4. Mound the filling into the pie crust. Sprinkle the streusel topping over the pear mixture, pressing the streusel between your fingers into small lumps as you sprinkle.
  5. Place pie on the heated baking sheet. Bake the pie until the pastry is golden-brown and the filling is bubbly and thickened at the edges, 55 to 65 minutes. Rotate the pie halfway through baking, if the pastry or streusel browns before the filling is thickened, loosely cover the top or edges of the pie as needed with pie shields or aluminum foil.
  6. Transfer to a rack and cool completely before serving. The pie can be stored at room temperature for up to 2 days.
 

October 5, 2012 Crispy Kale Salad with Lime Dressing


When food historians and trend watchers look back at the second decade of the twenty-first century, they will no doubt include the kale salad as an emerging food trend. From my vast library of food magazines accumulated over the past twenty (Gourmet) to thirty (Bon Appetit) years I didn’t find a recipe for kale salad until the January 2007 issue of Gourmet. The source was Lupa, the trattoria style restaurant owned by Mario Batali and Joe Bastianich. Inspired by an antipasto, thinly sliced Tuscan or Lacinato kale was combined with ricotta salata and tossed with a simple vinaigrette. In their usual exacting way, Gourmet provided a photo and further description of Lacinato kale in their Kitchen Notebook.  A little more than five years later, Tuscan kale is a green anyone who frequents farmers markets or has a community supported agriculture (CSA) share would be able to identify at first glance. Today, kale is being tossed with all matter of fruits, cheeses and grains to make a hearty, healthful salad.

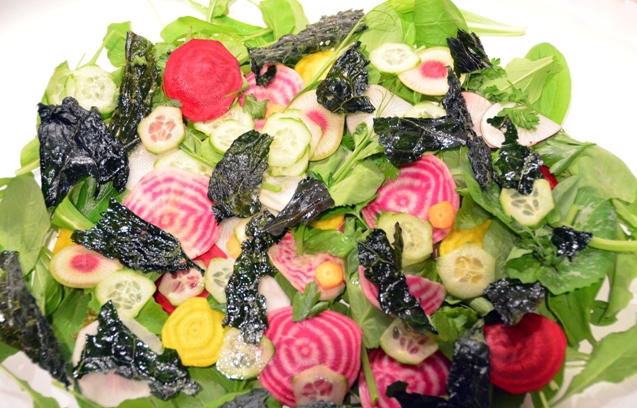
Now, in their September restaurant issue, Bon Appetit has anointed the kale salad from Battersby, a trendy Brooklyn restaurant with the title of “dish of the year”. Dish of the year? Well for me it was salad of the weekend because almost all of the ingredients to make the dish were growing in the garden with the exception of cucumbers. Strips of crispy kale adorn a salad of baby greens, pea shoots, thinly sliced cucumbers, root vegetables and more kale. A dressing of lime juice, brown sugar, Thai chili and fish sauce gives the salad a southeast Asian flair. Brushing rather than tossing the leaves with oil, keeps the chips from being too greasy. My kale strips took less time than the original recipe, they were sufficiently crispy in twenty minutes, most likely due to using the convection setting on the oven. The greens of choice that came from our garden for this salad included young kale leaves, baby arugula and mache (hello eighties) and pea shoots. Our fall crop of root vegetables provided us with the beautiful colors of watermelon, black and Easter egg radishes, Chiogga and Golden beets, baby carrots and snow white Hakurei turnips. The herbs I used were Italian flat-leaved parsley, cilantro, cinnamon basil and the first of the new crop of chervil. I added thinly sliced cucumbers, although peppers would have worked as well. In the off-season, I prefer Kirby or pickling cucumbers, I find they have more flavor than other varieties. We enjoyed the salad and I would definitely make it again. The simplicity of the original kale salad from Lupa is deserving of a try as well.  What I am really looking forward to is what happens to kale after the first frost. It becomes amazingly sweet. Then it will be time to cook with kale in traditional heartier dishes like stews and soups.

Crispy Kale Salad with Lime Dressing

from Bon Appetit September 2012

Ingredients

  • 1 1/2T light brown or palm sugar, packed
  • 1/4c fresh lime juice
  • 3T fish sauce ( I am partial to Three Crabs brand)
  • 1t minced garlic
  • 1/2 red Thai chili, seeded and thinly sliced
  • 24 small Tuscan kale leaves (5″ long) or 5″ pieces torn from larger leaves
  • 1T vegetable oil
  • Kosher salt and freshly ground pepper
  • 3c loosely packed mixed tender herbs, I used Italian flat leaved parsley, cilantro, cinnamon basil and chervil
  • 3c mixed shaved root vegetables, I used radishes, beets, carrots and turnips
  • 2c of a combination of baby arugula, pea tendrils and mache (watercress is another option here)
  • 2c thinly sliced stemmed Tuscan kale leaves
  • 1c thinly sliced cucumber

Directions

  1. Dissolve sugar and 2 tablespoons warm water in a microwave oven for about 30 seconds. Whisk in the next four ingredients for dressing. Set aside.
  2. Arrange racks in upper and lower thirds of oven; preheat to 250F. Brush tops of kale leaves with oil; season with salt and pepper. Arrange leaves in a single layer on 2 large baking sheets. Bake, rotating sheets top to bottom and back to front halfway through until kale is crisp, anywhere from 20 to 30. Know your oven!! Transfer the leaves from the baking sheet to a cooling rack.
  3. In a large bowl mix herbs and the next four ingredients with enough dressing to coat lightly. Divide salad among plates; top with crispy kale leaves and additional dressing if desired.

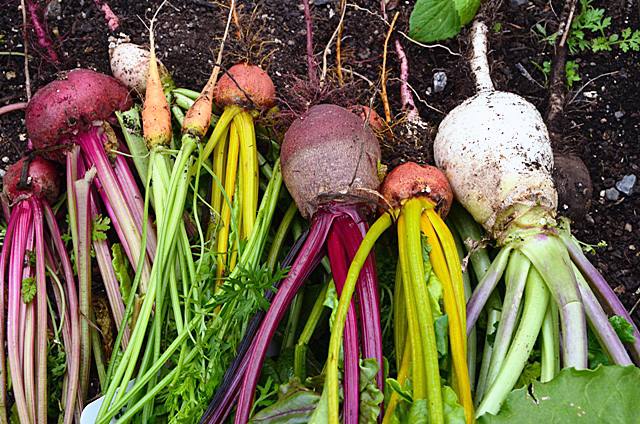
    First harvest of fall root vegetables
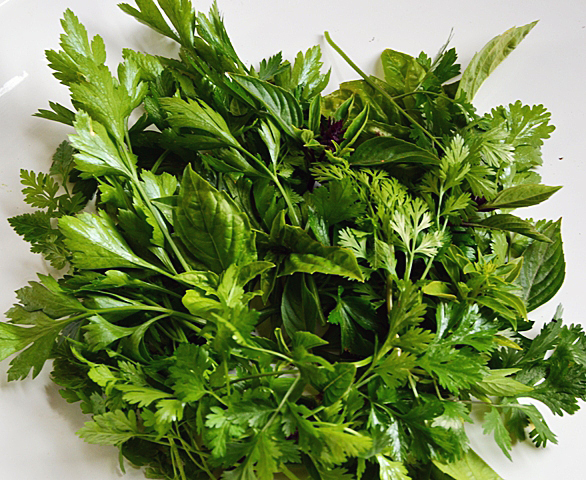
Italian parsley, cilantro, cinnamon basil and chervil