January 29, 2013 Char Siu Bao- Steamed Pork Buns

DSC_8303a

For lovers of culturally authentic and delicious food, the dim sum experience in New York City’s Chinatown is not to be missed. After arriving in the heart of Chinatown at what looks like the lobby of a typical office building, we were whisked away by elevator to one of two floors where food is served. We were seated in a spacious, brightly lit banquet room at tables with starched white tablecloths, gold brocade chair covers and red walls.The room, full of hungry diners, were mostly Chinese, but also of every other ethnic persuasion, from toddlers to grandmas. Red velvet walls display dragons and large screen television sets broadcasted news and variety programs from China. 

But that’s not what we were there for.  We were waiting for the waiters and waitresses who maneuvered their metal carts stacked high with bamboo steamers through the crowd of anxious diners.  A photograph and price of each item was on the outside of the cart to avoid any language barrier issues. Not that there was one at our table, our good friend is from China and fills our table with a diverse offering of dim sum, from the unusual, chicken feet and jellyfish (yes I have tried them both) to the very popular char siu buns. I enjoyed the buns so much that I decided to add them to our Chinese New Year menu several years ago.

 
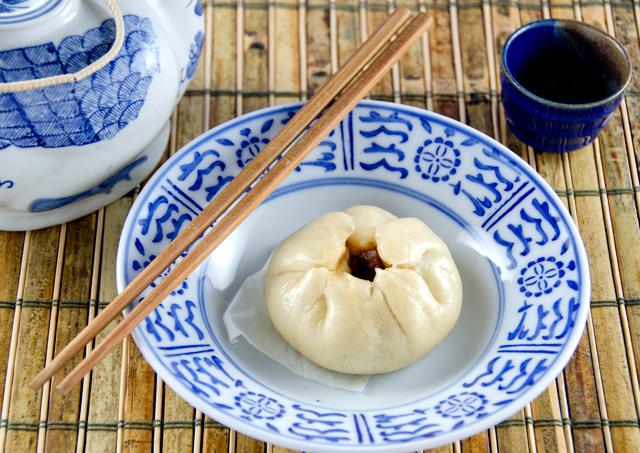
Char siu bao (buns) are a Cantonese dim sum favorite. They can be either baked or steamed and can have a variety of fillings ranging from savory, like vegetables, tofu, chicken or pork to sweet like sweetened red or mung bean paste. The buns in this recipe are filled with barbecued pork (char siu) and encased in a pillowy soft, slightly sweetened dough. Only a cup and half of the char siu I wrote about in a previous post is needed for this recipe. If you make that recipe, the additional pork can be used in stir fries, dumplings and noodle dishes. The finely chopped pork is added to what I would call a Chinese barbecue sauce. It is best to refrigerate the filling overnight to enhance the flavors and make the filling easier to work with.

Some recipes for the buns just use baking powder as a leavening agent but I prefer a recipe that uses two leavening agents, baking powder and yeast. The dough is easier to stretch and manipulate which results in a more attractive finished product. The dough is shaped into a 12 inch roll and in this case, cut into sixteen pieces. For mini buns, cut into 32 pieces, or 12 pieces for large buns. The pieces are rolled into a ball and then flattened into a disk. A small wooden dowel is used to roll out the dough circles. When I first attempted rolling out the dough in years past I used a conventional rolling pin with not always the best results. Last year Joe made me my own small dowel rolling pin and it makes the dough much easier to work with. Your dough round should have a plump “belly button” in the center. That means you roll toward but not fully into the center of the dough, turning the dough after each roll of the pin, totally avoiding the center of the round. The thinner outer edges are easier to pleat and the belly stretches over and protects the filling.

After the dough rises, the buns can either be baked or steamed. When I first made buns I gravitated to the baked variety. I thought the browned exterior the oven gave them a real “finished” look. I have learned to love the steamed buns over the years, no color change, but puffy and just as tasty. The steps of the recipe can be executed over the course of several days.  Finished buns can be frozen for about a month. Take as many as needed out of the freezer and revive in a bamboo steamer.

Char Siu Bao

Fine Cooking  #109
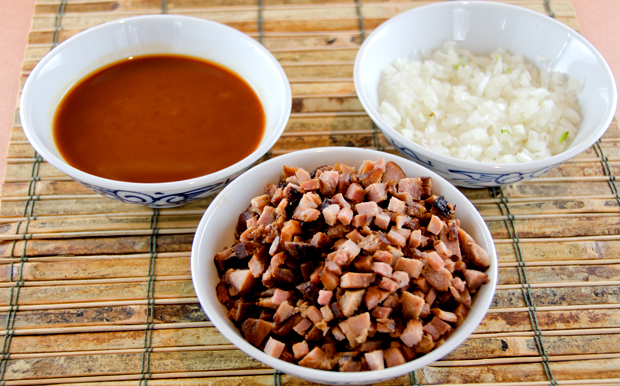
The chopped pork, onion and sauce ready to make the char siu filling.

 For the filling

  • 1/2 c lower-salt chicken broth
  • 2 T oyster sauce
  • 2 T. ketchup
  • 5 t granulated sugar
  • 4 t cornstarch
  • 1 T dark soy sauce
  • Kosher salt and freshly ground white pepper
  • 1 1/2 c Chinese barbecued pork, cut into small pieces
  • 2 Tbs. peanut oil
  • 1 small yellow onion, cut into 1/4-inch dice (1/2 cup)
  • 1 Tbs. Shaoxing (Chinese rice wine)
  • 1-1/2 tsp. Asian sesame oil

Directions for the filling

  1. In a medium bowl, stir or whisk the broth, oyster sauce, ketchup, sugar, cornstarch, soy sauce, 1/2 tsp. salt, and a pinch of pepper. Finely dice enough of the barbecued roast pork to yield 1-1/2 cups (about 6 oz.). Heat a wok over high heat for 30 seconds. Add the peanut oil and swirl to coat. When a wisp of white smoke appears, in about 30 seconds, add the onion. Reduce the heat to medium low and cook, stirring often, until golden-brown, about 6 minutes.
  2. Add the pork, increase the heat to high, and stir-fry to combine, 2 to 3 minutes. Drizzle the wine from the edge of the wok into the pork mixture and stir well. Reduce the heat to medium. 
  3. Make a well in the center of the mixture and pour in the sauce. Stir until the mixture thickens, about 3 minutes. Add the sesame oil and mix well. Refrigerate until cool, preferably overnight.
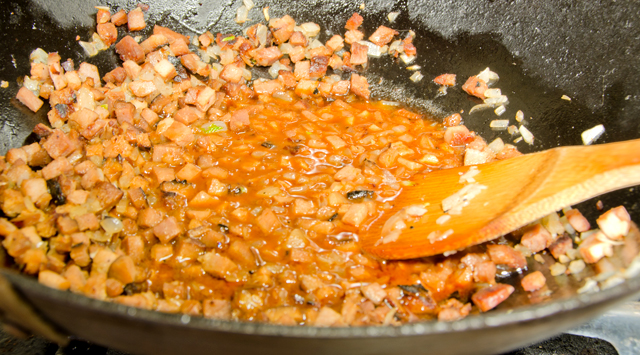
Stirring the sauce into the pork and onion.
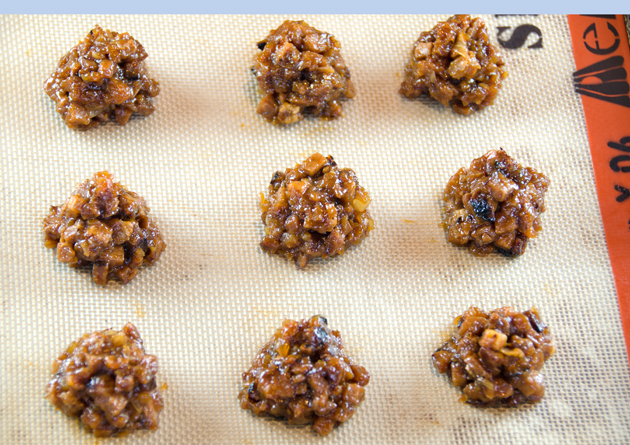
The mixture thickens in about 3 minutes. Let it cool overnight in the refrigerator.


It's easier to pre-portion the filling before time.
It’s easier to pre-portion the filling before time.


For the dumplings

Adapted from Asian Dumplings

Makes enough for 12 large, 16 medium or 32 small buns

Ingredients

  • 1 1/2 t  instant dry yeast
  • 3/4 c lukewarm water
  • 2T canola oil
  • 2T sugar
  • 2 t baking powder
  • Scant 3 cups (12 1/2 ounces) flour
  1. To make the dough in a food processor: Combine the sugar,instant yeast, baking powder and flour in the bowl of the food processor. Pulse two or three times to combine. With the motor on, pour in the lukewarm water and canola oil through the feed tube in a steady stream and allow the machine to continue running until the dough starts coming together into a ball, about 20 seconds. Add more lukewarm water as needed by the teaspoon if that doesn’t occur. Let the machine continue for only 45 to 60 seconds to knead most of the dough into a large ball that cleans the sides of the bowl; a little may be left behind. The finished dough should  feel somewhat soft but not sticky.
  2. Place the dough in a clean oiled bowl.  Cover with plastic wrap and place in a warm draft-free place to rise for about 45 minutes or until almost doubled.  Alternately, let the dough rise overnight in the refrigerator. Return the dough to room temperature before using.

Form and fill the buns

  • Yeast dough from the previous step
  • 1 1/2c char siu bun filling from first step
  1. Pat the dough into a disc on a lightly floured surface. Cut the disk in half and wrap half with plastic to prevent the dough from drying out while you work with the other half.
  2. Roll the dough into a 12″ log. Cut the log in half, then cut into 8 pieces for medium, 16 for small.  Roll each piece into a ball, then flatten into a 1/4 inch thick disk. A small wooden dowel is best for this step. The rim should be thinner than the center; keeping a one inch wide belly in the center to ensure consistent thickness. Lay the finished circle on a tray, lightly dusting the bottom with flour to prevent the rounds from sticking.
  3. Cut parchment paper into 2 1/2 or 3-inch squares (for small or medium buns, respectively) before you begin to assemble the buns.
  4. Hold a dough circle in your hand, spoon filling in the center of the circle, leaving enough dough clear on the sides to pull up on . I like to pre-portion the filling to ensure a uniform amount in each bun.
  5. Bring the sides of the dough up while depressing the filling, pinching the dough as it reaches the top. Finally, twist the top to fully seal the bun.
  6. Place the buns on the parchment squares and place in a warm draft-free again to rise until doubled in size, about 45 minutes.
  7. The buns are ready now to steam, 12 minutes for small, 15 for medium. A finished bun will look puffy and dry. Serve warm.
  8. Leftover buns can be refrigerated for up to a week or frozen for up to a month. Revive cooked buns by steaming them for 5 to 8 minutes
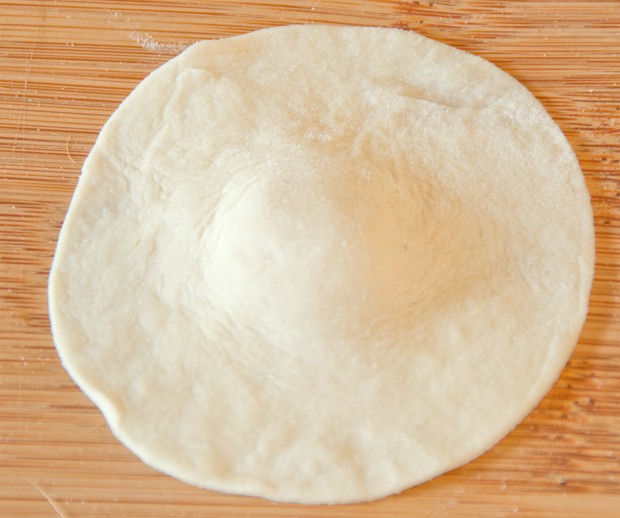


Round of dough with the "belly button".
Round of dough with the “belly button”.
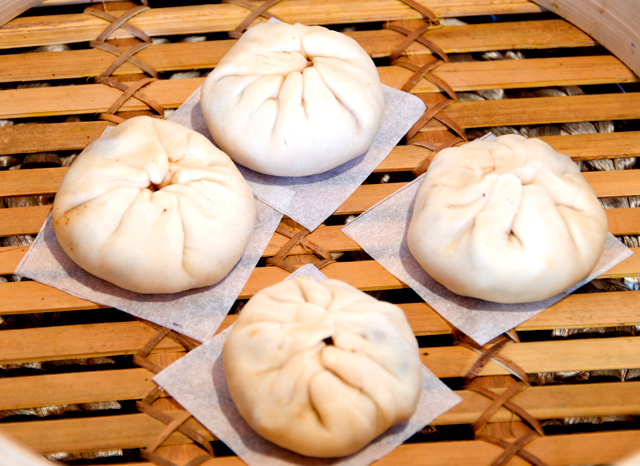
Finished buns, ready to steam.
Finished buns, ready to steam


January 21, 2013 Char Siu Pork

DSC_8250a


Our Chinese New Year celebration is about a month away so it’s time to start planning this year’s menu and what can be made ahead. My sources all agree, Chinese steamed buns can be made a month ahead so that seemed like a good place to start. Making steamed filled buns involves several steps, the first is making the char siu pork filling.

In Cantonese, char means fork in both the noun or verb form and siu (soo) means to roast or burn. “Fork roasted” refers to the way this traditional Cantonese street food is prepared, slow cooked on skewers over an open fire. Char siu should be moist and flavorful on the inside and caramelized and slightly chewy on the outside. Traditional Cantonese char siu is dyed with food coloring resulting in an unnatural ring of magenta when you cut into the meat.I forgo that step. I prefer the reddish brown color that dark soy imparts to the meat. After making char siu and pork buns for seven years now, pork shoulder is my cut of preference. On the fatty scale it is somewhere between the pork tenderloin or loin which I have found to be too lean and the currently popular pork belly, which is too fatty for my tastes. The shoulder has enough fat to prevent the meat from drying out.

I have been using the recipe for char siu from “The Chinese Kitchen” written by Eileen Yin-Fei Lo since we began celebrating Chinese New Year. I discovered this book when some of the recipes were used in a cooking class I attended in San Francisco.  When I cook Chinese recipes I try to keep the ingredients as authentic as possible from the original recipe. Two of the marinade ingredients for her char siu have alluded me all these years, Mei Kuei Lu Chiew and wet or preserved red bean curd. In the front of her book Ms. Lo has a section devoted to Chinese ingredients, “The Chinese Larder”. In this section she further describes uniquely Chinese ingredients that may not be familiar in the Western kitchen. Wet bean curd are cubes of fermented bean curd with salt, wine and red rice; not to be confused with preserved bean curd. Wet bean curd is red in color, not spicy and is used in braising and barbecuing recipes. I found what I thought might be reasonable substiutes but was pretty certain not the exact ingredient she was calling for.  Mei Kuei Lu Chiew is a Chinese spirit, based on sorghum and flavored with rose petals, needless to say, I gave up on that one the first year. Ms Lo admits that some of the English labeling of Chinese products may be confusing. She provides Chinese calligraphy next to each entry to show your grocer to ensure you have the right product. That would be fine but I have found increasingly that the markets I encounter are not Chinese but a mix of all Southeast Asian cultures. I have access to two supermarkets that carry Asian ingredients but both are Korean-owned. Thus the ingredients in the store may be Asian, but with a definite Korean slant with some Thai, Vietnamese, Chinese, a smattering of Japanese and Central American to boot.

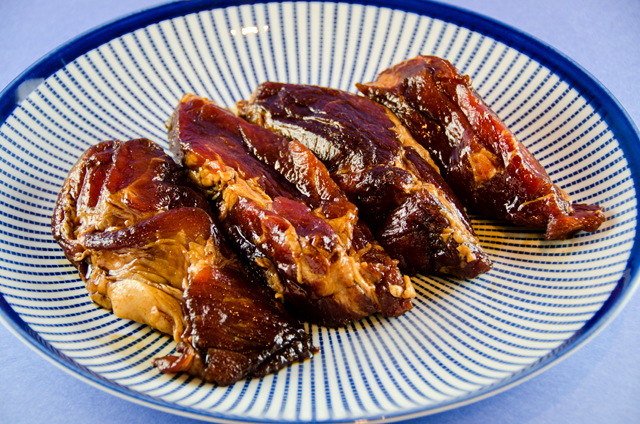
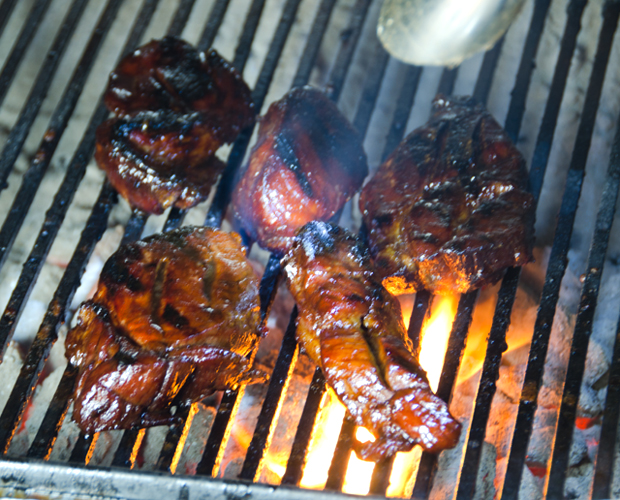
Twelve years after the publication of “The Chinese Kitchen”  Ms. Lo’s recipe for char siu pork and steamed buns were featured in the February/March 2011 issue of Fine Cooking magazine. I was pleased to see that in the updated version of the recipe in Fine Cooking both of my “problem ingredients” were no longer part of the marinade. Shaoxing or Chinese rice wine is now in place of Mei Kuei Chiew and the preserved bean curd is eliminated all together.  Some recipes call for maltose to give char siu its classic glazed look but honey works just as well, has a thinner consistency and is easier to handle.The meat is cut into four pieces and pierced several times to allow the marinade to penetrate, preferably overnight. Most recipes call for roasting the meat and broiling it at the end to give it that desirable char. This year I roasted it in the oven for fifteen minutes and Joe finished it in the fireplace grill. The sliced pork is now ready to top a bowl of noodles, chop into a filling for fried rice, or combine with other ingredients for a dumpling filling. My next step is to combine some of the pork with a sauce to fill steamed buns.

Char Siu – Barbecued Roast Pork

Ingredients

  • 1 2lb piece of pork shoulder
  • 1/2 c honey
  • 1/4c oyster sauce
  • 1/4c hoisin sauce
  • 3 1/2T dark soy sauce
  • 3 1/2T light soy sauce
  • 3T Shaoxing (Chinese rice wine)
  • 1 1/2t five-spice powder
  • Kosher salt and freshly ground white pepper

Directions

  1. Cut the pork shoulder lengthwise into 4 equal strips. Using a small knife, pierce each strip 4 times to help the marinade penetrate the meat. Transfer the meat to a gallon zip-lock bag.
  2. Combine the honey, oyster sauce, hoisin sauce, dark and light soy sauce, rice wine, five spice powder, 1/2t salt and a pinch of ground white pepper in a small bowl. Pour over the meat in the bag. Massage the pork all around in the marinade so that it is covered. Push out all the air and seal the bag. Refrigerate for at least eight hours and preferably overnight.
  3. Position a rack in the top third of the oven and heat oven to 425F. Line a large heavy duty baking sheet with heavy-duty foil. Put the meat on the baking sheet and spoon some of the marinade over it. Roast until an instant read thermometer  inserted in the middle of the pork registers 165F, 30 to 40 minutes. During the cooking process, baste the meat occasionally with the juice from the pan and flip it several times.
  4. Position an oven rack about 4 inches from the broiler and heat the broiler on high. Broil the pork until it is slightly charred in places, about 2 minutes.
  5. *Alternate cooking method. Preheat oven to 375F. Place pork on foil lined baking sheet. Roast in oven for fifteen minutes, turning once.
  6. Skewer the pork and grill at about 400F, basting the pork with the remaining sauce, turning and basting until the pieces are nicely charred.
  7. Let the pork cool and then refrigerate until you are ready to make the bun filling. The pork may be refrigerated for up to 5 days or frozen for up to a month.


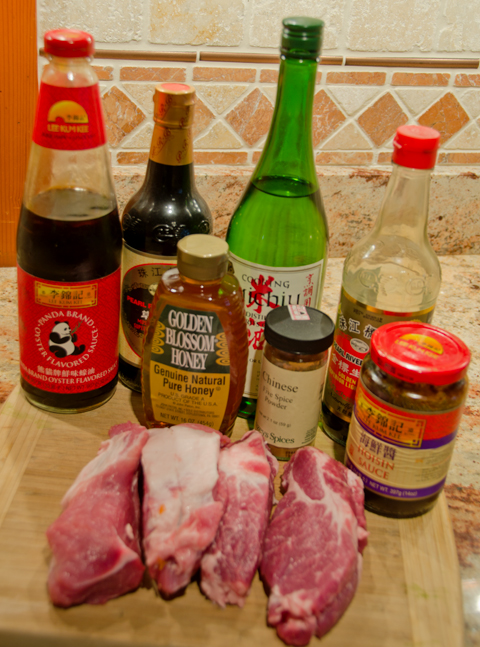
Ingredients ready to go for the pork marinade.


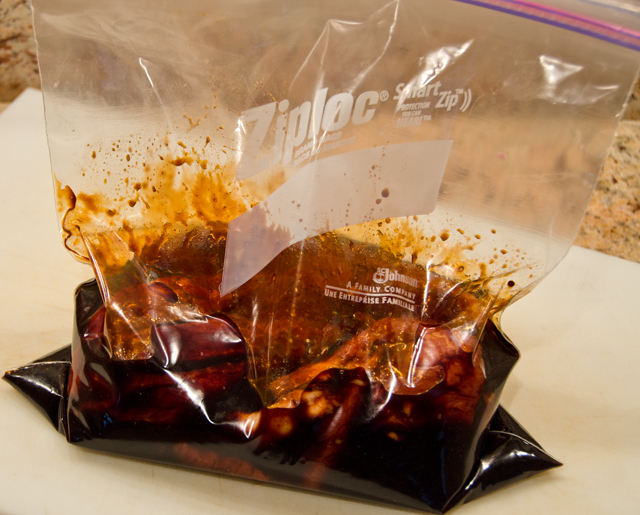
Pork pieces and marinade are added to a zip-loc bag.
Out of the marinade after 24 hours, meat looks good already!
The fireplace grill give the meat that nice char that is desirable in char siu.
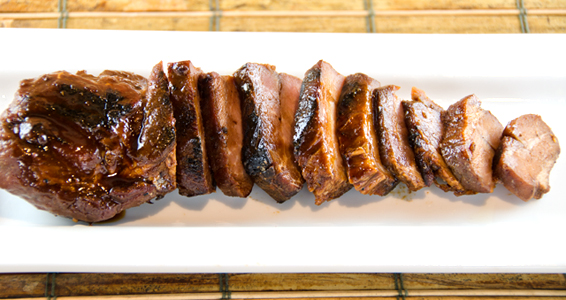
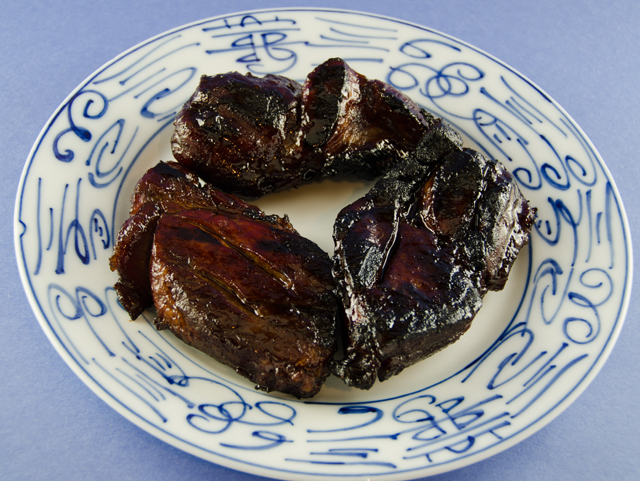
Char siu pork right off the grill.


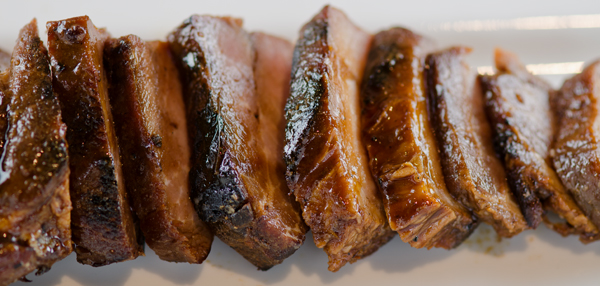
Char siu ready to be chopped up for bun filling.


September 25, 2012 Chard Chips and Pickled Chard Stems


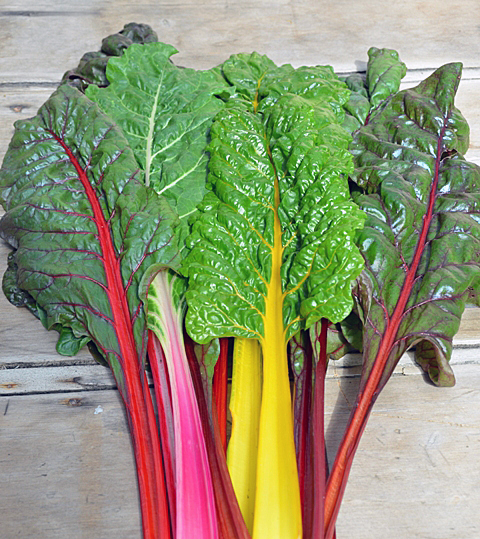
When the new issue of Fine Cooking came last week I was ready to put it aside for a few weeks. The holiday desserts and side dishes looked very tempting, but the beginning of fall was just last Saturday and I am still enjoying cooking as much as I can with the harvest from our garden. As I quickly thumbed through the issue I happened to notice an article that interested me, “What We Are Cooking Now.” Specifically, what really caught my eye were Swiss chard chips. I had heard of kale chips, both the pricey little bags sold in health food stores and the homemade varieties that a friend introduced me to. So why not chard chips? We have three sections of chard of the Bright Lights and Rhubarb variety still producing, so I thought it would be fun to try my hand at this. Since I am a proponent of using both the chard leaves and the stems, I wanted to use the colorful stems in another healthy nibble so a refrigerator pickle seemed to be the best choice here.
My on-line research revealed many different approaches to making chard chips and after reading them all, came up with my own method. There are certain important things to remember if you are going to make chard chips. Wash the leaves thoroughly, chard leaves are usually very crinkly, and those crevices can be dirty. After washing the leaves, remove the stems, reserve if using. Spin the leaves dry in a salad spinner and use paper towels to remove any excess moisture. Any moisture left on the leaves will cause them to steam, not bake and crisp up. A  “bunch” is a non-specific term, to be exact as possible, I used 25 chard leaves that were about 12-14 inches long after stemming. When in doubt, keep the leaf pieces larger, 2 inch squares approximately. The leaves will break easily when they are dry and too many small pieces will give you chard crumbles or dust.  Place the dry leaf pieces in a large bowl and toss lightly with olive oil and your seasonings of choice. Start with a modest amount, about a tablespoon of oil, you can always add more, it’s not as easy to take it away. I used a little Espelette pepper olive oil, kosher salt, fresh ground pepper, a little garlic powder and a little plain olive oil to taste. I did not grease my baking sheet or use cooling racks to elevate the leaves. I did not crowd or overlap the leaves. I used four large baking sheets in two ovens, racks in the top and the bottom set to 275F on the convection bake setting. The caveat here is, know your own oven, my chips seemed to be ready quicker than most of the recipes I looked at, keep a watchful eye to ensure a crispy, not a burnt chip!
Chard Chips

  • 1 large bunch of chard, 25 leaves, 12-14 inches long
  • Olive oil
  • Seasoning of your choice, I used kosher salt, garlic powder and freshly ground pepper

Directions

  1. Preheat oven to 275F (convection bake). Put racks in the top and bottom of oven.
  2. Wash chard leaves thoroughly in several changes of water. Remove the stems from the leaves, reserve for chard stem pickles.
  3. Dry chard leaves, first in a salad spinner, then remove excess moisture with paper towels. Cut leaves into 2″x2″ pieces, or a size as close as possible, when in doubt, larger is better.
  4. Spread leaves on a large ungreased baking sheet, do not overlap or crowd. My leaves took up four sheets that I baked in two ovens.
  5. Bake chard for six to seven minutes, check to see how the leaves are drying, at this point I loosened the leaves with a spatula and my fingers and rotated the baking sheets, top to bottom and front to back.
  6. Bake for another six to seven minutes, chard should be crisp, not burnt.
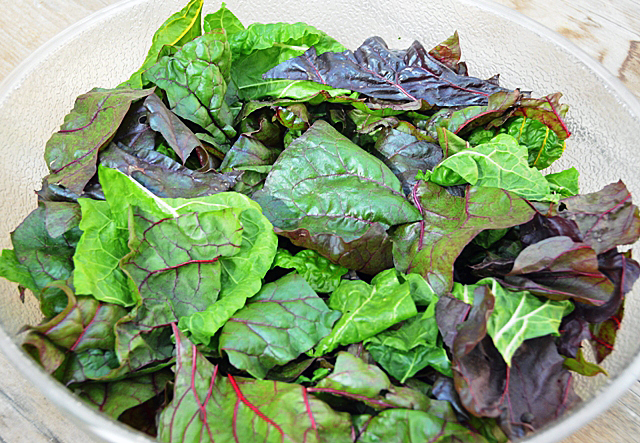
Trimmed chard leaves ready to be tossed with olive oil and seasonings


Give the chard leaves enough room to ensure even baking.
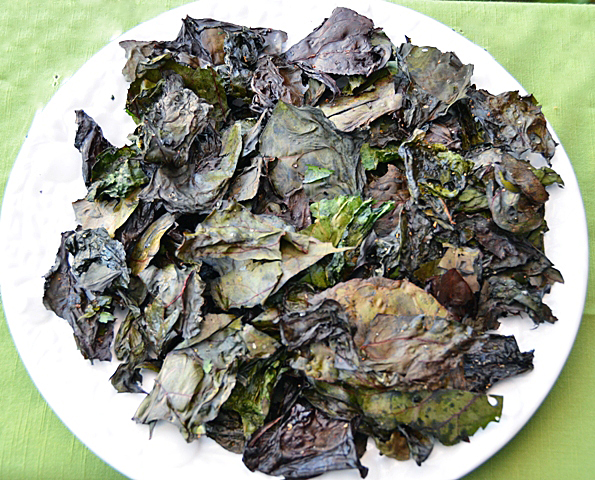
Not the prettiest snack, but certainly tastes good!


Pickled Chard Stems

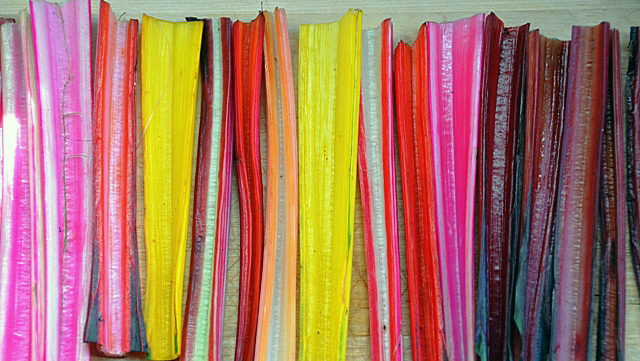
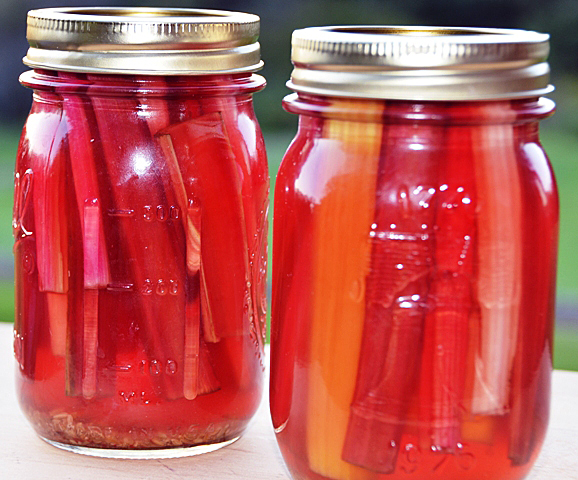
Colorful Bright Lights and Rhubarb chard stems are too pretty to waste.

Pickling shows off the brightly colored stems in another healthy nibble. Refresh the stems in some ice water to crisp them up and cut to even lengths to fit your canning jar. I chose pint jars but one cup sized jars would work as well. I used a basic refrigerator pickle recipe and added my own spice blend combination. Allow them to cure in the refrigerator for a few days, after three days they were ready. If your stems are wide, cut them in half lengthwise, there will be less chance for the stems to be stringy.

Quick Chard Pickle

Makes  2 pints

  • 2 pint canning jars and lids
  • Enough chard stems to pack tightly into the jars
  • 2c water
  • 1c rice wine vinegar
  • 1/4c granulated sugar
  • 1/2t cumin seed
  • 1/2t coriander seed
  • 1/2t fennel seed
  • 1 small piece of cinnamon stick about 2″
  • 1/2t pink peppercorns
  • 1/2t white peppercorns

Directions

  1. Sterlize two pint canning jars by washing them in hot soapy water, rinsing and drying them thoroughly. Crush spices in a mortar and pestle or small food processor. Distribute spices evenly between the two jars.
  2. In a medium saucepan bring two cups of water to a boil. Add vinegar, sugar and salt and bring the mixture back to a boil.
  3. Pack the chard stems in the jars as tightly as possible. Using a wide mouth canning funnel, pour the brine over the stems to cover completely. Place lids and bands on the jars and let cool. Refrigerate, chard pickles will be ready in a few hours but at their best in about two days.

    My spice blend ready to crush in the mortar and pestle.
Pickled chard stems ready for the refrigerator. Notice the classic Bicentennial Liberty Bell jar on the right.