March 29, 2013 Chervil Vinegar and a Spring Salad

DSC_9390a

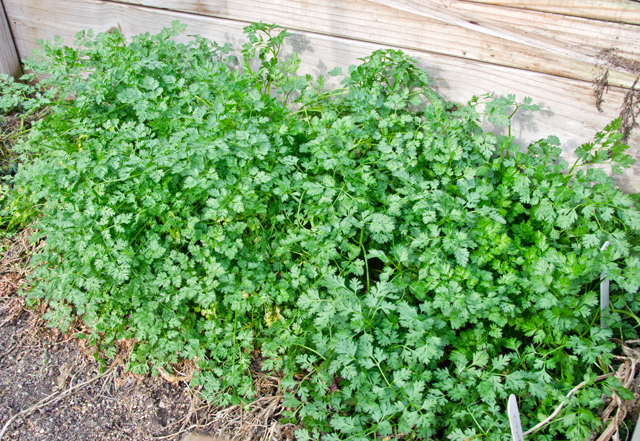
The calendar tells me it’s spring but it certainly doesn’t feel like it.  The fat wet snowflakes that coated the ground several days ago moved out as quickly as they came in, but there is still a definite chill in the air. Joe planted peas last Saturday, March 23rd, two weeks later than last year when we had many days in March with temperatures in the 60s and 70s. When we had our “garden walk” on Sunday, Joe pointed out one bright spot. Under the shelter and warmth of the cold frame, last years planting of chervil had wintered over, resulting in a bushy green row.

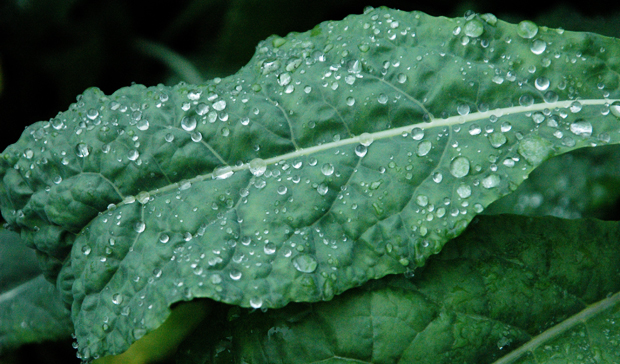
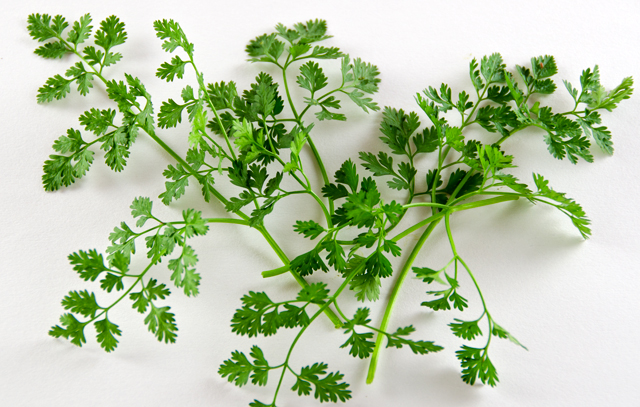
Chervil is an annual herb that prefers the cooler temperatures of spring and fall.  It is in the same plant family as parsley and carrots with delicate curly leaves that resemble something between the two.The flavor is delicate and reminiscent of mild anise or licorice. Mature chervil plants produce a delicate white flower that is also edible and looks pretty garnishing a salad.

This is definitely an herb to grow for yourself. Although it is sold dried (I wouldn’t bother), it is most fully appreciated when picked fresh. It is easy to grow and now is the time to plant.  Plant seeds in moist soil in an area that gets partial sun. It also does well in containers.

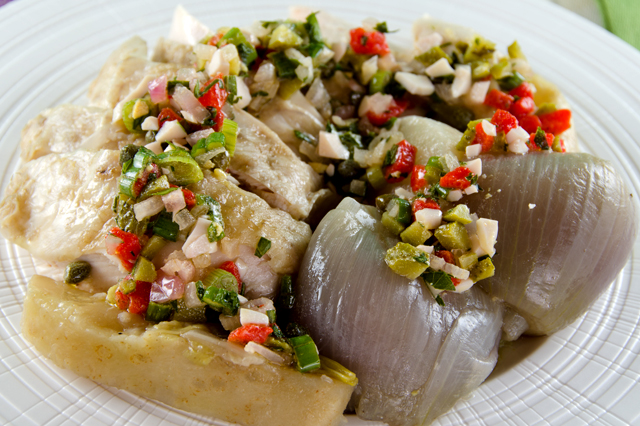
Heat is the enemy of chervil in more ways than one. Summer’s heat will cause the plant to bolt or go to seed.  Heating chervil in the cooking process dissipates the flavor so it is always best used fresh. Chervil marries well with delicate flavors like chicken, fish and eggs. It is part of the classic French seasoning blend, fines herbes that also includes tarragon, parsley and chives.

 
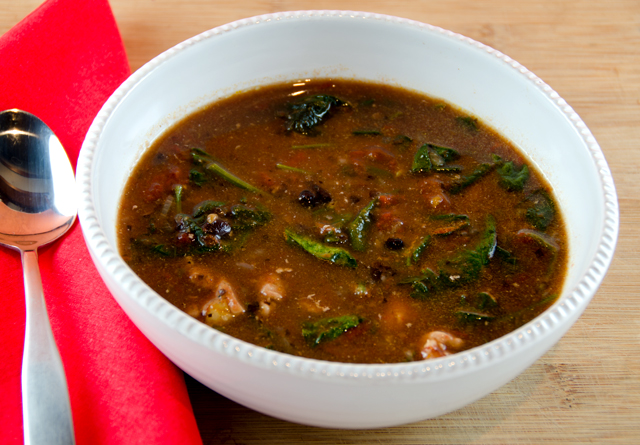
Appropriate for this week, I learned that chervil is linked to the Easter celebration in parts of Europe. Chervil’s aroma is similar to that of myrrh, one of the gifts presented to the baby Jesus by the three wise men. Because it is one of the first plants to come up in the spring garden, it is associated with rebirth. The literal translation for Maundy Thursday in German is Green Thursday so in some parts of that country they commemorate the day with a green chervil soup.

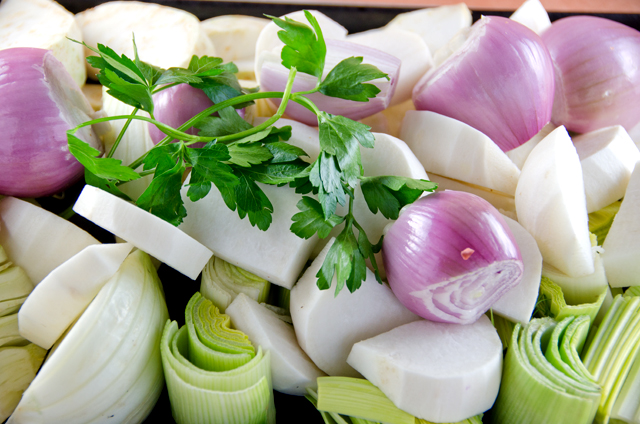
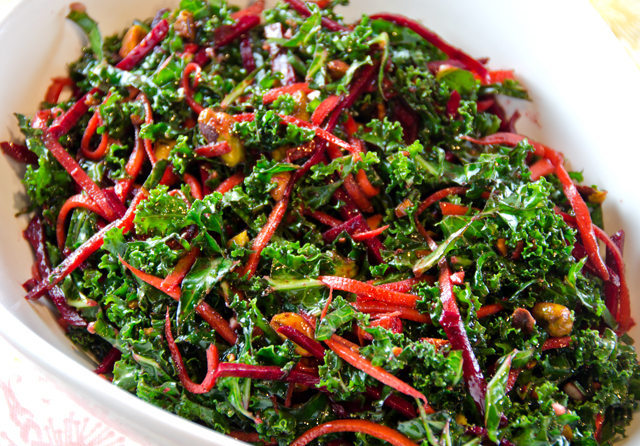
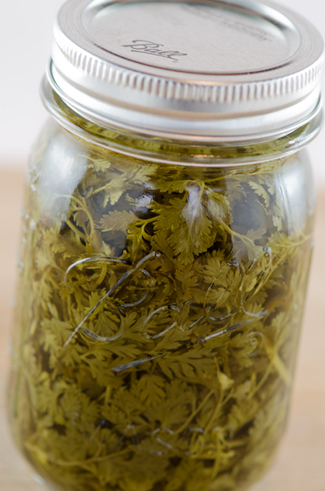
Chervil complements the garden’s first produce, asparagus, new potatoes, and root vegetables like beets and carrots. I like to add sprigs to a green salad for a touch of anisey flavor. I often infuse it in white wine vinegar for a delicacy I wouldn’t find in any gourmet shop.Choose a mild vinegar such as white wine or rice to match the flavor of chervil.

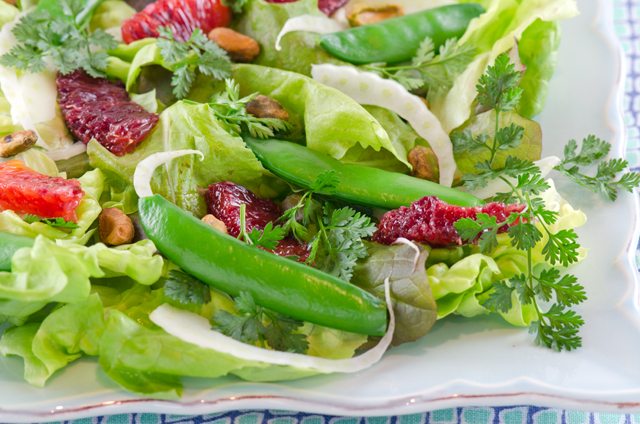
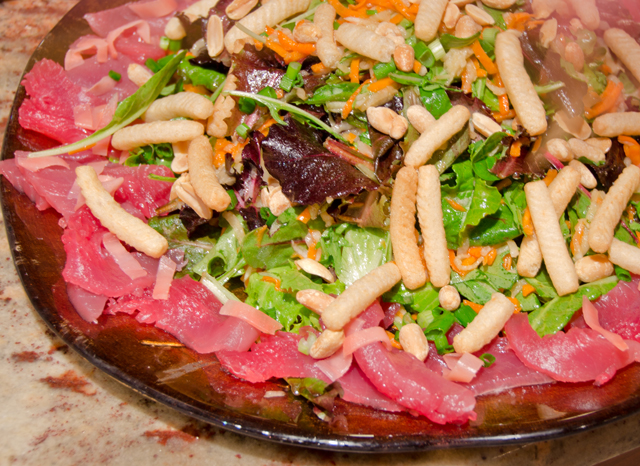
The garden isn’t ready yet, but this salad combines some of my early spring favorites. Bibb and baby romaine lettuce, sugar snap peas, blood oranges with a double dose of anise flavor from the shaved fennel and sprigs of chervil. I topped the salad with crunchy pistachios and tossed with a simple vinaigrette of white wine vinegar, finely chopped shallots and a good quality extra virgin olive oil.

DSC_9344a
A healthy crop of chervil growing in the cold frame.

Chervil Vinegar

Ingredients

  • A large handful of fresh chervil, 3-4 cups loosely packed
  • 2 cups of a mild vinegar, such as white wine or Chinese rice vinegar
  • One sterilized pint jar with lid

Directions

  1. Rinse the chervil and pat dry with paper towels. Pack chervil loosely into a sterilized dry heat proof pint jar.
  2. Heat the vinegar to just simmering in a stainless steel pan. Pour it over the chervil; push any wayward stems or leaves under the surface. Allow the vinegar to cool, then cap the jar and leave at room temperature for two weeks, shaking the jar occasionally.
  3. Strain the vinegar and bottle it in sterilized dry bottles. Cap tightly and store in a cool spot or cupboard. If you like, drop a sprig of fresh chervil in the finished bottle.
DSC_9400a
Chervil vinegar will be ready in about two weeks.

DSC_9351a DSC_9367a

 Spring Salad for two

Ingredients

Vinaigrette

  • 1T white wine or rice vinegar
  • 1/4 Dijon mustard
  • Pinch of sugar
  • 3T extra virgin olive oil
  • 1T finely minced shallots
  • Kosher salt and freshly ground pepper

Salad

  • About 4-5 cups Bibb and Romaine lettuce
  • Two small blood oranges, segmented
  • 1/2c thinly shaved fennel
  • 1c sugar snap peas, steamed and patted dry
  • 1/2c chervil fronds, long stems removed
  • 1/4c pistachio nuts

Directions

  1. In a small bowl combine the vinegar, mustard, sugar and shallots. Gradually whisk in the olive oil.
  2. In a large bowl, season the greens with a pinch of salt and a few grinds of the pepper and toss with enough of the vinaigrette to lightly coat 
  3. Top with blood orange segments, shaved fennel, sugar snap peas, chervil fronds and pistachio nuts.  Gently toss and serve.  Top with additional freshly ground pepper if desired.

DSC_9371a

March 24, 2013 Poached Chicken with Salsa Rustica

DSC_9310a

Chicken is a regular part of our weekly dinner rotation, whether it’s boneless breasts in a pesto sauce, chicken thighs and legs in a fragrant blend of Moroccan spices or crispy skinned roast chicken redolent of garlic and lemon.  I turn to poached chicken when I am making a broth that is going to be made into chicken stock or a chicken soup.  Recently, one too many dinners out, vacation and parties called for a few weeks of eating light. So I was interested to see an article in the latest issue of Fine Cooking, “Beyond Roast Chicken. Three new ways to cook a whole bird from three creative chefs.”

That’s what attracted me to the recipe that Lidia Bastianich offered in this article, poached chicken with salsa rustica. Lidia is a master of Italian cooking, a restaurateur, and author of many cookbooks. Her television programs on PBS are not only informative but entertaining as well. So I decided to follow Lidia’s lead and made a poached chicken for dinner.

Poaching is a technique that cooks chicken gently and slowly, submerged in a liquid that is heated to just under the boiling point, about 180F, when small bubbles begin to break the surface. The cooking process begins with a broth of herbs and spices, enhanced with dried porcini mushrooms and Parmesan rinds, providing the rich umami.  Fragrant root vegetables, fennel and celery root, along with shallots, leeks and turnips are added next to the broth. Taking a step from what we normally do with our roast chicken, she stuffs it with peppercorns, bay, crushed garlic and lemon. The chicken is double wrapped in cheesecloth which both keeps the aromatics in the bird and not in the broth and provides a way to retrieve the chicken from the pot at the end of cooking. Poaching chicken provides both a moist flavorful chicken with no additional fat and a flavorful broth to serve with the meal and later as a soup.

Don’t skip the salsa rustica that accompanies this dish. Made mostly with pantry ingredients, it’s the first salsa I’ve ever seen that includes a hard-boiled egg. It adds a pop of color to the very flavorful but pale chicken and a unique piquant flavor. I could see serving this salsa with fish and pork as well.

Be sure to use Turkish or true bay leaves, laurus nobilis. California bay leaves are not from the same family but are similar in shape. They have a strong menthol flavor that will overpower the dish. I am fortunate that we have several Turkish bay trees to pick my leaves from. The salsa rustica recipe called for dill gherkins but I picked up a jar of cornichons. So is there really that big of a difference? Gherkins can refer to both a variety of cucumber, harvested very small for the pickling process and the pickle itself. Gherkins can be either tart or sweet. French cornichons are the tart, crisp pickles made from gherkins or other cucumbers picked small. My choice was fine since the original recipe called for dill (tart) gherkins.

The broth, delicious on it’s own, can be made into a quick soup.  Bring the broth to a simmer and add a small pasta such as ditalini or orzo. Cook until al dente and serve topped with grated cheese and finely chopped parsley. We used the broth several days later to poach halibut fillets seasoned with a ginger citrus herb blend and topped with fresh lime peel.

Poached Chicken with Salsa Rustica from Fine Cooking #122

Serves 4-6, yields 3 quarts broth

Salsa Rustica

Ingredients

  • 1/3c extra virgin olive oil
  • 1/4c red wine vinegar
  • 1/3c thinly sliced scallions
  • 1/4c finely chopped red onion
  • 1/4c finely chopped jarred roasted red pepper
  • 1/4c finely chopped cornichons
  • 1 hard boiled egg, finely chopped
  • 1T balsamic capers, drained
  • 1/8t dried mustard
  • Pinch of cayenne pepper
  • 2T finely chopped flat leaved parsley
  • Kosher salt and fresh ground pepper to taste
DSC_9263a_edited-1
Components for the salsa rustica.

Directions

  1. In a medium bowl, whisk the olive oil and vinegar.  Add the scallions, onion, roasted red pepper, cornichons, egg, capers, mustard and a pinch of cayenne. Whisk to combine.
  2. The salsa can be made up to 5 days ahead, but you will probably consume it before the chicken is cooked so either make a double batch or make it the day of! Cover and refrigerate, let sit at room temperature for a half hour before serving. Before serving, stir in the parsley and  season to taste with salt and pepper.

DSC_9270

Poached Whole Chicken

Ingredients

  • 8 sprigs flat leaved parsley
  • 1T plus 2t whole black peppercorns
  • Kosher salt
  • 1/4c dried mushrooms (1/4oz), preferably porcini
  • 4 fresh Turkish bay leaves
  • 1 piece of Parmigiano-Reggiano rind (optional but nice)
  • 8 large shallots, peeled
  • 2 large turnips cut into 1 inch wedges (carrots were the original choice…)
  • 2 large leeks, white and light green parts, cut crosswise into 4-inch pieces, halved lengthwise and rinsed
  • 1 large fennel bulb, trimmed and cut through the root into 6 wedges
  • 1 medium celery root, trimmed, peeled and cut into large wedges
  • 1 whole chicken (about 3 1/2 lb) my brand of choice is Bell and Evans
  • 3 large cloves garlic, smashed
  • 1 lemon, halved
Root vegetables are added to the Parmesan porcini enhanced broth.

Directions

  1. Place the parsley sprigs and 1 tablespoon of the peppercorns on a six inch square of cheesecloth. Tie up with string to make a sachet.
  2. Pour 6 quarts of water to a 10-12 quart stockpot. Add the sachet, 2T salt, the dried mushrooms, 2 bay leaves and cheese rind if using.  Cover and bring to a boil over high heat.  Add the shallots, turnips, leeks, fennel and celery root. Return the liquid to a boil. Reduce heat to a simmer, partially cover and let vegetables simmer while you prepare the chicken, 10 to 15 minutes.
  3. Remove the giblets from the chicken (mine didn’t have them!!), rinse them and reserve. Into the chicken cavity place 1t salt, the garlic, the remaining 2t peppercorns, 2 bay leaves, the juice of the lemon and the squeezed lemon halves. Tie the bird’s legs together and tuck the wings behind the neck.
  4. Cut a 30 inch double-layer cheesecloth square and lay it on a work surface. Put the chicken in the center, breast side up. Tie two diagonally opposite corners snugly over the bird with a simple over hand knot. Tie the other corners the same way.
  5. Cut a yard long length of string and thread one end through the cheesecloth topknots. Pull the ends even and tie in a double knot close to the cheesecloth.
  6. Lower the chicken into the broth, being careful to keep the string out of the pot. Loop the free end of the string around a handle of the stockpot so it doesn’t fall into the pot. Add giblets if using. Bring to a boil over high heat, then lower the heat to maintain a gentle simmer.
  7. Cook, uncovered until the chicken is cooked through, an instant read thermometer inserted into the breast will register 158-160F. The chicken will continue to cook after you remove it from the pot, the final temperature will be 165F. Start checking at 45 minutes. If you prefer firmer vegetables, check on them sooner and remove them with a slotted spoon.
  8. Set a deep rimmed baking sheet large enough to hold the chicken near the pot. Transfer the chicken to the baking sheet, letting the excess liquid drain back into the pot. Using a slotted spoon, transfer the vegetables to a bowl and ladle a bit of the broth over them. Cover to keep warm.
  9. Unwrap the bird, remove the string and discard the ingredients from the cavity.  Pour some hot broth over the bird and cover loosely with foil to keep it warm.
  10. Set a fine strainer over a deep pot and strain the broth.
  11. Carve the chicken and serve with the vegetables, moistened with some broth and topped with salsa. Leftover broth can be refrigerated for 5 days or frozen up to 3 months.

DSC_9303a

March 16, 2013 Kale Slaw

DSC_9243a 

I’ve been on a first name basis with kale for quite a few years now. Lacinato, Nero, Tuscan, Dinosaur, and Red Russian, are all varieties we have been growing the last several years. This dark leafy green has been dubbed by nutritionists as a “super food’. Low in calories and high in fiber, it is rich in manganese, and cancer fighting vitamins A, C and K. 

We grow kale in the fall, and as the first frosts come, the leaves become even sweeter.  At first, I used kale as a side dish or in an improvised stew of sausage, clams, and tomatoes. Now that kale has become the vegetable darling “du jour”, the recipe possibilities have become endless. Kale chips are easy to make and more economical than the six dollars for the one ounce package you would pay in the supermarket. All matter of fruit is being combined with kale to make healthy, fiber rich smoothies. I was looking for a healthy side dish and decided to make a kale slaw with ingredients I already had in my refrigerator.

So what makes it a salad or slaw? One definition I read said that slaw originated from the Danish word, “sla”, short for salad.  Probably the most popular explanation originated in the eighteenth century. Our word, coleslaw, is Anglicized from the Dutch, “koolsa”, or cabbage salad. Since cole slaw’s main ingredient is thinly shredded cabbage, I have chosen to bestow the name slaw to this dish. Flatter leaved kale like Lacinato would be easiest for slicing but a curly variety as I used in this recipe works as well. This slaw holds up well for several days, it doesn’t get soggy or wilt, though if you have some left over the next day you might need to drain off a little excess liquid. Beets and carrots happened to be what I had on hand but other vegetables would work as well, turnips, jicama, peppers and shredded cabbage just to name a few.  This is an opportunity to pull out the Kuhn Rikon stainless steel julienne peeler to get the fine shreds of carrot. Pomegranate balsamic brings a rich sweetness that plays nicely off the strong flavor of kale. Honey or maple syrup could substitute for the agave sweetener. Use a flavorful extra virgin olive oil since you will taste it in the final dish.  The slaw would also be good as a topper for fish or chicken tacos.

Sue’s Kale Slaw

Serves four

Ingredients

  • 4c thinly sliced raw kale
  • 1c thinly julienned raw carrots
  • 1c thinly julienned raw beets
  • 1/3c roughly chopped pistachios
  • 2T pomegranate balsamic vinegar
  • 1T pomegranate red wine vinegar
  • 1t agave sweetener
  • 1t Dijon mustard
  • 1 small clove of garlic, finely chopped
  • 1/4c extra virgin olive oil
  • Kosher salt and fresh ground pepper

Directions

  1. Slice out the center rib of the kale leaves and discard. Cut the kale into very thin ribbons to measure out four cups.
  2. Very finely julienne the carrot and the beets. Add to the bowl with the kale.
  3. Chop pistachios and set aside.
  4. Combine the vinegars, agave sweetener, garlic, mustard and olive oil in a small bowl. Whisk gently to combine.
  5. Pour vinaigrette over the vegetables, you may not need it all, and toss lightly.  Add pistachios and toss again. Season to taste with kosher salt and pepper.

DSC_0550a

   DSC_0549a                                                                                                                                                   

 DSC_9241a

 DSC_9250a


March 12, 2013 Pork Tenderloin with Pico de Gallo

DSC_9216a

Pork tenderloin appears weekly in our dinner rotation. It’s low in fat, easy to cook and with a variation of the rub and accompanying sauce, can take on many different nationalities. This recipe has a south of the border flavor with a peppery and slightly sweet rub and black bean pico de gallo.

Pico de gallo is translated “rooster’s beak” and there are several explanations of how the name came about. One was for the way it was originally eaten, by pinching pieces of the salsa between the thumb and forefinger, which is supposed to resemble a rooster’s beak. A messy proposition at best. Another puts forth that the spicy bite of the dish is like the bite of a rooster. The one that I see as most logical is that it originates from the Spanish verb “picar” which means “to chop”, as are the minced ingredients in this salsa.

Black beans add some additional fiber to the dish. If you don’t have time to make your own from scratch, canned beans are acceptable. My brand of preference is Goya, I prefer to rinse them lightly before proceding with the recipe. There will be enough seasoning mix to flavor the pico de gallo and more for future use. The original recipe on Epicurious called for 1/2 cup of arugula, loosely packed, but the recipe never included a step that used the arugula. I just use it as a bed for the tenderloin that wilts it slightly and adds another peppery component to the dish. 

Pork Tenderloin with Black Bean Pico de Gallo

Adapted from Epicurious website/Self magazine

Serves two with leftovers

Ingredients

Pork rub

  • 1T sweet paprika
  • 1T smoked paprika
  • 1T kosher salt
  • 1T chili powder (I used regular)
  • 1T brown sugar
  • 1/4t cayenne pepper
  • 1T olive oil
  • 1 pork tenderloin, 14-16oz, trimmed of excess fat
  • 1 c arugula

Directions for Pork Tenderloin

  1. Mix first six ingredients for spice rub in a small bowl until well combined.
  2. Sprinkle the rub over the tenderloin, then rub the pork on all sides, pressing gently so the seasoning adheres well to the tenderloin. Cover with plastic and let sit at room temperature for an hour before cooking.
  3. Preheat oven to 350F. Heat olive oil in a large oven-proof skillet over medium high heat. When it is hot, add the tenderloin and cook, turning every 3-5 minutes until browned on all sides.
  4. Transfer the skillet to the preheated oven and roast until a meat thermometer inserted into it’s thickest part reads 140F.
  5. Using a pot holder, remove tenderloin from the oven, cover loosely with foil and let rest for 10 minutes before serving.  

 Black Bean Pico de Gallo

  • 1 1/2 c cooked black beans
  • 1c diced tomato
  • 1 small yellow pepper, diced
  • 1/2c diced red onion
  • 1/3c finely chopped cilantro
  • 1t minced jalapeno
  • Juice of a fresh lime
  • 1T of the pork seasoning mix
  • Kosher salt to taste

Directions for Pico de Gallo and Final Assembly

  1. Combine all ingredients in a medium bowl. Taste and adjust seasoning as needed.
  2. Line a seving platter with arugula. Top with sliced tenderloin.
DSC_9192a
Spice rub for the pork
DSC_9200a
Coat the tenderloin thoroughly on all sides.
DSC_9210a
Black bean pico de gallo


DSC_9219a
Spicy sliced tenderloin on a bed of arugula.


March 7, 2013 Dragon Fruit Salsa

DSC_9188a

I always look forward to my weekly excursions to Wegmans. It’s my one stop for food shopping, with the exception of fish and seafood that I get just a few miles down the road at Hellers Seafood. From the truffles that are kept under lock and key to the large selection of pristine fresh fruit and vegetables, I love their produce department. In the “off season” it’s the next best thing to growing your own. Sometimes I’m even introduced to something new, well at least to me. That was the case last week. I walked in, grabbed my cart and headed for my first stop, the produce section. The lady giving out samples of fresh-squeezed juice was quite busy so I happened to notice a gentleman from Melissa’s produce giving out samples of a fruit that I heard of but had never tasted before, dragon fruit. It was paired in a little sample cup with some strawberry slices. Although expensive (5.99 for one fruit!) I was feeling adventurous after a taste.  I bought two, I knew I wanted to try them on my own.

Dragon fruit, also known as pitaya, is the fruit of a cactus (this east coast girl can’t relate!)  It was first grown in Central and South America and expanded to Southeast Asia through the French. It is now grown domestically in Florida, Texas and Southern California. The fruit emerges from the aptly named moon flower that blooms for one night only. Pollination by fruit bats and other insects must occur that one night or no fruit will emerge. Dragon fruit is quite interesting in appearance. the ones I purchased were about the size of a mango and fuchsia in color with soft green spikes, resembling the scales of the dragon. There are also varieties with yellow and red skin. The flesh can vary from white to red.  The taste was lightly sweet, with crunchy little seeds, reminiscent of  those in a kiwi. The texture of the flesh reminded me of a crisp pear. Dragon fruit is very easy to prepare, just cut in half and either scoop out the flesh or cut away the flesh from the skin with a sharp knife.

A current favorite of the marketing world, dragon fruit is being infused into everything from rum, vodka, a flavored Pepsi, an antioxidant tea to an air freshener and a scented candle.  Dragon fruit is low in calories, high in fiber, rich in B vitamins and antioxidants. The skin is not edible but makes a lovely serving vessel. It can be added to fruit salads, smoothies and desserts. In this salsa recipe I chose to pair the mild crisp dragon fruit to contrast with some very sweet pineapple and some heat from a jalapeno. The amount of heat you add to the salsa is up to you. My frozen jalapenos still pack quite a punch. Serve with fish or chicken.

DSC_9162a
Dragon fruit can vary from bright red to yellow, the ones I purchased were fuschia with green tips.


Dragon Fruit Salsa

Makes about 2 cups

Ingredients

  • 1 1/2c dragon fruit cut into 1/2 inch chunks
  • 1c peeled and cored pineapple cut into 1/2 inch chunks
  • 1 small bell pepper, stemmed and cored, cut into 1/2 inch chunks
  • 1/2 of a whole jalapeno pepper, chopped finely
  • Juice of one medium lime
  • 1/4c finely chopped cilantro
  • Kosher salt and freshly ground pepper to taste

Directions

  1. Combine the first six ingredients in a medium bowl and stir gently.
  2. Season to taste with salt and freshly ground pepper.
DSC_9171a
The flesh of the dragon fruit can be white or pink in color. The seeds remind me of a kiwi.


DSC_9178a
The firm fruit is easily cut in half and scooped out of the skin.

March 5, 2013 Steamed Scallops with Black Beans

DSC_8527a

Chinese black beans are not to be confused with the black turtle beans used in Central and South American cooking. The Chinese black bean also known as douchi, is actually a black soy bean that has been cooked, fermented and salted. As a condiment they predate soy sauce and miso and it is believed they have been used as far back as the Han dynasty in the second century.

Once popular throughout China, they are now most associated with Cantonese cooking. The flavor of Chinese black beans has been described as sharp, salty, pungent and winy. They can be found in most Asian markets in small plastic bags, often flavored with orange peel and ginger. They have a soft pliable texture and resemble dried currants. They can stored at room temperature well wrapped in a cabinet away from light.

The cookbook authors I consulted were divided on to rinse or not to rinse the beans before using them. If you don’t rinse you must allow for their extreme saltiness and adjust the seasonings in your recipe accordingly. I choose to rinse them, especially if other ingredients in the recipe are going to bring their own saltiness. They are a condiment, so use sparingly.

In this recipe the sweet clean flavor of the scallops contrast nicely with the black beans. Always look for dry scallops, those that have not been treated with a solution that whitens them and causes them retain more water. Most scallops come with the tough “catch” muscle still attached. The scallop uses this muscle to keep it’s shell closed for long periods of time. It’s not pleasant to eat and removing it is very easy, just gently peel it off. Serve this dish with rice or noodles to soak up the juices.

Steamed Scallops with Black Beans

adapted from The Chinese Kitchen by Eileen Yin-Fei Lo

Serves 4-6

Ingredients

  • 1T fermented black beans, rinsed and drained
  • 2t minced fresh ginger
  • 2T oyster sauce
  • 2t soy sauce
  • 1T Chinese rice wine vinegar
  • 2t sugar
  • 1t Kosher salt
  • 2t peanut oil
  • Pinch freshly ground white pepper
  • 1lb large fresh sea scallops, excess liquid drained

Directions

  1. Mix all the ingredients except the scallops in a large bowl
  2. Remove the adductor muscle from the scallops. Place the scallops on a steam proof plate. Pour the steaming ingredients over the scallops and marinate for 30 minutes.
  3. Bring about a quart of water to a boil in a wok. Place the steamer in the wok so that it sits above but never touching the water.
  4. Place the dish in the steamer, cover and steam for about 5 minutes or until the scallops are white and opaque. Serve in the steam proof dish.

 DSC_8515a

February 25, 2013 Yu Sheng

 DSC_8524 copy

Yu sheng is definitely not a traditional Chinese New Year dish though similar salad recipes have always existed in China. It is a contemporary dish unique to the Chinese communities of both Singapore and Malaysia. Though debated by some, the most popular and generally accepted story of the salad’s origins came from the 1960’s at the upscale Cathay Hotel in Singapore. Four chefs, referred to as the “heavenly kings” were brought together years earlier by a Hong Kong master chef with the intention of introducing Cantonese cuisine to the world. At the passing of the master chef, the heavenly four went their separate ways, each commanding his own restaurant. The chefs still got together on a regular basis to exchange ideas and create new dishes, and yu sheng was the most memorable of these creations.
In English, yu sheng literally means “raw fish” but it is a homophone for another Chinese word that means abundance. Yu sheng is traditionally served on the seventh day of the new year celebration, when man was created,  also referred to as “everyone’s birthday”. It is said that eating yu sheng will bring diners good fortune and prosperity in the new year.  The salad should have at least seven ingredients. Each ingredients has it’s own symbolism.

The ingredients we chose were

lettuce:  symbolizing harmony and wealth

carrots: eminence 

daikon radish:  success

pickled ginger: good luck

raw fish: abundance

peanuts: longevity

shrimp chips: resembling gold bars and the wealth they bring.

Fish choices for yu sheng on the many menus and recipes I consulted included salmon, mackerel and abalone but our fish of choice has always been pristine sushi grade tuna. Other ingredients that might be found in yu sheng include dyed sweet potato, papaya, jellyfish, pomelo and candied fruit. When the salad is tossed the diners call out “lo hei” which means to mix it up but it also sounds like a word that means to prosper more and more. The higher the toss, the better the luck in the coming year.

Yu Sheng

Serves 2-4

Ingredients

Salad

  • 5-6 cups of mesclun lettuce
  • 1/4 lb sushi grade tuna, sliced thinly
  • 2 carrots, shredded
  • 1 3″ section of daikon radish, shredded, squeezed to remove excess liquid
  • 1/4c red pickled ginger cut into thin strips
  • 1/2c roasted, unsalted peanuts, chopped coarsely
  • Shrimp chips

Directions

  1. Place lettuce in a serving bowl and top with shredded carrot and daikon
  2. Top with pickled ginger, tuna and peanuts. Place shrimp chips around the outer rim of the plate.

Dressing

  • Juice of two limes (about 1/4c)
  • 1/3c plum sauce, chopped if too chunky
  • 2T Toasted sesame oil
  • 3T Canola oil
  • 1/4t five-spice powder

Directions

  1. Whisk salad dressing ingredients together in a small bowl. Taste and correct seasoning as needed.
  2. Pour dressing over salad and toss high for a happy and abundant new year. Lo hei!

February 10, 2013 Spicy Sichuan Noodles

DSC_8417a

Searching out new and unusual ingredients has always played an important part in my “joy of cooking”.  In the olden days (the eighties) and  b.i. (before Internet), the hunt would involve trips to ethnic markets, phone calls to vendors and an ever-growing stack of mail order catalogs to aid in my search.  Gardening has always given us the ability to grow fresh herbs and vegetables that were not readily available in our markets. There was one elusive spice that I encountered in Chinese cookbooks that wasn’t just hard to find, but unavailable for many years in the United States, Sichuan peppercorns. 

Banned in 1968, Sichuan peppercorns were safe for human consumption. The real concern here was citrus canker, a disease the imported spice could carry and infect the foliage of citrus plants in the United States. The ban was lifted in 2005 when it was discovered that heating the peppercorns to 170 degrees, killed the bacteria that harmed plants.

Sichuan peppercorns are not true peppercorns or chilies but tiny crimson berries that come from the prickly ash trees that grow in the mountainous regions of Sichuan province. The first taste of a Sichuan peppercorn on the tongue starts with the impression of a mentholy flavor with some lemony overtones followed by a numbing tingle in the mouth.  According to Harold McGee, author of “On Food and Cooking”, Sichuan peppercorns can produce the same effect as carbonated drinks on the lips and tongue. Combined with chili peppers or ginger, they create a taste combination unique to Sichuan cooking, ” ma la ” or the spicy and tingly sensation left in the mouth after eating a dish with this combination.  Ma means both anesthetic and “pins and needles” in Chinese. La, of course, is the spicy part of the equation, provided by chills and ginger.

Spicy Sichuan Noodles showcases the ma la combination very nicely. Using the original recipe as a starting point, we recreated a dish as best memory would allow. It was one of many dishes that we shared with friends in an excellent Sichuan restaurant hidden away in a New Jersey strip mall. Dry roasting the Sichuan peppercorns releases their aromatic oils and brings out their flavor. Only roast the amount you will be using in a recipe since the oils dissipate quickly. In our version, we chose to stir fry, not deep fry the pork. We also chose thicker udon noodles instead of Chinese egg noodles and added some roasted peanuts on top for extra crunch. Noodles are always a part of the Chinese new year celebration, as they symbolize longevity. Noodles should never be cut, even when eating. Twist those noodles around your chopsticks for a long life.


Spicy Sichuan Noodles

Adapted from “The Taste of China” by Ken Hom

Serves 4-6 as part of a Chinese meal, 2-4 as a single dish

 Ingredients

  • 1 tablespoon Sichuan peppercorns
  • 1/2 pound ground pork
  • 3 tablespoons dark soy sauce
  • 3 teaspoons salt
  • 3T peanut oil
  • 3 tablespoons chopped garlic
  • 2 tablespoons finely chopped peeled fresh ginger
  • 5 tablespoons finely chopped scallions
  • 2 tablespoons sesame paste or smooth peanut butter
  • 2 tablespoons chili oil
  • 1 cup chicken stock
  • 12 ounces fresh or dry Chinese egg noodles
  • 1 T toasted, chopped peanuts

Directions

  1. Heat a wok or heavy skillet over medium heat. Add the peppercorns and stir-fry for about 5 minutes until they brown slightly and start to smoke. Remove them from the heat and allow them to cool, then grind them. Set aside.
  2. Heat the same wok over medium high heat and add 1T oil. When the oil is hot add the ground pork, stirring with a spatula to break up the pieces. Add the dark soy sauce and continue to cook pork until browned, about four minutes. Remove pork with a slotted spoon and drain on paper towels.
  3. Bring a 3-4 quart pot of water on the stove to a boil.
  4. Reheat the wok with the 2 tablespoons oil and stir-fry the garlic, ginger and  4 tablespoons of the scallions for 30 seconds, then add the peanut butter or sesame paste, the remaining soy sauce and salt, the chili oil and chicken stock. Simmer for four minutes. Return the pork to the pan and stir.
  5. Cook the noodles in the boiling water two minutes if they are fresh, five minutes if they are dried. Drain in a colander. Transfer them to a serving bowl or individual bowls. Ladle on the sauce and top with the  pork mixture. Sprinkle with the ground Sichuan peppercorns, toasted peanuts, scallions and serve.

DSC_8455a

DSC_8432a

February 5, 2013 Chinese Dumplings-Potstickers

DSC_8388a

Dumplings are important part of the Chinese New Year menu. They are considered lucky because they resemble ancient Ming dynasty coins, silver and gold ingots called yuan bao. Dumplings symbolize wealth and hopes for a profitable future. Some cooks will hide a gold coin in a dumpling. The person who finds the coin will find good fortune in the new year, as long as they don’t bite down or swallow the coin!

Dumplings can be steamed, boiled or pan fried and can be wrapped in various styles. The wrappers are easily found in most supermarkets, usually near the produce section. Wonton wrappers are square and gyoza wrappers are round. I find the thickness of either depends on the manufacturer. Last year, needing a new challenge, I learned how to make my own. The dough is very simple, just flour and water, either cold or very hot, I had better results with the very hot water.  Chinese cooks prefer Gold Medal all purpose bleached flour for dumpling making, its slightly lower gluten content produces the best results. Higher gluten flour produces a less than ideal tough chewy skin.

I like to make my filling first, preferably the day before I am filling the dumplings. Chilling makes it easier to handle and portion between the dumplings. For the dumpling wrapper recipe I chose to weigh my flour for the most accurate results. A cup of flour weighs 4.5 ounces, so 10 ounces is a generous two cups. I made my dough in the food processor, adding the just-boiled water slowly until it was absorbed by the flour. Because of the extremely dry conditions that day, I am certain the dough absorbed a bit more water than what would be typical  Place the dough in a quart bag to let the gluten in the dough relax for at least an hour. Dumpling wrappers are rolled out the same way as the pork bun dough was in this post. After struggling with a standard rolling pin, Joe made me a small one that made the task much easier.

I made two varieties, potstickers and beggars purses. Potstickers are just that, dumplings that are browned on the bottom in a little oil first. Water is added to the pan, a lid is put on the pan and steam finishes them in the second part of the process. Dumplings of any variety can be frozen for future snacking. Just remember to spread the uncooked dumplings out on a lightly greased cookie sheet, making sure the dumplings are not touching. Place the cookie sheet in the freezer for several hours. Now the dumplings can be stored in freezer bags until you are ready to use them. Partially thaw before cooking the dumplings.

Dumpling Dough

from Asian Dumplings, author  Andrea Nguyen

Ingredients

  • 10 oz (2 cups appx.)  all purpose flour
  • 3/4c very hot water

Directions

  1. Weigh or measure out your flour and add to food processor bowl fitted with the metal blade.
  2. With the machine running, slowly add the water through the feed tube allowing it to be absorbed by the flour until a ball is formed. Do not over process!
  3. Place the ball of dough onto a work surface and knead until uniform and smooth. The dough should be firm and silky to the touch and not sticky.
  4. Place the dough ball in a quart-sized bag and seal. Let dough rest for at least an hour
  5.  After the rest, pull out the dough and cut it into 4 roughly equal sections. Roll each section into a 1-inch thick log, then cut each log into 9 pieces. Shape each piece into a thick coin or disc. Lightly flour the top and bottom of each disc.
  6. I placed my discs between the front and back of a cut up quart sized freezer bag and stamped down with my marble mortar to make a circle.
  7. Use a dowel rolling pin to press on just the outer edges of the disc. Roll back and forth once, then rotate the disc. Roll, rotate. Roll, rotate. Add a little flour if necessary to keep it from sticking and tearing.
  8. You don’t want to make your wrappers too thin.They need to be thick enough to hold whatever filling you’re going to put in it. The final dumpling skin should be just over 3 inches in diameter. This recipe should make about 36 wrappers. Cover wrappers with plastic until using.
DSC_8324a
My repurposed baby scale gives exact measurements!
DSC_8327a
Dumpling dough just relaxing for a little bit.
DSC_0790a
A marble mortar and a quart-sized freezer bag helped make my dumpling circles.

Pork and Shrimp Filling for Potstickers

From Fine Cooking #103

Ingredients

  • 2 c finely chopped napa cabbage
  • 8 oz. ground pork
  • 8 oz. peeled, deveined raw shrimp, coarsely chopped
  • 3 medium scallions, thinly sliced
  • 3 large cloves garlic, minced
  • 2 T Shaoxing (Chinese rice wine) or dry sherry
  • 1T grated fresh ginger
  • 1 T soy sauce
  • 2 t toasted Asian sesame oil
  • 1/2 teaspoon granulated sugar
  • Freshly ground black pepper
  • 36 very thin, 3-inch circular, store-bought pot sticker or gyoza wrappers
  • 2 tablespoons peanut or vegetable oil

Directions

For the filling

  1. In a medium bowl, toss the cabbage with 2 teaspoons salt and set aside for 30 minutes to release moisture. Wring out in a clean kitchen towel to extract as much liquid as possible.
  2. In a large bowl, combine the cabbage with the pork, shrimp, scallions, garlic, Shaoxing, ginger, soy sauce, sesame oil, sugar, and 1/4 teaspoon pepper. Stir until well mixed. Refrigerate for at least 20 minutes and preferably overnight.
DSC_8334a
Pork and shrimp filling on a dumpling round.

To form the dumplings

  1. Spoon 1 to 2 teaspoons of the filling onto a dough wrapper, fold it in half, and make your first pinch at the center of the curved edge and then pleat toward the center on both sides to create a rounded belly. This wider shape allows the dumplings to sit upright in the pan and form a flat surface for browning.
  2. Repeat with the remaining wrappers and filling. As you work, arrange the filled dumplings in a single layer without touching on large plates, so they don’t stick together.
  3.  Heat 2 Tbs. vegetable oil in a heavy-duty 10- or 12-inch skillet over medium-high heat until shimmering. Working quickly and in batches if necessary (adding more oil for the second batch if needed), arrange the dumplings belly side down in concentric circles starting from the outer edge. Cook until golden brown on the bottom, 1 to 2 minutes.
  4. Pour in about 1/2 cup water or enough to come about a third of the way up the sides of the dumplings, bring to a boil, cover, and cook until all of the water has been absorbed, 2 to 3 minutes. Remove the lid, reduce the heat to medium, and continue cooking just until the dumplings are dry and crisp on the bottom, 1 to 2 minutes. Loosen the dumplings from the pan with a spatula.
  5. Invert the pan over a plate to flip the dumplings, browned side up, onto the plate (or transfer with a spatula). Serve immediately with your choice of dipping sauce.
DSC_8397a
Potstickers, ready to serve with some dipping sauce.

DSC_8406a

February 2, 2013 Chicken and Black Bean Soup

DSC_8312a

Last week I made chicken and black bean soup or should I more accurately describe it, cooking by the power of suggestion. Our ladies Bible study group is currently in a series on the book of Nehemiah. The teacher of the series, Kelly Minter is a self described foodie and each chapter of the study ends with a few of her favorite recipes. This past week there was a recipe for her favorite Southwest Chicken Soup. I didn’t want to follow her recipe exactly but a concept was set in my mind and the frigid temperatures we were experiencing definitely called for a satisfying warm soup.

The starting point for a good soup is a good homemade chicken stock and I like to have it on hand for impromptu meals like this one. Not only do you benefit from the richer flavor of homemade but you can control the amount of salt in your recipe.  Another plus is that when your homemade stock has been cooled and refrigerated, the fat separates at the top and can easily be scraped off. Normally when I make stock I simmer the chicken long enough for it to be cooked through. Then I remove the meat from the bones and cook the broth, vegetables and bones a bit longer before straining. But because of Hurricane Sandy and the need to consolidate all of our frozen foods into one freezer, some of my supply of frozen chicken had fallen victim to the dreaded freezer burn.  Not bad, just icy, a little dried out and less than optimal. So I used some boneless and bone in pieces to make this batch of stock. I didn’t waste the chicken, the dogs were quite happy to partake in this batch, supplementing their usual food.

For my soup I used homemade stock, chopped, roasted tomatoes that I froze last summer and a pickled jalapeno from a batch that I canned. I did use canned beans, since the meal was impromptu; I didn’t have time to soak and cook fresh ones. I chose boneless chicken thighs because the dark meat holds up better when reheating a soup, and let’s face it, most soup does get reheated. Good canned chicken broth is a reasonable substitute. I prefer a low sodium version and usually have a few containers of the Pacific brand of both chicken and beef on hand. I seasoned my chicken with Penzey’s adobo seasoning to enhance the flavor profile of the southwest. Substitute a combination of cumin, oregano and cayenne if you don’t have this blend.  A small can of chopped roasted tomatoes could stand in for my garden variety. You get the idea, use what you have. I added the chopped spinach at the end since I knew it didn’t need to cook very long and wanted to give the soup a green vegetable element. We had ours with a salad, maybe a little sour cream top the soup and some crusty bread would also be a welcome addition.

Chicken and Black Bean Soup

Serves 4-6

Ingredients

  • 1 small onion, finely chopped
  • 1T canola oil
  • 3 boneless skinless chicken thighs cut into 1″ pieces
  • 2t Penzey’s adobo seasoning or a combination of cumin, smoked paprika and oregano
  • 1 qt bag roasted tomatoes, chopped or 1 can
  • 1 finely chopped pickled jalapeno (optional)
  • 4-5 c defatted, homemade chicken stock or low fat canned chicken broth
  • 3-4c baby spinach
  • Kosher salt and freshly ground pepper to taste

Directions

  1. Heat chicken stock or broth over medium high heat in a 5 quart Dutch oven until heated through.
  2. In a saute pan, cook  the onion over medium heat until softened but not browned, 3-4 minutes. Set aside.
  3. Sprinkle adobo seasoning over chicken, add to the saute pan and cook, adding a little broth to the pan as needed until slightly browned, 10-12 minutes.
  4. Puree 1/2 c of the black beans in a mini food processor.
  5. Add cooked onion, pureed beans, chopped tomatoes, pickled jalapeno and the rest of the canned beans to the broth. Add cooked chicken and heat through. Add salt and freshly ground pepper to taste.
  6. Soup can be prepared up to 2 hours ahead. Reheat over medium heat. Before serving, add spinach to wilt. Serve in warmed bowls.
DSC_5791b
The first blush on a jalapeno last summer.