January 13, 2018 Herbed Ricotta Zucchini Ravioli


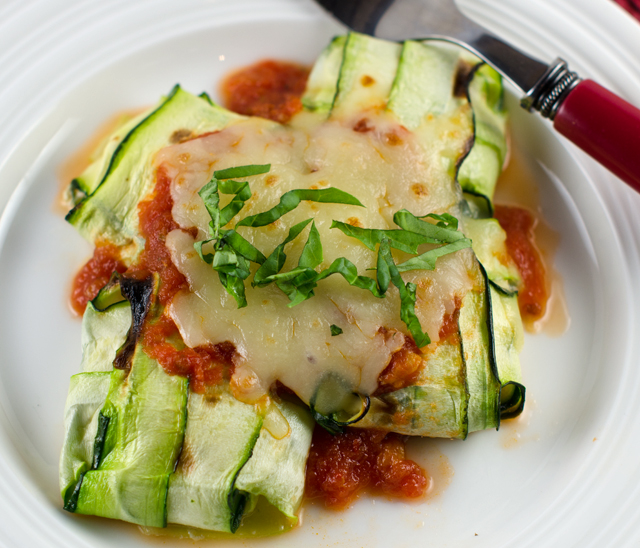
Normally I wouldn’t share a recipe for zucchini in the middle of January, but this time I had to make an exception. I am always looking for new ways to prepare for the buckets of zucchini that our garden produces every summer, so I had to try out this recipe I saw on The Chew, “Herby” Ricotta Zucchini Ravioli. In this recipe, very thinly shaved zucchini slices take the place of pasta and are filled with a herbed ricotta filling.

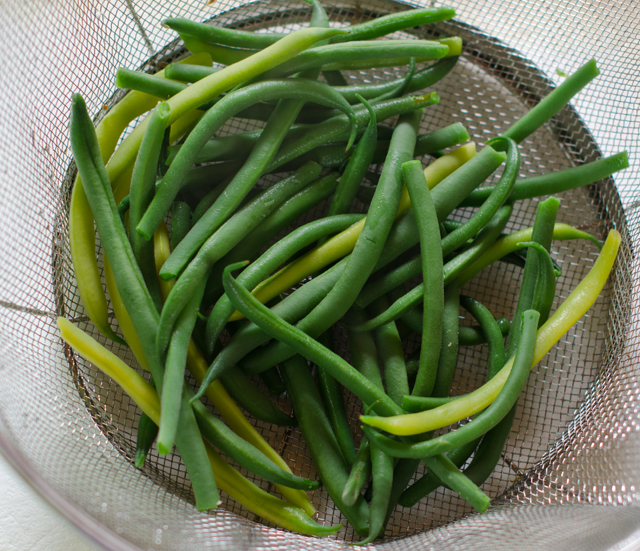
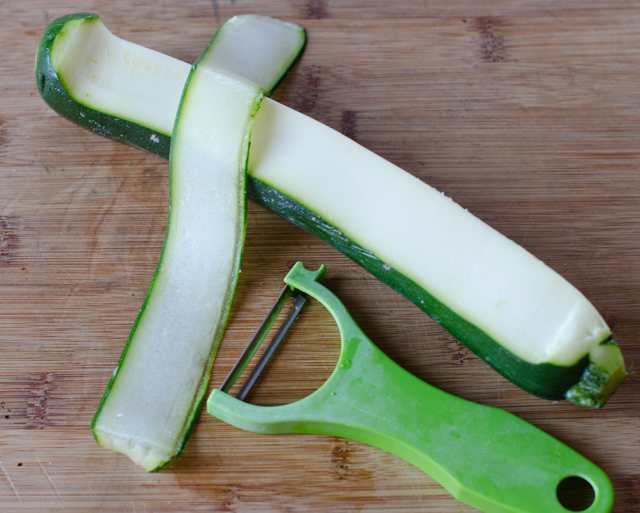
The zucchini could be sliced on a mandoline, but to simplify things, a Y peeler works just as well. Remove the first strip of skin, then a few more slices until you have a flat surface. Make slices down the length of the zucchini until you reach the seedy core. Look for medium length zucchini. I found that strips 5-6 inches long and 1½ inches wide were the right size to accommodate a generous tablespoon of the filling. Place the slices on baking trays lined with paper towels and lightly salt to draw out any excess liquid.

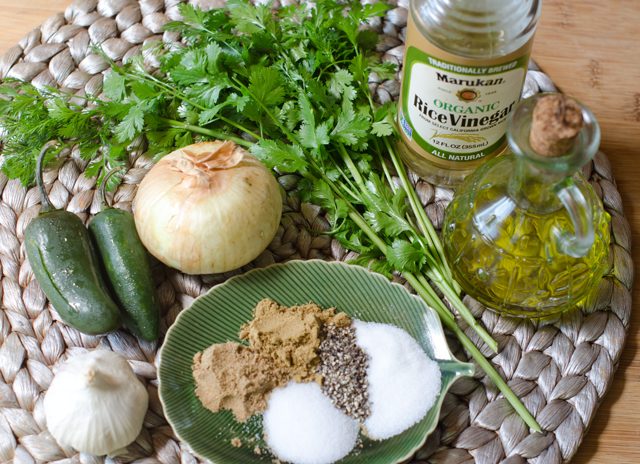
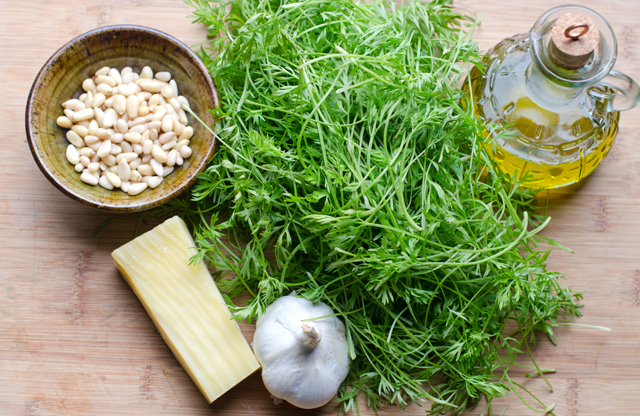
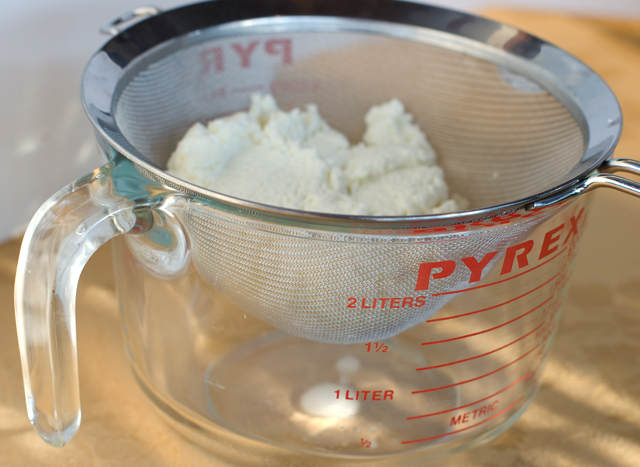
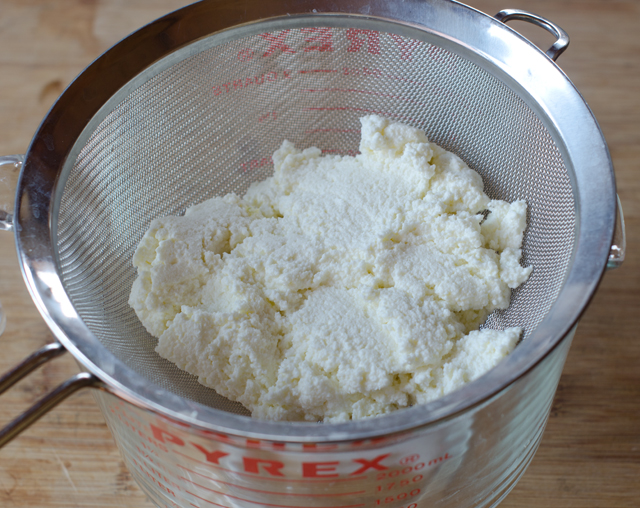
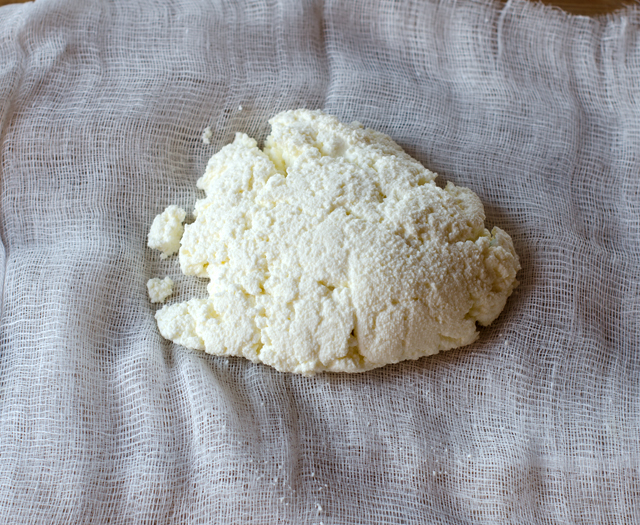
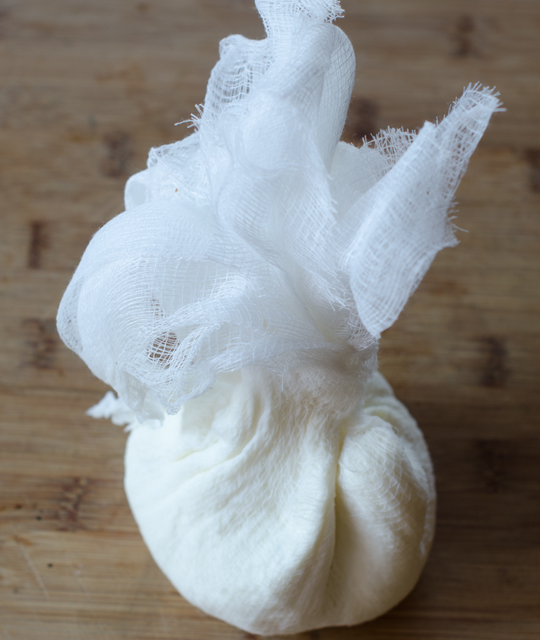
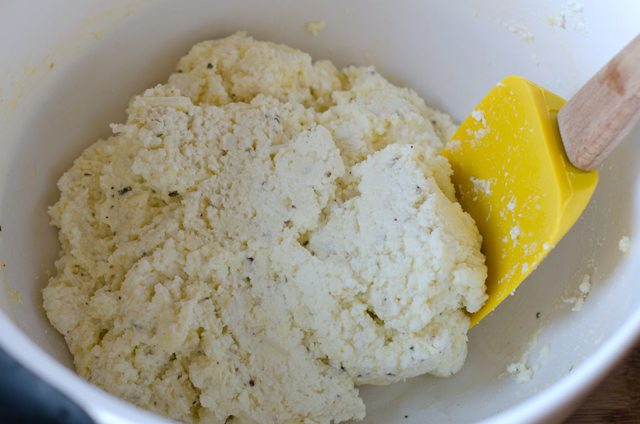
The filling is very simple, ricotta cheese with an egg, grated Parmesan and seasonal herbs. Fresh ricotta is always best but one without preservatives is a good second choice. Drain the ricotta in a fine strainer to draw out excess liquid then squeeze it out in cheesecloth to make it as dry as possible. There aren’t any fresh herbs in the garden on this very cold January day, but Joe has brought some into the conservatory. For this recipe I used parsley, thyme and a little dried oregano. Let the ricotta herb mixture sit for 10 to 15 minutes to allow the flavors to blend.

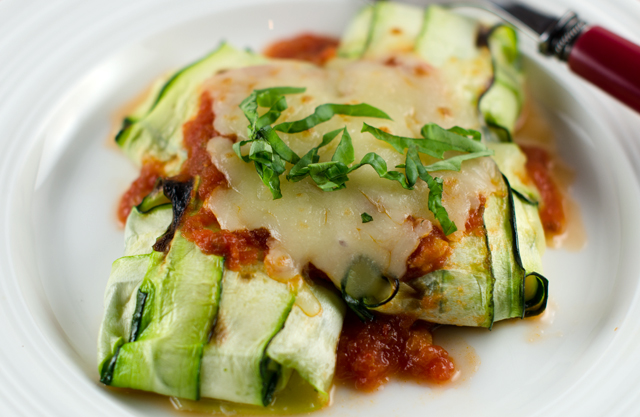
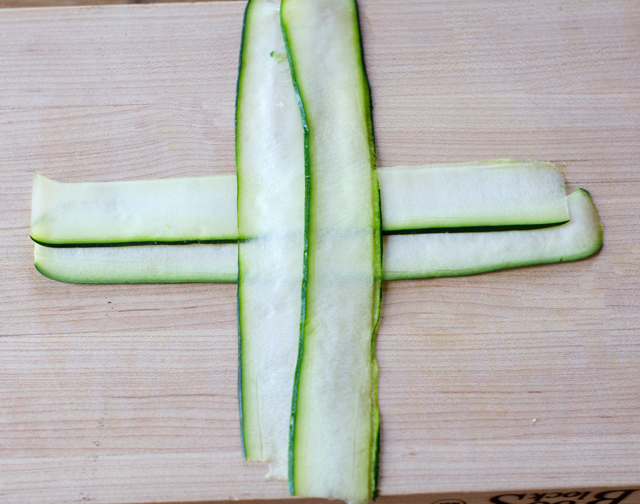
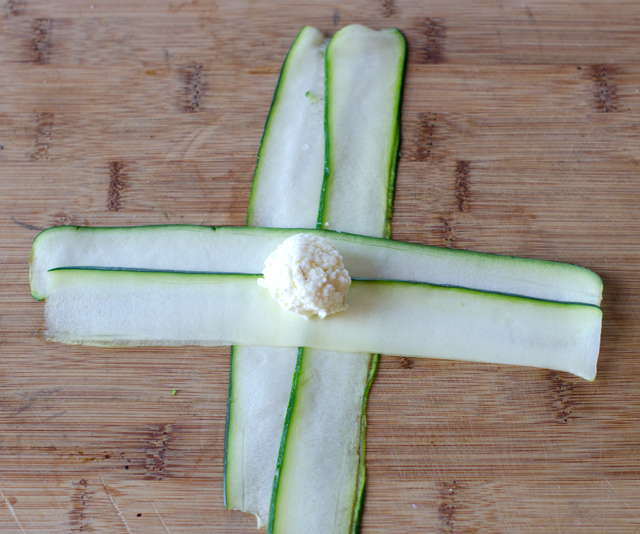
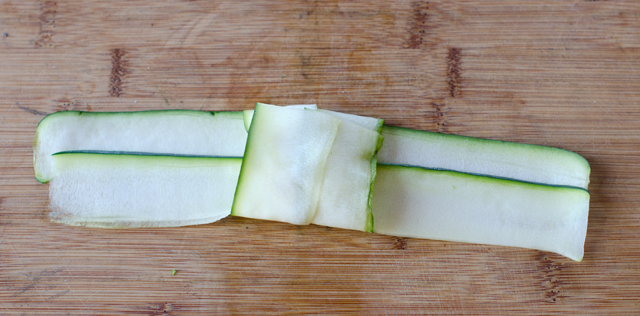
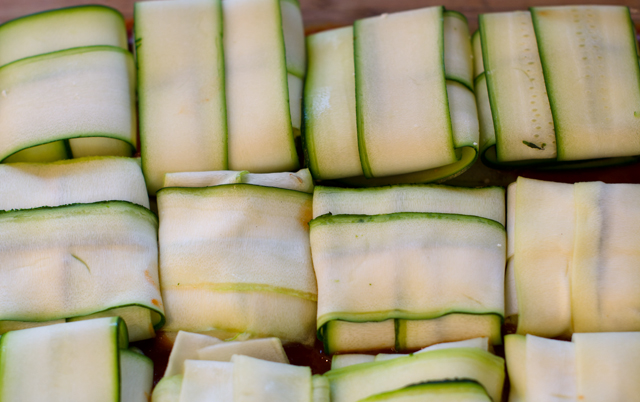
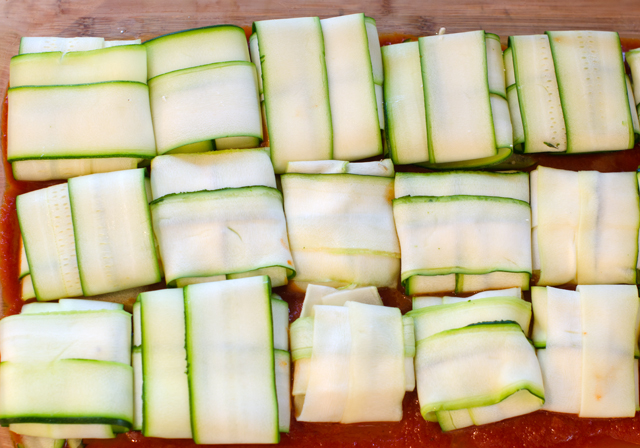
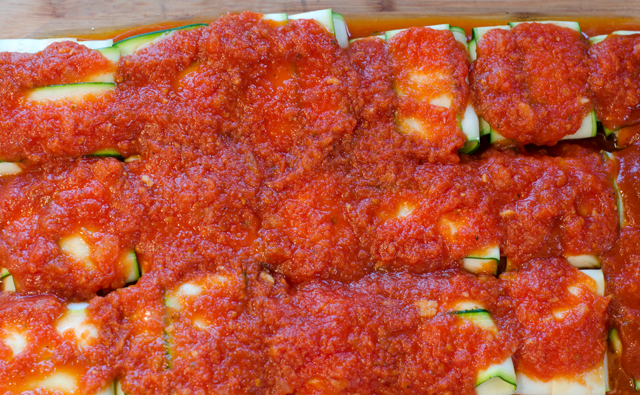
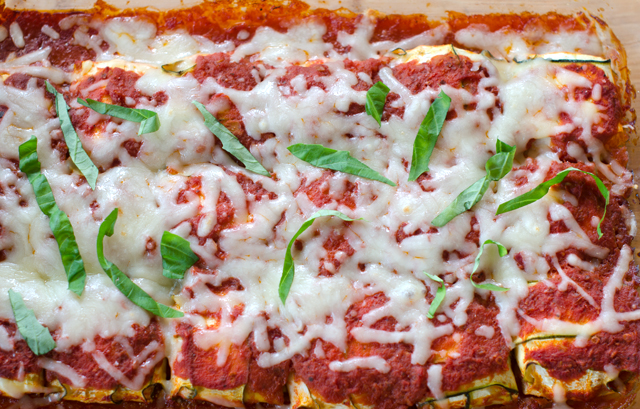
Now it’s time to make the bundles. Put enough tomato sauce on the bottom of your prepared pan to lightly coat it. Blot any excess liquid from the zucchini. On a clean work surface, lay two strips of zucchini so that they slightly overlap lengthwise. Lay two more noodles on top perpendicular to the first two strips, it should look like a plus sign. Place a generous tablespoon at the intersection where the strips meet. Starting with the bottom strips, fold them over the center, repeat with the second set of strips. Place the ravioli seam side down in the prepared baking dish and repeat with remaining zucchini strips until you fill the baking dish. Top with sauce and sprinkle with shredded mozzarella cheese. Bake for about 25 minutes, take out of the oven and sprinkle on the remaining Parmesan.

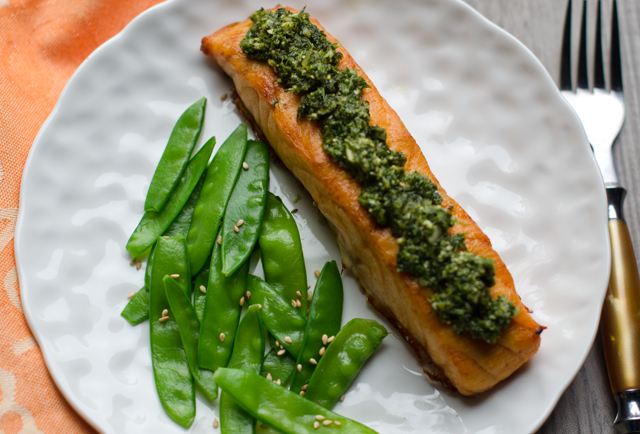
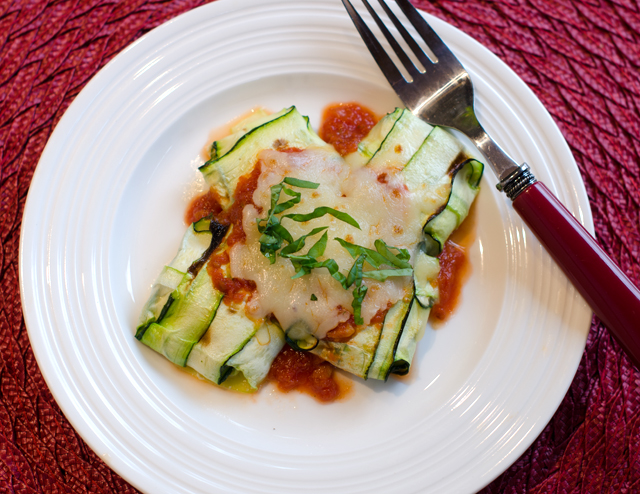
The verdict? Joe and I both thought they were delicious and didn’t feel cheated with the zucchini wrapper. As Chew co host Clinton Kelly said,” this is an amazing alternative to pasta.” The calorie savings are pretty amazing too with regular ravioli coming in at 785 calories while the zucchini ravioli is 260 calories! The portion size wasn’t mentioned though. This is not the best dish for the freezer. Zucchini is 95% water so I think this dish would best be served fresh. This is a great meatless dish whether for lunch, dinner or as a side. Pesto would be a good addition to the ricotta filling and a cheesy Alfredo sauce could take the place of the tomato sauce. Can’t wait until summer to try these with zucchini from the garden and my own variations.

Drain the ricotta in a fine mesh sieve for a half hour.


Wrap the ricotta in cheesecloth and squeeze out any excess moisture.

Using a Y peeler, slice the zucchini into long thin strips.
Combine the ricotta, beaten egg, herbs, spices and cheese.
Slightly overlap 2 strips of zucchini and overlap two more strips, forming a plus sign.
Place a generous tablespoon of filling where the strips intersect.
Fold the bottom strips over the filling.
Fold in the other 2 strips to the center to completely enclose the filling.

Add the ravioli, seam side down to a baking dish lightly coated with tomato sauce.
Top with additional sauce.
Top with mozzarella cheese and bake .


Herby Ricotta Zucchini Ravioli

Serves 4

Ingredients

  • Olive oil for greasing the baking dish
  • 2 c ricotta – whole milk or part skim
  • 4-5 medium zucchini
  • 1/3 c plus 2 T grated Parmesan (divided)
  • 1 large egg
  • ¼ c fresh herbs, finely chopped (parsley, thyme, chives etc.)
  • ¼ t freshly grated nutmeg
  • 2 cloves garlic, peeled and finely minced
  • 2 ½ c tomato sauce-homemade or your favorite store brand
  • 1 c shredded mozzarella
  • Basil chiffonade for garnish
  • Kosher salt and freshly ground pepper to taste
  • Cheesecloth – that will be used with the ricotta

Directions

  1. Preheat the oven to 375°F.  Lightly grease a 8×12 baking dish with olive oil.
  2. Place a fine mesh sieve over a medium bowl and add the ricotta. Set aside and allow to sit for 30 minutes.
  3. Using a Y vegetable peeler, slice the zucchini lengthwise into thin strips, avoiding the seedy core. Place strips on a paper towel lined baking sheet, lightly sprinkle with salt and set aside.
  4.  In a medium bowl, add ricotta, 1/3 c Parmesan, egg, chopped herbs, nutmeg and garlic. Season with salt and pepper and stir until fully combined. Set aside for 10 minutes to let the flavors combine.
  5. Blot excess moisture off zucchini slices. On a work space, overlap 2 strips of zucchini and then overlap 2 additional strips on top and across the first 2 strips, forming a cross shape.
  6. Using a spoon or cookie scoop, place a generous tablespoon of the ricotta mixture into the center of the zucchini formation.
  7. Fold the bottom layer of the zucchini strips over the filling and into the center so that they are overlapping. Fold in the other two strips to the center so that the filling is completely enclosed. Repeat process with remaining filling and zucchini.
  8. In prepared baking dish, spread ½ cup sauce evenly over the bottom. Place zucchini seam-side down. Pour remaining sauce over zucchini. Top with remaining Parmesan and mozzarella. Transfer to oven and bake for 20 to 25 minutes, until zucchini is al dente.
  9. Garnish  with basil and serve.

September 7, 2017 Green Bean Salad with Cherry Tomatoes, Feta and Parsley

Whether you call them snap beans, green beans or string beans, our garden has produced a steady stream since early July. Joe plants both bush and pole beans and not just green beans. We grow purple beans that look pretty on the vine but as soon as you plunk them in a pot of boiling water, they turn a dark green color. This is due to a plant pigment, anthocyanin, that deteriorates in high temperatures. If you want to preserve the bean’s  purple color, choose a crisp young bean that doesn’t require cooking.

Yellow or wax beans also add color to the garden. According to Cook’s Illustrated, yellow beans are just green beans bred to have none of the chlorophyll pigment that gives the green bean its color.

Snap beans are low in calories, a good source of fiber and vitamins A and C. Their grassy, nutty flavor is appealing to just about everyone. In the cooler months we are most likely to do a warm preparation of beans with garlic and thyme. In the summer I like to blanch them and make a green bean salad. This combination is a creation of my own and a dish I have made countless times this summer.

I start with approximately a pound of beans. I wash and stem the beans and sort out any that are significantly fatter and or older. Bring a large pot of water that has been well salted to the boil and add the large beans first. I give them an extra minute or two to cook. Then I add the rest of the beans and start my timer at a generous four minutes. I taste (careful, it will be hot) one bean, and if I can bite through with no resistance, they are done. If not, set the timer for another minute, then taste again. Drain the beans in a colander and rinse with cool water. Spread the beans out on dish towels to let the excess moisture evaporate.

In a large bowl combine the beans, chopped parsley and tomatoes. A bite-sized cherry tomato works best here, cutting them in half makes them easier to eat. I have used different varieties over the summer. On this particular day I used a white cherry tomato. They aren’t really white but a very pale yellow. Toss the ingredients with the vinegar and oil. Next add the feta and tamari almonds. My preference is French feta, it is milder (less salty) in flavor and creamier in texture. Tamari almonds bring a umami flavor and a pleasant crunch. Season to taste with salt and pepper. Serve immediately, leftovers taste great the next day.

Green Bean Salad with Cherry Tomatoes, Feta and Parsley

Serves four

Ingredients

  • 1 lb green beans, washed, stemmed and trimmed into 2-3 inch pieces, can be wax or purple beans also
  • 15-20 small tomatoes, halved
  • 1/3 c finely chopped parsley
  • 1/3 c crumbled feta (I prefer French feta in this salad)
  • 1/3 c tamari almonds
  • 3 T grapefruit or another light balsamic vinegar
  • 6 T olive oil
  • Kosher salt and freshly ground pepper

Directions

  1. Bring a large pot of lightly salted water to a boil. Add the beans, bring back to the boil and turn back the heat to a simmer and cook beans for 4 ½ minutes. Test one bean to be sure they are tender. Drain in a colander and rinse with cool water.
  2. In a bowl large enough to toss the ingredients comfortably, add the beans, tomatoes and chopped parsley. Toss with the oil and vinegar. Add feta and tamari almonds and toss again.  Season well with salt and pepper and serve immediately.

August 11, 2017 Green Beans and Cucumbers with Miso Dressing

I couldn’t bear to do it, smash the cucumbers and green beans as called for in this recipe that is. This very easy and flavorful dish from the June issue of Bon Appetit uses a technique popular in many Asian countries. Smashing the cukes and beans with a cleaver or a rolling pin tenderizes them and makes lots of nooks and crannies for the dressing to permeate. But not with the first green beans and cucumbers from the garden this season. Maybe in a week or two but for now I will use a more traditional approach. This recipe is quite similar to pau huang gua, a Sichuan cucumber salad, typically served with rich spicy food.

Start the recipe by peeling the cucumber, I like to leave a small strip of skin for color contrast. Chop into bite sized pieces and toss with a little salt to draw out excess moisture. The beans were an interesting addition, the original recipe in Bon Appetit didn’t call for cooking them, I presume they thought dressing them would do the job of tenderizing them. I chose to blanch the beans for just a few minutes to make them crisp-tender and ready to absorb the dressing.

The dressing couldn’t be easier, the ginger, garlic and serrano pepper are all grated, a Microplane makes quick work of that. Combine these ingredients with white miso, rice vinegar, olive and sesame oil. Miso is a fermented soybean paste traditionally used in Japanese cooking. White miso will provide a more delicate flavor, switch in a red miso for a stronger and saltier flavor. You will find miso in the refrigerated section of Asian grocery and health food stores.

Place the well-drained cucumbers and green beans in a bowl and toss with some of the dressing, just enough to coat the vegetables. You will have more than enough, which is a good thing. Toss sautéed eggplant and zucchini with halved cherry tomatoes with the dressing for another version of this dish.

Cucumber vines in the greenhouse, circa 2015.
Joe is growing both bush and pole beans.

Green Beans and Cucumbers with Miso Dressing

Serves 4

Ingredients

  • 3 Persian cucumbers or 1 English hothouse cucumber
  • Kosher salt
  • 1 lb green beans, stems trimmed
  • 1 1½ piece ginger, peeled and finely grated
  • 1 serrano or Fresno chile, finely grated
  • 1 garlic clove, finely grated
  • 1/3 c unseasoned rice vinegar
  • ¼ c white miso
  • ¼ c olive oil
  • ½ t toasted sesame oil
  • Toasted sesame seeds and scallions or thinly sliced shallots for serving

Directions

  1. Peel cucumbers and chop into bite-sized pieces. Toss with a pinch of salt in a medium bowl. Let sit to allow salt to penetrate.
  2. Bring a medium sized pan of water to a boil with a pinch of salt. Add beans and cook until just tender, 3-4 minutes. Drain beans in a colander.
  3. Whisk ginger, chile, garlic, vinegar, miso, olive and sesame oils in a medium bowl until smooth.
  4. Transfer the beans to a bowl for serving and toss with the dressing. Drain cucumbers well and add to the bowl, toss again. Top beans and cucumbers with toasted sesame seeds and scallions.
Toss cucumber chunks with a pinch of salt to extract excess water.
The beans I used were just picked, blanching them for a few minutes tenderizes them and brings out their flavor.
The original recipe used scallions, I used shallots from our garden.


July 15, 2017 Tomato Salads

This is a space to record Joe’s creative tomato salads throughout the summer. The pictures won’t always be the best since they are taken in the kitchen. Just a way to commemorate these wonderful salads.

July 10 salad – Sun Gold, Gold Nugget and Super Sweet tomatoes, raspberries, purple basil, mozzarella with peach vinegar and blood orange olive oil.

July 12 – Sun Gold tomatoes, ricotta and purple basil with peach vinegar and blood orange olive oil.

July 15 – Super Sweet 100’s, Sun Gold, Gold Nugget, Snow Cherry, Chocolate Cherry, Fourth of July, mozzarella, purple basil, raspberries, blueberries, Cascadian raspberry vinegar, Persian lime oil.

July 16 – Brandywine, Sun Gold, Super Sweet, Gold Nugget, Snow Cherry, Chocolate Cherry, purple basil, mozzarella, ricotta, Parmesan, purple basil, Cascadian raspberry vinegar, Persian lime oil.

July 17 – Fourth of July, Gold Nugget, Snow Cherry, Super Sweet, burrata, Persian cucumbers, purple basil, Cascadian raspberry vinegar, Persian lime oil.

August 14

August 16

August 17

July 12, 2017 Swiss Chard Quesadillas

Tuesday evening is Joe’s night to work late and although we don’t sit down for dinner when he comes home, I like to have a little snack ready. We sip a little wine, catch up on the days activities, maybe watch some television in the kitchen. This quesadilla was inspired by what I had in the fridge and the garden that summer evening. I have used spinach in a quesadilla in the past, why not some Swiss chard this time? A little sweet onion, sautéed until caramelized would be a good contrast to the earthy flavor of chard. All I needed now was a wrapper and some queso. I didn’t have tortillas on hand but I did have some sandwich wraps that could fill in. I always have several varieties of cheese in the fridge, the sharp flavor of cheddar worked well here.

We are still in the process of thinning the chard plants out. They are supposed to be 9-12 inches apart so it didn’t take long to pick what I needed. The chard is still relatively young so it wouldn’t need the long cooking that late summer chard does. I discuss basic chard preparation in this post. I also used some of the finely chopped stems for texture and their brilliant color.

I think a sweet onion works best with this flavor combination. I used a Vidalia, but whatever variety your market is featuring this week is fine. Sweet onions are low in pyruvic acid, the component that makes your eyes tear. I recently read that one of the best ways to store Vidalias is wrapped separately in a paper towel and stored in the refrigerator. I will be trying this method out.

If you are making a quesadilla you can’t forget the queso. If you prefer not to use cheddar, a Jack cheese would be a good choice too. I served the quesadillas plain, sour cream or a tomatillo salsa would be a good accompaniment. Next time I might add a few slivers of pickled jalapeno to the mix. Cooked black beans would be a good addition or some sautéed mushrooms. This recipe is just based on what I had on hand that evening. Golden crisp on the outside with healthy greens, a little sweetness from the onion with the creaminess of cheddar, this is a winning combination for a quick and delicious light meal or snack.


Swiss Chard Quesadillas

Makes two 8″ quesadillas

Ingredients

  • 16-18 medium to small chard leaves
  • 1 medium sweet onion
  • Extra virgin olive oil
  • Butter
  • Tortillas or wraps
  • ½-1 cup shredded cheese, I used cheddar, mozzarella or jack works too

Directions

  1. Wash chard leaves in several changes of water. Separate the chard leaves from the stems. Chop the leaves roughly. You should have 5 cups loosely packed leaves and ½-1 cup finely diced chard stems.
  2. Heat a tablespoon of olive oil in a 10 inch non stick skillet over medium high heat. Add stems and a sprinkle of salt and cook until softened, 3-4 minutes.
  3. Add the chard leaves and the water that still clings to the leaves and cook until wilted. Add a tablespoon more of water if necessary to wilt the leaves. Move stems and leaves to a plate and keep warm.
  4. Slice a medium onion very thinly, a mandolin or food processor is good for this. You should have 3 cups loosely packed thin slices.
  5. Wipe out the pan, add another tablespoon of oil and heat over medium high heat, cook onion until softened and brown. Reduce heat to medium if necessary. This should make about 1 cup of caramelized onion.
  6. Let the skillet cool off a bit and wipe out with a paper towel. Over medium high heat melt a teaspoon or so of butter and a little olive oil. When the butter is melted, add the first wrap or tortilla, spread out one half of the chard over this as evenly as possible.
  7. Evenly spread the cooked onions over the chard and then sprinkle the cheese over. Place the second wrap over the cheese and press down with your hand or a spatula to melt the cheese and make it adhere.
  8. Cook for 2-3 minutes on the first side, it’s okay to peek to make sure it isn’t browning too much. With the help of the spatula, flip and cook on the other side, about 2 minutes, adding a little more butter and oil if necessary.
  9. Move the quesadilla to a platter and keep warm, repeat cooking process with the second quesadilla. Cut quesadillas into wedges 4 to 8 pieces as desired.  Serve warm.
Chop the stems.
Sweet onion sautéed until golden brown.
Sautéed chard and stems are first to go on.
Then the sautéed onion.
Then a sprinkling of cheese.
A second tortilla or wrapper in my case, goes on top. Press down to help the cheese adhere. This was taken after this first quick flip.
Let it get golden brown.

July 4, 2017 Quick Pickled Baby Beets

The hot days of July are upon us so it’s time to harvest the root crops planted in early spring. that are still in the ground. We said good-bye to the radishes several weeks ago after the first heat wave of the summer. Warm temperatures cause radishes to bolt and become woody in texture. They will be planted at the end of summer for a fall harvest. The first planting of Japanese turnips have been harvested and now it’s time to harvest the rest of the beets.The”life cycle” of our beet consumption began with very small thinnings we add raw to our salads. The second thinning produces slightly larger leaves the size of spinach that are sautéed in olive oil with a little garlic and red pepper flakes for a wonderful side dish. Baby beets are sliced as thinly as possible or julienned and added to green salads.The Chiogga beets look pretty in salads, a slice looks like a candy cane bulls-eye and the Golden beets bring a pop of bright yellow.

I love beets, especially pickled ones. I have canned pickled beets in past summers for long storage, this year I thought I would make refrigerator pickles. Quick pickled baby beets couldn’t be simpler to make. These refrigerator pickles require very little prep and they are ready to eat after a few hours in the brine. Divide your beets by colors or they will bleed into each other. The brine is a touch sweet with a little spice. These pickles will last for several months in the refrigerator.

Just picked beets from the garden.
After a good clean up.


Quick Pickled Baby Beets

Makes 2 pint jars

Ingredients

  • 1 lb baby beets,  separated into colors
  • 1 c white wine vinegar
  • 2 t kosher salt
  • ½ c sugar
  • 2 T honey
  • Fresh ginger slices
  • 1 t coriander seed
  • 1 t black peppercorns
Trimmed and ready for pickling.

Directions

  1. Wash beets well, trim off the leaves and leave about an inch of stem on the beets. Separate beets into colors if you don’t want them to bleed into each other.
  2. Bring a medium pan of water to a boil. You can put all the beets of one variety in the pan, start checking the smaller beets at the two minute mark. Beets should be easily pricked with the tip of a knife, larger beets will take a few more minutes.
  3. Drain beets well in a colander. Place in a heat proof container like a canning jar, separating out the varieties.
  4. Combine vinegar, salt, sugar, honey and spices and bring to a boil. Pour the hot canning liquid over the beets and set aside to cool. Once cool, store in the refrigerator.


June 13, 2017 Green Harissa

Harissa is a spicy and aromatic chili sauce, commonly found in the cooking of the North African countries of Tunisia, Morocco and Algeria. The basic recipe calls for hot peppers, garlic, salt, olive oil and spices. This version from Vedge , a vegetarian restaurant in Philadelphia, uses green jalapenos, onions, garlic, a generous amount of fresh cilantro, along with dried coriander and cumin. Cilantro haters can substitute parsley or half parsley and half fresh spinach. Some mint might be interesting in the mix.

The original recipe called for 2 jalapenos, one was enough for my palate, remember you can always add more heat, it’s harder to take it away. It’s a good idea to wear gloves when handling chilies. Chili oil on sensitive parts of your body (hands, lips, eyes etc.) will burn for a long time. Chili oil is not water soluble, it’s fat soluble. So if you get some on your hands, rub some cooking oil into your hands before washing with soap and water.

Serve green harissa as a sauce for grilled vegetables and fish, lamb burgers, an unconventional taco topping, the possibilities are endless.

Green Harissa

Makes 1 cup

Ingredients

  • 2 c loosely packed cilantro leaves
  • 1 c finely chopped onion
  • 2 garlic cloves
  • 2 jalapeno peppers, stems and seeds removed
  • 2 T or more olive oil
  • 2 T rice wine vinegar
  • 1 t ground coriander
  • 1 t ground cumin
  • 1 t salt
  • 1 t freshly ground black pepper
  • 1 t sugar
Cilantro in the greenhouse.


Directions

  1. Combine all of the ingredients in a blender and blend until smooth

June 11, 2017 Carrot Top Pesto

Spring is an ideal time for planting root vegetables like turnips, beets and carrots. They especially love the cooler temperatures that we have been blessed with this spring. We try to be frugal with seeds, so the ones that aren’t planted are saved from season to season. I catalog them alphabetically like a card file in clamshell plastic containers that in a previous life held spinach or lettuce from a big box store. I use 3×5 cards to separate them into specific categories, beets, cucumbers, fennel etc. This year I even did a little clean up, getting rid of all packets before 2013.

Last year a friend gave Joe quite a few packets of carrot seeds he purchased on sale. Some were planted but most went into storage in the fridge over the winter. He wasn’t certain how many of them would germinate this season so he planted them very densely. As luck would have it, every carrot seed germinated.  Now it was time for some serious thinning.

Thinning is a necessary step in vegetable gardening if you want to have mature healthy plants. This can be done in stages. Armed with my Cutco scissors, I did the first thinning when the plants were about four inches tall. Pulling out the unwanted seedlings can often pull out the ones you wanted to leave growing. I snipped the plants at the soil line. With a colander full of the lacy feathery tops I thought about how I could use them. I remembered that parsley and carrots are related so I tasted a few of them. They have an herbaceous flavor, that to me was reminiscent of parsley.

I have made pesto with basil and arugula, why not carrot tops? I used a basic formula that I have used to make other types of pesto, herbs or a green, in this case carrot tops, garlic, nuts, a hard cheese and olive oil. Baby carrot greens are more delicate in flavor and are a special reward for the gardener. Organically grown full-sized carrot greens can be used too, eliminating any thick stems. I used my pesto as a topping for roasted salmon. It would work with chicken breasts and of course, roasted carrots.

Time to thin the carrots.
The first thinning of carrot greens.

Carrot Top Pesto

Makes about a cup

Ingredients

  • 3 cups lightly packed carrot tops
  • 1 clove of garlic
  • 3 T pine nuts
  • ¼ c extra virgin olive oil, more if needed to make a paste
  • ¼ c grated Parmesan cheese
  • Kosher salt and pepper to taste

Directions

  1. Place the carrot tops, garlic and pine nuts in the bowl of a food processor.
  2. Pulse until coarsely chopped. With the motor running, slowly add olive oil until a paste forms. Add cheese and pulse several times to combine.
  3. Season with salt and pepper to taste. Use immediately or cover tightly with plastic wrap and refrigerate for up to 2 days.

June 4, 2017 Arugula and Snow Pea Shoot Salad

I am pleased to say that the weather this spring  has cooperated with Joe’s spring plantings. Many years spring  has brought just a little cool weather followed by a blast of 90 degree plus temperatures that we never recover from. We have had our share of rain, but only one heat wave ( 3 consecutive days of 90° heat)  in May.

The cool, occasionally rainy weather makes for plump healthy radishes, too much heat and they become tough, pithy and hot. This week I picked the first harvest of beautiful crimson red, pink, purple and white Easter Egg radishes. Joe does consecutive plantings of quick-growing crops like radishes, arugula and salad greens so that they aren’t all ready to harvest at once.

Peas are one of the first seeds we plant in the garden, not just for the edible pods, we also reserve one section to harvest for the shoots alone. The round leaves and wispy tips are reminiscent of a green butterfly. To harvest I pinch off the tender tips, the top several leaves and the tendril that ends the vine, in turn they will send out new growth for the next harvest in several days.

This salad combines the best of spring, spicy arugula, snow pea shoots, crunchy sweet radishes from our garden and kohlrabi from the local farmers market. I accented the salad with some toasted hazelnuts and creamy French feta. For this vinaigrette I combined champagne vinegar, Dijon mustard, shallot, a touch of honey and extra virgin olive oil. When making a salad be sure to use a bowl that gives you plenty of room to toss your ingredients. I start by tossing the greens with dressing to coat them lightly, then I add some of the other ingredients and toss again. I leave the rest to top the salad with, this ensures that the last person who is served doesn’t get all the heavier ingredients that end up in the bottom of the bowl.

A cool spring makes for nice plump radishes.
Mature arugula
More arugula, but not as mature.
Snow pea shoots

Arugula and Snow Pea Shoot Salad

Serves two

Ingredients for the Salad

  • 4 c snow pea shoots
  • 4 c arugula
  • 4-5 medium radishes, thinly sliced
  • 1 c kohlrabi, peeled and cut into matchstick julienne
  • ¼ c toasted hazelnuts
  • 1/3 c crumbled French feta

Ingredients for the Vinaigrette

  • 2 t champagne vinegar
  • ½ t honey (more to taste)
  • ¼ t Dijon mustard
  • ½ t finely chopped shallot
  • ¼ c extra virgin olive oil
  • Kosher salt and freshly ground pepper to taste

Directions

  1. To make the dressing, combine all the ingredients in a small bowl and whisk together until evenly combined. Taste and adjust seasonings if necessary. Season to taste with kosher salt and pepper.
  2. Place the arugula and snow pea shoots in a large bowl and toss with some of the vinaigrette and taste. Add about half of the other ingredients, toss again, adding more of the dressing if necessary. Top the salad with the remaining ingredients. Season each portion to taste with freshly ground black pepper.


April 19, 2017 Avocado and Cabbage Slaw

Suvir Saran’s first restaurant, Devi was awarded a coveted Michelin star for his critically acclaimed Indian cuisine. He closed Devi in 2012, and more recently opened Tapestry, in May of 2016. The cuisine at Tapestry had a more global focus interpreted with an Indian viewpoint. Unfortunately Tapestry closed in March of this year after being open for only ten months in spite of positive reviews. The problem according to Mr Saran was “high rents and low covers”. I never had the opportunity to visit the restaurant, but Food and Wine magazine provided a recipe from Tapestry for Avocado and Cabbage Slaw in their January issue.

What gives this slaw its unique flavor is the addition of chaat masala. It is a sand colored spice blend, predominately flavored with dried mango powder, also known as amchoor, black salt and asefetida. It is a traditional accompaniment to a fruit snack, often sold by street vendors, phal-ki-chaat, four or five fruit selections sprinkled with fresh lime juice and chaat masala.

The avocado and cabbage slaw is a reimagining of the traditional snack. This time, crunchy colorful cabbage, creamy avocados and juicy tomatoes take the place of the fruit. Chaat masala is part of the dressing that includes lime juice, honey, fresh ginger, fish sauce, spicy sriracha, cilantro and mint. You could make your own chaat masala, some of the ingredients, cumin and coriander seed are accessible in any supermarket, others, dried mango, asafoetida powder, would require an online trip to an Indian grocer. I purchased my chaat masala on Amazon. It has a very pleasant light spicy fragrance and includes thirteen spices.

We enjoyed the salad, the chaat masala made it unique but never having the original dish I think we were at a disadvantage. I will have to try the fruit salad to make a comparison.

Avocado and Cabbage Slaw

Serves six

Ingredients

  • 3 T fresh lime juice
  • 2 T honey
  • 1 T peeled and finely grated fresh ginger
  • 2 t sriracha
  • 2 t Asian fish sauce
  • 1 t white wine vinegar
  • ¾ t chaat masala
  • ¼ t ground cumin
  • kosher salt and freshly ground pepper
  • 1 lb green and/or red cabbage, cored and finely shredded
  • 6 scallion, light green and white parts only, thinly sliced
  • 1 pint cherry or grape tomatoes
  • ½ c cilantro leaves, finely chopped
  • ¼ c mint leaves finely chopped
  • 2 Hass avocadoes-peeled, pitted, and diced, plus more for serving
  • 1 c roasted, salted cashews, chopped, plus more for garnish
  • Microgreens for garnish

Directions

  1. In a large bowl whisk the first eight ingredients until well combined. Season with salt and pepper.
  2. Add the cabbage, scallions, tomatoes, chopped cilantro and mint, diced avocado and 1 cup of chopped cashews. Toss to coat. Garnish with avocado slices, chopped cashews and microgreens.