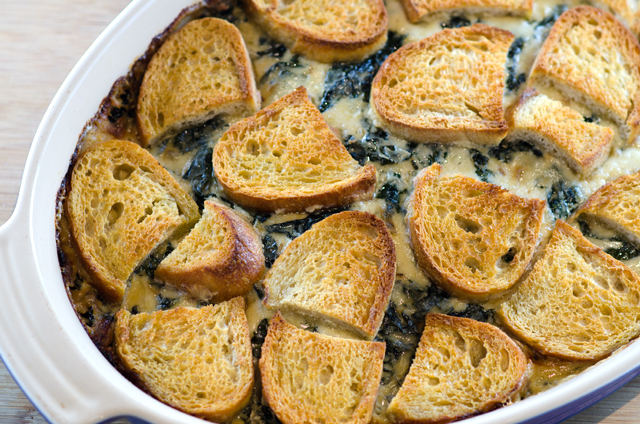
December 12, 2014 Creamy Kale Gratin

DSC_0072aWhen it comes to Thanksgiving I’m “all about the sides”. Now don’t get me wrong, we had three turkeys for Thanksgiving, roasted, grilled and smoked, all cooked to perfection by my hubby. No fried turkey this year, we tried it one Thanksgiving and the combination of a deep fryer and a windy day on a wooden deck made for an interesting and potentially dangerous afternoon.

I love fall vegetables, a variety of interesting winter squashes, beautiful brassicas and hearty root vegetables all appear at our table. In previous years I would make myself crazy with last minute preparations for a half dozen complicated side dishes before we sat down to Thanksgiving dinner. Now I like to roast a combination of root vegetables tossed with olive oil, salt and freshly ground pepper and supplement them with some other interesting sides.

If I am at home in the early afternoon I will occasionally turn on “The Chew”, a television program that has been described as “The View” for foodies. The panel includes among others, star chef, restauranteur and cookbook author, Mario Batali, and it was Mario’s recipe this day that caught my attention, Creamy Kale Gratin.
We are not newcomers on the ever expanding kale bandwagon. Joe has been growing it in the fall for quite a few years, before it achieved it’s current celebrity status. This year’s crop was abundant. He grew both the Red Russian variety with it’s reddish purple stems and curly leaves and the Lacinato or dinosaur kale with crinkly long dark green leaves. What most people don’t know is that after the first frost, kale becomes sweeter and could easily convert the most die hard kale hater.

Today’s episode was titled potluck party, focusing on dishes you could bring to a Thanksgiving dinner and I’m sure this dish would be a hit at any potluck meal, Thanksgiving or otherwise. Mario compared this dish to steakhouse creamed spinach, only made with kale. Mario had the assistance of actress Katherine Heigl, best known for her Emmy winning role on Grey’s Anatomy.  Her job, along with promoting her new television series, was to chop some of the kale while Mario made the Bechamel  sauce. I saw that chef Michael Symon was at the ready, most likely in case the task was too much for her to handle. I noticed she did a fine job, Michael said with a bit of surprise that she did a good job and Mario commented on her “mad skills”. She explained that she played a cook in one of her movies (Life As We Know It; I checked)  and they taught her to properly chop. She refered to it as a hidden talent, one of those things you learn as an actor.

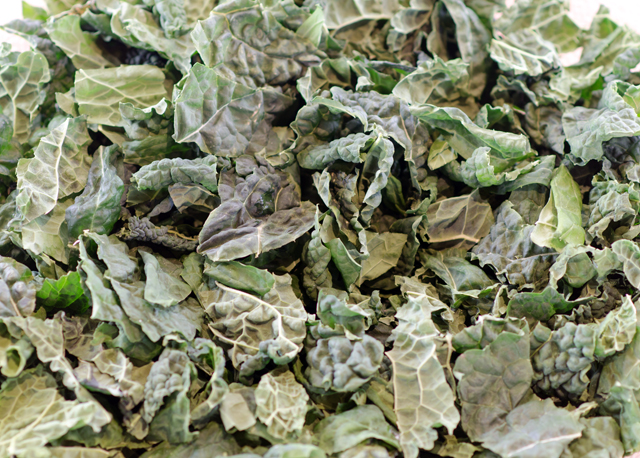
The kale leaves are roughly chopped to the stem. Twenty cups may seem like a large quantity but like all greens, they cook down quickly. Rather than putting the stems in the trash, Mario puts the stems in half full pickle jars and snacks on them the next day. The kale is cooked in a large sautepan until wilted, it will cook fully when it is combined with the cheese sauce and croutons. A layer of croutons is placed on the bottom of a large buttered gratin dish. The next layer is the kale combined with the very cheesy sauce seasoned with freshly ground nutmeg. The remaining croutons are layered on top.

Either variety of  kale is suitable for this recipe. From my observation of the video it looks like they used a curly variety, I used the darker Lacinato with long crinkly leaves. I prepped my dish the day before, stopping before sprinkling the croutons with olive oil, salt and pepper. I brought the dish to room temperature the next day, finished the final steps and baked the gratin. The last dilemma the Chew tackled was how do you eat the bread bit? Fork and knife is fine but if you want to pick it up like a crostini, that’s just fine too.   We all enjoyed the gratin, a delicious way to enjoy one of the final offerings of the fall garden.

DSC_0029_edited-1
Lacinato kale in the fall garden.

Creamy Kale Gratin

Serves 10

Ingredients

  • 20 cups Russian or Lacinato kale, stems removed and roughly chopped
  • 1 loaf sourdough bread, cut into 1/2 inch slices
  • 6 T butter, and additional butter for the baking dish
  • 1/2c shallots, sliced
  • 1t red pepper flakes
  • 1/4c all purpose flour
  • 1 1/2c milk
  • 1 1/2c heavy cream
  • 8oz grated gruyere cheese
  • 8oz grated sharp white cheddar cheese
  • 1/2c crème fraiche
  • 1/2c Parmigiano Reggiano, freshly grated
  • 1/2t freshly grated nutmeg

Directions

  1. Preheat oven to 400°F
  2. Preheat a large sauté pan over medium high heat. Add 2 tablespoons butter and a drizzle of olive oil. When the butter has melted, add the shallots, salt, pepper and red pepper flakes. Sauté until translucent, about 4 minutes. Add the kale and season with salt and pepper. Sauté until wilted about 4 minutes. Set aside.
  3. Meanwhile, in a separate heavy bottomed pot (think Le Creuset) , melt 4 tablespoons butter. Add flour and stir to combine. Cook the flour mixture for 2 minutes, stirring continuously. Slowly pour in the milk and cream and whisk to combine. Continue to cook,, stirring continuously with a wooden spoon, until the béchamel sauce coats the back of a wooden spoon (about 5 minutes). Remove from the heat. Add in the cheeses and whisk until smooth. Season with freshly grated nutmeg, salt and pepper. Stir in the reserved kale mixture.
  4. Butter a large gratin baking dish. Lay an even layer of the read slices in the bottom of the gratin dish. Pour the creamy kale over the bread. Top the casserole with the remaining bread slices, placing them tightly together. Season the bread with salt and pepper and drizzle with olive oil. Place in the oven to bake for 30 minutes, until the topping is golden brown. Remove from the oven and allow to cool for 5 to 10 minutes before serving.
DSC_0035a
A rough chop is all you need for this dish.
DSC_0037a
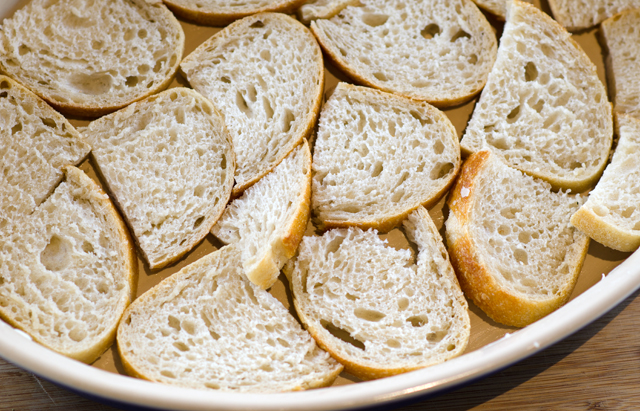
A layer of bread slices are placed at the bottom of the dish.
DSC_0039_edited-1
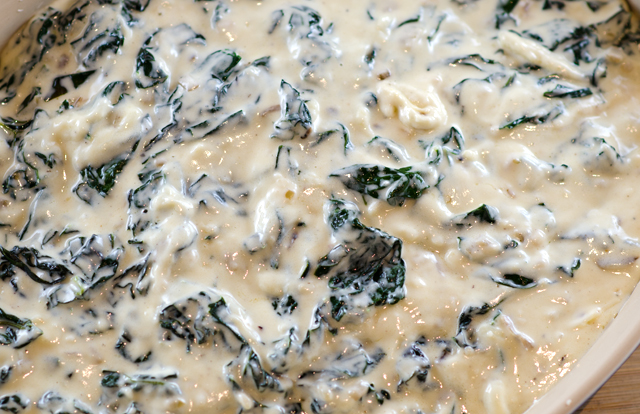
Next, a layer of creamy, cheesy kale.
DSC_0062a
Then another layer of sourdough bread rounds.
DSC_0070a
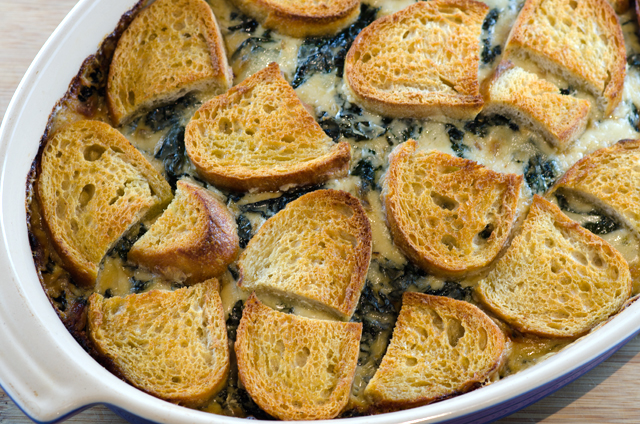
Brush sourdough lightly with olive oil, sprinkle with salt and freshly ground pepper and bake. Delicious!


November 16, 2014 NuMex Suave Orange Peppers

DSC_9452aA warm early fall, plant cages and a drip irrigation system all contributed to a bumper crop of sweet and hot peppers this season. One of the most interesting varieties we grew was the Nu Mex Suave Orange.  In appearance, this pepper closely resembles a habenaro. If you are not familiar with habenaros, they are one of the hottest varieties grown. Pepper heat is rated on the Scoville scale. For example, jalapenos are around 25,000 units, hot enough to satisfy most palates. The red Savina habenaro is 577,000 Scoville units, a bit too hot for all but the most dedicated pepperheads to enjoy.

So why was there a need to breed a mild habenaro? In addition to their heat, habenaros have a unique flavor that most people couldn’t taste because they couldn’t get past the scorching heat.

This is where the developers of new pepper breeds came in. With seed donated from a chile aficionado from Texas, and many seeding trials, the varieties, Nu Mex Suave Red and Orange pepper were originated.  Nu Mex is the name for products created at the agricultural experimentation station at New Mexico State University at Las Cruces and suave, meaning mellow or smooth, emphasizes the mild nature of the chile. Nu Mex Suaves look like a cross between a habenaro and a Scotch bonnet, another hot chili, used in Jamaican jerk sauces and salsa.

DSC_9455a

The fruits are about 2 inches in size, plump, wrinkled and bright orange yellow in color.  Suaves have a citrusy flavor with an orange lemony overtone. The heat is felt in the back of the mouth and throat as opposed to a jalapeno where you will experience the heat on your tongue and lips.

Their wrinkled appearance and thin waxy skin make them a poor candidate for roasting. I used them in salads and had my own experiment with some mini stuffed peppers. I also froze several bags  and look forward to the mild heat and citrusy flavor they will add to soups, stews and other dishes.

DSC_9483a

November 11, 2014 Puerto Rican Coleslaw

DSC_9489aA flavorful salad that’s a healthier alternative to mayonnaise based slaws. Crispy cabbage, celery and radishes are combined with sweet Sungold tomatoes in this very easy to make dish. Why is it considered Puerto Rican? Couldn’t find a definitive answer for that, but the addition of some sliced hearts of palm would give it a real Caribbean flair. Serve with a grilled steak or roast chicken, the leftovers keep for several days, that is, if you can keep it that long.

Puerto Rican Coleslaw

Makes about six servings

Ingredients

  • 6-8 c finely chopped green cabbage
  • 1 c diced small tomatoes
  • ½ c chopped celery, if the stalks are large, cut in half lengthwise first
  • 1/2c chopped celery leaves
  • 6-7 radishes, cut root and stem off first, then cut into half moon slices
  • ¼ c sliced green onion
  • 2 T apple cider vinegar
  • 1 t fresh lime juice
  • ½ t kosher salt, or more to taste
  • ¼  to 1/2t hot pepper sauce, I used sriracha sauce
  • 3T grapeseed or canola oil

Directions

  1. Chop up the cabbage, tomatoes and celery leaves, and slice celery, radishes and green onions, and toss into a large bowl. You can make this part ahead, place it in a container with a lid and pop it in the fridge until you’re ready to make the salad.
  2. In a small bowl, whisk together apple cider vinegar, lime juice, salt, hot sauce and oil. Taste to see if you want to add more hot sauce.
  3. Toss salad with the dressing. You can make this salad ahead and store it in the fridge for a few hours before you’re ready to serve.

October 25, 2014 Cauliflower Salad

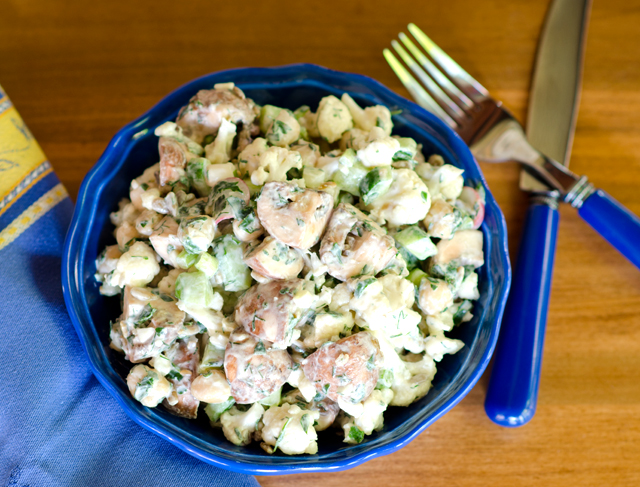
DSC_9433a“Gifted” with another box of Brassicas this week, I was looking for a way to use cauliflower in a fall salad. A new cookbook, Bar Tartine : Techniques and Recipes, gave me the salad I was looking for.

Opened in 2005, Bar Tartine, located in the Mission District of San Francisco is an offshoot of the highly praised San Francisco bakery, Tartine. In addition to doing their own curing, preserving and in-house fermenting, the food draws influences from countries as diverse as Norway, Japan and Hungary.

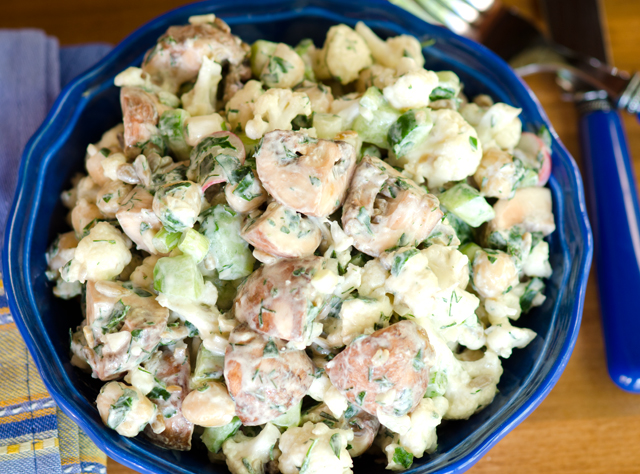
The cauliflower is broken down into tiny florets, save the rest to make cauliflower “mashed potatoes”. In a bowl with the yogurt dressing, combine the florets with cucumbers, chickpeas and mushrooms. Our garden provided me with the radishes and serrano peppers needed for this salad. I was hesitant to use the two serranos as suggested, ours get quite hot so I went with just one. The yogurt dressing tamed the chiles heat quite a bit.
Resist the urge to roast or blanch the cauliflower before adding it to the salad, if you normally dislike it raw.  Marinating small florets in the dressing softens them up considerably without making them mushy. The yogurt dressing is especially good and would work well with other salad combinations.

DSC_9387a
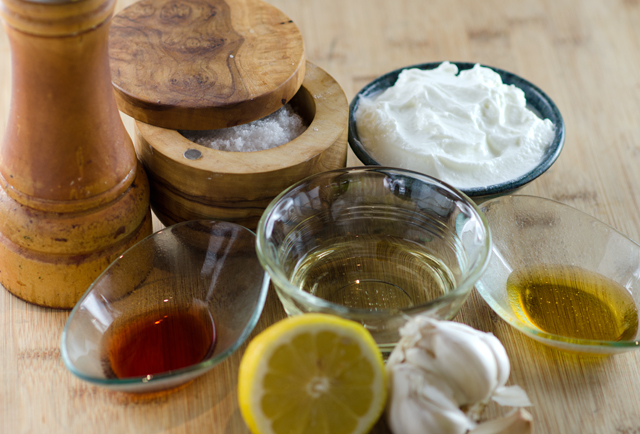
Assembled ingredients for the yogurt dressing.


Bar Tartine Cauliflower Salad

Serves 6

Ingredients

For the dressing

  • 1 c Greek style yogurt, regular or low fat
  • 5T sunflower oil
  • 2 cloves of garlic, minced
  • 2T freshly squeezed lemon juice
  • 1T red wine vinegar
  • 1T honey
  • 1 1/2t fine grain sea salt
  • Freshly ground black pepper

Directions for the dressing

  1. In a bowl large enough to hold all the salad components, whisk together the yogurt, sunflower oil, garlic, lemon juice, vinegar, honey, salt and pepper to taste. If not using immediately, store dressing in an airtight container. Dressing can be made several days ahead.

Ingredients for the salad

  • 6-8 c cauliflower, trimmed into tiny florets
  • 2 medium cucumbers, peeled, seeded if necessary, cut into small dice
  • 4-5 scallions, cut into 1/4″ rounds
  • 1c cooked chickpeas, fresh is best but rinsed well and drained thoroughy if canned.
  • 8oz mushrooms, button or shiitake, quartered
  • 6-8 radishes, ends trimmed and thinly sliced
  • 1 or 2 green serrano chiles, stemmed, seeded and thinly sliced
  • 1/4c sunflower seeds, lightly toasted
  • 1/4c each chopped fresh flat leafed parsley, dill and tarragon

Directions for the salad

  1. Add the cauliflower, cucumbers, scallions, chickpeas, mushrooms, radishes, chilies, sunflower seeds and herbs to the bowl toss lightly and let stand for 15 minutes.
  2. During this time the vegetables will begin to exude some liquid the cauliflower will soften. Toss again and transfer salad to a bowl. Leftovers should keep for several days, if you can keep them around that long!

DSC_9428a

October 9, 2014 Broccoli Soup

DSC_9270aOne day last week I received several phone calls and a text message from my husband at his office in a very short period of time. I wasn’t sure what was up since I had just been there, so I had to find out what was so urgent. “Are you near by? he asked, “A patient came in and brought me some of the biggest broccoli, cauliflower and cabbage I’ve ever seen.”  I wasn’t, nearby that is, so he planned to bring them home that evening.

When he came in that evening, something was missing, the vegetables. Joe left them in the computer room on his way out and since computer rooms can get a little warm, we promptly hopped back into the car and back to the office to rescue the Brassicas and the computer room from smelling like broccoli, cauliflower and cabbage!

With the advent of autumn and cooler temperatures  a new harvest of Brassicas are arriving at local farmers markets.Brassicas are a genus of plant in the mustard family. They are less frequently referred to these days, as cruciferous vegetables, giving note to the crosslike shape of plant’s flowers. The usual suspects we think of most are broccoli, cauliflower and brussels sprouts but they also include all types of radishes, turnips and even watercress. Brassicas are counted as some of the healthiest vegetables around containing high amounts of vitamin A caretonoids, vitamin C, folic acid and fiber.

With these huge veggies staring me down every time I opened the refrigerator door, the obvious question came, how was I going to use them? Cauliflower was an easy start, I like to toss the florets with olive oil, kosher salt and Aleppo and chipotle pepper. Roasted until it was a warm golden brown, we devoured the whole tray, before we even sat down to dinner one night.

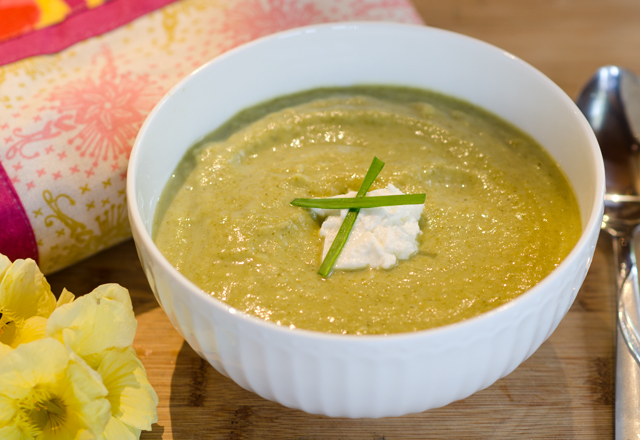
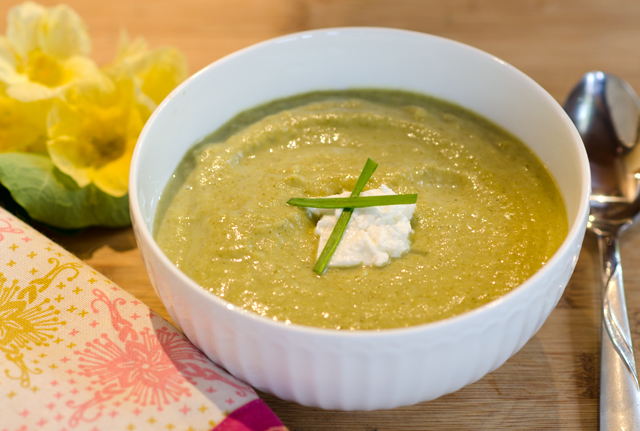
Broccoli soup has always been a cooler weather favorite of ours. Previous recipes I have made were heavy in the cream, butter and cheese department. My rich broccoli cheddar soup was a yearly birthday request from one of my co workers many years ago. This time I wanted to try something a little lighter. The recipe I chose this time showcases the sweet and flavorful broccoli, accented by just a little bit of fresh herbs. Don’t forget to use the broccoli stalks as well, especially when you have very fresh broccoli, they have as much flavor as the florets. Half and half is optional, I thought the soup had a creamy texture without it.
This is a healthy soothing soup that would pair well with a salad for lunch but is elegant enough to serve as a first course when you are entertaining. Now it’s back to the kitchen for me to find creative ways to use cabbage!

DSC_9202a
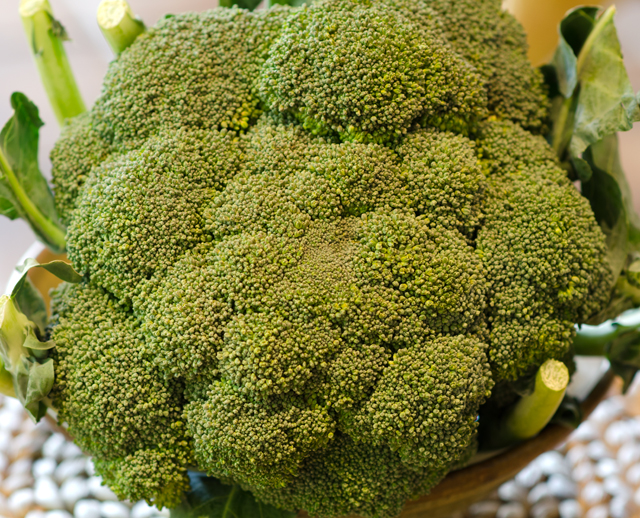
A very healthy head of broccoli.
DSC_9211a
Ingredients, ready to go.


Broccoli Soup

Serves four

Ingredients

  • 1T butter
  • 1T extra virgin olive oil
  • 1 medium onion, chopped
  • 2 cloves garlic, chopped
  • 1 stalk celery chopped
  • 1t each of fresh parsley and thyme
  • 8c chopped broccoli (use both the stems and florets)
  • 6c reduced sodium chicken broth or vegetable broth
  • 1/2c half and half (optional)
  • Freshly ground pepper and kosher salt to taste

Directions

  1. Heat butter and oil in a Dutch oven over medium high heat until the butter melts. Add onion and celery; cook, stirring occasionally, until softened, 4 to 6 minutes.
  2. Add garlic, thyme and parsley; cook, stirring, until fragrant, about 30 seconds.
  3. Stir in broccoli. Add broth; bring to simmer over high heat and reduce heat to maintain the simmer. Cook until the broccoli is very tender, about 8 minutes.
  4. Puree the soup in batches in a blender until smooth. Season to taste with salt and pepper. Stir in half and half if desired.

DSC_9269a

October 2, 2014 Imam Bayildi

DSC_9143aImam bayildi translates roughly,”the priest fainted”. But why, was it because the eggplant dish was so delicious, did he eat too much at one sitting or was he just in shock at the amount of expensive olive oil used to make it?

One account in Turkish lore tells the story of an imam or priest, well known for his love of good food. One day the Imam announced his engagement to the daughter of a wealthy olive oil merchant. Part of her dowry included huge casks of olive oil, the size of a man, twelve in all. After the couple were married, the new bride proved to be an amazing cook. One dish in particular, eggplant cooked in olive oil, proved to be the imam’s favorite. In fact he requested the exact same dish twelve nights in a row. But the thirteenth night his favorite dish was missing from his evening meal. When asked why she didn’t make it, she told him the enormous supply from her dowry was used up. The news so shocked him that…..the priest fainted.

No matter what the story, Imam bayildi is a very well known Turkish meze, not really an appetizer but comparable to the small plate tapas dishes of Spain. Traditionally the dish is an eggplant cut down the middle, stuffed with garlic, onion, tomatoes and aromatic spices and simmered in olive oil to cover.

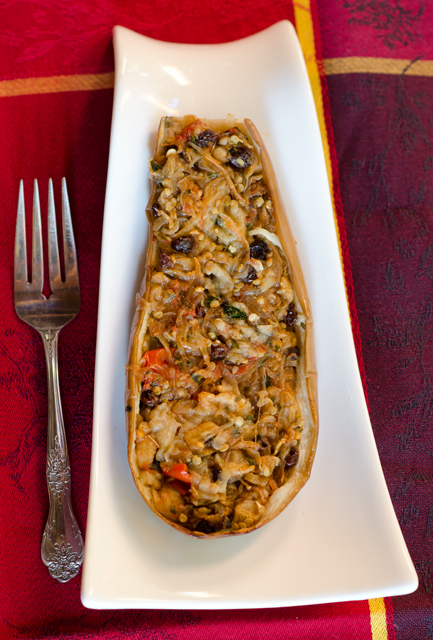
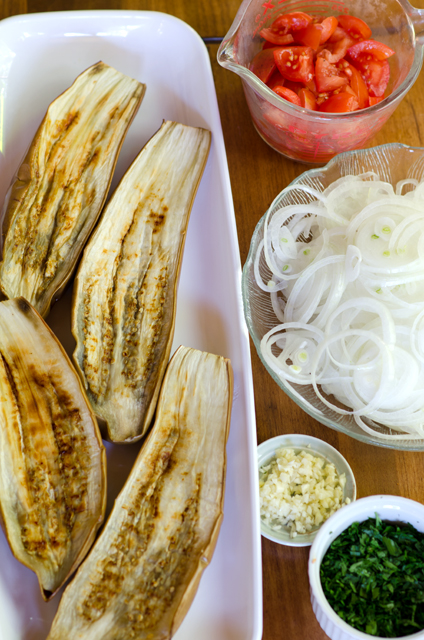
My goal in making this recipe was to cut back on the copious amount of olive oil but still make a flavorful dish. Rather than cook the eggplant whole in olive oil, I cut the eggplants in half, brushed the cut side with olive oil and baked it until the flesh was easy to scoop out. I combined the chopped eggplant with sauteed onion, garlic and tomato and currants. The addition of the aromatic spices, cinnamon and allspice will make your kitchen smell heavenly. I could also see the addition of feta cheese, pine nuts, even ground beef or the more traditional lamb. Serve warm or at room temperature along with a green salad for a delicious luncheon entree.

Imam Bayildi or Baked Stuffed Eggplant to Make a Priest Faint

Serves four

Ingredients

  • 4 medium eggplants
  • 6 T extra virgin olive oil
  • 2 medium onion, very thinly sliced (I used a mandoline)
  • 4 cloves garlic, finely chopped
  • 1 1/4c chopped tomatoes
  • 5T chopped flat leafed parsley
  • 1/2t dried oregano
  • 1/4c currants
  • 1/4t ground allspice
  • 1/4t ground cinnamon
  • 2T fresh lemon juice
  • Kosher salt and freshly ground pepper

Directions

  1. Preheat oven to 375F. Cut the eggplants in half lengthwise. Cut several lengthwise slits in the eggplant halves. Brush with olive oil and sprinkle lightly with salt. Bake, cut side down for about 1/2hr, until the flesh is soft and easy to scoop out. Keep oven on at same temperature.
  2. While eggplant is cooking, heat 2 tablespoons of olive oil in a large non-stick frying pan. Cook the onions over low heat, stirring occasionally, until very soft, 20 minutes. Add the chopped garlic and cook for an additional 5 minutes. Add the tomatoes, 4 tablespoons of the parsley and the oregano and simmer until almost dry, about another 5 minutes. Add the currants, allspice and cinnamon. Season to taste with salt and pepper. Set this mixture aside.
  3. Scoop out the eggplant flesh with a spoon, leaving the skin and 1/4 inch of the lining intact. Finely chop the pulp and add it to the onion and tomato mixture. Mix well and season with salt and pepper.
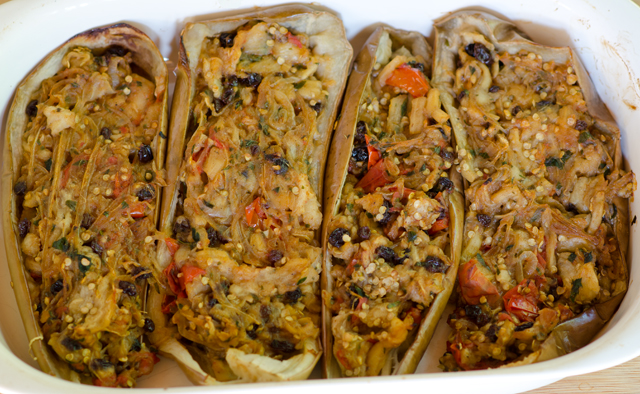
  4. Place the eggplant shells in a baking dish just large enough to hold them. Fill them with the tomato onion mixture. Sprinkle with fresh lemon juice. Cover and bake the eggplants for 15 minutes. Uncover and bake an additional 10 minutes.
  5. Serve warm or cool at room temperature.
DSC_9126a
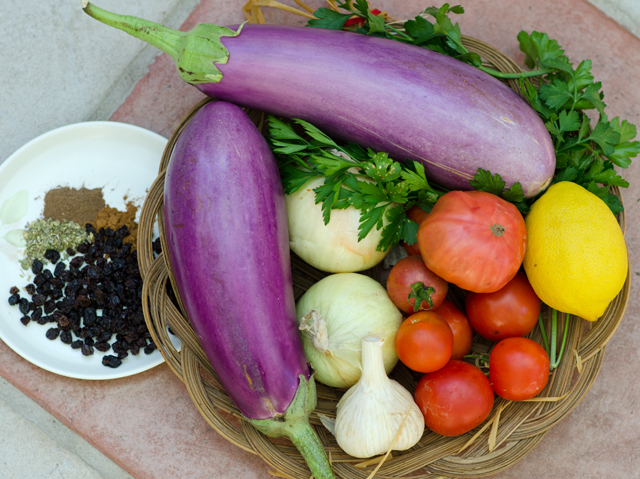
Ingredients, ready to go!
DSC_9130a
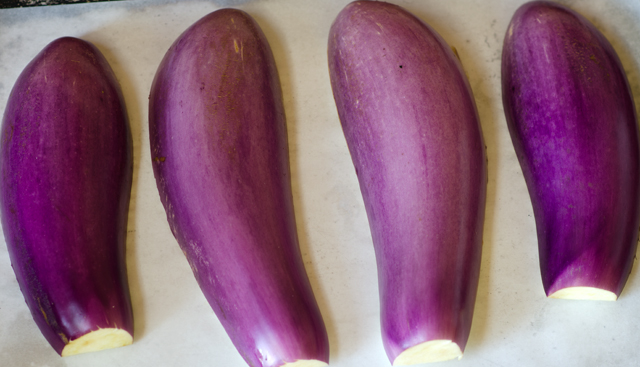
Cut the eggplants in half, brush with olive oil and place cut side down on a parchment lined baking sheet. This variety is an “Italian pink” called Dancer.

DSC_9133a

DSC_9135a
The shells are now filled with the eggplant, onion, tomato and aromatic spice mixture and baked.

September 25, 2014 Eggplant Involtini

DSC_9067aWith lots of caponata, grilled eggplant, ratatouille, and a double batch of eggplant parmesan under my belt, I was looking for another way to enjoy the bounty of our eggplants this season. It came in the July/August issue of Cooks Illustrated magazine, eggplant involtini.

After all these years (30+) I still look forward pouring over the latest issues of the cooking magazines I subscribe to. Since the magazines are a little in advance of what is ready to harvest from the garden, I put a yellow sticky note on the seasonal recipes I would like to try. Eggplant involtini was in the July/August issue that arrived in June when our eggplants didn’t even have their first flowers, so I have been waiting several months to try this recipe.

Involtini are neat little bundles of stuffed meat, fish or vegetables. Fillings can be as varied as your imagination. Eggplant works especially well as a wrapper for involtini. Use your largest, broadest eggplants to make the planks. Lop off the stem and hold the eggplant upright. With a very sharp knife, make approximately 1/2″ thick planks. For the first and last pieces you will need to trim off the rounded outer edge. I found that a vegetable peeler handled the problem nicely.

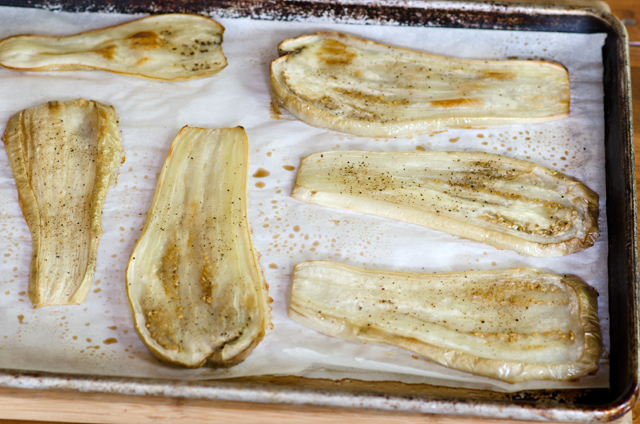
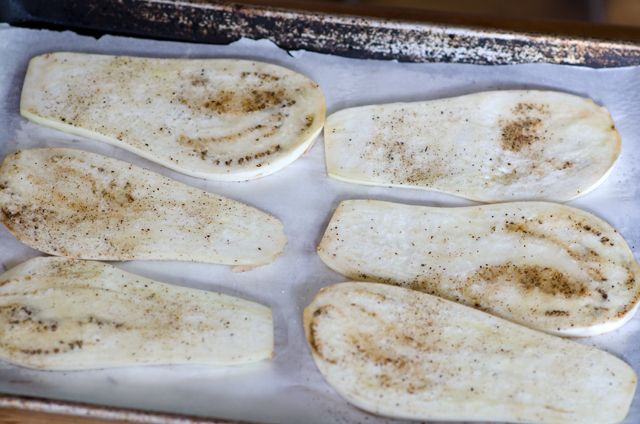
Instead of frying, which is called for in many involtini recipes, the slices are brushed lightly on both sides with olive oil, and seasoned with salt and pepper and baked. This makes the slices pliable enough to roll without falling apart.

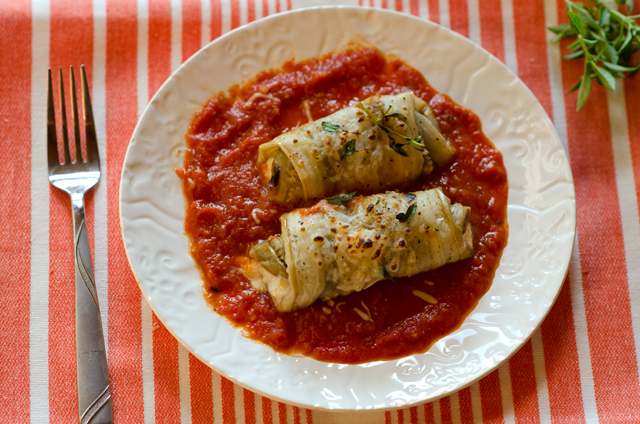
Once the slices have cooled a bit, fill with the fatter edge closest to you and roll up. Ricotta, though it doesn’t have much flavor of it’s own is a good binder for the more flavorful ingredients, pecorino romano and basil. The addition of fresh lemon juice brightens the flavors. A generous tablespoon of filling is enough for each slice. The original recipe called for some bread crumbs in the filling to bind it a little, I didn’t include this step and thought my filling held up nicely.

While you are cooking the eggplant there’s time to make a very basic sauce. Canned whole tomatoes, garlic, oregano, kosher salt and pepper are all you need. I always use my whole roasted tomatoes from the garden that I freeze for months without tomatoes. We had a bumper crop this year so I will be making a lot of chili, lasagna, stuffed peppers over the winter months. As for the canned varieties, in a taste test done by Cooks Illustrated, Muir Glen Organic Whole Tomatoes was the winner. Muir Glen is about a dollar more per can than the more familiar runner up, Hunts.

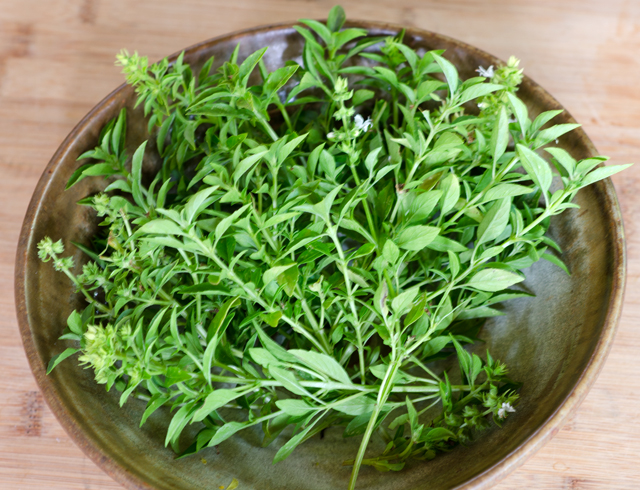
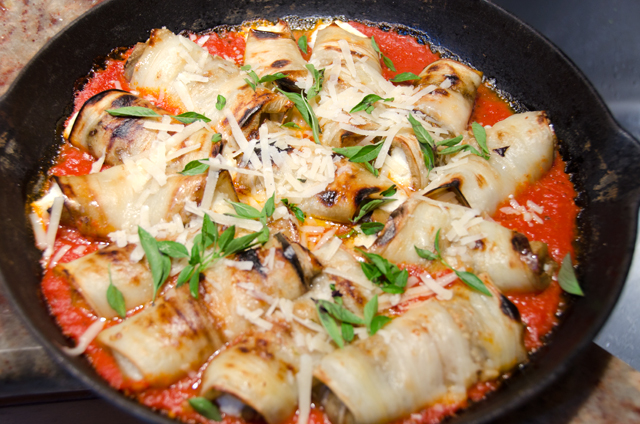
The involtini rolls, are added to the thickened sauce and brought to a simmer. Once the sauce is warmed, additional cheese is sprinkled on top. The rolls are browned and the cheese is melted in the broiler. Finish off with a sprinkle of basil, mini basil leaves worked well here.

Not the quickest or easiest preparation, but both the rolls and the sauce can be made in advance and assembled right before serving. An impressive dish good enough for company.

Eggplant Involtini

Serves 4 to 6

Ingredients

  • 2 large eggplants, shorter wider eggplants are best (1 1/2 pounds each), if skin is thick, peel, I did not peel mine
  • 6T olive oil
  • Kosher salt and pepper
  • 2 cloves garlic, finely minced
  • 1/4t dried oregano
  • Pinch red pepper flakes
  • 1 28oz canned whole peeled tomatoes drained with juice reserved, chopped coarse-I used my garden roasted tomatoes
  • 1c  whole-milk or part skim ricotta cheese
  • 3/4c hard Italian grating cheese like Gran Padano or Pecorino Romano
  • 1/4c plus 1 tablespoon chopped fresh basil or torn mini basil
  • 1T fresh lemon juice

Directions

  1. Slice each eggplant lengthwise into 1/2-inch-thick planks (you should have 12 planks). Trim rounded surface from each end piece so it lies flat. I found that using a vegetable peeler made this easier. Adjust 1 oven rack to lower-middle position and second rack 8 inches from broiler element. Heat oven to 375°F.
  2. Line 2 rimmed baking sheets with parchment paper and spray generously with vegetable oil spray.
  3. Arrange eggplant slices in single layer on prepared sheets. Lightly brush 1 side of eggplant slices with oil and sprinkle with kosher salt and pepper. Turn slices over and repeat brushing and seasoning.
  4. Bake until tender and lightly browned, 30 to 35 minutes, switching and rotating sheets halfway through baking. This process took about 10 minutes less in my convection oven.  Let cool for 5 minutes. Using thin spatula, flip each slice over. Heat broiler.
  5. While the eggplant is cooking, heat remaining 1 tablespoon oil in 12-inch broiler-safe skillet, over medium-low heat until just shimmering. Add garlic, oregano, pepper flakes, and 1/2 teaspoon salt and cook, stirring occasionally, until fragrant, about 30 seconds.
  6. Stir in tomatoes and their juice. Increase heat to high and bring to simmer. Reduce heat to medium-low and simmer until thickened, about 15 minutes. Cover and set aside.
  7. Stir together ricotta, 1/2 cup cheese, 1/4 cup basil, lemon juice, and 1/2 teaspoon salt in medium bowl.
  8. With widest ends of eggplant slices facing you, evenly distribute ricotta mixture on bottom third of each slice. Gently roll up each eggplant slice and place seam side down in tomato sauce.
  9. Bring sauce to simmer over medium heat. Simmer for 5 minutes. Transfer skillet to oven and broil until eggplant is well browned and cheese is heated through, 5 to 10 minutes. Sprinkle with remaining 1/4 cup Pecorino and let stand for 5 minutes. Sprinkle with remaining 1 tablespoon basil and serve.
DSC_8719a
The variety I used for this dish was Clara, a pure white Italian style eggplant.
DSC_9051a
Eggplant slices are brushed with olive oil and seasoned lightly with salt and pepper.
DSC_9054a
After baking the slices are soft enough to roll but don’t fall apart.
DSC_9055a
I used roughly torn mini basil in my filling.
DSC_9059a
The very simple filling made of ricotta cheese, Pecorino Romano, fresh lemon juice and mini basil.
DSC_9060a
The eggplant slices are easy to roll up. Place them seam side down in the warmed sauce.

DSC_8993aDSC_9079a

September 10, 2014 Grilled Asian Eggplant Salad

DSC_8668a

It’s a great time of year to try out some new eggplant recipes. Whether from the farmers market, your local CSA or your own garden, freshly harvested eggplants are at their best. Our garden has produced an amazing array of eggplants this summer. Bright fuchsia Dancer, slender dark violet Orient Express, pure white Clara, beautifully variegated Nubia, all the varieties we have harvested this year have thin skin and minimal seeds.
What we most often consider to be Asian eggplants are the long slim tapered varieties.   Actually Asian eggplants, whether Chinese, Japanese, Thai or Indian can be round or pear shaped, pure white or lime green and as small as an egg as well as the dark purple we are most familiar with.
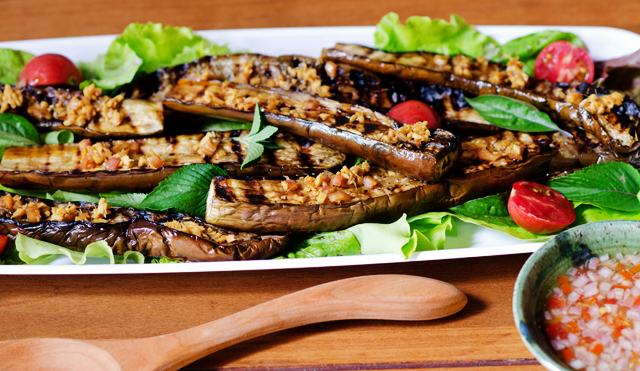
In this Thai-style recipe for a yam or salad, eggplant slices are brushed with oil and grilled. If the weather is inclement or you just don’t have the time to fire up the grill they can be cooked indoors on a ridged grill pan.

Save the seasoning until after the grilling the eggplant. It’s then the creamy flesh will soak up the flavor of the ginger and soy, transforming the once raw bitter slices to something delicious.
Though not necessarily typical of this type of salad, I served the grilled eggplant slices on salad greens. Our lettuces have made their late summer return to the garden and I tossed some assorted greens with a few sweet cherry tomatoes, basil and mint. I used the small spicy leaves of Thai basil and Vietnamese mint that doesn’t overpower the salad. An Asian style vinaigrette combining the traditional combination of hot, sour salty and sweet dresses the greens and enhances the flavor of the grilled eggplant.

DSC_8855a
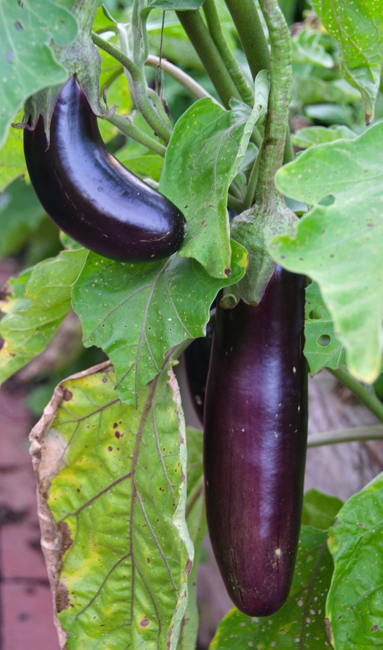
Beautiful dark purple Orient Express eggplant.

Grilled Asian Eggplant Salad

Serves four

Ingredients

  • 1/4 c freshly squeezed lime juice
  • 1/4 c peanut or canola oil
  • 3 T finely minced shallot
  • 1 1/2 T fish sauce
  • 2 t granulated sugar
  • 1 to 2 Thai bird chiles, minced, or 1-1/2 to 2 serrano chiles, seeded, minced
  • Kosher salt and freshly ground black pepper
  • 2 T minced fresh ginger
  • 1-1/2 T soy sauce
  • 1 1/2 lb. long, slender Asian eggplants, trimmed and halved lengthwise
  • 4-5 c baby lettuce leaves
  • 10 to 12 oz. cherry or grape tomatoes, halved (about 2 cups)
  • 1 c  packed fresh basil leaves, Thai, if you have it
  • 1/4 c packed fresh mint leaves, I used Vietnamese mint (very mild)

Directions

  1. Prepare a medium-high gas or charcoal grill fire.  Alternately heat a grill pan over medium high heat.
  2. In a small bowl, whisk 3 Tbs. of the oil with the lime juice, 2 Tbs. of the shallot, the fish sauce, 1 tsp. of the sugar, and the chiles. Season to taste with salt and pepper.
  3. In another small bowl, combine 2 tsp. water with the ginger, soy sauce, the remaining 1 Tbs. shallot, and 1 tsp. sugar.
  4. Arrange the eggplant halves on a rimmed baking sheet, brush both sides with the remaining 1 Tbs. oil, and sprinkle with salt and pepper. Grill the eggplant, covered, until tender, 3 to 5 minutes per side. Alternately grill the eggplant in a grill pan, 3-5 minutes on each side until tender.
  5. Combine the lettuces, tomatoes, basil, and mint in a large bowl. Re whisk the lime dressing and toss just enough into the salad to lightly coat the greens. Season the salad to taste with salt and pepper. Transfer the salad to a platter and arrange the eggplant over the salad. Spoon the ginger mixture over the eggplant, and serve immediately.

DSC_8672a

August 19, 2014 Tzatziki Sauce

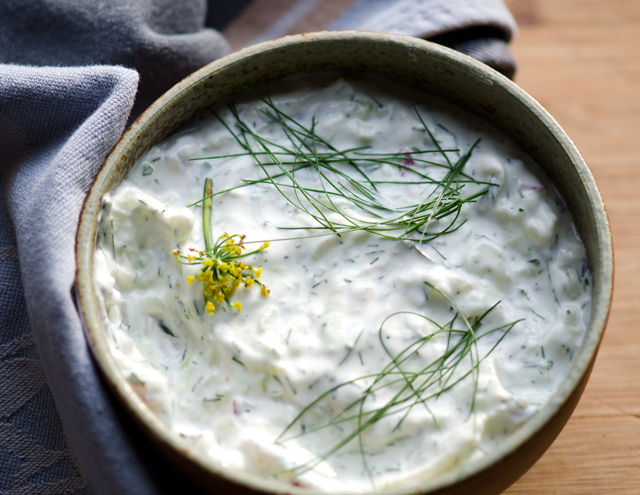
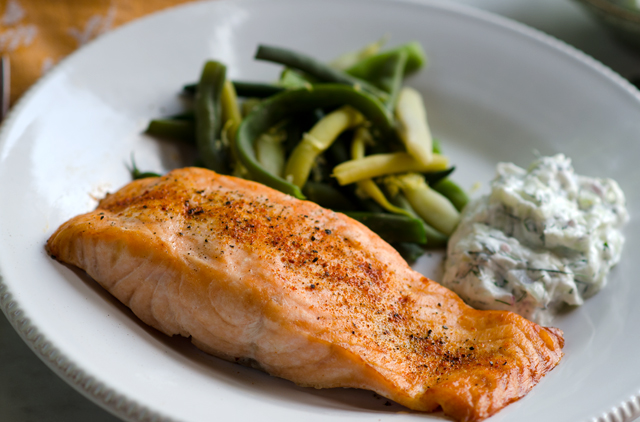
DSC_8546aIt’s a deliciously creamy sauce or dip based on yogurt, cucumbers and dill, and yes the Greeks do have a word for that, tzatziki. Pronounced in English, zat-zee-key, it is a traditional Greek “meze” or something to whet the appetite. I serve it with chicken, fish and vegetables. Tzatziki is also great as a sauce with gyros or wraps.

Until the last several years, you would have needed to drain the yogurt for several hours before proceding with the recipe. With the advent of Greek yogurt, that step is eliminated. “Greek style” yogurt is strained to remove the whey, the watery part. The term “Greek” is not regulated and some yogurts are thickened with cornstarch and milk protein concentrates. Read the label, Greek yogurt should contain only milk and live active cultures. In Greece, sheep’s milk yogurt is traditionally used in tzatziki, I have read that it is sweeter and richer than cow or goat’s milk yogurt. If you are using regular yogurt it needs to be drained in a fine mesh sieve or cheesecloth for about four hours to obtain the thicker texture of Greek yogurt.

Grated cucumber, garlic, dill and sometimes mint are added to the yogurt base. Peel and seed the cucumber before grating. I use a teaspoon to make one long scoop down the middle to eliminate the seeds. Keep the cucumber in halves, they are large enough to shred on a box grater without hurting  your fingers. Put the shredded cucumber in a strainer over a bowl and sprinkle a little salt on it. This will drain out some of the excess liquid. I squeeze out the rest of the liquid by putting the cucumber in a clean cloth dishtowel and wringing it out. Alternately, squeeze the cucumber in your hands. This is an important step to ensure the sauce does not become watery.

The dill and mint should be fresh and if I am adding mint I will wait until right before serving since just picked mint can overwhelm the dish. Tzatziki is a versatile sauce that combines the slightly sour tang of yogurt along with the cool refreshing flavors of cucumber, dill and mint. It’s a great addition to your summer menus.

Tzatziki Sauce

Makes about two cups

Ingredients

  • 1-1/2 c plain whole or 2% milk yogurt, preferably Greek
  • 2 medium cloves garlic, finely chopped
  • 3/4 c peeled, seeded, and grated cucumber
  • 1 T fresh lemon juice
  • 2 t chopped fresh dill
  • 2t finely chopped mint (optional)
  • 2 t extra-virgin olive oil

Directions

  1. Put the cucumber in a colander over a bowl and lightly sprinkle with salt. After a half hour wrap the cucumber in a clean cloth dishtowel and squeeze as much liquid out of it as you can. Alternately, squeeze the liquid out with your hands.
  2. Add the chopped garlic, cucumber, lemon juice, dill, and olive oil to the yogurt mixture. Stir to blend and season to taste with salt. Cover and chill for at least 4 hours before serving.
Make Ahead Tips

The dip can be made up to a day ahead.

DSC_8611a

August 17, 2014 Tomato Gazpacho

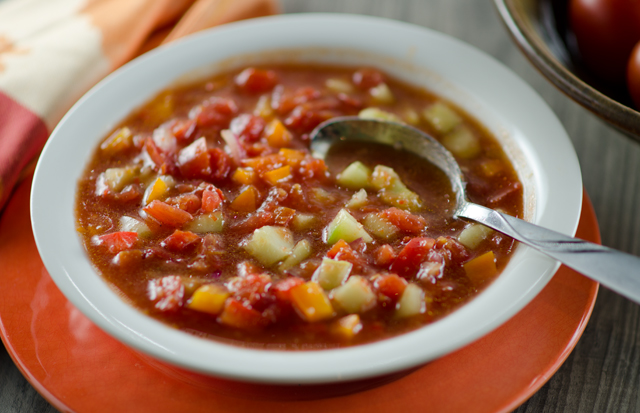
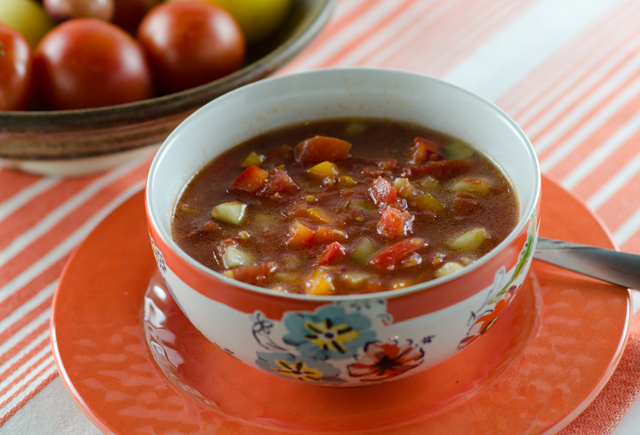
DSC_8572aSummertime in a bowl, liquid salad, just two of the descriptive names for that summer favorite, gazpacho. Our tomatoes are finally starting to ripen along with a healthy crop of cucumbers. I think I read about fifty recipes and finally settled on my own combination of vegetables. I used some purchased tomato juice, but as the tomatoes from the garden become more plentiful, I will use them to make my own juice.
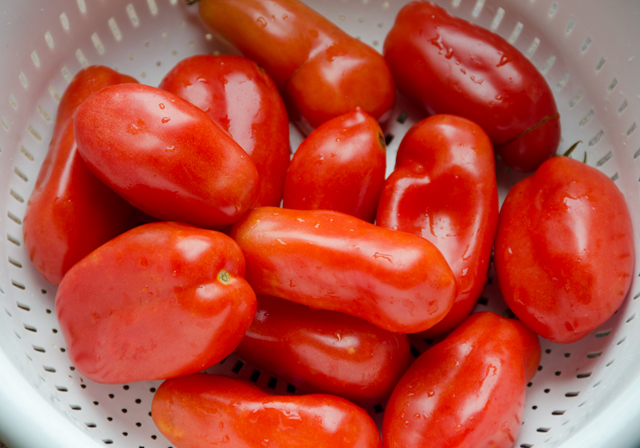
I skipped the traditional stale bread and went very easy on the olive oil. I did use my best Spanish sherry vinegar for this refreshing soup that originated in the Andalusian province of southern Spain. I didn’t blanch, peel or seed any of the vegetables. I did hand chop them for uniformity of size and blended just a little bit of them to enhance the tomato juice base. Flavorful vine ripened tomatoes are key to this recipe. It’s also a good time to use your not so perfect specimens that won’t make it in your tomato salad. The peppers in my gazpacho were purchased, but it won’t be long before I will be picking them from the garden. A jalapeno pepper is nice also to add a little extra heat.
Make gazpacho a day ahead if possible. The flavor only gets better from sitting overnight in the fridge.
Full of sun ripened flavor and packed with nutrients, this low fat chilled vegetable soup is the perfect refreshment for hot summer days.

Tomato Gazpacho

Serves six

Ingredients

  • 3 1/2c plum tomatoes, cored and cut into 1/4 inch dice
  • 1/2c finely chopped red onion, soaked in ice water for 15 minutes and drained
  • 2c cucumbers, peeled, seeded and cut into 1/4 inch dice
  • 1 1/2c bell pepper cut into 1/4 inch dice
  • 1 small clove of garlic, chopped finely
  • 2c tomato juice
  • 1/4c sherry vinegar
  • 2T flavorful extra virgin olive oil
  • 3-4 dashes of green Tabasco sauce
  • 1T  Worcestershire sauce
  • Kosher salt and fresh ground pepper

Directions

  1. Place tomatoes, onion, cucumber, pepper and garlic in a bowl
  2. Add the tomato juice, vinegar, olive oil, Tabasco and Worcestertshire sauce. Season with kosher salt and freshly ground pepper.
  3. Transfer two cups of the mixture to a blender or food processor and pulse the machine on and off to coarsely puree the contents. Return the pureed mixture to the bowl and stir to combine. Refrigerate for at least six hours or preferably overnight before serving.
DSC_8532a
Vine ripened tomatoes either from the farmers market or your own garden make this a special treat.
DSC_8536a
Ingredients, chopped and ready to go.

DSC_8564a