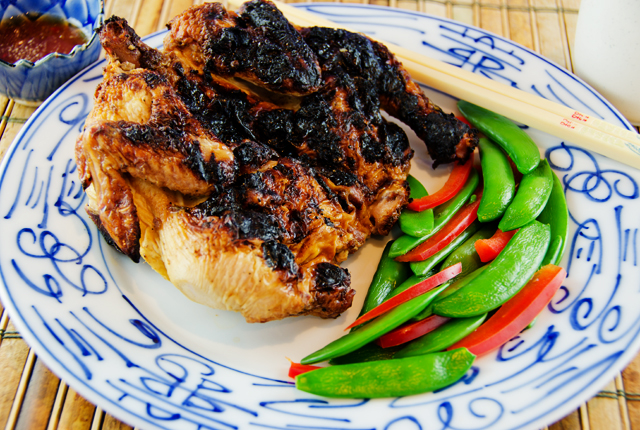
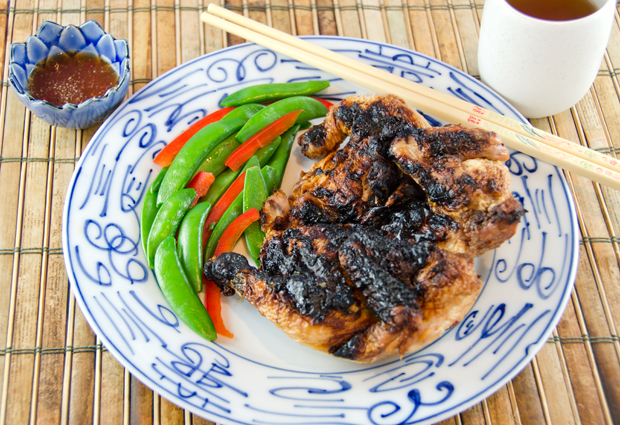
April 14, 2013 Vietnamese Grilled Five-Spice Cornish Game hens

DSC_9710a

My first experience with Vietnamese food was in the late eighties when I accompanied my husband to a conference in Houston Texas. Using what is now an almost extinct method, (the phone book) I was fortunate to contact a dear friend from college, Hue, who was living in the area.  In the BF (before Facebook) years it was good to reconnect and catch up in person after almost ten years.

Hue’s parents served in the Peace Corps and part of her childhood and teenage years were spent in Southeast Asia and Africa. That’s where she developed a palate for what were then considered exotic cuisines. Hue had settled in the Houston area and was teaching elementary school with a predominately Spanish speaking population.  I don’t even think she spoke Spanish in college, but that’s another story. She knew we appreciated good food and took us to one of her favorite restaurants. They served a cuisine that she thought we were probably not familiar with, Vietnamese. I was only beginning to explore Thai food at that time, I wasn’t familiar with Vietnamese cuisine at all. As it is with our friend from China, you get special attention from the restaurant staff when you can order your meal in their language. Hue spoke Vietnamese (of course) and we enjoyed a wonderful family style meal with dishes and flavors that I had never experienced before.

Before we left Houston, Hue gave me a spiral bound cookbook, “Happy in My Stomach”. The phrase “happy in my stomach” is the Vietnamese equivalent of the American expression of a “happy heart”. The book, written in 1975 was a compilation of recipes and customs contributed by Vietnamese emigres and compiled by YMCA refugee services at the Eglin Refugee Reception Center. The intention of the book was to build a bridge through cooking between the Vietnamese and American cultures. I would imagine it was the first English language Vietnamese cookbook.  I added it to my growing cookbook collection, but didn’t really use it .

Fast forward ten years and there were now a growing number of Vietnamese restaurants in our area and many new cookbooks written that were devoted to Vietnamese cooking. We were also growing some Vietnamese herbs like rau ram in our garden.To learn more about Vietnamese cooking, I decided to cook my way through some of the more popular Vietnamese recipes I had accumulated. I tried my hand at Pho (phuh to say it correctly), both chicken and beef, rice paper rolls, and the Vietnamese “hoagie” banh mi, making my own roast pork, pate and rolls.

In addition to cookbooks and magazines, I have notebooks with recipes I have collected from other sources. Some I might try once, others become a regular in my cooking repertoire.   The recipe for Barbecued Vietnamese five-spice Cornish game hens is a recipe I first tried over five years ago and one we still enjoy to this day. It’s a variation of Ga Roti or Vietnamese rotisserie chicken. The birds marinate overnight in a flavorful mixture of herbs and spices. Grilling the hens gets the skin nice and crispy and the meat stays juicy. The game hen is an individual portion, whether you eat it all, or save half for lunch the next day. Cornish game hens are not actually a game bird but a breed developed in the fifties that produced a larger, more broad breasted chicken at a younger age. They are not very expensive but the cost conscious could substitute chicken thighs.  The dipping sauce, nuoc cham really makes the dish special. The flavor combination of sweet, sour, salty and spicy adds another dimension of flavor to this dish. Use your fingers to dig in and appreciate every succulent bite.

Vietnamese Grilled Five Spice Cornish Game Hens

from SFGate Top Recipes of 1990

Serves four

Ingredients

For the hen preparation

  • 4 Cornish Game Hens
  • 4 garlic cloves
  • 2 shallots, or 3 green onions (white part only)
  • 1 1/4T sugar
  • 1/2t salt
  • 1/4t freshly ground black pepper
  • 1t five-spice powder
  • 1 1/2T Vietnamese fish sauce (nuoc mam)
  • 1 1/2T light soy sauce
  • 1 1/2T dry sherry

Directions

  1. Halve the hens through the breast. This is easy to do with kitchen shears or a very sharp knife. Flatten the breast with the palm of your hand.
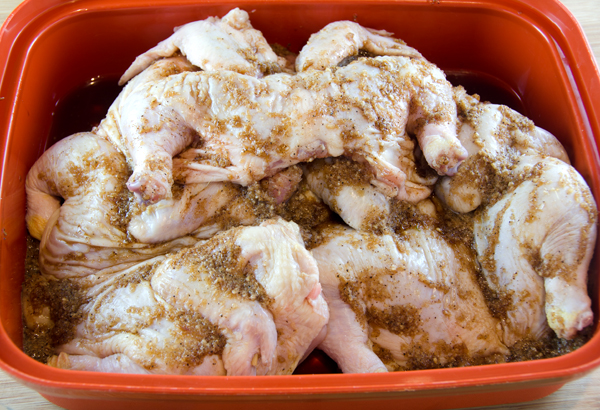
  2. In a food processor, mince the garlic, shallots (or green onion) and sugar.  Add the salt, pepper, five spice powder, fish sauce, soy sauce and sherry. Pulse to combine ingredients thoroughly. Pour the mixture over the hens. Cover and refrigerate for at least 2 hours or overnight.
  3. Prepare a fire in a barbecue. Let the coals burn down to medium-hot. Set the hens skin side down on the rack and grill over medium hot coals for 15 minutes. Turn and grill for 15 minutes longer, or until they are thoroughly cooked and the skin is crisp and browned. Serve with nuoc cham dipping sauce.

Nuoc Cham Dipping Sauce

Makes 3/4 cup

Ingredients

  • 2 garlic cloves
  • 1 or 2 chile peppers, I used serrano
  • 1T sugar
  • 3T fish sauce
  • 2 1/2T fresh lime juice
  • 4T water

Directions

  1. In a food processor, combine garlic, chile pepper and sugar into a paste. Transfer the mixture to a bowl and add the fish sauce, lime juice and water. Stir to blend. Let the mixture sit for at least 15 minutes until ready to serve. Serve in dipping bowls.
DSC_9708a
The hens benefit from an overnight marinade in soy and other seasonings.
DSC_9727a
Time to dig in!


DSC_0103-copy
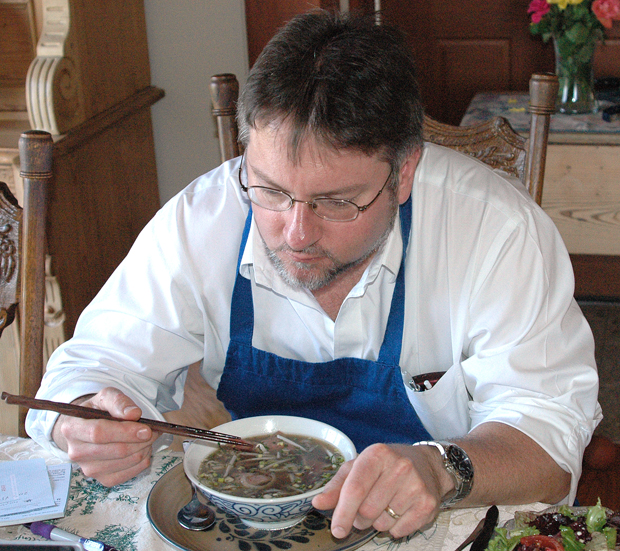
Enjoying a bowl of pho in 2008.
DSC_0156a
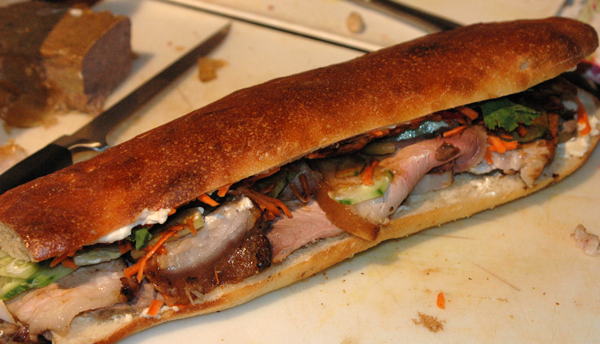
My homemade banh mi, the Vietnamese version of a hoagie.

DSC_9790a

March 24, 2013 Poached Chicken with Salsa Rustica

DSC_9310a

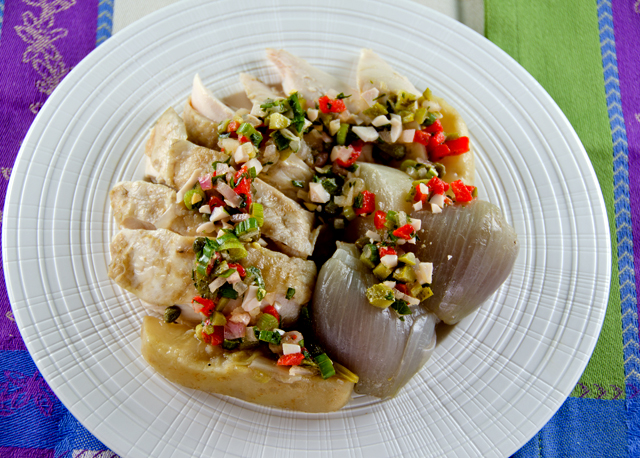
Chicken is a regular part of our weekly dinner rotation, whether it’s boneless breasts in a pesto sauce, chicken thighs and legs in a fragrant blend of Moroccan spices or crispy skinned roast chicken redolent of garlic and lemon.  I turn to poached chicken when I am making a broth that is going to be made into chicken stock or a chicken soup.  Recently, one too many dinners out, vacation and parties called for a few weeks of eating light. So I was interested to see an article in the latest issue of Fine Cooking, “Beyond Roast Chicken. Three new ways to cook a whole bird from three creative chefs.”

That’s what attracted me to the recipe that Lidia Bastianich offered in this article, poached chicken with salsa rustica. Lidia is a master of Italian cooking, a restaurateur, and author of many cookbooks. Her television programs on PBS are not only informative but entertaining as well. So I decided to follow Lidia’s lead and made a poached chicken for dinner.

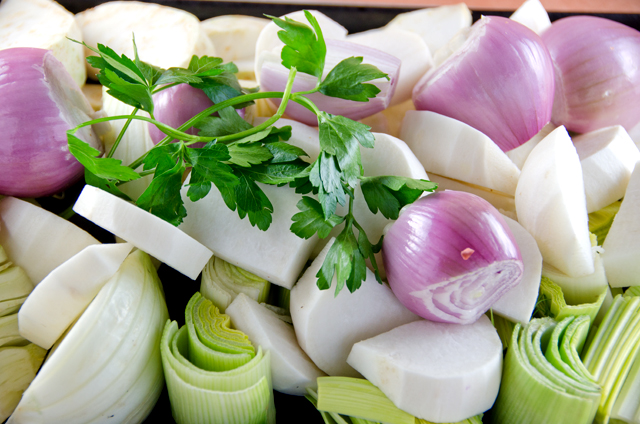
Poaching is a technique that cooks chicken gently and slowly, submerged in a liquid that is heated to just under the boiling point, about 180F, when small bubbles begin to break the surface. The cooking process begins with a broth of herbs and spices, enhanced with dried porcini mushrooms and Parmesan rinds, providing the rich umami.  Fragrant root vegetables, fennel and celery root, along with shallots, leeks and turnips are added next to the broth. Taking a step from what we normally do with our roast chicken, she stuffs it with peppercorns, bay, crushed garlic and lemon. The chicken is double wrapped in cheesecloth which both keeps the aromatics in the bird and not in the broth and provides a way to retrieve the chicken from the pot at the end of cooking. Poaching chicken provides both a moist flavorful chicken with no additional fat and a flavorful broth to serve with the meal and later as a soup.

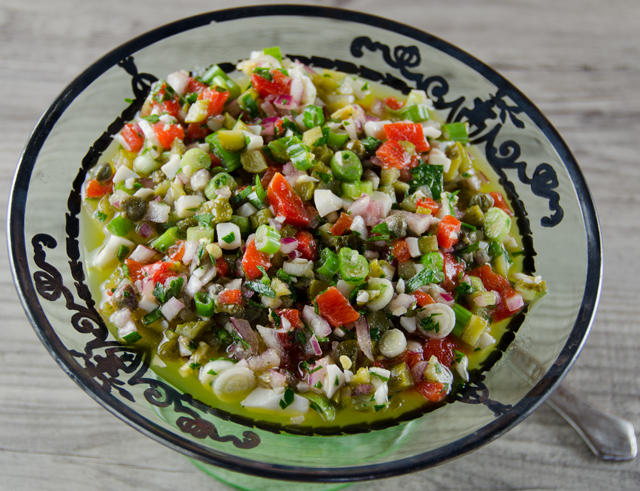
Don’t skip the salsa rustica that accompanies this dish. Made mostly with pantry ingredients, it’s the first salsa I’ve ever seen that includes a hard-boiled egg. It adds a pop of color to the very flavorful but pale chicken and a unique piquant flavor. I could see serving this salsa with fish and pork as well.

Be sure to use Turkish or true bay leaves, laurus nobilis. California bay leaves are not from the same family but are similar in shape. They have a strong menthol flavor that will overpower the dish. I am fortunate that we have several Turkish bay trees to pick my leaves from. The salsa rustica recipe called for dill gherkins but I picked up a jar of cornichons. So is there really that big of a difference? Gherkins can refer to both a variety of cucumber, harvested very small for the pickling process and the pickle itself. Gherkins can be either tart or sweet. French cornichons are the tart, crisp pickles made from gherkins or other cucumbers picked small. My choice was fine since the original recipe called for dill (tart) gherkins.

The broth, delicious on it’s own, can be made into a quick soup.  Bring the broth to a simmer and add a small pasta such as ditalini or orzo. Cook until al dente and serve topped with grated cheese and finely chopped parsley. We used the broth several days later to poach halibut fillets seasoned with a ginger citrus herb blend and topped with fresh lime peel.

Poached Chicken with Salsa Rustica from Fine Cooking #122

Serves 4-6, yields 3 quarts broth

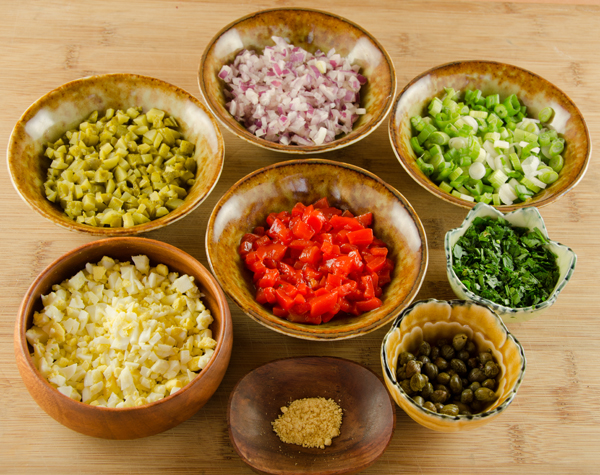
Salsa Rustica

Ingredients

  • 1/3c extra virgin olive oil
  • 1/4c red wine vinegar
  • 1/3c thinly sliced scallions
  • 1/4c finely chopped red onion
  • 1/4c finely chopped jarred roasted red pepper
  • 1/4c finely chopped cornichons
  • 1 hard boiled egg, finely chopped
  • 1T balsamic capers, drained
  • 1/8t dried mustard
  • Pinch of cayenne pepper
  • 2T finely chopped flat leaved parsley
  • Kosher salt and fresh ground pepper to taste
DSC_9263a_edited-1
Components for the salsa rustica.

Directions

  1. In a medium bowl, whisk the olive oil and vinegar.  Add the scallions, onion, roasted red pepper, cornichons, egg, capers, mustard and a pinch of cayenne. Whisk to combine.
  2. The salsa can be made up to 5 days ahead, but you will probably consume it before the chicken is cooked so either make a double batch or make it the day of! Cover and refrigerate, let sit at room temperature for a half hour before serving. Before serving, stir in the parsley and  season to taste with salt and pepper.

DSC_9270

Poached Whole Chicken

Ingredients

  • 8 sprigs flat leaved parsley
  • 1T plus 2t whole black peppercorns
  • Kosher salt
  • 1/4c dried mushrooms (1/4oz), preferably porcini
  • 4 fresh Turkish bay leaves
  • 1 piece of Parmigiano-Reggiano rind (optional but nice)
  • 8 large shallots, peeled
  • 2 large turnips cut into 1 inch wedges (carrots were the original choice…)
  • 2 large leeks, white and light green parts, cut crosswise into 4-inch pieces, halved lengthwise and rinsed
  • 1 large fennel bulb, trimmed and cut through the root into 6 wedges
  • 1 medium celery root, trimmed, peeled and cut into large wedges
  • 1 whole chicken (about 3 1/2 lb) my brand of choice is Bell and Evans
  • 3 large cloves garlic, smashed
  • 1 lemon, halved
Root vegetables are added to the Parmesan porcini enhanced broth.

Directions

  1. Place the parsley sprigs and 1 tablespoon of the peppercorns on a six inch square of cheesecloth. Tie up with string to make a sachet.
  2. Pour 6 quarts of water to a 10-12 quart stockpot. Add the sachet, 2T salt, the dried mushrooms, 2 bay leaves and cheese rind if using.  Cover and bring to a boil over high heat.  Add the shallots, turnips, leeks, fennel and celery root. Return the liquid to a boil. Reduce heat to a simmer, partially cover and let vegetables simmer while you prepare the chicken, 10 to 15 minutes.
  3. Remove the giblets from the chicken (mine didn’t have them!!), rinse them and reserve. Into the chicken cavity place 1t salt, the garlic, the remaining 2t peppercorns, 2 bay leaves, the juice of the lemon and the squeezed lemon halves. Tie the bird’s legs together and tuck the wings behind the neck.
  4. Cut a 30 inch double-layer cheesecloth square and lay it on a work surface. Put the chicken in the center, breast side up. Tie two diagonally opposite corners snugly over the bird with a simple over hand knot. Tie the other corners the same way.
  5. Cut a yard long length of string and thread one end through the cheesecloth topknots. Pull the ends even and tie in a double knot close to the cheesecloth.
  6. Lower the chicken into the broth, being careful to keep the string out of the pot. Loop the free end of the string around a handle of the stockpot so it doesn’t fall into the pot. Add giblets if using. Bring to a boil over high heat, then lower the heat to maintain a gentle simmer.
  7. Cook, uncovered until the chicken is cooked through, an instant read thermometer inserted into the breast will register 158-160F. The chicken will continue to cook after you remove it from the pot, the final temperature will be 165F. Start checking at 45 minutes. If you prefer firmer vegetables, check on them sooner and remove them with a slotted spoon.
  8. Set a deep rimmed baking sheet large enough to hold the chicken near the pot. Transfer the chicken to the baking sheet, letting the excess liquid drain back into the pot. Using a slotted spoon, transfer the vegetables to a bowl and ladle a bit of the broth over them. Cover to keep warm.
  9. Unwrap the bird, remove the string and discard the ingredients from the cavity.  Pour some hot broth over the bird and cover loosely with foil to keep it warm.
  10. Set a fine strainer over a deep pot and strain the broth.
  11. Carve the chicken and serve with the vegetables, moistened with some broth and topped with salsa. Leftover broth can be refrigerated for 5 days or frozen up to 3 months.

DSC_9303a


March 12, 2013 Pork Tenderloin with Pico de Gallo

DSC_9216a

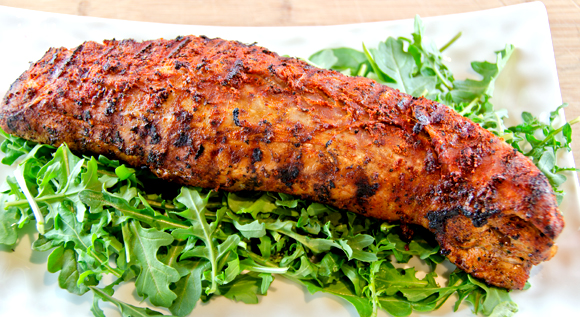
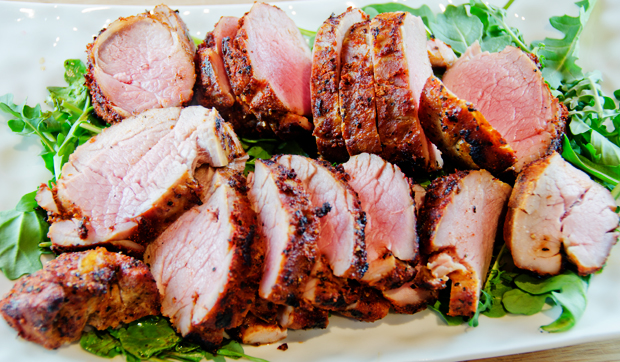
Pork tenderloin appears weekly in our dinner rotation. It’s low in fat, easy to cook and with a variation of the rub and accompanying sauce, can take on many different nationalities. This recipe has a south of the border flavor with a peppery and slightly sweet rub and black bean pico de gallo.

Pico de gallo is translated “rooster’s beak” and there are several explanations of how the name came about. One was for the way it was originally eaten, by pinching pieces of the salsa between the thumb and forefinger, which is supposed to resemble a rooster’s beak. A messy proposition at best. Another puts forth that the spicy bite of the dish is like the bite of a rooster. The one that I see as most logical is that it originates from the Spanish verb “picar” which means “to chop”, as are the minced ingredients in this salsa.

Black beans add some additional fiber to the dish. If you don’t have time to make your own from scratch, canned beans are acceptable. My brand of preference is Goya, I prefer to rinse them lightly before proceding with the recipe. There will be enough seasoning mix to flavor the pico de gallo and more for future use. The original recipe on Epicurious called for 1/2 cup of arugula, loosely packed, but the recipe never included a step that used the arugula. I just use it as a bed for the tenderloin that wilts it slightly and adds another peppery component to the dish. 

Pork Tenderloin with Black Bean Pico de Gallo

Adapted from Epicurious website/Self magazine

Serves two with leftovers

Ingredients

Pork rub

  • 1T sweet paprika
  • 1T smoked paprika
  • 1T kosher salt
  • 1T chili powder (I used regular)
  • 1T brown sugar
  • 1/4t cayenne pepper
  • 1T olive oil
  • 1 pork tenderloin, 14-16oz, trimmed of excess fat
  • 1 c arugula

Directions for Pork Tenderloin

  1. Mix first six ingredients for spice rub in a small bowl until well combined.
  2. Sprinkle the rub over the tenderloin, then rub the pork on all sides, pressing gently so the seasoning adheres well to the tenderloin. Cover with plastic and let sit at room temperature for an hour before cooking.
  3. Preheat oven to 350F. Heat olive oil in a large oven-proof skillet over medium high heat. When it is hot, add the tenderloin and cook, turning every 3-5 minutes until browned on all sides.
  4. Transfer the skillet to the preheated oven and roast until a meat thermometer inserted into it’s thickest part reads 140F.
  5. Using a pot holder, remove tenderloin from the oven, cover loosely with foil and let rest for 10 minutes before serving.  

 Black Bean Pico de Gallo

  • 1 1/2 c cooked black beans
  • 1c diced tomato
  • 1 small yellow pepper, diced
  • 1/2c diced red onion
  • 1/3c finely chopped cilantro
  • 1t minced jalapeno
  • Juice of a fresh lime
  • 1T of the pork seasoning mix
  • Kosher salt to taste

Directions for Pico de Gallo and Final Assembly

  1. Combine all ingredients in a medium bowl. Taste and adjust seasoning as needed.
  2. Line a seving platter with arugula. Top with sliced tenderloin.
DSC_9192a
Spice rub for the pork
DSC_9200a
Coat the tenderloin thoroughly on all sides.
DSC_9210a
Black bean pico de gallo


DSC_9219a
Spicy sliced tenderloin on a bed of arugula.


March 5, 2013 Steamed Scallops with Black Beans

DSC_8527a

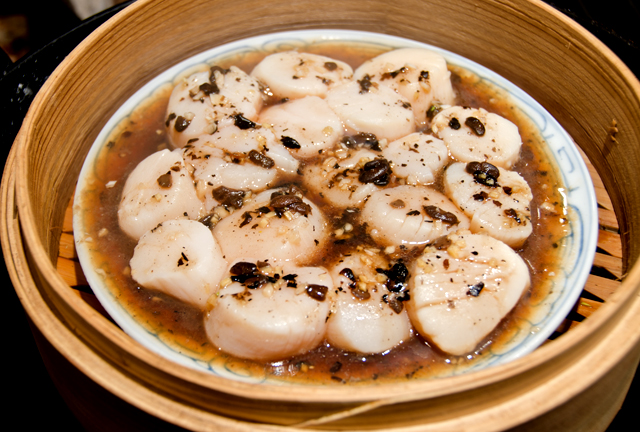
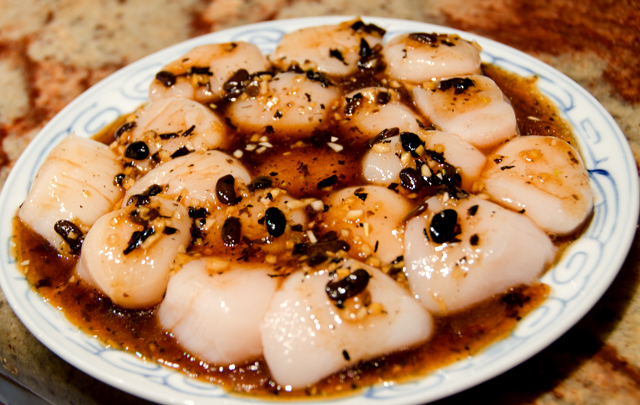
Chinese black beans are not to be confused with the black turtle beans used in Central and South American cooking. The Chinese black bean also known as douchi, is actually a black soy bean that has been cooked, fermented and salted. As a condiment they predate soy sauce and miso and it is believed they have been used as far back as the Han dynasty in the second century.

Once popular throughout China, they are now most associated with Cantonese cooking. The flavor of Chinese black beans has been described as sharp, salty, pungent and winy. They can be found in most Asian markets in small plastic bags, often flavored with orange peel and ginger. They have a soft pliable texture and resemble dried currants. They can stored at room temperature well wrapped in a cabinet away from light.

The cookbook authors I consulted were divided on to rinse or not to rinse the beans before using them. If you don’t rinse you must allow for their extreme saltiness and adjust the seasonings in your recipe accordingly. I choose to rinse them, especially if other ingredients in the recipe are going to bring their own saltiness. They are a condiment, so use sparingly.

In this recipe the sweet clean flavor of the scallops contrast nicely with the black beans. Always look for dry scallops, those that have not been treated with a solution that whitens them and causes them retain more water. Most scallops come with the tough “catch” muscle still attached. The scallop uses this muscle to keep it’s shell closed for long periods of time. It’s not pleasant to eat and removing it is very easy, just gently peel it off. Serve this dish with rice or noodles to soak up the juices.

Steamed Scallops with Black Beans

adapted from The Chinese Kitchen by Eileen Yin-Fei Lo

Serves 4-6

Ingredients

  • 1T fermented black beans, rinsed and drained
  • 2t minced fresh ginger
  • 2T oyster sauce
  • 2t soy sauce
  • 1T Chinese rice wine vinegar
  • 2t sugar
  • 1t Kosher salt
  • 2t peanut oil
  • Pinch freshly ground white pepper
  • 1lb large fresh sea scallops, excess liquid drained

Directions

  1. Mix all the ingredients except the scallops in a large bowl
  2. Remove the adductor muscle from the scallops. Place the scallops on a steam proof plate. Pour the steaming ingredients over the scallops and marinate for 30 minutes.
  3. Bring about a quart of water to a boil in a wok. Place the steamer in the wok so that it sits above but never touching the water.
  4. Place the dish in the steamer, cover and steam for about 5 minutes or until the scallops are white and opaque. Serve in the steam proof dish.

 DSC_8515a

January 21, 2013 Char Siu Pork

DSC_8250a


Our Chinese New Year celebration is about a month away so it’s time to start planning this year’s menu and what can be made ahead. My sources all agree, Chinese steamed buns can be made a month ahead so that seemed like a good place to start. Making steamed filled buns involves several steps, the first is making the char siu pork filling.

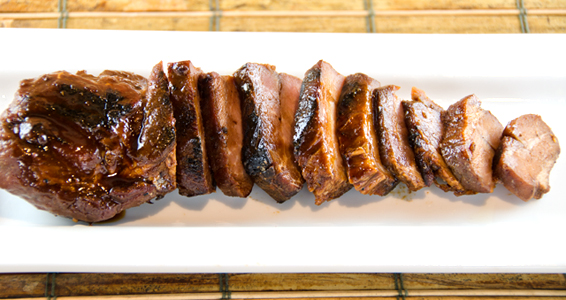
In Cantonese, char means fork in both the noun or verb form and siu (soo) means to roast or burn. “Fork roasted” refers to the way this traditional Cantonese street food is prepared, slow cooked on skewers over an open fire. Char siu should be moist and flavorful on the inside and caramelized and slightly chewy on the outside. Traditional Cantonese char siu is dyed with food coloring resulting in an unnatural ring of magenta when you cut into the meat.I forgo that step. I prefer the reddish brown color that dark soy imparts to the meat. After making char siu and pork buns for seven years now, pork shoulder is my cut of preference. On the fatty scale it is somewhere between the pork tenderloin or loin which I have found to be too lean and the currently popular pork belly, which is too fatty for my tastes. The shoulder has enough fat to prevent the meat from drying out.

I have been using the recipe for char siu from “The Chinese Kitchen” written by Eileen Yin-Fei Lo since we began celebrating Chinese New Year. I discovered this book when some of the recipes were used in a cooking class I attended in San Francisco.  When I cook Chinese recipes I try to keep the ingredients as authentic as possible from the original recipe. Two of the marinade ingredients for her char siu have alluded me all these years, Mei Kuei Lu Chiew and wet or preserved red bean curd. In the front of her book Ms. Lo has a section devoted to Chinese ingredients, “The Chinese Larder”. In this section she further describes uniquely Chinese ingredients that may not be familiar in the Western kitchen. Wet bean curd are cubes of fermented bean curd with salt, wine and red rice; not to be confused with preserved bean curd. Wet bean curd is red in color, not spicy and is used in braising and barbecuing recipes. I found what I thought might be reasonable substiutes but was pretty certain not the exact ingredient she was calling for.  Mei Kuei Lu Chiew is a Chinese spirit, based on sorghum and flavored with rose petals, needless to say, I gave up on that one the first year. Ms Lo admits that some of the English labeling of Chinese products may be confusing. She provides Chinese calligraphy next to each entry to show your grocer to ensure you have the right product. That would be fine but I have found increasingly that the markets I encounter are not Chinese but a mix of all Southeast Asian cultures. I have access to two supermarkets that carry Asian ingredients but both are Korean-owned. Thus the ingredients in the store may be Asian, but with a definite Korean slant with some Thai, Vietnamese, Chinese, a smattering of Japanese and Central American to boot.

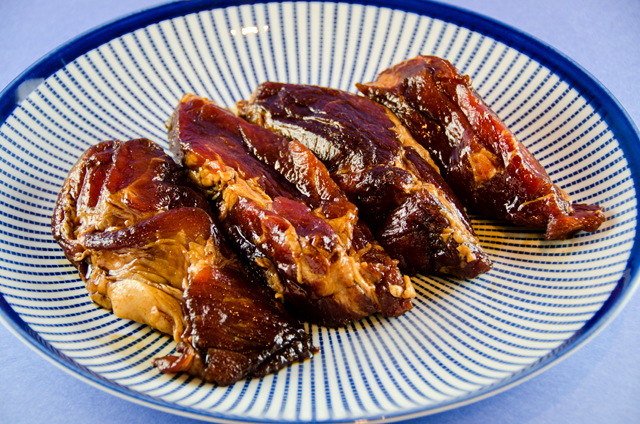
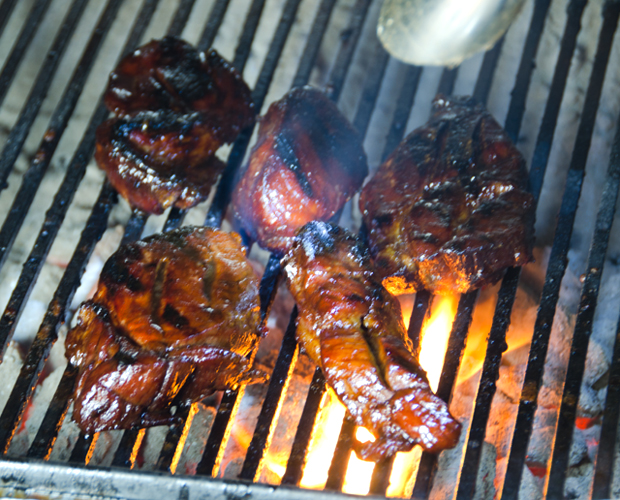
Twelve years after the publication of “The Chinese Kitchen”  Ms. Lo’s recipe for char siu pork and steamed buns were featured in the February/March 2011 issue of Fine Cooking magazine. I was pleased to see that in the updated version of the recipe in Fine Cooking both of my “problem ingredients” were no longer part of the marinade. Shaoxing or Chinese rice wine is now in place of Mei Kuei Chiew and the preserved bean curd is eliminated all together.  Some recipes call for maltose to give char siu its classic glazed look but honey works just as well, has a thinner consistency and is easier to handle.The meat is cut into four pieces and pierced several times to allow the marinade to penetrate, preferably overnight. Most recipes call for roasting the meat and broiling it at the end to give it that desirable char. This year I roasted it in the oven for fifteen minutes and Joe finished it in the fireplace grill. The sliced pork is now ready to top a bowl of noodles, chop into a filling for fried rice, or combine with other ingredients for a dumpling filling. My next step is to combine some of the pork with a sauce to fill steamed buns.

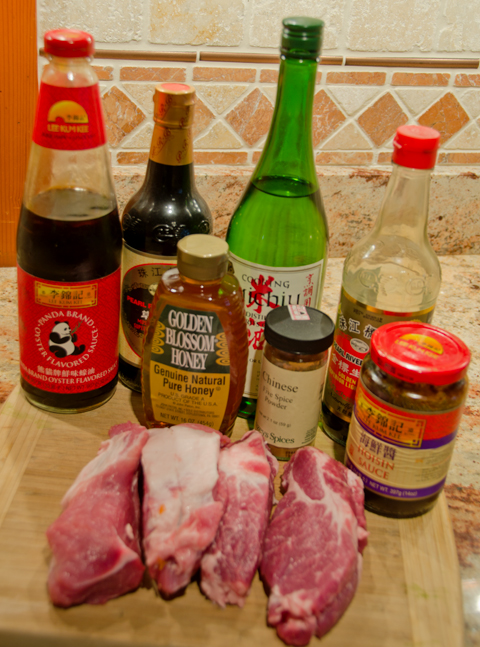
Char Siu – Barbecued Roast Pork

Ingredients

  • 1 2lb piece of pork shoulder
  • 1/2 c honey
  • 1/4c oyster sauce
  • 1/4c hoisin sauce
  • 3 1/2T dark soy sauce
  • 3 1/2T light soy sauce
  • 3T Shaoxing (Chinese rice wine)
  • 1 1/2t five-spice powder
  • Kosher salt and freshly ground white pepper

Directions

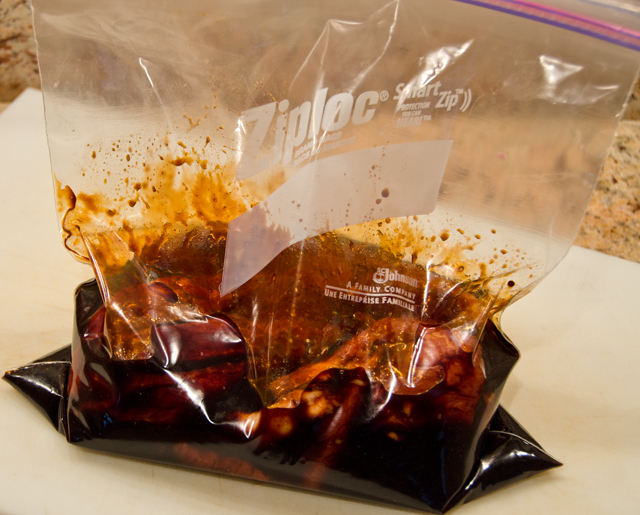
  1. Cut the pork shoulder lengthwise into 4 equal strips. Using a small knife, pierce each strip 4 times to help the marinade penetrate the meat. Transfer the meat to a gallon zip-lock bag.
  2. Combine the honey, oyster sauce, hoisin sauce, dark and light soy sauce, rice wine, five spice powder, 1/2t salt and a pinch of ground white pepper in a small bowl. Pour over the meat in the bag. Massage the pork all around in the marinade so that it is covered. Push out all the air and seal the bag. Refrigerate for at least eight hours and preferably overnight.
  3. Position a rack in the top third of the oven and heat oven to 425F. Line a large heavy duty baking sheet with heavy-duty foil. Put the meat on the baking sheet and spoon some of the marinade over it. Roast until an instant read thermometer  inserted in the middle of the pork registers 165F, 30 to 40 minutes. During the cooking process, baste the meat occasionally with the juice from the pan and flip it several times.
  4. Position an oven rack about 4 inches from the broiler and heat the broiler on high. Broil the pork until it is slightly charred in places, about 2 minutes.
  5. *Alternate cooking method. Preheat oven to 375F. Place pork on foil lined baking sheet. Roast in oven for fifteen minutes, turning once.
  6. Skewer the pork and grill at about 400F, basting the pork with the remaining sauce, turning and basting until the pieces are nicely charred.
  7. Let the pork cool and then refrigerate until you are ready to make the bun filling. The pork may be refrigerated for up to 5 days or frozen for up to a month.


Ingredients ready to go for the pork marinade.


Pork pieces and marinade are added to a zip-loc bag.
Out of the marinade after 24 hours, meat looks good already!
The fireplace grill give the meat that nice char that is desirable in char siu.
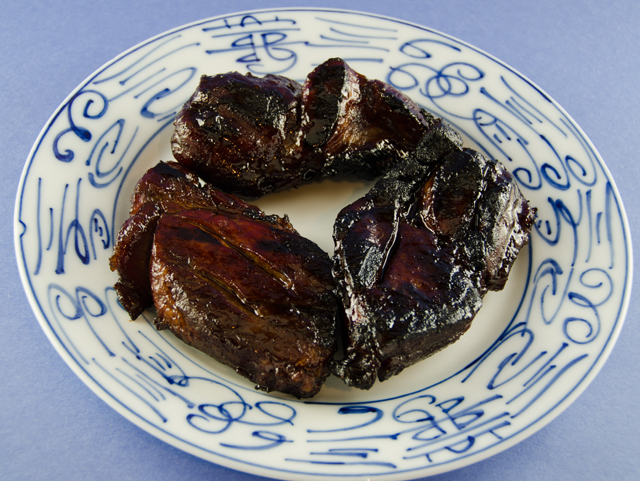
Char siu pork right off the grill.


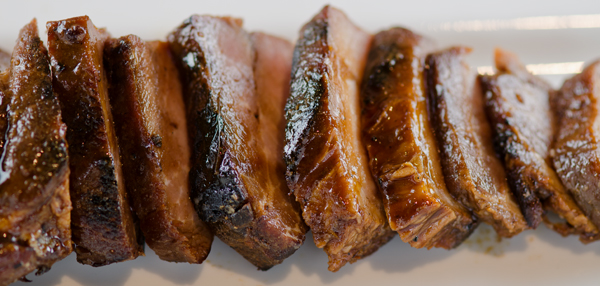
Char siu ready to be chopped up for bun filling.


November 19, 2012 Turkey Meatloaf

In anticipation of  “superstorm” Sandy several weeks ago it was time to consolidate the freezers so that only one would be needed to hook up to the generator. That’s when we discovered an abundance of ground turkey that I wrapped in individual packages. The generator kept the turkey and everything else in the freezer nice and cold for the four days we were without power but it was about time to use the turkey up.
A broken foot has put me in a cast and off my feet for now so Joe has ably taken over the cooking. When he asked for suggestions on how to use it, I immediately thought of turkey meatloaf. I was craving a little comfort food at that time.  Not that I knew of a good recipe but I remembered another delicious meatloaf than included ground beef, pork and chopped prunes he made back in January at his mother’s request. My goal was to find a recipe that specifically called for ground turkey. A short search on Epicurious brought me to a recipe from Gourmet magazine from January 2003.  Positive reviews from 92% of four hundred and seventy five reviewers couldn’t be wrong, obviously a recipe worth trying.

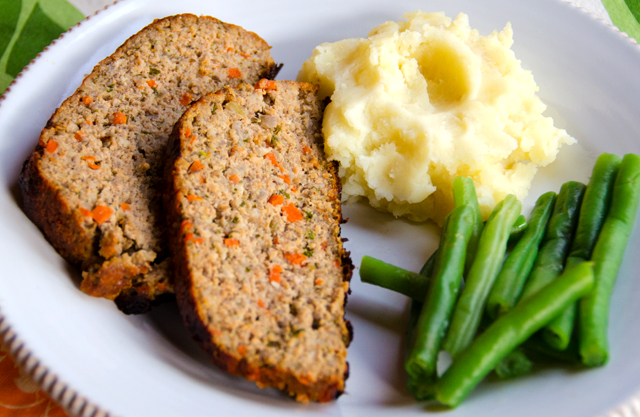
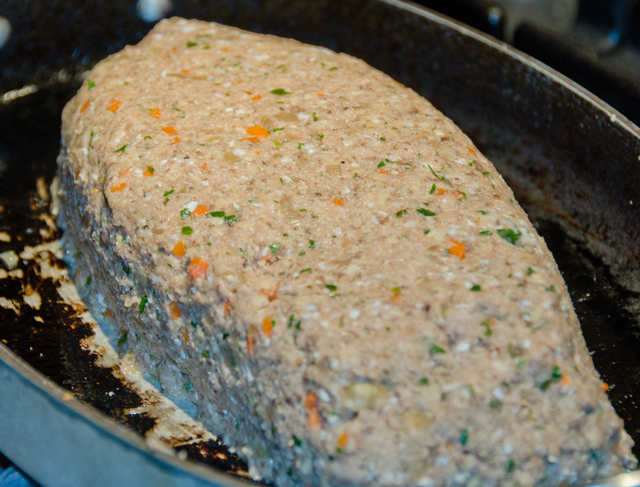
Ground turkey and a generous amount of vegetables combine to make this a flavorful meatloaf. The only time consuming part of the recipe is chopping the vegetables. Make sure you give yourself a little time in your preparation for the cooked vegetables to cool before adding in the ground turkey. We substituted Japanese-style panko bread crumbs for the white bread. Panko are flakes, not crumbs and they lend a light airiness to the mix. Cremini mushrooms also known as “baby bellas” add an extra depth of meaty flavor, texture and moistness to the meatloaf. Feel free to substitute other varieties of mushrooms. Instead of cooking it in a loaf pan, Joe formed the meatloaf in a long oval and baked it in a small roasting pan.  The meatloaf reached the desired end temperature in less time than originally stated in the recipe. An instant read thermometer is key here.  The top, painted with some ketchup and the flecks of orange from the carrot make this more colorful than your average meatloaf.  We have enjoyed this meatloaf twice now in the past two weeks.

Turkey Meatloaf

Gourmet January 1993

 Ingredients
 
  • 1 1/2 c finely chopped onion
  • 1 T minced garlic
  • 1 t olive oil
  • 1 medium carrot, cut into 1/8-inch dice
  • 3/4lb cremini mushrooms, trimmed and very finely chopped in a food processor (feel free to experiment with other varieties)
  • 1 t  Kosher salt
  • 1/2 t freshly ground black pepper
  • 1 1/2 t Worcestershire sauce
  • 1/3 c finely chopped fresh Italian parsley
  • 1/4 c plus 1T ketchup
  • 1 c Panko bread crumbs
  • 1/3 c 1% milk
  • 1 whole large egg, lightly beaten
  • 1 large egg white, lightly beaten
  • 1 1/4 lb ground turkey

Directions

  1. Preheat oven to 400°F.
  2. Cook onion and garlic in oil in a 12-inch nonstick skillet over moderate heat, stirring, until onion is softened, about 2 minutes.
  3. Add carrot and cook, stirring, until softened, about 3 minutes. Add mushrooms, 1/2 teaspoon salt, and 1/4 teaspoon pepper and cook, stirring occasionally, until liquid mushrooms give off is evaporated and they are very tender, 10 to 15 minutes.
  4. Stir in Worcestershire sauce, parsley, and 3 tablespoons ketchup, then transfer vegetables to a large bowl and cool.
  5. Stir together panko crumbs and milk in a small bowl and let stand 5 minutes. Stir in egg and egg white, then add to vegetables.
  6. Add turkey and remaining 1/2 teaspoon salt and 1/4 teaspoon pepper to vegetable mixture and mix well with your hands. (Mixture will be very moist.)
  7. Form into a 9- by 5-inch oval loaf and place in a lightly greased roasting pan and brush meatloaf evenly with remaining 2 tablespoons ketchup. Bake in middle of oven until thermometer inserted into meatloaf registers 170°F, 50 to 55 minutes.
  8. Let meatloaf stand 5 minutes before serving.
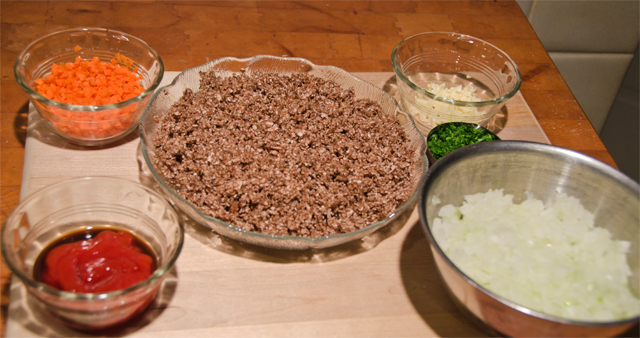
    Vegetable mis en place for the meatloaf.
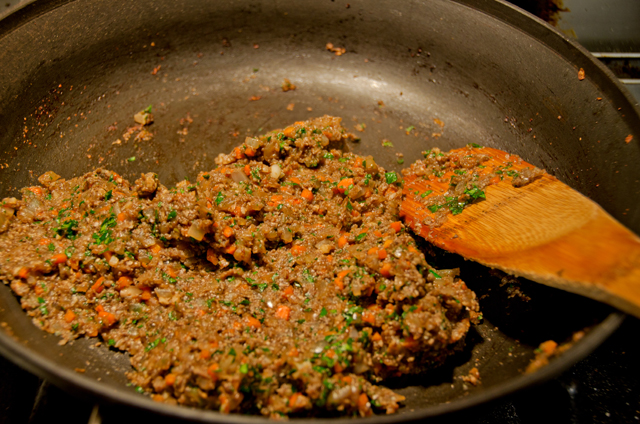
    Saute the vegetables and allow them to cool before adding to the ground turkey.


    Joe chose a free-form oval in a small roasting pan rather than the loaf pan.

November 6, 2012 Crispy Braised Chicken Thighs with Olives, Lemon and Fennel


Our Sunday dinners are often inspired by the recipes in Thomas Keller’s cookbook, Ad Hoc at Home. Ad Hoc is Keller’s casual dining restaurant with menus inspired by the family-style meals that feed his staff. It is a coffee table sized book full of recipes featuring Keller’s home-style recipes and beautiful food photography.  However, this is one book not to leave on your table to collect dust.  Our family has enjoyed his recipes from this book for short ribs, beef stroganoff and roasted chicken with root vegetables to name a few.  Unlike most cookbooks where I pick and choose recipes, this is one that I have read cover to cover. The recipes are well suited for the enterprising home cook and filled with tips and techniques for success from master chef Keller.

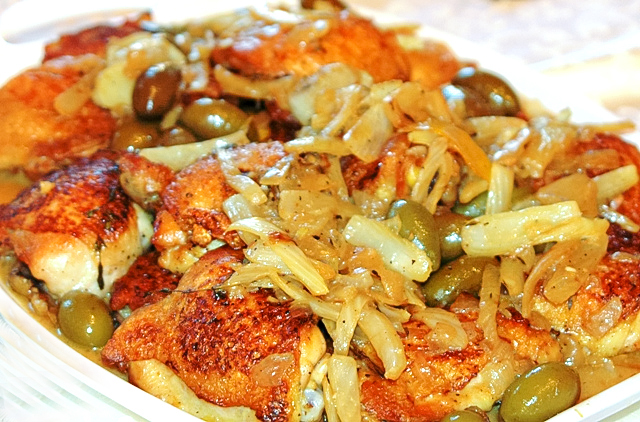
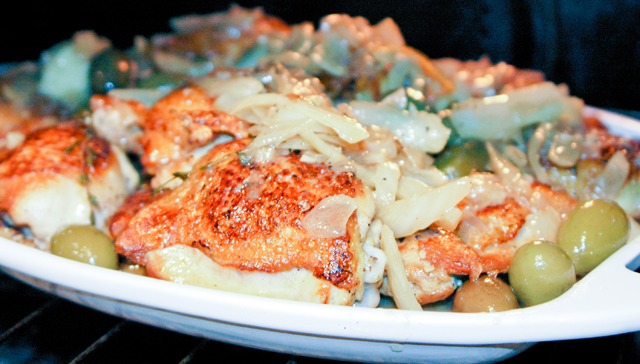
Crispy braised chicken thighs with olives, lemon and fennel is an easy satisfying dish.  In this recipe, flavorful bone-in chicken thighs are first browned then braised along with olives, fennel, onion, lemon zest and red pepper flakes.  Keller avoids the usual rubbery chicken skin that can occur with braises by briefly broiling the skin at the end of the cooking time. So you have a winning combination of tender succulent meat and crispy skin. The combination of delicate sweet fennel, salty olives and refreshing lemon take this recipe in a definite Mediterranean direction. The only ingredient you may have difficulty in finding are the Ascolane olives. I actually prefer the juicy briny Ceringolas and have no problem finding them at the Wegmans olive bar. I made one and a half times the recipe to allow for leftovers and take home meals.

Crispy Braised Chicken Thighs with Olives, Lemon, and Fennel

Serves 6

Ingredients

  • 3 fennel bulbs
  • 12 chicken thighs
  • Kosher salt
  • Canola oil
  • 1 cup coarsely chopped onion
  • 1 tablespoon finely chopped garlic
  • 1/4 cup dry white wine, such as Sauvignon Blanc
  • 1 cup Ascolane or other large green olives, such as Cerignola
  • 1/4 teaspoon red pepper flakes
  • 4 fresh or 2 dried bay leaves
  • 4 strips lemon zest – removed with a vegetable peeler
  • 8 thyme sprigs
  • 1 cup lower sodium chicken stock
  • About 1/3 cup flat-leaf parsley leaves

Directions

  1. Cut off fennel stalks. Trim bottom of bulbs and peel back the layers until you reach the core; reserve the core for another use. Discard any bruised layers, and cut the fennel into 2-by-1/2-inch batons. You need 3 cups fennel for this recipe; reserve any remaining fennel for another use.
  2. Preheat oven to 375 degrees. Set a cooling rack on a baking sheet.
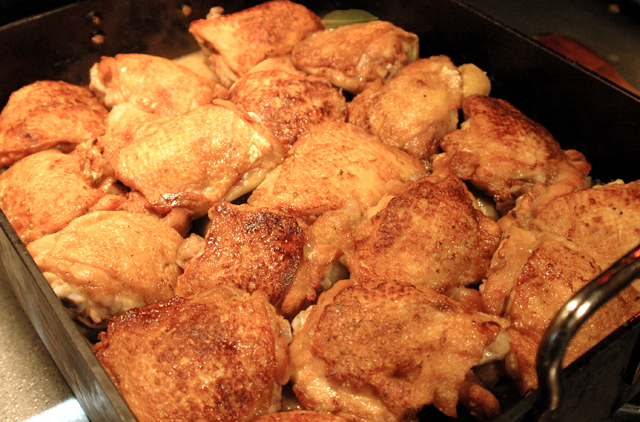
  3. Season chicken thighs on both sides with salt. Heat some canola oil in a large ovenproof saute pan or roasting pan that will hold all the thighs in one layer over medium-high heat. Add thighs skin-side down and brown on the skin side, about 4 minutes. Turn thighs over and cook for about 1 minute to sear the meat. Transfer to the cooling rack.
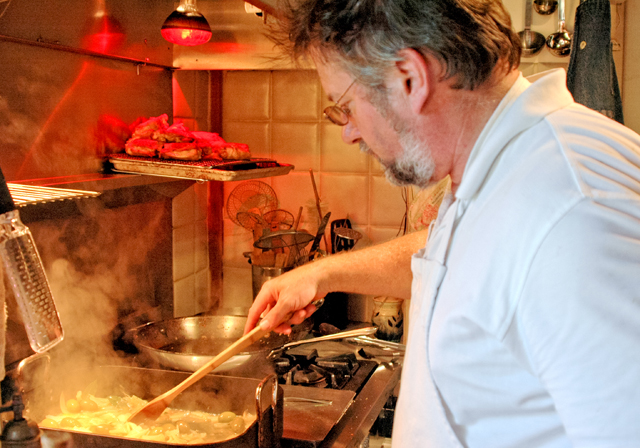
  4. Reduce heat to medium-low, add onion to the pan, and cook for 1 1/2 minutes. Add garlic and cook for 1 minute. Cook, stirring often, until onion is translucent, about 5 minutes. Stir in fennel, turn heat up to medium, and cook, stirring often, until fennel is crisp-tender, about 10 minutes.

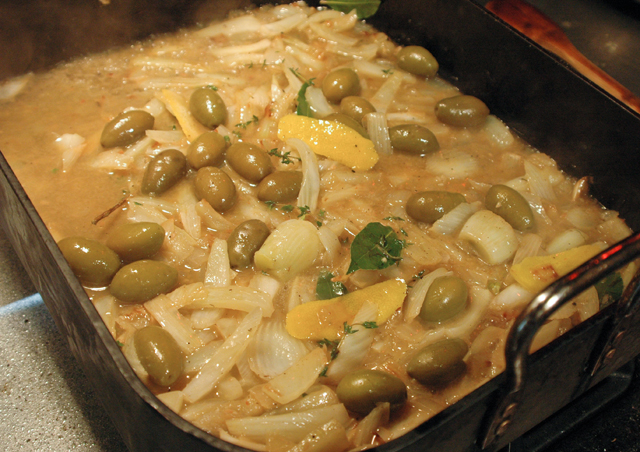
  5. Pour in wine and simmer for about 2 minutes to burn off alcohol. Stir in olives, red pepper flakes, bay leaves, lemon zest, and thyme, then pour in chicken stock. Increase heat, bring liquid to a simmer, and cook until fennel is tender, about 1 minute.

  6. Taste the stock and season with salt as needed. Return chicken to the pan skin-side-up, in a single layer. When the liquid returns to a simmer, transfer to the oven and cook for about 20 minutes, until chicken is cooked through.

  7. Turn on the broiler, and put the pan under the broiler for a minute or two to crisp and brown the skin. Remove from oven, and transfer to a serving platter. Garnish with parsley leaves.

    The chicken thighs are first browned then put aside while the vegetables are cooked in the chicken fat.


Saute the vegetables before adding the chicken thighs back in.


A delcious combination of fennel, sweet onion, Ceringola olives and lemon peel are a good compliment to the chicken thighs.

October 28, 2012 Halibut with Mushrooms, Leeks and Clams


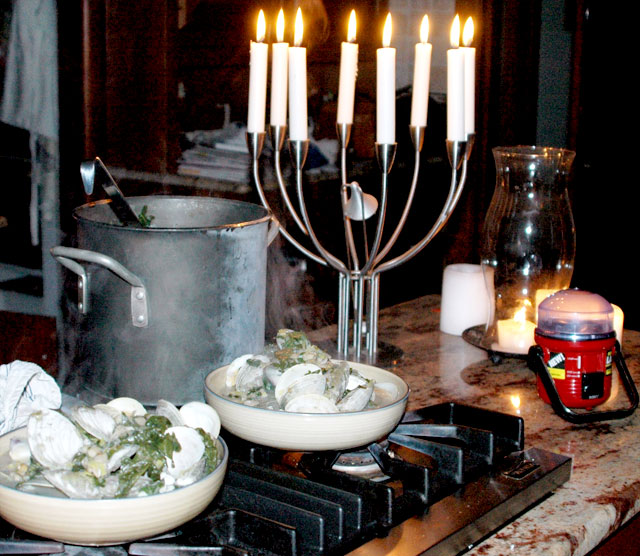
A romantic candlelit/flashlit dinner.
It was a cold and snowy day and night. October 2011 brought some of the most unusual weather we have ever seen. I prepared for a weekend of cooking. I shopped Friday and planned for a Sunday supper of osso buco and saffron risotto for our family and halibut with clams and mushrooms for Joe and myself Saturday evening. When I got up Saturday morning the skies were gray and laden with moisture. The storm started as a cold rain but by about nine thirty a.m. changed over to snow that allegedly wasn’t supposed to occur until much later that afternoon.
Joe made a mad dash to take down the outdoor canopies but they were covered with snow before he could put them away. Trees and power lines quickly became burdened with the weight of a heavy wet snow. As with many local weather events, this was given a name, “snowtober”.
I decided to get a head start on some kitchen prep and Joe, anticipating the need for our generators headed to his favorite hardware store, Finkles for some parts. Then it happened, the power went out for fifteen minutes, then back on for ten, off again, on again, then finally off. A call to PECO confirmed my suspicions, we were going to be without power for a long time. Prep for tomorrow’s osso buco was put aside for now.
 
Thanks to my mom we have an unusually large collection of flashlights and lanterns that really come in handy when the power is out. Our kitchen cooktops are powered with propane. So dinner, lights on or not, would still go on. Candelabras, flashlights and lanterns aimed at our workstations, we prepped leeks and mushrooms.
 
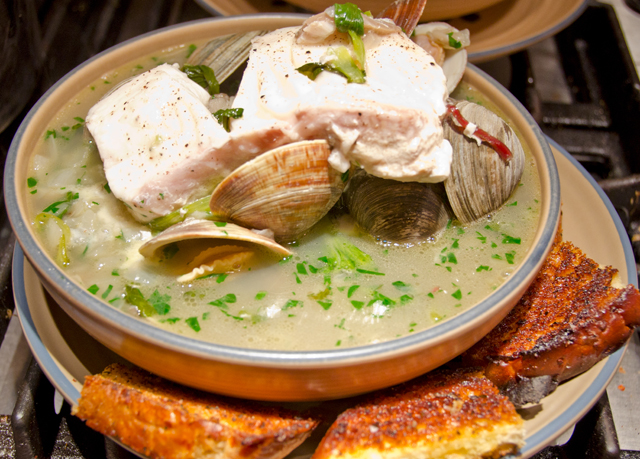
Halibut with leeks, mushrooms and clams has become a favorite weekend dinner of ours. In the course of a year I try many new recipes. Many just once, others like this become part of our regular dinner rotation. It is elegant and deceptively easy. Delicately flavored halibut is combined with briny clams, mellow sweet leeks and earthy mushrooms. I am always making additions and substitutions to the recipe, sweet onions for the leeks, mussels for the clams. Halibut can be expensive, another firm fleshed white fish such as monkfish or Chilean sea bass would be a good choice. Sometimes we add spinach or kale to make this a heartier dish.
 
Dinner was delicious and was the best part of the weekend. The power came on the next morning, only to go out again that afternoon. The osso buco would have to wait for another weekend. Almost exactly one year later, we are waiting to see the path of hurricane Sandy. This storm isn’t going to bring snow, but heavy rain and wind. Generators are at the ready and our flashlights have fresh batteries. Our food shopping trip will include a stop at our favorite seafood market so that we will be ready for whatever the weather will bring. 
 

An early “winter wonderland” that lasted a day or so.
 
 Braised Halibut with Leeks, Mushrooms, and Clams

Serves 3-4

Ingredients

  • 3 tablespoons butter
  • 2 large leeks, white and light green parts thinly sliced
  • 1 clove garlic, minced
  • 2 cups chicken or clam broth
  • 1 pound fresh halibut, skin removed (preferably wild)
  • 2 dozen little neck clams, well-scrubbed
  • 4c thinly sliced oyster or hen-of-the-woods mushrooms
  • the zest of one lemon
  • 1 tablespoon freshly chopped parsley
  • Kosher salt and freshly ground black pepper

Directions

  1. Melt the butter over medium heat in a large 5 1/2 quart Dutch oven  with a lid. Add the mushrooms, garlic clove, and leeks; season lightly with salt and pepper. Cook until softened, but not browned, 6-8 minutes. Add the broth, raise the heat to medium high, and bring to a boil.
  2. Season the halibut with salt and pepper. Nestle the fish and the clams in the skillet. Bring the broth back to a boil, cover tightly, and reduce heat to low. Cook gently until the fish is just cooked through and the clams have opened, about 7 minutes. If all of the clams are not open, remove the fish and the opened clams and continue cooking until the remaining clams open, another 2-3 minutes. Discard any clams that have not opened by this time. Stir in the lemon zest and sprinkle with the parsley.
  3. Serve the fish and clams in a shallow bowl topped with the delicious broth and vegetables.
    Cody is up for whatever the weather brings!


This is what it looked like around 10:30 AM that day. The snow wasn’t supposed to start until late in the afternoon!!


Same dish on a different day.

October 27, 2012 Cedar Planked Salmon


Getting my husband to try new cooking techniques isn’t always the easiest thing to do. If I can convince him to try something new once and then he embraces it, I know I have found something worthwhile.  The convincing was easy with the rib roast cooked like a steak. I just showed him the YouTube video of chef-author Adam Perry Lang cooking it on the Jimmy Kimmel program. What guy (or gal for that matter..) could resist pounding a rib roast with a baseball bat to increase the cooking surface area of the meat? It was a big hit at our house this summer and successfully repeated a few weeks ago.
Last summer I wanted to try cooking salmon on cedar planks. Since we love the flavor that a wood fire brings when we cook turkey or chicken on our outdoor smoker, why not infuse some cedar smoke into some delicious salmon fillets? I bought the planks, introduced him to the concept and recipe and we were cooking.
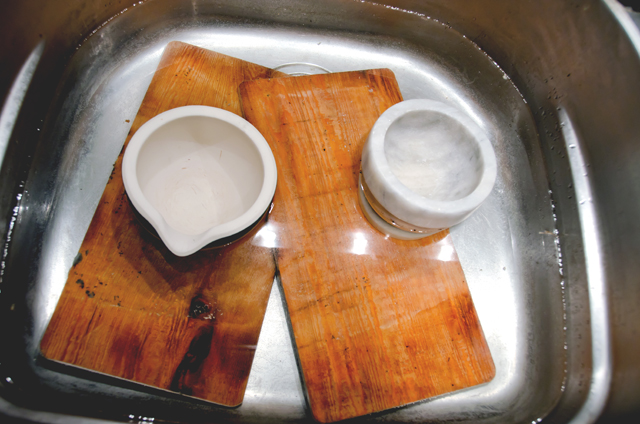
Cooking on wood planks certainly isn’t new.  It is a technique that was pioneered by Native Americans who roasted both fish and game on aromatic cedar planks. Cedar planks are available everywhere these days from supermarkets to specialty cooking stores. Just be certain not to buy planks that have been treated with chemicals, like those from a home improvement store. Your planks will need to be soaked before using for several hours or overnight so they don’t burn on the grill. Some recipes soak the planks in cider, wine or sake, but that could be an expensive proposition considering the amount of liquid needed to submerge the planks. I soak my planks in one of our sinks using heavy marble and ceramic mortars to weigh them down. 
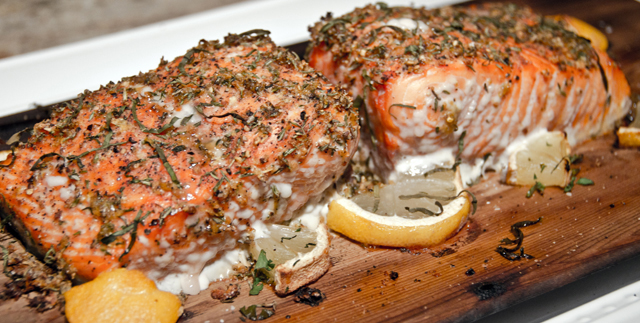
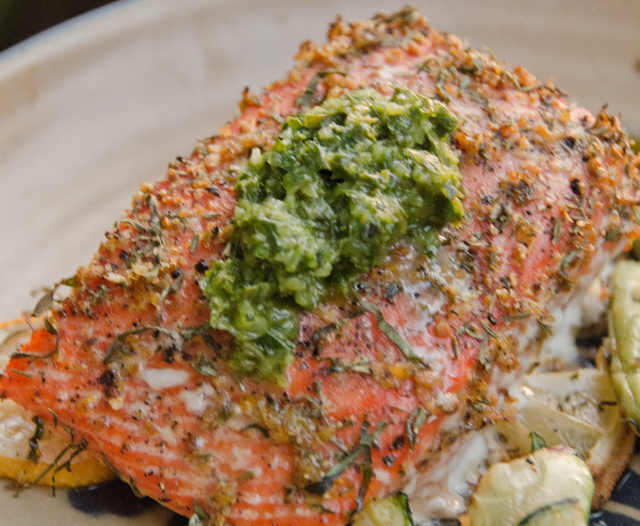
We chose Copper river salmon, which is available fresh from May to September. As with all salmon, Copper river is loaded with Omega 3 oils and recommended by the American Heart Association. Omega 3 oils help reduce heart disease and lower cholesterol.  I season my fish with a dry rub before grilling to enhance the flavor. Cedar planked salmon is excellent on its own with a squeeze of lemon or served with a sauce. I have served it with both a horseradish sour cream sauce and herbed salsa verde. What is the white stuff that your salmon may exude? Protein, albumin to be exact. It occurs more often in salmon with a high fat content. It is definitely safe to eat but can be wiped off for aesthetic reasons.
Cedar planks can be reused. Wash the used planks with warm water, clean off any debris with a soft bristle brush and allow to air dry. Don’t use soap because the board may absorb it and affect the flavor it gives off.  I wrap my used planks in plastic wrap and store them in the freezer. Don’t reuse if the planks are excessively charred, cracked or split. 

Salmon prepped and ready for the grill.


Cedar Planked Salmon
Serves four

Ingredients

Salmon Rub

  • 1 Tbs. grated lemon zest, minced
  • 1T dried lemon peel
  • 1 1/2tsp. chopped fresh thyme
  • 1 tsp. granulated or brown sugar
  • 1/8t cayenne pepper
  • Kosher salt and freshly ground black pepper
  • About 1/2c lemon basil cut in a chiffonade
  • 1 1/2 to 2lbs salmon filets cut into 6-8oz portions, skin on and pin bones removed
  • 1-2 T olive oil
  • 1 lemon, cut into thin slices
  • Food safe cedar planks
Soak cedar planks for several hours or overnight.


Directions
Cedar Planks
Soak the cedar planks in water to cover for at least two hours and up to overnight.  Drain the planks.
Salmon preparation

  1. In a small bowl, with a fork, combine the fresh and dried lemon zest, thyme, sugar, cayenne pepper, 1 1/2 tsp. salt, and 1 Tbs. pepper. Rub the salmon fillets on both sides with olive oil and then set each fillet portion skin side down on the planks.
  2. Sprinkle the fillets with the lemon herb mixture, dividing it evenly. Gently rub the seasoning into the fillets. Sprinkle the chiffonade of lemon basil over the fish. Place the lemon slices around the fish. Let stand at room temperature while the grill heats.
  3. Prepare a gas or charcoal grill fire for indirect cooking with high heat: On a gas grill, heat all burners on high; then turn off all but one burner just before cooking the salmon; on a charcoal grill, bank the coals to two opposite sides of the grill. Arrange the planks over the cooler part of the grill, positioning them so that the thickest part of the fish is closest to the heat source. Allow space between the planks to allow heat and air to flow. Cover the grill and cook until the thickest part of each fillet registers about 135°F on an instant-read thermometer, 20 to 35 minutes depending on the thickness of the fillets. The planks may smoke a bit (this is fine) and will become very aromatic.
  4.  Fillets should  rest on the planks for 5 to 10 minutes before serving.  Serve as is or with the sauce of your choice.

    Salmon served with an herbed salsa verde and wax beans from the garden.


October 22, 2012 Thai Curry with Scallops and Calamari


Fall is definitely making its mark this week, the leaves are turning, mornings are chilly and tonight, for one night only they say, temperatures are going down below freezing. That means a mad scramble to bring all the tender plants, hibiscus, bay and citrus trees, inside to the warmth of the conservatory. We enjoy our tropical plants outdoors in the summer but the reality of fall reminds us that this is not their home. These plants not only provide us with their beauty but often add a unique touch to our cooking.  Lemongrass, a favorite nibble of our golden retriever, Cody, adds a subtle citrusy hint to our Thai dishes.

Our love of Thai food started many years ago at Siam, a little storefront restaurant in Lambertville, New Jersey,  Growing Thai basil, chilis, lemongrass and coriander brings authentic flavors to our recipes.   Although specialty produce items such as lemongrass and kefir lime leaves are available in the produce section of many supermarkets these days, having these plants in your home allows you more spontaneity in menu planning.

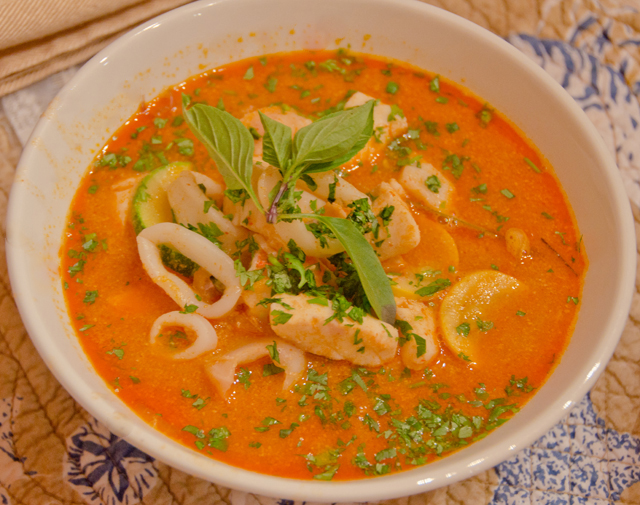
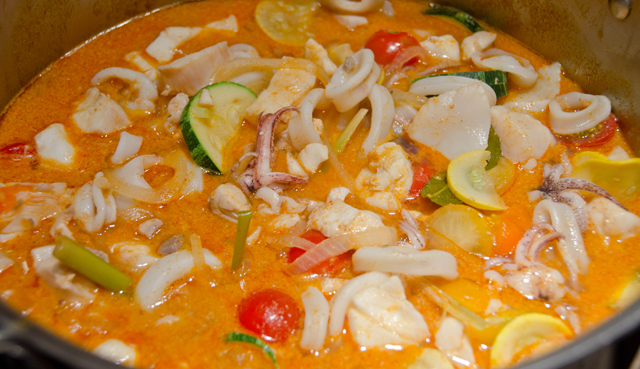
Such was the case with this impromptu dinner we made in August. Two days earlier, scallops and calamari were a part of my birthday dinner with friends and family.  Now the leftover seafood and some fresh garden vegetables would be part of a delicious sweet and spicy curry. We love the complex flavors in Thai cooking and this recipe is no exception. I used the Thai Curry recipe maker in Fine Cooking as a starting point. You “drag and drop” ingredients into the recipe bowl to personalize the dish to your liking.  Each recipe combines coconut milk, meat or fish, assorted vegetables, herbs and spices with red, yellow, green or Panang curry paste.

Curry paste is quite different than curry powder.  Curry powder, mostly known in Indian cooking, is a blend of dry ingredients that can include up to twenty different ground spices, herbs and seeds. Curry paste is “wet”, made from fresh, not dried ingredients. Curry pastes come in a variety of colors and heat and may include fresh chilis, lemongrass, ginger, galangal, shallots, kefir lime, shrimp paste and peanuts. The red chili paste I used in this recipe is a blend of red chilis, coriander, garlic, shallots, galangal and shrimp paste. It is hot but not terribly so and the sweetness of  the coconut milk in this recipe mellows out the chilis. A quick weeknight supper, perfect with some fragrant jasmine rice or rice noodles to sop up the juices.


Thai Curry with Scallops and Calamari
created with the Fine Cooking Recipe Maker

Serves 4

Ingredients

  • 1 (13.5- to 14-oz.) can coconut milk, my favorite brand is Chaokoh
  • 1/4 cup red curry paste
  • 1 cup lower-salt chicken broth, or homemade chicken or vegetable broth
  • 2 Tbs. light brown sugar or light brown palm sugar; more as needed
  • 1 tsp. fish sauce; more as needed-I like the Three Crabs brand, available in most Asian markets
  • 6 whole fresh kefir lime leaves (or substitute 1 tsp. finely grated lime zest)
  • 1/2 lb. squid tubes cut into 1/2″ thick rings, tentacles cut into bite-sized pieces
  • 1 c zucchini, sliced 1/4″ thick
  • 1 c yellow squash sliced 1/4″ thick
  • 1/2 lb. scallops, outer muscle removed
  • 1 c halved cherry tomatoes
  • 1/4 c loosely packed chopped fresh cilantro
  • Thai basil sprigs and lime wedges for garnish

Directions

  1. Before opening, shake can of coconut milk to redistribute the solids that accumulate at the top of the can.
  2.  Over medium heat, in a 3- to 4-quart saucepan or wok, simmer 1/2 cup of the coconut milk, stirring occasionally, until reduced by about half, 3 to 5 minutes. It will get very thick and shiny and may or may not separate; either is fine.
  3.  Add the curry paste, whisk well, and cook, continuing to whisk, for 1 minute. Whisk in the broth, sugar, fish sauce, lime leaves, and remaining coconut milk. Bring to a simmer over medium-high heat.
  4.  After 2 minutes, add the calamari, zucchini and yellow squash and continue to simmer, adjusting the heat as necessary.
  5.  After 1 minute, add the scallops and continue to simmer. After another minute, add the cherry tomatoes and continue to simmer until everything is tender and cooked through, about 1 more minute.
  6.  Remove the curry from the heat. Season to taste with more sugar and fish sauce, and stir in the cilantro. Transfer to a serving bowl or serve from the pot. Remove the lime leaves or tell your guests to eat around them. Garnish with lime wedges and basil sprigs.