October 29, 2013 Crunchy Baked Pork Chops

DSC_3629a

Most Saturday mornings from early May to Thanksgiving you will find me shopping at the Wrightstown Farmers Market. Local residents and their well behaved pooches browse the stalls and purchase goods from twenty five vendors. The offerings range from locally grown produce, farm fresh eggs, meats and poultry, to dog treats, homemade soaps and pottery. I go to supplement the produce in our own garden, stock up on dog treats and on this week, I stopped by the stand for Purely Farms to pick up some pork chops for a future dinner.

Since 2004, Marc and Johanna Michini have been farming 117 acres they have named Purely Farm in Pipersville, Bucks County. Their mission statement is “to provide the local community with quality and wholesome, naturally pasture raised meats”.  Their meats are hormone and antibiotic free.They not only raise pigs, but chicken and lamb also. We have enjoyed their artisanal sausages, bacon and pork chops for several years now.

I wasn’t sure what I wanted to do with the chops until Joe reminded me of a preparation that we had enjoyed before, Crunchy Baked Pork Chops. The recipe from Cook’s Illustrated magazine originally called for boneless chops cut  3/4 to an inch thick, a cut that is readily available in most supermarkets. The chops from Purely Pork were bone-in and cut 1 1/4 inch thick. The original recipe called for a half hour of brining. Lacking the time, I skipped that step though I am not opposed to brining. Brining changes the cell structure of the meat and results in a juicier pork. But I also knew the quality of the product from Purely Pork was far superior to what I would have purchased in a supermarket.

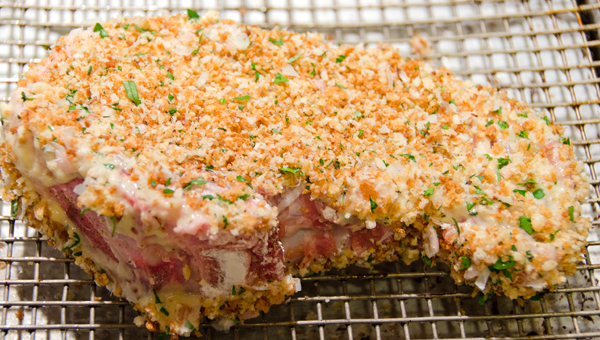
The crunchy in this recipe is the crumb coating. Homemade bread crumbs are tossed with shallots, garlic, oil, salt and pepper and baked to a deep golden brown. The cooled crumbs are combined with Parmesan, and lemon thyme and parsley from the garden. Next the chops are coated in a three step process. First, they are lightly dredged in flour, then coated with a slurry of egg white, Dijon mustard and flour. The last step is the bread crumb coating that is lightly pressed onto the chop. The chops are placed on a wire rack over a baking sheet to allow air to circulate around the chop while baking, avoiding the dreaded soggy bottom. Since pork chops are easy to overcook, an instant read thermometer is a must. An internal temperature of 150°F provided us with delicious chops. They were crunchy and golden on the outside and tender and juicy in the middle.


Crunchy Baked Pork Chops

Serves 4

Slightly adapted from Cooks Illustrated

Ingredients

  • 4 1″ thick bone in, 6-8 ounces pork chops
  • 4 slices white sandwich bread
  • 2T minced shallot
  • 1T minced garlic
  • 2T vegetable oil
  • Kosher salt and freshly ground black pepper
  • 2T grated Parmesan cheese
  • 1t minced fresh thyme leaves
  • 2T minced fresh parsley leaves
  • 1/4c unbleached all-purpose flour plus 6 tablespoons
  • 3 large egg whites
  • 3T Dijon mustard

Directions

  1. Place chops on a plate and salt on both sides. Let chops come to room temperature for an hour before cooking.
  2. Adjust oven rack to middle position and heat oven to 350°F, 325°F if you have a convection oven.
  3. Tear bread into 1″ pieces and pulse in a food processor (I used a mini) until coarsely ground. You should have about 3 1/2c of crumbs.
  4. Transfer crumbs to a bowl. Add shallot, garlic, oil, 1/4t salt and 1/4t pepper. Toss until the crumbs are evenly coated with oil. Place crumb mixture on a rimmed baking sheet. Bake crumbs until golden brown and dry, about 10 minutes. Stir crumbs occasionally to insure even browning. Cool crumbs to room temperature. Toss crumbs with Parmesan, thyme and parsley. Leave oven on.
  5. Place 1/4c flour in a pie plate. In a second pie plate, whisk whites and mustard until combined; add remaining 6 tablespoons flour and whisk until almost smooth, small lumps will still remain.
  6. Increase oven temperature to 425°F, 400°F if using convection mode. Spray wire rack with nonstick cooking spray and place on top of  a rimmed baking sheet. This will allow greater air circulation and prevent chops with a soggy bottom!  Season chops with pepper. Dredge one chop in flour, shake off excess. Using tongs, coat with egg mixture; let excess drip off. Coat all sides of chop with bread crumb mixture, pressing gently so that the crumbs adhere to the chop. Transfer breaded chop to wire rack. Repeat with remaining chops.
  7. Bake until instant-read thermometer inserted into center of chop registers 150°F, 17-25 minutes. Let rest on rack for 5 minutes before serving.
DSC_3620a
Bone-in pork chops from Purely Pork.
DSC_3622a
Pork chop coated with crumb mixture. Cooking on a wire rack prevents the bottom from getting soggy.
DSC_3627a
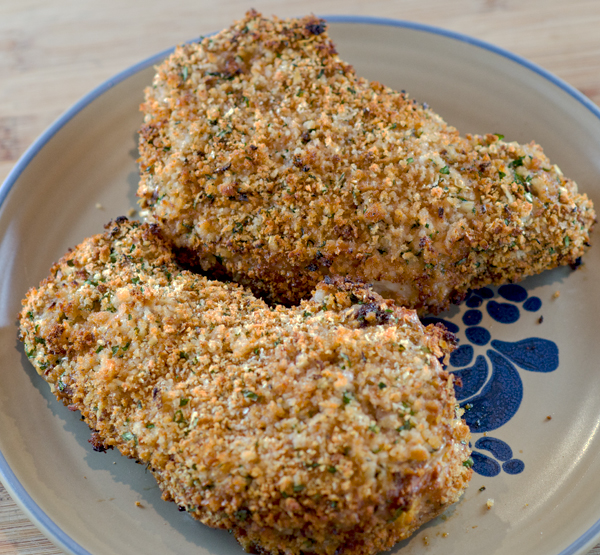
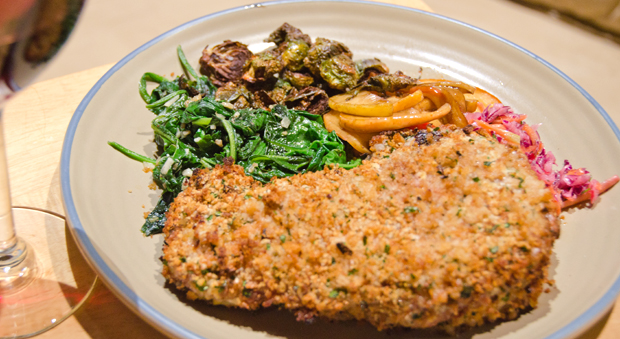
Chops are crispy on the outside, juicy inside.

July 23, 2013 Tavuk Kebabi and Grilled Lamb Kofte

DSC_1092a


Two entrees were on the menu for our Middle Eastern cookout, one chicken and the other lamb. Both dishes were types of shish (skewered) kebab (cubes of grilled meat).

Our Turkish chicken recipe came from Saveur’s June/July issue featuring barbecue from around the world. In Turkey the masters of the kebab are called ustas. Ustas, who are always men, begin their apprenticeship from youth, learning butchery, mastering techniques of the grill and eventually taking over their own business. But it is more than just a business, ustas are the pride of their city, local heroes, revered for carrying on the culinary traditions of the kebab. Tavuk Kebabi is a recipe that translates “chicken cubes of grilled meat”. In this recipe, boneless chicken thighs are marinated in a flavorful blend of mint, thyme, Aleppo pepper and sweet red pepper paste. Time restraints prohibited me from ordering the Turkish sweet pepper paste called for in the recipe. I substituted the more available harissa, a spicy pepper condiment and cut back on the additional hot pepper in the recipe. Aleppo pepper is a worthy addition to your pantry. It is native to the northern Syrian town of Aleppo and also is grown in Turkey. The peppers are sun dried, seeded and crushed into flakes. Aleppo peppers are dark red in color with a high oil content. Their flavor is mildly spicy and fruity with cumin-like undertones.

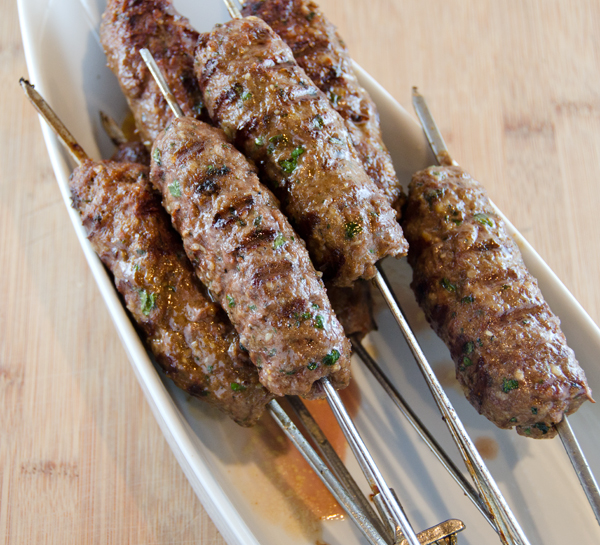
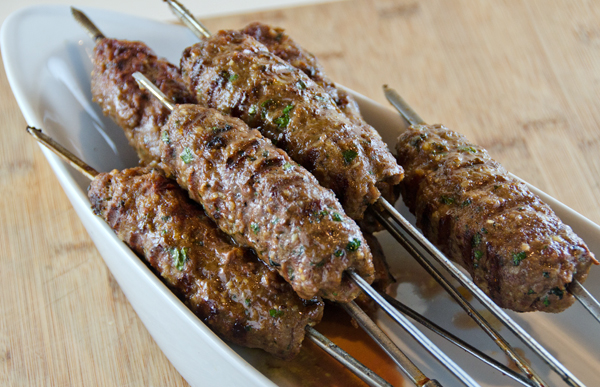
The lamb kebabs were courtesy of a recipe in Cooks Illustrated.  Not truly kebabs these were kofte, long cylinders of spiced ground lamb. Popular thorough out the Middle East and southeast Asia, kofte (plural kofta) comes from the Persian word “to grind”. Kofta usually feature some type of ground meat but there are also vegetarian versions based on beans, spinach or grains. As with any meatball they can be sautéed in gravy but these were grilled over a charcoal fire.

This version of kofte uses a Turkish blend of spices called baharat.  Baharat translates to “spice” in Arabic and the combination of spices in baharat will vary with the region. It will usually include black pepper, cumin, cinnamon and coriander. Shaping the ground lamb, onion and pine nuts into a cigar shape makes them easier to maneuver over a grill. Wrap the grilled kofta in a flatbread and serve with a yogurt-garlic sauce accented with a little sesame paste.

DSC_1040a
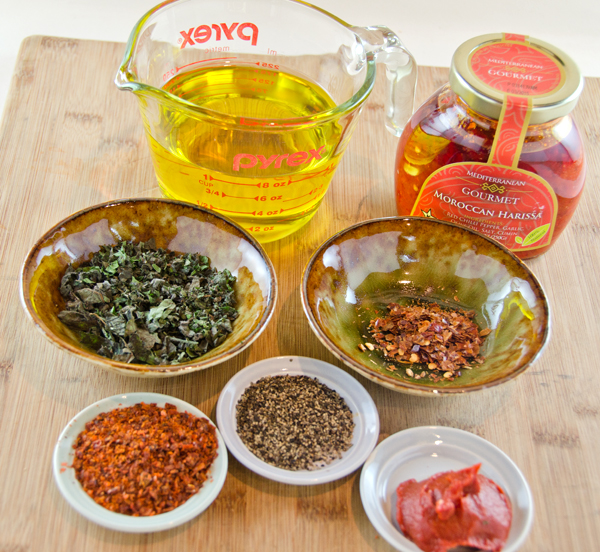
Ingredients for the marinade


Tavuk Kebabi  slightly adapted from Saveur Magazine June/July 2013

Mint and Aleppo Pepper Marinated Chicken Kebabs

Serves 6-8

Ingredients

  • 1 c olive oil
  • 1 T chopped fresh mint
  • ¼ t crushed red chile flakes
  • 1 T dried thyme
  • 1 T Aleppo pepper
  • 1 T tomato paste
  • 1 T harissa
  • 1 t freshly ground black pepper and kosher salt to taste
  • 1½ lbs boneless skinless chicken thighs
  • 6 12″ metal skewers
DSC_1067a
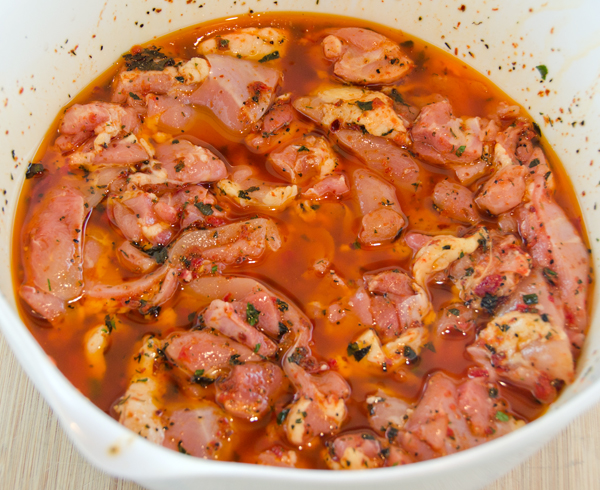
Marinade for 30 minutes and up to 2 hours.


Directions

  1. Mix oil, mint, chile flakes, thyme, Aleppo pepper, tomato paste, red pepper paste, black pepper and salt in a large bowl. Add chicken and toss to coat. Cover bowl with plastic wrap and let sit at room temperature for at least 30 minutes or refrigerate for up to two hours.
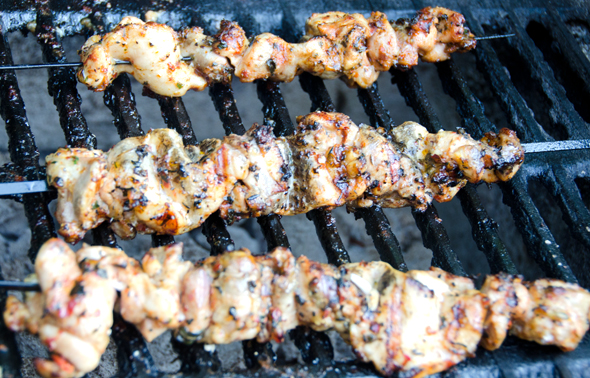
  2. Heat a charcoal grill, bank coals on one side. Remove chicken from marinade and thread onto  skewers. Grill on hottest part of grill, turning as needed, until the chicken is slightly charred and cooked through, 12-15 minutes. If the outside starts to burn before the chicken is fully cooked, move to the cooler side of the grill until done.
DSC_1089a
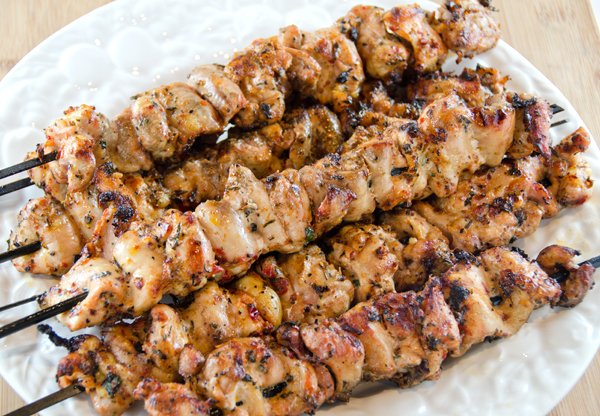
Getting a nice char on the chicken kebabs
DSC_1092 copy
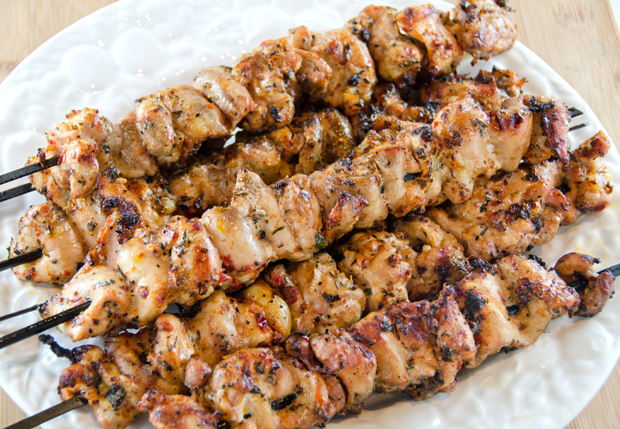
Kebabs ready to serve.

DSC_1083a


Grilled Lamb Kofte

Serves 4 to 6

Ingredients for the Yogurt-Garlic Sauce

  • 1 T plain Greek yogurt
  • 2 T fresh lemon juice
  • 2 T tahini
  • 1 garlic clove, minced
  • ½ t salt

Directions for the Yogurt-Garlic Sauce

  1. Whisk all ingredients together in bowl. Set aside.

Ingredients for Kofte

  • ½ c pine nuts
  • 4 cloves of garlic, peeled
  • 1 ½ t smoked paprika
  • 1 t salt
  • ½ t pepper
  • 1 t whole cumin
  • ½ t whole coriander
  • ¼t ground cloves
  • 1/8 t ground nutmeg (ground from whole if possible)
  • 1/8 t ground cinnamon
  • 1 ½ lbs ground lamb
  • ½ c grated onion, drained
  • 1/3 c minced flat-leaved parsley
  • ¼c minced fresh mint
  • 1 ½ t unflavored gelatin

Directions for the Kofte

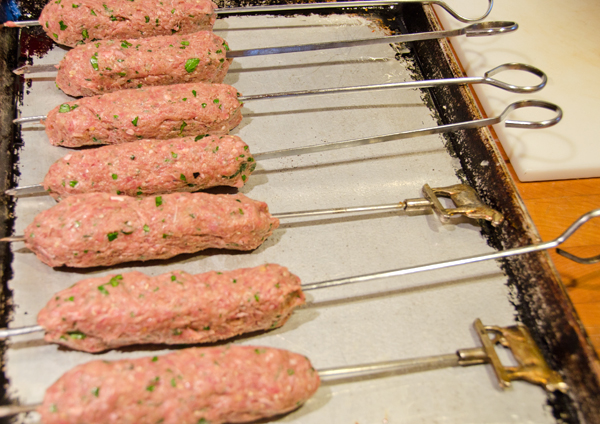
  1. Process pine nuts, garlic, paprika, salt, cumin, pepper, coriander, cloves, nutmeg and cinnamon in food processor until a smooth paste forms, 30 to 45 seconds. Transfer mixture to large bowl. Add lamb, onion, parsley, mint and gelatin; knead with your hands until thoroughly combined and the mixture feels slightly sticky, about 2 minutes. cylinder about 1 inch in diameter. Using 8 (12 inch) metal skewers, thread 1 cylinder onto each skewer, pressing gently to adhere. Transfer skewers to lightly greased baking sheet, cover with plastic wrap, and refrigerate for at least 1 hour and up to 24 hours.
  2. Remove kebabs from refrigerator 30 minutes before grilling. Prepare a grill for medium high heat. Grill kebabs directly over heat, turning to brown on all sides, until cooked through, about 8 minutes.
DSC_1026a
Mixture of ground lamb, onion, pine nuts, herbs and spices
DSC_1031a
Knead with your hands until thoroughly combined.
DSC_1032a
Shape lamb mixture into 5 inch cylinders and thread onto skewers.
DSC_1086a
Ready to fold into flatbreads and top with yogurt-garlic sauce.

July 16, 2013 Roasted Lobster with Mojo Mayonnaise

DSC_0998a

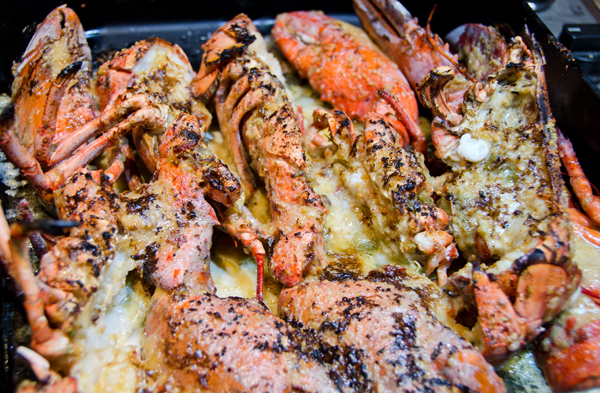
Lobster is a once and a while treat for us and a sale at a local market was enough motivation to pick up a few and to pull out an old favorite recipe. When I was buying cookbooks on a regular basis and life was a bit simpler, I would occasionally try to cook my way through my latest purchase. Such was the case with the Rick Bayless cookbook, Mexico, One Plate at a Time.

Mexico, One Plate at a Time, written thirteen years ago is the fourth cookbook written by Mexican food authority, teacher, restaurant owner, cookbook writer and PBS television host, Rick Bayless. His motivation for writing this book was to help the average cook take the first steps toward understanding real Mexican cooking, not the Mexican American cooking so many of us are familiar with. He provides not only the history and culture behind some of Mexico’s classic dishes, he offers his best recipe for the classic and a contemporary take on the dish that brings it into the twenty-first century. The food stained pages attest to my efforts. I began by covering the basics, guacamole, salsa, moved into new territory with ceviches and found a new way to use the poblano chilis from our garden with delicious chiles rellenos. For entrees I tried the complex turkey mole, added red snapper vera cruz into our dinner rotation and discovered the rich, delicious roasted lobster tails with mojo mayo.

This lobster variation finds it’s roots in Seafood in Mojo de Ajo. He describes mojo de ajo as a bath of golden slow-cooked garlic that traditionally dresses shrimp or a white fish. Garlic, as with other foods (onions, cilantro) we might assume to be native to Mexico, actually were brought by the Spanish explorers of the sixteenth century. Most of us won’t be able to find the red-tinged ajo criollo that he recommends and Mexican cooks love, but it is important to find the freshest garlic available. Look for firm, plump heads that feel heavy for their size. A lighter head is a sign of dehydration. Also, stay away from garlic that is sending out green shoots, that garlic will most likely be bitter.

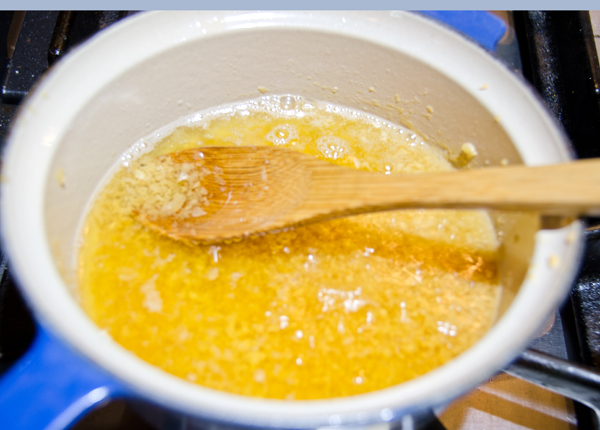
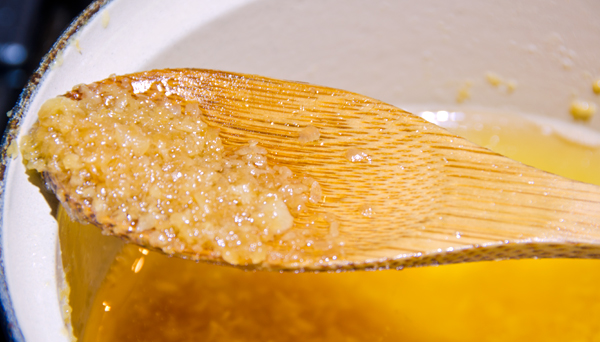
The garlic cooks in a good quality vegetable oil that will bubble gently at a very low simmer. This is where the mojo magic occurs, the sharp taste of raw garlic is mellowed and it’s sweetness emerges. Keep a watchful eye on your simmering pan, the final product should become the color of light brown sugar. If the garlic turns dark in color it will be bitter and inedible.

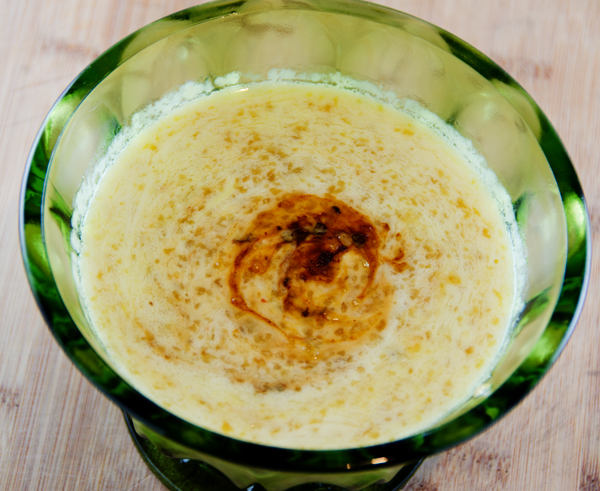
The dish reaches the next step when the cooled oil is added slowly to a base of egg yolks, fragrant lime juice and smoky chipotle peppers resulting in a lusicious mojo mayonnaise that will bring not only lobster but any seafood preparation to a new level.

As Mr. Bayless states at the beginning of his book, food, even a classic dish, is a dynamic evolving creation and he is certainly willing to adapt and accommodate his recipes for the time challenged modern cook. The cookbook version of the recipe for mojo de ajo requires peeling 3/4 of a cup of garlic cloves and a half hour of occasional stirring and temperature moderation of the slow cooked garlic. Two steps that require a certain amount of time and might have steered some (many) home cooks away from this recipe.

My recent observations both on his website, as well as a video from a Chicago block party segment he did on the Rachael Ray show from 2010 show how he has adapted the preparation of mojo de ajo from the original recipe in the book.  Although he did mention using fresh garlic he also gave approval to peeled garlic from the supermarket as a reasonable substitute. He told the large audience that over the course of years he developed an easy way to make a large quantity of the mojo. Rather than chop the garlic by hand, he puts it in a plastic bag and crushes it with a rolling pin. The garlic is then placed in a square baking pan and covered with three cups of olive oil. After cooking for 45 minutes in a 325°F oven he adds some lime juice and cooks for another fifteen minutes. In his book Mr. Bayless originally expressed that oven cooking the garlic in oil would result in a less reliable product, it is now the standard for the recipe on his website The liquid gold, as he often refers to it, can be stored in the refrigerator for several weeks, making it well worth the effort the home cook would put into it.  Mojo de ajo can also be used in vinaigrettes, hash brown potatoes or drizzled over hot pasta tossed with chili flakes and breadcrumbs. A compromise you say? If it gets more people in the kitchen and stimulates cooking creativity, then I would say no harm done.

Roasted Lobster Tails with Mojo Mayonnaise

Serves 6

Ingredients

  • 3/4c peeled garlic cloves
  • 1 1/4c good quality canola oil and a little more for brushing the tails
  • 2 large egg yolks
  • 3T fresh lime juice
  • 2 canned chipotle chiles in adobo, seeded and finely chopped
  • Kosher salt
  • Six 6 ounce lobster tails in their shell

Directions

  1. Either chop the garlic finely by hand into small pieces or drop the cloves through the feed tube of a food processor with the motor running and process until the pieces are 1/8 inch in size. You should have about 1/2 cup of chopped garlic. Scoop the garlic into a small saucepan and add all of the oil and set over medium low heat. Stir occasionally as the oil barely comes to a simmer. Adjust the heat to maintain the gentle simmer (bubbles will rise in the pot like sparkling mineral water) and cook, stirring occasionally until the garlic is a soft golden color, about 30 minutes. Cool to room temperature and transfer to a measuring cup with a spout.
  2. In a food processor or blender, combine the egg yolks and lime juice. Pulse to combine and then, with the machine running, slowly (I can’t emphasize slowly enough…) dribble in the oil along with stray pieces of garlic. The mixture will thicken into a mayonnaise. When all of the oil is in and the mayonnaise is thick, spoon in the rest of the garlic and process just long enough to combine. Scrape into a bowl, stir in the chopped chipotles and season with salt to taste. Cover the mojo mayonnaise and refrigerate until using.
  3. Kill and cut up the lobsters, if this is something you are uncomfortable doing, opt for lobster tails that just need an overnight thaw in the refrigerator.
  4. Heat the broiler. Crack open the lobster pieces. Lay the prepared lobster pieces or tails on a heavy duty baking sheet, for a whole lobster you will have a split front half, a split tail, 2 arms and 2 claws.  Brush the lobster meat with oil. Place about 8 inches below the broiler. Broil for 5 minutes. Remove from the broiler and check one of the tails for doneness by cutting off about 1/2 inch of the meat at the front, it should be just about tender but still have a hint of translucency at the center. If it is far from done, return the lobster to the broiler for about a minute or so. Smear all sides of the lobster meat evenly with an 1/8-inch layer of mojo mayonnaise and return to the broiler. Broil until the mayonnaise is a golden brown, about 1 minute more.
  5. Transfer the lobster to a serving platter, serving the remaining mayonnaise separately.
DSC_0960a
Oil and garlic slowly simmering in the pan, bubbles will rise in the pot like sparkling mineral water.
DSC_0969a
The garlic should turn a soft pale golden color, like the color of light brown sugar.
DSC_0989a
Mojo mayonnaise with tart lime juice and smoky and spicy chipotles en adobo.


June 15, 2013 My Big Fat Greek Cookout featuring Grilled Branzino with Ladolemono

DSC_0567a

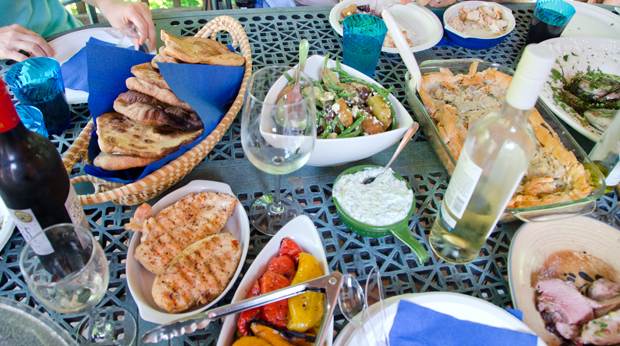
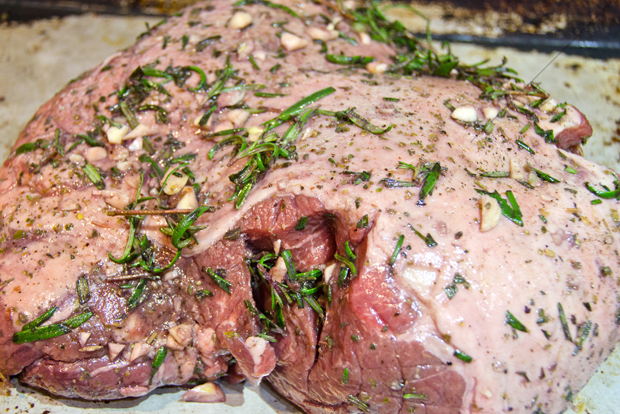
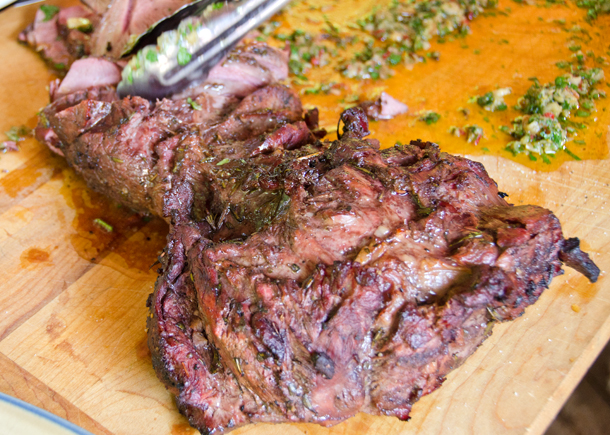
To make our Sunday cookouts more interesting this summer we have decided to go in an international direction. Since we wanted to serve boneless leg of lamb, Greek cuisine seemed like a natural. Joe applied the “charred and scruffed” approach to the lamb, making a board dressing with roasted garlic, Greek olive oil and fresh Italian (oops) parsley, salt and pepper.

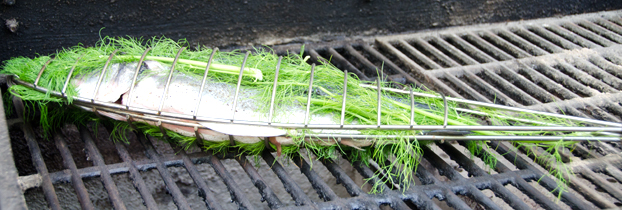
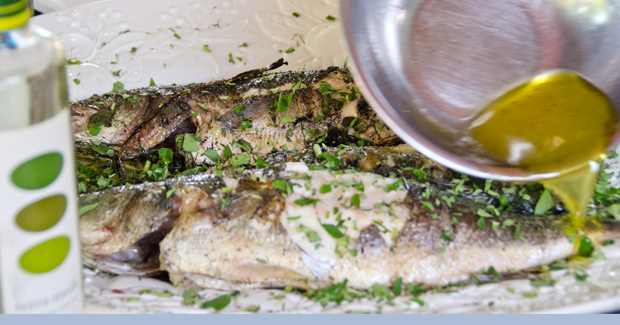
We like to serve two entrees and at first were thinking chicken but a recipe in Bon Appetit and the unanimous positive user reviews convinced me otherwise. Whole bronzino, a Mediterranean sea bass, already a favorite of ours, seasoned simply with a little olive oil, kosher salt and fresh ground pepper. The light and flaky cooked fish is drizzled with ladolemono, a classic Greek vinaigrette. What makes this vinaigrette unique is the one-to-one ratio of acid to oil as opposed to the traditional one-to-three, found in most vinaigrettes. Fresh squeezed lemon juice is combined with Greek extra virgin olive oil and dried (we used fresh since we had it ) Greek oregano is crumbled over the top. Very simple and delicious, I know we will repeat this again.

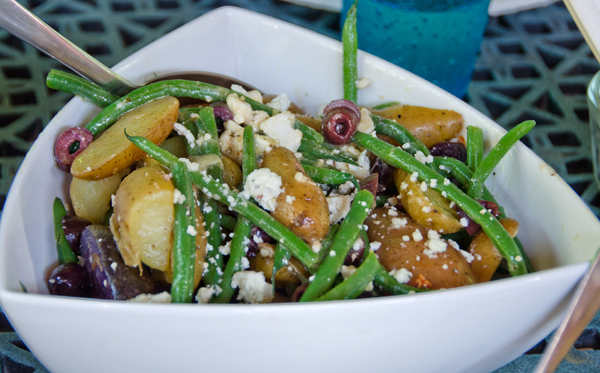
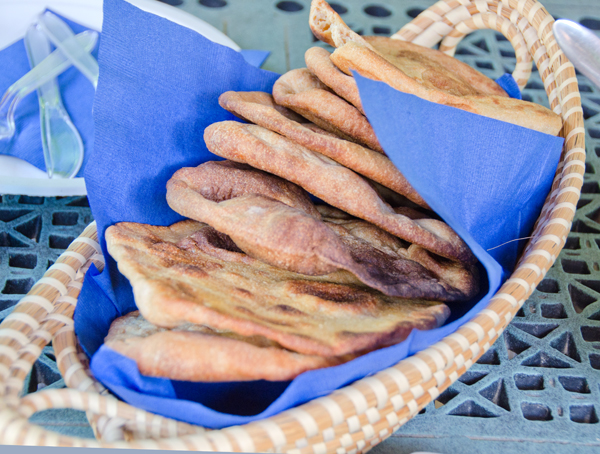
Grilled vegetables, though not exclusively Greek, are an important part of  Mediterranean cuisine and complimented both entrees very nicely.  A Greek potato salad of fingerling potatoes, haricots verts, crumbled feta and black olives was a Bobby Flay contribution. Since we love green salads I made a classic Greek salad of tomatoes, cucumbers, feta and Kalamata olives. I like to combine those ingredients with some crunchy Romaine lettuce and top it with a simple vinaigrette of red wine vinegar, oregano, garlic and Greek extra virgin olive oil. Spanakopita or spinach pie was a natural addition, a dish that I often make when our crop of spring spinach is plentiful. Sometimes I make this dish with puff pastry but since the theme was Greek I used phyllo. I made whole wheat pita breads to wrap up the lamb and vegetables, just wished they had puffed up more. Next time I will bake them on the Kamado.

I made tzatziki, the Greek cucumber yogurt sauce that is accented with lemon, garlic and fresh dill. It went perfectly with the lamb and grilled vegetables. When I made this as a caterer I would need to strain the yogurt to give it a thicker texture. The ready availability of Greek yogurt has eliminated that step.

Dessert was Kathy’s delicious and flaky baklava and cheesecake topped with my homemade strawberry frozen yogurt. Greek wines and licoricey iced tea were the beverages. A delectable feast that was enjoyed by all.

Grilled Branzino with Ladolemono

From Bon Appetit June 2011

Makes 2-4 servings

Ingredients

  • 2 whole bone-in branzino, cleaned
  • 1T extra virgin olive oil, Greek preferably
  • Kosher salt and freshly ground pepper
  • 1/2c ladolemono (recipe follows)
  • 1T dried Greek oregano

Directions

  1. Prepare a grill to medium high heat.  Brush fish with oil and season skin and cavity with salt and pepper
  2. Grill fish, turning once, until cooked through, about 10 minutes. Transfer to a platter, drizzle with ladolemono, crumble oregano over, and serve

Ladolemono

Make 1/2 cup

Ingredients

  • 1/4c fresh lemon juice
  • 1/4c extra virgin olive oil, Greek preferably
  • Kosher salt and freshly ground pepper

Directions

  1. Whisk together lemon juice and oil. Whisk in kosher salt and freshly ground pepper to taste.
DSC_0542a-copy
The boneless leg of lamb was marinated in garlic, rosemary and olive oil.
DSC_0551a
The fish “cage” makes it easier to flip. A few fennel fronds for extra flavor.
DSC_0546a
Opa! Joe likes to toss the vegetables with a little flourish.
DSC_0559a
Bobby Flay’s Greek potato salad
DSC_0557a
Spanakopita, Greek spinach pie
DSC_0564a
Succulent lamb, enhanced by a flavorful board dressing.
DSC_0558a
Whole wheat pita breads for wrapping up lamb, tzatziki and veggies.
DSC_0561a
Pouring some of the ladolemono over the cooked branzino


 .

May 27, 2013 Yellowtail Snapper with Mango Salsa

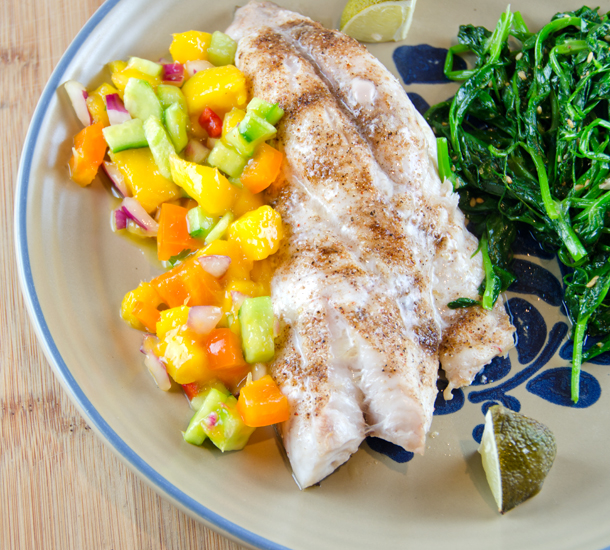
DSC_0372aFirm white fleshed fish is a canvas on which many dishes can be created. With descriptors like clean, bright, and mild, the preparation can take you in many directions. A good pristine piece of fish can be prepared as simply with a little salt, pepper and a squeeze of citrus. You can also add a sauce and a rub and the flavors can transport you to the cuisine of your choice.

Our fish this evening was a yellowtail snapper fillet, named for the single yellow stripe that runs the length of the fish, even along the head. It is considered to be one of the best flavored snappers and since this very perishable fish made the trip up from Florida, I decided to “snap” one up.

I find that many people have a fear of cooking fish. They err on the side of overcooking it and the result is dry and flavorless. Perfectly cooked fish is moist and delicious. We have found a method of cooking fish that gives us consistently good results. In 1959, The Canadian Department of Fisheries and Oceans published a cookbook to help promote the country’s fishing industry. Popularized by late chef and food writer James Beard, they came up with a method of calculating how long to cook a piece of fish. Measure your piece of fish at the thickest point and cook at 10 minutes per inch or 1 minute per one tenth of an inch at 450°F. If you are baking a fillet, fold the thinner tail section under to maintain a uniform thickness. Check your fish a few minutes before the prescribed cooking time. It should be opaque in the center and cooked until translucency is gone. Also remember that the fish continues to cook from residual heat when first removed from the oven. To measure, any clean, well marked ruler will do. We still have our “Perfect Fish” that was patent pending in 1984 and not available now as far as my research found.

 
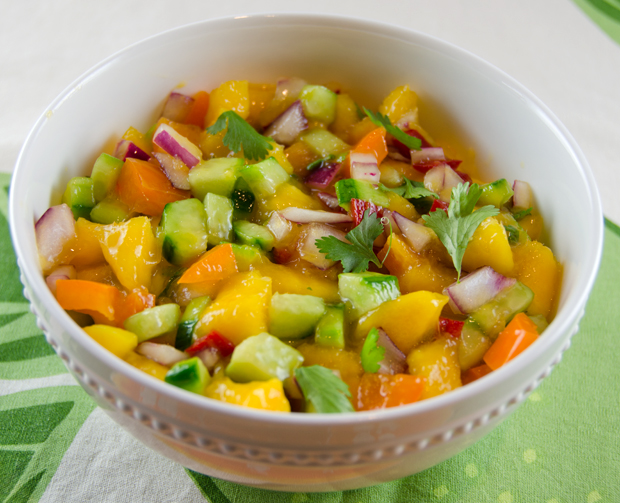
I decided to go in an island direction and prepared a Caribbean style rub and a simple mango salsa to accompany our fish. You can substitute red snapper, bronzino or sea bass for the yellowtail. It is important to note that your dish will only be as good as the fish you purchase. If you are purchasing whole fish look for bright, clear eyes. The flesh should be firm and shiny, not dried out. Ask to smell the fish if you need to, it should smell like seawater or nothing at all. Look for a dealer who properly handles seafood. My store of choice is Hellers Seafood in Warrington Pa, about 12 miles from my home. If I am planning to buy fish I bring a cooler filled with ice packs to keep the fish as cold as possible. Then it immediately goes in the fridge and used the same day. Just remember, no amount of sauce or rub will make a bad piece of fish taste any better.

DSC_0345a

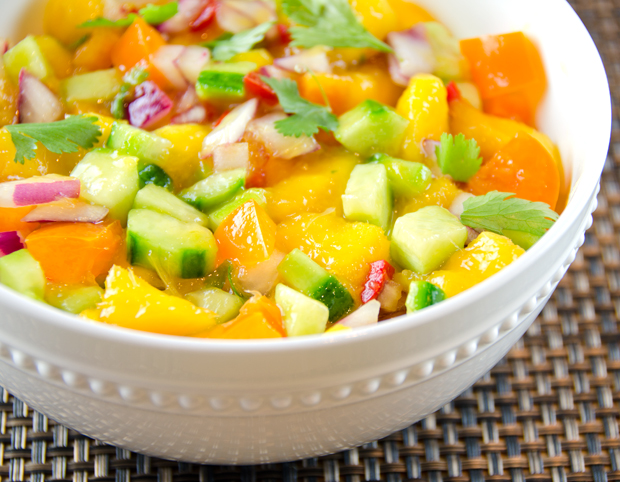
Mango Salsa

Makes 2 cups

  • 1 1/2c diced mango
  • 1c diced cucumber
  • 1/2c pepper (red, yellow or orange)
  • 1/3c diced red onion
  • 1 small red jalapeno, chopped, seeds and ribs removed
  • 3T fresh lime juice
  • 1/4c torn cilantro leaves
  • 1T or more of Persian lime oil
  • Kosher salt and freshly ground pepper to taste

Directions

  1. Combine all ingredients in a medium bowl. Add salt and pepper to taste.

Caribbean Rub for Fish

  • 1/2 t allspice
  • 1t cumin
  • 1 1/2t thyme
  • 1t onion powder
  • 1t black pepper
  • 1/2t salt
  • 1/4t cayenne pepper (or to taste)
  • 1t brown sugar

Directions

  1. Whisk all spices together in a small bowl.
  2. Sprinkle the spice rub over the fillet before cooking.

Canadian fisheries method of cooking fresh fish

General Directions

  1. Preheat your oven to 450°F.
  2. Measure your whole fish, steak or fillet at it’s thickest point.
  3. Bake fish for 10 minutes for every inch of thickness. The original instructions say to turn the fish over at the halfway point, you can, we don’t. If you check internal temperatures, it should be about 145°F.

 DSC_0360a

May 14, 2013 Red Snapper Veracruzana

DSC_0122a

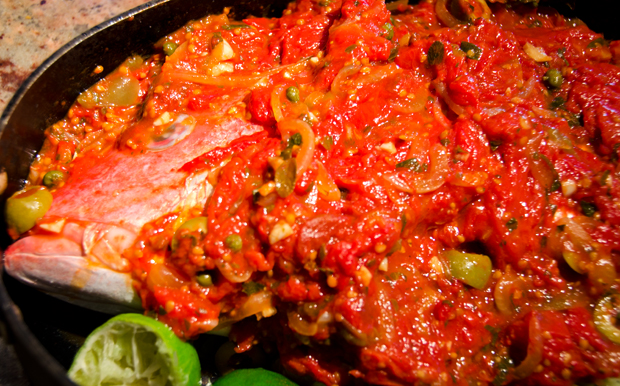
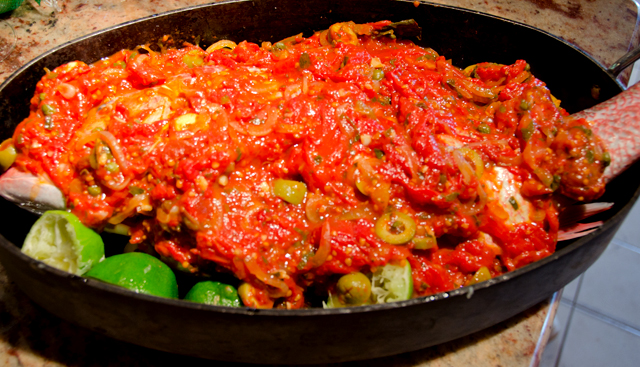
With influences from both Old and New World cuisine, red snapper veracruzana is a classic Mexican dish with definite Spanish overtones. When the Spanish explorer Hernan Cortes landed on the southeastern gulf area of Mexico on Good Friday, 1519 he gave it the name “Villa Rica de la Vera Cruz” which translates to  the rich village of the true cross. Rich not just in the abundance of the gold and silver that they would soon find here but in seafood, tomatoes, peppers, and vanilla as well as their diet staples, corn, beans and squash. Cultivated first by the Mayans and later by the Aztecs, the Spanish introduced the tomato throughout their empire. The Spanish conquistadors in turn brought parsley, cilantro and thyme, as well as garlic, onions and olives to the coastal Mexican cuisine which influences it to this day. Red snapper or huachinango as it it called in Mexico, is nestled in a sauce of rich ripe tomatoes, onions and garlic with a salty tang that comes from Manzanilla (Spanish) olives and capers. Pickled jalapenos add tartness and only a moderate amount of spice. I like to make my own pickled jalapenos in late summer when our pepper plants are prolific. I used a whole fish in this preparation but don’t let that stop you from trying this recipe. The sauce would be just as good on fish fillets or even shrimp.

Red Snapper Veracruzana

Slightly adapted from Mexico One Plate at a Time

Serves four to six

Ingredients

  • One 4 pound cleaned and scaled firm meaty fish, such as snapper, grouper, striped bass, pompano (ask your fishmonger to cut out the red gills and trim off the fins at the top, bottom and alongside the gills. An easier approach, to feed four, use four 5-6 ounce boneless skinless fish fillets of the same type of fish named above. You will not need as much sauce, only about five cups will be needed for this recipe. Reserve the rest for another use.
  • 2 limes juiced
  • Kosher Salt
  • 1/4c olive oil
  • 1 medium white onion, thinly sliced
  • 4 large cloves of garlic, peeled and finely chopped
  • 3lbs ripe tomatoes, cored and chopped into 1/2 in pieces (7 cups)
  • 3 fresh Turkish bay leaves
  • 1 1/2 teaspoons dried Mexican oregano (can substitute standard oregano)
  • 3T chopped flat leafed parsley
  • 1c pitted and roughly chopped Manzanilla olives
  • 1/4c capers, drained and rinsed
  • 3 or 4 pickled jalapeno peppers, stemmed, seeded and thinly sliced

Directions

  1. Cut two parallel slashes across each side of the fish, cutting through the flesh to the backbone. Place the fish in a baking dish large enough to hold it comfortably. Drizzle both sides of the fish with the lime juice and sprinkle generously with salt. Cover and refrigerate from one to four hours.
  2. In a five quart Dutch oven, heat the oil over medium heat. Add the onion and cook, stirring regularly, until just beginning to brown, about 5 minutes. Add the garlic and cook 1 minute more, stirring occasionally. Raise the heat to medium high and add the tomatoes, bay leaves, oregano, parsley and half of the olives, capers and chiles. Simmer briskly, stirring frequently, for about 5 minutes to evaporate some of the liquid. Reduce the heat to medium low, stir in one cup of water and simmer for 15 minutes. Taste and season with salt to taste. Remove from the heat.
  3. Heat the oven to 350°F. Lightly oil a roasting pan large enough to hold the fish comfortably.  Remove the fish from the lime marinade and lay it in the pan. Cover the fish with the tomato sauce. Bake in the center of the oven until internal temperature of fish is about 140°F or until flesh is opaque and separates easily with a fork, start checking at the 35 minute mark. Prepare a serving platter large enough to hold the entire fish. Use two sturdy large metal spatulas to transfer the fish from the baking pan to the serving platter. Spoon up the rest of the sauce from the pan and cover the fish. Sprinkle your finished dish with the remaining olives, capers and parsley.
  4. To serve your beautiful presentation, set out the spatulas you used to move the fish from the pan to the plate along with a very sharp knife.Using the sharp knife , cut between the head and body until the knife touches the backbone. Repeat on tail end. Insert knife at tail end, and cut from backbone to cavity. With knife resting against backbone, cut up to head. Insert a spatula underneath flesh of fish, on top of the backbone and lift. Lift tail; remove backbone.If desired, remove skin from fillet.
DSC_0062
Can you just smell the tomatoes, garlic, just-picked bay leaves and Mexican oregano? I used my roasted tomatoes I freeze every season. According to the video I watched of the Mexican chef preparing this dish on the Epicurious website, Mexican chefs don’t mind skin on their tomatoes.


DSC_0121a
If the fish tail extends beyond the roasting pan, wrap it in foil to prevent it from burning.


May 9, 2013 Moroccan Chicken with Apricot-Olive Relish

DSC_0150a

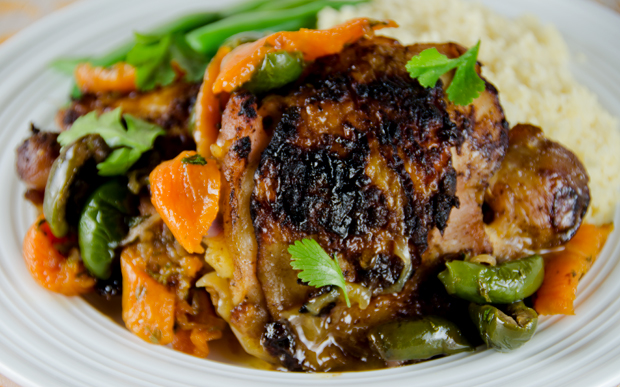
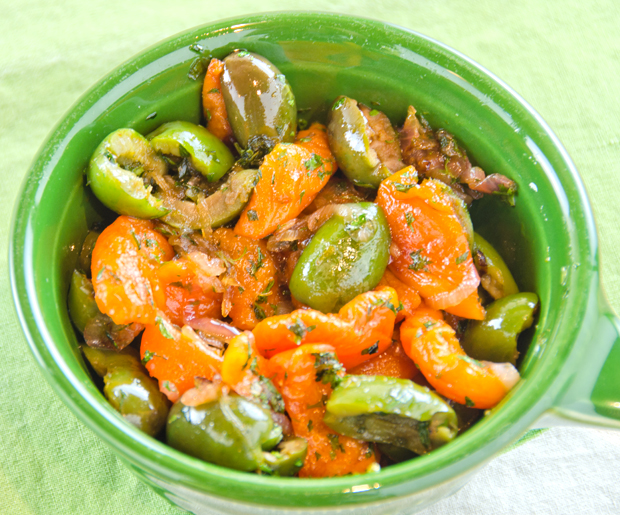
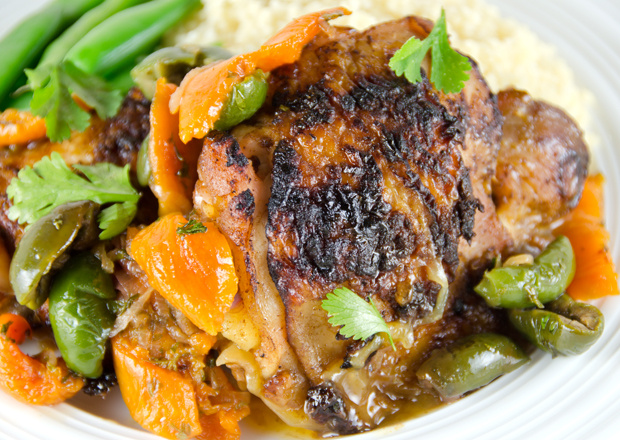
Sweet tart apricots combine with plump juicy olives in this Moroccan inspired dish. It’s quick enough for a weeknight but is special enough to serve to guests. The blend of Moroccan inspired spices, cumin, coriander, cinnamon and ginger give the dish a wonderful aroma. Toasting your own spices brings out the flavor even more.

Smoked paprika or pimenton de la Vera is not the paprika that many of us have been cooking with for years.  Pimenton originates from the La Vera region of southwest Spain. Chilis are smoke dried over fires that are kindled with the local oak logs.  The dried pepper can range from sweet (dulce) to hot (picante). This recipe uses the sweet version that has the mildest amount of heat.

Cerignolas are my olives of choice in this dish. I can usually find them at the supermarket olive bar at Wegmans.  Cerignolas are a large, meaty olive that originate from the town of Cerignola in the province of Puglia, Italy. They are milder in flavor because they are cured in lye, yes, like drain cleaner lye, there is a recipe here.  I prefer the green Cerignola but they also come in black and red. The red color is the result of food coloring and never seemed quite natural to me.  Cerignolas always come with the pit. To remove the pit, place olives on a cutting board and whack lightly with the side of a chef’s knife. The pit pulls out easily.

Don’t over plump your apricots. Five minutes is long enough for just purchased dried apricots, any longer may turn the apricots to mush. The apricot balsamic vinegar is a worthwhile addition to the dish. It adds a richness and nicely compliments the flavors in the dish. Serve with couscous and a green vegetable.

Moroccan Chicken with Apricot-Olive Relish

adapted from a recipe in Food and Wine Magazine

Serves three or two with leftovers

Ingredients

  • 2t cumin seeds
  • 1t coriander seeds
  • 2T honey
  • 2T apricot balsamic vinegar (if not using, increase honey to 3T)
  • 1/4c canola oil plus 1T canola oil
  • 1T grated fresh ginger
  • 3T fresh lemon juice
  • 1 clove minced garlic
  • 1/2t cinnamon
  • 1t smoked Spanish paprika or sweet pimenton de la Vera
  • 1t kosher salt
  • 1/2t freshly ground black pepper
  • 6 chicken thighs on the bone, with skin (about 2 to 2 1/4 lb)
  • 1c dried apricots
  • boiling water
  • 2 medium thinly sliced shallots
  • 1/2 cup pitted green olives, such as Cerignola or Picholine
  • 2T chopped cilantro

Directions

  1. Preheat oven to 375F
  2. Toast cumin and coriander in a small saute pan over medium heat until slightly browned and fragrant. Remove from heat, cool and grind in spice grinder or small food processor.
  3. In a bowl, whisk the honey, apricot vinegar, 1/4c canola oil, lemon juice, grated ginger, garlic, cumin, coriander, cinnamon, smoked paprika, cayenne, salt and pepper. Arrange the chicken in one layer in a glass or ceramic baking dish. Reserve 1/4 cup of marinade and pour the rest over the chicken. Turn to coat pieces. Refrigerate for 2-3 hours, turning once.
  4. Meanwhile, in a small bowl, pour boiling water over the apricots to cover and let stand until plump, about 6 minutes.
  5. Remove chicken from marinade. Heat the remaining tablespoon of oil over medium high in a large saute pan. Working in batches so as not to crowd the pan, brown the chicken well all over, about 3 minutes per side, transferring each batch to a plate.
  6. Return chicken to the baking dish, cover with foil and bake for about 25 minutes or until chicken is cooked through.
  7. In the same skillet, heat the remaining tablespoon of oil. Add the shallots and cook over moderate heat until softened and slightly browned, about 5 minutes. Add the apricots, olives and reserved marinade and bring to a simmer.  Cook over moderately high heat until the marinade is thickened and glazes the apricots and olives, about 2 minutes. Stir in the cilantro.
  8. Transfer chicken to plates, top with apricot olive relish and serve.
DSC_0097a
Marinade the chicken pieces for several hours.
DSC_0103a
Colorful apricot olive relish
DSC_0110a
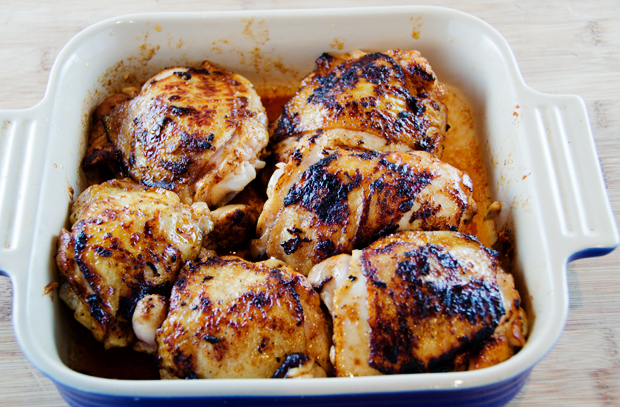
Browned chicken pieces are returned to the dish, covered with foil and baked in the oven for twenty-five minutes.

DSC_0141a

DSC_0153a

April 30, 2013 Slow Roasted Pork Shoulder on a Kamado grill

DSC_0040a

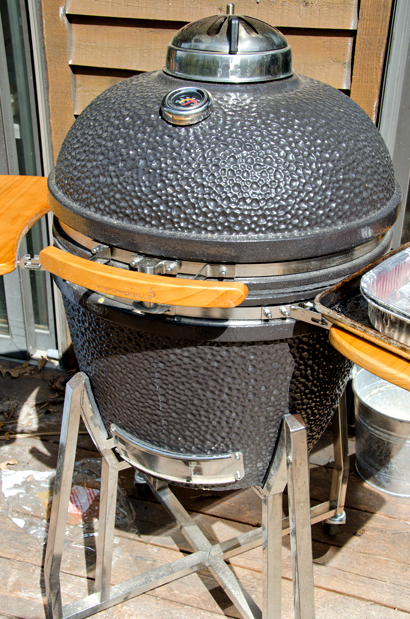
We have been interested in a kamado-style cooker for several years now. The Big Green Egg was the first to catch our eye, but the price plus the accessories had always seemed a bit prohibitive. Last year I spotted a similar cooker at the local Costco but by the time I was able to get Joe to the store, they were all gone. Fortunately this time the grill was in stock and we found assistance to load the 200+ pound grill onto our rolling cart and into the car.  Joe was able to get our purchase out of the car in pieces and had it assembled in a relatively short amount of time. With the assistance of a friend, the grill was rolled out on the deck and we were ready to cook. 

The mushi (to steam) kamado (cooker, oven or kiln) is based on a Southern Japanese ancient clay cooking vessel. The mushikamado began as a round pot with a domed lid, originally used to steam rice for ceremonial occasions.  This versatile cooker was introduced to the United States from Japan after the Second World War by the servicemen who brought them home. An enterprising American pilot began manufacturing the grills in the 1960’s and shortened the name to kamado.  A damper and draft-door were added to bring temperature control to the device and the cooking fuel has changed from wood to charcoal. The cookers that once were made of extremely temperature sensitive clay are now constructed with a variety of materials including high-fired ceramics.  Ceramic material provides excellent heat retention and more efficient fuel burning.   Kamados can achieve consistent temperatures, as low as 225°F  and as high as 750°F. and can hold heat for long periods of time. What started as a ceremonial rice cooker has evolved into a multi purpose cooker that smokes, bakes, roasts and slow cooks.

We are still in the process of learning the nuances of the kamado. We revisited a favorite that we usually cook in the oven, a slow roasted pork shoulder. The original post is here.

DSC_0009a
Our new kamado-style grill.


DSC_0010a
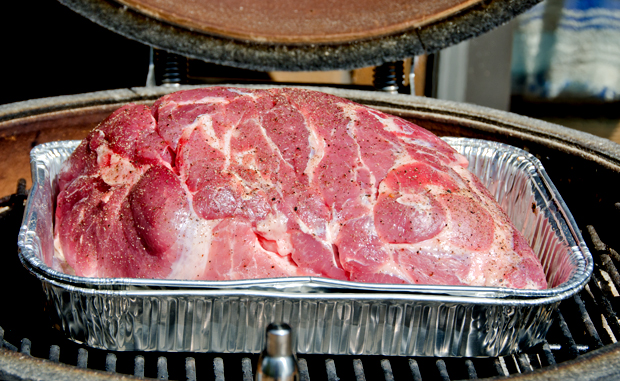
The pork, seasoned simply with salt and pepper, ready for the grill.


DSC_0016a
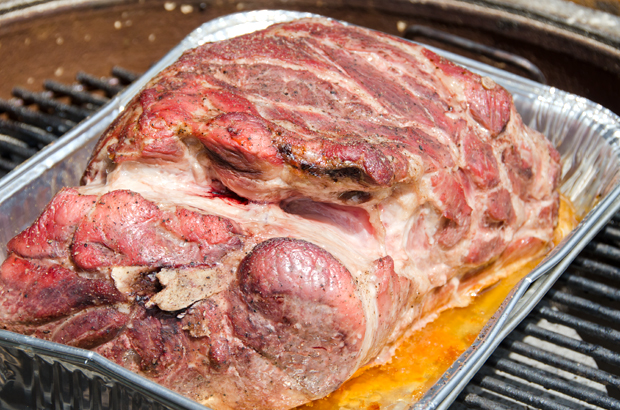
The pork shoulder after several hours of cooking.


DSC_0018 copy
Tender, after four hours of cooking


DSC_0039a
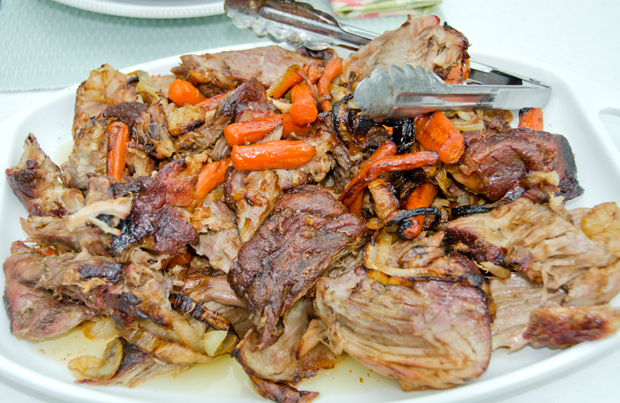
The pork is broken into chunks and onion, garlic and carrots go into the roasting pan. It cooks for one more hour.
DSC_0041a
The finished dish, we served it with scalloped potatoes, white beans with garlic oil, grilled asparagus and red peppers.


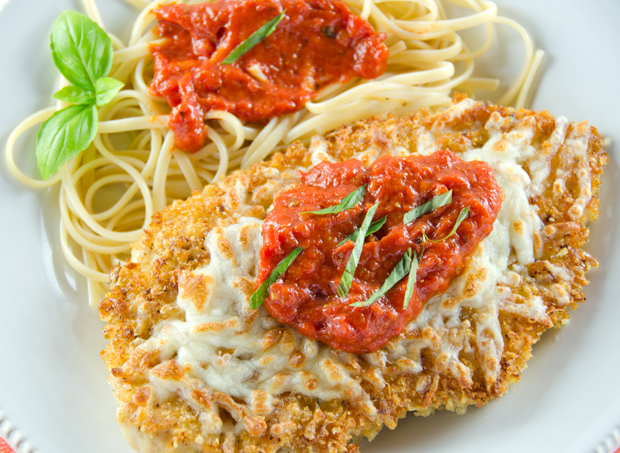
April 23, 2013 Chicken Parmesan

DSC_9878a

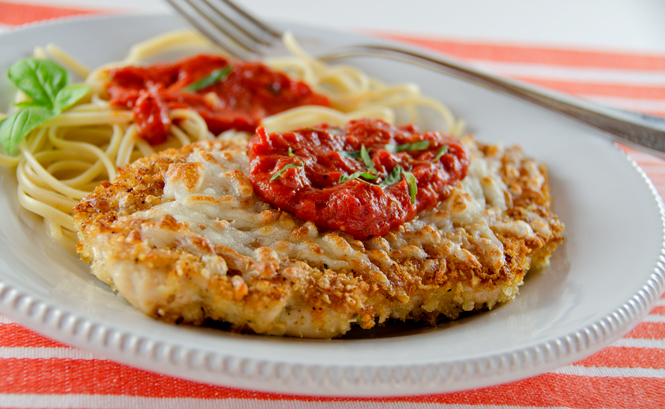
What’s in a name? Sometimes a bit of confusion. You might think a dish with the name Parmesan originated from the city of Parma in the northern Italian region of Emilia- Romagna .  Well you would be wrong. Both the island of Sicily and southern region of Campania claim the origins of this dish.  There it is known as Parmigiana di Melanzane or Parmesan of Eggplant because of the prominence of Parmigiana-Reggiano in the dish. Author Mary Taylor Simeti offers another interesting explanation in her book, “Pomp and Sustenance: 25 Centuries of Sicilian Food”. Sicilians thought that their local dish of sliced eggplant layered with tomato sauce and caciocavallo cheese was originally Melanzane alla Palmitiana. Palmitiana means shutter in Sicilian and refers to the layered louver-like pattern of eggplant slices. It is said that Sicilians have a difficult time pronouncing the letter “l”, so the dish became known as parmigiana.
Whatever the explanation, Cooks Illustrated offered their second version of Chicken Parmesan in their March/April 2013 issue. It is a lighter version of the Italian classic. I used my own roasted tomatoes that I froze last summer to make a very simple but flavorful sauce. In the Cooks Illustrated recipe the breast cutlets are sliced horizontally,  I like to pound mine to an even thickness. The chicken has a light coating of panko crumbs, herbs and Parmesan cheese. Always buy real Parmigiano-Reggiano not the green powdered stuff in a can.

When Cooks Illustrated did their first redo of this classic fifteen years ago in 1998 they suggested using panko bread crumbs, not widely available at that time. Then you could only get them in Asian markets or by mail order. Now every supermarket and big box store carries panko. Even Emeril has his own brand. Panko differs from other bread crumbs because it is processed into flakes, not crumbs. Flakes result in a broader surface area when frying and gives the finished product a lighter crispy coating. A sprinkling of mozzarella and fontina and the chicken goes under the broiler to finish.Only two tablespoons of the sauce top the finished cutlet  That way all the components maintain their integrity; the chicken is juicy with a nice crispy crust, the sauce complements without overwhelming and there is just enough creamy melted cheese to coat it .  The recipe makes plenty of sauce so be certain to cook some pasta to enjoy it with the chicken.

DSC_9894a

Chicken Parmesan

Adapted slightly from Cooks Illustrated #121

Serves four

Ingredients for sauce

  • 1T olive oil
  • 2 minced garlic cloves
  • 1/2t dried oregano
  • Pinch of red pepper flakes
  • 1 (28oz) can crushed tomatoes (I used 2 quart bags of roasted tomatoes)
  • 1/4t sugar
  • 2T chopped fresh basil

Directions for sauce

  1. Heat the olive oil in a straight sided sautepan over medium high heat until just shimmering.
  2. Add garlic, 1t salt, oregano and pepper flakes, cook, stirring occasionally until fragrant, about 30 seconds.
  3. Stir in tomatoes and sugar, increase heat to high and bring to a simmer.
  4. Reduce heat to medium-low and simmer until thickened, 20-25 minutes. Since I use my own tomatoes this is the point where I put the tomatoes through a food mill to eliminate the seeds and give the sauce a smooth texture.
  5. Off heat, stir in basil. Season with salt and pepper to taste. Cover and keep warm.

Ingredients for the chicken

  • 4 boneless, skinless chicken breasts, 4-6 oz each, pounded 1/2 inch thick
  • 1t kosher salt
  • 1/2c shredded whole milk or part-skim mozzarella cheese
  • 1/2c fontina cheese
  • 1 large egg
  • 1T all-purpose flour
  • 3/4c freshly grated Parmesan cheese
  • 1/2c panko bread crumbs
  • 1/2t garlic powder
  • 1/4 t dried oregano
  • Freshly ground black pepper
  • 1/3c vegetable oil
  • 1/4c fresh basil, julienned

Directions for the Chicken

  1. Sprinkle each side of the cutlets with 1/8 t of salt and let stand at room temperature for twenty minutes.
  2. Combine the mozzarella and fontina cheese in a bowl. Set aside.
  3. Adjust oven rack 4 inches from the broiler element and heat broiler.
  4. Whisk egg and flour together in a shallow pan until completely smooth.
  5. Combine Parmesan, panko, garlic powder, oregano and a grind of fresh pepper in a second shallow pan.
  6. Pat the chicken dry with paper towels. Working with 1 cutlet at a time, dredge cutlet in egg mixture. Allow excess to drip off.
  7. Coat the cutlets in the Parmesan mixture, pressing gently so crumbs adhere. Transfer to a large plate.
  8. Heat oil in a 10-inch nonstick skillet over medium high heat until shimmering. Carefully place two of the cutlets in the skillet and cook without moving them until bottoms are crispy and golden brown, 1 1/2 to 2 minutes. Using tongs, carefully flip cutlets and cook on second side until golden brown, 1 1/2 to 2 minutes. Transfer cutlets to a paper towel lined plate and repeat with remaining cutlets.
  9. Place cutlets on a rimmed baking sheet and sprinkle cheese mixture evenly over cutlets. Broil until cheese is melted and beginning to brown, 2-4 minutes. Watch carefully! Transfer chicken to serving platter and top each cutlet with 2 tablespoons sauce. Sprinkle with basil, serve immediately, passing remaining sauce separately.
DSC_0470a
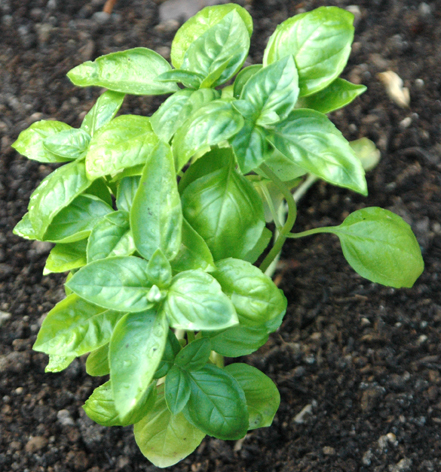
Can’t wait for the basil in the garden.


DSC_5375
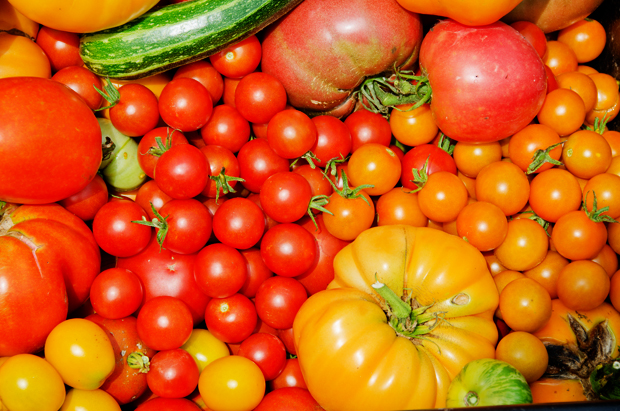
Some of last year’s tomato harvest.

DSC_9884a


April 20, 2013 Grouper with Grilled Vegetables and Romesco Sauce

DSC_9807-copyVer-sa-tile   adj.

  1. Capable of doing many things competently
  2. Having varied uses or serving many functions.

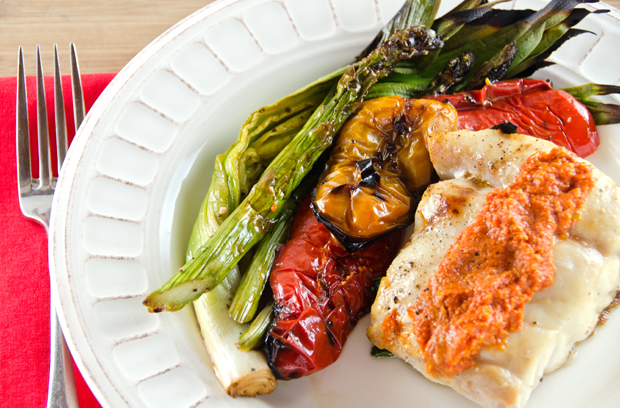
Versatile, that’s a word that accurately describes Romesco sauce. This rich, vibrant condiment is from the coastal town of Tarragona in northeastern Spain. It’s origin is often credited to the local fishermen who added it to seafood dishes. Authentically made with dried Spanish Nora peppers, most of the recipes I consulted used fresh or jarred roasted peppers. As with many traditional sauces, there are many variations on the recipe. My version combines roasted red peppers, almonds, some toasted bread, tomatoes, sherry vinegar and smoked paprika. These traditional Mediterranean ingredients are transformed into a luscious sauce that complements a wide variety of dishes. Romesco sauce can be served as a sauce with chicken, fish or grilled vegetables. It can be tossed with pasta, layered on a sandwich or used as a dip for crudites.

Romesco is a thick sauce, like pesto, and like pesto it is traditionally made with a mortar and pestle but a food processor brings it together in no time at all. If it were late summer I would be using my own roasted peppers, instead I used spicy and sweet piquillo, or bird’s beak peppers that also originate from northern Spain.  Be sure to toast the almonds to enhance their nutty flavor, Spanish Marcona almonds would fill in nicely too.

 
Romesco sauce plays a part in a festival in northern Spain called Calcotada. It is an early spring event that celebrates the harvest of calcots, slender onions similar to baby leeks. After the calcot harvest, community festivals are held where the onions are grilled along with meat and other vegetables on outdoor barbecues. Once charred, the onions are wrapped in newspaper to steam and finish cooking. The not so proper way to eat a calcot is to put on a bib, pull back the blackened exterior, dip it in Romesco sauce, tilt your head back and pop the onion in your mouth, sword-swallower style.  We don’t have calcots in our garden, but Joe was able to harvest some of last season’s leeks before they had a chance to go to seed. He grilled the leeks along with some asparagus and peppers to accompany our meal. I topped grouper with this sauce, but other firm fleshed white fish such as monkfish or mahi-mahi would work as well.

Grouper with Grilled Vegetables and Romesco Sauce

Serves four

Romesco Sauce

Ingredients

  • 1 c(1/2-inch cubes) stale whole grain bread
  • 1/2 c toasted whole almonds
  • 1 1/2c  roasted red peppers in water, drained
  • 1/2c sun dried tomatoes packed in oil, drained
  • 1 clove garlic, chopped
  • 1 tablespoon sherry vinegar
  • 1/4 teaspoon pimentón de la vera (smoked paprika)
  • Kosher salt and pepper
  • Dash of cayenne pepper
Directions
  1. Toast almonds on a cookie sheet, shaking it occcasionally to ensure even browning.
  2. Combine bread and almonds in a food processor and process until finely ground.
  3. Add peppers, tomato, garlic, vinegar and pimentón; process until a thick puree forms, stopping to scrape down sides of the bowl as needed. Season to taste with salt, pepper and a dash of cayenne pepper.

Grouper and Vegetables

Ingredients

  • 4 6oz  grouper filets (or other firm fleshed white fish such as halibut, mahi-mahi)
  • Assorted vegetables, peppers, onions, asparagus, cut and trimmed for the grill
  • Olive oil
  • Kosher salt and pepper

Directions

  1. Toss the vegetables with olive oil, salt and pepper to coat.
  2. Grill the vegetables in batches, flipping once, until both sides are nicely charred and the vegetables are just tender, about 12 minutes total.
  3. Set aside in a warm oven while cooking the fish
  4. Meanwhile, generously coat both sides of the fish with the oil and season both sides with salt. Let the fish sit at room temperature for 15 minutes. Bake the fish in a 450F oven using the Canadian fisheries method to determine cooking time. I will discuss cooking fish on the grill in a future post. Warm about a cup of sauce, thinned out with a little stock or water to your desired consistency. Top fish with the sauce.
DSC_9769 copy
Ingredients for the romesco sauce.


    DSC_9816-copy


        DSC_9796-copy