April 2, 2015 Roasted Salmon with Ginger Shiitake Glaze


DSC_2133a

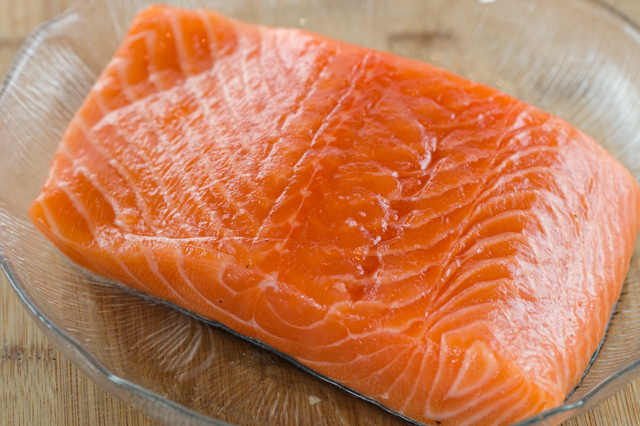
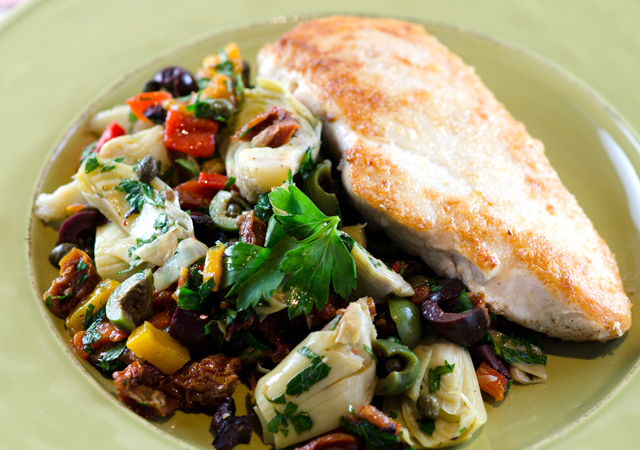
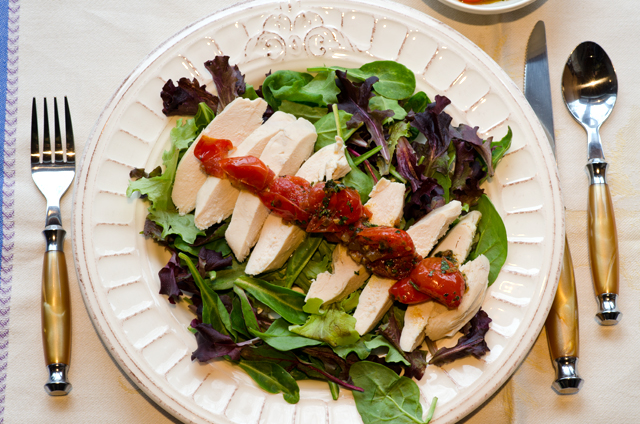
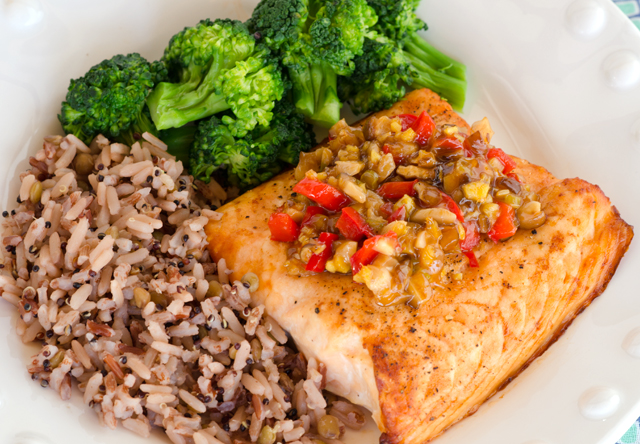
Salmon is on our dinner menu once a week and I am always looking for new and interesting ways to prepare it. Always a healthy dinner choice, salmon is a good source of protein, potassium, selenium, B vitamins and omega 3 fatty acids. This recipe from Fine Cooking magazine , salmon with ginger and shiitakes has become a new favorite for us.

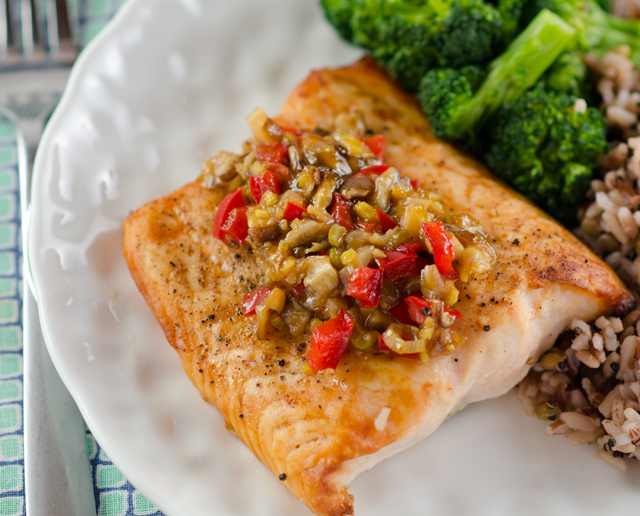
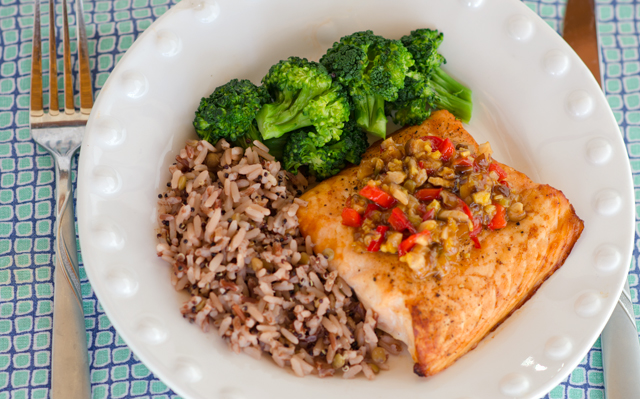
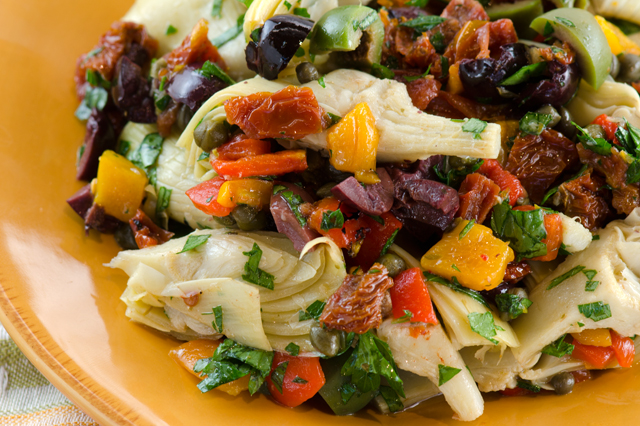
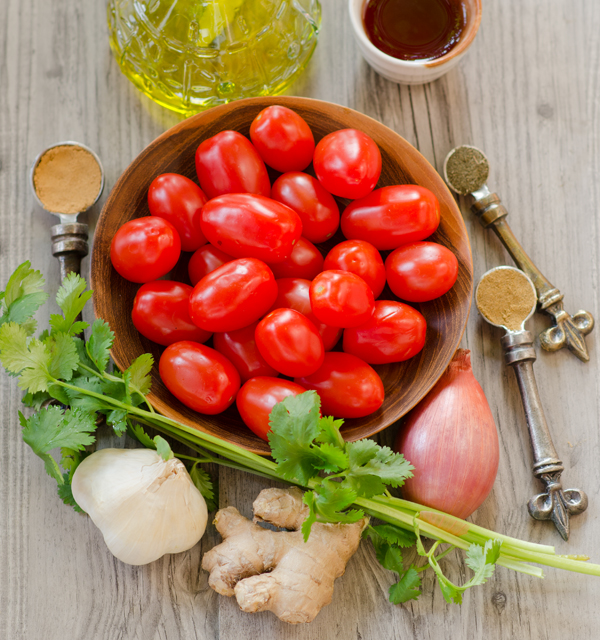
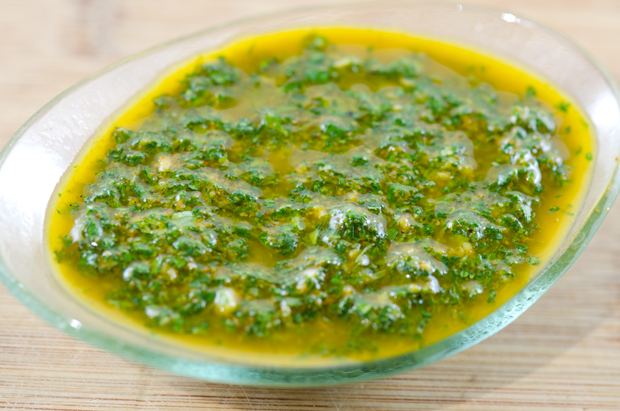
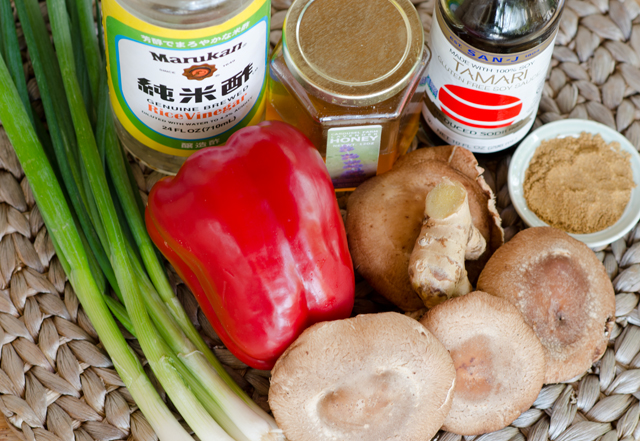
The original recipe called for broiling the salmon but I have adapted it for the way we cook salmon most of the time in non grill months, roasting. The fish is seasoned simply with salt, pepper and  ground coriander, you can use whatever seasoning blend you choose that compliments the recipe. What makes this recipe special is the topping, a marriage of a glaze and chunky vegetable mix that is spooned right before the fish is done. A flavorful combination of red pepper, shiitake mushrooms, ginger and scallions is seasoned with honey, ginger, rice vinegar, soy and sriracha. The topping is easy to do and  can even be made several hours in advance,

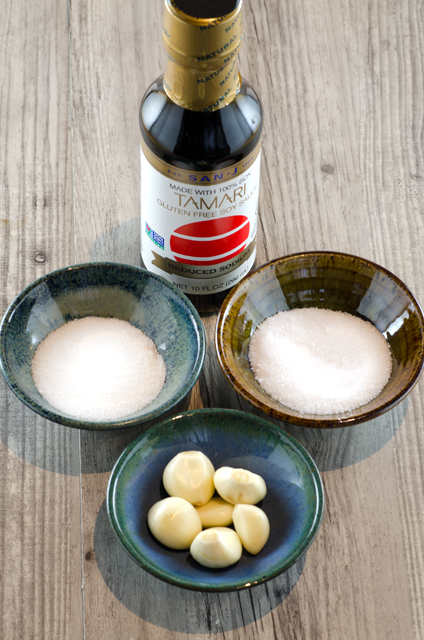
I substituted tamari for the low sodium soy sauce that was called for in the original recipe. Maybe you have seen tamari on you supermarket shelf next to the soy sauce and wondered what makes it different. Tamari and soy are both the by-products of fermented soybeans.Tamari is a Japanese soy sauce and is thicker, less salty with an umami quality to it.  It is made by collecting the liquid that drains from miso, fermented soybean paste. Since it is brewed only from soybeans, water and salt, it is gluten free. Sriracha, once a product I could only find in Asian markets is commonplace in supermarkets today. Add Sriracha to your own liking, if you don’t have it, another hot sauce or a few pepper flakes can stand in.  In case you didn’t know, sriracha is a Thai hot sauce made from chili peppers, vinegar, garlic, sugar and salt. I recommend the Huy Fong brand that has a rooster on the label. I plan to make my own version from the large collection of hot peppers we have in the near future.

Roasted Salmon with Ginger Shiitake Glaze

Serves four

Ingredients

  • 1 1/2lbs salmon filet
  • 2T canola oil
  • 1/4t ground coriander
  • Kosher salt and freshly ground pepper
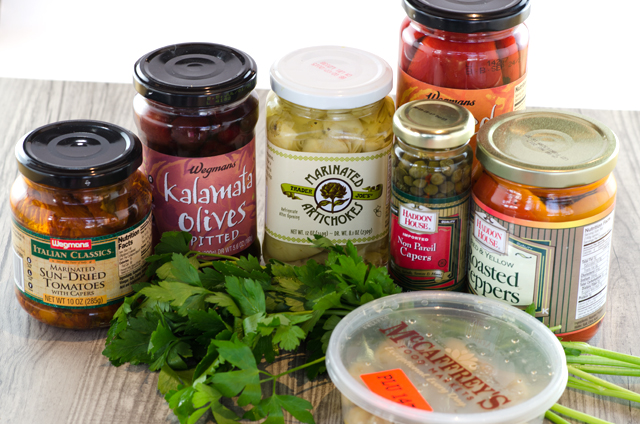
  • 1/3c finely diced red pepper
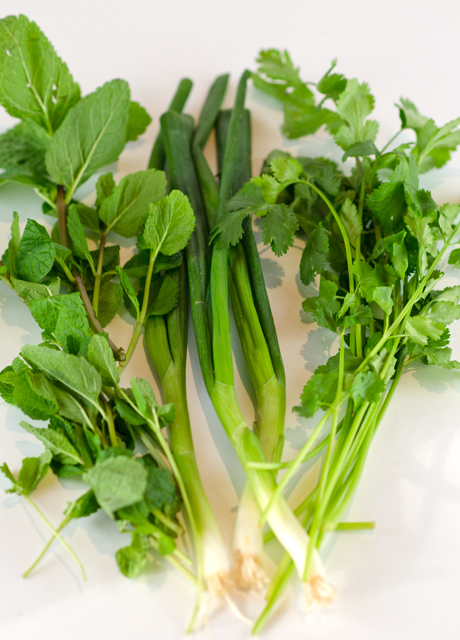
  • 4 scallions, finely sliced, white and green parts separated
  • 2T finely chopped ginger
  • 1c shiitake mushrooms, stemmed and cut into fine dice
  • 1/4c honey
  • 3T rice vinegar
  • 1T Tamari style soy sauce
  • 1t Sriracha (or to taste)
  • 1t cornstarch mixed with 1t of water

DSC_2249a


Directions

  1. Preheat oven to 450°F. Cut salmon into individual servings and salt and pepper lightly (kosher or sea salt) and sprinkle with ground coriander. Let the fish sit at room temperature while you prepare the sauce.
  2. In a 12″ skillet over medium heat,  cook the red pepper, scallion whites and ginger in 2 tablespoons of canola oil.
  3. Stir occasionally until the pepper and scallions start to soften and brown, about 3 minutes.
  4. Raise the heat to medium high and add the mushrooms and sprinkle with salt. Cook stirring until they soften and brown, about three minutes.
  5. Add the honey, vinegar, tamari, chili sauce and a 1/4c water. Bring to a simmer.
  6. Whisk the cornstarch and water together and stir this into the glaze. Return to a simmer and cook until the glaze thickens, about 1 minute. Remove from the heat.
  7. Coat a pan that will hold the filets comfortably with 1T canola oil or non stick spray. Measure thickest part of filet with a ruler (every 10th of an inch equals 1 minute of cooking time at 450° F.)
  8. At 1 minute prior to calculated time of completion, raise oven temperature to broil,  remove fish from oven and coat evenly with the glaze. Return the salmon to the oven to broil the topping, this could take 1-2 minutes. Watch this step carefully.
  9. Serve immediately or be sure to remove from baking pan immediately (so that the fish does not continue to cook.)
  10. For a more translucent preparation decrease cooking time by 1-2 minutes.
  11. Serve fish on warmed plates.

DSC_2140a

DSC_2136a


March 10, 2015 Imam Bayildi Revisited

DSC_1861aImam Bayildi translates “the priest fainted”. Was it because the dish was so delicious or was it a reaction of this frugal priest  to the copious amount of expensive olive oil his bride used to make this dish? This is my second interpretation of this popular Turkish dish, one of a group of vegetarian recipes referred to as zeytinyagli or olive oil foods, served cold.  This recipe cuts down considerably in the amount of olive oil traditionally used in the original dish but definitely not on the flavor.

This is another recipe from Ana Sortum, chef at Oleana restaurant in Cambridge Massachusetts.  This recipe is similar to the first one I made in some of the steps.The eggplants are sprinkled with salt and brushed with olive oil and baked until the flesh is soft.  In the first recipe the flesh is scooped out and mixed in with the other ingredients, in the second the other ingredients are combined and pressed into the cooked eggplant, I liked that method. Onions, garlic, tomatoes, oregano and parsley are found in both recipes. Finely diced cauliflower, star ingredient of the moment, is a unique component for Imam Bayildi and adds a different texture and flavor to this dish that I liked. The second recipe also uses green bell pepper, an ingredient that I am not a big fan of. Green peppers are less expensive but not quite as nutritious as their red, yellow and orange counterparts. As a gardener, I have just considered them to be peppers that someone wasn’t patient enough to let ripen.  I am now coming around to seeing green bell peppers as a unique ingredient. In this dish they add an interesting  slightly bitter edge to the sweetness of the onion and the creaminess of the eggplant.

This is the first time I have ever grated tomatoes for a recipe. Choose ripe firm tomatoes and grate them over a shallow bowl with the largest holes of your box grater. Keep your hand flat and grate until the tomato flesh is scraped away from the skin. Discard the skin and you are left with tomato pulp that can be used in a variety of dishes. I am sure this is a technique I will use again.

Aleppo pepper is one of my favorite ingredient discoveries of the last several years. It is dark red, flaky and somewhat oily in texture. It takes it name from the ancient city of Aleppo in northern Syria, just east of the Turkish/Syrian border.  The flavor profile is rich, sweet and fruity with hints of cumin. The heat profile is moderate, just a bit hotter than paprika. As a result of the conflict in Syria, what now is sold as Aleppo is actually an identical pepper plant, Maras, that is grown in Turkey.

DSC_1848a

Imam Bayildi

Serves 8 as a side dish or 4 as an entrée

Ingredients

  •  4 small eggplants, about 1/2lb each
  • 10Tolive oil divided,  4T for brushing eggplants, 3T for sautéing, 3T for drizzling over finished dish.
  • Kosher salt
  • 2 1/2lb tomatoes, halved
  • 2c diced sweet onion
  • 1c diced green bell pepper
  • 1/2c finely diced cauliflower
  • 1T finely chopped garlic
  • 1/2c chopped Italian parsley, more for garnishing the finished dish.
  • 1t finely chopped fresh oregano or 1/2t dried
  • Aleppo pepper or crushed red pepper flakes
  • 3/4c crumbled feta, more for garnish

Directions

  1. Position a rack in the center of the oven and preheat to 375°F.
  2. Halve the eggplants lengthwise and place cut side up on a large rimmed baking sheet. Season the cut sides generously with kosher salt and brush with the first 4T of olive oil. Flip the halves over and bake cut side down until soft, about 30-35 minutes. Set aside until cooled.
  3. While the eggplant bakes, grate the cut sides of the tomato on the large holes of a box grater. It is easiest to put the grater in a bowl. Discard the skins. Drain the pulp in a fine meshed sieve until most of the liquid has drained through, about 20 minutes.
  4. Heat 3T of the oil in a 12-inch skillet over medium heat. Add the onion and cook, stirring occasionally, until soft, about 5 minutes. Add the pepper, cauliflower and garlic, cook, stirring occasionally, until all the vegetables have softened somewhat, about 5 minutes. Remove pan from the heat and stir in the tomato pulp, parsley and oregano. Season to taste with salt and pepper. Stir in the feta.
  5. Use a spatula to flip over the eggplant halves. With a slotted spoon, divide the filling among the eggplant, using the spoon to gently push the filling into the flesh.
  6. Drizzle with the remaining olive oil and bake until hot, about 10 minutes. Sprinkle with more crumbled feta and parsley and serve.

DSC_1856a

DSC_1857a

DSC_1872a

February 17, 2015 Stovetop Smoked Salmon with Kaffir Lime Sauce

DSC_1253a


I discovered my love of cooking in the early eighties and a good time for me meant a trip to the cookware store. In those years I was the proverbial gadget queen. Some of them were good purchases, a KitchenAid stand mixer, food processors in different sizes, a serious ice cream maker, all very useful when I was catering. One purchase I made that was a good investment was a stovetop smoker. Made by the Camerons company, the one I purchased thirty years ago looks exactly the same as the one they sell today, at about the same price. The smoker is made from dishwasher safe stainless steel. It is a rectangular box (15″x11″) fitted with a wire rack that sits over a drip tray with a lid that slides on for a snug fit. The handles fold out from the side of the box and stay relatively cool during the cooking time but I would still advise using a potholder. One source said it easily fits over a burner but I have always used it over two burners.

I confess I haven’t used this smoker as much as I probably should. I have smoked cheese, shrimp and, of course, salmon. The Camerons company sells wood chips in oak, alder, hickory and cherry that I have used in the past. This time I chose a different smoking medium, tea. I followed a smoking formula that I have used previously with tea smoked chicken. Brown sugar is used because when sugar caramelizes it forms volatile compounds that enter the air as smoke. This gives the salmon a bittersweet caramel flavor. Rice adds it’s own flavor and absorbs the moisture the sugar creates. This is important because the smoking mixture should be as dry as possible, the goal is to create smoke, not steam. I chose Lapsang souchong, a black tea from the Fujian province of China and Joe’s favorite. The tea is dried over a smoking pine fire that gives it a sweet, clean smoky flavor. I also used some orange peel to add some of it’s aromatics.

The smoking medium is placed on the base, lining the bottom with foil makes for the easiest clean up. Next is the drip tray, then the wire rack. If you spray the wire rack with a little non stick spray it will make the salmon easy to remove. Place the salmon on the middle of the rack so that the smoke can circulate freely around it. Slide on the lid and close it completely. I turn the burners on to medium high until I see the first puffs of smoke wafting out, then I back it down to a low simmer. The guide states that for every 6 ounces of fish, allow ten minutes cooking time, so the one pound piece of salmon cooked in less than a half hour.

The salmon can be served as an appetizer or a main course. Serve with an accompanying sauce.  Horseradish and sour cream or tzatziki would be good choices. I made a sauce that I found on the Martha Stewart website using both lemongrass and kaffir lime leaves. Since I would venture to guess most people don’t have a stovetop smoker, though it is a good investment, a heavy pot or wok lined with foil with a rack that suspends the food over the smoking mixture and a foil lid would be a reasonable substitute.

The booklet that came with the smoker gives recipes for fish, poultry, meat, sausages, cheese and even eggs! It is also suitable for outdoor use, either over a campfire or on the rack of a barbecue. Quoting directly from the booklet it is, “perfect for slimmers” that’s how dieters are referred to in the U.K..  It describes the smoking technique as one that is “widely used in Europe” and it “puts pleasure back into eating.” I must agree, it is a healthy way of cooking and the salmon turned out moist and quite delicious, just lightly scented with smoke. I won’t wait so long in between next time to use the stovetop smoker.

Stovetop Smoked Salmon

Makes 1 pound

Ingredients

  • 1 lb. salmon fillet, pin bones removed
  • Kosher salt and granulated sugar

Smoking medium

  • 1/3c loose tea (I used Lapsang souchong, other aromatic teas could substitute)
  • 1/3c rice (any type)
  • 1/3c brown sugar
  • Several strips of orange zest.

Directions

  1. Check the salmon for any pin bones and sprinkle the surface generously with sugar and kosher salt. Place in refrigerator uncovered for one hour.
  2. Set up the smoker and line the bottom with foil for the easiest cleanup.
  3. Scatter the smoking ingredients over the bottom of  the pan.
  4. Place the drip tray over the bottom.
  5. Spray the food rack with non stick spray for easy removal of the fish
  6. Center the salmon on the rack so that the smoke will circulate around the fish easily.
  7. Slide the lid on and turn the burners on to medium high. As soon as you see the first puff of smoke, turn the burners down to a simmer. You should still see some smoke escaping, if not, turn the burners up a little.
  8. Smoke the salmon for about 25 minutes or to your desired doneness.
Sprinkle the salmon with kosher salt and a little sugar to bring out the moisture in the fish.


I still keep the smoker in the original box.
The smoking mixture of brown sugar, rice, Lapshang souchong tea and orange peel.
Center the salmon on the rack over the smoking medium.
Lapsang souchong tea has a smoky aroma.
Now we're smoking!
Now we’re smoking!
One pound of salmon will takes less than a half hour.


Kaffir Lime Sauce

Ingredients

  • 1T olive oil
  • 3 medium shallots, finely chopped
  • 3-4 stalks lemongrass, cut crosswise into 2-inch lengths
  • 6 kaffir lime leaves, fresh or dried, cut into thirds
  • 1T chili paste (I used sambal oelek)
  • 1/4c red wine
  • 1c canned crushed tomatoes
  • 2T heavy cream
  • Kosher salt and freshly ground pepper


Ingredients for the sauce.
Lemongrass
Lemongrass

Directions

  1. Heat olive oil in medium skillet over low heat. Add shallots and cook until soft and translucent, about 1 minute. Crush the lemongrass pieces and add to the skillet; cook for 30 seconds. Rub the lime leaves between your hands to bring out their aroma, add them to the skillet and cook 30 seconds more.
  2. Add chili paste and cook, stirring, until browned, about 15 seconds. Add wine and cook until reduced by half, about 2 minutes.
  3. Add tomatoes and bring mixture to a boil. Immediately reduce to a simmer and cook for 30 minutes. Strain mixture into a small saucepan through a fine mesh sieve; discard solids, I used a food mill for this step. Add cream to saucepan and place over medium heat. Cook sauce until liquid is reduced slightly, about 5 minutes. Serve warm.

February 10, 2015 Thai Lettuce Wraps

DSC_1162a


If I told you, “we’re having meatballs” you might conjure up a vision of succulent, tender meatballs in a garlicky fragrant tomato sauce, or maybe you are imagining nutmeg scented  Swedish meatballs in a creamy gravy. But the meatball is not confined to the West, the Chinese have the Lion’s Head, oversized pork meatballs traditionally cooked in a clay pot and southeast Asian countries such as Thailand, Laos and Cambodia enjoy the street food of seasoned ground meat wrapped in crispy lettuce leaves.

Our love of Thai food has led Joe to grow some of the ingredients that haven’t always been that common in the local supermarket. We have a lemongrass plant that gets large and bushy in the garden every summer. We harvest a large portion of the stalks and freeze them for recipes like this. The significantly cut back plant is brought indoors to winter over. The greatest danger the lemongrass plant meets inside is our Golden Retriever, Cody, who when given the chance, loves to nibble on the leaves. We have three kaffir lime trees that have never produced a lime. That’s okay though, they are grown for their leaves that when crushed produce an intense citrus aroma. We also grow Thai chiles and basil, Vietnamese mint and the herb that no one is on the fence about, coriander.

The dish this is loosely based on larb, a southeast Asian favorite.  This recipe makes a do it yourself appetizer or a light lunch . Set out all of your ingredients and let everyone assemble their own wrap. To eat, take a lettuce leaf, top with several meatballs, add some julienned vegetables, an herb leaf or two, a spoonful of sauce and a sprinkling of chopped peanuts. Roll it up and dig in!

DSC_3888a
Lemongrass plant in early summer. It will become many times this size by the Fall.


Thai Lettuce Wraps with Meatballs

Make about 2 dozen meatballs

Dipping sauce

Ingredients

  • 1/4c fish sauce, I am partial to the Three Crabs brand
  • 1/4c fresh lime juice
  • 1T Asian sesame oil
  • 2t minced Thai chilis, substitute red pepper flakes if necessary
  • 1t brown sugar
  • 1T minced cilantro

Directions

  1. Combine fish sauce, lime juice, sesame oil, chili, brown sugar and cilantro in a small bowl. Let the flavors blend while you make the meatballs.

Meatballs

Ingredients

  • 1lb ground pork or turkey
  • 1t finely minced garlic
  • 1T finely minced lemongrass, bulb end only
  • 1T finely minced ginger
  • 2T finely minced shallots
  • 1t rice vinegar (the type with no sugar added)
  • 1T Asian sesame oil
  • 1-2t low sodium soy sauce
  • Peanut or grape seed oil to fry the meatballs

Directions

  1. Combine the garlic, lemongrass, ginger, shallots, vinegar, sesame oil and soy sauce in a medium bowl. Add pork and use your hands to combine ingredients thoroughly. If you have time, chill the mixture for about a half hour, this will  make it easier to roll the meatballs.
  2. Use a tablespoon sized scoop to make the balls, you should have about two dozen. Place on a rimmed baking sheet. Cover and chill for at least an hour.
  3. Heat several tablespoons of oil in a large skillet over medium high heat. Cook in two batches so you don’t crowd the skillet. Cook, turning occasionally to brown all sides, about 8 to 10 minutes. Transfer to a platter and keep warm.

For final assembly

Ingredients

  • Lettuce leaves, Romaine or Bibb work best here
  • Finely julienned cucumber, carrot and daikon radish
  • Coriander and mint leaves
  • Finely chopped unsalted peanuts.

Directions

  1. Separate lettuce leaves as carefully as possible not to tear them. The inside leaves work the best as wrappers.  Wash and spin dry in a salad spinner.
  2. Julienne the cucumber, radish and carrot by hand or with a julienne tool.
  3. Wash herb leaves and separate into individual leaves.
  4. Chop peanuts.
  5. Place all the above items on a large serving dish.
  6. Serve with meatballs and sauce.
DSC_0064a
Lemongrass stalks. The bulb end is used in cooking.


Though not used in this recipe,  this is what the Kaffir Lime looks like. The distinct double leaf has a pointed point and a rounded bottom section.
Though not used in this recipe, this is what the Kaffir Lime looks like. The distinct double leaf has a pointed point and a rounded bottom section.

February 6, 2015 Mediterranean Style Pan Seared Chicken Breasts

DSC_1136aMy yearly “pantry purge” brought to my attention some items that would expire in the next few months and needed to be used sooner rather than later.  The jar of marinated artichoke hearts I bought at Trader Joe’s last year would reach it’s expiration date in a month.  Not wanting to waste them, I started with the artichoke hearts as a foundation. I looked for other items on the shelf that would add some complimentary Mediterranean flavors.  Also in the pantry I found jarred sun dried tomatoes and roasted peppers. In the refrigerator I found a container of olives, a previously opened  jar of capers and some fresh parsley. I was set to put together an improvised combination that would work well as a topping for the chicken breasts I planned on cooking that evening. I was calling it a “salsa” though Joe pointed out there was nothing sauce-like about it.

To make this dish I started with the marinated artichoke quarters, draining and reserving the marinade in case I needed to add some to the finished dish. The sun dried tomatoes were next, and even though I drained some of the oil off,  they retained enough to give the right balance.  Capers add a salty element to the dish so I made sure to rinse them well before adding them to the dish. I used Kalamata olives and Castelvetrano, an olive with a mild buttery flavor and one of my favorites. The red and yellow roasted peppers,  just needed to be drained and chopped. Combining all of the ingredients in a medium bowl I tasted for seasoning and in this case, a little bit of lemon juice and  a splash of balsamic vinegar was the right addition.

So what should I call this? It’s not quite a sauce, but is a versatile topping for fish, chicken, pasta, it could also be used as an omelet filling or even as a topping for a flatbread pizza.  The ingredients are interchangable as well. Petite diced canned tomatoes could be substituted for the sun dried tomatoes, mushrooms for the artichoke hearts, a little pesto would be a good addition, you can see what I mean. It’s just important to taste as you go to achieve the right balance of flavors.

This would have been great over the poached chicken breasts I made from the last post but I decided to learn another method.  In this recipe, also from Cooks Illustrated, boneless chicken breasts are lightly salted, then parcooked in a covered casserole in the oven. The chicken is then pan seared in a moderately hot skillet and kept moist with a slurry of flour, butter and cornstarch that is brushed on at the end. It gives a nice coating to the chicken and helps it stay moist. As with all meat, poultry and fish recipes, an instant read thermometer takes away the guesswork  and is essential for the best results.

DSC_1107a
The ingredients for the topping.

Mediterranean Topping

Makes about 4 cups

Ingredients

  • 2c marinated, quartered artichoke hearts from a 12oz jar, drained (save liquid)
  • 2T capers, drained and rinsed
  • 1/2c sun dried tomatoes, drained, chopped and lightly patted dry
  • 1/2c olives, combination of green and black, pitted and chopped
  • 1/3c chopped roasted peppers
  • 1/4c chopped fresh parsley
  • Balsamic vinegar and lemon juice to taste
  • Kosher salt and freshly ground pepper

Directions

  1. In a medium bowl combine the artichoke hearts, capers, sun dried tomatoes, olives, roasted peppers and parsley.
  2. Add balsamic vinegar, salt and freshly ground pepper to taste.

DSC_1115a

DSC_1124a

Pan Seared Chicken Breasts

From Cooks Illustrated March 2010

Serves 4

Ingredients

  • 4 boneless skinless chicken breasts, 6-8 ounces each, trimmed of excess fat
  • 2t kosher salt (1t regular salt)
  • 1T canola oil
  • 2T unsalted butter melted
  • 1T all purpose flour
  • 1t cornstarch
  • 1/2t freshly ground black pepper

Directions

  1. Place oven rack in the lowest position and heat to 275°F. Poke the thicker end of the chicken breast with a fork five to six times and sprinkle evenly with the salt. Place the chicken, smooth side down in a 9×13″ baking dish. Cover the dish tightly with foil. Bake until the thickest part of the breast registers 145-150°F on an instant read thermometer, start checking at the 30 minute mark, it could take as long as 40 minutes.
  2. Remove pan from the oven and transfer the chicken with tongs to a towel-lined plate and pat dry. Heat the oil in a 12-inch skillet over medium high heat until smoking. While you are waiting for the pan to heat up, whisk the melted butter, cornstarch and flour together. Brush the top of the chicken with half of the butter mixture. Place the chicken in the skillet, coated side down and cook until browned, 3-4 minutes. While the chicken is browning, coat the other side of the chicken with the remaining mixture. Flip the chicken over with tongs, reduce heat to medium and cook until the second side is browned and the thickest part of the breast registers 160°F, another 3-4 minutes. Transfer chicken to a serving plate.
  3. Serve chicken with Mediterranean topping.

DSC_1120a


January 25, 2015 Poached Chicken Breasts with Warm Tomato Ginger Vinaigrette

DSC_0828a

Poach (poch) verb, to take by illegal methods, in this case, as in taking all the flavor out of a chicken breast, leaving it tough, stringy and tasteless.  Sound familiar? If you were offered a poached chicken breast you might be inclined to decline, and rightfully so.  Cooks Illustrated has taken this classic techinque and perfected it for the home cook. It’s not that difficult or time consuming and will produce consistently good results.

Poaching is a gentle cooking method, best for delicately flavored foods, whether it be an egg, fish, or in this case, chicken. The chicken is cooked in a simmering liquid, just under the boiling point between 160°F and 180°F. Problems occur when the poaching liquid is either too cool or too hot or the cook minding the pot has left the poaching process go on too long.  This method does require some watchfulness but is much easier than traditional approaches to poaching.

As with any recipe, start with the best product you can find. Just like you, your chicken shouldn’t be bloated so look for a brand that has not been injected with a saline solution.  Trim away any excess fat or sinew before proceeding with the recipe. I have found that four 6-8 ounce chicken breasts are optimal. Wrap each chicken breast in plastic wrap and pound firmly on a stable surface. Your goal is to even out the thickness of the breast so you should be pounding the thicker top part to be more in line with the thinner “tail”. Whatever you do, don’t pound with the jagged side of a meat tenderizer. It will tear the meat and leave you with something unusable. I have a flat mallet expressly for this purpose but a heavy skillet or the flat side of the tenderizer will work as well.

Next step is the poaching liquid, classic French recipes usually include flavorings such as wine, lemon, stock or a bouquet garni. The chefs at Cooks Illustrated have done years of testing for various recipes to determine what flavorings will actually permeate into the cell wall of the meat. With the knowledge they have acquired over the years, they determined that salt, sugar, garlic and soy sauce would flavor the meat and still leave the chicken with a neutral flavor suitable to a wide range of recipes. Soy brings that desired “umami” or meaty, savory flavor.  I chose to use a gluten-free low sodium soy sauce since salt was one of the ingredients in the poaching liquid.

You will need a very large pot to cook the breasts, enough to accomodate four quarts, a full gallon of water plus a little room at the top. A word to the wise, start with your pot on the burner and bring the water and the ingredients to it. In my case, a Le Creuset pot filled with a gallon of water is quite cumbersome and heavy to carry. Whisk the ingredients together in your pot until the salt and sugar are dissolved. Place a steamer basket, metal works best here, in the bottom of the pot. This is used to keep the breast from making contact with the bottom of the pot, allowing for the chicken to cook evenly on all sides.  My steamer has a ten inch diameter when opened and comforably held the breasts without overlapping or crowding. Cover and let the pot sit at room temperature for 30 minutes. This allows the internal temperature of the breast you just recently took from the refrigerator to slowly rise. After the short brine, turn the heat on your stove to medium.

Stir the water occasionally to even out any hot spots. It should take about 15-20 minutes for the water to reach a temperature of 175°F. I used my thermapen to check every five minutes or so but clipping a thermometer to the inside of the pot works as long as you are diligent to check the temperature’s progress. When the water is at the right temperature, turn off the heat and cover the pan.

Now you have a little time to make a salad and a vinaigrette (the one that follows or your own) while the chicken cooks.  Cooks Illustrated suggests that you remove the chicken at 160°F, the suggested internal temperature for poultry. I remove mine at a slighly lower temperature (155°F) knowing that the chicken will continue to rise in temperature even after it is removed from the cooking liquid. Place the chicken breasts on a piece of foil and wrap loosely.

Let chicken rest for 5 minutes. Slice the breast on a slight bias, running with the grain of the meat. I served it with a warm tomato ginger vinaigrette, an excellent accompaniment, inspired by chutney ingredients. Just remember if you are using grape tomatoes, they are meatier with a thicker skin and will not break down as easily as a cherry tomato. Serve the chicken on a bed of greens, stuff in a pita pocket or shred as a last minute addition to a soup recipe.

Wrap each chicken breast in plastic wrap and pound with the flat edge of a mallet to an even thickness.


The ingredients that flavor the chicken breast, soy, salt, sugar and garlic.

Perfectly Poached Chicken Breasts

Cooks Illustrated March/ April 2014

Serves four

Ingredients

  • 4 (6 to 8 ounce) boneless, skinless chicken breasts, trimmed
  • ½c soy sauce (I used gluten-free, low sodium)
  • ¼c salt (I used kosher)
  • 2T granulated sugar
  • 6 garlic cloves, smashed and peeled

Directions

  1. Individually wrap each breast in plastic and pound thick ends to an even thickness with tail end, about 3/4 inch thick.
  2. Whisk 4 quarts water, soy sauce, salt, sugar and garlic in a Dutch oven until the sugar and salt are dissolved. Arrange breasts, skinned side up in a steamer basket, making sure the breast don’t overlap. Submerge the steamer basket in the brine. Let sit at room temperature to brine for 30 minutes.
  3. Heat the pot over medium heat, stirring occasionally to even out any hot spots. In 15-20 minutes the water should reach a temperature of 175°F.  Turn off the heat,  take it off the burner and cover. Let stand until meat reaches desired temperature, 155°F to 160°F, start checking temperature of the meat in the thickest part of the breast at the 15 minute mark.
  4. Transfer breasts to a cutting board, cover with aluminum foil and let rest for 5 minutes. Slice the breast on the diagonal into 1/4 to 1/2 inch thick slices and serve.

DSC_0823a

Warm Tomato-Ginger Vinaigrette

Ingredients

  • ¼c extra virgin olive oil
  • 1 minced shallot
  • 1 ½t freshly grated ginger
  • ¼t ground cumin
  • 1/8t ground fennel
  • 12 ounces of cherry or grape tomatoes (halved if cherry tomatoes, quartered if grape)
  • Salt and pepper
  • 1T red wine vinegar
  • 1t packed brown sugar
  • 2T chopped fresh cilantro or parsley

Directions

  1. Heat 2 tablespoons of the olive oil in a  10-inch skillet until shimmering. Add shallot, garlic, cumin and fennel and cook until fragrant, about 15 seconds.
  2. Stir in the tomatoes and a pinch of salt and cook, stirring frequently until the tomatoes have softened, 3 to 5 minutes.
  3. Off heat stir in the vinegar and sugar and season with salt and pepper to taste, cover or put under a heat lamp to keep warm. Stir in cilantro or parsley and remaining oil just before serving.

DSC_0846a

January 10, 2015 Turkey Zucchini Meatballs

DSC_0549a

It’s a new year and it’s time to put the emphasis back on healthy meals. But healthy doesn’t have to equal boring. Meatballs are lightened up with ground turkey and fresh herbs in this recipe from Yotam Ottolenghi’s cookbook, Jerusalem.  Originally from Jerusalem, Ottolenghi is a London based chef restaurant owner, food writer and cookbook author known for his vibrant, fresh, multi cultural cuisine. His recipe takes ground turkey and zucchini, two ingredients with not much flavor going for them on their own and combines them with fresh herbs, cilantro and mint, along with garlic, cumin and spicy cayenne pepper to make a delicious meatball.

In July, I would be making this recipe with herbs and zucchini fresh from the garden. But it’s a bitter cold day in January, so like everyone else I have to bite the bullet and plunk down several dollars for a small bunch of herbs I would have buckets of in the summer. Don’t get me started with the zucchini…  When I purchase herbs at the supermarket I try to treat them as a precious commodity. How many times have you (or I) brought home a bunch of herbs, used the tablespoon or teaspoon we needed and the rest was sentenced to the crisper drawer. The next time you notice it, you’re not even sure what it is. My favorite method of preserving fresh herbs as long as possible in the fridge, is to trim the stem ends and place the bunch in a glass with several inches of water. I place a loose plastic storage bag over the herbs and not only can I successfully store them for a week or more, I am more likely to use them since they are not tucked away in a drawer.

This is a wet meat mixture to work with so use a minimally processed product, the extra water added in some brands of ground turkey is not your friend.  Check the label, the turkey I purchased was 93/7, lean to fat with no water added. I used a hand grater for the zucchini and lightly wrung it out in  a cloth towel to eliminate extra liquid. I like to taste the leaf of the herbs I am using to see how pungent (or not) they are to see what adjustments I might need to make for the recipe.

Put all the ingredients in a large enough bowl so that you can combine your ingredients thoroughly. Take off your rings and roll up your sleeves to do some serious mixing.  Put some non stick spray on the sheet that you will place the meatballs when formed and also on your hands to minimize the herbs from sticking to your fingers (some will). Ottolenghi’s original recipe called for these to be made as small burgers, but I thought meatballs were better suited for this January night.

Cook the meatballs in a large (12inch) heavy skillet. I used a Le Creuset cast iron type skillet. Just a thin film of a neutral oil, canola, safflower, is all you need to coat the bottom of the pan. Be sure not to overcrowd the pan, I cooked 18 meatballs in two batches. I shake the pan halfway through to make sure they don’t stick.  Finish your browned meatballs in the oven for 5 to 7 minutes to finish cooking them.

The accompanying sauce is very simple, Greek yogurt, sour cream, lemon peel and juice and an interesting middle eastern ingredient, sumac.  I discuss sumac at greater lengths here. Sumac is extracted from the berries of the sumac bush and it adds an astringent, fruity taste to dishes. I purchased mine from Penzeys. I am over my Meyer Lemon envy of 2013 now that Joe is growing several trees that are producing fruit. They are inside now for the winter. This is the season for harvest and I was able to pick a fresh lemon from one of our trees.  More information about Meyer lemons is in this post.  Meyer lemons are not as acidic as regular lemons but the sumac added another layer of flavor complexity to the sauce.

Herb substitutions could be made, parsley for the cilantro, finely snipped chives for the green onions. A tzatziki sauce would also be a good accompaniment. Serve with a tomato sauce and zucchini “noodles” for a family-friendly spaghetti and meatballs substitution.  This one definitely goes in the “I would make this one again” column.

Turkey and Zucchini Meatballs

Makes about 18

Ingredients for Meatballs

  • 1lb ground turkey
  • 2c grated zucchini
  • 3 scallions, white and green, thinly sliced
  • 1 large egg
  • 2T chopped mint
  • 2T chopped cilantro
  • 2 cloves garlic, crushed or finely chopped
  • 1t ground cumin
  • 1t table salt
  • 1/2t freshly ground pepper
  • 1/2t cayenne pepper
  • about 1/8c of a neutral cooking oil, canola, safflower

Ingredients for the Sour Cream and Sumac Sauce

  • 1/2c sour cream (regular or low fat)
  • 2/3c plain Greek yogurt (regular or low fat)
  • 1t grated lemon zest
  • 1T freshly squeezed lemon juice
  • 1 small clove garlic, crushed
  • 1T sumac
  • 1/2t salt
  • 1/4t freshly ground pepper

Directions

  1. Make the sour cream sauce by placing all the ingredients in a small bowl. Stir well and set aside or chill until needed.
  2. Preheat the oven to 425°F. In a large bowl combine all the ingredients for the meatballs, except the cooking oil. Mix well with your hands. Shape into 2″ balls. Place meatballs on a well greased baking sheet to ready for cooking.
  3. Pour enough oil into a large heavy frying pan to form a layer about 1/16 inch thick on the bottom of the pan. Heat over medium heat until oil is shimmering, sear the meatballs in batches on all sides. Cook each batch for about 4 minutes adding oil as needed, until browned.
  4. Transfer the seared meatballs to a baking sheet and place in the oven for 5-7 minutes, or until just cooked through. Serve warm or at room temperature with the sauce on the side.
DSC_0526a
Mint, scallions and cilantro bring a lot of flavor to the meatballs.


I grated zucchini on a box grater and wrung out the extra moisture with a tea towel.
Why yes, I pick my lemons fresh from the tree.
DSC_0559a
Meyer lemons have thinner skin and are sweeter than the usual lemon.
Ready to go into the frying pan.
DSC_0565a
Cilantro in a half filled glass of water, ready to put the bag on top and store in the fridge.

DSC_0556a


October 2, 2014 Imam Bayildi

DSC_9143aImam bayildi translates roughly,”the priest fainted”. But why, was it because the eggplant dish was so delicious, did he eat too much at one sitting or was he just in shock at the amount of expensive olive oil used to make it?

One account in Turkish lore tells the story of an imam or priest, well known for his love of good food. One day the Imam announced his engagement to the daughter of a wealthy olive oil merchant. Part of her dowry included huge casks of olive oil, the size of a man, twelve in all. After the couple were married, the new bride proved to be an amazing cook. One dish in particular, eggplant cooked in olive oil, proved to be the imam’s favorite. In fact he requested the exact same dish twelve nights in a row. But the thirteenth night his favorite dish was missing from his evening meal. When asked why she didn’t make it, she told him the enormous supply from her dowry was used up. The news so shocked him that…..the priest fainted.

No matter what the story, Imam bayildi is a very well known Turkish meze, not really an appetizer but comparable to the small plate tapas dishes of Spain. Traditionally the dish is an eggplant cut down the middle, stuffed with garlic, onion, tomatoes and aromatic spices and simmered in olive oil to cover.

My goal in making this recipe was to cut back on the copious amount of olive oil but still make a flavorful dish. Rather than cook the eggplant whole in olive oil, I cut the eggplants in half, brushed the cut side with olive oil and baked it until the flesh was easy to scoop out. I combined the chopped eggplant with sauteed onion, garlic and tomato and currants. The addition of the aromatic spices, cinnamon and allspice will make your kitchen smell heavenly. I could also see the addition of feta cheese, pine nuts, even ground beef or the more traditional lamb. Serve warm or at room temperature along with a green salad for a delicious luncheon entree.

Imam Bayildi or Baked Stuffed Eggplant to Make a Priest Faint

Serves four

Ingredients

  • 4 medium eggplants
  • 6 T extra virgin olive oil
  • 2 medium onion, very thinly sliced (I used a mandoline)
  • 4 cloves garlic, finely chopped
  • 1 1/4c chopped tomatoes
  • 5T chopped flat leafed parsley
  • 1/2t dried oregano
  • 1/4c currants
  • 1/4t ground allspice
  • 1/4t ground cinnamon
  • 2T fresh lemon juice
  • Kosher salt and freshly ground pepper

Directions

  1. Preheat oven to 375F. Cut the eggplants in half lengthwise. Cut several lengthwise slits in the eggplant halves. Brush with olive oil and sprinkle lightly with salt. Bake, cut side down for about 1/2hr, until the flesh is soft and easy to scoop out. Keep oven on at same temperature.
  2. While eggplant is cooking, heat 2 tablespoons of olive oil in a large non-stick frying pan. Cook the onions over low heat, stirring occasionally, until very soft, 20 minutes. Add the chopped garlic and cook for an additional 5 minutes. Add the tomatoes, 4 tablespoons of the parsley and the oregano and simmer until almost dry, about another 5 minutes. Add the currants, allspice and cinnamon. Season to taste with salt and pepper. Set this mixture aside.
  3. Scoop out the eggplant flesh with a spoon, leaving the skin and 1/4 inch of the lining intact. Finely chop the pulp and add it to the onion and tomato mixture. Mix well and season with salt and pepper.
  4. Place the eggplant shells in a baking dish just large enough to hold them. Fill them with the tomato onion mixture. Sprinkle with fresh lemon juice. Cover and bake the eggplants for 15 minutes. Uncover and bake an additional 10 minutes.
  5. Serve warm or cool at room temperature.
DSC_9126a
Ingredients, ready to go!
DSC_9130a
Cut the eggplants in half, brush with olive oil and place cut side down on a parchment lined baking sheet. This variety is an “Italian pink” called Dancer.

DSC_9133a

DSC_9135a
The shells are now filled with the eggplant, onion, tomato and aromatic spice mixture and baked.

September 25, 2014 Eggplant Involtini

DSC_9067aWith lots of caponata, grilled eggplant, ratatouille, and a double batch of eggplant parmesan under my belt, I was looking for another way to enjoy the bounty of our eggplants this season. It came in the July/August issue of Cooks Illustrated magazine, eggplant involtini.

After all these years (30+) I still look forward pouring over the latest issues of the cooking magazines I subscribe to. Since the magazines are a little in advance of what is ready to harvest from the garden, I put a yellow sticky note on the seasonal recipes I would like to try. Eggplant involtini was in the July/August issue that arrived in June when our eggplants didn’t even have their first flowers, so I have been waiting several months to try this recipe.

Involtini are neat little bundles of stuffed meat, fish or vegetables. Fillings can be as varied as your imagination. Eggplant works especially well as a wrapper for involtini. Use your largest, broadest eggplants to make the planks. Lop off the stem and hold the eggplant upright. With a very sharp knife, make approximately 1/2″ thick planks. For the first and last pieces you will need to trim off the rounded outer edge. I found that a vegetable peeler handled the problem nicely.

Instead of frying, which is called for in many involtini recipes, the slices are brushed lightly on both sides with olive oil, and seasoned with salt and pepper and baked. This makes the slices pliable enough to roll without falling apart.

Once the slices have cooled a bit, fill with the fatter edge closest to you and roll up. Ricotta, though it doesn’t have much flavor of it’s own is a good binder for the more flavorful ingredients, pecorino romano and basil. The addition of fresh lemon juice brightens the flavors. A generous tablespoon of filling is enough for each slice. The original recipe called for some bread crumbs in the filling to bind it a little, I didn’t include this step and thought my filling held up nicely.

While you are cooking the eggplant there’s time to make a very basic sauce. Canned whole tomatoes, garlic, oregano, kosher salt and pepper are all you need. I always use my whole roasted tomatoes from the garden that I freeze for months without tomatoes. We had a bumper crop this year so I will be making a lot of chili, lasagna, stuffed peppers over the winter months. As for the canned varieties, in a taste test done by Cooks Illustrated, Muir Glen Organic Whole Tomatoes was the winner. Muir Glen is about a dollar more per can than the more familiar runner up, Hunts.

The involtini rolls, are added to the thickened sauce and brought to a simmer. Once the sauce is warmed, additional cheese is sprinkled on top. The rolls are browned and the cheese is melted in the broiler. Finish off with a sprinkle of basil, mini basil leaves worked well here.

Not the quickest or easiest preparation, but both the rolls and the sauce can be made in advance and assembled right before serving. An impressive dish good enough for company.

Eggplant Involtini

Serves 4 to 6

Ingredients

  • 2 large eggplants, shorter wider eggplants are best (1 1/2 pounds each), if skin is thick, peel, I did not peel mine
  • 6T olive oil
  • Kosher salt and pepper
  • 2 cloves garlic, finely minced
  • 1/4t dried oregano
  • Pinch red pepper flakes
  • 1 28oz canned whole peeled tomatoes drained with juice reserved, chopped coarse-I used my garden roasted tomatoes
  • 1c  whole-milk or part skim ricotta cheese
  • 3/4c hard Italian grating cheese like Gran Padano or Pecorino Romano
  • 1/4c plus 1 tablespoon chopped fresh basil or torn mini basil
  • 1T fresh lemon juice

Directions

  1. Slice each eggplant lengthwise into 1/2-inch-thick planks (you should have 12 planks). Trim rounded surface from each end piece so it lies flat. I found that using a vegetable peeler made this easier. Adjust 1 oven rack to lower-middle position and second rack 8 inches from broiler element. Heat oven to 375°F.
  2. Line 2 rimmed baking sheets with parchment paper and spray generously with vegetable oil spray.
  3. Arrange eggplant slices in single layer on prepared sheets. Lightly brush 1 side of eggplant slices with oil and sprinkle with kosher salt and pepper. Turn slices over and repeat brushing and seasoning.
  4. Bake until tender and lightly browned, 30 to 35 minutes, switching and rotating sheets halfway through baking. This process took about 10 minutes less in my convection oven.  Let cool for 5 minutes. Using thin spatula, flip each slice over. Heat broiler.
  5. While the eggplant is cooking, heat remaining 1 tablespoon oil in 12-inch broiler-safe skillet, over medium-low heat until just shimmering. Add garlic, oregano, pepper flakes, and 1/2 teaspoon salt and cook, stirring occasionally, until fragrant, about 30 seconds.
  6. Stir in tomatoes and their juice. Increase heat to high and bring to simmer. Reduce heat to medium-low and simmer until thickened, about 15 minutes. Cover and set aside.
  7. Stir together ricotta, 1/2 cup cheese, 1/4 cup basil, lemon juice, and 1/2 teaspoon salt in medium bowl.
  8. With widest ends of eggplant slices facing you, evenly distribute ricotta mixture on bottom third of each slice. Gently roll up each eggplant slice and place seam side down in tomato sauce.
  9. Bring sauce to simmer over medium heat. Simmer for 5 minutes. Transfer skillet to oven and broil until eggplant is well browned and cheese is heated through, 5 to 10 minutes. Sprinkle with remaining 1/4 cup Pecorino and let stand for 5 minutes. Sprinkle with remaining 1 tablespoon basil and serve.
DSC_8719a
The variety I used for this dish was Clara, a pure white Italian style eggplant.
DSC_9051a
Eggplant slices are brushed with olive oil and seasoned lightly with salt and pepper.
DSC_9054a
After baking the slices are soft enough to roll but don’t fall apart.
DSC_9055a
I used roughly torn mini basil in my filling.
DSC_9059a
The very simple filling made of ricotta cheese, Pecorino Romano, fresh lemon juice and mini basil.
DSC_9060a
The eggplant slices are easy to roll up. Place them seam side down in the warmed sauce.

DSC_8993aDSC_9079a

June 27, 2014 Grilled Chicken with Chermoula Sauce

DSC_7879a

As a lover of all things related to food and cooking, I am especially pleased when I discover something new, at least new to me. In the tradition of herb and olive oil based sauces like pesto and chimichurri, chermoula is a sauce that originates from Morocco and other North African countries. It is a tangy blend of fresh herbs and spices, lemon and olive oil.

It is traditionally used to season fish but pairs equally as well with chicken or grilled vegetables. It can be both a dry spice mixture or more commonly, an herb sauce. I used it both ways in this recipe. First, as the rub for the chicken and then as the sauce to serve with the chicken. If you like, preserved lemon peel or a pinch of saffron would be a welcome addition to the mix. If you don’t like cilantro, either change the proportions of cilantro and parsley or eliminate it altogther. Traditionally, like pesto, this was made in a mortar and pestle but a mini food processor makes quick work of the recipe. I cooked these indoors on a grill pan, if I were cooking on an outdoor grill I would prefer whole chicken pieces.  Friendly to many diets, chermoula is a sauce worth discovering.

Grilled Chicken Breasts with Chermoula Sauce

Serves four

Ingredients for marinated chicken
  • 4 pieces boneless, skinless chicken breast
  • 4 T fresh-squeezed lemon juice
  • 4T olive oil
  • 1t ground cumin
  • 1t ground coriander
  • 1t garlic powder
  • 1t sweet paprika

DSC_7856a

Ingredients for the Chermoula Sauce

  • 2 large garlic cloves, coarsely chopped
  •  1/2 c coarsely chopped cilantro
  • 1/4 c coarsely chopped parsley (flat is my preference, but curly works too)
  • 1 T + 2 t freshly squeezed lemon juice
  • 1/2 t sweet paprika
  • 1/2 t ground cumin
  • 1/4t cayenne pepper (optional)
  • 1/8t saffron threads (optional)
  • 4 -5 T olive oil
  • Kosher salt and pepper to taste

Directions

  1.  Trim all fat and sinew from chicken breasts. Place chicken breast between two pieces of plastic wrap and with the flat edge of a mallet, pound to an even thickness, season generously with kosher salt. Whisk together lemon juice, olive oil and spices to make the marinade. Put chicken pieces inside a Ziploc bag or plastic container with a snap-tight lid, pour marinade over and let chicken marinate in the refrigerator 4-6 hours, turning bag occasionally.
  2. To make the chermoula sauce, put chopped garlic, chopped cilantro, chopped parsley, lemon juice, sweet paprika, and ground cumin, cayenne and saffron (if using) in food processor and pulse to combine. Add the 4 T olive oil and pulse just enough to get it mixed in, then taste to see if you want the other tablespoon of oil and add it if you want a milder sauce. (Don’t over-process; the mixture is not supposed to be smooth.) Add salt and pepper to taste.
  3. To cook the chicken in a grill pan, spray grill pan with nonstick grill spray or brush with oil and preheat grill pan to high (you can only hold your hand there for a few seconds at that heat.) Let chicken come to room temperature while the pan heats.
  4. To get criss-cross grill marks, lay the chicken top-side down at a diagonal across the grill pan and let it cook until well-defined grill marks are showing, about 3-4 minutes. It’s okay to lift a corner to check.  Turn the chicken so it’s going the opposite way at an angle to the grill grates and cook about 3-4 more minutes. Then turn chicken over and cook 4-5 minutes on the second side, or until chicken is firm but not hard to the touch.Serve chicken hot, with Charmoula Sauce spooned over.

DSC_7862aDSC_7886a