July 3, 2015 Oven Roasted Broccoli and Carrots

DSC_3357aMy original idea for this post was to make a salad, but sometimes the simplest things are the best. Freshly harvested broccoli and carrots are tossed with a good quality extra virgin olive oil, salt, freshly ground black pepper and my favorite ingredient to add to the roasting mix, aleppo pepper. Aleppo pepper, as I have mentioned before in a previous post is one of my favorite new ingredients of the past several years. It is dark red in color, flaky and somewhat oily in texture. It’s flavor profile is rich, sweet and fruity with hints of cumin.  Aleppo’s heat profile is moderate, only just a little hotter than paprika.

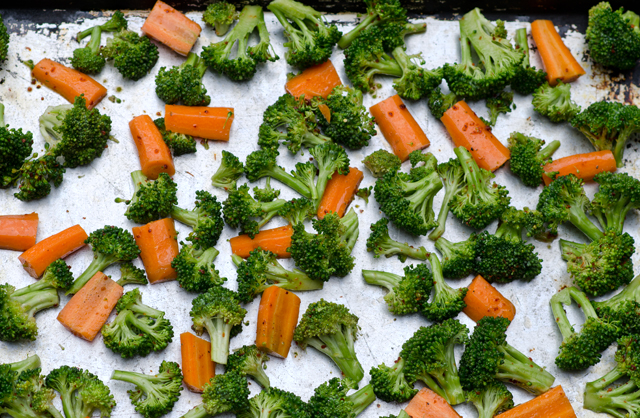
Begin by cutting your vegetables in relatively uniform pieces; in this case; the broccoli in individual florets and carrots in one inch lengths so they will roast in the same time as the broccoli.  Remember that vegetables shrink when roasting so always cook more than what you might if you were steaming or sautéing.

Although some recipes have you do it right in the pan, vegetables are more evenly oiled and seasoned in a bowl . Use just enough oil to give an even coating, about two tablespoons for this quantity should be enough. Season generously with salt, freshly ground pepper and whatever herb you might choose. In addition to Aleppo pepper, I have used paprika, chipotle pepper, cumin, thyme, it all depends on what compliments your vegetables best.

Roasting should always be done on a large shallow sided sheet pan. The ones I use are called “half size” and have a 18″x13″ dimension. They are relatively inexpensive and available in most big box stores. I consider them indispensible and have about a dozen from my catering days. Using a pan or baking dish with high sides will cause them to steam rather that roast because of the high water content of vegetables.

Give the vegetables room for roasting, everything should be in a single layer on the pan with a little room between each piece. I like to roast on a relatively high heat, 425°F to 450°F to insure they will caramelize on the outside and be nice and tender on the inside.  I like to stir or shake the pan every five minutes or so to roast every surface.  Time may vary for desired doneness, that’s why I check them frequently. The larger your pieces are, the longer it will take them to cook.

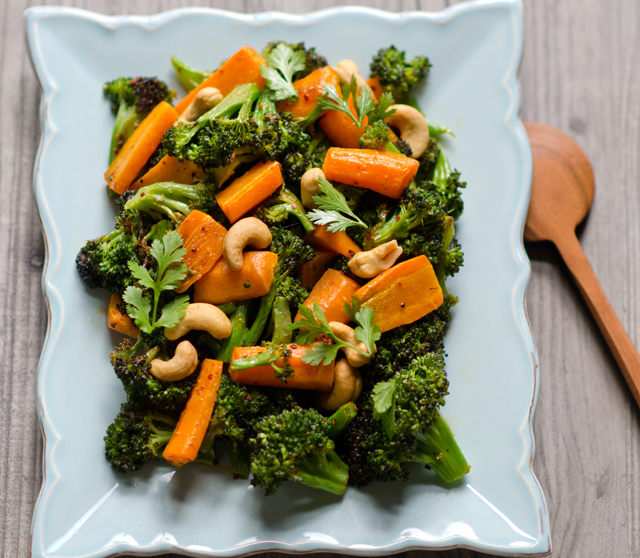
For a finishing touch to my roasted vegetables I added some cashews and a little fresh cilantro. In this case, simple was the best.
DSC_3324a

DSC_8441a

DSC_3352a
Cut vegetables into uniform pieces and spread out evenly on a sheet pan.

Oven Roasted Broccoli and Carrots

Serves 2-3

Ingredients

  • 1 large head of broccoli, florets chopped off the stalk, about 6-7 cups
  • 3 medium carrots, cut in half and into 1″ lengths
  • 2-3T extra virgin olive oil
  • 2-3t kosher salt
  • 2t freshly ground black pepper
  • 1t Aleppo pepper
  • 1/4c unsalted cashews
  • 1/4c cilantro leaves

Directions

  1. Preheat oven to 425°F.In a large bowl, toss the vegetables together with the olive oil, salt and pepper.
  2. Transfer vegetables to a large sheet pan, spreading them out evenly.
  3. Roast vegetables, shaking the pan every five minutes or so to be certain all surfaces are roasted. My vegetables were very fresh and took about 15 minutes total to cook. Your time may vary.
  4. Transfer vegetables to a serving bowl. Garnish with cashews and cilantro.
June 14, 2015 Crustless Spinach, Mushroom and Canadian Bacon Quiche

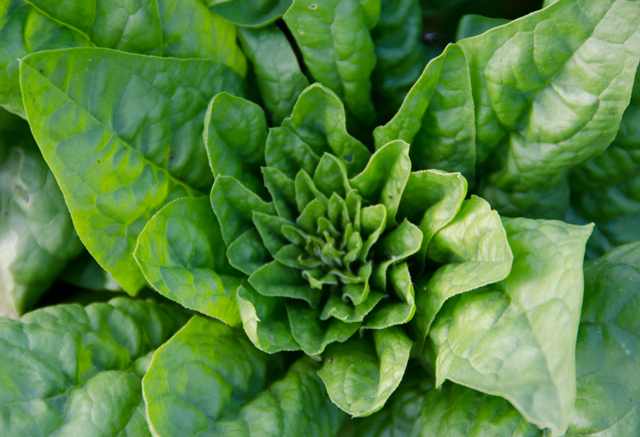
DSC_3155aConsider a humble little package of frozen chopped spinach, a convenience and a staple in many kitchens, including mine. You might be quite surprised how many cups of fresh spinach it takes to make that 10 ounce brick of frozen. That was the information I was looking for this week.

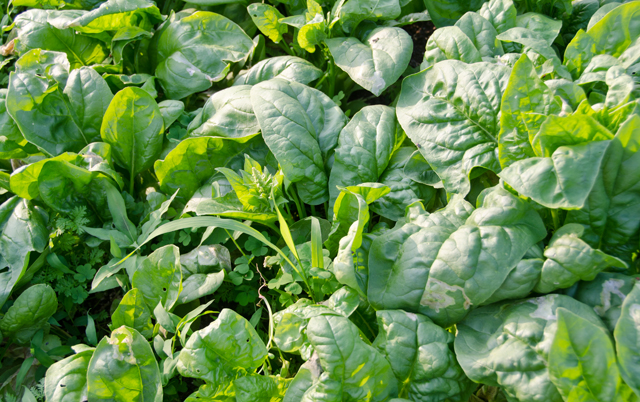
Our spinach plants are going to seed and it was time to do one last serious pick before pulling them out and getting the space ready for another planting. When picking spinach, especially in the extreme hot weather (95°F) it is important to not use a metal bowl or colander, they will put your freshly picked leaves into immediate wilt that will be hard to revive from.  I prefer using a clear plastic “pebble” bowl, sturdy hard plastic bowls I used in my catering business. I snip off the best leaves with scissors, leaving the plant and damaged leaves behind for the mulch pile. Next, I soak the spinach in a clean sink of cold water. I start the process by swishing the leaves around in the sink. I let them sit for a few minutes, the spinach will float to the top, and the dirt and debris will sink to the bottom.  Then I gently lift out the leaves and transfer them to a colander. I will repeat the process again to be sure all the dirt is removed. I refrigerated the spinach in the large bowls with some plastic wrap draped over the top.

Now it was time to find ways to use up this bounty.  Spinach is a powerhouse of nutrition, low in calories, a rich source of iron, vitamins A, C, and K, potassium, calcium and magnesium. End of the season spinach is still very good, but not necessarily something you would want to use in a salad. So I was on the hunt for recipes with cooked spinach. Frittata, quiche, spanakopita, all good choices but many recipes just call for that ubiquitous ten ounce package of frozen spinach. I needed to find the conversions to take that very large bowl to the amount of cooked spinach I needed.

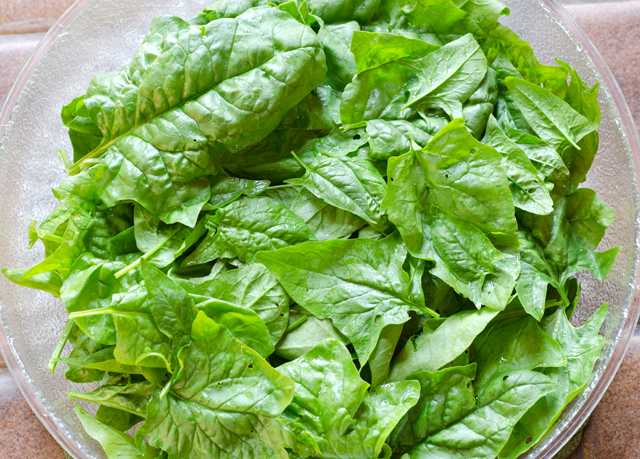
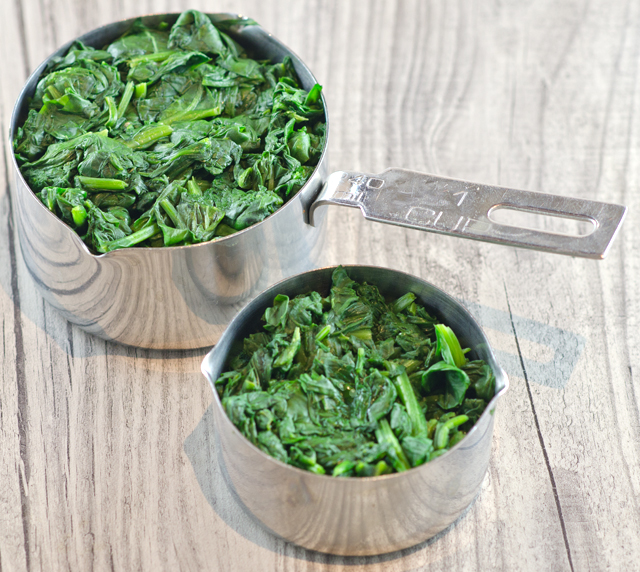
Spinach is 90% water in composition and when cooked, 1 pound of fresh spinach is equivalent to 10 to 12 cups and will cook down to 1 cup. One 10-ounce package of frozen spinach is the equivalent of 1 1/2 pounds of fresh spinach or about 15-18 cups of spinach. In my pictures you will see a before and after of the spinach. To reduce it, I cooked the spinach in a 10″ sauté pan using just the water that clung to the leaves. Then I drained it thoroughly in a fine mesh colander, squeezed it dry and chopped it roughly.

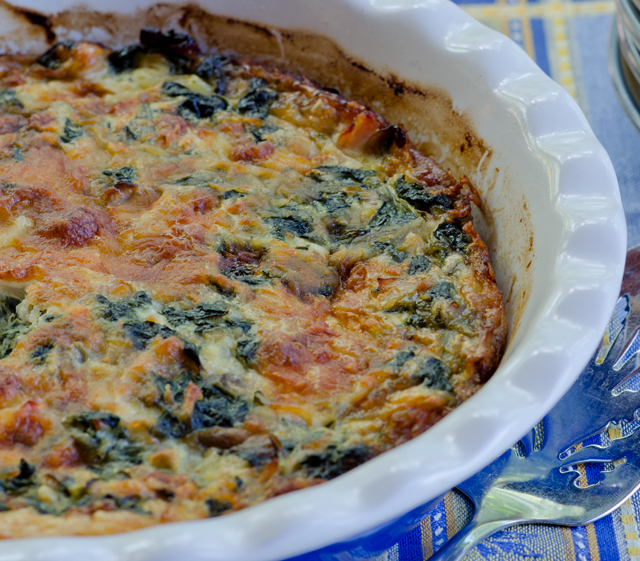
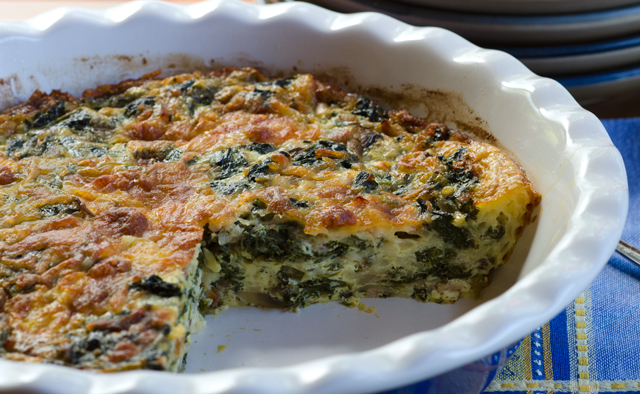
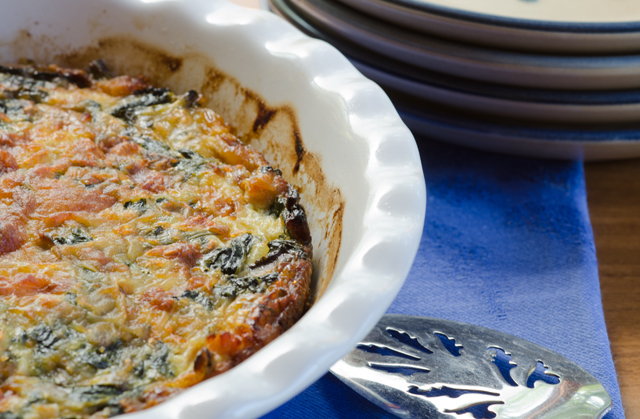
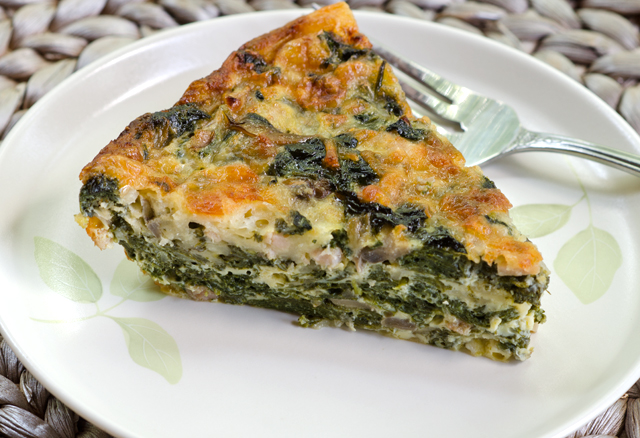
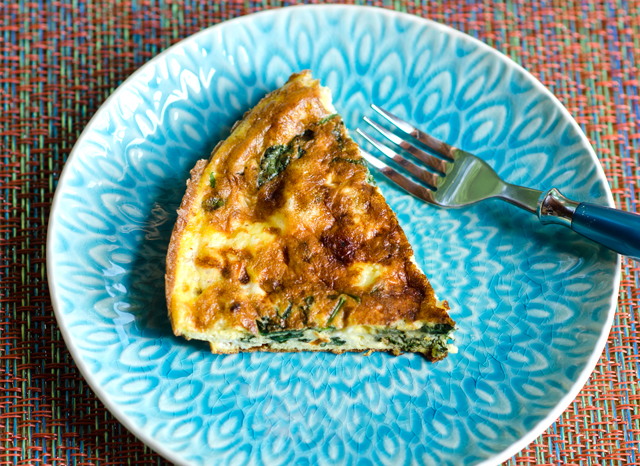
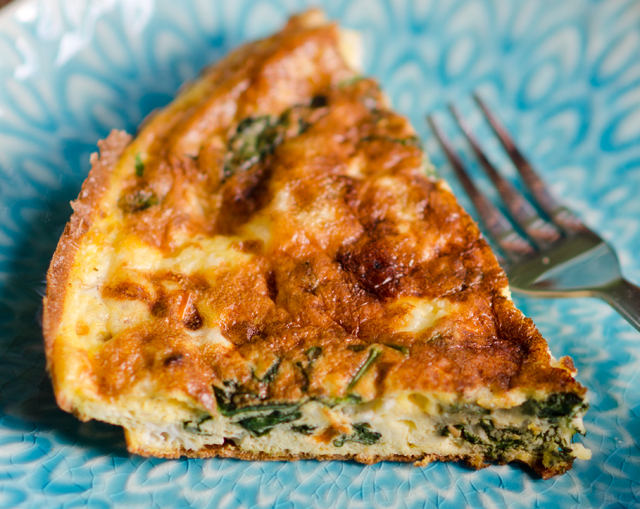
My efforts paid off. With the spinach I picked, I was able to make all three, frittata, quiche and spanakopita. This quiche can be put together in minutes since the most time consuming part is eliminated, making the crust.  I added some sauteed sliced mushrooms and Canadian bacon. In case you didn’t know, American bacon comes from the fatty belly of the pig and Canadian bacon is cut from the loin.  Of course a 10 ounce package of frozen spinach can be substituted in this recipe. It makes a nice breakfast or light lunch and reheats well the next day.

DSC_3115a
Fifteen to eighteen cups of fresh spinach.
Cooks down to this!
Cooks down to this!

DSC_3148a

Crustless Spinach and Canadian Bacon Quiche

Makes 6-8 servings

Ingredients

  • 1c finely chopped onion
  • 1c sliced fresh mushrooms
  • 1T vegetable oil
  • 1 package (10 ounces) frozen chopped spinach or 1½c cooked and chopped fresh spinach
  • 2/3c finely chopped Canadian bacon
  • 5 large eggs
  • 3c shredded swiss cheese (other cheeses will work too like cheddar or Monterey Jack)
  • 1/8t freshly ground pepper

Directions

  1. In a large skillet, sauté onion and mushrooms in oil until tender.
  2. Add spinach and ham, cook and stir until the excess moisture is evaporated.  Cool slightly.
  3. Beat eggs, add cheese and mix well. Stir in spinach mixture and season with pepper; blend well.
  4. Spread evenly into a greased 9-inch pie plate or quiche dish.
  5. Bake at 350°F for 40 to 45 minutes or until a knife inserted near the center comes out clean.

DSC_3145aDSC_3162a


June 10, 2015 Arugula, Strawberry, Snow Pea and Radish Salad

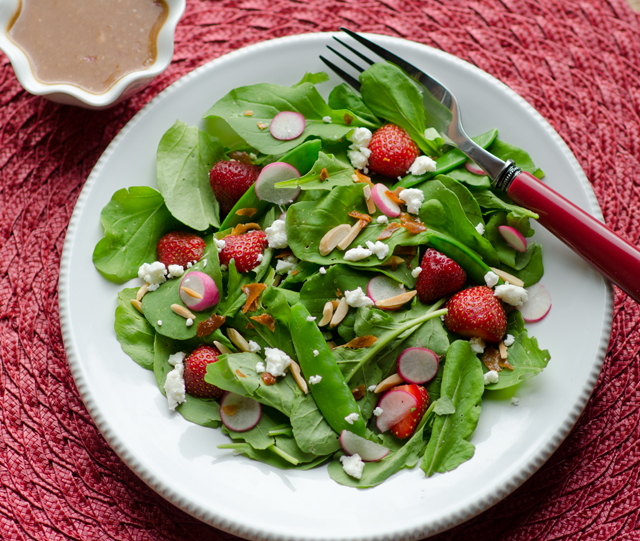
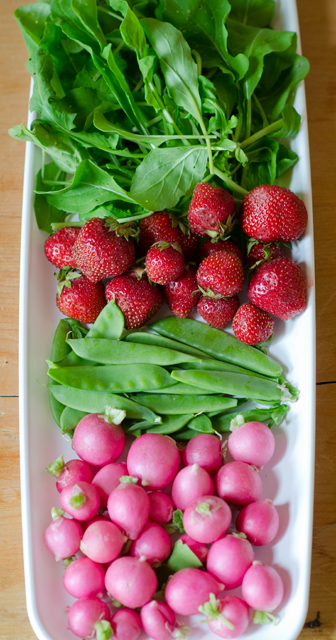
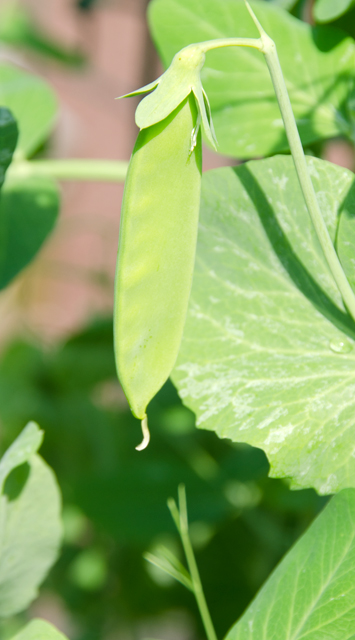
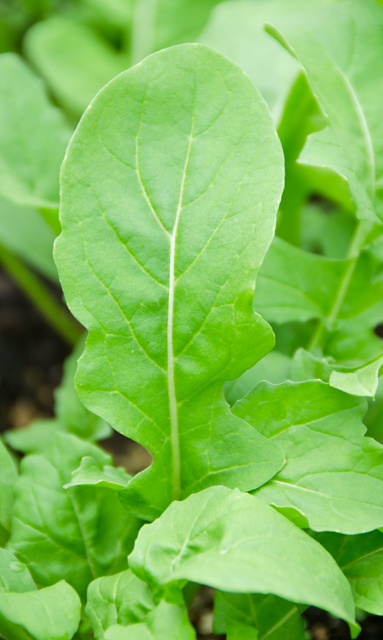
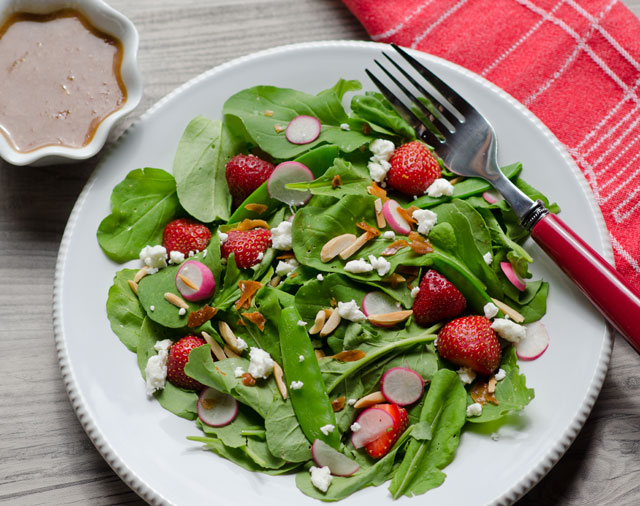
DSC_2927aJune’s warm temperatures are making an appearance again this week, but technically it’s still spring until the 21st. This end of spring salad brings together four elements that are a part of the early June gardens in our area. All salad greens love the cooler temperatures of spring and arugula is no exception. We have been enjoying pea shoots for several weeks now and the peas started making their appearance last week. They  will probably only last to the end of this month when warmer temperatures will cause the vines to die off.

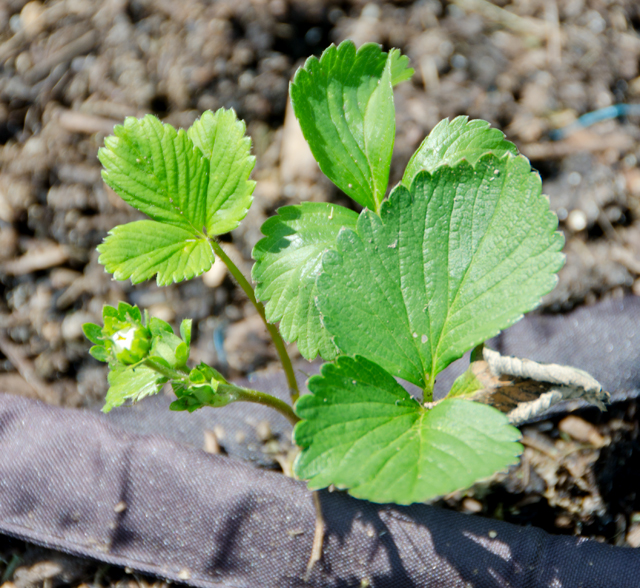
I just harvested our most currant crop of radishes, another vegetable that doesn’t like mid summer heat.  At my request, Joe planted a strawberry bed this spring.  In fact, some of the plants are already flowering. He has removed the flowers from these ambitious plants to give them time to establish themselves before producing fruit.  So there is a good chance that the plants that bear two times in a season will produce their first strawberries late in the summer.

A strawberry vinaigrette is the perfect accompaniment for this salad. I chose a strawberry balsamic vinegar from The Tubby Olive, a store that is always inspiring new salad combinations for me. For the dressing I combined garlic, shallot, Dijon mustard, strawberry balsamic, just a touch of honey and a good extra virgin olive oil. When making a salad be sure to use a bowl that gives you plenty of room to combine the ingredients.  I start by tossing the greens first with dressing to coat them lightly and then add some of the other components and toss again. I leave the rest to top the salad with, this ensures the last person who is served doesn’t get all the heavier ingredients that end up in the bottom of the bowl.

DSC_2940a

Arugula Strawberry Snow Pea and Radish Salad

Serves two

Ingredients

For the dressing

  • 1t finely minced garlic
  • 3T minced shallot
  • 1t Dijon mustard
  • 3T Strawberry balsamic vinegar
  • 1/4t honey
  • 1/4c extra virgin olive oil
  • Kosher salt and freshly ground pepper

For the salad

  • 4-5 cups of arugula, washed and trimmed
  • 1c strawberries, stemmed and sliced in half
  • 1c snow peas, strings removed, lightly steamed
  • 1c radishes, thinly sliced
  • 1/4c slivered almonds, lightly toasted
  • 2-3 slices of prosciutto, crisped in a non stick pan
  • 1/4c creamy feta, crumbled
  • Freshly ground pepper

Directions

  1. To make the dressing, combine all the ingredients in a small bowl and whisk together until evenly combined. Taste and adjust if necessary. Season to taste with kosher salt and pepper.
  2. Place the salad greens in a large bowl and toss with some of the vinaigrette and taste. Add about half of the other ingredients, toss again, adding more of the dressing if necessary. Top the salad with the remaining ingredients. Season each portion to taste with freshly ground black pepper. Reserve remaining vinaigrette for a later use.

DSC_7727a

DSC_3016a
Our new strawberry patch. They need to be “nipped in the bud” to produce stronger plants.
Joe will plant more arugula in the fall.

DSC_2933a

June 6, 2015 Spinach and Chickpea Curry

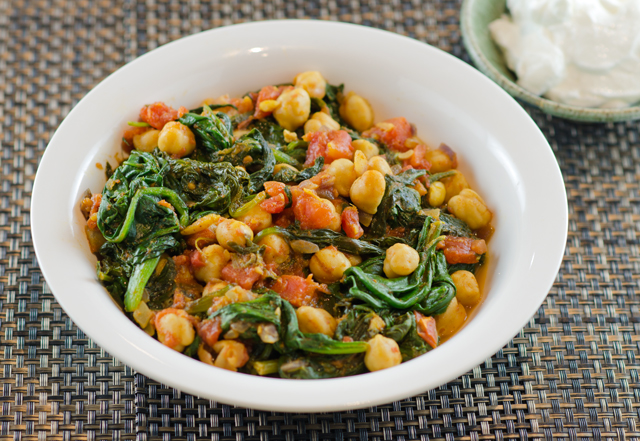
DSC_2863aStill on the hunt for spinach themed dishes, I found this recipe for Spinach and Chickpea Curry in Fine Cooking. It is similar to a northern Indian dish called palak  chole, palak being the Punjabi word for spinach and chole the word for chickpea. The dish can be made in no time at all with some basic pantry ingredients.

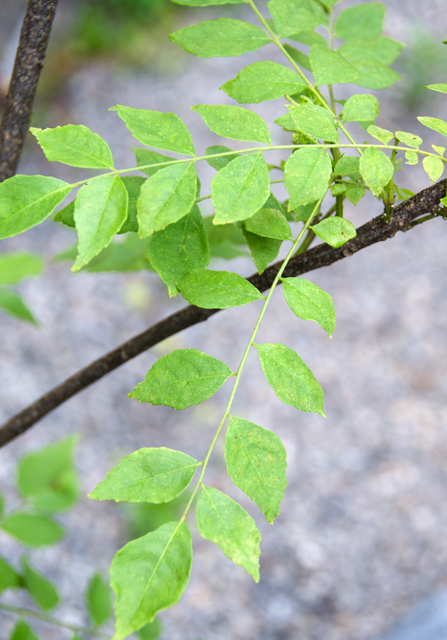
Curry powder, a staple in many kitchens, is not a single spice like basil or oregano but a combination of ingredients and will vary by region and country. Most curry powder recipes include coriander, turmeric, cumin, cayenne, ground ginger and mustard seed. To add to the confusion, there is also a curry plant that is supposed to smell like curry and a curry leaf plant. The leaves of the curry leaf plant are used mostly in the cooking of southern India.  The leaves look like small bay leaves but are edible and have a lime-lemony taste.

Garam masala is the other spice blend in this dish. Garam is the Indian word for warm or hot and masala is a mixture of spices. Garam masala is a blend of dry roasted ground spices from northern India. Dry roasting adds to the complexity of garam masala and it is not as hot and spicy as other blends. It may contain up to 12 spices including black pepper, cinnamon, cloves, coriander, cumin, cardamom, dried chilis, mace, nutmeg and other spices.  As with all spice blends they should be kept in a cool dark cabinet and have a shelf life of about six months.

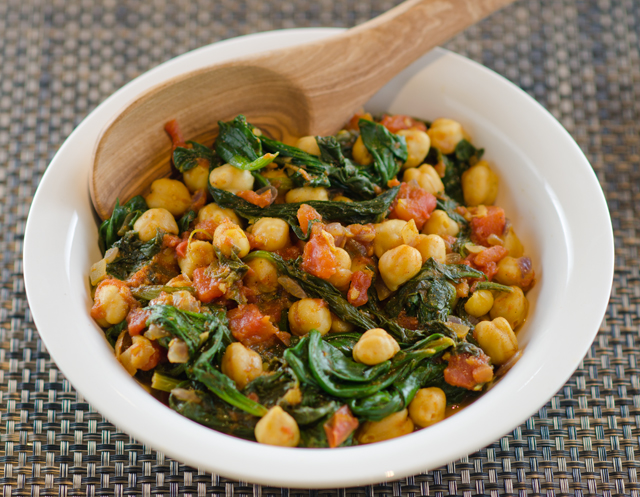
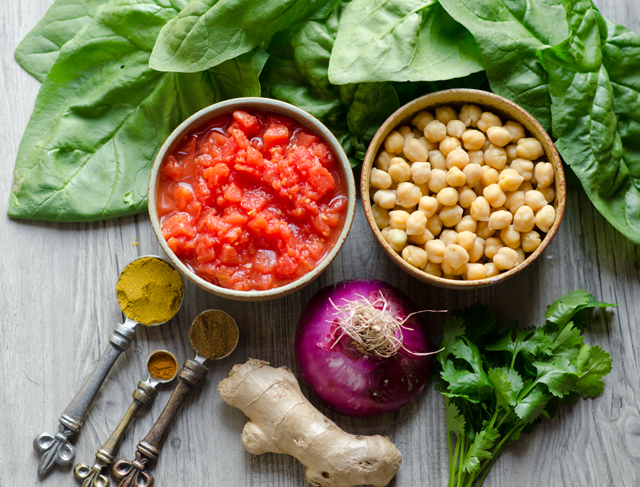
Saute onion, ginger, spice blends and cayenne over medium high heat. The fragrance is absolutely intoxicating. Stir in drained and rinsed chickpeas, canned diced tomatoes and a little kosher salt. Next, add handfuls of spinach, stirring to wilt as you go. The recipe calls for baby spinach but I used garden spinach that I cut down to size and removed large ribs and stems from. This was a dish that came together in less than an hour, and that including picking, washing and trimming the spinach. Serve garnished with cilantro and some plain yogurt to stir in if you choose. Next time I think I will make some naan to sop up the juices. Leftovers are fabulous, that is, if you have them.  This dish was so good, it was requested two days in a row.

DSC_2860a

Spinach and Chickpea Curry

Ingredients

  • 3T canola oil
  • 1/4c chopped red onion
  • 2T finely chopped fresh ginger
  • 1T curry powder
  • 1t garam masala
  • 1/8t cayenne pepper
  • 1 15oz can chickpeas, drained and rinsed
  • 1 14½oz can diced tomatoes
  • 1¼t kosher salt plus additional for final seasoning
  • 7-8c fresh spinach, torn into 1″ pieces
  • ¼c chopped cilantro
  • Plain Greek style yogurt for serving

Directions

  1. Heat canola oil in a 12″ sauté pan over medium high heat. Add onion, ginger, curry powder, garam masala and cayenne pepper. Cook, stirring often until the onion is softened, 2-3 minutes.
  2. Stir in one can of drained and rinsed chickpeas, one can of diced tomatoes and 1¼t salt.
  3. Add spinach by the handful, stirring to wilt as you go. Continue to cook, stirring often, until the spinach is completely wilted and the flavors have melded, 4 to 5 minutes more. Season to taste with more salt. Remove the pan from the heat and stir in ¼c cilantro.
  4. Spoon onto a platter and serve with Greek yogurt for dolloping on top.
The curry leaf plant.

DSC_2866a

June 2, 2015 Spinach, Sun Dried Tomato and Feta Frittata

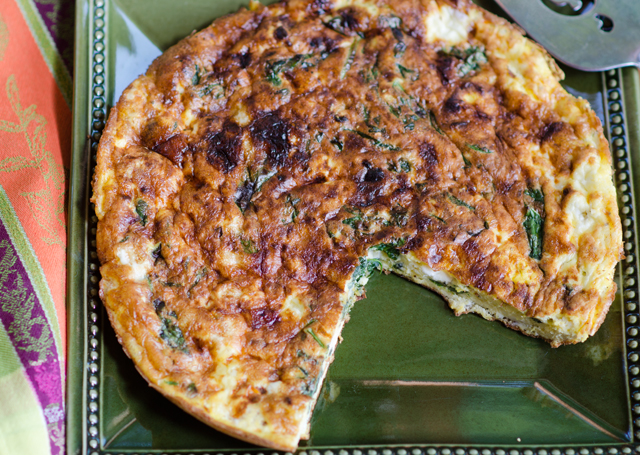
DSC_2848aI was looking for a different way to use some of our abundance of spinach and decided a frittata would be a good choice. Frittata is the Italian name for a flat open faced omelet. They are quick to make and can be enjoyed warm or at room temperature, not only just for breakfast, but at lunch and dinner as well.  In the late Marcella Hazan’s The Classic Italian Cookbook, she delineates three distinctions between the omelet and the frittata.

  • An omelet is cooked briefly over high heat, a frittata is cooked slowly over low heat.
  • An omelet is creamy and moist, just short of runny. A frittata is formed and set, although by no means, stiff and dry.
  • An omelet is rolled or folded over into an oval tapered shape. Frittatas are flat and perfectly round.

This recipe’s framework came from a recipe on the Cooks Illustrated website. It called for a dozen eggs and just a few tablespoons of half and half to add some creaminess. The original recipe was for a frittata with broccoli rabe, sun dried tomatoes and fontina cheese. I substituted four cups of lightly packed spinach with the large stems and ribs removed for the rabe. The spinach was just picked and washed so I was able to cook it down quickly with just the water that clung to the leaves, so very little oil was needed in the pan. I substituted my favorite French feta for the fontina, since spinach and feta are such a good combination. The sun dried tomatoes called for in the original recipe were oil packed. The sun dried tomatoes I used were ones I made last summer with Sun Gold tomatoes from the garden. They just needed to be reconstituted in some warm water for about ten minutes to bring them back to life. I was surprised (and pleased) that the skin came off in the process. I chopped them roughly before adding them to the frittata.

A  heavy bottomed oven safe non stick skillet is absolutely necessary to make the frittata. Before you proceed with the recipe be sure the skillet fits comfortably under the broiler without a great deal of maneuvering. The handle on my skillet was a bit high and made getting it in and out of the oven quite challenging. Have thick potholders at the ready so you don’t burn your fingers pulling the pan out of the oven. Once out, leave the potholder over the handle to remind yourself the pan is still hot. Use a spatula to loosen the frittata from the pan and transfer to a platter or cutting board. Of course, there are countless variations of the frittata and as the season moves on my add-ins will change.  Whatever you put in yours, it’s a great quick weeknight supper to serve alongside a simple green salad.

DSC_2601a
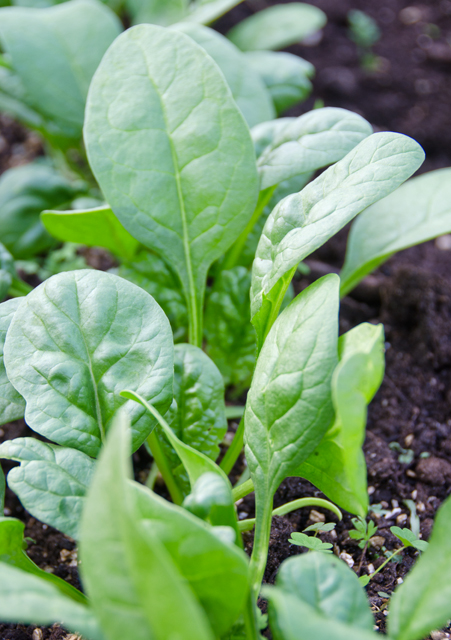
Spinach, just a few weeks ago.
DSC_2902a
That same spinach a few days ago.
DSC_2901a

Spinach, Sun Dried Tomato and Feta Frittata

Makes one 12″ frittata

Ingredients

  • 12 large eggs
  • 3 T half and half
  • 1 teaspoon olive oil
  • 4 c loosely packed spinach, large ribs and stems removed, cut into 1 inch pieces
  • 1 clove garlic, finely minced
  • 1/8t red pepper flakes
  • 3/4c lightly crumbled feta cheese
  • 1/4c coarsely chopped sun dried tomatoes

DSC_2850a

Directions

  1. Adjust oven rack to upper middle position, about 5 inches away from the heating element. Heat broiler.
  2. Whisk eggs, half and half, ½t salt and ¼t freshly ground pepper in a medium bowl until well combined, about 30 seconds. Set eggs aside.
  3. Heat oil in a 12-inch non stick skillet over medium heat until shimmering; add spinach and cook until it wilts, about 1 minute. Add garlic and red pepper flakes and cook until fragrant, about 30 seconds. Stir crumbled Feta and sun dried tomatoes into eggs; add egg mixture to skillet and cook, using spatula to stir and scrape bottom of skillet, until large curds form and spatula begins to leave wake but eggs are still very wet, about 2 minutes. Shake skillet to distribute eggs evenly, cook without stirring for 30 seconds to allow the bottom to set.
  4. Slide skillet under broiler and broil until frittata has risen and surface is puffed and spotty brown, 3 to 4 minutes; when cut into with a paring knife the eggs should still be slightly wet. Remove skillet from oven and let stand 5 minutes to finish cooking; using spatula, loosen frittata from skillet and slide onto platter or cutting board. Cut into wedges and serve.


DSC_2855a

May 30, 2015 Cucumber, Radish and Turnip Salad

DSC_2759a

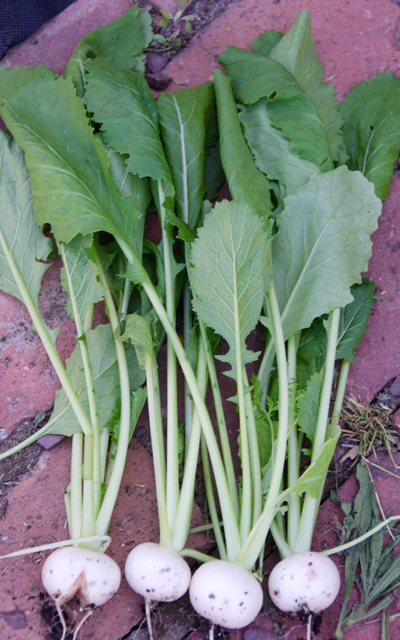
Cucumbers and radishes will never co-exist in our garden. Radishes need the cooler temperatures of spring while cucumbers didn’t make an appearance in our garden last year until August. This salad, loosely adapted from one in Bon Appetit, also utilizes another spring offering, sweet mild Hakurei turnips. Hakurei turnips are harvested at about the same size as a radish. They are pure white and their flavor lends nicely to salads.

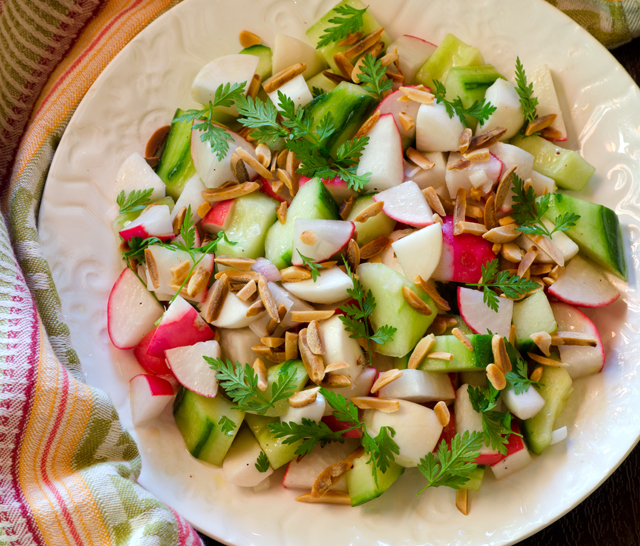
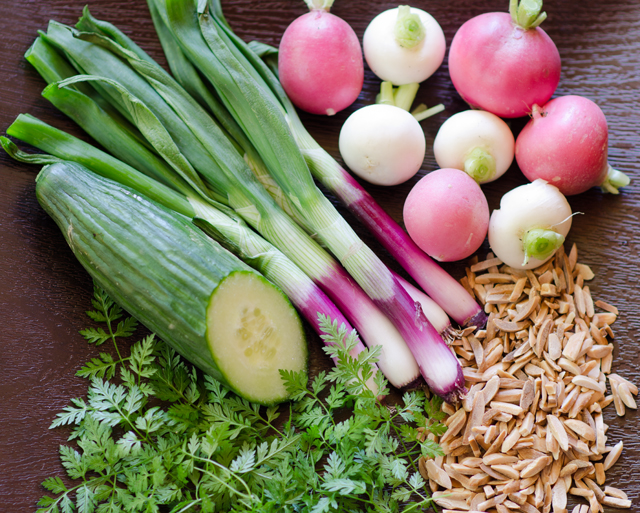
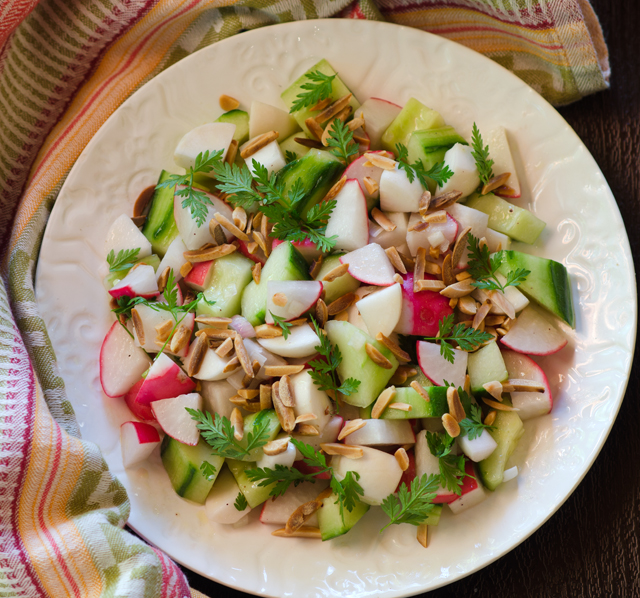
In this salad, small chunks of cucumber, radish and turnip are combined with toasted almond slivers and tossed with a vinaigrette.

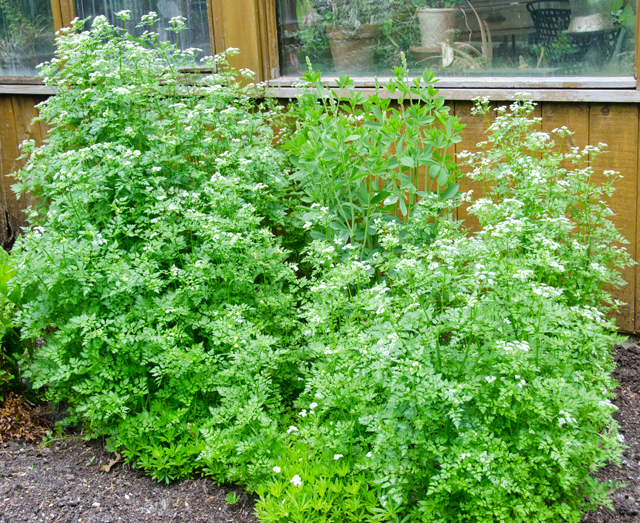
I made a vinaigrette accented with spring’s most etherial and delicate herb, chervil.  A cousin to parsley, it’s leaves look like delicate lacy ferns. Our chervil was originally planted in the garden but a new larger healthy patch has seeded itself in the back of the house, nowhere close to it’s orginal location. It is a plant that also prefers cooler temperatures and partial shade. The flavor is subtle, mildly anise with just a touch of parsley. Because of it’s delicate nature, it’s rare that you would find chervil in any market, farmers or otherwise. However it is easy to grow and fortunately often seeds itself.

Toasted almonds lend a nice crunch to this dish. Rather than the oven you could alternately toast these in a dry skillet on the stove top. Whatever choice you make, watch nuts carefully, one minute they’re a pale tan, the next they are too dark. Toss the nuts occasionally, and as soon as they turn uniformly golden in color, remove from the baking sheet because they will continue to cook and darken in the pan.

I cut all the vegetables into small uniform chunks, slicing all of them would make for a different texture and would make an interesting salad as well. I like a touch of sweetness in most of my vinaigrettes, I used honey from a new vendor at my local farmers market in Wrightstown. Truly Pure and Natural carries a whole line of natural products, including local honey. They have an entire line of delicious flavored honeys, everything from lavender, to coffee to one they call “hottie honey”. I availed myself to quite a few “tastings” and came home with a three pack.  I added just a touch of the hibiscus honey to my vinaigrette. I’m sure I will be back for more!

As with many salads, this one needs to be assembled right before serving.  If you don’t have chervil, flat leaved parsley can substitute.

This large patch of chervil surprised us at the back of the house.
We use both the turnip greens and the sweet  Hakurei turnips.
We use both the turnip greens and the sweet Hakurei turnips.
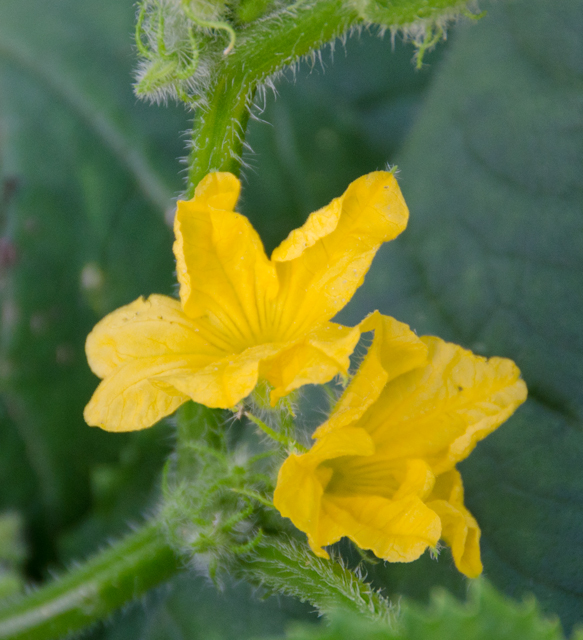
The first cucumber flowers didn't appear until later in the season last year.
The first cucumber flowers didn’t appear until later in the season last year.

DSC_2752a

Cucumber, Radish and Turnip Salad

Makes four servings

Ingredients

  • 1/2c slivered almonds
  • 1 or 2 spring onions, finely chopped
  • 1/4c raspberry champagne vinegar or your vinegar of choice
  • 1t honey (I used Hibiscus infused honey)
  • 1/4c extra virgin olive oil (more to taste)
  • Kosher salt and freshly ground pepper
  • 1c English hothouse cucumber chunks, peeled, seeded and cut into ½inch chunks
  • 1c radishes, trimmed and cut into ½inch chunks
  • 1c Hakurei turnips, trimmed and cut into ½inch chunks
  • 1c chervil leaves and more for garnishing the salad

Directions

  1. Preheat oven to 350°F. Spread almonds out evenly on a rimmed baking sheet. Toast, tossing occasionally, until golden brown, 8 to 10 minutes; let cool.
  2. Whisk onion, vinegar, honey and olive oil in a large bowl; season with salt and pepper. Add cucumbers, radishes and turnips, chervil and almonds; toss to coat.
  3. Season to taste with salt and pepper.

DSC_2757a


May 4, 2015 Claytonia Salad

DSC_2521a

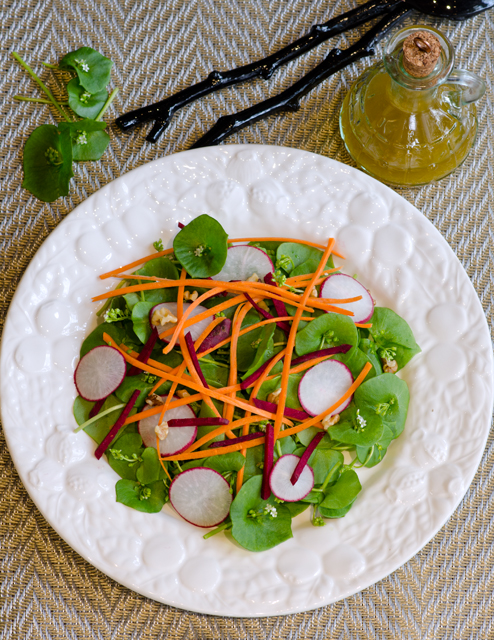
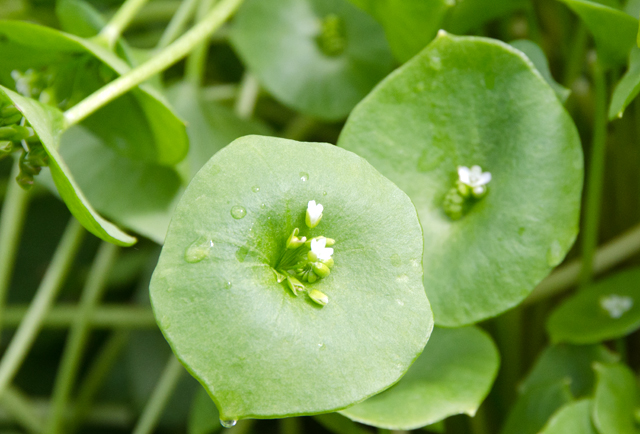
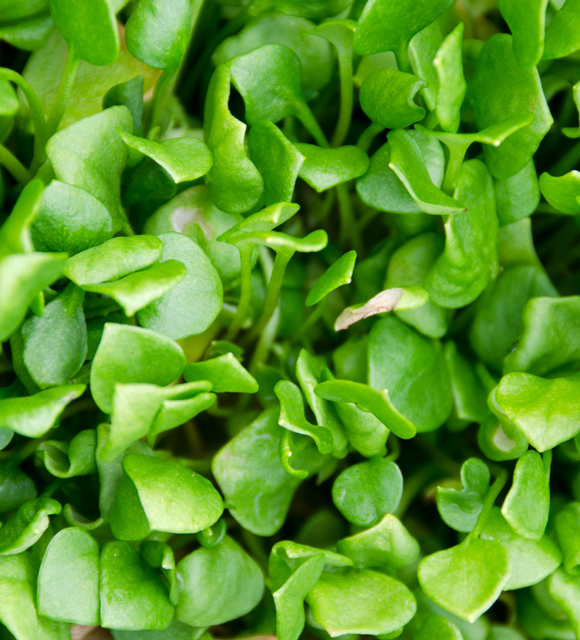
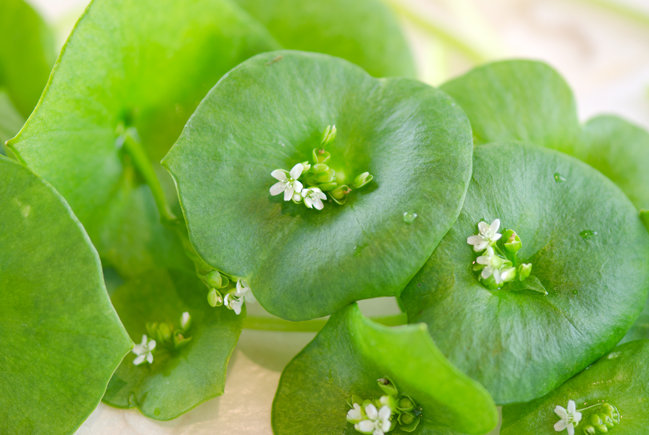
Claytonia is not a small nation tucked away in the Alps, nor is it the latest addition to the periodic table of elements. Claytonia perfoliata, it’s full name, is a cold hardy salad green that grows wild up and down the west coast of the United States.  The plant grows up from thin, succulent stems. The leaves are delicate and small, shaped almost like a spade. Eventually tiny white flowers will grow out from the center of the leaf. The entire plant is edible from stem to flower with a texture reminiscent of spinach with a very mild flavor that is slightly sweet when first picked.

During the California gold rush, miners learned about claytonia from local Indians. It became an important part of their diet because it was plentiful and it’s vitamin C content helped to ward off scurvy, hence it’s other name, miner’s lettuce. It was because of it’s nutritional value, British settlers brought claytonia from America to Europe, and later to settlements in Australia and Cuba.

Joe first learned about claytonia from his readings in the books of his gardening hero, Eliot Coleman. Joe planted claytonia in the greenhouse and under a cold frame late last fall.  This time the plantings were successful but when the cold weather came on with a vengeance, the plants stopped growing. Since the plants can survive the freeze/thaw cycle, they were the first to start growing in the spring. Claytonia is supposedly an easy self-seeder but if not, Joe will plant it earlier in the fall to give it a better head start for winter salads.

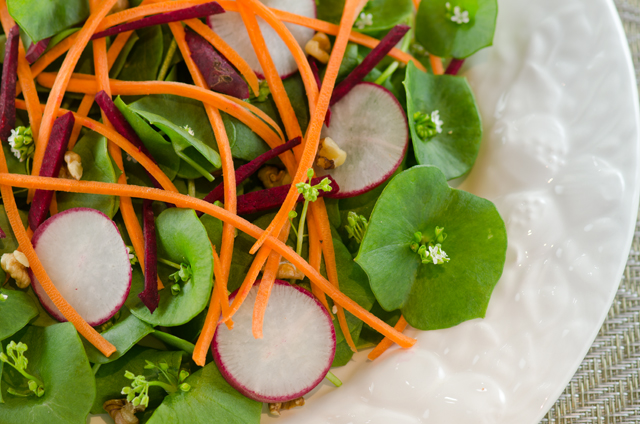
I like to use it alone in a salad or with other similar greens with a delicate texture.  In this salad I paired the claytonia with other spring vegetables, carrots, beets and radishes. Since it bruises easily, I prefer to toss the greens first with the vinaigrette, then layer the other ingredients on top. The sweet tartness of apricot vinaigrette pairs nicely with the greens.

Claytonia or miner's lettuce thriving in the spring garden.
Claytonia or miner’s lettuce thriving in the spring garden.


Claytonia Salad

Serves two, the salad components are all approximations

Ingredients

  • Enough claytonia to fill the bowl of your choice
  • Shredded carrots
  • Finely julienned raw beets
  • Thinly sliced radishes
  • Chopped walnuts
  • Freshly ground black pepper
  • Apricot vinaigrette (recipe follows)  or the vinaigrette of your choice

Directions

  1. In a large bowl lightly dressing the claytonia with the vinaigrette. With tongs transfer the greens to salad plates. Top the dressed greens with the carrots, beets, radishes and walnuts. Add freshly ground pepper to taste.

Apricot Vinaigrette

Ingredients

  • ¼c apricot balsamic vinegar
  • 1t honey
  • 1 small clove garlic, finely chopped
  • ¼t Dijon mustard
  • 1/3 to ½c extra virgin olive oil
  • Kosher salt and freshly ground pepper

Directions

  1. In a small bowl whisk all ingredients together. Season to taste with kosher salt and freshly ground pepper.

DSC_2315a

DSC_2511a

DSC_2524a


April 28, 2015 Salmon Piperade

DSC_2394aMy local big box store always has one bargain that I can never pass up, sweet peppers. Six in a bag, two each of red, yellow and orange, they usually cost about 6.49. Supermarket sweet red peppers occasionally are on sale at a 1.99 per pound but can go as high as 4.99 a pound in the off season. Orange and yellow ones never seem to go on sale. Since we only have access to local and peppers from our garden only two months out of the year, I don’t mind buying them.

The peppers are grown in greenhouses in Canada and have consistent good flavor and texture. I like using them in salads, stuffing them with chili and cooking them on the grill. We had a few left over recently that weren’t grilled and was looking for a way to use them in the next several days. Then I remembered piperade.

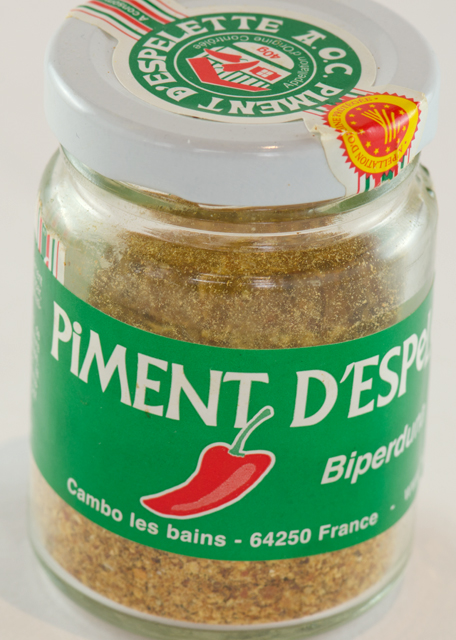
Classic piperade originates from the Basque country in the southwest region of France. It is a versatile preparation that compliments everything from eggs to chicken to fish dishes.  A simple saute of bell peppers, onion and tomato, piperade is enlivened by the addition of piment d’espelette. Piment d’espelette is a pepper native to France in the Basque country. The flavor is fresh and fruity with just a hint of smoky heat.

Piment d’Espelette has AOC (appellation d’origine contrôlée) status. This is a protective designation of origin and means the pepper only comes from a 22 square kilometer region around the town of Espelette. The peppers are harvest by hand, air dried and finished in a kiln. They are sold dried, whole or pulverized into a flaky powder. Since we are not in tomato season I used diced canned tomatoes for this recipe. The once 16 ounce can has shrunk to 14.5 ounces, when will this madness stop? I used Hunts because Cooks Illustrated put them on top of their most recent testing. Their flavor was reported to be fresh, bright and sweet-tart. Sounds good to me.

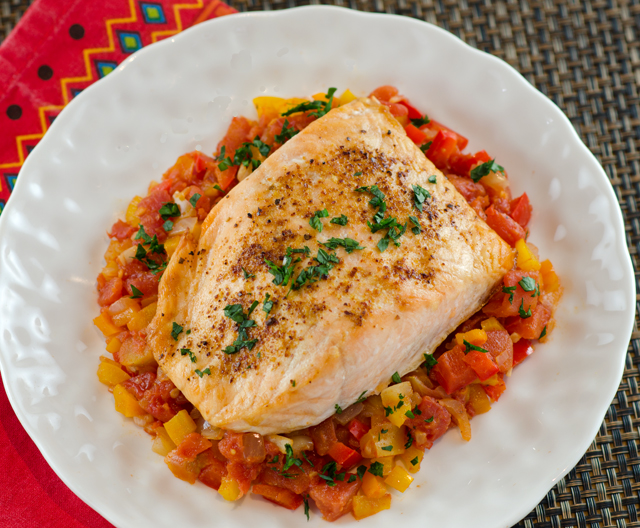
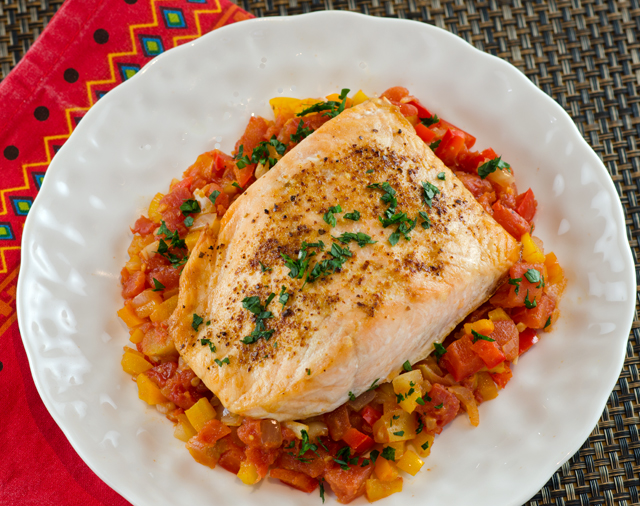
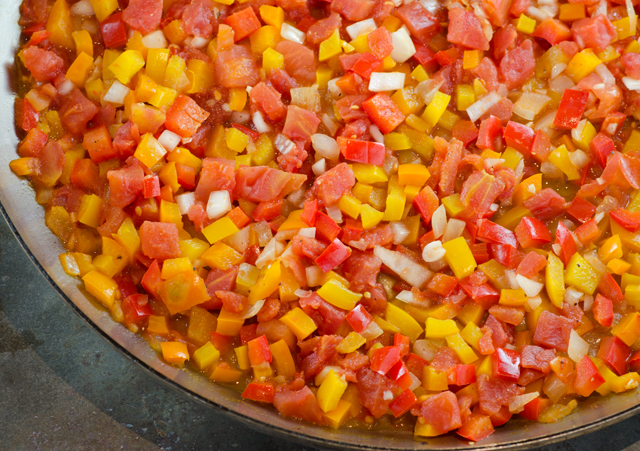
Espelette pepper is sold by specialty grocers and can easily be found on line if you are an intrepid spice hunter like me. If not, substitute smoky paprika or Aleppo pepper with a dash of cayenne pepper. The piperade comes together easily. Saute an onion until translucent, add garlic, peppers and piment d’Espelette. Cook another minute until fragrant then add the tomatoes and their juice. Bring the mixture to a boil, season well and cook slowly for about 45 minutes or until the juices have thickened. Keep piperade warm while you cook the fish. Serve salmon on a bed of piperade and garnish with parsley. Serve leftover piperade with poached or scrambled eggs the next day.

DSC_2386a
I used finely chopped peppers and onion in my preparation.
DSC_2471a
Piment d’Espelette is a protected designation meaning the peppers can only be grown in a specific location.

DSC_2389a

Salmon Piperade

Serves two

Ingredients

  • 1T olive oil, plus 2t for cooking salmon
  • 1 medium onion, diced small
  • 1T finely chopped garlic
  • 1 yellow pepper, diced (about ¾cup)
  • 1 red pepper, diced (about ¾cup)
  • 1 orange pepper, diced (about ¾cup)
  • 1t or to taste, piment d’Espelette, substitute smoky paprika and a dash of cayenne if necessary, additional to sprinkle on fish before baking
  • 1 14.5 ounce can of diced tomatoes
  • Kosher salt and freshly ground black pepper
  • 2 6-ounce boneless skinless salmon fillets
  • 1-2T chopped parsley

Directions

  1. Heat 1 tablespoon of olive oil in a medium sauté pan over medium high heat. When the oil begins to shimmer, add the onion. Cook, stirring frequently until the onion is translucent, about 4-5 minutes.
  2. Add the garlic, peppers and piment d’Espelette. Cook, stirring frequently until fragrant, about 1 minute. Add the tomatoes and their juices, season well with salt and pepper. Bring the mixture to a boil, lower to a simmer, cover and cook slowly for about 45 minutes, stirring every now and then.
  3. Brush salmon fillets with olive oil, season with salt, freshly ground pepper and piment d’Espelette. Cook fish according to your favorite method, this is how we bake our fish. Spoon warm piperade on serving dish, nestle cooked fish on the piperade. Sprinkle with chopped parsley.

DSC_2393a

March 10, 2015 Imam Bayildi Revisited

DSC_1861aImam Bayildi translates “the priest fainted”. Was it because the dish was so delicious or was it a reaction of this frugal priest  to the copious amount of expensive olive oil his bride used to make this dish? This is my second interpretation of this popular Turkish dish, one of a group of vegetarian recipes referred to as zeytinyagli or olive oil foods, served cold.  This recipe cuts down considerably in the amount of olive oil traditionally used in the original dish but definitely not on the flavor.

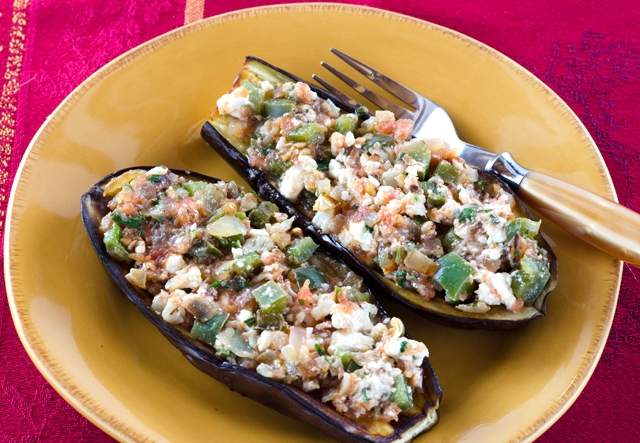
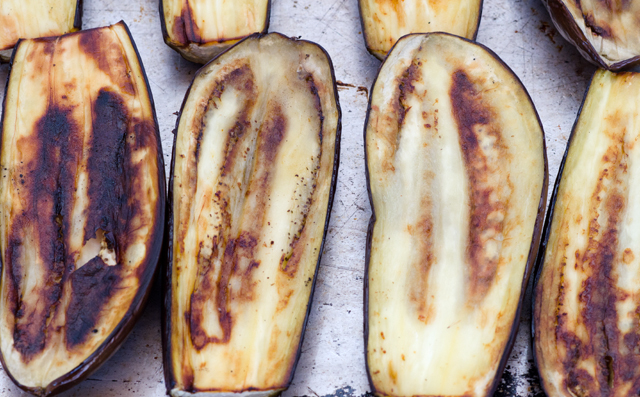
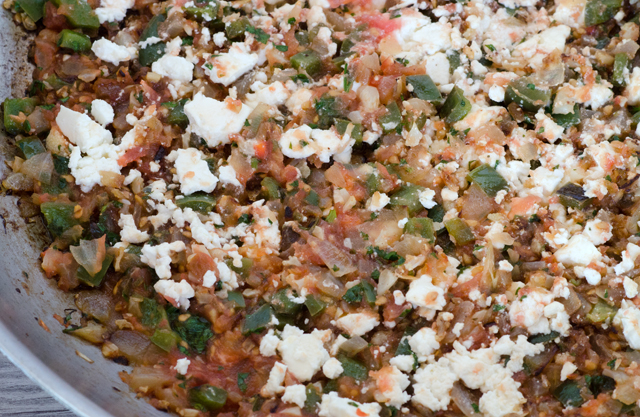
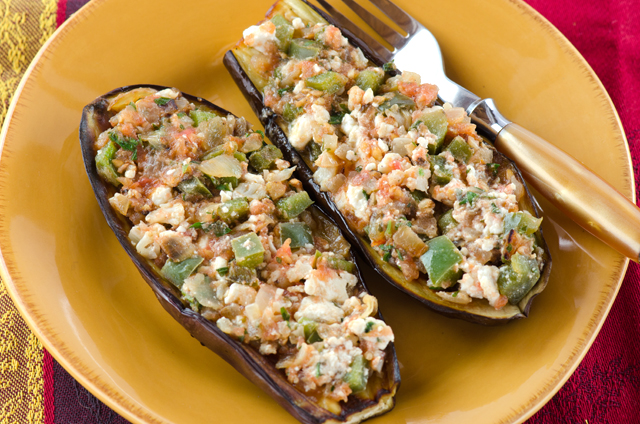
This is another recipe from Ana Sortum, chef at Oleana restaurant in Cambridge Massachusetts.  This recipe is similar to the first one I made in some of the steps.The eggplants are sprinkled with salt and brushed with olive oil and baked until the flesh is soft.  In the first recipe the flesh is scooped out and mixed in with the other ingredients, in the second the other ingredients are combined and pressed into the cooked eggplant, I liked that method. Onions, garlic, tomatoes, oregano and parsley are found in both recipes. Finely diced cauliflower, star ingredient of the moment, is a unique component for Imam Bayildi and adds a different texture and flavor to this dish that I liked. The second recipe also uses green bell pepper, an ingredient that I am not a big fan of. Green peppers are less expensive but not quite as nutritious as their red, yellow and orange counterparts. As a gardener, I have just considered them to be peppers that someone wasn’t patient enough to let ripen.  I am now coming around to seeing green bell peppers as a unique ingredient. In this dish they add an interesting  slightly bitter edge to the sweetness of the onion and the creaminess of the eggplant.

This is the first time I have ever grated tomatoes for a recipe. Choose ripe firm tomatoes and grate them over a shallow bowl with the largest holes of your box grater. Keep your hand flat and grate until the tomato flesh is scraped away from the skin. Discard the skin and you are left with tomato pulp that can be used in a variety of dishes. I am sure this is a technique I will use again.

Aleppo pepper is one of my favorite ingredient discoveries of the last several years. It is dark red, flaky and somewhat oily in texture. It takes it name from the ancient city of Aleppo in northern Syria, just east of the Turkish/Syrian border.  The flavor profile is rich, sweet and fruity with hints of cumin. The heat profile is moderate, just a bit hotter than paprika. As a result of the conflict in Syria, what now is sold as Aleppo is actually an identical pepper plant, Maras, that is grown in Turkey.

DSC_1848a

Imam Bayildi

Serves 8 as a side dish or 4 as an entrée

Ingredients

  •  4 small eggplants, about 1/2lb each
  • 10Tolive oil divided,  4T for brushing eggplants, 3T for sautéing, 3T for drizzling over finished dish.
  • Kosher salt
  • 2 1/2lb tomatoes, halved
  • 2c diced sweet onion
  • 1c diced green bell pepper
  • 1/2c finely diced cauliflower
  • 1T finely chopped garlic
  • 1/2c chopped Italian parsley, more for garnishing the finished dish.
  • 1t finely chopped fresh oregano or 1/2t dried
  • Aleppo pepper or crushed red pepper flakes
  • 3/4c crumbled feta, more for garnish

Directions

  1. Position a rack in the center of the oven and preheat to 375°F.
  2. Halve the eggplants lengthwise and place cut side up on a large rimmed baking sheet. Season the cut sides generously with kosher salt and brush with the first 4T of olive oil. Flip the halves over and bake cut side down until soft, about 30-35 minutes. Set aside until cooled.
  3. While the eggplant bakes, grate the cut sides of the tomato on the large holes of a box grater. It is easiest to put the grater in a bowl. Discard the skins. Drain the pulp in a fine meshed sieve until most of the liquid has drained through, about 20 minutes.
  4. Heat 3T of the oil in a 12-inch skillet over medium heat. Add the onion and cook, stirring occasionally, until soft, about 5 minutes. Add the pepper, cauliflower and garlic, cook, stirring occasionally, until all the vegetables have softened somewhat, about 5 minutes. Remove pan from the heat and stir in the tomato pulp, parsley and oregano. Season to taste with salt and pepper. Stir in the feta.
  5. Use a spatula to flip over the eggplant halves. With a slotted spoon, divide the filling among the eggplant, using the spoon to gently push the filling into the flesh.
  6. Drizzle with the remaining olive oil and bake until hot, about 10 minutes. Sprinkle with more crumbled feta and parsley and serve.

DSC_1856a

DSC_1857a

DSC_1872a

February 11, 2015 Kung Pao Brussels Sprouts

DSC_1210a

Magazine features come and go over the years and often reveal the trends of the time. In the first issue of Bon Appetit I purchased back in 1982 (!) readers could find a column featuring recipes created using a relatively new appliance, the food processor, “Bon Vivant”, a “who’s who and what’s new in the world of food, wine and spirits”, columns featuring cooking for two, wine and spirits, travel and “Too Busy to Cook”, time saving reader recipes.

One column that has lasted all these years is “R.S.V.P.”, reader’s requests of restaurant recipes. Back in 1982 you could find a baker’s dozen of recipes, everything from zucchini nut muffins to sole wellington with a recipe for homemade sausage thrown in for good measure.

In 2015, “R.S.V.P.” still graces the opening pages of the magazine in a paired down format. The February issue has just three recipes, one per page with an accompanying illustration. One recipe in particular caught my eye this month, Kung Pao Brussels sprouts. This recipe comes from Kevin Gillespie, Top Chef “cheftestant” season six and fan favorite. Kevin is presently the chef owner of Gunshow in Atlanta and the author of a best selling cookbook, Fire in My Belly.

I liked the idea of using the kung pao technique with a vegetable.  In the elevated role of the vegetable in today’s cuisine, the first real star was kale and recently that title has been handed over to cauliflower, I feel it’s only a matter of time that Brussels sprouts will take over the spotlight. Like it’s counterparts, kale and cauliflower, Brussels sprouts are a member of the brassica family with the same health benefits. They are packed with antioxidants, vitamin C, folic acid and minerals such as potassium, iron and selenium. Their season is from about mid September to March, and as we have learned from other brassicas, those harvested after the first hard frost are the sweetest.

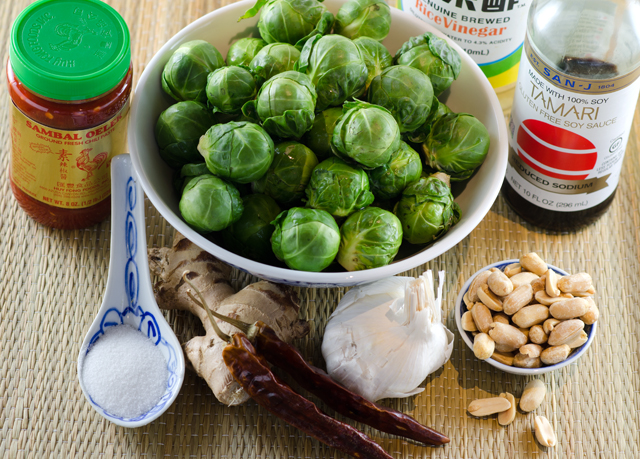
Kung Pao originates from the Szechuan province of China. The classic preparation involves two main ingredients, spicy chiles that contrast with the crunchy, fatty peanuts.  Several sources recount the origins of this dish in similar ways with slight variations. It was either created by or it was the favorite dish of the Gong Bao, a high government official in the nineteenth century. I will leave out the part about the chicken needing to be cut into small pieces because of his dental problems or that the name Kung Pao fell out of favor during the Cultural Revolution. Or maybe you like the alternate explanation, the name Kung Pao loosely translates as “hot firecrackers”. The recipe calls for chile de Arbol  but I thought this would be a perfect opportunity to use dried Kung Pao peppers with similar heat that were harvested from our garden.

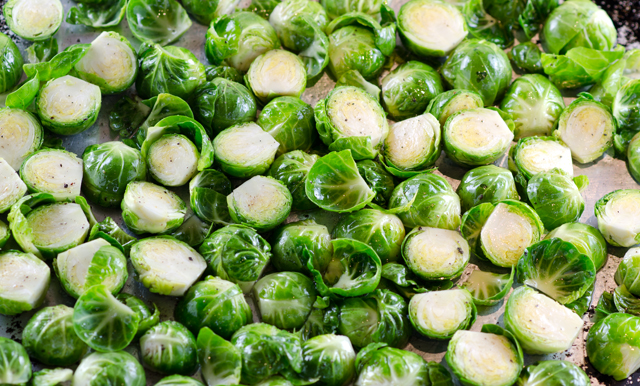
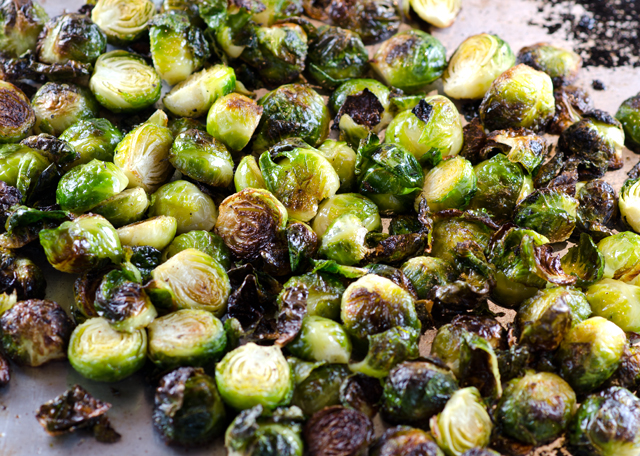
Rinse the sprouts well and trim the bottoms. Slice in half lengthwise and remove any yellowed or damaged leaves. Toss the sprouts with oil, kosher salt and a generous grind of pepper. At the halfway point I take them out, toss them around a bit and flip the baking sheet in the opposite direction. I took my sprouts out about five minutes sooner than the original recipe called for because I was baking in convection mode.  Adjust the heat of the dish to your own comfort level. The dish is supposed to be hot but remember you can always add a little more sambal oelek or another chili pepper, but you can’t take them away.

Assemble the sauce ingredients while the sprouts are baking. Cook the garlic and ginger until deliciously fragrant. Add sambal oelek, chilis and remaining ingredients, thicken with cornstarch and simmer.  I found that using half the amount of sugar, 1 1/2 tablespoons, gave the right amount of hot to sweet balance in the dish.

Would I make this again? Definitely and Joe agrees, this sauce could be used with other vegetables, eggplant, green beans or in a stir fry using several vegetables. And that September 1982 issue of Bon Appetit? There’s a recipe for Red Snapper Szechuan, with surprisingly similar ingredients to the Brussels sprouts  that looks pretty good to me.

DSC_1187aDSC_1190a

DSC_1191a

Kung Pao Brussels Sprouts

Ingredients

Serves 6

  • 2 pounds Brussels sprouts, halved
  • 5 tablespoons vegetable oil, divided
  •  Kosher salt and freshly ground black pepper
  •  1 tablespoon cornstarch
  • 3 garlic cloves, finely chopped
  •  2 tablespoons finely chopped peeled ginger
  •  2 tablespoons hot chili paste (sambal oelek)
  •  6 dried chiles de árbol, lightly crushed (I used Kung Pao chilies)
  •  ½ cup soy sauce
  •  3 tablespoons sugar
  •  2 teaspoons unseasoned rice vinegar
  •  ⅓ cup unsalted, roasted peanuts

Directions

  1. Preheat oven to 425°F. Toss brussels sprouts and 4 Tbsp. oil on a rimmed baking sheet; season with salt and pepper. Roast, tossing once, until softened (but not soft) and browned, 20–25 minutes. Set aside.
  2.  Meanwhile, mix cornstarch and 1 Tbsp. water in a small bowl until smooth.
  3. Heat remaining 1 Tbsp. oil in a medium saucepan over medium-high. Add garlic and ginger and cook, stirring often, until garlic is golden brown, about 2 minutes.
  4. Add chili paste and cook, stirring, until darkened, about 2 minutes. Add chiles, soy sauce, sugar, vinegar, and ½ cup water and bring to a boil; stir in cornstarch slurry. Simmer, stirring, until sauce coats spoon, about 2 minutes. Let cool slightly.
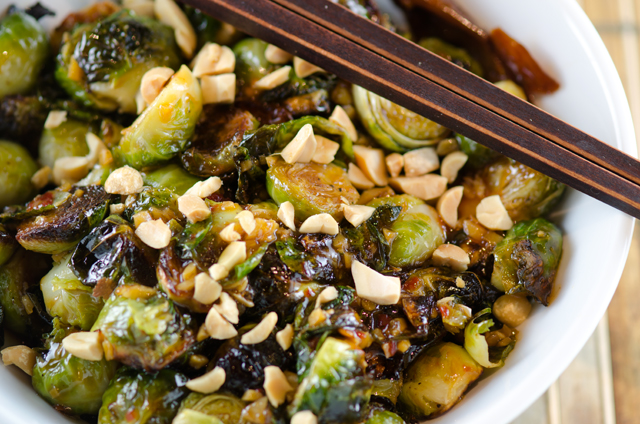
  5. Toss brussels sprouts with sauce and serve topped with peanuts.
DSC_1213a
Dried Kung Pao peppers from our garden.

DSC_1208a