July 27, 2014 Braised Swiss Chard with Raisins, Olives and Capers

DSC_8313aMove over broccoli, step aside tomatoes, the research has been completed and the new ranking of the powerhouse fruits and vegetables is in. Researchers at William Patterson University in conjunction with the CDC did a study of 41 fruits and vegetables ranking them by the 17 critical nutrients they contain. The foods were scored by their content of fiber, potassium, protein, calcium, folate and important vitamins. Following watercress and Chinese cabbage is our bronze medal winner, Swiss chard. Chard is a good source of vitamins K, A and C as well as potassium, iron and fiber.

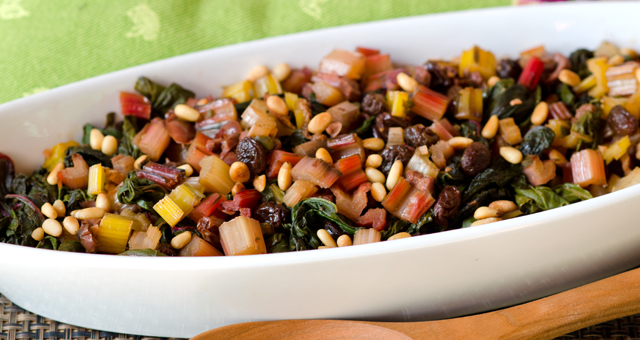
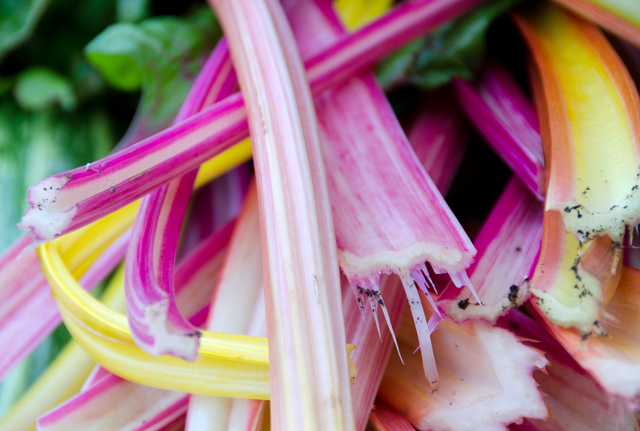
We have been long time fans of chard, it is our choice for a cooked green in the summer after the heat causes our spinach plants to bolt. I think many people shy away from chard because it has two distinct parts, the leaves and the stems that need to be cooked separately. Many recipes avoid the stems but that is unfortunate since the stems can add texture and color to the dish. Two of the varieties we grow, Rhubarb, has bright red stems and Bright Lights has stems in almost neon shades of pink, yellow and orange. Although they will fade a bit, I prefer to simmer the stem sections in broth or water to maintain optimum color. Remember to cook chard in a non reactive pan, like spinach it will discolor if cooked in aluminum or unlined iron.

This preparation is one of our favorites that we have enjoyed for years. The earthy assertive flavor of chard combines nicely with Mediteranean flavors of garlic, capers, olives and raisins. I like to plump raisins in warm water for just a few minutes before adding to the recipe. I cut the stems of the chard into slightly smaller pieces than most recipes call for, the stems will cook quicker and will retain their color.

Farmers markets will be your best source for chard this time of year. Wash well in several changes of water. For a more detailed explanation about the preparation and cooking of chard, please look at this post.

As for the rankings, the word powerhouse equals nutrient density. Higher ranking foods provided more nutrients per calorie. Watercress scored a perfect 100, chard not far behind with 89.27. Broccoli and tomatoes? 34.89 and 20.37 respectively, reason enough to add chard to your diet.

ADSC_8174

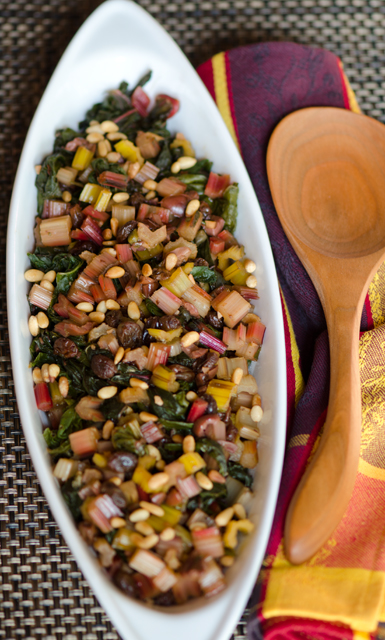
Braised Swiss Chard with Raisins, Olives and Capers

Serves four

Ingredients

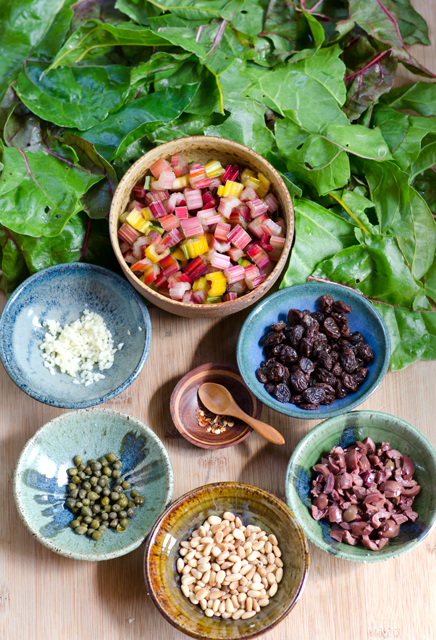
  • 2lbs chard, washed, leaves and stems separated
  • 11/2c chicken or vegetable stock (water is okay too)
  • 1T olive oil
  • 1T capers, rinsed
  • 2t chopped garlic
  • 1/4c raisins (dark or golden)
  • 1/4c chopped Kalamata olives
  • 1/8t red pepper flakes (or to taste)
  • Kosher salt and freshly ground pepper
  • 2T toasted pine nuts
DSC_8293a
A very attractive “mis en place”.

Directions

  1. Cut the chard stems away from the leaves. Cut chard leaves into rough slices and set aside. Cut stems into 1/2 inch pieces. Combine stems in a large non reactive saute pan with stock and bring to a simmer. Simmer over low heat for about 8-10 minutes until softened. Check an individual stem piece to see if it is at your desired doneness. With a slotted spoon, transfer to a bowl and keep warm.
  2. Add the olive oil, capers, garlic, raisins, olives, red pepper flakes to the saute pan. Bring to a simmer and add the reserved chard leaves, in batches if necessary. Cover the pan and cook for 2 minutes, or until wilted. Uncover the pan and continue to simmer over low heat until the leaves are tender, 8-10 minutes. Add the reserved stems and toss with the ingredients in the pan. Increase the heat to evaporate any remaining liquid. Season with salt and pepper. Transfer to a serving dish and sprinkle with toasted pine nuts.
DSC_4492a
The neon colored stems of Bright Lights chard.

DSC_8305a

July 20, 2014 Pickled Coleslaw

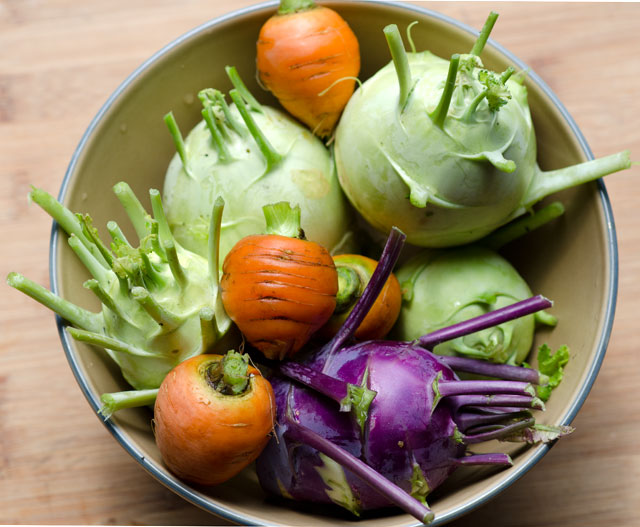
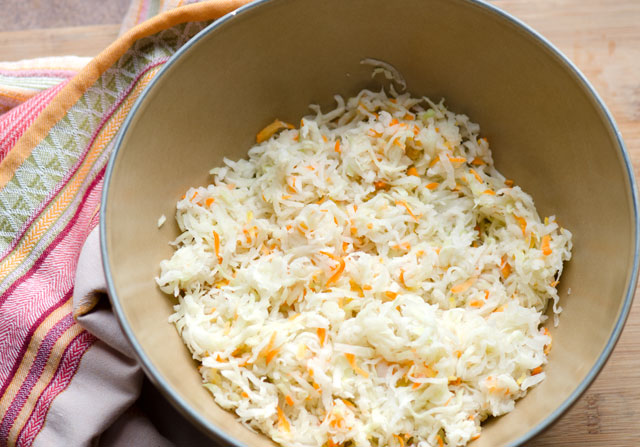
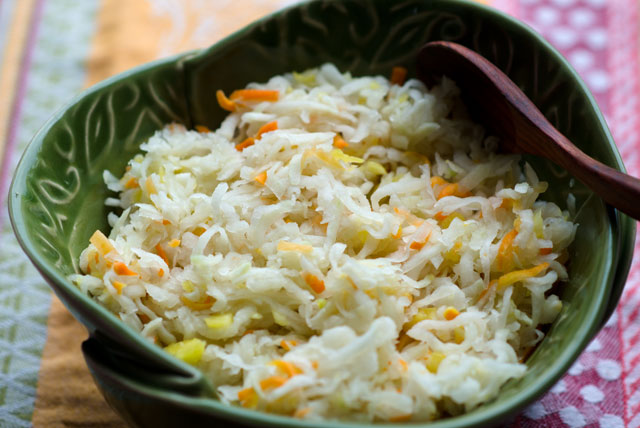
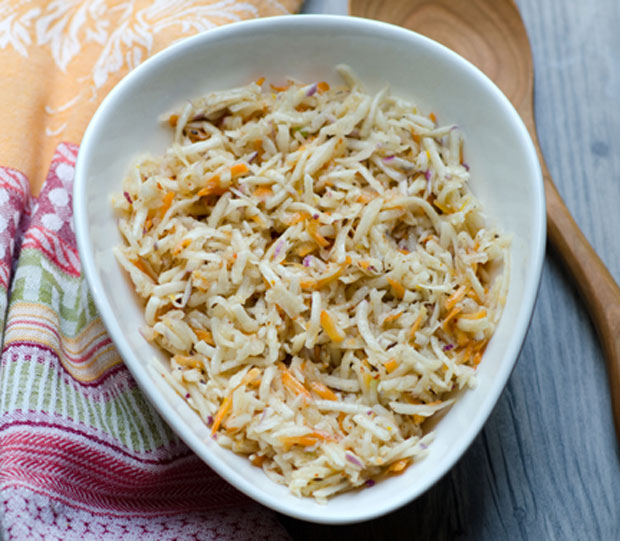
DSC_8207aAnother day, another pickle. This time it’s pickled coleslaw, a way to eliminate the mayo and make it picnic basket friendly. This slaw can be stored in the fridge for up to ten days. The cabbage in this coleslaw is turnip cabbage, or as it is better known, kohlrabi.
Kohlrabi is a member of the Brassica family, like cabbage, broccoli and cauliflower. The  tasty bulbs are low in calories, a good source of calcium, potassium, vitamins A and C and fiber.

Kohlrabi is crunchy, a little bit sweet and can have the spicy kick of a radish or turnip. I peeled and shredded the little space alien looking veggies along with a few carrots in the food processor. Toss the shredded kohlrabi and carrot with some kosher salt to extrude as much water out of them as possible. After about ten minutes, use your hands or wrap in a clean kitchen towel  to squeeze as much water out of the kohlrabi as possible. The less water left behind the crunchier the slaw will be.

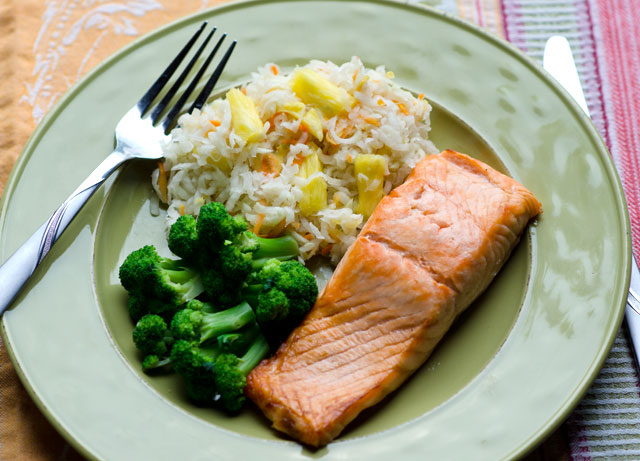
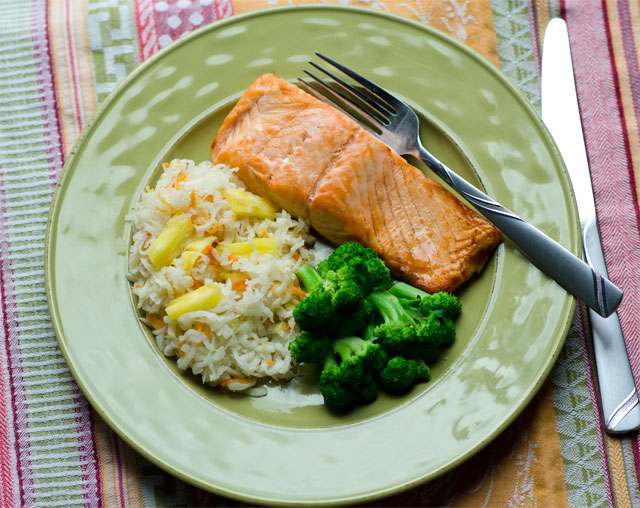
The original recipe called for white vinegar and pineapple juice. I had white balsamic pineapple vinegar and the sweet, slightly tart flavor really complimented the kohlrabi nicely. Add some pineapple chunks just when ready to serve. Goes great with fish, as a taco topping or even with hot dogs!

Pickled Coleslaw

Adapted from Fine Cooking

Makes 2 1/2 quarts

Ingredients

  • 9c shredded kohlrabi
  • 1/2c shredded carrot
  • 2T kosher salt (I use Diamond Crystal, if using Morton, use a little less)
  • 1/4c pineapple balsamic vinegar or white vinegar
  • 3/4c pineapple juice (fresh is best)
  • 1c fresh pineapple in small dice

Directions

  1. Toss the kohlrabi and carrot in a large bowl with the salt. Let sit at room temperature for about ten minutes.
  2. Wring out as much moisture as possible from the vegetables with your hands. Transfer the vegetables to a dry bowl.
  3. Add the vinegar and juice and toss thoroughly. The slaw can be served immediatley or placed in quart jars and refrigerated up to ten days.
  4. Add fresh pineapple right before serving.
DSC_8147a
Kohlrabi and carrots ready for trimming and peeling.
DSC_8154a
Kohlrabi and carrots after being salted and wrung out.
DSC_8206a
Add pineapple right before serving.

DSC_8198a

July 13, 2014 Pickled Beets and Pickled Beet Hummus

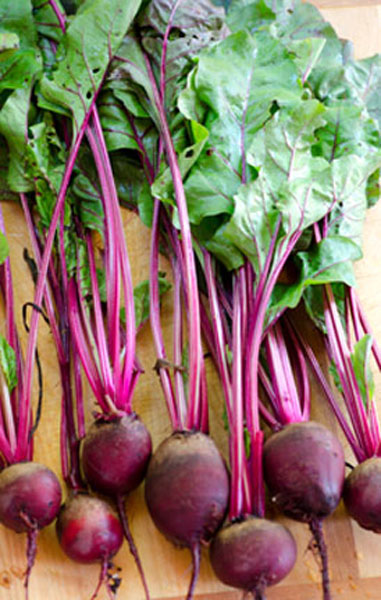
DSC_8128aPoor maligned beets! With descriptors like, they taste like dirty socks, mud and even wood, it’s no wonder they have a bad rap to overcome. Unlike former president George H.W. Bush who disliked broccoli, our current president is on the record as a beet hater, thus they are not grown in the White House garden.  Well all I am saying is “give beets a chance!”
Over the last few years I have developed a growing affection for beets.  In addition to the traditional Detroit Dark Red we have been growing the candy striped Chiogga (kee-oh-ja) and the bright orange-yellow Golden beet.We grow small crops of a row or two in succession all throughout the season. Beets pulled fresh from the garden have a sweet, rich and yes, earthy flavor.

I like to take small beets and either julienne or thinly slice them raw for salads. Roasted beets are good either sliced or cut in wedges on a bed of baby greens with orange supremes, goat cheese and toasted walnuts.
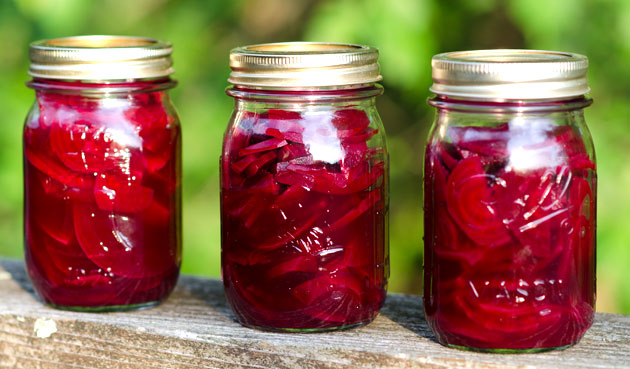
This summer I found myself with too many beets to use in a short amount of time. I decided to pickle some so they can be enjoyed over the course of several weeks. Pickling, simply put, is a way of preserving in a vinegar or brine mixture. The acid in the vinegar slows bacterial growth and the beets keep in the refrigerator for several weeks.

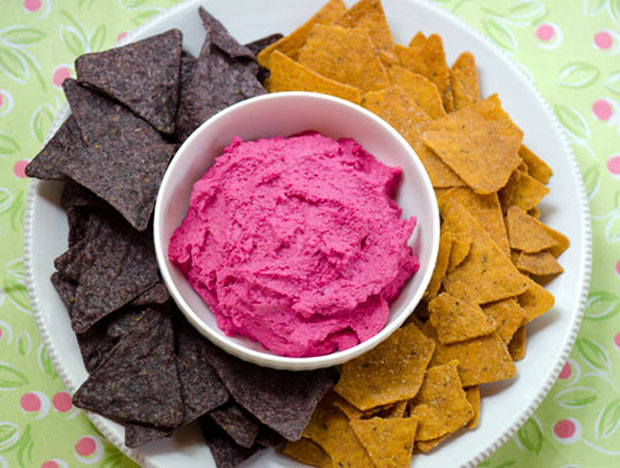
I chose a recipe from Fine Cooking magazine that used both red wine and red wine vinegar. As with any recipe, use a red wine as well as a red wine vinegar that you would be happy to drink and cook with on their own. A word of warning, red beets will stain your fingers, if you want to avoid that, wear disposable gloves when working with them. They taste great right away and even better once they have a chance to chill in the fridge. You can enjoy them on their own or add a few along with their liquid to brighten up a hummus recipe. Don’t forget, the beet greens are good to eat. Remove any large stems, blanch in boiling water for about 2-3 minutes, Drain well and saute in olive oil with some chopped garlic and red pepper flakes.

DSC_8111aDSC_8118a

Wine Pickled Beets

Makes about 1 1/2 quarts

Ingredients

  • 2 lb. trimmed red beets (about 5 medium)
  • 1 cup dry red wine, such as Cabernet Sauvignon
  • 3/4 cup red wine vinegar
  • 1/2 cup fresh orange juice
  • 1/4 cup granulated sugar
  • 4 whole allspice berries
  • 2 whole cloves
  • 1 tsp. kosher salt

Directions

  1. Put the beets in a 4-quart pot, add water to cover, and bring to a boil. Turn the heat down and simmer until the beets are crisp-tender, 20 to 25 minutes. Drain and set aside until cool enough to handle.
  2. Peel and halve the beets. Slice crosswise 1/4 inch thick and distribute among three 1-pint jars or other sealable nonreactive containers.
  3. In a 2- to 3-quart nonreactive saucepan, bring the wine, vinegar, orange juice, sugar, allspice, cloves, and salt to a simmer over medium heat, stirring until the sugar dissolves, 3 to 5 minutes.
  4. Pour the liquid over the beets to cover. Let sit, uncovered, at room temperature for 2 hours to cool and pickle the beets. Serve, or cover and refrigerate until ready to serve.
Make Ahead Tips

The pickles can be refrigerated in a covered container for up to 6 weeks

DSC_8137a

July 4, 2014 Turnip Slaw

DSC_8025a-copy

In the winter months turnips are mashed, glazed, braised, roasted, and bathed in nutmeg scented white sauce, but what to do with the humble root in the summer months? I love to add crisp sweet turnip slices to top a green salad along with our spring harvest of carrots and radishes and here in a delicious turnip slaw.

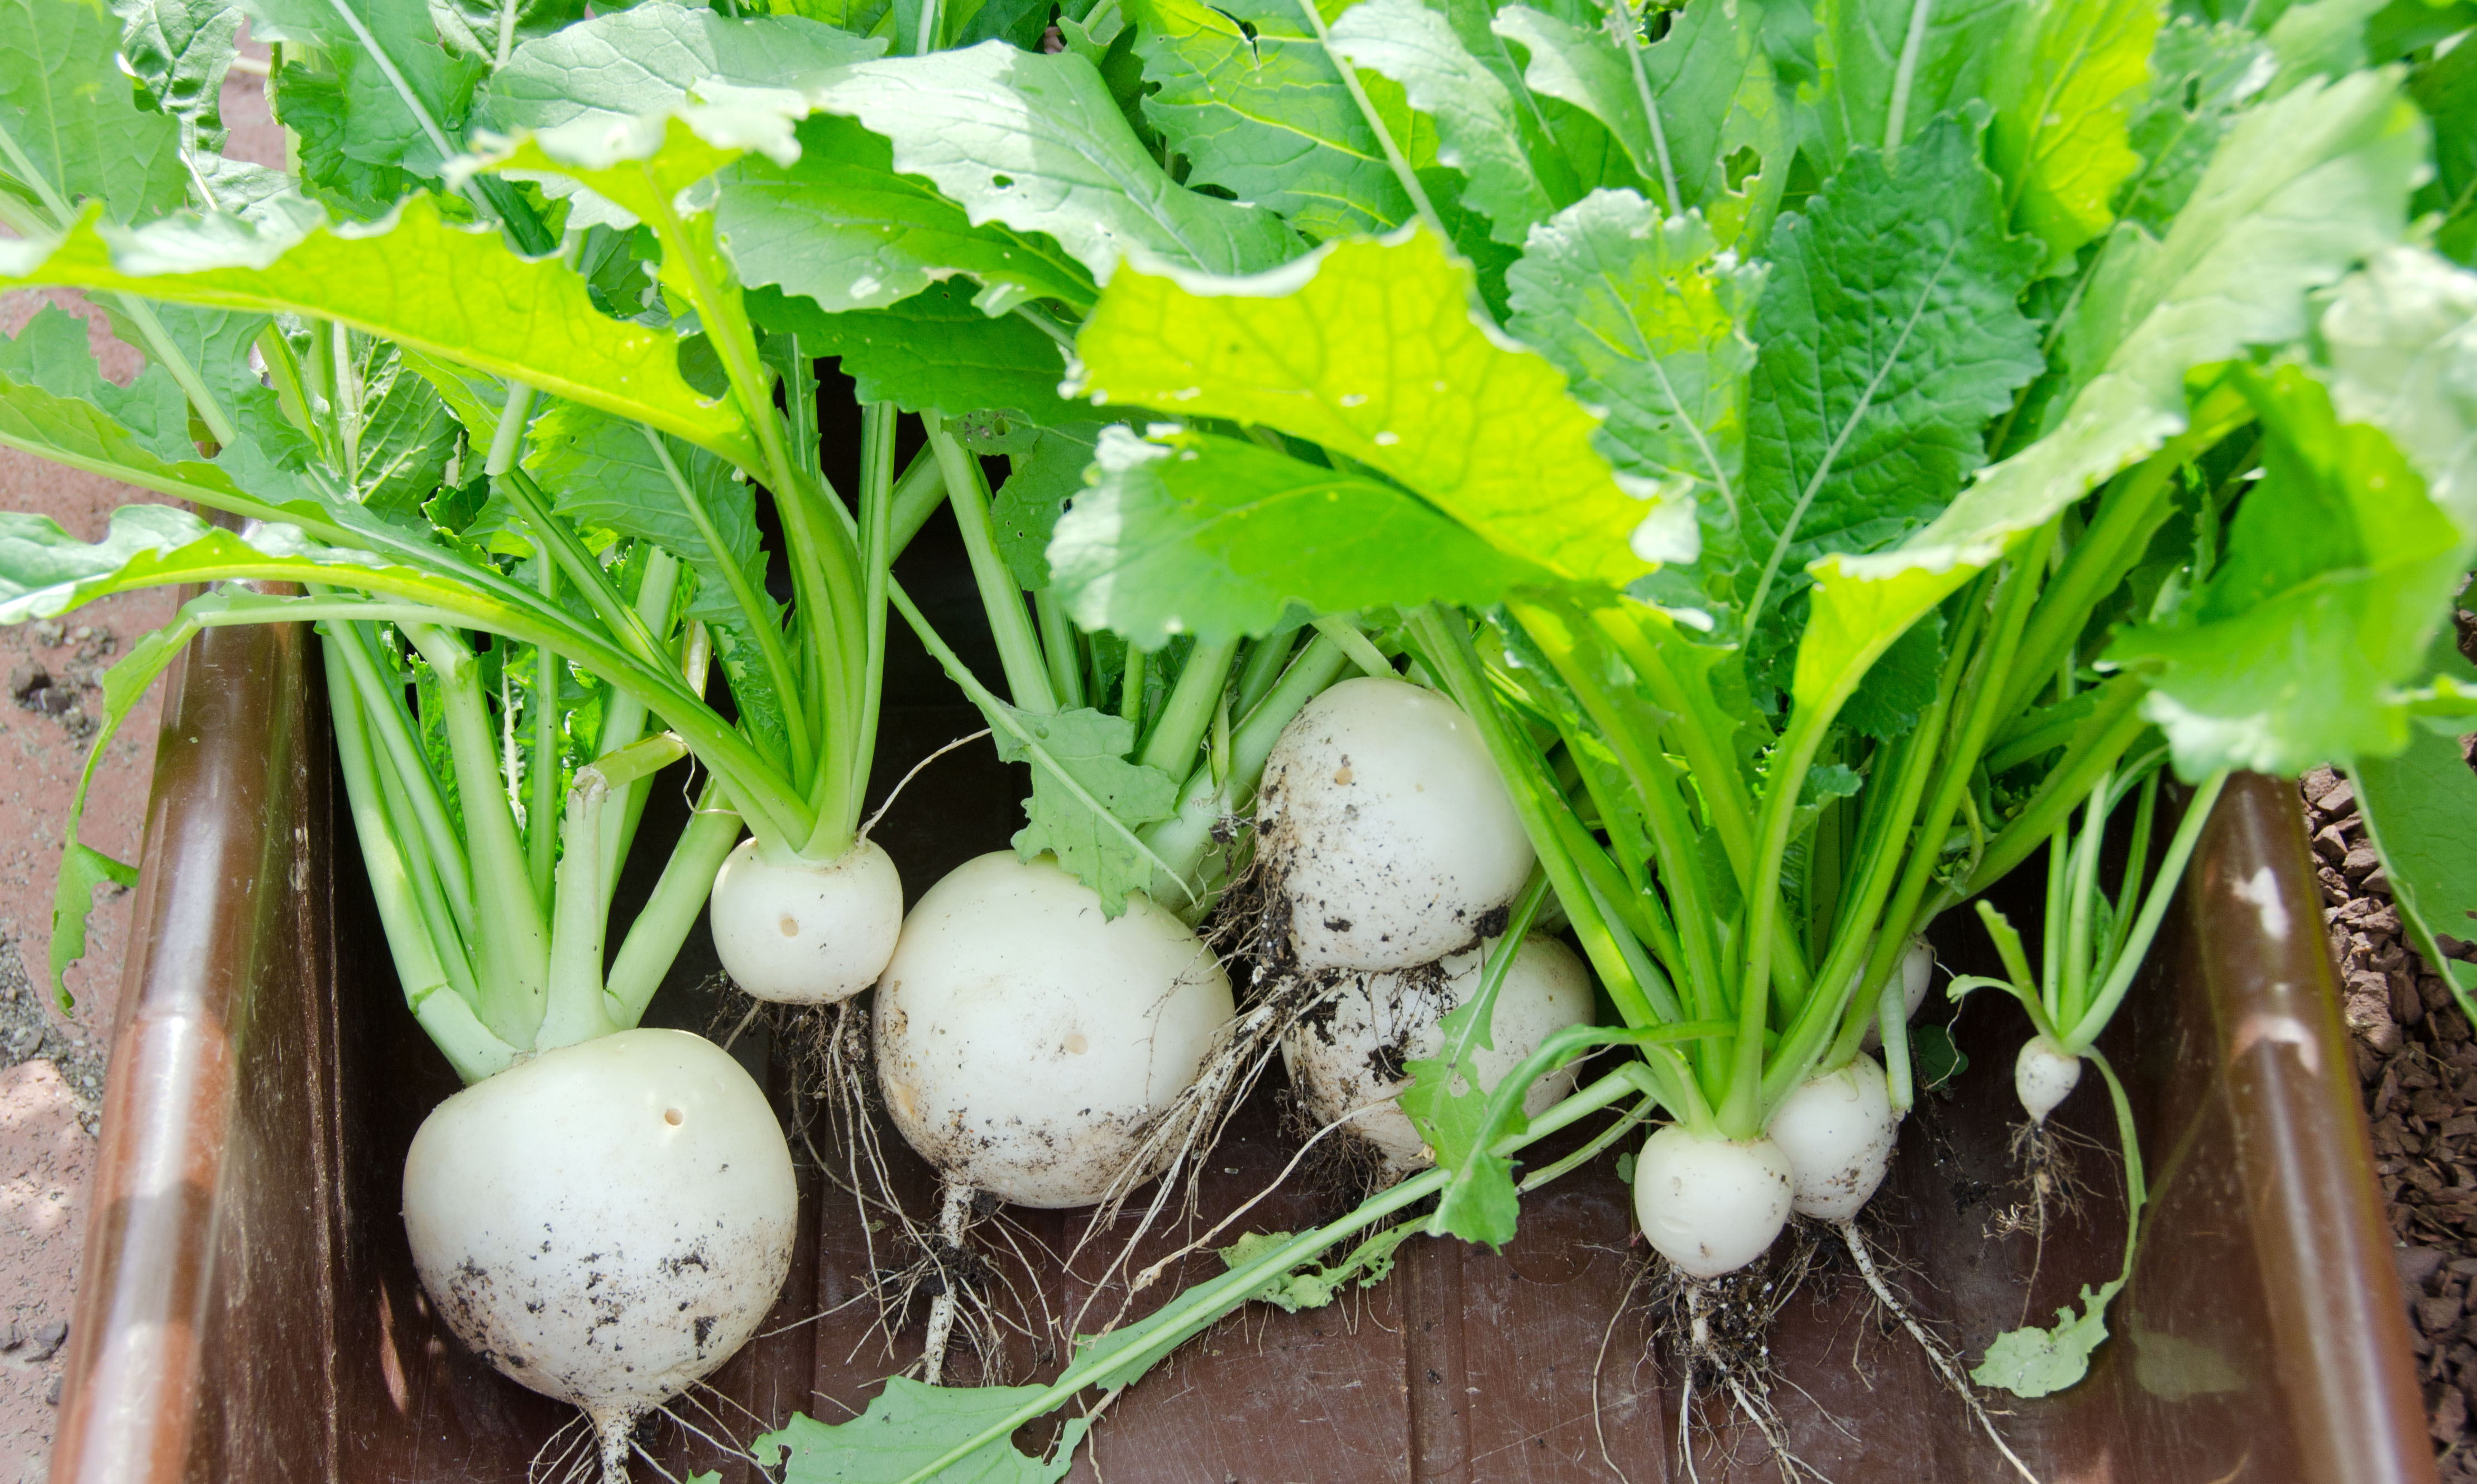
Japanese Hakurei turnips are pure white and delicately sweet. They should be harvested when they are about the size of a large radish and when they are small there is no need to peel.

I combined the Hakurei turnip with the more traditional purple top turnips It took ten turnips of various sizes, from a golf ball to a tennis ball to make one pound for this recipe. I left just a little of the purple on for color contrast and added some baby carrot thinnings from the garden for additonal color. Grating the turnips in the food processor made it easy, they were too small to make a decent hand cut julienne. Drain the turnips and squeeze out any excess liquid before adding the vinaigrette.

I love the smell of toasted cumin seeds and they add their own smokiness to the slaw. Toast the cumin seeds in a dry skillet, tossing occasionally until they turn a shade darker. You could crush the toasted cumin in a mortar and pestle if you desire to really bring out the flavor.

A harvest of Hakurei turnips. The greens are good sauteed with garlic.

Turnip Slaw

Serves four to six

Ingredients

For the slaw

  • 1lb turnips, tops and root ends trimmed, peeled if necessary
  • 1 medium carrot, washed and trimmed

For the dressing

  • 1 clove of garlic, chopped
  • 1/2t salt
  • 1/3c fresh orange juice
  • 1t grated orange peel
  • 3T fresh lime juice
  • 1T minced shallot
  • 2t honey
  • 1t toasted cumin seed
  • 1/2t or more chipotle pepper powder (optional if you like a little heat)
  • 1/2c vegetable oil
  • 1/4t fresh ground black pepper
  • Additional kosher salt and fresh ground pepper to taste

Directions

  1. Fit a food processor with the grating disc and shred the turnips and carrot.
  2. Drain vegetables of any excess liquid. You can let them sit over a fine colander or better yet, place vegetables on a very clean cloth dishtowel, gather up the ends and give a good squeeze. Place the grated turnip and carrot in a large bowl.
  3. Combine in a medium bowl, garlic, salt, juices and peel, shallot, honey, cumin and chipotle pepper if using.
  4. Add oil in a slow stream, whisking until well blended. Season with pepper.
  5. Pour about a half cup of the dressing over the vegetables. Toss to coat. Taste and season with additonal salt and pepper. Add additional dressing if needed. Chill for an hour to allow the flavors to blend.


June 18, 2014 Spinach and Mushroom Crustless Quiche

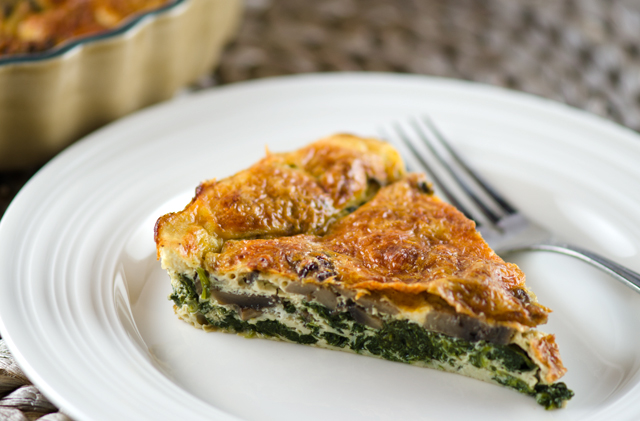
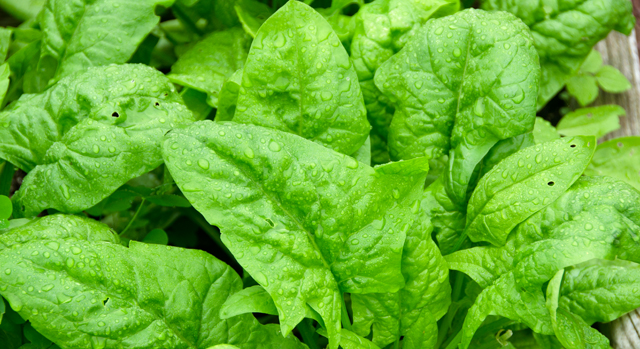
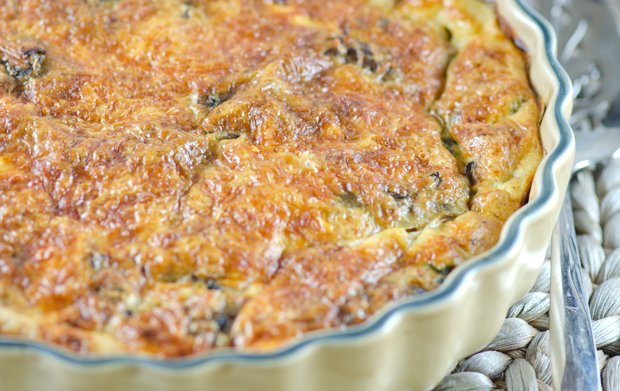
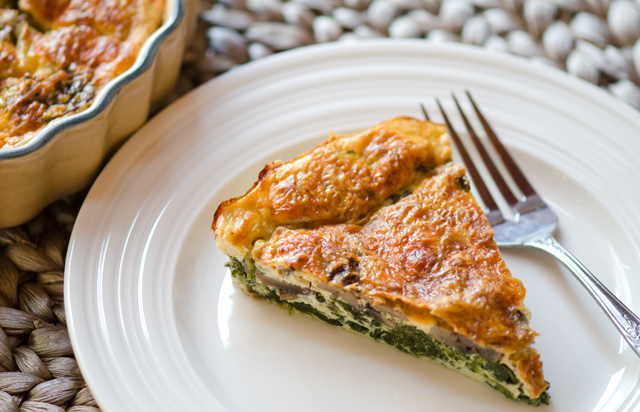
DSC_7849aAs the old song goes “see you in September”. It was time to say good bye to the spinach in our garden. Spinach does not like warm weather and temperatures have soared into the 90+ vicinity the last several days. So before it all bolted or went to seed I picked the remaining spinach.Then the plants could be pulled out of the ground and the space could be used to plant something else.
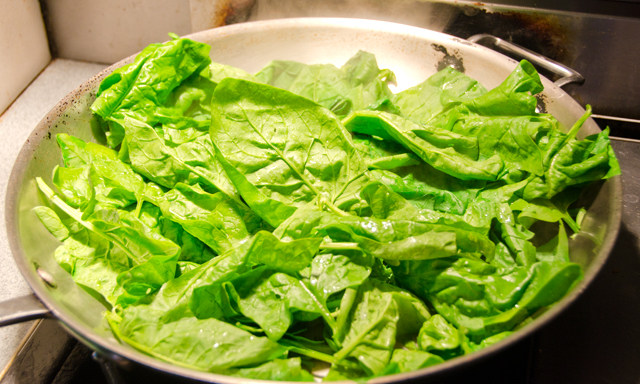
Most of the time we enjoy fresh garden spinach with dinner just sautéed with a little olive oil and garlic. It cooks down so quickly that a large bowl full of uncooked spinach soon becomes a very small plate of cooked spinach.  I decided for the last hurrah to make a crustless spinach and mushroom quiche. It would make a nice light lunch and breakfast for the next day.

A quiche essentially is a savory custard that is baked in a piecrust. A custard mixture is a liquid, usually milk or cream and combined with eggs and baked until it sets. I used fresh spinach but frozen spinach or bagged spinach would work as well. Just remember to squeeze out all the water or the custard will be too wet. Eliminating the crust saves time and calories too. Spinach and feta are a natural combination, but any cheese with good melting qualities will work, mozzerella, cheddar and parmesan to name a few.

A minor disaster occurred about fifteen minutes into baking my quiche, the power went out. We weren’t having a storm or bad weather at all, it just went out long enough (five minutes) that I had to reset all the clocks in the house and the oven, though still warm, had to be brought back to temperature. I didn’t take the quiche out of the oven, I just adjusted my baking time to make certain the custard was cooked. The top was a little too brown but still tasted good.
A delicious way to say good bye for the summer!

DSC_7839a

Spinach and Mushroom Crustless Quiche

Serves six

Ingredients

  • I cup of fresh sliced mushrooms (white, cremini etc.)
  • 8 cups of fresh spinach or 1 box frozen chopped spinach
  • 1T olive oil
  • 1t chopped garlic
  • 4 large eggs
  • 1 cup of milk, cream or half and half
  • 1/2c feta cheese, crumbled
  • 1/3c grated parmesan cheese
  • 1/2c shredded mozzarella cheese
  • Kosher salt and freshly ground pepper

Directions

  1. Preheat oven to 350F degrees. If using fresh spinach, cook it down in a large sauté pan and drain in a colander. Squeeze out the rest of the moisture in a clean dish towel. I cooked whole leaves so at this point I chopped it. If using frozen chopped spinach, thaw in microwave and drain well.
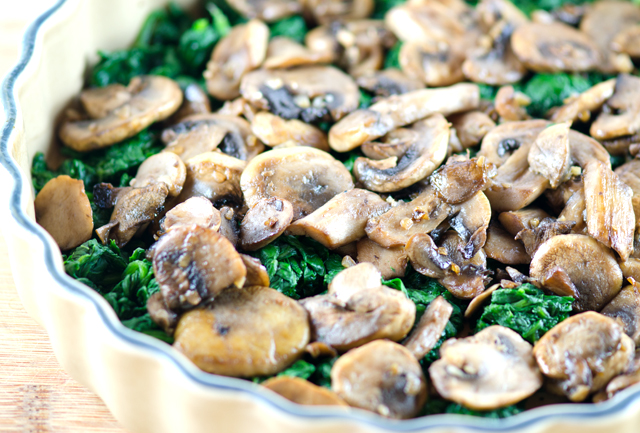
  2. In the same pan, heat the olive oil and add the chopped garlic. Sauté garlic until it starts to brown slightly then add the mushrooms.  Sprinkle a little salt and a grind of pepper over the mushrooms and sauté until they have released all of their moisture and no more water remains on the bottom of the skillet. This should take about five minutes.
  3. Lightly grease or spray with nonstick spray a 9 inch pie pan or quiche dish. Evenly spread the spinach over the dish, scatter the mushrooms over the top, then sprinkle the feta over.
  4. In a medium bowl whisk the eggs. Add the milk, parmesan and a grind of fresh pepper. Pour the liquid over the ingredients in the dish.
  5. Sprinkle the mozzarella cheese over top. Place the dish on a baking sheet, this will make it easier to transfer the dish in and out of the oven.  Place dish in the oven and bake until the quiche is golden brown and a tester comes out clean. This will take between 45 minutes to an hour, starting checking at 45 minutes.
  6. Allow quiche to cool a bit, cut into slices and serve. It’s also good cold!

DSC_7795aDSC_7829aDSC_7833aDSC_7842aDSC_7851a

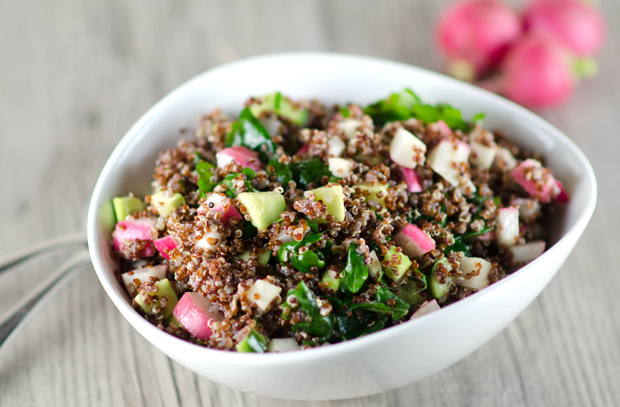
June 14, 2014 Quinoa, Cucumber, Radish and Turnip Salad

DSC_7755a

You know that quinoa has become part of the mainstream vocabulary when it shows up in a beer commercial during a football broadcast on television. Sure, the guy eating the quinoa burger refers to it as “kwee-noh” and his friend who is looking on asks,”what is that, a loofah?” Enough people “get it” to make this a funny commercial.

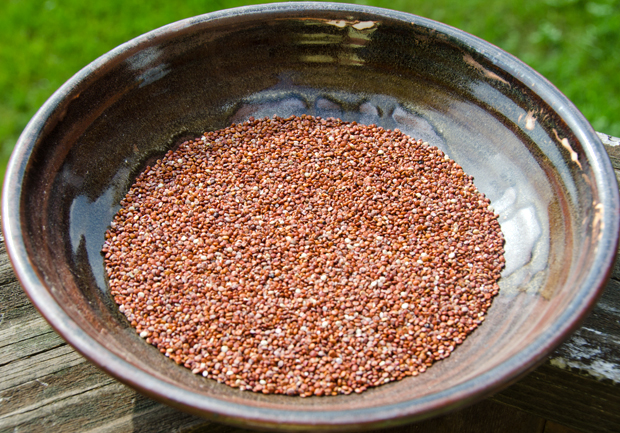
Quinoa, pronounced “KEEN wah” is showing up these days in everything from whiskey, to chips, chocolate bars and yes, burgers. Quinoa is an edible seed or a pseudo-grain, because it is cooked and used in recipes like a grain.  It is closely related to beets, chard, spinach and even tumbleweeds. Quinoa is unique because it is a complete protein, containing all nine essential amino acids and provides “good” fat along with fiber, potassium and iron. Since it is not a grain, quinoa is well suited for gluten free diets.
Even though most quinoa is sold prerinsed, it is a good idea to rinse it before proceeding with your recipe to remove any remaining saponin, a bitter coating that protects the plant from insects. Submerge the quinoa in a bowl of cold water, swish it around and drain it in your finest strainer. Like rice, the cooking ratio is 2:1 liquid to grain.

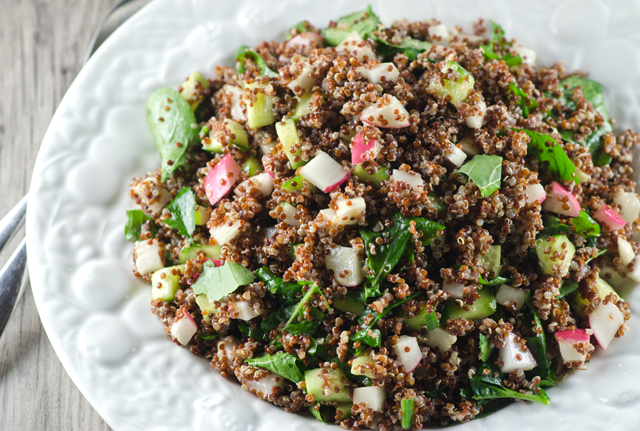
In this recipe from Fine Cooking magazine, nutty quinoa is combined with crisp summer vegetables, spicy arugula and a  slightly sweet miso vinaigrette. I used red quinoa in this recipe but white or black would be fine too. I used the radishes from our garden. They have peaked now with the onset of the warmer weather.  I also included Japanese turnips in the salad that we are harvesting now. Unlike the standard turnip, the Hakurei variety is pure white, very mild and sweet, even when raw. Don’t hesitate to add the pickled ginger, it brings just a little spiciness and acidity to the salad. This salad will be a welcome addition to picnics and potlucks all summer long.

DSC_7745a
Because of it’s nutritional profile, quinoa has been called a “superfood”.

Quinoa, Cucumber, Radish and Turnip Salad with Miso Vinaigrette

Serves six

Ingredients

  • 2-3/4 cups plus 1/3 cup lower-salt vegetable or chicken broth
  • 3 Tbs. white miso
  • 3 T seasoned rice vinegar
  • 2 T soy sauce, preferably reduced sodium
  • 1 T Asian sesame oil
  • 1/2 cup canola or other neutral vegetable oil
  • 2 T chopped sweet pickled sushi ginger
  • 1 1/2c red quinoa, any color will do
  • 1c Japanese baby turnips
  • 2c cucumbers, cut into bite sized pieces
  • 2c radishes, cut into bite sized pieces
  • 2  packed cups of arugula

Directions

  1. Put 1/3 cup of the broth and the miso, vinegar, soy sauce, and sesame oil in a blender; blend to combine. With the motor running, slowly add the canola oil to make a creamy dressing. Add the ginger and pulse a couple of times to very finely chop.
  2. In a 2- to 3-quart saucepan, bring the remaining 2-3/4 cups broth to a simmer over medium heat. Add the quinoa, cover, turn the heat down to medium low, and cook until the quinoa is tender and the liquid is absorbed, 10 to 15 minutes. Remove from the heat and let stand for 3 to 5 minutes. Uncover and fluff with a fork. Let cool to room temperature, about 30 minutes.
  3. Toss the quinoa, turnips, cucumber, radishes, and greens together. Add 3/4 cup of the vinaigrette, toss, and serve, passing the remaining dressing at the table. (Save the remaining vinaigrette for other salads; it will keep for at least 3 days in the refrigerator.)
DSC_7677a
The French breakfast radishes are literally popping out of the ground!
DSC_7749a
The radish harvest along with a little Hakurei turnip.

DSC_7776a

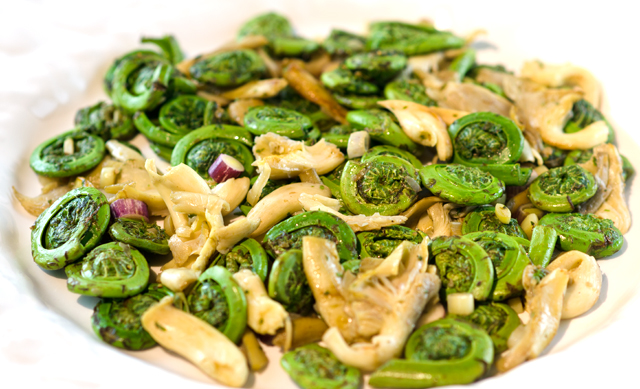
May 21, 2014 Fiddlehead Ferns and Yellow Oyster Mushrooms with Spring Garlic

DSC_6942a

Standing in line at the mushroom vendor at the farmers market on Saturday I spotted them. Among the portabellos, creminis and the morels, there was a basket of fiddlehead ferns The two customers ahead of me purchased some, so was it the power of suggestion, I’ll never know. They were being sold by the third of a pound, so I put down my five dollars and walked off with a small brown paper bag filled with fiddlehead ferns.
Fiddlehead does not refer to a specific species of fern but the coiled form of any fern that has not yet unfurled. In the United States they are ostrich ferns, mostly found across the northeastern states and the Great Lakes region, particularly along shady river banks. Wherever they grow their availability is only for about a three week period in early spring when ferns grow their new shoots.

The name comes from it’s appearance; fiddleheads look like the tuning end of a violin. They are also known as croziers because of their resemblance to the top of a shepherd’s staff. Their fifteen dollar a pound and higher price is for a good reason, they are wild harvested and not cultivated. I resisted nibbling on a raw fiddlehead when I read that eating them raw can cause stomach distress. It is advisable not to hunt for fiddleheads without an experienced forager.  One variety, the royal fern, cultivated in the Far East has been linked to stomach and esophageal cancer.  Boil fiddleheads for three to four minutes in lightly salted water with a pinch of baking soda. This helps them retain texture and color and removes bitterness and the possibility of gastric distress.
Fiddleheads are a good source of vitamins A, C and fiber. Their flavor has been likened to asparagus, green beans with a chewy texture all it’s own. To prepare fiddleheads, rinse, remove any residual brown paper-like coating and trim the brown ends. They do not keep well so use them as soon as possible after your purchase.

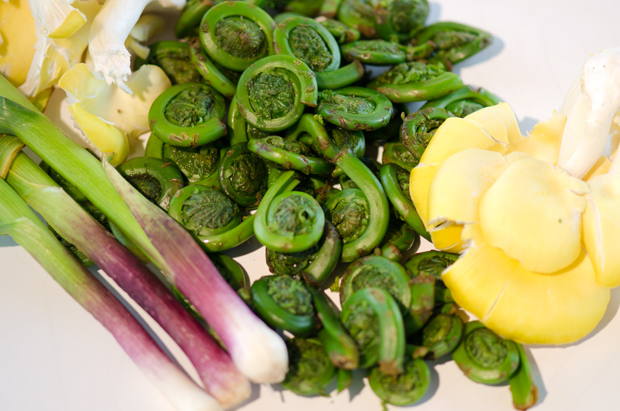
In this recipe I combined fiddleheads along with mild garlic shoots and another farmers market find, yellow oyster mushrooms, grown locally in Kennett Square, Pa, the mushroom capital of the United States.

DSC_6922a

Fiddlehead Ferns and Yellow Oyster Mushrooms with Spring Garlic Shoots

Serves 2

Ingredients

  • Water
  • 1T kosher salt
  • 1/2t baking soda
  • 1/3lb fiddlehead ferns
  • 1 stalk of spring garlic
  • 1/4lb yellow oyster mushrooms (white are fine)
  • unsalted butter

Directions

To prepare fiddlehead ferns

  1. Bring a large pot of water to a boil.
  2. Trim the browned ends off the ferns. If any brown covering remains on the ferns, rub it off. Rinse briskly under running water.
  3. Drop ferns into a large pot of boiling water to which you have added 1 tablespoon kosher salt and 1/2t baking soda.
  4. Boil until tender, about 3-4 minutes. Drain well.

To finish the dish

  1. Chop the tender end of the spring garlic finely. Tear mushrooms into bite sized pieces.
  2. Heat a skillet over medium high heat. Melt a tablespoon or two of unsalted butter in the pan. Add mushrooms and cook until mushrooms release some of their liquid and begin to brown. Add fiddleheads to the pan and sauté lightly. Season to taste with salt and pepper.
DSC_6924a
How do I love thee, fiddleheads? Let me count the ways….
DSC_6927a
Unfortunately, the yellow color disappears when the mushrooms are sautéed.
DSC_6930a
Spring garlic gives a mellow, mild garlic flavor.
DSC_6946a
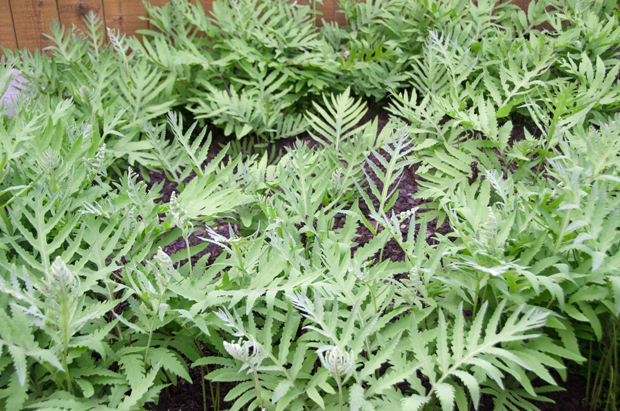
Ferns from our yard. I wonder if they could be harvested? Not going to try.

February 21, 2014 Chickpea and Leek Soup

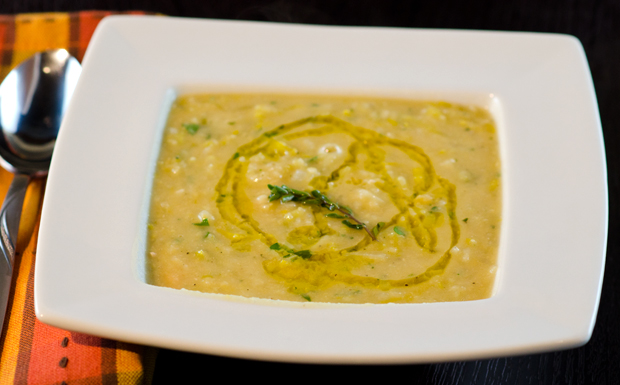
DSC_4682a

I am a lucky woman. My husband planned, shopped, and took the day off from work and shoveling snow to cook a very special Valentine’s Day dinner for me. At the time I wasn’t even sure what the menu would be. I made a few requests and he filled in the rest. They were small courses or “bites” as he called them. A favorite tradition of mine, the demands of life and family required us to take a break from this meal for several years.The “meal of love” as he calls it, lasted several hours so I had some movies and the season finale of Top Chef to watch. I should have probably worked out between courses, we went to a wedding the next day and I was concerned about fitting into the dress I was wearing.

One dish I did request was a soup made with fresh chickpeas that stayed in my memory as a favorite after all these years. I love chickpeas and fresh ones have a wonderful nutty quality. My job now was to locate the source of memorable recipe. After some thought I remembered where it was from, a magazine that I subscribed to for some time, The Herb Companion.

The tag line of The Herb Companion was “in celebration of the useful plants”. Useful they are, The Herb Society of America defines an herb as “a plant valued for it’s flavor, fragrance, medicinal and healthful qualities, economic and industrial uses, pesticidal properties and coloring materials (dyes).”  The magazine helped familiarize readers with herbs, both common and quite unique, how to grow them and their uses from culinary to crafts.

This issue (Feb-Mar 95) was in part devoted to alliums. Allium is a classification (genus) that includes garlic, onions, shallots and leeks to name just a few. Alliums are rich in sulphur compounds and have been said to be useful in everything from lowering blood pressure to relieving pain and inflamation.

However, my main interest was in the recipes, not the health benefits of alliums. Alliums pair well with the culinary herbs, in this case, Italian or flat leaved parsley and marjoram. Marjoram is closely related to oregano with a sweeter, more delicate flavor. Appropriate for the occasion, marjoram, according to Roman legend is known as the “herb of love”,

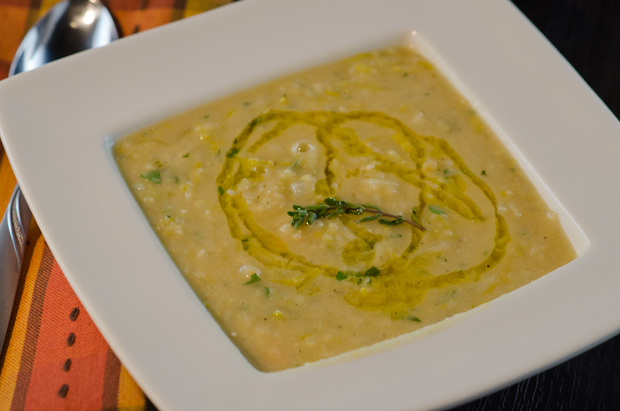
In this simple soup the delicate onion flavor of leeks combines with nutty chickpeas and fragrant fresh herbs. The original recipe called for water but Joe substituted a rich homemade turkey stock that brought another layer of flavor to the soup. When making any dish with dried beans, it’s best to purchase them from a bulk bin with a high turnover rate for the freshest possible beans. Old beans don’t rehydrate very well. Store dried beans in a cool dark pantry and use within a year. Chickpeas,as with all beans are a good source of iron, folate and dietary fiber. Canned beans could be substituted but they also bring additional salt and preservatives to the soup.

My memory was happily confirmed, this was a delicious soup and the recipe made enough to freeze for future meals. Sad to say, The Herb Companion is no more. As of 2013, after more than twenty years of bimonthly publication, the magazine has been incorporated into Mother Earth Living Magazine.

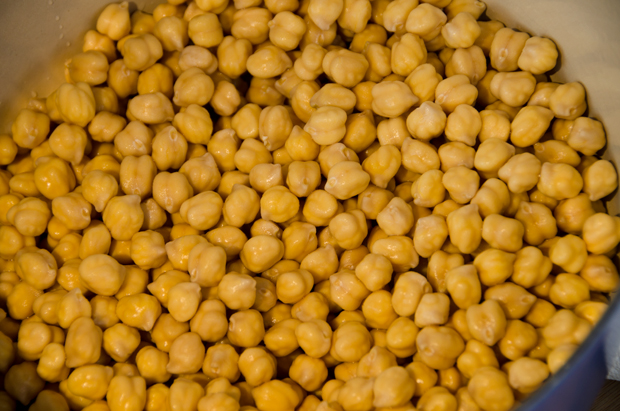
DSC_4628a
Fresh chickpeas after an overnight soak.

Chickpea and Leek Soup

Serves four to six

Ingredients

  • 1/2lb. dried chickpeas
  • 1 bunch leeks (about 1 1/2lbs.)
  • 1 medium onion
  • 3 large cloves garlic
  • 3-4c water, chicken or turkey stock
  • 1/3c extra virgin olive oil
  • 5 sprigs Italian parsley
  • 3 marjoram sprigs
  • Kosher salt and freshly ground black pepper
DSC_4638 copy
The other players in the soup

Directions

  1. Soak the chickpeas in cold water to cover overnight
  2. Drain, rinse and cover with fresh water. Bring to a boil, reduce heat and simmer until very tender, about an hour. Puree half the chickpeas (or more for a thicker textured soup) Return them to the pot and salt well.
  3. Meanwhile, clean and trim the leeks, including only the tender green and slice 1/8 inch thick. Dice the onion and mince the garlic. Gently cook the vegetables covered, in 3 tablespoons of oil over low heat until they have softened,
  4. Add the vegetables to the chickpeas along with 3 cups of water or stock. Salt and pepper lightly and simmer the soup for about 30 minutes. Chop the parsley and marjoram leaves and add them to the soup. Simmer for an additional 5 minutes and adjust seasoning.
  5. Serve the soup hot with the remaining olive oil drizzled on top.
DSC_2854a
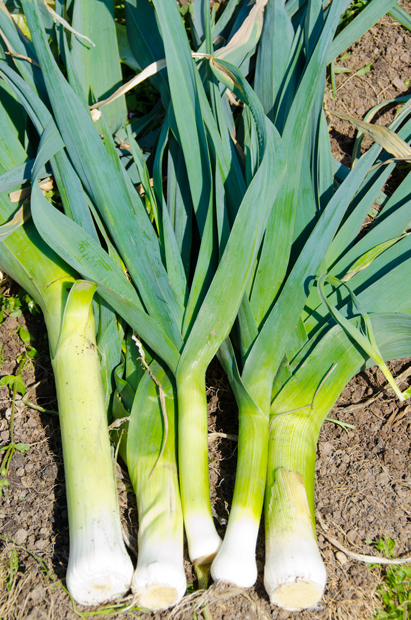
Leeks from the garden will have to wait for a spring thaw.

DSC_4681a

December 15, 2013 Green Beans with Parsley Pesto

DSC_4089a


Thanksgiving evening, the turkeys and the side dishes were out and we were ready to serve dinner buffet style from the kitchen. Then I noticed it, the double steamer basket and a small container next to it. I forgot, also read, “got too busy” to make the green bean dish I had prepped ahead. Not that we would miss it. After slurping down Chesapeake Bay oysters, butternut squash soup with cider cream, homemade breads, a salad of baby greens and spinach from Joe’s greenhouse, we were ready for the main event. Turkeys, roasted, grilled and smoked, roasted vegetables, yam casserole, stuffing, zucchini, no one would starve for certain. The green beans could wait for another day.

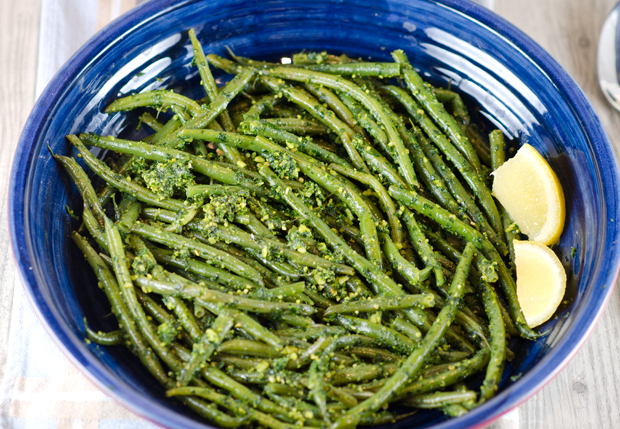
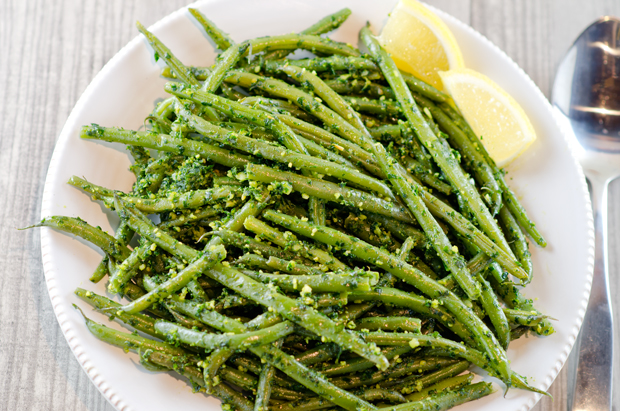
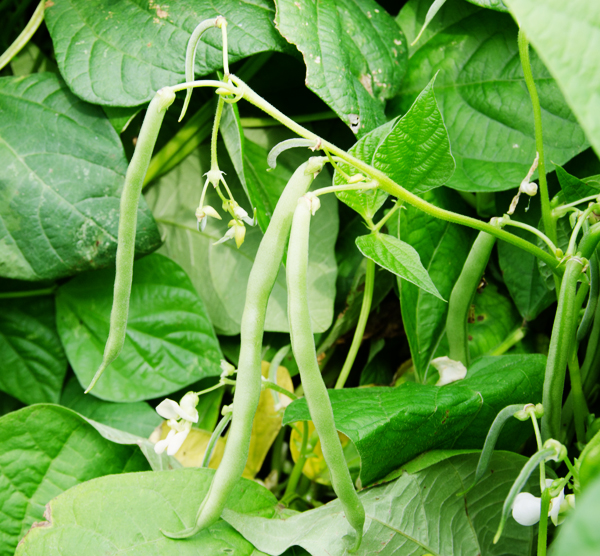
We grow both pole and bush style beans. Green beans, yellow or wax beans and purple beans are in abundance courtesy of the garden from July to early September. Green beans are not in season now so I bought the skinny “haricot verts” that would cook quickly in the steamer basket. Always looking for a new twist on the beans, a recipe from Food and Wine magazine would fit the bill. Green beans with parsley lemon pesto sounded like a great way to feature the beautiful flat leafed parsley still thriving in the greenhouse. Like most people, when you say pesto I immediately think basil. This is a recipe for winter months without basil and combines toasted pine nuts with parsley, garlic, lemon and olive oil. The dish comes together fairly easy, the pesto can be made a day ahead and then tossed with the steamed beans.

Pine nuts are the edible seed of a pine cone. Every pine tree produces seeds but less than a third of the varieties produce seeds that are large and flavorful enough to eat. To say pine nuts are expensive would be an understatement. I read that Italian pine nuts have been going for as much as 60 to 120 dollars a pound due to bug infestations and weather conditions. The small container of Italian pine nuts I purchased was weighed by the quarter pound, by the pound I estimated them to cost about thirty eight dollars. Even Chinese pine nuts have gone up in price. If you decide to purchase Italian pine nuts for any dish  just be sure they are out of harm’s way so they don’t become someone’s late night snack. Walnuts or almonds would be a more reasonably priced alternative and just as flavorful. The amount of pesto is enough for four pounds of green beans, I only cooked a pound of beans because we had quite a few side dishes. Leftover pesto could be tossed with pasta or used as a spread on a turkey sandwich.

DSC_6633a


Green Beans with Parsley Pesto

Serves 6-8 as part of a buffet

Ingredients

  • 1/2 cup pine nuts
  • 2 cups flat-leaf parsley leaves
  • 1 garlic clove, crushed
  • 1 teaspoon finely grated lemon zest
  • 1 tablespoon fresh lemon juice
  • 1/4 cup extra-virgin olive oil
  • Kosher salt
  • Freshly ground pepper
  • 1 lb. green beans (I prefer using the thinner haricot verts)
  • Lemon wedges, for serving

Directions

  1. In a small skillet, toast the pine nuts over moderate heat, tossing, until golden, about 5 minutes; transfer to a food processor and let cool completely.
  2. Add the parsley, garlic, lemon zest and lemon juice to the food processor and pulse until the parsley is very finely chopped. With the machine on, gradually add the olive oil and process until the pesto is nearly smooth. Season with salt and pepper and scrape into a large bowl.
  3. Put a steamer basket in the bottom of a pot. Fill the pot with 1 inch of water, add salt and bring to a boil. Add the green beans, cover and steam until bright green and crisp-tender, 8 to 10 minutes. Drain the beans and transfer to the large bowl. Toss with enough pesto to coat and season with salt and pepper; serve with lemon wedges.
Make Ahead The pesto can be refrigerated overnight. Bring to room temperature before tossing with the beans.
DSC_5254aDSC_4079a

November 30, 2013 Cauliflower with Brown Butter, Pears, Sage and Hazelnuts

DSC_4022a

Move over kale there’s a new vegetable star in town, cauliflower. Well, at least according to Bon Appetit’s trend alert in the November issue. Top chefs are now embracing the once lowly vegetable, in everything from a “ragu” atop pizza to roasted and topped with tahini dressing.

We’ve been enjoying cauliflower in new ways in the last couple of years. I like to separate it into florets, put it in a big bowl and toss it with olive oil, kosher salt and Aleppo pepper. Then I roast it on a baking sheet in a hot oven, tossing it occasionally, so that all the pieces get sweet and toasty brown. If the cauliflower gets done before the main course, I keep it warm under a heat lamp and inevitably most of it gets eaten before we sit down to dinner. I refer to it as veggie popcorn. The other method of cooking is to cook the florets in boiling water until soft. Then I put the cauliflower in the food processor with a little half and half, salt, pepper and my seasoning of choice and puree it. This time cauliflower morphs into “mashed potatoes” for a low carb treat.

Last Saturday was the last local outdoor farmers market, some of the vendors will return once a month now for an indoor market. While loading up on vegetables for Thanksgiving, I noticed one farm was offering along side the usual white variety, purple and a yellow-orange cauliflower. The young woman behind the counter referred to the orange one as “cheddar”. The shopper next to me turned up her nose and made a “yuk” face. She said the color reminded her of packaged macaroni and cheese.

If she knew the story behind this variety I think she would have changed her mind. Cauliflower belongs to the genus Brassica which includes broccoli, cabbage and yes, kale. The “cheddar” or orange variety of cauliflower was first discovered in Canada in the 1970’s. Scientists at Cornell University crossed it with the standard white cauliflower to create a vitamin rich variety, popular with farmers markets and specialty grocers. What my fellow shopper didn’t know was that the hue is from extra beta carotene. It is naturally stored in edible portion of the plant, the head of the flower buds, also known as the curd. That means it has 25% more vitamin A than it’s white cousin and second only to carrots.

Purple cauliflower had it’s origins in either Italy or South Africa. Anthocyanin pigments, also found in red cabbage and red wine gives purple cauliflower it’s color and the added benefits of promoting eye and heart health. Milder in flavor than the white variety, most varieties will retain most of their purple color when cooked.

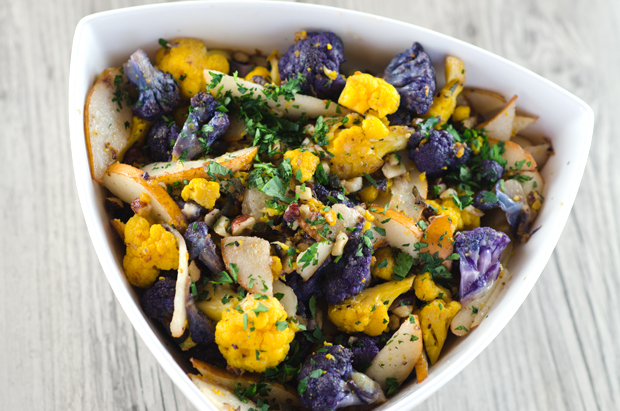
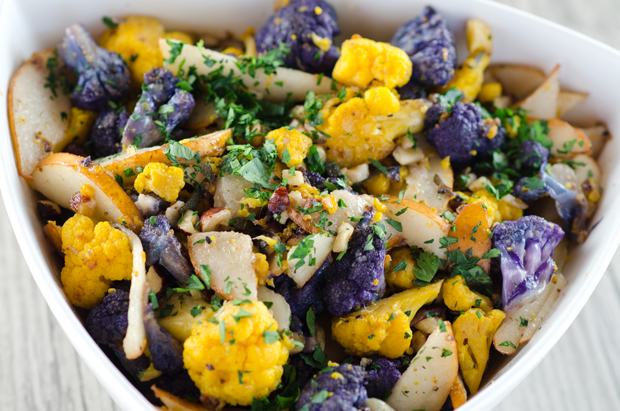
This recipe is courtesy of Andrew Carmellini, a Food and Wine best new chef 2000. He is best known for his modern Italian dishes and his recipe combines some of fall’s favorite ingredients. The nutty flavor of roasted cauliflower is enhanced with brown butter and hazelnuts and combined with sweet pears and fragrant sage. It is a great addition to any holiday table and easy enough for a weeknight. It gains points with busy holiday cooks in two ways; one, it is a stovetop dish, freeing up valuable oven space and two, it’s delicious both warm and at room temperature, perfect for a buffet and leaving time for last minute prep for other dishes. Purple and yellow cauliflower will certainly brighten up any holiday table, but it would be just as delicious with the standard white variety.

Cauliflower with Brown Butter, Pears, Sage and Hazelnuts

From Fine Cooking magazine

Serves 8-10

Ingredients

  • 6T unsalted butter
  • 1 medium head white cauliflower  or 2 small heads yellow and purple cauliflower cut into small florets about 3/4 inch wide
  • 1/2 cup toasted, skinned, chopped hazelnuts (see tip right)
  • 8 fresh sage leaves, thinly sliced crosswise
  • Kosher salt and freshly ground black pepper
  • 2 large ripe pears, cored and thinly sliced
  • 2 Tbs. chopped fresh flat-leaf parsley
Tip:

To toast hazelnuts, spread them in a single layer on a baking sheet. Bake in a 350°F oven for 14 to 18 minutes, stirring every 5 minutes, until lightly browned. While still warm, rub them against each other in a clean dishtowel to remove the papery skins.

Directions
  1. In a 12-inch skillet over medium-high heat, melt the butter until light brown and bubbly. Add the cauliflower, hazelnuts, and sage.
  2. Cook for 2 minutes, stirring occasionally. Season with 1 tsp. salt and 1/2 tsp. pepper and continue cooking, stirring occasionally, until the cauliflower is browned and crisp-tender, 7-8 minutes more.
  3. Remove the pan from the heat. Add the pear slices and parsley. Gently toss to combine and warm the pears. Season to taste with more salt. Serve hot or at room temperature.
Make Ahead Tips

You can prep all the ingredients several hours ahead except for the pears, which will brown if cut too far in advance.

DSC_4007a
Beautiful purple and “cheddar” cauliflower.
DSC_3412a
The sage is still doing well in our fall garden.
DSC_4019a
A side that would be a delicious and colorful addition to any holiday table.