March 17, 2016 Spinach Pie

DSC_6530a
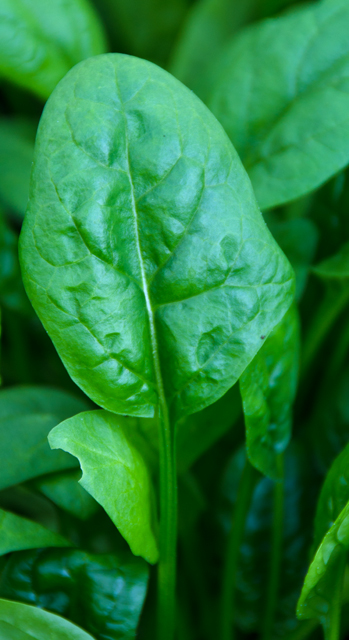
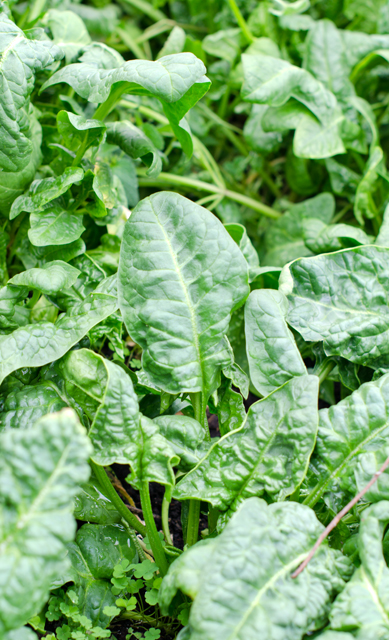
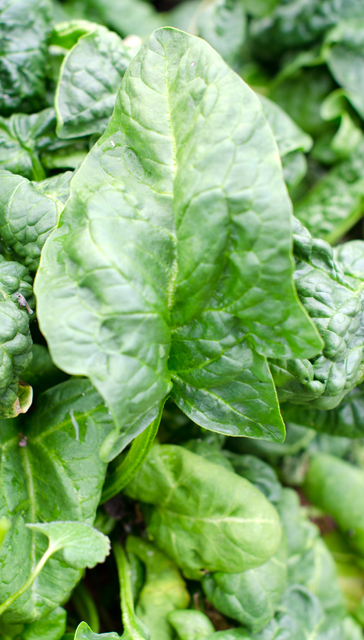
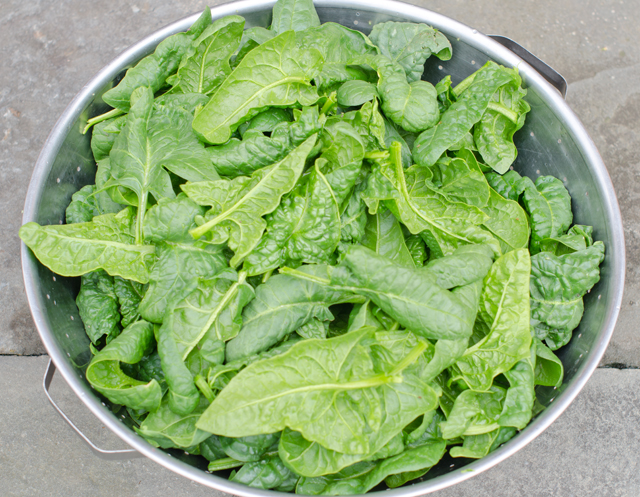
For once it looks like the groundhog was right, winter is over. Last week’s tease of highs in the 80’s has now settled back into a mostly rainy week with temperatures in the 50’s and 60’s. Spring arrives this weekend and it’s time to head back to the garden. Our garden’s first offering is spinach. Planted as a fall crop, it wintered over nicely in the greenhouse . It’s not the delicate baby spinach that you would want in a salad, but larger, very crinkly spinach, perfect for cooked dishes. I will attest that is still sweet and flavorful, after nibbling on some stems when I picked a large colander full today.

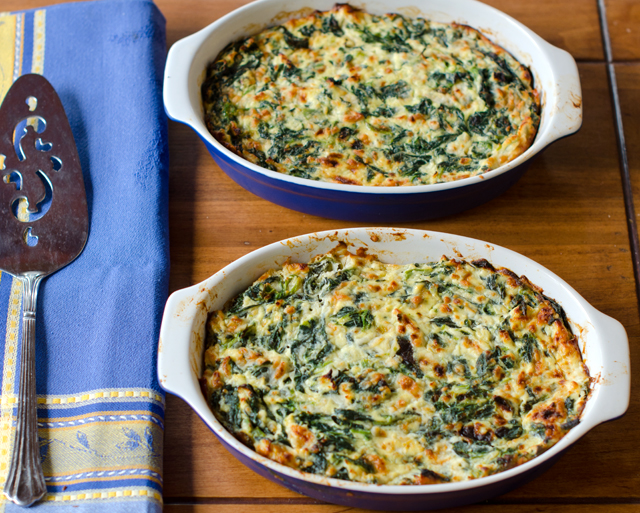
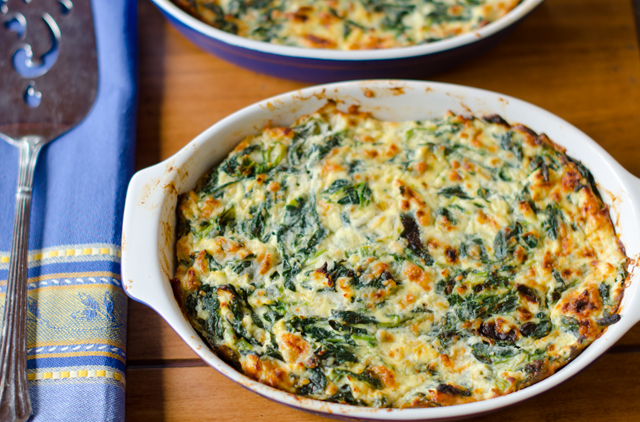
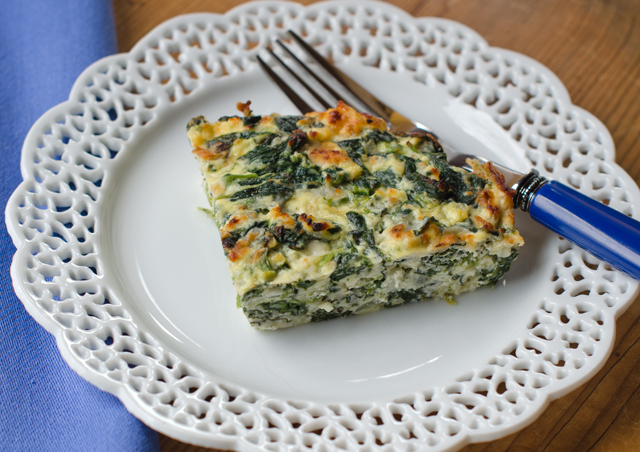
I found this recipe for Spinach Pie on the Epicurious website from a book called Irish Country Cooking, quite appropriate since St. Patrick’s Day is today. My choice was further confirmed when I read the author’s comment that three generations of her family have enjoyed this dish and this recipe was often made to use up her father’s seasonal harvest of spinach.

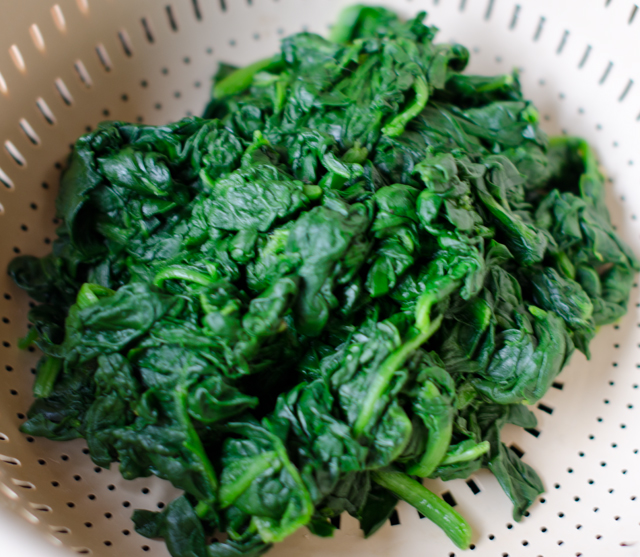
It takes a lot of spinach to make a pound, twelve cups to be exact. When that spinach is cooked down it will yield about a cup. Wash spinach in a large sink in several exchanges of cold water, those crinkles can hide a lot of dirt and debris. Remove any large stems and trim away any discolored leaves. The recipe called for steaming the spinach, I chose to cook it down in batches in a non stick skillet, which was just as easy. Drain spinach in a colander or better yet squeeze in your hands to remove excess moisture. Roughly chop spinach and in a large bowl combine with onion, beaten eggs and the cheeses. Mix well to be certain the spinach is mixed thoroughly with the other ingredients. Transfer this mixture to a quiche dish or individual dishes. If you like it could even be made in a crust. Different cheeses could be substituted as long as they have the same texture, cheddar for the mozzarella, I substituted ricotta for the cottage cheese. The addition of some chopped smoked salmon or a little crumbled sausage would be nice too.  A 10 ounce container of frozen spinach, thawed and well drained can be substituted for the fresh spinach.

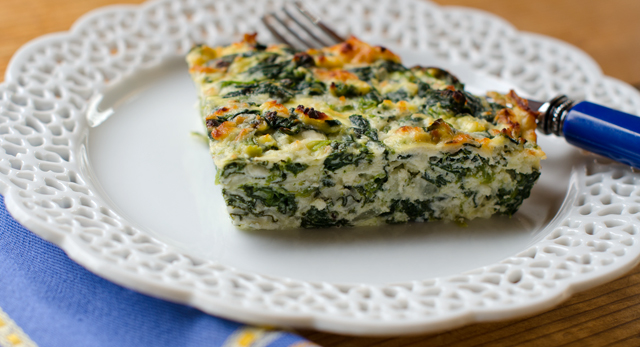
Spinach pie is appropriate at any meal, breakfast, a light luncheon entree, a side at dinner. You could also bake this in a rectangular baking dish and cut it into small squares as an hors d’oeuvre. I barely made a dent into the spinach that’s in the greenhouse so it looks like I will be making this again in the weeks to come.

DSC_6460a

DSC_6462a

DSC_6485a

DSC_6490a

Spinach Pie

Ingredients

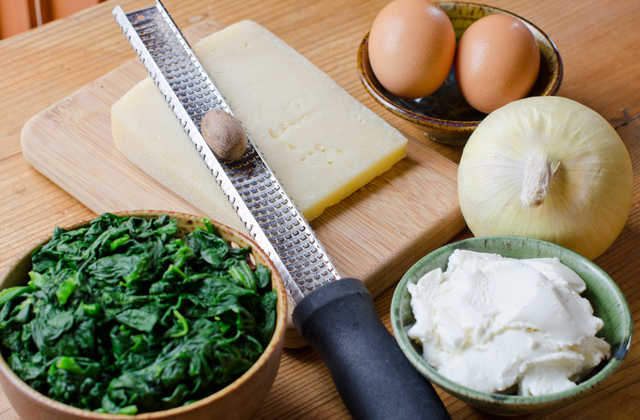
  • 1 lb 4 oz spinach, washed or a 10 ounce container of frozen chopped spinach, thawed and well drained of excess liquid
  • 1 medium onion, finely chopped
  • 2 eggs, beaten
  • 10 oz ricotta or cottage cheese (regular or low fat)
  • 10 oz freshly grated Parmesan cheese
  • Kosher salt and freshly ground pepper to taste
  • ¼ t freshly ground nutmeg

DSC_6515a

Directions

  1. Preheat oven to 350°F, 325°F if using convection heat
  2. Wilt the spinach in a large non stick saute pan with the water that is still clinging to the leaves, drain well and roughly chop.
  3. In a large bowl, mix the cooked spinach with the onion, beaten eggs and cheeses. Be sure that the spinach is thoroughly combined with the other ingredients. Season the mixture with salt, pepper and nutmeg.
  4. Transfer mixture to one or several smaller baking dishes that have been coated with non stick spray. Bake in preheated oven for 25 to 30 minutes.

DSC_6520a

DSC_6523a

DSC_6526a

DSC_6533a

March 6, 2016 Crunchy Winter Slaw

DSC_6250a

Slaws aren’t just for summer picnics anymore. A crisp winter slaw is the perfect compliment for hearty stews, soups and braises. This one from the latest edition of Bon Appetit combines green cabbage or fennel, daikon radish, celery root with juicy sweet Asian pear. Not fond of celery root? Use celery instead. No Asian pears in your market, use a tart apple. A dressing of lemon juice, maple syrup, Dijon mustard and olive oil brings the flavors together. Topped with some toasted pumpkin seeds and some shreds of Manchego cheese, this slaw is crunchy, fresh and light. and one I’m sure to be making again throughout the season.

Crunchy Winter Slaw

Serves 4

Ingredients

  • 1/3 c raw pumpkin seeds
  • 1 t plus ¼c olive oil
  • Kosher salt and freshly ground pepper
  • 3 T fresh lemon juice
  • 1 T Dijon mustard
  • 2 t pure maple syrup
  • 4 c very thinly sliced green cabbage and/or fennel
  • 1½ c matchsticks Asian pear
  • 1½c peeled celery root or celery
  • 1½c matchsticks peeled daikon radish
  • 3 oz Manchego cheese, divided

DSC_6215a

Directions

  1. Preheat oven to 350°F. Add 1 t olive oil to a  bowl then add the seeds and toss to coat them thoroughly.  Season the seeds with salt and pepper and spread evenly on a baking sheet. Bake until golden brown and puffed, rotating the baking sheet and tossing the pan halfway though baking time, about 5 minutes.
  2. Let them cool and finely chop 2 t  pumpkin seeds.
  3. Whisk together chopped seeds, lemon juice, mustard, maple syrup and remaining oil in a small bowl, season with salt and pepper.
  4. Combine the cabbage, fennel, Asian pear, celery root, daikon, most of the Manchego and remaining toasted pumpkin seeds in a large bowl. Drizzle dressing on top and toss to combine.
  5. Season with salt and pepper and top with remaining Manchego.

DSC_6246a


February 16, 2016 Shaved Fennel and Arugula Salad with Blood Oranges and Walnuts

DSC_5859aThis simple salad unites two of winter’s best produce offerings, fennel and blood oranges. I added some peppery arugula, tossed them with a blood orange dressing with toasted fennel seed and topped it with toasted walnuts.

In the world of vegetables, poor fennel doesn’t get the attention that it truly deserves. Originally an Italian import, it’s readily found in any well stocked grocery store, usually keeping company near the radishes and lettuces. It’s full of nutrients like vitamin C, potassium and fiber with a texture that is crisp like celery and a flavor is mildly anisey. Fennel is available year round but it’s peak season is fall and winter.

I propose the reason for fennel negligence is twofold. One, many cooks aren’t sure what parts are usable and two, they are not sure how to cut it up. That’s easy to clarify, when shopping for fennel choose small to medium plump bulbs always with the stalks and feathery greenery still attached. To prepare for cooking, cut off the stalks and the feathery foliage. Remove any outside ribs that appear tough or damaged. Slice the trimmed fennel bulb crosswise thinly with a knife or mandoline for raw preparations or cut vertically into larger pieces for grilling or roasting. The stalks can be as a bed for cooking whole fish or stuffed in a chicken before roasting. The stalks could also be used as a component in chicken or vegetarian stock. The feathery fronds make an attractive edible garnish. I use raw fennel quite often in our winter salads and I also like fennel quartered either roasted or grilled. Grilling caramelizes fennel and enhances the flavor.

Blood oranges are readily available now and I like to use them as much as I can during their December to March season The red blush of the blood orange’s skin hints at what’s inside. The magenta flesh color is due to the presence of anthocyanins, the pigment that makes blueberries blue, cherries red and eggplants purple. Blood orange’s flavor is tart-sweet with just a hint of berry.

This is a very easy salad to make. Shave the fennel crosswise very thinly with a mandoline or sharp knife. Always use the finger guard with the mandoline, I learned the hard way on a new, very sharp mandoline a few years ago, when I was shaving fennel come to think of it. Cut the peel and pith from the orange, again using your sharpest knife and cut crosswise into rounds. The crispy fennel and peppery arugula are combined with a blood orange and toasted fennel seed vinaigrette. Add the blood orange sections and toss again. Top with toasted walnut pieces and fennel fronds.

Shaved Fennel and Arugula Salad with Blood Oranges and Walnuts

Serves four

Ingredients for the salad

  • 1 medium fennel, top trimmed off and fronds reserved
  • 4 blood oranges
  • 6-7 c baby arugula
  • ¼c toasted chopped walnuts

DSC_5863a

Ingredients for the dressing

  • l blood orange
  • 1 T fresh lemon juice
  • 1  T minced shallot
  • 1 t honey
  • ½t fennel seed
  • 1 t salt
  • ½c extra virgin olive oil
  • Kosher salt and freshly ground pepper

Directions for the dressing

  1. Juice the orange, you should have about ¼ cup.
  2. In a dry skillet, lightly toast the fennel seeds until fragrant. Cool slightly and crush with a mortar and pestle.
  3. Stir all the ingredients together in a medium bowl. Add salt and freshly ground pepper to taste.  Reserve.

DSC_5841a

DSC_5849a

Directions for the salad

  1.  Slice fennel very thinly crosswise with a mandoline or a very sharp knife, stopping before you get to the core. You should have 1½ to 2 cups.
  2. Using a very sharp knife, cut the peel and white pith from the oranges. Slice crosswise into thin rounds.
  3. In a large bowl add fennel and arugula and toss to combine. Whisk the dressing together to recombine. Add some of the dressing to the arugula and fennel and toss lightly. Season with salt and pepper. Add the blood orange sections and toss gently. Divide among the salad plates and top each portion with fennel fronds and walnuts. Season to taste with salt and pepper.

DSC_5854a


February 6, 2016 Roasted Cauliflower Salad with Orange and Tarragon


DSC_5828aThe produce department of a well stocked supermarket is a happy place for me. I love looking at neat rows of perfect produce with automatic misters that always seem to turn on the minute I reach in to pick out my choice. I look for new vegetables I have read about in food magazines. Kale sprouts? Not in local stores yet. I am inspired to try that new recipe, create a new salad. I bemoan the high cost of tiny bunches of fresh herbs and swear that I will ask Joe to pot up more to use in the winter season. In our gardening “off season” I can even find local lettuces and greens grown in indoor greenhouses not far from where I live.

About a month ago I discovered one of my favorite vegetables was missing from it’s place of prominence on the shelves. Cauliflower, usually placed near it’s cousin broccoli was all but missing in action. When I did find it, it was banished to a corner at the very end of the produce aisle. There was only a very sparse offering and the heads were probably half the size of those from local farms available just a few months ago. And the price? These tiny heads were selling at $5.99 a piece, I could easily pass that up.

After a little research, I learned that the problem was due to the changing weather and rainfall patterns from a strong El Nino in the primary areas where it is grown, California’s Imperial Valley and near Yuma Arizona. The combination of cauliflower’s current status as most favored vegetable (sorry kale!) and the recent shortage led to it’s conspicuous absence.

Several weeks have passed and the price is coming down a bit so I have currently suspended my moratorium on cauliflower. This salad, roasted curried cauliflower with orange and tarragon in the latest issue of Fine Cooking was the inspiration for my return.

Florets of cauliflower and thinly sliced shallots are tossed with curry powder, olive oil, salt and pepper. Since they can vary in heat quite a bit, I chose a sweet curry powder from Penzey’s. Curry powders are are a blend of spices, thirteen in this case, including turmeric, coriander, cumin and ginger, just to name a few. You can also make your own curry blend according to your tastes. The cauliflower and shallots are spread out on a large baking sheet and roasted until the vegetables are tender and browned, 20 to 25 minutes. Watch carefully, since I was using convection heat I reduced the temperature from 450°F to 425°F. I also stir the cauliflower around at about the halfway point to insure even browning.

While the vegetables are roasting, prepare the orange segments, I discuss how to do it here. Unlike cauliflower, oranges and all citrus are plentiful and priced well this time of year. If you don’t want to try your hand at supreming, substitute Mandarin orange segments, not the ones packed in syrup, of course!

The vinaigrette is composed of rice vinegar, Dijon mustard, orange juice and extra virgin olive oil. Fresh tarragon brings a “licoricey” flavor to the dressing but if the expense of a small container of fresh tarragon bothers you as much as it does me, skip it or add a little dried. Toss the cooled vegetables along with the orange segments, almonds, currants and mache. I used a mache “blend” from Organic Girl that includes mache rosettes, baby red and green chard and tango lettuce. It’s a good quality product for non garden months. You could also choose baby arugula or any salad blend.

We loved the salad and finished it in one sitting. The flavors and textures all contrast very nicely. I added a little crumbled soft goat cheese to our salads, some chickpeas or finely chopped fennel would also be an interesting addition. This could also double as a vegetarian main dish and would be great for a buffet.

Roasted  Cauliflower Salad with Orange and Tarragon

Serves four (or two very hungry people)

  • 1 large head cauliflower cut into 1″ florets (about 8 cups)
  • 1 c thinly sliced shallots
  • 1½t curry powder
  • 7 T extra virgin olive oil
  • Kosher salt and freshly ground pepper
  • 2 large oranges (I used Cara Cara)
  • 1 T rice vinegar
  • 2 t Dijon mustard
  • 2-3 T chopped fresh tarragon
  • 1/3 c coarsely chopped tamari almonds or toasted slivered almonds
  • ¼c dried currants
  • 5-6 c mâche or baby arugula

Directions

  1. Position a rack in the center of the oven to 450°F. Line a large rimmed baking sheet with foil.
  2. Toss the cauliflower and shallots with the curry powder, 2 T oil, salt and pepper. Spread on a baking sheet and roast until the vegetables are tender and browned, 20 to 25 minutes. Let cool.
  3. Slice the ends of the oranges so they rest flat on a cutting board, cut off the peel and the pith. Working over a bowl, cut the orange segments free from the membranes, letting them fall into the bowl. Squeeze the juice out of the membranes into a small bowl.
  4. In another small bowl, whisk the vinegar and the mustard. Slowly whisk in the remaining 5 T oil. Whisk in 3 T of the orange juice and the tarragon. Season to taste.
  5. Add the cauliflower, almonds and currants to the orange segments and toss with enough vinaigrette to coat well. Add the mache and toss again. Drizzle with remaining vinaigrette and serve.

DSC_5820a

Cauliflower tossed with curry powder. The orange color comes from the turmeric.
DSC_5833a
Delicious!

January 30, 2016 Spinach, Blood Orange and Bean Salad with Sprouts

DSC_5806aThe February issue of Bon Appetit includes a nine page (ten if you count the colorful illustration on the first page) article devoted to beans. The title, “Cool Beans” brings a smile to my face because it was an often used expression of a dear friend of mine.

“Cool Beansincludes a four step method on how to cook dried beans from scratch, a pictorial of some of the prettiest beans I have ever seen, available by mail order only and they even address the, ahem, gas issue. There are recipes for cassoulets, pastas, stews and chilis. What caught my attention however was a bean salad; blood orange and mixed bean salad with sprouts. Since I wanted to make the salad for that evening, I needed to forgo the soaking and the next day slow cooking. So I did the next best, and most practical thing, I used a can of cannellini beans, Goya is my brand of choice. If you use canned beans, rinse and drain them well. A large can of cannellini beans will give you 1 1/2 cups of beans as opposed to the 2 cups in the original recipe.

The salad comes together very quickly. Blood orange segments, readily available this time of year enhance the salad with beautiful garnet red color and deep sweet orange flavor with just a little bit of raspberry tartness. Celery slices, underused in salads (at least by me) and broccoli sprouts give a crisp contrast. Fennel would be an interesting substitution for celery. The dressing is a very simple vinaigrette, lime juice, sherry vinegar, extra virgin olive oil and a small Thai chili. Our rather large supply of frozen chilis pack as much heat as any fresh one. My additions to the original recipe were baby spinach leaves and toasted almonds for crunch. Top the salad with some cilantro or parsley leaves. This salad probably could serve four but we ate it in one sitting as a side dish.

The origin of the expression “cool beans”? A Cheech and Chong movie? The 80’s sitcom Full House? There doesn’t seem to be a true concensus. What I do know is that it’s time to place an order for some heirloom beans so I can make this delcious salad again.

Spinach, Blood Orange and Bean Salad with Sprouts

Serves four

For the vinaigrette

Ingredients

  • 2T fresh lime juice
  • 2t Sherry or red wine vinegar
  • ¼c extra virgin olive oil
  • 1 small Thai chili, thinly sliced
  • Kosher salt and freshly ground pepper

DSC_5793a

Directions

  1. Whisk ingredients together in a medium bowl. Season to taste with salt and freshly ground pepper. Set aside.

For the salad

Ingredients

  • 6c baby spinach leaves
  • 1 can cannellini beans, rinsed and well drained or fresh cooked beans
  • 3 blood or navel oranges
  • 1c celery stalks, sliced thinly on the diagonal
  • ½c radish or broccoli sprouts
  • ¼c toasted almond slivers
  • Kosher salt and freshly ground pepper

DSC_5797a

Directions

  1. Add beans to vinaigrette and toss to coat, let sit for 10 minutes for flavors to blend.
  2. Remove peel and pith with a small, very sharp knife from 3 blood or navel oranges. Cut crosswise into ¼” thick rounds.
  3. Add the spinach, orange sections, celery slices and sprouts to the bowl with beans and toss. Season with salt and pepper.
  4. Top with additional sprouts, cilantro leaves and toasted almonds.
DSC_6772a
The borlotti beans we grow in the garden are very pretty. Unfortunately they lose their mottled color when cooked.

DSC_5800a

January 5, 2016 Roasted Vegetable Salad

DSC_5416aJust because we are in the middle of a chilly (notice I didn’t say cold) and somewhat rainy winter, doesn’t mean that a green salad can’t be part of your meal. I have been using a formula from an article in Fine Cooking to make delicious and interesting winter salads. Hearty roasted vegetable salads combine mixed winter greens with roasted winter vegetables and fruits, nuts, cheeses and dried fruits.

I confess that even though I’m not making the trek out to the greenhouse these days where I still might find some spinach or claytonia, my local supermarkets are providing a varied assortment of fresh salad greens. I always purchase a smaller package because I am more likely use them up before the recommended expiration date. Choose from one of the many blends in your produce section or go solo with baby arugula or spinach.

Winter root vegetables are the next component in the salad. I line my pan first with parchment paper for easy clean up.  Uniformity is the key here, cut everything into a 3/4 inch dice or wedge and toss with a little olive oil and some kosher salt. If you choose to roast red beets they will need to be on a pan of their own so they won’t bleed into the other fruits and vegetables. High heat cooking carmelizes and brings out the sweetness in the vegetables and fruit. Just remember not to crowd the pan or you will end up steaming them.

Dried fruit balances out the bitterness of the greens, for this recipe I chose dried cherries. Some aged Gouda brings another layer of flavor and toasted slivered almonds add a little crunch. Toss the salad with a simple fruity vinaigrette, I combined a tangy red apple vinegar with toasted almond oil from the Tubby Olive.

Roasted Vegetable Salad

Ingredients

  • 4 generous cups winter greens such as spinach, arugula, endive, baby greens-kale, chard etc.
  • Roasted root vegetables and fruit, I used a combination of red and gold beets, and a firm tart apple such as a Braeburn, roasting recipe follows
  • ¼c toasted slivered almonds
  • 1/3c diced aged Gouda
  • 3T dried cherries
  • Kosher salt and freshly ground pepper
I roasted red and golden beets along with apples. Toasted almonds and dried cherries complemented the flavors nicely.


For the vinaigrette

Ingredients

  • 2T red apple balsamic vinegar
  • 1t honey
  • ½t Dijon mustard
  • 3T toasted almond oil
  • ¼ t grated lemon peel
  • Kosher salt and freshly ground pepper

Directions

  1. Whisk all the ingredients together in a small bowl.
  2. Season to taste with salt and pepper.

For the Roasted Vegetables

Ingredients

  • 6c mixed root vegetables and fruit (I used red and golden beets and apples) trimmed and cut into ¾ inch wedges
  • Olive oil to coat the vegetables
  • Kosher salt

Directions

  1. Position racks in the upper and lower third of the oven. Preheat oven to 450°F.
  2. In a large bowl combine the golden beets with the apples. Toss them with a little oil and some kosher salt. Transfer them to a large parchment lined heavy duty baking sheet and spread out in a single layer. Repeat the process with the red beets and transfer to their own baking sheet.
  3. Roast, flipping over with a spatula halfway through and rotating the baking sheets. The vegetables should be browned and tender.  It took me about 18 minutes, watch carefully so you don’t burn them.
Roasted golden beets and apples, red beets were roasted separately.


Directions for assembling the salad

  1. Put the greens in a bowl large enough to toss them. Drizzle the greens with about 2T of the vinaigrette. Toss the greens well and add a little more dressing if necessary. Arrange greens on salad plates or a large platter.
  2. Season the roasted vegetables lightly with some of the remaining vinaigrette. Arrange them over the greens, then top with the nuts, cheese and fruit.
  3. Serve with freshly ground pepper and additional dressing if desired.

DSC_5417a


November 27, 2015 Roasted Beet Salad with Beet Pesto, Goat Cheese and Hazelnuts

DSC_5227aAt the end of September we took a week long trip to Denver Colorado. Part of the time was fun, visiting Garden of the Gods, Pikes Peak, Rocky Mountain National Park, and the Denver Arboretum. Part of the time was study, well at least for Joe, he was attending the Family Medicine Experience, gaining CME (continuing medical education) in anticipation of the boards he took last week. All of the week was fun for me, I visited a local winery and a teahouse, went to Red Rocks, toured the Coors brewing facility (free samples) and went to a Mexican cooking demonstration at a Denver restaurant.

One of my main jobs in anticipation of any trip we take is to choose the restaurants we will enjoy that week. I take my responsibility seriously, and it took some arduous research to find the best restaurants. This was not our first trip to Denver, previous trips included dinners at the then trendy Rattlesnake Club, now closed and The Fort, a restaurant that serves “new foods of the old west”. On a more recent trip in 2004, we were one of the first to dine at the newly opened Frasca Food and Wine, now considered by many to be one of the best restaurants in the country. So the pressure was on.

I skip over the ads at the top of the search engine, any restaurant can call themselves “the best” and Trip Advisor is okay but sometimes a family friendly or a breakfast only spot can be at the top of the list. I prefer to look at the reviews of the local city magazine when I do this type of research, for that I turned to 5280 magazine which refers to Denver’s mile high altitude and their yearly ranking of the 25 best restaurants. I skipped over the restaurants that weren’t in Denver (sorry Frasca!) also steakhouses and sushi bars because I didn’t think they would provide enough of the local flavor.  I read the reviews, perused the menus and  looked for where they were in proximity to our hotel, we didn’t necessarily want to be driving all night to get to our destination.

I discovered there are a surprising amount of restaurants whose names include the word “and “, Stoic and Genuine, Beast and Bottle, Colt and Grey were all restaurants we ate at. That doesn’t include Work and Class, Olive and Finch, Hutch and Spoon. Definitely a trend.

Another trend, and one we definitely approve of, is the number of farm to table restaurants. Although we had enjoyable experiences at all of the restaurants we dined at, the one that really reminded us of eating at home was Root Down, an award winning “field to fork” restaurant, housed in what was once a circa 1953 gas station. Every course was thoroughly enjoyed and documented with a photo on the IPad. One of our favorites was a dish that Joe had, a roasted baby beet salad. The beets, both red and golden were served on a bed of arugula with goat cheese and toasted hazelnuts. There was a dollop of beet pesto (!) and the dressing was a basil vinaigrette artfully drizzed in circles on the plate.

Now, the job would be interpreting the dish at home. The beet harvest in the Kipp garden was over so my beets came from the farmers market (red) and the supermarket (golden).Since I was using greens from our garden greenhouse I had a varied selection to choose from, spinach, leaf lettuces, claytonia, upland cress and yes, some arugula. The cheese varied in the Instagram pictures I saw, sometimes it was a slice of a creamy goat cheese, other times it was crumbles of  chevre. The cheese on the salad at  Root Down was from Broken Shovel Farm, a local supplier. I used a chevre from Giggling Goat Dairy,  a supplier I became familiar with this summer at our local farmers market.  I stayed with toasted hazelnuts, but I think walnuts would work just as well.

Beet pesto was new for me and at first I wasn’t quite sure what qualified this as a pesto. It is usually a sauce that combines an herb, most often basil, with nuts, olive oil and cheese. The definition of the word that pesto originates from is pestare which means to pound or to crush, so it does qualify as a pesto.  I combined cooked beets, a dash of red apple balsamic, toasted unsalted sunflower seeds, a little lemon juice and extra virgin olive oil. It turned into a delcious vibrant magenta sauce that would be great as a dip, tossed with pasta or as a sandwich spread.
I changed the vinaigrette to accompany the salad from basil, not in season now and not my first choice with beets to a tarragon vinaigrette. The anisy tarragon contrasts beautifully with the natural sweetness of the beets.

Roasted Beet Salad with Beet Pesto, Goat Cheese and Hazelnuts

For the Roasted Beets

Ingredients

  • 1½ lb. each red and golden beets

Directions

  1. Preheat oven to 425°F. Wrap beets in foil packets, separating by color. Place on a baking sheet; bake until beets are slightly soft to the touch, 45 minutes to 1 hour depending on their size. Cool beets in packets, then rub off skins (use a paring knife for tough spots).
DSC_5086a
Ingredients for the beet pesto.

For the Beet Pesto

Ingredients

  • 1c cooked, roughly chopped red beets
  • 1 clove garlic, minced
  • 1/3c roasted unsalted sunflower seeds
  • 2T tarragon leaves
  • 1T apple balsamic vinegar
  • 1T lemon juice
  • 1/4c extra virgin olive oil

Directions

  1. Place all of the ingredients in a food processor and blend until smooth.

For the Vinaigrette

Ingredients

  • ¼c apple vinaigrette or a white balsamic
  • ½c roughly chopped red beets
  • 1t honey
  • 1/3c extra virgin olive oil
  • 2T tarragon leaves

Directions

  1. Combine all ingredients in a small food processor and process until well combined

Assembling the Salad

Ingredients

  • 6-8 c Baby arugula- I used a combination of greens from our greenhouse that included arugula
  • ½c toasted chopped hazelnuts
  • 4oz crumbled goat cheese
  • Roughly chopped roasted red and golden beets (from the first step)
  • Freshly ground black pepper

Directions

  1. Add arugula to salad plates. Top with goat cheese, hazelnuts and chopped beets.
  2. Add a dollop of beet pesto to the plate
  3. Serve vinaigrette on the side.
  4. Add a grind of black pepper to each salad as desired.

DSC_5231a

October 31, 2015 Homemade Hot Pepper Sauces

DSC_4979aLast weeks plunge into the deep freeze meant it was time for one final harvest of hot peppers. With a formula that worked and an abundant source of peppers the challenge was to make a few hot sauces using the same method as the sriracha sauce from a few weeks ago. I first tried the NuMex Suave Orange peppers and several days later using green and red pasilla peppers and green poblano peppers. The jars fermented on the back kitchen countertop for about a week. I wasn’t sure what the results would be so my expectations weren’t very high.

To finish, I followed the same procedure for each variety, transferring the chopped chilis to the food processor, adding enough (1/3 to 1/2cup) white vinegar to puree until smooth. I carefully washed out the processor between peppers to keep each type as pure as possible. I strained the mixture through the medium disc of the food mill to eliminate any seeds. I think it’s easier than the mesh strainer and gives the finished product a little texture.

Now for some taste testing. The Numex Suave Orange has the flavor nuances of the habanero that are usually missed because the heat dominates. The sauce has a citrusy flavor with hints of orange and lemon and finishes with a little heat. The green pasilla flavor reminds me of green bell pepper and has a touch of moderate heat. The green poblano has an initial hint of sweetness and finishes with more heat than the green pasilla. I especially like the red pasilla sauce. The color is a deep dark red and the flavor is rich and full but not too hot. I think it would be the perfect addition to a chili recipe.

Numex Suave Orange Peppers
DSC_4858a
The habanero peppers on the left measure a tongue burning 100,000 to 300,000 on the Scoville scale while the Numex Suave Orange on the right are a very mild 800!
Adding peppers and garlic to the food processor.
Chop the peppers as finely as possible.
The peppers ferment for about a week.
DSC_4985a
The finished product

October 13, 2015 End of Summer Green Gazpacho

DSC_4896aSummer was officially over several weeks ago and the first touch of frost was on our lawn Sunday. That doesn’t mean the garden is giving up yet. There are still some tomatoes, peppers, both sweet and hot, eggplants and herbs ready for the picking.The tomatoes may not be the prettiest, but they are certainly the sweetest.  Joe has planted a large crop of spinach and salad greens in the garden greenhouse that we will enjoy for several months to come. After a week of indulging in Denver’s finest cuisine it was time to get back on the healthy eating track. What better way to use some of  these ingredients than in a cold refreshing green gazpacho?

Gazpacho by definititon is a liquid salad that originated from the southern Spanish region of  Andalusia. The name possibly originated from the Latin word “caspa” meaning fragments, alluding to the small pieces in gazpacho. You can make this as chunky or as smooth as you choose. I love the addition of avocados in our nightly salad with dinner and had a few extra ripe ones to give this soup a creamy texture. I used the bounty of our garden and the addition of a cucumber for it’s crisp sweetness. Give this soup several hours to chill and the flavors to blend.

Substitutions  are permitted, watercress for the spinach, that will bring a spicy kick to the soup.  Cilantro can sub for the basil, add a touch of Tabasco if you don’t have a fresh hot pepper, I would be happy to share.  I always stock up on vinegars at The Tubby Olive and used their Alfoos Mango in my soup, love them in our vinaigrettes too. If you don’t  have a fruit vinegar, use white wine vinegar and a touch of honey. A little chopped cucumber as garnish gives a little crunch and since our nasturtiums are still in bloom I couldn’t resist adding a few for their vibrant color and spiciness.

DSC_4913a

A new crop of spinach in the garden greenhouse is ready for harvest.


End of Summer Green Gazpacho

Makes about 4 cups

  • 2 medium tomatoes or 12-15 small tomatoes
  • 3-4 small cucumbers peeled and cut into chunks
  • 1 avocado, flesh cut into large chunks
  • ½c basil leaves
  • ½c flat leafed parsley leaves
  • ½ to 1 whole hot pepper, jalapeno or serrano
  • 1 sweet pepper, seeded, stemmed and cut into chunks
  • 2c packed baby spinach leaves
  • 2 cloves garlic, finely chopped
  • 2-3T fruity balsamic vinegar (I used Mango from Tubby Olive)
  • Cold water to blend
  • Kosher salt and freshly ground pepper
  • Water as needed
  • 1T extra virgin olive oil

Directions

  1. Reserve ½ cup cucumber chunks and chop finely.
  2. Combine the tomatoes, cucumbers, avocado, basil, hot pepper and sweet pepper, spinach, garlic and balsamic vinegar with cold water as needed in the bowl of a food processor or blender. Process until smooth adding more water as necessary to achieve a smooth texture. Taste and season with salt, pepper and more vinegar if desired.
  3. Refrigerate until cold, pour into bowls and garnish with cucumber chunks.

DSC_4906a

September 23, 2015 End of Summer Eggplant Soup

DSC_4242aEven though the temperatures are still in the eighties, fall is rapidly approaching and  it’s time to say goodbye to our summer vegetables. What better way to use them now and enjoy them later than in an end of summer eggplant soup. Another good reason to have soup on hand was the stomach virus that Joe and I suffered through last week. Nothing tastes better when you are on the road to recovery is a nutritious soothing soup.

I am still picking eggplants, peppers and tomatoes, but not in the same quantities as a few weeks ago. The days are getting shorter and even though the days are warm, the nights are definitely cooler. After an afternoon pick yesterday I came back with quite a nice variety of eggplants, several peppers and a few tomatoes.   This is the type of recipe you could make differently every time, depending on what is still there for the picking. I wanted to make this as easy as possible so I decided to roast the vegetable first before combining them in a soup. Carrying over on the easy concept, I lined the baking trays with parchment to make clean up a snap. I cut the eggplants in half and lightly brushed the cut edge with olive oil and sprinkled with salt and pepper.  On the second large baking sheet I added several tomatoes, peppers, an onion and some unpeeled garlic cloves, brushed everything with olive oil, and sprinkled on kosher salt and freshly ground pepper.

I decided on a 375°F oven, the temperature we use when oven roasting vegetables. I checked the tray with the tomatoes, peppers, garlic and onion first, they were done in about 12-15 minutes, getting a nice toasty brown. The eggplants took a little longer, they are done when the skins start to collapse. Once cooled, it’s easy to separate the flesh from the skin. Squeeze the garlic from the skins and roughly chop the onion. I pureed the vegetables in the food processor in batches. Because some of my eggplants were seedy I put the puree through a food mill with a medium disc. Pour the finished puree into a stockpot. I added ground cumin, coriander, salt, freshly ground black pepper and a touch of cayenne. Add chicken or vegetable stock to thin out the consistency. Make some to enjoy now and freeze some for the cold winter months.

DSC_4181a

Late summer harvest of eggplants.

DSC_4230a

Place vegetables on a parchment lined baking sheet.


The skin easily peels off the peppers and tomatoes. Roughly chop the onion.
Eggplants are ready when they start to collapse. The flesh separates from the skins.


End of Summer Eggplant Soup
Serves: 6

Ingredients

  • 3 ½lb eggplant, any type, halved lengthwise
  • 2 red or yellow bell peppers, or any combination, halved and cored
  • 3-4 tomatoes, halved and cored
  • 1 small onion peeled and halved
  • 4 garlic cloves
  • Olive oil
  • Kosher salt and freshly
  • ½t ground cumin
  • ½t ground coriander
  • 3-4 cups chicken or vegetable stock
  • Basil leaves as garnish

Directions

  1. Preheat oven to 375°F.
  2. Line two large baking pans with parchment paper.  Brush cut side of eggplant with olive oil, sprinkle with salt and pepper and arrange cut side down in one layer on baking sheet. On the second sheet,  arrange tomatoes, bell peppers, garlic, and onions, cut side down, in a single layer. Brush with olive oil and sprinkle with salt and freshly ground pepper. Bake vegetables until eggplant and bell peppers have a slight char on their skins. Check at 15 minutes, as garlic may need to come out earlier so that it doesn’t burn. Let cool until ready to handle. Remove skins as much as possible.
  3. Working in batches, pulse vegetables in a food processor, you can either roughly chop or take them down to a puree. If necessary, put the mix through a food mill.  Transfer vegetables to a large stockpot and add broth and spices. Cook for 15-20 minutes over medium heat, stirring occasionally.
  4. Adjust seasonings to taste.
  5. Serve garnished with basil leaves

DSC_4239a