May 30, 2015 Cucumber, Radish and Turnip Salad

DSC_2759a

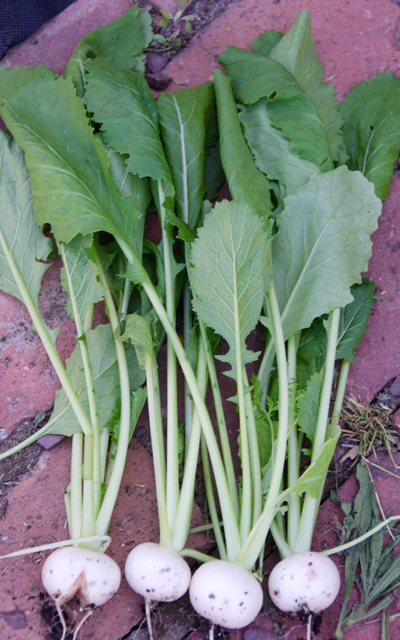
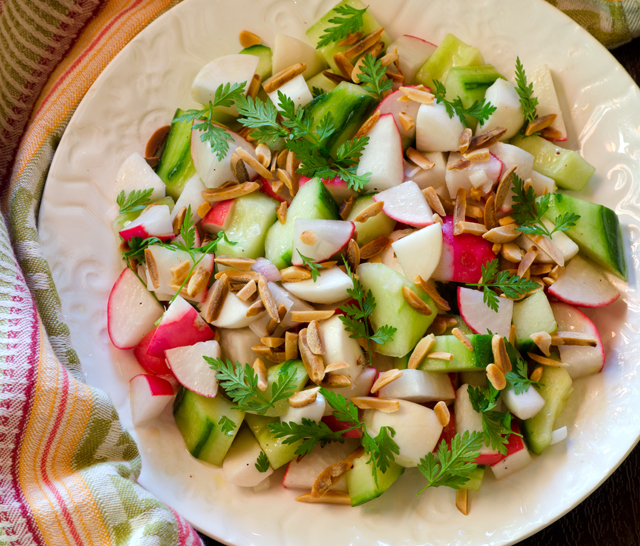
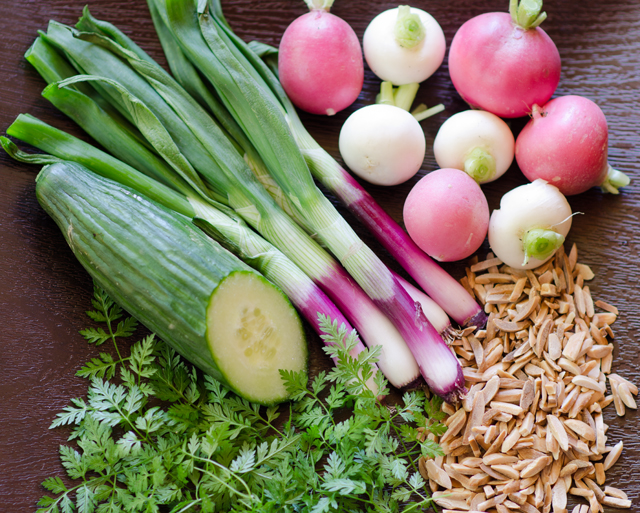
Cucumbers and radishes will never co-exist in our garden. Radishes need the cooler temperatures of spring while cucumbers didn’t make an appearance in our garden last year until August. This salad, loosely adapted from one in Bon Appetit, also utilizes another spring offering, sweet mild Hakurei turnips. Hakurei turnips are harvested at about the same size as a radish. They are pure white and their flavor lends nicely to salads.

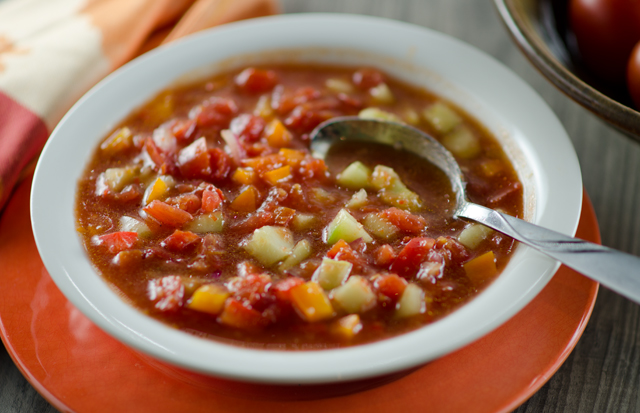
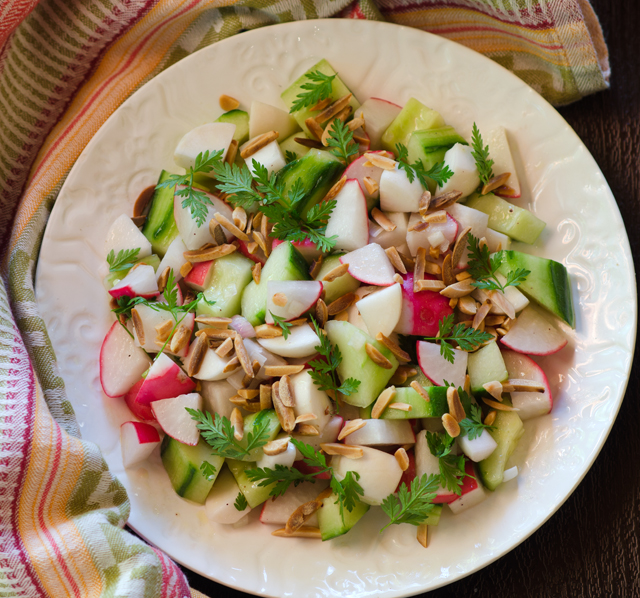
In this salad, small chunks of cucumber, radish and turnip are combined with toasted almond slivers and tossed with a vinaigrette.

I made a vinaigrette accented with spring’s most etherial and delicate herb, chervil.  A cousin to parsley, it’s leaves look like delicate lacy ferns. Our chervil was originally planted in the garden but a new larger healthy patch has seeded itself in the back of the house, nowhere close to it’s orginal location. It is a plant that also prefers cooler temperatures and partial shade. The flavor is subtle, mildly anise with just a touch of parsley. Because of it’s delicate nature, it’s rare that you would find chervil in any market, farmers or otherwise. However it is easy to grow and fortunately often seeds itself.

Toasted almonds lend a nice crunch to this dish. Rather than the oven you could alternately toast these in a dry skillet on the stove top. Whatever choice you make, watch nuts carefully, one minute they’re a pale tan, the next they are too dark. Toss the nuts occasionally, and as soon as they turn uniformly golden in color, remove from the baking sheet because they will continue to cook and darken in the pan.

I cut all the vegetables into small uniform chunks, slicing all of them would make for a different texture and would make an interesting salad as well. I like a touch of sweetness in most of my vinaigrettes, I used honey from a new vendor at my local farmers market in Wrightstown. Truly Pure and Natural carries a whole line of natural products, including local honey. They have an entire line of delicious flavored honeys, everything from lavender, to coffee to one they call “hottie honey”. I availed myself to quite a few “tastings” and came home with a three pack.  I added just a touch of the hibiscus honey to my vinaigrette. I’m sure I will be back for more!

As with many salads, this one needs to be assembled right before serving.  If you don’t have chervil, flat leaved parsley can substitute.
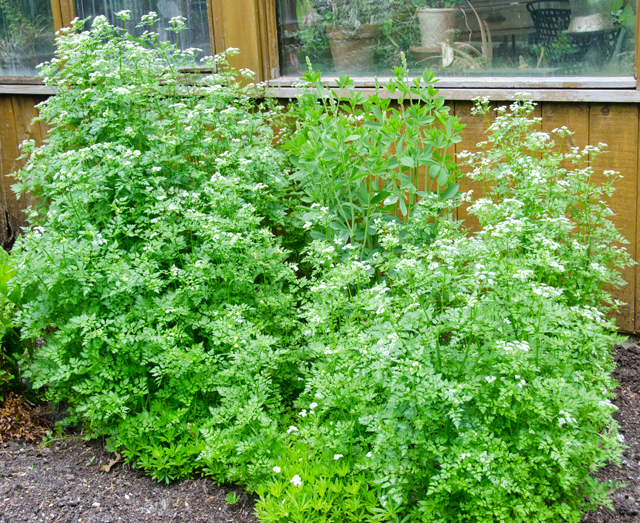
This large patch of chervil surprised us at the back of the house.
We use both the turnip greens and the sweet  Hakurei turnips.
We use both the turnip greens and the sweet Hakurei turnips.
The first cucumber flowers didn't appear until later in the season last year.
The first cucumber flowers didn’t appear until later in the season last year.

DSC_2752a

Cucumber, Radish and Turnip Salad

Makes four servings

Ingredients

  • 1/2c slivered almonds
  • 1 or 2 spring onions, finely chopped
  • 1/4c raspberry champagne vinegar or your vinegar of choice
  • 1t honey (I used Hibiscus infused honey)
  • 1/4c extra virgin olive oil (more to taste)
  • Kosher salt and freshly ground pepper
  • 1c English hothouse cucumber chunks, peeled, seeded and cut into ½inch chunks
  • 1c radishes, trimmed and cut into ½inch chunks
  • 1c Hakurei turnips, trimmed and cut into ½inch chunks
  • 1c chervil leaves and more for garnishing the salad

Directions

  1. Preheat oven to 350°F. Spread almonds out evenly on a rimmed baking sheet. Toast, tossing occasionally, until golden brown, 8 to 10 minutes; let cool.
  2. Whisk onion, vinegar, honey and olive oil in a large bowl; season with salt and pepper. Add cucumbers, radishes and turnips, chervil and almonds; toss to coat.
  3. Season to taste with salt and pepper.
DSC_2757a


May 17, 2015 Shaved Asparagus Salad with Aged Gouda and Hazelnuts

DSC_2646a

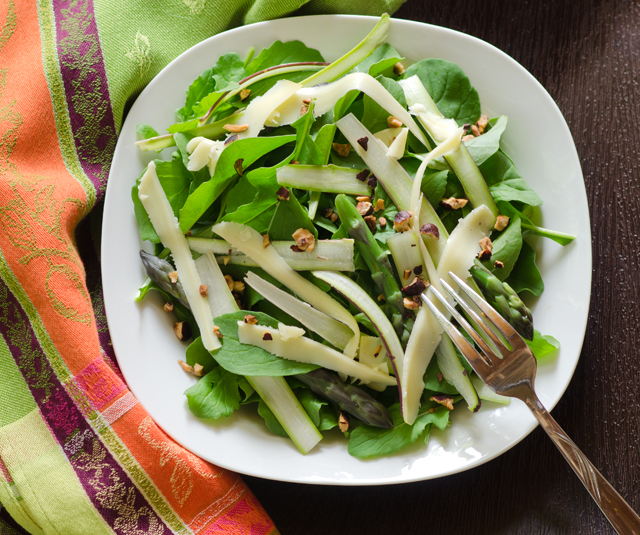
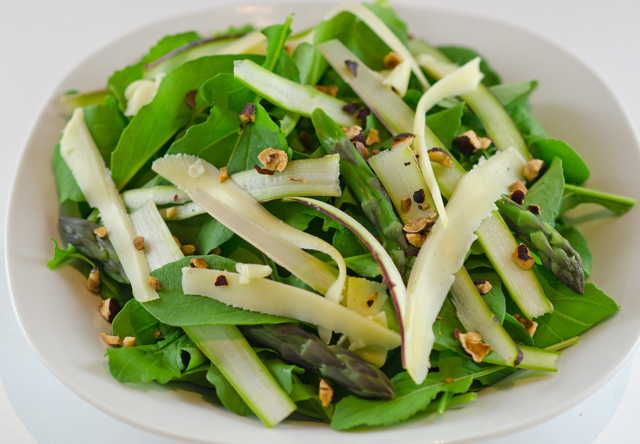
Long before the term “Farm to Table” entered our vocabulary, chef, cookbook author and food and wine educator, John Ash authored the cookbook, From the Earth to the Table. His restaurant, John Ash and Company in the wine country of Santa Rosa, California, was one of the first to focus on local seasonal ingredients in his dishes. We have had the pleasure of dining in Mr. Ash’s restaurant on several occasions when visiting Sonoma County. It was for this reason I knew his recipe for Shaved Asparagus Salad with Aged Gouda and Hazelnuts in Fine Cooking magazine would be one worth trying.

Asparagus celebrates the arrival of spring and is one of the first local offerings of produce at our farmers market. The season is fleeting so I try to use it as often as possible.  When you bring asparagus home it’s important to store it properly. I store it the same way I store fresh herbs. Stand the stalks upright in a wide mouth glass or jar with an inch or two of water in it. Be sure that all the cut ends are in the water. Cover loosely with a  clear plastic gallon storage bag. The green in this salad is arugula and the timing couldn’t be more perfect. The temperatures here this past week have been far from spring like. The heat made it feel like it was mid July rather than May. That meant it was time to pick the arugula while it is still in it’s prime. Days of warmer temperatures make arugula’s peppery flavor even hotter and causes the plant to bolt or go to seed.

Begin the recipe by making a simple vinaigrette. Rice vinegar, lemon juice, honey, extra virgin olive oil  and shallot complement and allow the flavors of the salad to shine through. The only change to the original recipe I made here was to use a plain rice vinegar rather than a seasoned one. Seasoned rice vinegar contains sugar, corn syrup, salt and MSG. I knew the honey would bring enough sweetness to the dressing, and I prefer not to add the extra salt and MSG.

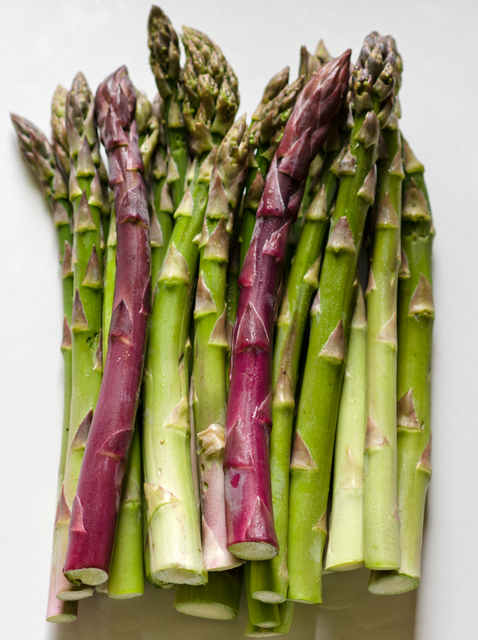
Remove the tips from the asparagus and set aside. The original recipe calls for thick asparagus but the vendor I buy asparagus from at the farmers market already has them bundled; purple, green, thick, thin, all in the same bunch. I found that medium stems are just as easy to peel as long as they are firm. A vegetable peeler does double duty in this recipe, use it to shave the asparagus stalks and the Gouda. Discard the first shaving of the asparagus, that will contain the more fibrous outer skin. The inner stalk is crisp and tender and is delicious raw. Marinade the tips and the shaved stalks for 15 minutes, long enough to blend the flavors and soften the asparagus a little.

How aged should your Gouda be for this salad? The complex caramel flavor of a five year Gouda is best on it’s own as a wine and cheese pairing. The Gouda at Wegmans that is aged for three months has a buttery flavor with a tangy finish and is just right for this recipe.  You may want to pop the Gouda in the freezer for about 10 minutes for easier shaving. The cheese will quickly come up to temperature.  The rich toasty flavor of hazelnuts is an excellent contrast to the Gouda.  If you are not a fan of hazelnuts, walnuts or pine nuts would be a good substitute.

Shaved Asparagus Salad with Aged Gouda and Hazelnuts

Serves 6

Ingredients

For the vinaigrette

  • 3T rice vinegar
  • 2T lemon juice
  • 2T extra virgin olive oil
  • 1T fragrant honey such as wild flower or orange blossom
  • 1T finely chopped shallot
  • Kosher salt and freshly ground black pepper to taste

DSC_2648a

DSC_2630a
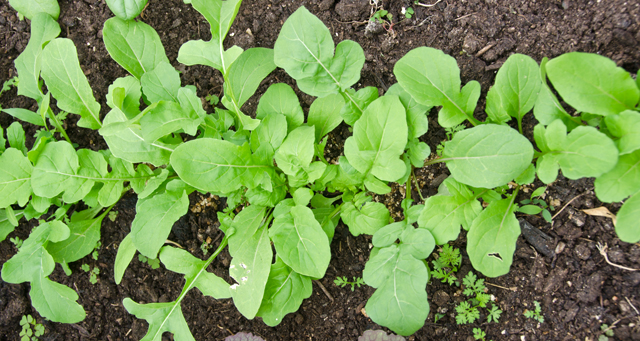
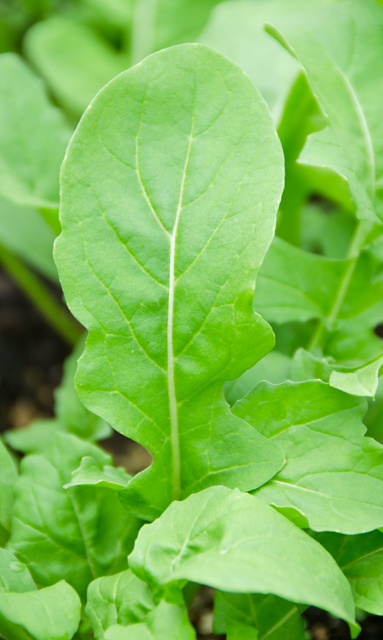
Our first crop of arugula this season.

DSC_2631a

For the asparagus

  • 3/4 lb. medium to thick asparagus
  • 3c baby arugula
  • ½c toasted and chopped hazelnuts
  • 2½oz. thinly shaved aged Gouda

Directions

  1. Make the vinaigrette. Whisk all the ingredients together, cover. Can be refrigerated up to 3 days.
  2. Make the salad. Remove the tips of the asparagus and put them in a large bowl. Using a vegetable peeler, shave a stalk, discarding the first shaving. If shaving the first side becomes awkward, turn stalk over and repeat. Add shavings to the tips. Repeat with the remaining stalks.
  3. Toss the asparagus with 1/3 cup of the vinaigrette and let sit 10 to 5 minutes, this helps the asparagus to soften a bit and blends the flavors.
  4. Add the arugula and hazelnuts and toss, adding more dressing as needed to lightly coat the arugula. Arrange on plates and top with the shaved cheese. Serve immediately.

DSC_2642a

December 12, 2014 Creamy Kale Gratin

DSC_0072aWhen it comes to Thanksgiving I’m “all about the sides”. Now don’t get me wrong, we had three turkeys for Thanksgiving, roasted, grilled and smoked, all cooked to perfection by my hubby. No fried turkey this year, we tried it one Thanksgiving and the combination of a deep fryer and a windy day on a wooden deck made for an interesting and potentially dangerous afternoon.

I love fall vegetables, a variety of interesting winter squashes, beautiful brassicas and hearty root vegetables all appear at our table. In previous years I would make myself crazy with last minute preparations for a half dozen complicated side dishes before we sat down to Thanksgiving dinner. Now I like to roast a combination of root vegetables tossed with olive oil, salt and freshly ground pepper and supplement them with some other interesting sides.

If I am at home in the early afternoon I will occasionally turn on “The Chew”, a television program that has been described as “The View” for foodies. The panel includes among others, star chef, restauranteur and cookbook author, Mario Batali, and it was Mario’s recipe this day that caught my attention, Creamy Kale Gratin.
We are not newcomers on the ever expanding kale bandwagon. Joe has been growing it in the fall for quite a few years, before it achieved it’s current celebrity status. This year’s crop was abundant. He grew both the Red Russian variety with it’s reddish purple stems and curly leaves and the Lacinato or dinosaur kale with crinkly long dark green leaves. What most people don’t know is that after the first frost, kale becomes sweeter and could easily convert the most die hard kale hater.

Today’s episode was titled potluck party, focusing on dishes you could bring to a Thanksgiving dinner and I’m sure this dish would be a hit at any potluck meal, Thanksgiving or otherwise. Mario compared this dish to steakhouse creamed spinach, only made with kale. Mario had the assistance of actress Katherine Heigl, best known for her Emmy winning role on Grey’s Anatomy.  Her job, along with promoting her new television series, was to chop some of the kale while Mario made the Bechamel  sauce. I saw that chef Michael Symon was at the ready, most likely in case the task was too much for her to handle. I noticed she did a fine job, Michael said with a bit of surprise that she did a good job and Mario commented on her “mad skills”. She explained that she played a cook in one of her movies (Life As We Know It; I checked)  and they taught her to properly chop. She refered to it as a hidden talent, one of those things you learn as an actor.

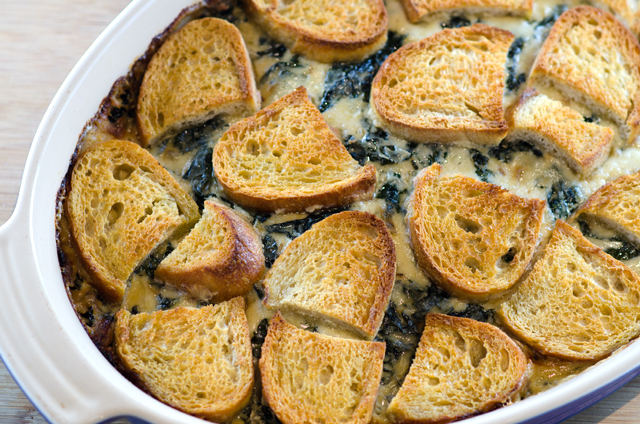
The kale leaves are roughly chopped to the stem. Twenty cups may seem like a large quantity but like all greens, they cook down quickly. Rather than putting the stems in the trash, Mario puts the stems in half full pickle jars and snacks on them the next day. The kale is cooked in a large sautepan until wilted, it will cook fully when it is combined with the cheese sauce and croutons. A layer of croutons is placed on the bottom of a large buttered gratin dish. The next layer is the kale combined with the very cheesy sauce seasoned with freshly ground nutmeg. The remaining croutons are layered on top.

Either variety of  kale is suitable for this recipe. From my observation of the video it looks like they used a curly variety, I used the darker Lacinato with long crinkly leaves. I prepped my dish the day before, stopping before sprinkling the croutons with olive oil, salt and pepper. I brought the dish to room temperature the next day, finished the final steps and baked the gratin. The last dilemma the Chew tackled was how do you eat the bread bit? Fork and knife is fine but if you want to pick it up like a crostini, that’s just fine too.   We all enjoyed the gratin, a delicious way to enjoy one of the final offerings of the fall garden.

DSC_0029_edited-1
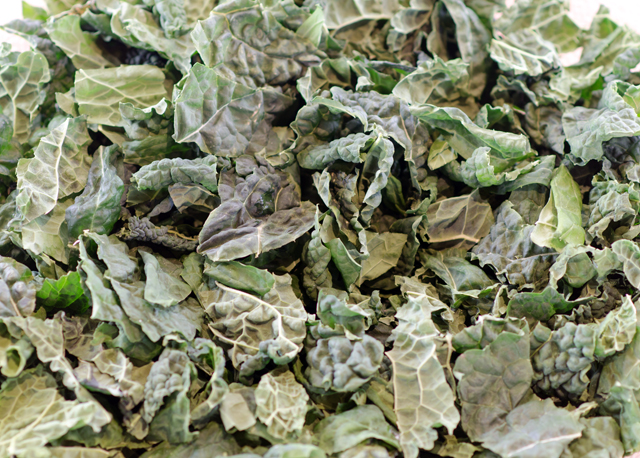
Lacinato kale in the fall garden.

Creamy Kale Gratin

Serves 10

Ingredients

  • 20 cups Russian or Lacinato kale, stems removed and roughly chopped
  • 1 loaf sourdough bread, cut into 1/2 inch slices
  • 6 T butter, and additional butter for the baking dish
  • 1/2c shallots, sliced
  • 1t red pepper flakes
  • 1/4c all purpose flour
  • 1 1/2c milk
  • 1 1/2c heavy cream
  • 8oz grated gruyere cheese
  • 8oz grated sharp white cheddar cheese
  • 1/2c crème fraiche
  • 1/2c Parmigiano Reggiano, freshly grated
  • 1/2t freshly grated nutmeg

Directions

  1. Preheat oven to 400°F
  2. Preheat a large sauté pan over medium high heat. Add 2 tablespoons butter and a drizzle of olive oil. When the butter has melted, add the shallots, salt, pepper and red pepper flakes. Sauté until translucent, about 4 minutes. Add the kale and season with salt and pepper. Sauté until wilted about 4 minutes. Set aside.
  3. Meanwhile, in a separate heavy bottomed pot (think Le Creuset) , melt 4 tablespoons butter. Add flour and stir to combine. Cook the flour mixture for 2 minutes, stirring continuously. Slowly pour in the milk and cream and whisk to combine. Continue to cook,, stirring continuously with a wooden spoon, until the béchamel sauce coats the back of a wooden spoon (about 5 minutes). Remove from the heat. Add in the cheeses and whisk until smooth. Season with freshly grated nutmeg, salt and pepper. Stir in the reserved kale mixture.
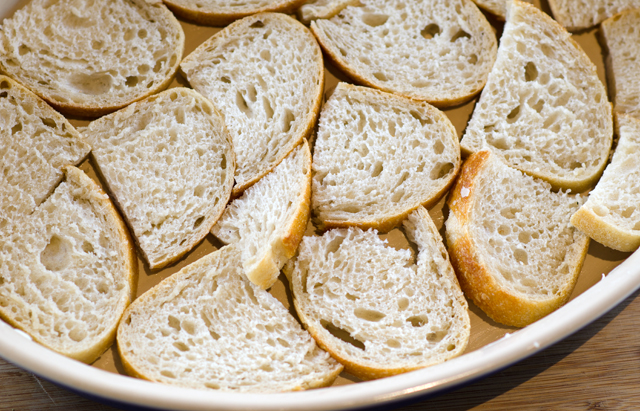
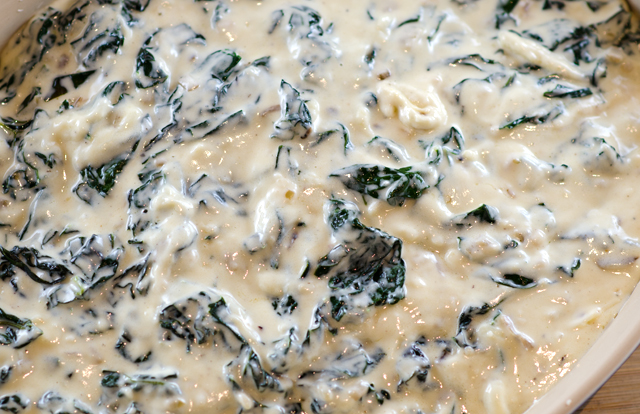
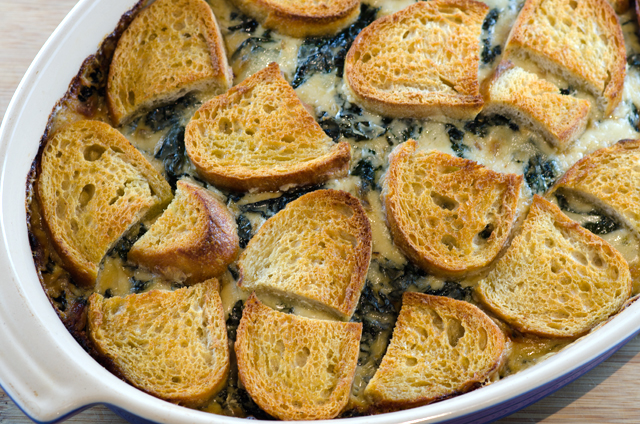
  4. Butter a large gratin baking dish. Lay an even layer of the read slices in the bottom of the gratin dish. Pour the creamy kale over the bread. Top the casserole with the remaining bread slices, placing them tightly together. Season the bread with salt and pepper and drizzle with olive oil. Place in the oven to bake for 30 minutes, until the topping is golden brown. Remove from the oven and allow to cool for 5 to 10 minutes before serving.
DSC_0035a
A rough chop is all you need for this dish.
DSC_0037a
A layer of bread slices are placed at the bottom of the dish.
DSC_0039_edited-1
Next, a layer of creamy, cheesy kale.
DSC_0062a
Then another layer of sourdough bread rounds.
DSC_0070a
Brush sourdough lightly with olive oil, sprinkle with salt and freshly ground pepper and bake. Delicious!


November 16, 2014 NuMex Suave Orange Peppers

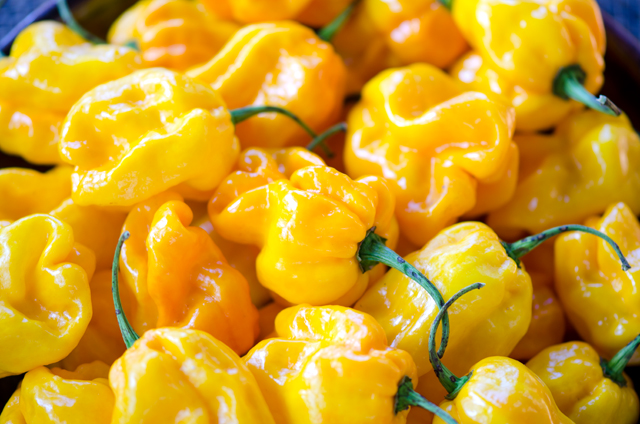
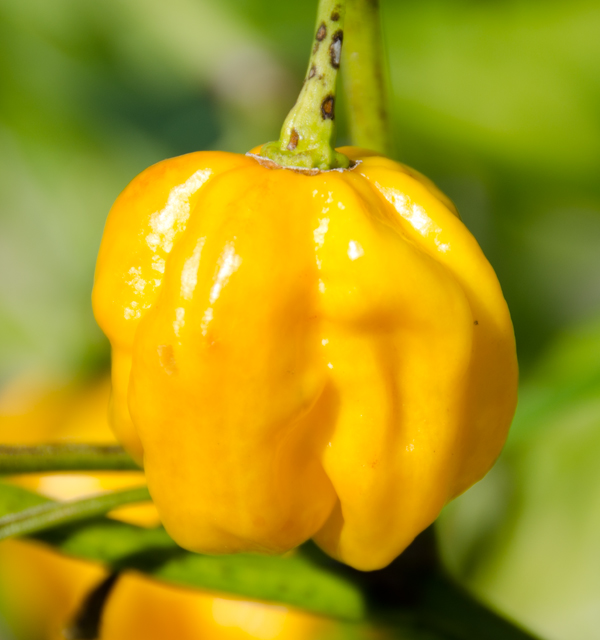
DSC_9452aA warm early fall, plant cages and a drip irrigation system all contributed to a bumper crop of sweet and hot peppers this season. One of the most interesting varieties we grew was the Nu Mex Suave Orange.  In appearance, this pepper closely resembles a habenaro. If you are not familiar with habenaros, they are one of the hottest varieties grown. Pepper heat is rated on the Scoville scale. For example, jalapenos are around 25,000 units, hot enough to satisfy most palates. The red Savina habenaro is 577,000 Scoville units, a bit too hot for all but the most dedicated pepperheads to enjoy.

So why was there a need to breed a mild habenaro? In addition to their heat, habenaros have a unique flavor that most people couldn’t taste because they couldn’t get past the scorching heat.

This is where the developers of new pepper breeds came in. With seed donated from a chile aficionado from Texas, and many seeding trials, the varieties, Nu Mex Suave Red and Orange pepper were originated.  Nu Mex is the name for products created at the agricultural experimentation station at New Mexico State University at Las Cruces and suave, meaning mellow or smooth, emphasizes the mild nature of the chile. Nu Mex Suaves look like a cross between a habenaro and a Scotch bonnet, another hot chili, used in Jamaican jerk sauces and salsa.

DSC_9455a

The fruits are about 2 inches in size, plump, wrinkled and bright orange yellow in color.  Suaves have a citrusy flavor with an orange lemony overtone. The heat is felt in the back of the mouth and throat as opposed to a jalapeno where you will experience the heat on your tongue and lips.

Their wrinkled appearance and thin waxy skin make them a poor candidate for roasting. I used them in salads and had my own experiment with some mini stuffed peppers. I also froze several bags  and look forward to the mild heat and citrusy flavor they will add to soups, stews and other dishes.

DSC_9483a

October 15, 2014 Baked Chiles Rellenos

DSC_9331aMy first exposure to Mexican cuisine didn’t occur until I was in college and that was limited to ketchupy salsa and salty tortilla chips. A few years later, I experienced the contrast of good Mexican food produced in a hole in the wall, mom and pop restaurant with a mediocre chain restaurant (remember Chi Chi’s anyone?)

As it was with other foreign cuisines I was unfamiliar with, I gained knowledge of the food by reading cookbooks. The cookbooks of Diana Kennedy and Rick Bayless introduced me to Mexican cuisine that varies from state to state, much the same as it does in the United States.  I bought a press and set out to make my own tortillas using a product I never heard of before, masa harina. My well-intentioned attempts were less than perfect for certain but I developed an appreciation for how it was done.

Then, there were the many varieties of peppers, used both fresh and dried I was unfamiliar with, their heat measured on the Scoville scale.  Some were hot, like the jalapeno and serrano, others very hot,  Habanero and Scotch bonnet, others with only mild heat, like poblanos and pasillas. The herbs, not readily available thirty years ago in markets like cilantro and Mexican oregano, were accessible to us as gardeners. There is always a small patch of cilantro in the garden in the warmer months, and we have a large Mexican oregano plant that Joe dries at the end of the season. We use hot peppers in their fresh, frozen and dried states. It has always surprised me that dried peppers, several years old are still as hot as a fresh one.
This year we have had a bumper crop of peppers, both sweet and hot. The peppers that are supposed to be hot, are hot. We learned last year, after a disappointing crop of rather mild jalapenos, the plants need to be stressed, as in, no special watering or fertilizing to produce hot peppers. I guess there is a life lesson there, but we can leave that for another time.
Another reason for the excellent pepper crop were the plant supports. When a plant starts producing peppers, it can weigh down the plant and many of the peppers touch the ground, making them susceptible to damage from pests and rotting. The delicate pepper plants stand tall with the supports and the peppers have room to grow.

We had the largest crop ever of poblano chiles. Poblanos have a dark green skin and left to ripen further on the vine will turn red. They are somewhat heart-shaped, 3-6 inches long and 2-3 inches wide. Which brings me to another pet peeve of mine. Our seed packet identified the pepper as an ancho and it was in actuality, a poblano. Poblano is the raw or cooked form of the pepper, it is only referred to as an ancho in its dried form. I had enough poblano peppers this season to dry some and to use some fresh.

Feeling ambitious, I decided to make my own interpretation of chiles rellenos. I will not lie to you and say this is an easy, quick, weeknight meal. The Mexican version of stuffed peppers, the translation of chiles rellenos, does take considerable time. The peppers were picked, sorted, with the wrinklier ones assigned to the drying pile. The chiles were roasted over the gas flame on the stove over the asador. Once charred on all sides I placed them in a large paper grocery bag to steam the peppers, loosening the skins even further and making them easier to peel. Remove the skin by running your hands down the chile, use a damp towel to remove any skin that won’t easily come off. Once peeled, the pepper is slit on the side so that you can remove the seed sac (Diana Kennedy refers to this as the placenta) and any large ribs.

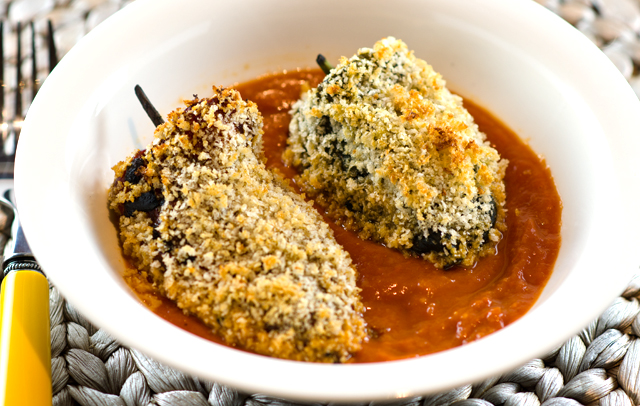
Now it’s time to fill your peppers. I used about 1/3 to 1/2 cup filling per pepper. Some recipes instruct you to close the peppers up with toothpicks but I found the peeled pepper skin adheres nicely to itself. Most recipes call for dipping the peppers, first in flour, then in an egg and flour batter and fried in hot oil. I wanted to attempt something a bit simpler, so I dipped the peppers in an egg wash and rolled them in panko crumbs and baked them. I served them with an easy sauce of roasted tomatoes, cooked with onion, chipotle chile and some of the adobo sauce that the chipotles are packed in.

DSC_9318a-copy
Poblano pepper on the vine.

Baked Chiles Rellenos

Make one dozen stuffed chiles

Ingredients

  • 12 Poblano peppers, fresh, red or green with smooth, not wrinkly sides if possible

Directions

  1. For a gas stove, arrange the chiles over a lit burner (you can fit two to three per burner). For an electric stove, arrange all chiles on a foil-lined rimmed baking sheet and position it 4 inches below a hot broiler. As each side blackens and blisters, turn the chiles with tongs until they’re blistered all over.
  2. Immediately put the chiles in a large bowl, cover, and let steam for 15 minutes. Remove the skin with your fingers or a paper towel. (It’s OK if you can’t remove all of it.)
  3. Slit the chiles lengthwise, starting about 1/2 inch from the stem and ending about 1/2 inch from the point. Remove the seed core, being careful not to damage the stem.

Recipe for the filling and finishing the chiles

Ingredients

  • 1/2 c low-fat or regular ricotta cheese
  • ¼ c crumbled feta
  • ½ c shredded jack or cheddar cheese
  • ¾ c well-drained chopped spinach or chard (I used chard)
  • Kosher salt and freshly ground pepper
  • 1 large egg
  • 1 c panko crumbs (more or less)

Directions for the filling and finishing the chiles

  1. Preheat oven to 425°F. Combine the first four ingredients in a medium bowl. Mix well and season to taste with kosher salt and freshly ground pepper.
  2. Spoon about 1/2 cup of the filling into each chile and then press the cut edges together. (If the chiles tear, press the torn edges together.) Arrange the chiles on a tray or baking sheet.
  3. Whisk egg with 1/2 cup water in bowl. Spread panko crumbs on a small plate.
  4. Dip chiles in egg wash. Coat with breadcrumbs. Place on baking sheet, and bake 20 to 25 minutes, or until golden.

Ingredients for the sauce

  • ½ c finely chopped onion
  • 2 tsp. chili powder
  • 1 tsp. ground cumin
  • 1 28-oz. can whole tomatoes
  • 1 canned chipotle chile in adobo sauce, drained

Directions for sauce

  1.  Heat oil in saucepan over medium heat. Add onion, chili powder, and cumin, and cook 4 to 5 minutes, or until onion is soft and spices are fragrant.
  2. Add tomatoes, and simmer 10 minutes, breaking up tomatoes with spatula or wooden spoon. Transfer to blender, add chipotle chile, and blend until sauce is smooth.
  3. Serve chiles rellenos in sauce.

DSC_9259a

DSC_9255a
I like to roast pepper on an asador, an open grated grill over the gas flame.

DSC_9325a


September 25, 2014 Eggplant Involtini

DSC_9067aWith lots of caponata, grilled eggplant, ratatouille, and a double batch of eggplant parmesan under my belt, I was looking for another way to enjoy the bounty of our eggplants this season. It came in the July/August issue of Cooks Illustrated magazine, eggplant involtini.

After all these years (30+) I still look forward pouring over the latest issues of the cooking magazines I subscribe to. Since the magazines are a little in advance of what is ready to harvest from the garden, I put a yellow sticky note on the seasonal recipes I would like to try. Eggplant involtini was in the July/August issue that arrived in June when our eggplants didn’t even have their first flowers, so I have been waiting several months to try this recipe.

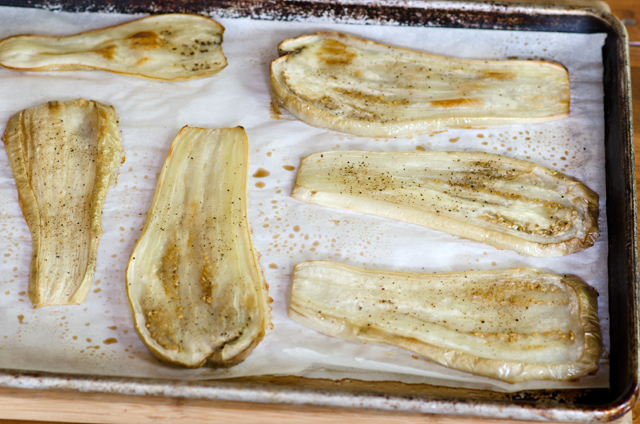
Involtini are neat little bundles of stuffed meat, fish or vegetables. Fillings can be as varied as your imagination. Eggplant works especially well as a wrapper for involtini. Use your largest, broadest eggplants to make the planks. Lop off the stem and hold the eggplant upright. With a very sharp knife, make approximately 1/2″ thick planks. For the first and last pieces you will need to trim off the rounded outer edge. I found that a vegetable peeler handled the problem nicely.

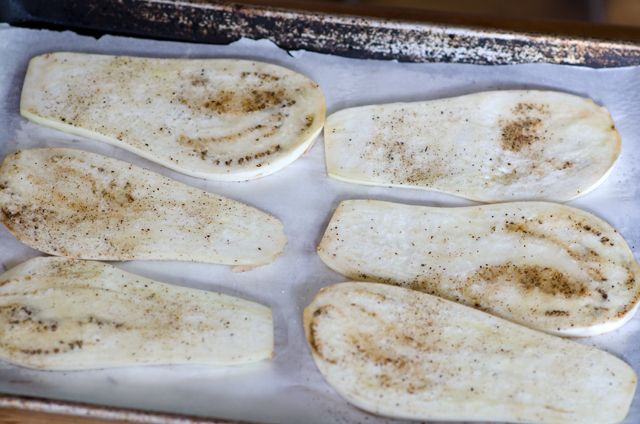
Instead of frying, which is called for in many involtini recipes, the slices are brushed lightly on both sides with olive oil, and seasoned with salt and pepper and baked. This makes the slices pliable enough to roll without falling apart.

Once the slices have cooled a bit, fill with the fatter edge closest to you and roll up. Ricotta, though it doesn’t have much flavor of it’s own is a good binder for the more flavorful ingredients, pecorino romano and basil. The addition of fresh lemon juice brightens the flavors. A generous tablespoon of filling is enough for each slice. The original recipe called for some bread crumbs in the filling to bind it a little, I didn’t include this step and thought my filling held up nicely.

While you are cooking the eggplant there’s time to make a very basic sauce. Canned whole tomatoes, garlic, oregano, kosher salt and pepper are all you need. I always use my whole roasted tomatoes from the garden that I freeze for months without tomatoes. We had a bumper crop this year so I will be making a lot of chili, lasagna, stuffed peppers over the winter months. As for the canned varieties, in a taste test done by Cooks Illustrated, Muir Glen Organic Whole Tomatoes was the winner. Muir Glen is about a dollar more per can than the more familiar runner up, Hunts.

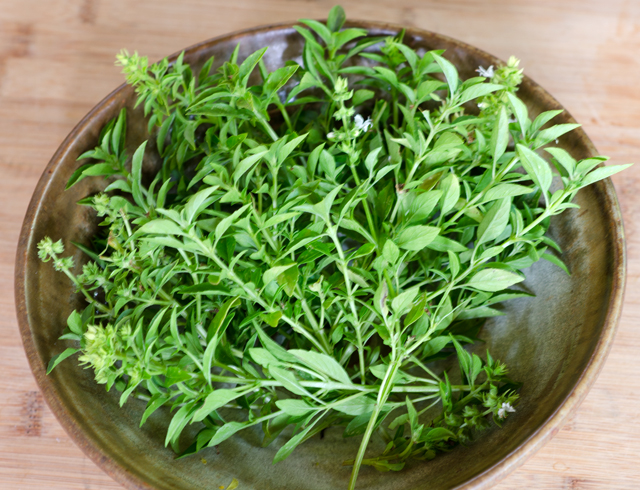
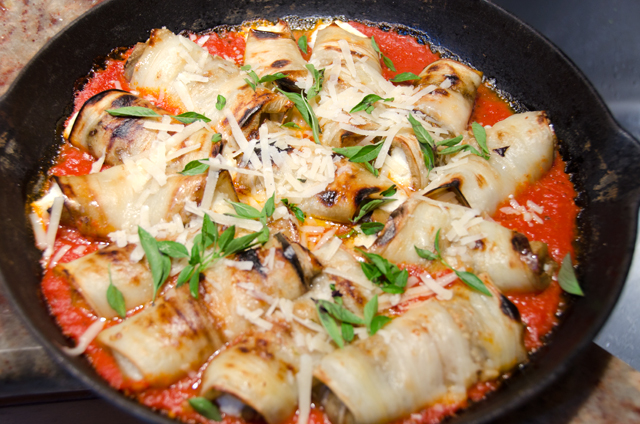
The involtini rolls, are added to the thickened sauce and brought to a simmer. Once the sauce is warmed, additional cheese is sprinkled on top. The rolls are browned and the cheese is melted in the broiler. Finish off with a sprinkle of basil, mini basil leaves worked well here.

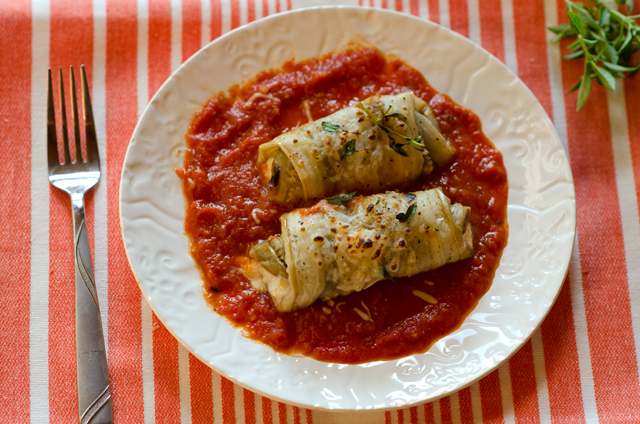
Not the quickest or easiest preparation, but both the rolls and the sauce can be made in advance and assembled right before serving. An impressive dish good enough for company.

Eggplant Involtini

Serves 4 to 6

Ingredients

  • 2 large eggplants, shorter wider eggplants are best (1 1/2 pounds each), if skin is thick, peel, I did not peel mine
  • 6T olive oil
  • Kosher salt and pepper
  • 2 cloves garlic, finely minced
  • 1/4t dried oregano
  • Pinch red pepper flakes
  • 1 28oz canned whole peeled tomatoes drained with juice reserved, chopped coarse-I used my garden roasted tomatoes
  • 1c  whole-milk or part skim ricotta cheese
  • 3/4c hard Italian grating cheese like Gran Padano or Pecorino Romano
  • 1/4c plus 1 tablespoon chopped fresh basil or torn mini basil
  • 1T fresh lemon juice

Directions

  1. Slice each eggplant lengthwise into 1/2-inch-thick planks (you should have 12 planks). Trim rounded surface from each end piece so it lies flat. I found that using a vegetable peeler made this easier. Adjust 1 oven rack to lower-middle position and second rack 8 inches from broiler element. Heat oven to 375°F.
  2. Line 2 rimmed baking sheets with parchment paper and spray generously with vegetable oil spray.
  3. Arrange eggplant slices in single layer on prepared sheets. Lightly brush 1 side of eggplant slices with oil and sprinkle with kosher salt and pepper. Turn slices over and repeat brushing and seasoning.
  4. Bake until tender and lightly browned, 30 to 35 minutes, switching and rotating sheets halfway through baking. This process took about 10 minutes less in my convection oven.  Let cool for 5 minutes. Using thin spatula, flip each slice over. Heat broiler.
  5. While the eggplant is cooking, heat remaining 1 tablespoon oil in 12-inch broiler-safe skillet, over medium-low heat until just shimmering. Add garlic, oregano, pepper flakes, and 1/2 teaspoon salt and cook, stirring occasionally, until fragrant, about 30 seconds.
  6. Stir in tomatoes and their juice. Increase heat to high and bring to simmer. Reduce heat to medium-low and simmer until thickened, about 15 minutes. Cover and set aside.
  7. Stir together ricotta, 1/2 cup cheese, 1/4 cup basil, lemon juice, and 1/2 teaspoon salt in medium bowl.
  8. With widest ends of eggplant slices facing you, evenly distribute ricotta mixture on bottom third of each slice. Gently roll up each eggplant slice and place seam side down in tomato sauce.
  9. Bring sauce to simmer over medium heat. Simmer for 5 minutes. Transfer skillet to oven and broil until eggplant is well browned and cheese is heated through, 5 to 10 minutes. Sprinkle with remaining 1/4 cup Pecorino and let stand for 5 minutes. Sprinkle with remaining 1 tablespoon basil and serve.
DSC_8719a
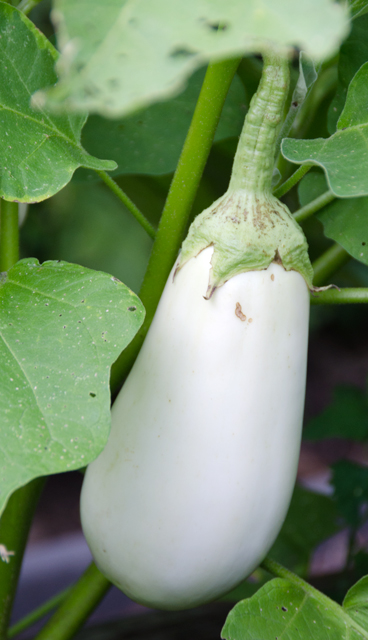
The variety I used for this dish was Clara, a pure white Italian style eggplant.
DSC_9051a
Eggplant slices are brushed with olive oil and seasoned lightly with salt and pepper.
DSC_9054a
After baking the slices are soft enough to roll but don’t fall apart.
DSC_9055a
I used roughly torn mini basil in my filling.
DSC_9059a
The very simple filling made of ricotta cheese, Pecorino Romano, fresh lemon juice and mini basil.
DSC_9060a
The eggplant slices are easy to roll up. Place them seam side down in the warmed sauce.

DSC_8993aDSC_9079a

Sept 13, 2014 Tomato, Cucumber and Watermelon Salad

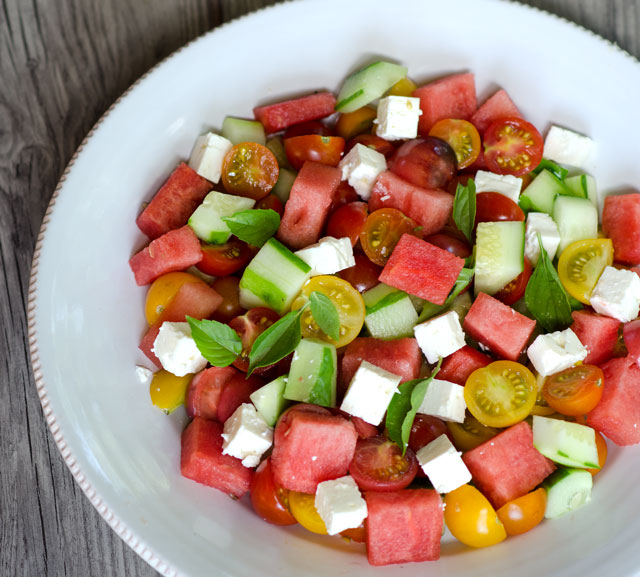
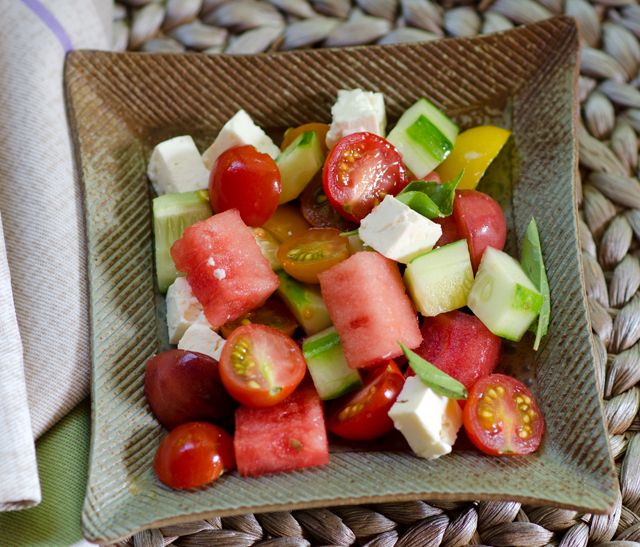
DSC_8707aCool, crisp, quick and delicious, what higher praise could I bestow on a summertime salad? This best-of-summer salad brings together sweet cherry tomatoes, crunchy cucumbers, succulent watermelon and creamy salty feta.

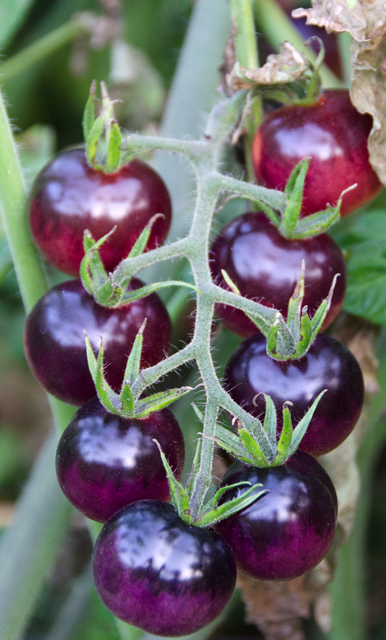
Joe has grown more tomatoes than ever and the varieties are amazing. Indigo Blue Berries, Black Cherry, Pink Bumble Bee, Sungold, to name a few, as beautiful to behold as they are sweet and juicy to devour.

Indigo Blue Berries are a new variety this year. Like the blueberry, Indigo Blue Berry tomatoes contain high levels of anthocyanin, a naturally occuring antioxidant. Pink Bumble Bee tomatoes are a round pink cherry tomato striped with yellow and orange.  The Black Cherry tomato is a deep red with a blackish hue. Sungolds are an apricot orange in color with a sweet tropical flavor.
It’s best to cut the tomatoes in half for easier eating. My serrated edge Cutco knife always gives me a neat cut through the tomato skin. I peel most of the skin from the cucumber and leave a strip of skin on for color. Scoop out the seeds if they are too large.

Another member of the cucurbit family, watermelon, brings a refreshing sweetness to the salad. The watermelon you will most likely find anywhere these days will be seedless.  Over the past several years it has become increasingly difficult to find seeded watermelons. Only 10% of watermelons grown on farms in 2011 were of the seeded variety, in 2003, almost 37% were.

Seedless watermelons are not genetically modified but are “the watermelon version of the mule.” They are a sterile hybrid achieved by crossing the pollen of the normal diploid (2 sets of chromosomes) watermelon with a female flower that is a tetraploid (4 sets of chromosomes). The genetic change occurs from the use of colchicine, a chemical derived from the fall blooming crocus that impacts chromosomes and has been used for years to treat and cure gout. The resulting seeds from these two plants are triploids (3 sets of chromosomes) and will produce sterile seedless watermelons. The white seeds, also known as “pips”  you may find in your seedless watermelons are hollow seed coats that didn’t mature.

Seedless or seeded, which type tastes better? Is it just nostalgia, do we fear the end of the days of watermelon seed spitting contests? If you still want seeds in your watermelon you may find those varieties at your farmers market or you may just need to grow your own.

As someone who always likes to sprinkle a little salt on her watermelon, feta just seems like a natural addition to this flavor combination. Feta brings both a creamy texture and a contrasting saltiness that brings out the flavors of the other elements of this salad. The simplest of dressings and a scattering of fresh basil and you have a great summer salad, colorful and easy to put together, a refreshing addition to any barbecue or cookout.

DSC_8735a
Pink Bumble Bee is a new addition to our tomato selection this year.
DSC_8728a
The Indigo Blue Berry is definitely blue, when ripe it develops a reddish hue.

Tomato Cucumber and Watermelon Salad

Serves four

Ingredients

  • 2c assorted cherry tomatoes, halved
  • 1 1/2c medium diced seedless watermelon
  • 1 large cucumber, peeled, quartered, seeded if necessary, cut into 3/4″ pieces
  • 3/4c feta cheese, cut into half inch cubes
  • 1/4c fresh mini basil leaves or large leaves torn into small pieces
  • 1T extra virgin olive oil
  • 1T lemon juice
  • Kosher salt and freshly ground pepper

Directions

  1. Put the cherry tomatoes, watermelon, cucumber, feta and basil in a large bowl.
  2. In a small bowl whisk together the olive oil, lemon juice, 1/4t salt and a 1/4t fresh ground pepper. Drizzle the dressing over the salad and toss gently to coat.

DSC_8704aDSC_8710a

September 10, 2014 Grilled Asian Eggplant Salad

DSC_8668a

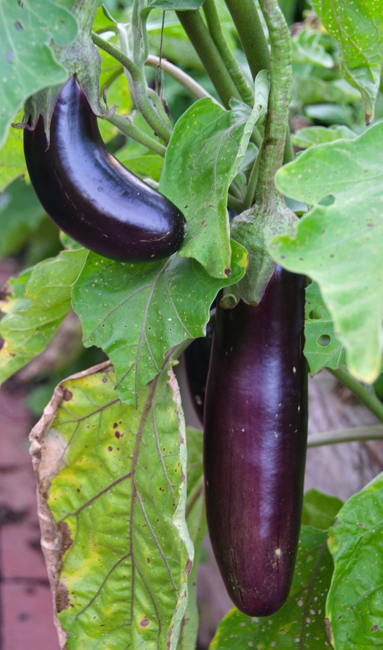
It’s a great time of year to try out some new eggplant recipes. Whether from the farmers market, your local CSA or your own garden, freshly harvested eggplants are at their best. Our garden has produced an amazing array of eggplants this summer. Bright fuchsia Dancer, slender dark violet Orient Express, pure white Clara, beautifully variegated Nubia, all the varieties we have harvested this year have thin skin and minimal seeds.
What we most often consider to be Asian eggplants are the long slim tapered varieties.   Actually Asian eggplants, whether Chinese, Japanese, Thai or Indian can be round or pear shaped, pure white or lime green and as small as an egg as well as the dark purple we are most familiar with.
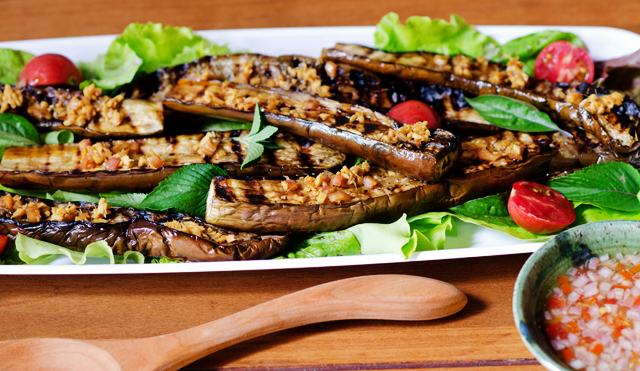
In this Thai-style recipe for a yam or salad, eggplant slices are brushed with oil and grilled. If the weather is inclement or you just don’t have the time to fire up the grill they can be cooked indoors on a ridged grill pan.

Save the seasoning until after the grilling the eggplant. It’s then the creamy flesh will soak up the flavor of the ginger and soy, transforming the once raw bitter slices to something delicious.
Though not necessarily typical of this type of salad, I served the grilled eggplant slices on salad greens. Our lettuces have made their late summer return to the garden and I tossed some assorted greens with a few sweet cherry tomatoes, basil and mint. I used the small spicy leaves of Thai basil and Vietnamese mint that doesn’t overpower the salad. An Asian style vinaigrette combining the traditional combination of hot, sour salty and sweet dresses the greens and enhances the flavor of the grilled eggplant.

DSC_8855a
Beautiful dark purple Orient Express eggplant.

Grilled Asian Eggplant Salad

Serves four

Ingredients

  • 1/4 c freshly squeezed lime juice
  • 1/4 c peanut or canola oil
  • 3 T finely minced shallot
  • 1 1/2 T fish sauce
  • 2 t granulated sugar
  • 1 to 2 Thai bird chiles, minced, or 1-1/2 to 2 serrano chiles, seeded, minced
  • Kosher salt and freshly ground black pepper
  • 2 T minced fresh ginger
  • 1-1/2 T soy sauce
  • 1 1/2 lb. long, slender Asian eggplants, trimmed and halved lengthwise
  • 4-5 c baby lettuce leaves
  • 10 to 12 oz. cherry or grape tomatoes, halved (about 2 cups)
  • 1 c  packed fresh basil leaves, Thai, if you have it
  • 1/4 c packed fresh mint leaves, I used Vietnamese mint (very mild)

Directions

  1. Prepare a medium-high gas or charcoal grill fire.  Alternately heat a grill pan over medium high heat.
  2. In a small bowl, whisk 3 Tbs. of the oil with the lime juice, 2 Tbs. of the shallot, the fish sauce, 1 tsp. of the sugar, and the chiles. Season to taste with salt and pepper.
  3. In another small bowl, combine 2 tsp. water with the ginger, soy sauce, the remaining 1 Tbs. shallot, and 1 tsp. sugar.
  4. Arrange the eggplant halves on a rimmed baking sheet, brush both sides with the remaining 1 Tbs. oil, and sprinkle with salt and pepper. Grill the eggplant, covered, until tender, 3 to 5 minutes per side. Alternately grill the eggplant in a grill pan, 3-5 minutes on each side until tender.
  5. Combine the lettuces, tomatoes, basil, and mint in a large bowl. Re whisk the lime dressing and toss just enough into the salad to lightly coat the greens. Season the salad to taste with salt and pepper. Transfer the salad to a platter and arrange the eggplant over the salad. Spoon the ginger mixture over the eggplant, and serve immediately.
DSC_8672a

August 23, 2014 Chilled Buttermilk Cucumber Soup

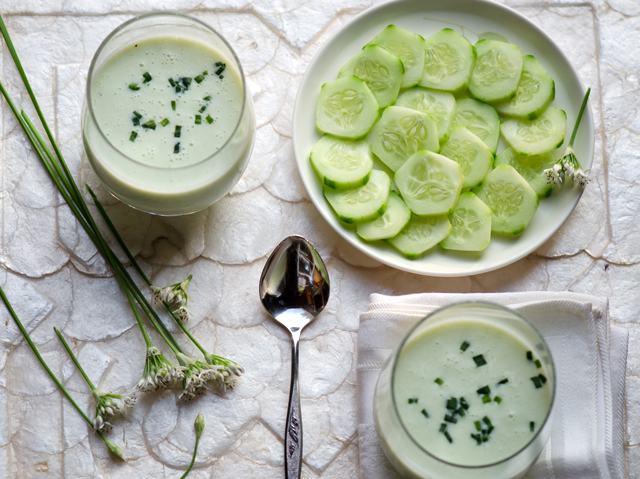
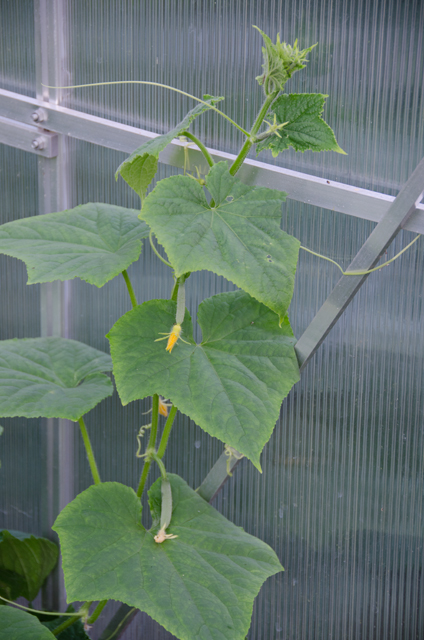
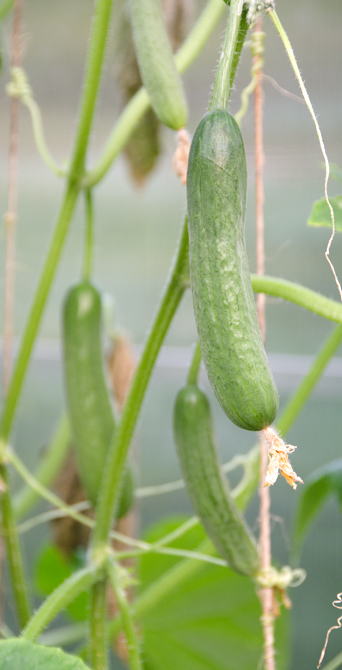
DSC_8646aI can’t remember a year when we have had such a prolific crop of cucumbers! We are growing two varieties this year, Bush Champion and Baby Persian. The Bush Champion has a compact growing habit. Ours are in the greenhouse area of the garden but are also suitable for patio and container gardening. The Baby Persian variety is growing up a trellis in the greenhouse. The term “baby” refers to the size when it is best to pick them, 4 to 6 inches. Of course, like many cucumbers, they will continue to grow larger than this. Hence the need to be diligent in picking to get them at their best.

Along with tzatziki sauce, I have been making lots of cold cucumber soup. Buttermilk cucumber soup is crisp and cool from the cucumbers, celery and shallots bring depth of flavor and buttermilk and sour cream provide a refreshing tang.  This no cook soup comes together in minutes, the only appliance you need is a blender.

Simply add rough chopped cucumber, celery, shallots, olive oil, buttermilk and sour cream to the bowl and blend until smooth. Force the soup through a fine strainer for the smoothest texture.  Chill for at least an hour, longer if possible to blend the flavors. Add a little crabmeat or cooked shrimp for a more substantial dish. A simple garnish of chopped garlic chives and you have a cool and delicious treat for summer dining.

DSC_8635a

Chilled Buttermilk Cucumber Soup

Ingredients

  • 1 1/2 ­lb. cucumbers, peeled, seeded, and cut into chunks
  • 2 medium celery stalks, roughly chopped
  • 1 small shallot, coarsely chopped
  • 2T extra-virgin olive oil
  • Kosher salt and freshly ground pepper
  • 1/2 c sour cream (low fat is fine)
  • 1/2 ­c buttermilk
  • Freshly ground black pepper
  • Chopped chives, to garnish

Directions

  1. In a blender, purée the cucumber, celery, shallots, olive oil, and 1 tsp. kosher salt until smooth.
  2. Strain through a medium-mesh sieve into a large bowl, pressing on the solids to extract as much liquid as possible.
  3. Whisk in the sour cream and buttermilk and season to taste with kosher salt and freshly ground black pepper. Refrigerate until chilled, at least 1 hour. Serve drizzled with olive oil and garnished with chives.
Make Ahead Tips

You can make this soup up to 2 days ahead.

DSC_8657a
Bush Champion cucumbers grow close to the ground. That little blossom will grow into a cuke soon!
DSC_8655a
Tiny Persian cucumbers growing up the trellis.
DSC_8656a
Almost the right size for picking.

DSC_8643a

August 17, 2014 Tomato Gazpacho

DSC_8572aSummertime in a bowl, liquid salad, just two of the descriptive names for that summer favorite, gazpacho. Our tomatoes are finally starting to ripen along with a healthy crop of cucumbers. I think I read about fifty recipes and finally settled on my own combination of vegetables. I used some purchased tomato juice, but as the tomatoes from the garden become more plentiful, I will use them to make my own juice.
I skipped the traditional stale bread and went very easy on the olive oil. I did use my best Spanish sherry vinegar for this refreshing soup that originated in the Andalusian province of southern Spain. I didn’t blanch, peel or seed any of the vegetables. I did hand chop them for uniformity of size and blended just a little bit of them to enhance the tomato juice base. Flavorful vine ripened tomatoes are key to this recipe. It’s also a good time to use your not so perfect specimens that won’t make it in your tomato salad. The peppers in my gazpacho were purchased, but it won’t be long before I will be picking them from the garden. A jalapeno pepper is nice also to add a little extra heat.
Make gazpacho a day ahead if possible. The flavor only gets better from sitting overnight in the fridge.
Full of sun ripened flavor and packed with nutrients, this low fat chilled vegetable soup is the perfect refreshment for hot summer days.

Tomato Gazpacho

Serves six

Ingredients

  • 3 1/2c plum tomatoes, cored and cut into 1/4 inch dice
  • 1/2c finely chopped red onion, soaked in ice water for 15 minutes and drained
  • 2c cucumbers, peeled, seeded and cut into 1/4 inch dice
  • 1 1/2c bell pepper cut into 1/4 inch dice
  • 1 small clove of garlic, chopped finely
  • 2c tomato juice
  • 1/4c sherry vinegar
  • 2T flavorful extra virgin olive oil
  • 3-4 dashes of green Tabasco sauce
  • 1T  Worcestershire sauce
  • Kosher salt and fresh ground pepper

Directions

  1. Place tomatoes, onion, cucumber, pepper and garlic in a bowl
  2. Add the tomato juice, vinegar, olive oil, Tabasco and Worcestertshire sauce. Season with kosher salt and freshly ground pepper.
  3. Transfer two cups of the mixture to a blender or food processor and pulse the machine on and off to coarsely puree the contents. Return the pureed mixture to the bowl and stir to combine. Refrigerate for at least six hours or preferably overnight before serving.
DSC_8532a
Vine ripened tomatoes either from the farmers market or your own garden make this a special treat.
DSC_8536a
Ingredients, chopped and ready to go.

DSC_8564a