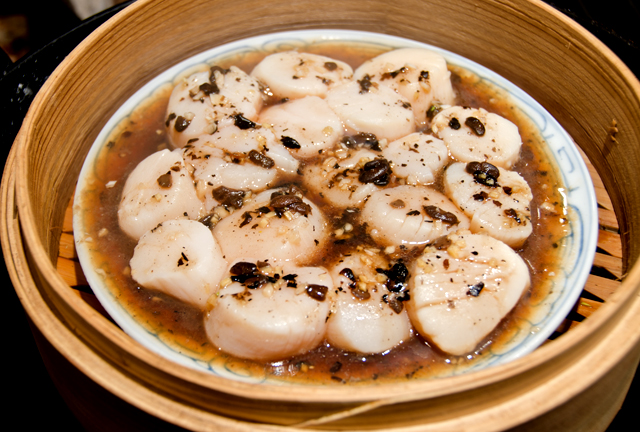
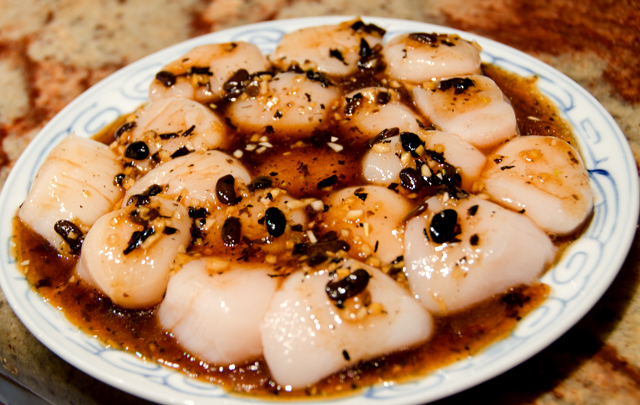
March 5, 2013 Steamed Scallops with Black Beans

DSC_8527a

Chinese black beans are not to be confused with the black turtle beans used in Central and South American cooking. The Chinese black bean also known as douchi, is actually a black soy bean that has been cooked, fermented and salted. As a condiment they predate soy sauce and miso and it is believed they have been used as far back as the Han dynasty in the second century.

Once popular throughout China, they are now most associated with Cantonese cooking. The flavor of Chinese black beans has been described as sharp, salty, pungent and winy. They can be found in most Asian markets in small plastic bags, often flavored with orange peel and ginger. They have a soft pliable texture and resemble dried currants. They can stored at room temperature well wrapped in a cabinet away from light.

The cookbook authors I consulted were divided on to rinse or not to rinse the beans before using them. If you don’t rinse you must allow for their extreme saltiness and adjust the seasonings in your recipe accordingly. I choose to rinse them, especially if other ingredients in the recipe are going to bring their own saltiness. They are a condiment, so use sparingly.

In this recipe the sweet clean flavor of the scallops contrast nicely with the black beans. Always look for dry scallops, those that have not been treated with a solution that whitens them and causes them retain more water. Most scallops come with the tough “catch” muscle still attached. The scallop uses this muscle to keep it’s shell closed for long periods of time. It’s not pleasant to eat and removing it is very easy, just gently peel it off. Serve this dish with rice or noodles to soak up the juices.

Steamed Scallops with Black Beans

adapted from The Chinese Kitchen by Eileen Yin-Fei Lo

Serves 4-6

Ingredients

  • 1T fermented black beans, rinsed and drained
  • 2t minced fresh ginger
  • 2T oyster sauce
  • 2t soy sauce
  • 1T Chinese rice wine vinegar
  • 2t sugar
  • 1t Kosher salt
  • 2t peanut oil
  • Pinch freshly ground white pepper
  • 1lb large fresh sea scallops, excess liquid drained

Directions

  1. Mix all the ingredients except the scallops in a large bowl
  2. Remove the adductor muscle from the scallops. Place the scallops on a steam proof plate. Pour the steaming ingredients over the scallops and marinate for 30 minutes.
  3. Bring about a quart of water to a boil in a wok. Place the steamer in the wok so that it sits above but never touching the water.
  4. Place the dish in the steamer, cover and steam for about 5 minutes or until the scallops are white and opaque. Serve in the steam proof dish.
 DSC_8515a

February 25, 2013 Yu Sheng

 DSC_8524 copy

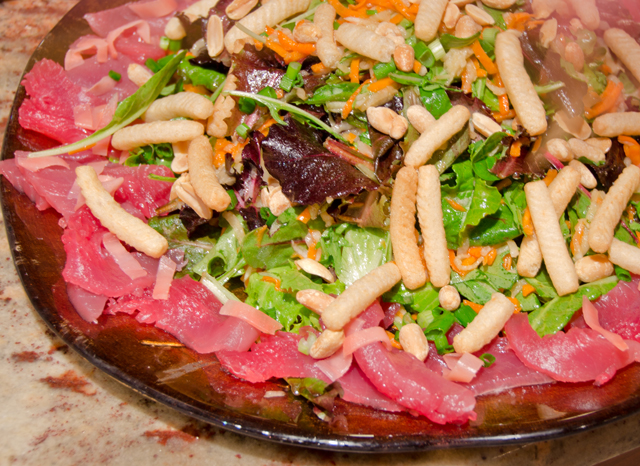
Yu sheng is definitely not a traditional Chinese New Year dish though similar salad recipes have always existed in China. It is a contemporary dish unique to the Chinese communities of both Singapore and Malaysia. Though debated by some, the most popular and generally accepted story of the salad’s origins came from the 1960’s at the upscale Cathay Hotel in Singapore. Four chefs, referred to as the “heavenly kings” were brought together years earlier by a Hong Kong master chef with the intention of introducing Cantonese cuisine to the world. At the passing of the master chef, the heavenly four went their separate ways, each commanding his own restaurant. The chefs still got together on a regular basis to exchange ideas and create new dishes, and yu sheng was the most memorable of these creations.
In English, yu sheng literally means “raw fish” but it is a homophone for another Chinese word that means abundance. Yu sheng is traditionally served on the seventh day of the new year celebration, when man was created,  also referred to as “everyone’s birthday”. It is said that eating yu sheng will bring diners good fortune and prosperity in the new year.  The salad should have at least seven ingredients. Each ingredients has it’s own symbolism.

The ingredients we chose were

lettuce:  symbolizing harmony and wealth

carrots: eminence 

daikon radish:  success

pickled ginger: good luck

raw fish: abundance

peanuts: longevity

shrimp chips: resembling gold bars and the wealth they bring.

Fish choices for yu sheng on the many menus and recipes I consulted included salmon, mackerel and abalone but our fish of choice has always been pristine sushi grade tuna. Other ingredients that might be found in yu sheng include dyed sweet potato, papaya, jellyfish, pomelo and candied fruit. When the salad is tossed the diners call out “lo hei” which means to mix it up but it also sounds like a word that means to prosper more and more. The higher the toss, the better the luck in the coming year.

Yu Sheng

Serves 2-4

Ingredients

Salad

  • 5-6 cups of mesclun lettuce
  • 1/4 lb sushi grade tuna, sliced thinly
  • 2 carrots, shredded
  • 1 3″ section of daikon radish, shredded, squeezed to remove excess liquid
  • 1/4c red pickled ginger cut into thin strips
  • 1/2c roasted, unsalted peanuts, chopped coarsely
  • Shrimp chips

Directions

  1. Place lettuce in a serving bowl and top with shredded carrot and daikon
  2. Top with pickled ginger, tuna and peanuts. Place shrimp chips around the outer rim of the plate.

Dressing

  • Juice of two limes (about 1/4c)
  • 1/3c plum sauce, chopped if too chunky
  • 2T Toasted sesame oil
  • 3T Canola oil
  • 1/4t five-spice powder

Directions

  1. Whisk salad dressing ingredients together in a small bowl. Taste and correct seasoning as needed.
  2. Pour dressing over salad and toss high for a happy and abundant new year. Lo hei!

February 10, 2013 Spicy Sichuan Noodles

DSC_8417a

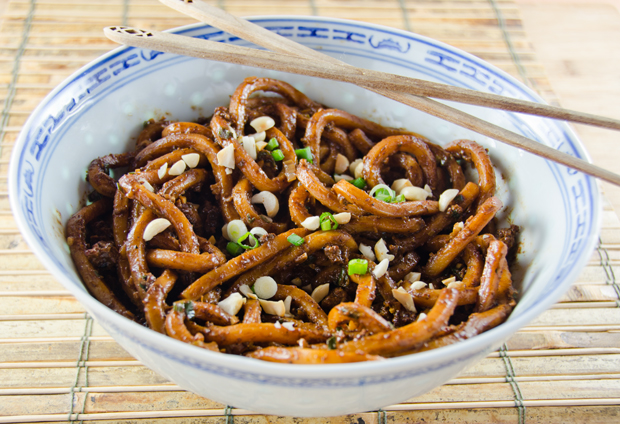
Searching out new and unusual ingredients has always played an important part in my “joy of cooking”.  In the olden days (the eighties) and  b.i. (before Internet), the hunt would involve trips to ethnic markets, phone calls to vendors and an ever-growing stack of mail order catalogs to aid in my search.  Gardening has always given us the ability to grow fresh herbs and vegetables that were not readily available in our markets. There was one elusive spice that I encountered in Chinese cookbooks that wasn’t just hard to find, but unavailable for many years in the United States, Sichuan peppercorns. 

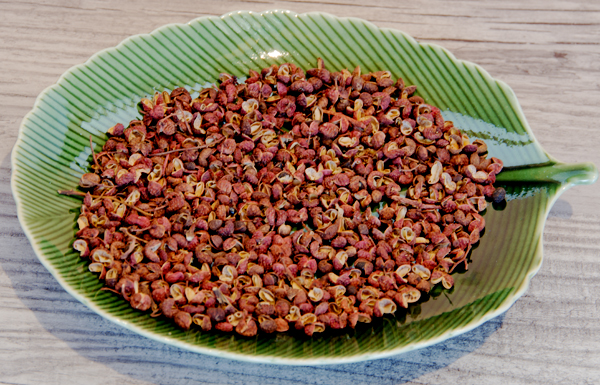
Banned in 1968, Sichuan peppercorns were safe for human consumption. The real concern here was citrus canker, a disease the imported spice could carry and infect the foliage of citrus plants in the United States. The ban was lifted in 2005 when it was discovered that heating the peppercorns to 170 degrees, killed the bacteria that harmed plants.

Sichuan peppercorns are not true peppercorns or chilies but tiny crimson berries that come from the prickly ash trees that grow in the mountainous regions of Sichuan province. The first taste of a Sichuan peppercorn on the tongue starts with the impression of a mentholy flavor with some lemony overtones followed by a numbing tingle in the mouth.  According to Harold McGee, author of “On Food and Cooking”, Sichuan peppercorns can produce the same effect as carbonated drinks on the lips and tongue. Combined with chili peppers or ginger, they create a taste combination unique to Sichuan cooking, ” ma la ” or the spicy and tingly sensation left in the mouth after eating a dish with this combination.  Ma means both anesthetic and “pins and needles” in Chinese. La, of course, is the spicy part of the equation, provided by chills and ginger.

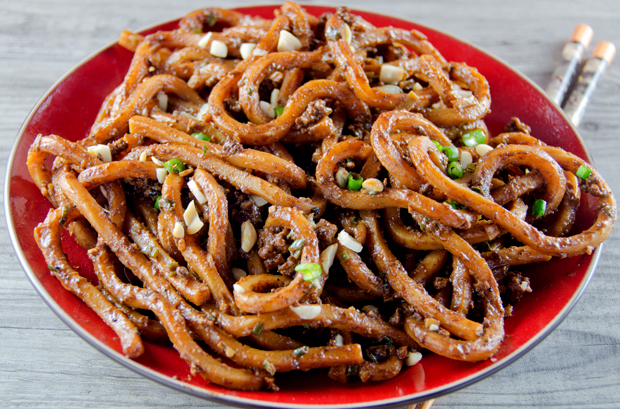
Spicy Sichuan Noodles showcases the ma la combination very nicely. Using the original recipe as a starting point, we recreated a dish as best memory would allow. It was one of many dishes that we shared with friends in an excellent Sichuan restaurant hidden away in a New Jersey strip mall. Dry roasting the Sichuan peppercorns releases their aromatic oils and brings out their flavor. Only roast the amount you will be using in a recipe since the oils dissipate quickly. In our version, we chose to stir fry, not deep fry the pork. We also chose thicker udon noodles instead of Chinese egg noodles and added some roasted peanuts on top for extra crunch. Noodles are always a part of the Chinese new year celebration, as they symbolize longevity. Noodles should never be cut, even when eating. Twist those noodles around your chopsticks for a long life.


Spicy Sichuan Noodles

Adapted from “The Taste of China” by Ken Hom

Serves 4-6 as part of a Chinese meal, 2-4 as a single dish

 Ingredients

  • 1 tablespoon Sichuan peppercorns
  • 1/2 pound ground pork
  • 3 tablespoons dark soy sauce
  • 3 teaspoons salt
  • 3T peanut oil
  • 3 tablespoons chopped garlic
  • 2 tablespoons finely chopped peeled fresh ginger
  • 5 tablespoons finely chopped scallions
  • 2 tablespoons sesame paste or smooth peanut butter
  • 2 tablespoons chili oil
  • 1 cup chicken stock
  • 12 ounces fresh or dry Chinese egg noodles
  • 1 T toasted, chopped peanuts

Directions

  1. Heat a wok or heavy skillet over medium heat. Add the peppercorns and stir-fry for about 5 minutes until they brown slightly and start to smoke. Remove them from the heat and allow them to cool, then grind them. Set aside.
  2. Heat the same wok over medium high heat and add 1T oil. When the oil is hot add the ground pork, stirring with a spatula to break up the pieces. Add the dark soy sauce and continue to cook pork until browned, about four minutes. Remove pork with a slotted spoon and drain on paper towels.
  3. Bring a 3-4 quart pot of water on the stove to a boil.
  4. Reheat the wok with the 2 tablespoons oil and stir-fry the garlic, ginger and  4 tablespoons of the scallions for 30 seconds, then add the peanut butter or sesame paste, the remaining soy sauce and salt, the chili oil and chicken stock. Simmer for four minutes. Return the pork to the pan and stir.
  5. Cook the noodles in the boiling water two minutes if they are fresh, five minutes if they are dried. Drain in a colander. Transfer them to a serving bowl or individual bowls. Ladle on the sauce and top with the  pork mixture. Sprinkle with the ground Sichuan peppercorns, toasted peanuts, scallions and serve.

DSC_8455a

DSC_8432a

February 5, 2013 Chinese Dumplings-Potstickers

DSC_8388a

Dumplings are important part of the Chinese New Year menu. They are considered lucky because they resemble ancient Ming dynasty coins, silver and gold ingots called yuan bao. Dumplings symbolize wealth and hopes for a profitable future. Some cooks will hide a gold coin in a dumpling. The person who finds the coin will find good fortune in the new year, as long as they don’t bite down or swallow the coin!

Dumplings can be steamed, boiled or pan fried and can be wrapped in various styles. The wrappers are easily found in most supermarkets, usually near the produce section. Wonton wrappers are square and gyoza wrappers are round. I find the thickness of either depends on the manufacturer. Last year, needing a new challenge, I learned how to make my own. The dough is very simple, just flour and water, either cold or very hot, I had better results with the very hot water.  Chinese cooks prefer Gold Medal all purpose bleached flour for dumpling making, its slightly lower gluten content produces the best results. Higher gluten flour produces a less than ideal tough chewy skin.

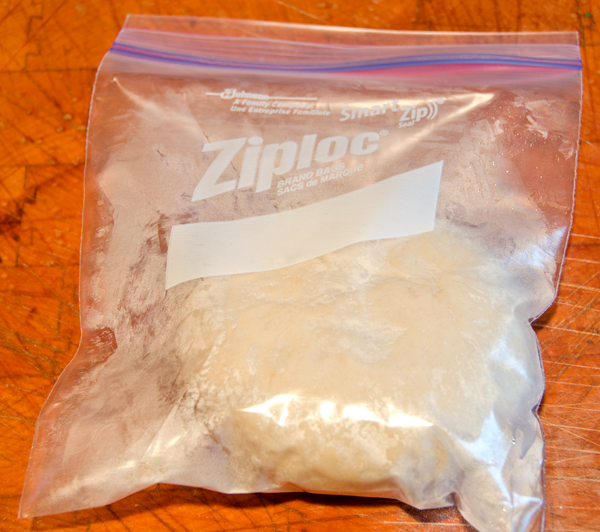
I like to make my filling first, preferably the day before I am filling the dumplings. Chilling makes it easier to handle and portion between the dumplings. For the dumpling wrapper recipe I chose to weigh my flour for the most accurate results. A cup of flour weighs 4.5 ounces, so 10 ounces is a generous two cups. I made my dough in the food processor, adding the just-boiled water slowly until it was absorbed by the flour. Because of the extremely dry conditions that day, I am certain the dough absorbed a bit more water than what would be typical  Place the dough in a quart bag to let the gluten in the dough relax for at least an hour. Dumpling wrappers are rolled out the same way as the pork bun dough was in this post. After struggling with a standard rolling pin, Joe made me a small one that made the task much easier.

I made two varieties, potstickers and beggars purses. Potstickers are just that, dumplings that are browned on the bottom in a little oil first. Water is added to the pan, a lid is put on the pan and steam finishes them in the second part of the process. Dumplings of any variety can be frozen for future snacking. Just remember to spread the uncooked dumplings out on a lightly greased cookie sheet, making sure the dumplings are not touching. Place the cookie sheet in the freezer for several hours. Now the dumplings can be stored in freezer bags until you are ready to use them. Partially thaw before cooking the dumplings.

Dumpling Dough

from Asian Dumplings, author  Andrea Nguyen

Ingredients

  • 10 oz (2 cups appx.)  all purpose flour
  • 3/4c very hot water

Directions

  1. Weigh or measure out your flour and add to food processor bowl fitted with the metal blade.
  2. With the machine running, slowly add the water through the feed tube allowing it to be absorbed by the flour until a ball is formed. Do not over process!
  3. Place the ball of dough onto a work surface and knead until uniform and smooth. The dough should be firm and silky to the touch and not sticky.
  4. Place the dough ball in a quart-sized bag and seal. Let dough rest for at least an hour
  5.  After the rest, pull out the dough and cut it into 4 roughly equal sections. Roll each section into a 1-inch thick log, then cut each log into 9 pieces. Shape each piece into a thick coin or disc. Lightly flour the top and bottom of each disc.
  6. I placed my discs between the front and back of a cut up quart sized freezer bag and stamped down with my marble mortar to make a circle.
  7. Use a dowel rolling pin to press on just the outer edges of the disc. Roll back and forth once, then rotate the disc. Roll, rotate. Roll, rotate. Add a little flour if necessary to keep it from sticking and tearing.
  8. You don’t want to make your wrappers too thin.They need to be thick enough to hold whatever filling you’re going to put in it. The final dumpling skin should be just over 3 inches in diameter. This recipe should make about 36 wrappers. Cover wrappers with plastic until using.
DSC_8324a
My repurposed baby scale gives exact measurements!


DSC_8327a
Dumpling dough just relaxing for a little bit.
DSC_0790a
A marble mortar and a quart-sized freezer bag helped make my dumpling circles.


 Pork and Shrimp Filling for Potstickers

From Fine Cooking #103

Ingredients

  • 2 c finely chopped napa cabbage
  • 8 oz. ground pork
  • 8 oz. peeled, deveined raw shrimp, coarsely chopped
  • 3 medium scallions, thinly sliced
  • 3 large cloves garlic, minced
  • 2 T Shaoxing (Chinese rice wine) or dry sherry
  • 1T grated fresh ginger
  • 1 T soy sauce
  • 2 t toasted Asian sesame oil
  • 1/2 teaspoon granulated sugar
  • Freshly ground black pepper
  • 36 very thin, 3-inch circular, store-bought pot sticker or gyoza wrappers
  • 2 tablespoons peanut or vegetable oil

Directions

For the filling

  1. In a medium bowl, toss the cabbage with 2 teaspoons salt and set aside for 30 minutes to release moisture. Wring out in a clean kitchen towel to extract as much liquid as possible.
  2. In a large bowl, combine the cabbage with the pork, shrimp, scallions, garlic, Shaoxing, ginger, soy sauce, sesame oil, sugar, and 1/4 teaspoon pepper. Stir until well mixed. Refrigerate for at least 20 minutes and preferably overnight.
DSC_8334a
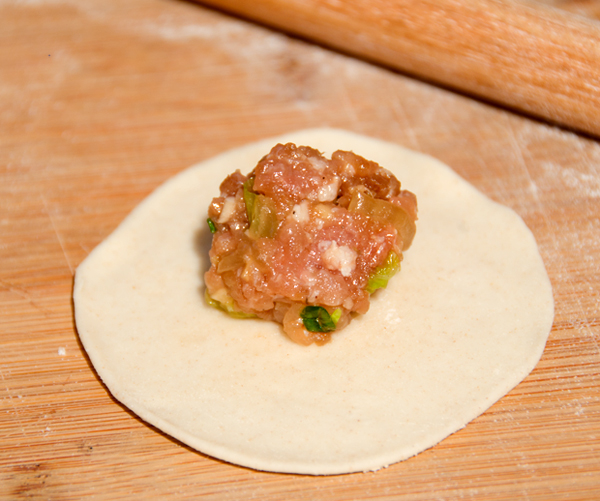
Pork and shrimp filling on a dumpling round.

To form the dumplings

  1. Spoon 1 to 2 teaspoons of the filling onto a dough wrapper, fold it in half, and make your first pinch at the center of the curved edge and then pleat toward the center on both sides to create a rounded belly. This wider shape allows the dumplings to sit upright in the pan and form a flat surface for browning.
  2. Repeat with the remaining wrappers and filling. As you work, arrange the filled dumplings in a single layer without touching on large plates, so they don’t stick together.
  3.  Heat 2 Tbs. vegetable oil in a heavy-duty 10- or 12-inch skillet over medium-high heat until shimmering. Working quickly and in batches if necessary (adding more oil for the second batch if needed), arrange the dumplings belly side down in concentric circles starting from the outer edge. Cook until golden brown on the bottom, 1 to 2 minutes.
  4. Pour in about 1/2 cup water or enough to come about a third of the way up the sides of the dumplings, bring to a boil, cover, and cook until all of the water has been absorbed, 2 to 3 minutes. Remove the lid, reduce the heat to medium, and continue cooking just until the dumplings are dry and crisp on the bottom, 1 to 2 minutes. Loosen the dumplings from the pan with a spatula.
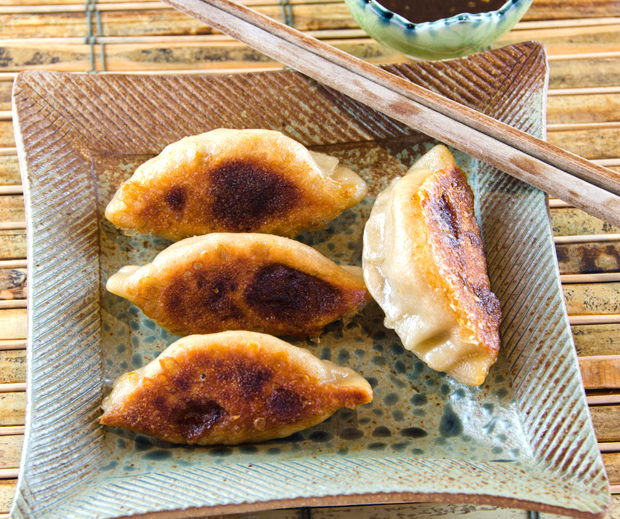
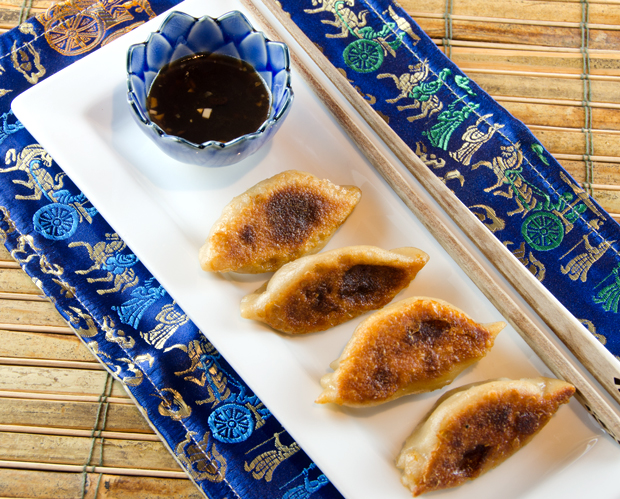
  5. Invert the pan over a plate to flip the dumplings, browned side up, onto the plate (or transfer with a spatula). Serve immediately with your choice of dipping sauce.
DSC_8397a
Potstickers, ready to serve with some dipping sauce.

 DSC_8406a


January 23, 2013 Golden Crisp Daikon Radish Cake with Spicy Herb Soy Sauce

DSC_8283a

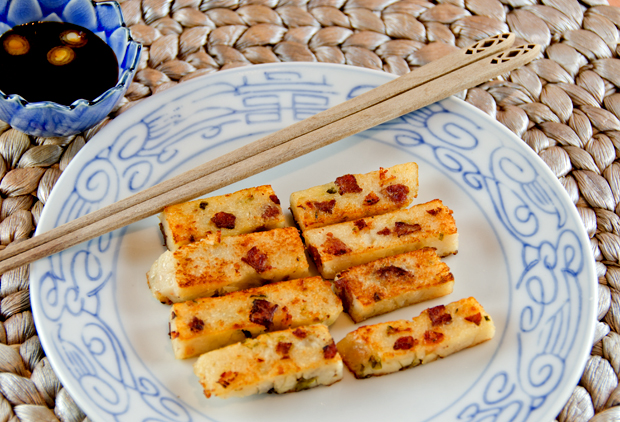
When is a turnip cake not a turnip cake at all? When it is made with daikon radish. The vegetable the Chinese refer to as a turnip or law bok closely resembles the Western daikon radish. Law Bok Gow or daikon radish cake, is a dim sum and Chinese New Year favorite. Radish is a homophone for the Cantonese word that means increasing good fortune. It is a steamed cake flecked with Chinese sausage, dried shrimp and scallions. Some versions also include shiitake mushrooms as well.

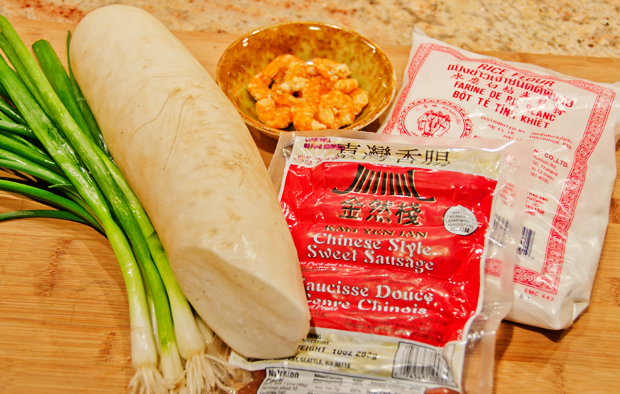
Two ingredients, Chinese sausage and dried shrimp may not be common to the Western kitchen, but they are readily available in most Asian markets. Chinese sausage, or lap cheong in Cantonese, is a dried, hard cured sausage (think salami or pepperoni) with a high fat content and a sweet flavor. Dried shrimp or xia mi are said to have the fifth flavor also refered to as umami. They are sold shell and all, in the refrigerated section of Asian markets. The flavor is very concentrated, so a little goes a long way.

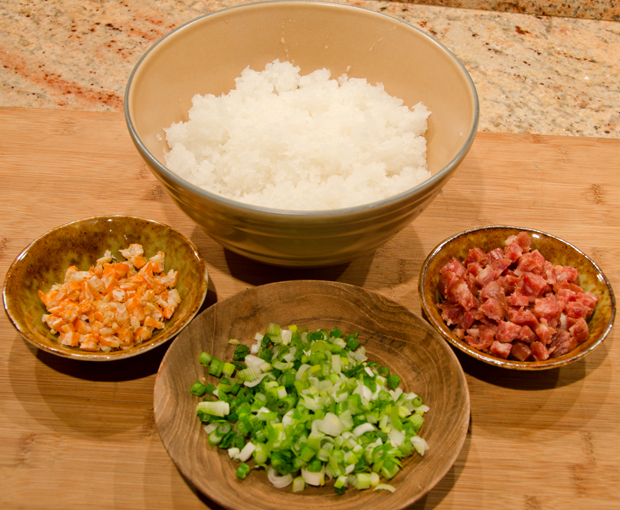
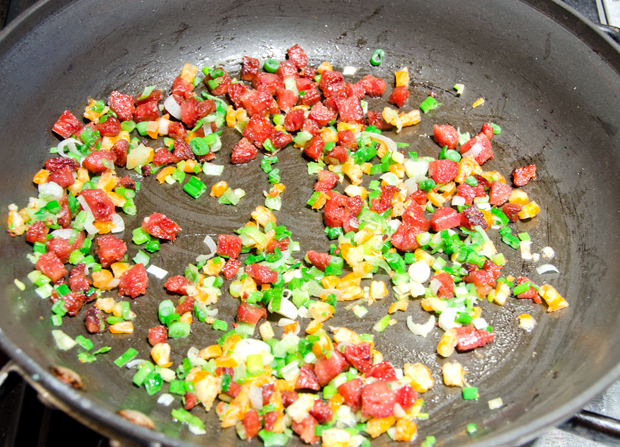
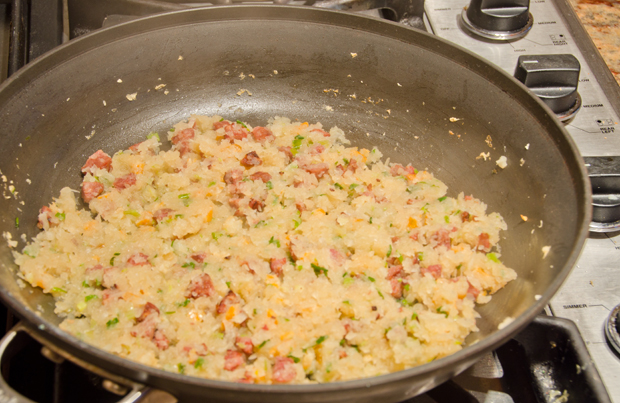
Finely chopped sausage is added to a hot skillet and browned, then the dried shrimp and scallions are added.The daikon radish is grated, then chopped and cooked to mellow out the flavor and release excess moisture. The daikon, sausage, shrimp and scallions are added to the batter of rice flour and water.

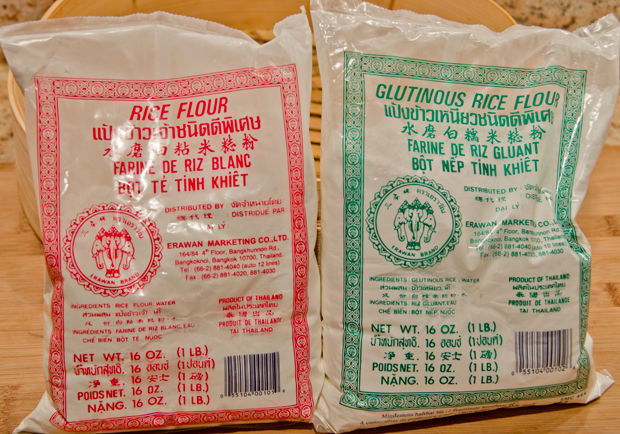
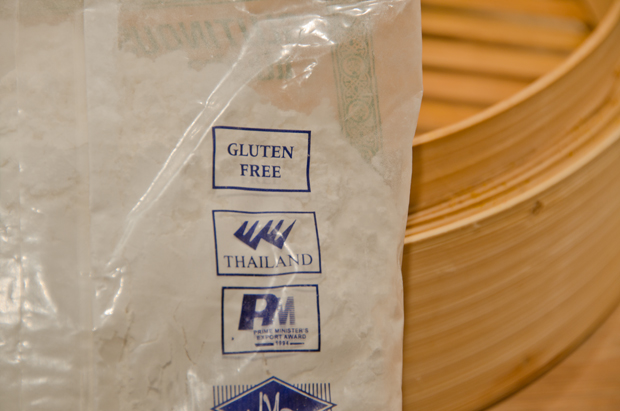
Be sure to use rice flour, not glutinous rice flour. Rice flour and glutinous rice flour are both made from rice and therefore gluten-free. Rice flour is made from medium or long grain rice and is mainly used in baked goods. Glutinous rice flour is made from short grain rice, the kind used in sushi. It has a high starch content and adds moisture and density to baked goods and is used to make the Japanese dessert, mochi. For the turnip cake, rice flour is used, read your bag carefully.
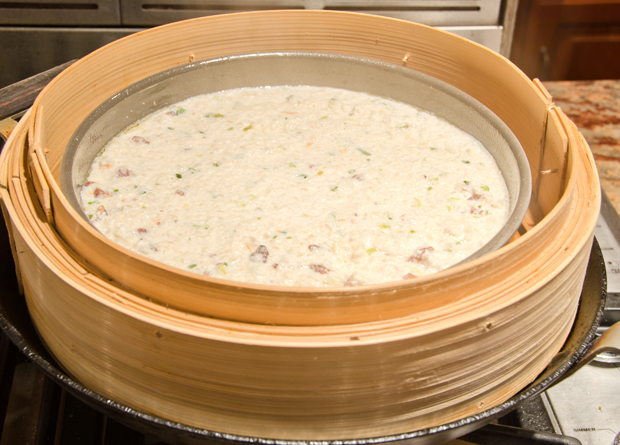
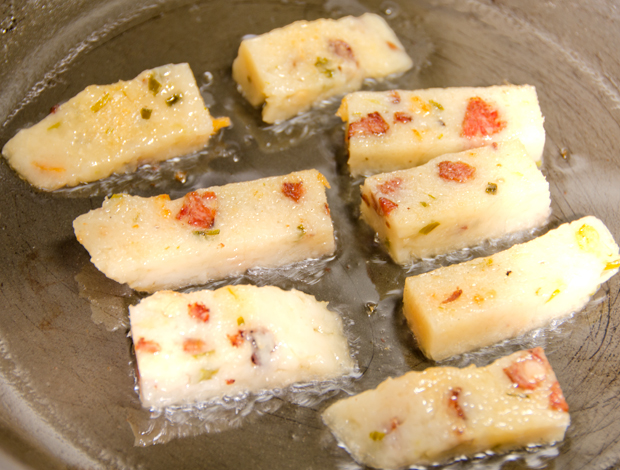
Pour the mixture into a well greased 9 1/2″ x 1 1/2″ cake pan. The cake is steamed until firm to the touch, about 45 minutes. When steaming for a long period of time, you will have to occasionally add water to the base of your steamer. Keep a small pot of simmering water on the stove for this purpose. I set a timer to check my water supply every ten minutes or so. Once the cake has cooled it removes easily from the pan. It can be eaten, as is, but I prefer to pan fry the slices, giving the exterior a nice crunch to contrast with the soft interior. Serve with spicy herb soy sauce or prepared hoisin or soy sauce.

Golden Crisp Daikon Cake

Ingredients

  • 1 1/2 lb daikon (Asian white radish), peeled, cut into 1-inch pieces
  • 2 Chinese sweet pork sausages (lop chong), cut into 1/4-inch cubes (about 3 ounces)
  • 1/2 c finely chopped green onions (about 3 large)
  • 2 T small dried shrimp, finely chopped
  • 1 c water
  • Nonstick vegetable oil spray
  • 1 1/2 c rice flour (not glutinous)

Directions

  1. Fit processor with large-hole grating disk. Working with a few pieces of daikon at a time, place daikon pieces in feed tube and process until coarsely grated. Transfer daikon to bowl. Replace grating disk in processor with metal blade. Return daikon to processor and finely chop, using on/off turns.
  2. Heat heavy large skillet over medium-high heat. Add sausage cubes to skillet and sauté until fat renders and sausage browns, about 5 minutes. Add green onions and dried shrimp; stir 1 minute. Add daikon with juices and 1/2 cup water; bring to boil. Reduce heat to medium; cook until daikon is soft and liquid is almost evaporated, stirring frequently, about 25 minutes.
  3. Meanwhile, spray 9-inch-diameter cake pan with 1 1/2-inch-high sides with nonstick spray. Whisk rice flour and remaining 1 cup water in large bowl until well blended. Stir in daikon mixture. Season to taste with salt and pepper. Spread daikon mixture evenly in prepared pan. Place cake pan on bamboo steamer rack set over wok filled halfway with simmering water or on metal rack set over simmering water in pot. Cover with lid; steam over medium heat until cake is set and firm to touch, occasionally adding more water to wok or pot as needed, about 45 minutes. Remove pan from steamer; cool cake in pan 1 hour. Cover and refrigerate daikon cake in pan overnight.
  4. DO AHEAD Daikon cake and sauce can be made 2 days ahead. Cover separately and refrigerate.
  5. Run small knife around daikon cake to loosen. Invert onto cutting board. Cut cake into 1/2-inch-thick slices (not wedges), then cut each slice crosswise into 2-inch-long pieces.
  6. Heat 1 tablespoon vegetable oil in large nonstick skillet over medium-high heat. Working in batches, add daikon cake slices to skillet and cook until golden brown, adding more oil to skillet for each batch as needed, about 5 minutes per side. Transfer slices to platter. Serve herb soy sauce alongside for dipping.

Spicy Herb Soy Sauce

Ingredients

  • 1 c soy sauce
  • 1 T Asian toasted sesame oil
  • 2 T (or more) vegetable oil, divided
  • 1 c fresh cilantro leaves
  • 1 T grated peeled fresh ginger, juices included
  • 2 small Thai red chiles, halved lengthwise, seeds removed, thinly sliced crosswise or 1 T hot chili sauce (such as sriracha)

Directions

  1. Whisk soy sauce and sesame oil in small bowl. Heat 1 tablespoon vegetable oil in small skillet over medium heat. Add cilantro, ginger with juices, and chiles or hot chili sauce; stir 30 seconds. Mix ginger mixture into soy sauce.
Daikon radish, dried shrimp, Chinese sausage, scallions and flour are the ingredients for this cake.


Ingredients ready to saute.


Saute the sausage until browned.


There are two types of rice flour, this recipe calls for regular (red label), not glutinous rice flour


Yes, glutinous rice is gluten-free!


Add the daikon radish and saute until the liquid evaporates.


Be sure your steamer is large enough to allow steam to rise and cook the cake.


Saute pieces of the cake in a little oil for a crunchy exterior.

January 21, 2013 Char Siu Pork

DSC_8250a


Our Chinese New Year celebration is about a month away so it’s time to start planning this year’s menu and what can be made ahead. My sources all agree, Chinese steamed buns can be made a month ahead so that seemed like a good place to start. Making steamed filled buns involves several steps, the first is making the char siu pork filling.

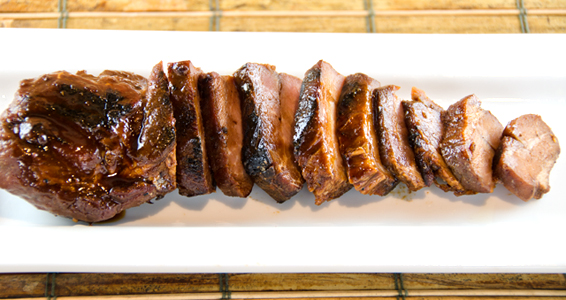
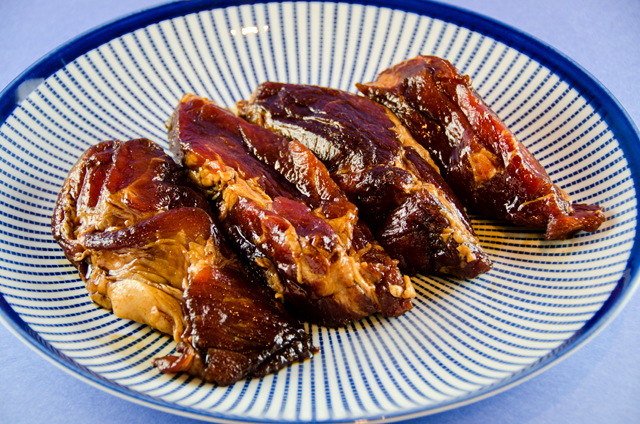
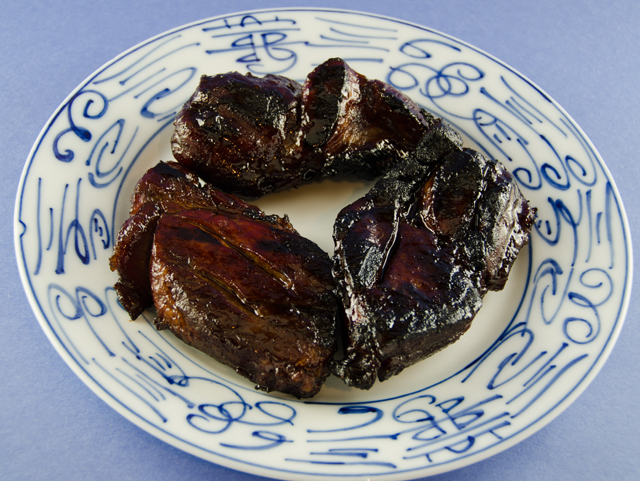
In Cantonese, char means fork in both the noun or verb form and siu (soo) means to roast or burn. “Fork roasted” refers to the way this traditional Cantonese street food is prepared, slow cooked on skewers over an open fire. Char siu should be moist and flavorful on the inside and caramelized and slightly chewy on the outside. Traditional Cantonese char siu is dyed with food coloring resulting in an unnatural ring of magenta when you cut into the meat.I forgo that step. I prefer the reddish brown color that dark soy imparts to the meat. After making char siu and pork buns for seven years now, pork shoulder is my cut of preference. On the fatty scale it is somewhere between the pork tenderloin or loin which I have found to be too lean and the currently popular pork belly, which is too fatty for my tastes. The shoulder has enough fat to prevent the meat from drying out.

I have been using the recipe for char siu from “The Chinese Kitchen” written by Eileen Yin-Fei Lo since we began celebrating Chinese New Year. I discovered this book when some of the recipes were used in a cooking class I attended in San Francisco.  When I cook Chinese recipes I try to keep the ingredients as authentic as possible from the original recipe. Two of the marinade ingredients for her char siu have alluded me all these years, Mei Kuei Lu Chiew and wet or preserved red bean curd. In the front of her book Ms. Lo has a section devoted to Chinese ingredients, “The Chinese Larder”. In this section she further describes uniquely Chinese ingredients that may not be familiar in the Western kitchen. Wet bean curd are cubes of fermented bean curd with salt, wine and red rice; not to be confused with preserved bean curd. Wet bean curd is red in color, not spicy and is used in braising and barbecuing recipes. I found what I thought might be reasonable substiutes but was pretty certain not the exact ingredient she was calling for.  Mei Kuei Lu Chiew is a Chinese spirit, based on sorghum and flavored with rose petals, needless to say, I gave up on that one the first year. Ms Lo admits that some of the English labeling of Chinese products may be confusing. She provides Chinese calligraphy next to each entry to show your grocer to ensure you have the right product. That would be fine but I have found increasingly that the markets I encounter are not Chinese but a mix of all Southeast Asian cultures. I have access to two supermarkets that carry Asian ingredients but both are Korean-owned. Thus the ingredients in the store may be Asian, but with a definite Korean slant with some Thai, Vietnamese, Chinese, a smattering of Japanese and Central American to boot.

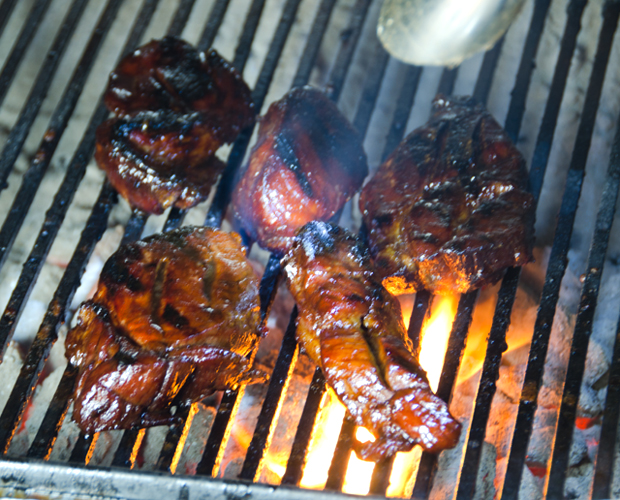
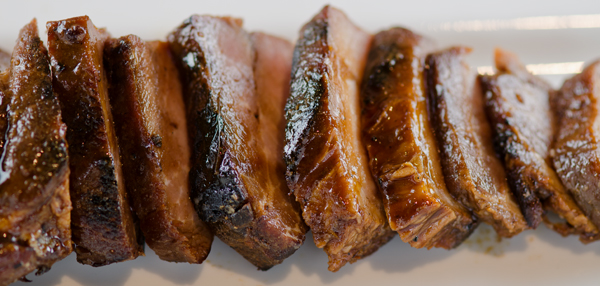
Twelve years after the publication of “The Chinese Kitchen”  Ms. Lo’s recipe for char siu pork and steamed buns were featured in the February/March 2011 issue of Fine Cooking magazine. I was pleased to see that in the updated version of the recipe in Fine Cooking both of my “problem ingredients” were no longer part of the marinade. Shaoxing or Chinese rice wine is now in place of Mei Kuei Chiew and the preserved bean curd is eliminated all together.  Some recipes call for maltose to give char siu its classic glazed look but honey works just as well, has a thinner consistency and is easier to handle.The meat is cut into four pieces and pierced several times to allow the marinade to penetrate, preferably overnight. Most recipes call for roasting the meat and broiling it at the end to give it that desirable char. This year I roasted it in the oven for fifteen minutes and Joe finished it in the fireplace grill. The sliced pork is now ready to top a bowl of noodles, chop into a filling for fried rice, or combine with other ingredients for a dumpling filling. My next step is to combine some of the pork with a sauce to fill steamed buns.

Char Siu – Barbecued Roast Pork

Ingredients

  • 1 2lb piece of pork shoulder
  • 1/2 c honey
  • 1/4c oyster sauce
  • 1/4c hoisin sauce
  • 3 1/2T dark soy sauce
  • 3 1/2T light soy sauce
  • 3T Shaoxing (Chinese rice wine)
  • 1 1/2t five-spice powder
  • Kosher salt and freshly ground white pepper

Directions

  1. Cut the pork shoulder lengthwise into 4 equal strips. Using a small knife, pierce each strip 4 times to help the marinade penetrate the meat. Transfer the meat to a gallon zip-lock bag.
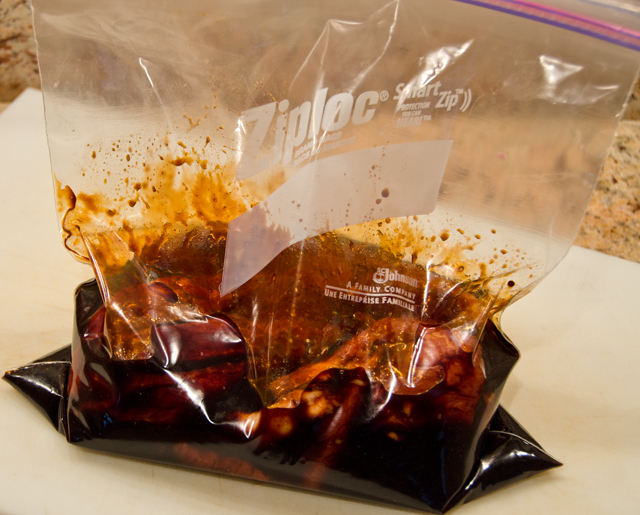
  2. Combine the honey, oyster sauce, hoisin sauce, dark and light soy sauce, rice wine, five spice powder, 1/2t salt and a pinch of ground white pepper in a small bowl. Pour over the meat in the bag. Massage the pork all around in the marinade so that it is covered. Push out all the air and seal the bag. Refrigerate for at least eight hours and preferably overnight.
  3. Position a rack in the top third of the oven and heat oven to 425F. Line a large heavy duty baking sheet with heavy-duty foil. Put the meat on the baking sheet and spoon some of the marinade over it. Roast until an instant read thermometer  inserted in the middle of the pork registers 165F, 30 to 40 minutes. During the cooking process, baste the meat occasionally with the juice from the pan and flip it several times.
  4. Position an oven rack about 4 inches from the broiler and heat the broiler on high. Broil the pork until it is slightly charred in places, about 2 minutes.
  5. *Alternate cooking method. Preheat oven to 375F. Place pork on foil lined baking sheet. Roast in oven for fifteen minutes, turning once.
  6. Skewer the pork and grill at about 400F, basting the pork with the remaining sauce, turning and basting until the pieces are nicely charred.
  7. Let the pork cool and then refrigerate until you are ready to make the bun filling. The pork may be refrigerated for up to 5 days or frozen for up to a month.


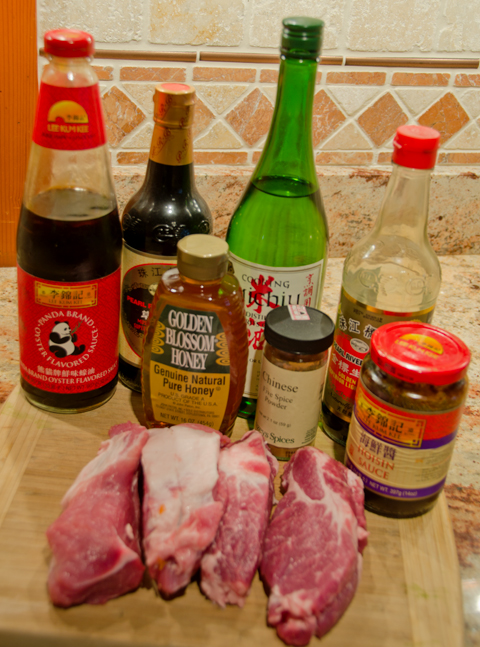
Ingredients ready to go for the pork marinade.


Pork pieces and marinade are added to a zip-loc bag.
Out of the marinade after 24 hours, meat looks good already!
The fireplace grill give the meat that nice char that is desirable in char siu.
Char siu pork right off the grill.


Char siu ready to be chopped up for bun filling.


January 6, 2013 Lobster Bisque

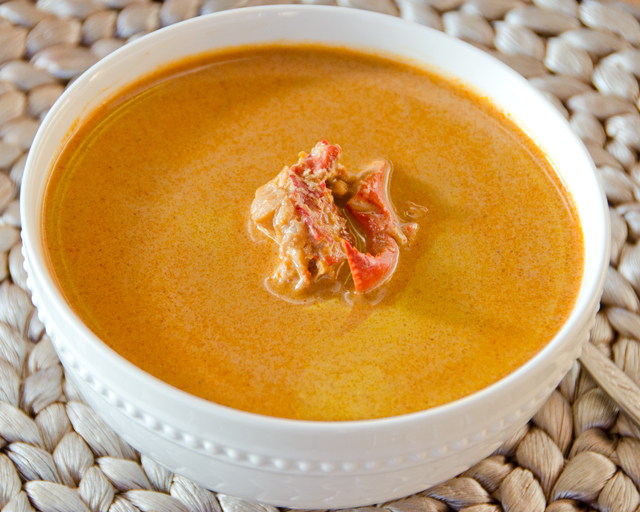
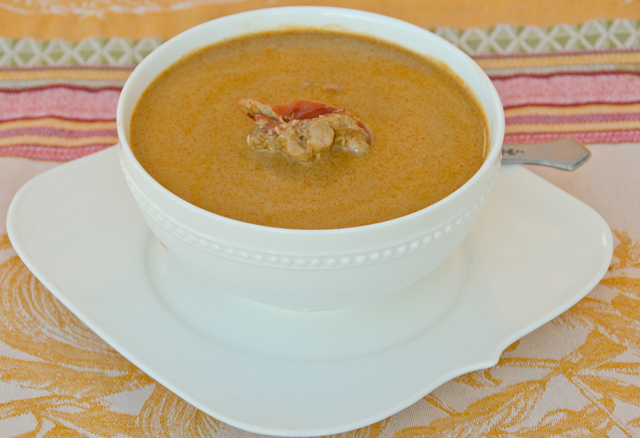
DSC_7834aOur New Year’s Eve tradition for almost thirty years is the anti New Years Eve celebration of most people. Our evening is very low key. We get together with one couple, cook a nice, but somewhat indulgent meal of surf and turf, curl up on the couch and watch movies until the ball drops. 

The highlight of this feast is a rich and flavorful lobster bisque that we have been making for 23 years now. Not a dish you would have every day or every week for that matter, but a nice splurge for a special occasion. This recipe is from a January 1990 Bon Appetit article with recipes from Jasper White, chef, restaurateur and New England seafood expert . Mr White offers his bisque recipe which he describes as “the perfect starter for a winter night.”

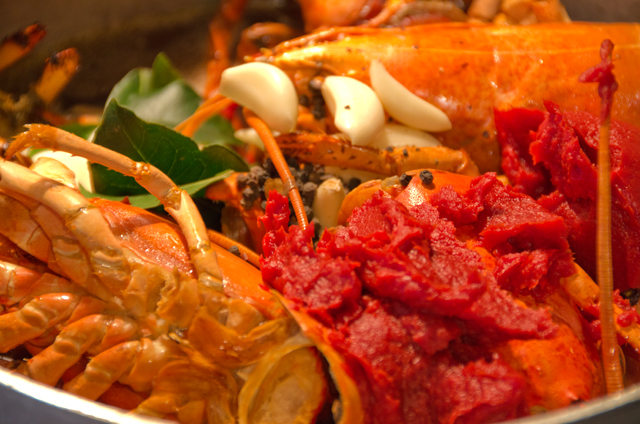
To say this recipe is a bit indulgent would be an understatement. It is not every day sweet briny lobsters, fragrant golden saffron and silky cream are combined in a luxurious soup. A warm winter resulted in a lobster glut in 2012 and we took advantage of the occasional weekend sale at our local markets. After enjoying lobster for dinner, we froze the body shells, planning ahead for the New Year’s Eve bisque. My fishmonger sells lobster bodies at a much cheaper price than whole lobsters and we also buy these to add to our stock. The shells are roasted, then combined in a stockpot with herbs, vegetables, wine, stock and saffron. This wonderful soup simmers for hours on the stovetop and your house will smell so warm and rich you will want to bottle the fragrance!

A bisque by definition is a rich, creamy soup made with shellfish, specifically crustaceans, in this case lobster. The addition of lobster meat to the final bisque is just an option, so that is one way of keeping the cost down.Though rice is the classic thickener for a bisque, tapioca starch, not cornstarch or arrowroot is the choice for this recipe. I’ve learned that tapioca starch thickens quickly and at a lower temperature than the other options. Tapioca grains don’t always dissolve completely, so straining the bisque twice eliminates that problem. In past years I made the veal stock that is called for in this recipe but I no longer have a source for veal bones. I use the reduced chicken and beef stock mentioned in the recipe, enhanced with a little veal demi glace. Many supermarkets carry the D’Artagnan brand. A little Cognac or another brandy is flamed at the end, burning off the alcohol, bringing even more complexity to the final dish.  The steps can be completed over the course of several days and the soup base minus the cream could be frozen for a future special occasion. Valentine’s Day, perhaps?
Lobster Bisque

 Serves 8 to 10

Ingredients

  • 3lbs cooked lobster body shells, halved lengthwise, head sacs removed
  • 5T olive oil
  • 2 large onions, coarsely chopped
  • 2 large carrots, coarsely chopped
  • 2 large celery stalks, coarsely chopped
  • 10 garlic cloves, coarsely chopped
  • 3 quarts plus 1 cup water
  • 2 c rich veal stock, or three cups canned low-salt chicken broth  and 1 cup canned unsalted beef broth, reduced to 2 cups
  • 1/2 of a 7.5 ounce container of veal demi glace (optional)
  • 2 c dry white wine
  • 6T tomato paste
  • 1T whole black peppercorns
  • 10 fresh tarragon sprigs
  • 4 fresh thyme sprigs
  • 3 bay leaves
  • 1/2t dried red pepper flakes
  • 1/2t saffron flakes
  • 1/4 c quick cooking tapioca
  • 2c heavy cream
  • 1/4c Cognac or other brandy
  • 1c cooked chopped lobster meat in 1/2 inch cubes
  • Kosher salt and freshly ground pepper

Directions

  1. Preheat oven to 375F. Transfer lobster shells to roasting pan. Drizzle with 2T olive oil. Roast until aromatic and slightly charred, stirring occasionally, about 45 minutes.
  2. While the shells are roasting, heat remaining 3T olive oil in a heavy large skillet over medium high heat. Add onions, carrots, celery and garlic and cook until light brown, stirring frequently, about 8 minutes.
  3. Transfer lobster shells to a large stockpot.  Set roasting pan over high heat. Add one cup water and bring to a boil, skimming foam from the surface. Stir in the sauteed vegetables, tomato paste, peppercorns, herbs, pepper flakes and saffron. Simmer until liquid is reduced to 6 cups, stirring frequently, about 1 1/2 hours.
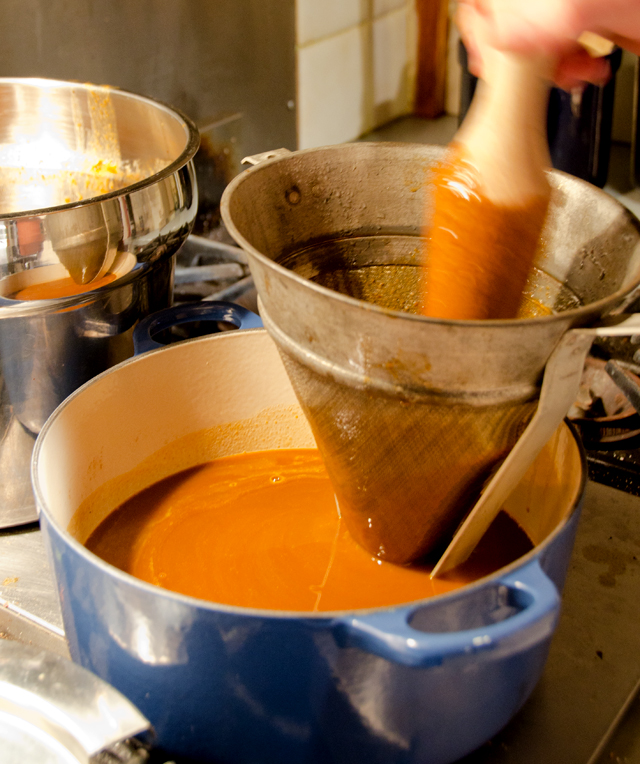
  4. Stir tapioca into bisque and let simmer until thickened, stirring frequently, about 30 minutes. Strain bisque through a coarse sieve, pressing on solids to extract as much liquid as possible. Strain bisque again through a fine sieve into a heavy large saucepan. Can be prepared ahead, cover and refrigerate for two days or freeze for future use.
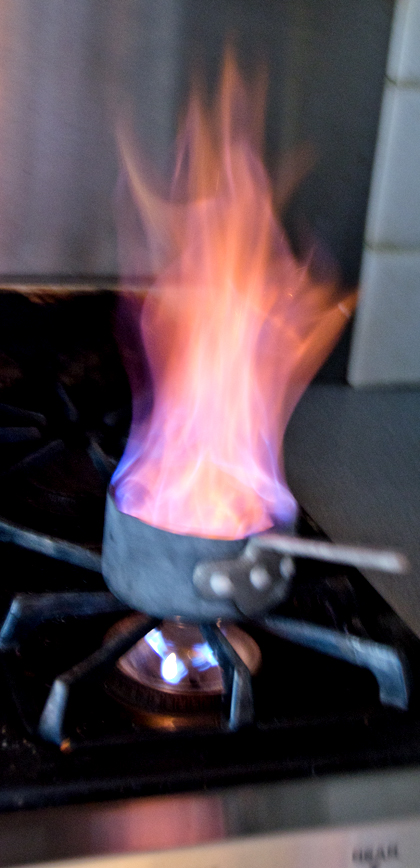
  5. Bring bisque to a gentle simmer, skimming surface if necessary. Add cream and heat through. Gently heat Cognac in a heavy small saucepan. Remove from heat and ignite with match. Allow flames to subside completely, then add to bisque. Add lobster meat if using and heat through. Season to taste with salt and pepper. Serve immediately in warmed bowls.


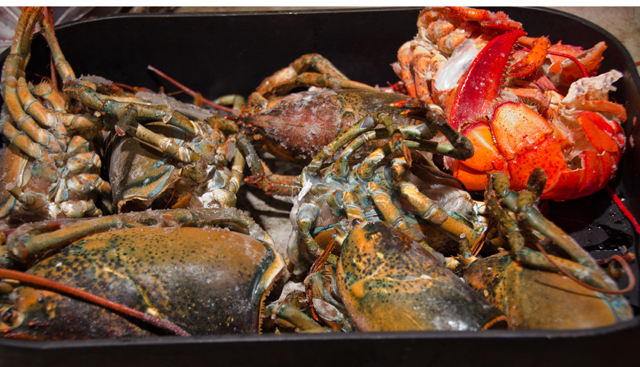
Lobster bodies are added to the roasting pan.


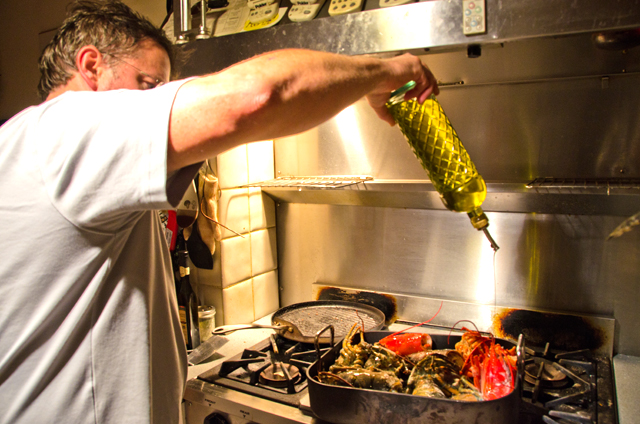
Drizzling olive oil over the lobster shells.


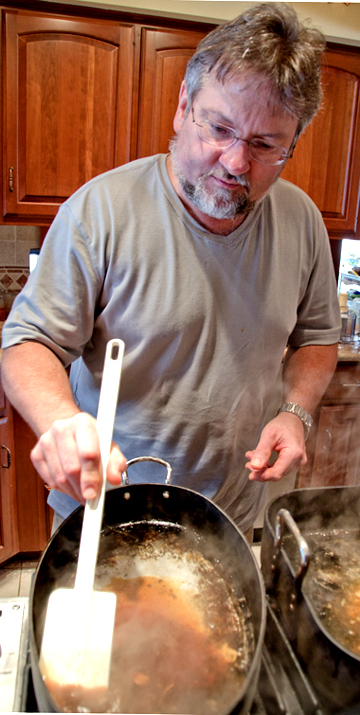
Scraping up the browned bits.


Roasted lobster shells and other ingredients go into the stockpot.


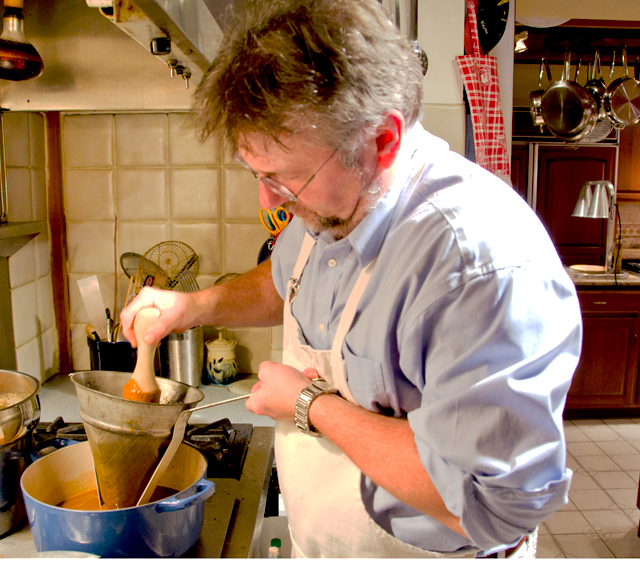
Straining the stock.


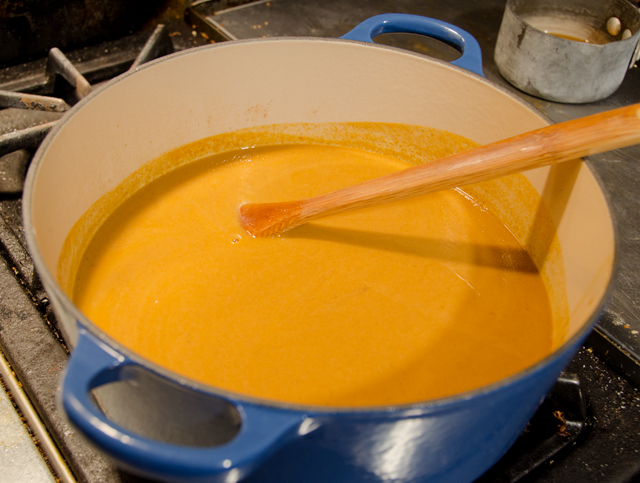
It already looks rich, even without the cream!


Now the cream is added.
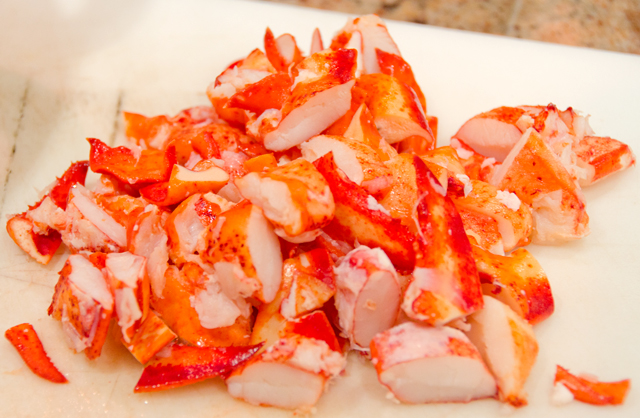
Chunks of lobster meat are a welcome addition to the soup.
Chunks of lobster meat are a delicious addition to the soup.
Cognac is flamed and when the flames subside, then added to the bisque.

             DSC_7826a

December 30, 2012 Seven Fishes Christmas Eve

DSC_7609a


The Feast of the Seven Fishes
 
The feast of the seven fishes is a tradition of often disputed, sometimes confusing origins. The “hot button” issue here seems to be, is the tradition Italian or Italian-American?Italian-Americans who believe seven fishes began in Italy are quite passionate in their beliefs.  They believe the feast originated in southern Italy and Sicily where seafood is abundant. Others propose that it originated with Italian American immigrants, celebrating the prosperity and bounty of the new world.  It is referred to as “Festa del sette pesci” (feast of the seven fishes) or “La Vigilia” (the vigil) referring to the old Roman Catholic tradition of fasting or refraining from eating meat before a holy day, in this case, Christmas.

I became aware of the seven fishes tradition several years ago at my local seafood purveyor, Hellers. The long lines of people waiting for the store to open in the days before Christmas piqued my curiosity. I also noticed some different items in their refrigerated cases for the occasion: fresh octopus, eel and a dried salt cod called baccala. It interested me enough to do my own research and add my own spin on it for our Christmas eve dinner.

Why seven fishes? Some say it is for the seven sacraments of the Catholic church, or the seven hills of Rome, and others, the seven virtues: faith, hope, charity, temperance, prudence, fortitude and justice.The exact number of fish to be eaten is another question. Numbers range from three, for the three wise men or the Trinity, to thirteen in reference to Jesus and his disciples. Whatever the number, it is a tradition in it’s third year for us, small courses with an interesting variety of not just fish but all kinds of seafood to usher in Christmas. This year, I counted eight types of seafood: calamari, clams, oysters, shrimp, crab, mussels (with shrimp and clams making a second appearance in the soup), scallops and sole.

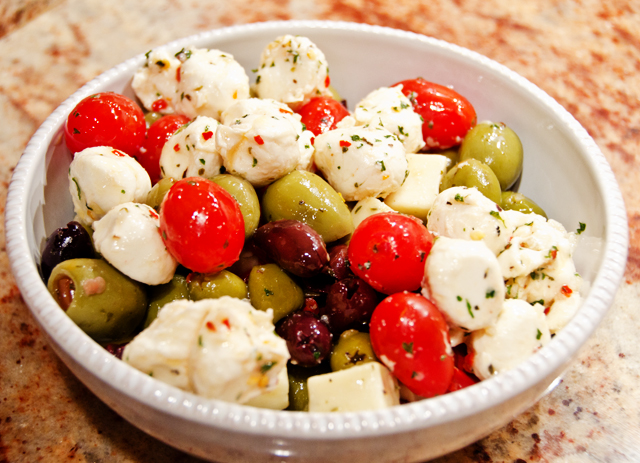
We started the evening with a little antipasti to stave off any hunger pains.


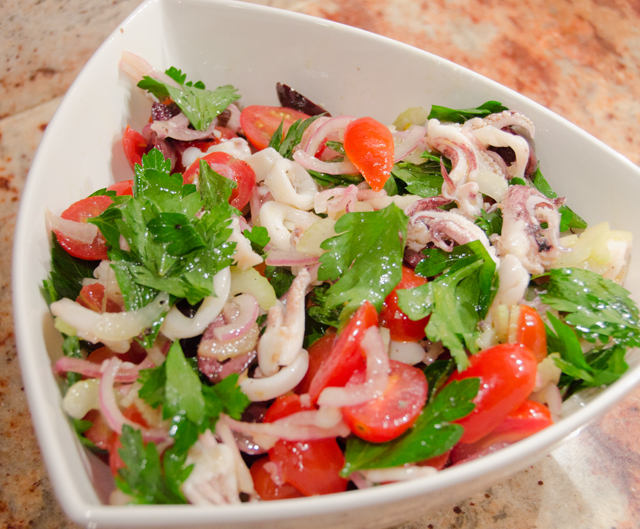
The first course was a cold calamari salad, very light and refreshing.


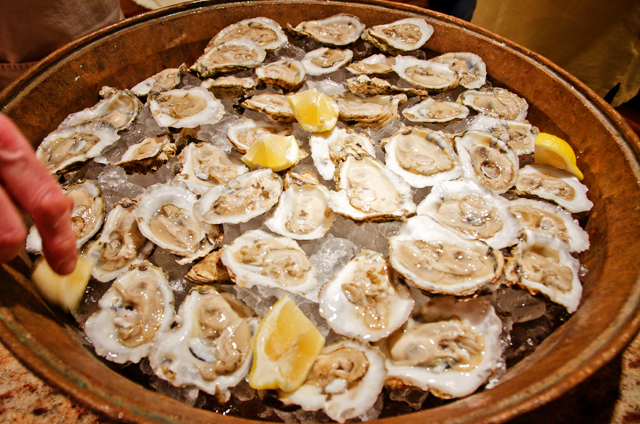
Nik brought fresh, briny Chesapeake Bay oysters that were harvested that day.


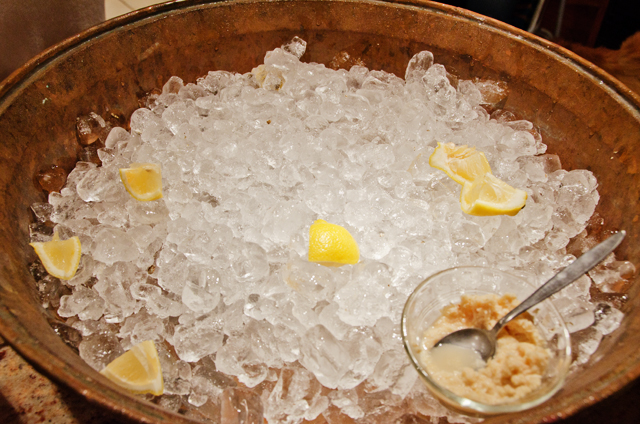
Obviously these were enjoyed, with a squirt of lemon, horseradish or cranberry-pear balsamic vinegar.


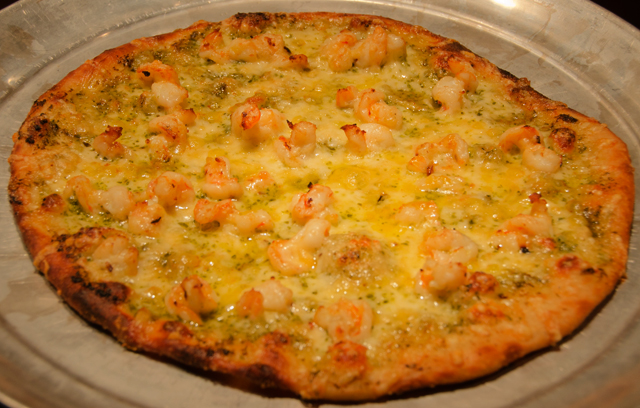
A thin crust pesto and shrimp pizza  was the next course.
A thin crust pesto and shrimp pizza was the next course.
We enjoyed stuffed clams next.


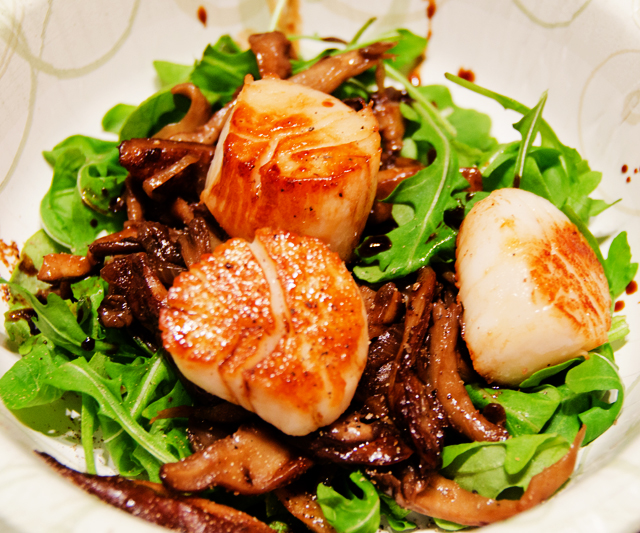
Seared scallops on a bed of baby greens with sauteed wild mushrooms.
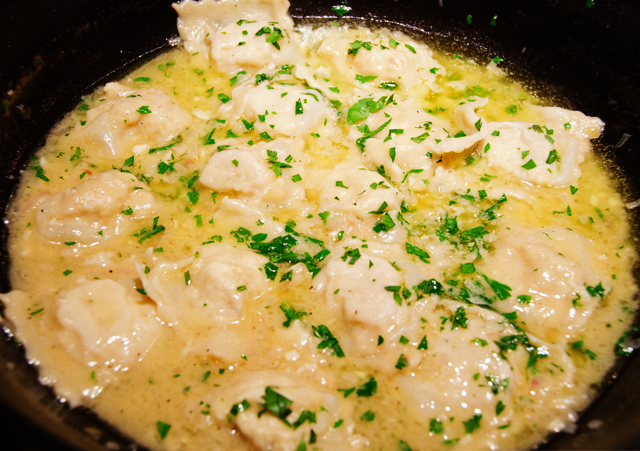
Joe's homemade crab ravioli were etherial and delicious with a simple herb beurre blanc.
Joe’s homemade crab ravioli were ethereal and delicious with a simple herb beurre blanc.


A few of our guests found it necessary to take a nap during dinner!


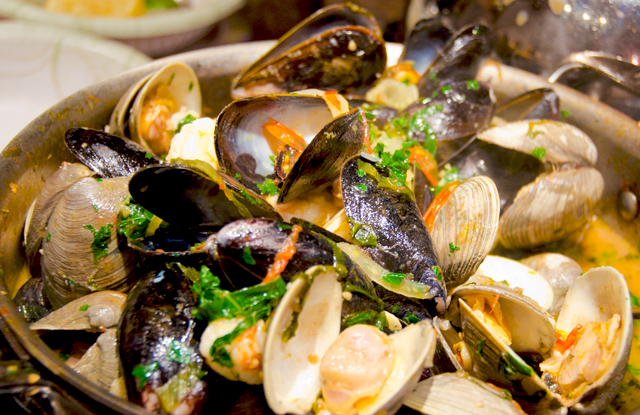
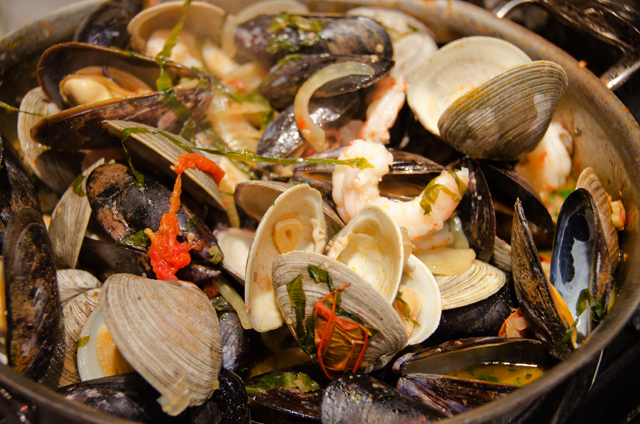
Michy's seafood stew combines shrimp, clams and mussels.
Michy’s seafood stew combines shrimp, clams and mussels.


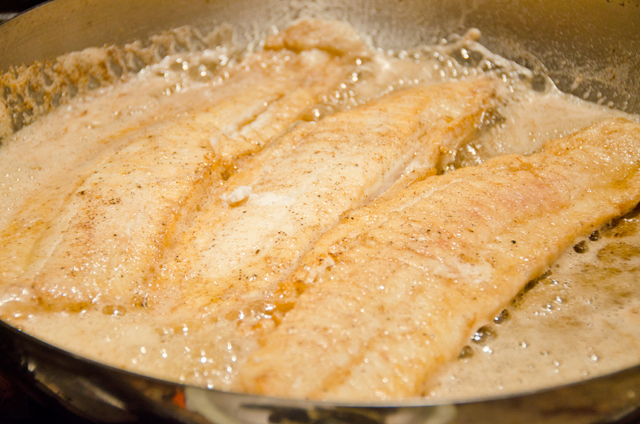
We finished off the evening with lemon sole with lemon and capers.


April 22, 2012 Lamb-Two Ways


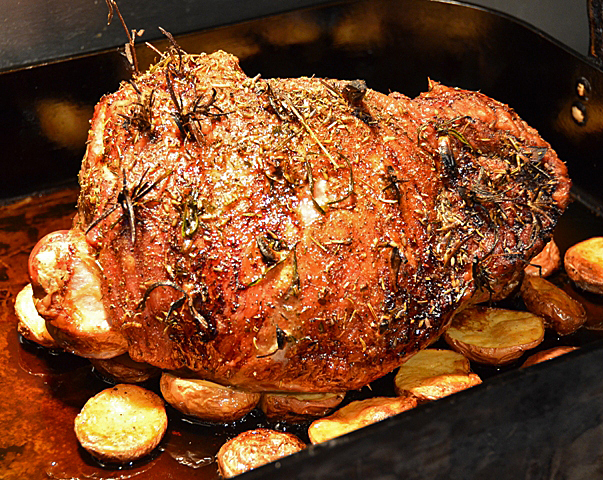
Easter Sunday’s roast lamb provided us with two meals, Provencal style leg of lamb and moussaka several days later. The leg of lamb we served was half of the leg, the shank end cut, which is the thigh from the hind leg. It is leaner and easier to carve than the butt end and makes for a more attractive presentation. The recipe, from the current issue of Fine Cooking magazine called for the lamb to be prepped the night before with a Provencal style rub and studded with garlic slivers. Herbes de Provence is a blend of dried herbs, common to the south of France. I found that no two herb combinations were in total concurrence, some had five herbs, others as many as nine. The one thing they all have in common is dried lavender. It is important to note that you should look for culinary lavender, there are many on-line sources, be certain not to use lavender from a garden center or florist that might be treated with pesticides. I had dried lavender from plants we grew from seed so I knew the quality would be better than something I might purchase.
Our approximately five and a half pound roast left me with a pound of leftover meat, we did have roast chicken and salmon on the menu as well. So the next challenge was to find an interesting recipe to use it in. A search for “leftover lamb” took me to a recipe for Moussaka Gratinee. I make moussaka quite often in the summer when we have an abundance of eggplants in the garden. Moussaka, a dish of Middle Eastern origins, is most often associated with Greek cuisine. It is usually a layered casserole of eggplant, beef or lamb, potatoes, tomatoes and topped with a Bechamel sauce. The recipe I chose baked the moussaka in individual ramekins, but I chose to make it in one casserole dish. A great way to use lamb leftovers with enough for lunch the next day.
.
Herbes de Provence Roast Leg of Lamb with Roasted Potatoes

adapted  slightly from the Fine Cooking Website

Ingredients

  • 1 5 1/2-lb bone-in shank half of a leg of lamb
  • 3 cloves garlic sliced into 1/8 inch slivers
  • 1 T herbes de Provence (I use the Penzey blend)
  • 1 T crushed dried lavender
  • 1 T coarse ground black pepper
  • 3 lbs small red potatoes, cut in half
  • 2 T olive oil
  • Kosher salt and freshly ground black pepper

Directions

  1. The night before-pat lamb dry with paper towels. With a sharp paring knife, make 2 inch deep slits all over the fat layer of the roast. Insert a sliver of garlic in each slit. Sprinkle roast with herbes de Provence, lavender and cracked black pepper. Cover and refrigerate.
  2. The next day-remove roast from refrigerator let sit at room temperature for at least one hour before cooking.  Position rack in the center of the oven and heat oven to 375F.
  3. Toss potatoes with olive oil, salt and pepper and spread in the bottom of a roasting pan.
  4. Sprinkle the lamb with salt and place on top of potatoes in the roasting pan. Roast until an instant-read thermometer inserted in the thickest part of the leg, away from the bone, reads 135°F to 140°F for medium rare, about 1 1/2 hours.
  5. Transfer roast to a serving platter, tent loosely with foil and rest for 20 minutes. Keep potatoes warm in the turned-off oven. Carve roast and serve with potatoes around it.

Personal Notes: Additional vegetables could be added to the roasting pan such as carrots, fennel, sweet onion, just cut the same size as the potatoes.

Moussaka Gratinee

adapted from the Fine Cooking website

Ingredients

  • 8 cups peeled trimmed eggplant, cut into 1/2 inch dice
  • Kosher salt
  • 1/4 c olive oil
  • 2 c finely chopped onion
  • l lb trimmed lamb cut into 1/2 inch dice
  • 2 cloves finely minced garlic
  • 1 T tomato paste
  • 1 T freshly grated nutmeg
  • Sea salt
  • 1/2 c beef stock
  • 3 T chopped fresh flat leaf parsley
  • 1 1/2 c milk or cream
  • 1 fresh bay leaf
  • pinch of ground mace
  • 2T unsalted butter
  • 2 T All-purpose flour
  • 1 large egg separated
  • 1 1/2 c cheese such as Pecorino Romano

Directions

  1. Put eggplant cubes in a colander set over a bowl, sprinkle with Kosher salt and set aside to drain for about 30 minutes.
  2. In a large skillet, heat 2 T olive oil over medium-low heat.  Add onion and cook until softened, about 10 minutes.
  3. Raise heat to medium high and add the lamb until it browns slightly, 5 minutes.  Lower the heat and add garlic, tomato paste, nutmeg, and 1 t sea salt. Add beef broth and stir to deglaze the pan, 5 minutes. Cook until liquid is slightly reduced, 2 minutes. Stir in parsley and season with fresh ground pepper. Transfer to a bowl and set aside.
  4. Dry the eggplant on paper towels. Heat remaining olive oil over medium high heat. Add eggplant, stirring frequently until lightly browned, about 2 minutes. Reduce heat to medium low and cook until soft, about 10 minutes.
  5. Preheat oven to 400°F and position the rack in the center.
  6. Stir the eggplant into the lamb mixture, scraping up the browned bits from the bottom of the pan.  Transfer the mixture to a large gratin dish.
  7. Put the milk or cream into a 2 quart saucepan with the bay leaf and mace. Bring to a boil, remove from heat, cover, and infuse for about 10 minutes. Strain into a liquid measuring cup and set aside.
  8. Melt the butter in a saucepan over medium heat. Add flour and stir occasionally, cook until lightly colored. Whisk in the milk and cook, whisking constantly until thickened, 3 to 4 minutes. Put egg yolk in a small bowl and whisk in about 1/4c of the warm sauce. Add yolk and sauce back into the saucepan and whisk until combined. Whisk in the cheese. Remove from heat and allow to cool.
  9. Whisk egg white until stiff peaks form and fold into the cooled sauce. Evenly spoon the sauce over the lamb-eggplant mixture.
  10. Place gratin dish inside a slightly larger dish. I used a disposable foil baking pan for this purpose. Add warm water to the foil container to come about 1/2 way up the dish. Cover the outer dish with foil and bake for 15 minutes. Uncover and continue to bake until browned and bubbling, about 30 minutes. Cool for 10 minutes and serve.
Personal Notes: ground lamb, beef or turkey could be substituted for the cooked cubed lamb, just adjust cooking time to properly brown the ground meat.

April 14, 2012 Italian Wedding Soup

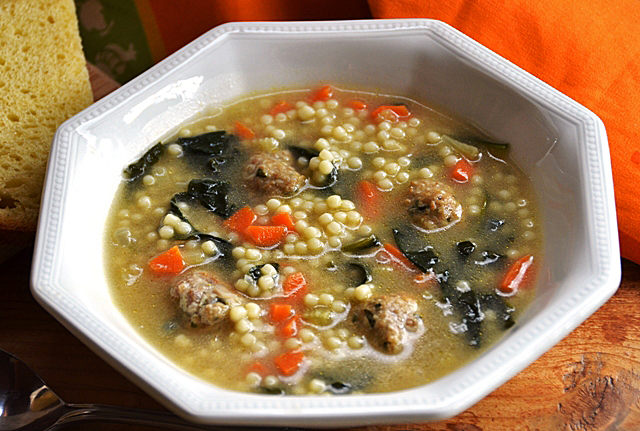
 As a former caterer I am well acquainted with Italian weddings. Lots and lots of good food and  copious amounts of  homemade treats for the very important cookie table. However,  Italian Wedding Soup was only just a good taste memory from many Easters ago. Of course, I didn’t have the old recipe (was it from Cuisine?) so I had some work to do.

My research took me to a soup that may have originated in Spain. Minestra Maritata, a Neapolitan soup of meat and greens got its name from the way the ingredients in this soup “si sposono bene” or marry well together. Just like the feast of the seven fishes, it’s debated whether the current recipe originated in Italy, or with the Italian American community, possibly in Pittsburgh Pa. The ingredients traditionally include chicken stock, meatballs or sausage, a green leafy vegetable and a small pasta. After much comparing of recipes, I chose to use and slightly adapt the one from the Barefoot Contessa using ground turkey and turkey sausage along with a touch of lemon peel in the meatballs. Homemade stock will always make the best soup but low sodium chicken broth is a reasonable substitution. My pasta of choice was acini de pepe, translated peppercorns in English.

Italian Wedding Soup

adapted from Barefoot Contessa Back to Basics

For the meatballs

  • 3/4 lb ground turkey
  • 1/2 lb uncooked turkey sausage casings removed
  • 1/2c fresh white bread crumbs
  • 2 t minced garlic
  • it grated lemon peel
  • 3T chopped parsley leaves
  • 1/4c freshly grated Pecorino Romano
  • 1/4c freshly grated Parmesan, plus more for serving
  • 3 T heavy cream
  • 1 large egg lightly beaten
  • Kosher salt and freshly ground pepper

For the soup

  • 2T olive oil
  • 1c minced onion
  • 1c  finely diced carrots
  • 3/4c finely diced celery
  • 10c  homemade chicken stock
  • 1/2c dry white wine
  • 1c small pasta, I used acini de pepe
  • 12oz washed and trimmed baby spinach

Directions

  1. Preheat oven to 350F.
  2. For the meatballs, combine ground turkey, sausage, bread crumbs, garlic, parsley Pecorino, Parmesan, cream, egg, 1t salt, and 1/2 t pepper in a bowl and mix gently with a fork.  Drop 1 to 1 1/4 inch meatballs on a parchment lined baking sheet. I used a small scoop for this, but a teaspoon would work as well. You should get about 40 meatballs. Bake for 25 minutes, or until cooked through and browned. Mine exuded a bit of cheese but that will be taken care of when added back to the soup.  Set aside.
  3. While the meatballs are baking, heat the olive oil over medium-low heat in a large heavy-bottomed soup pot.  Add the onion, celery, and carrots and saute until softened, 5-6 minutes stirring occasionally. Add the chicken stock and wine and bring to a boil. Bring the broth back to a simmer and add the pasta. Cook pasta according to package directions. Add meatballs to the soup and simmer for 1 minute. Stir in the spinach and cook until wilted, probably less than a minute. Taste soup for salt and pepper. Ladle into soup bowls and sprinkle each serving with extra grated Parmesan.

Additional notes: My Le Creuset 5 1/2 quart French oven was perfect for making this soup.I stressed  raw uncooked turkey sausage because there are quite a few sausages that are already pre cooked.  I made the  soup  ahead to the point of adding the chicken stock and wine.Store the meatballs in a separate container. Before serving, bring the soup back to the boil, return to a simmer, then add the pasta, and cook according to package directions. Add the meatballs, simmer for 1 minute, then the spinach for another minute. Serve with additional Parmesan.