January 13, 2016 Smoky Indonesian Style Chicken Curry

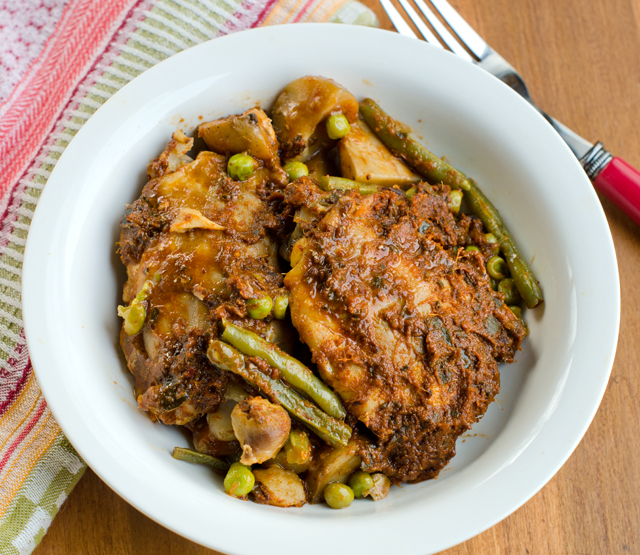
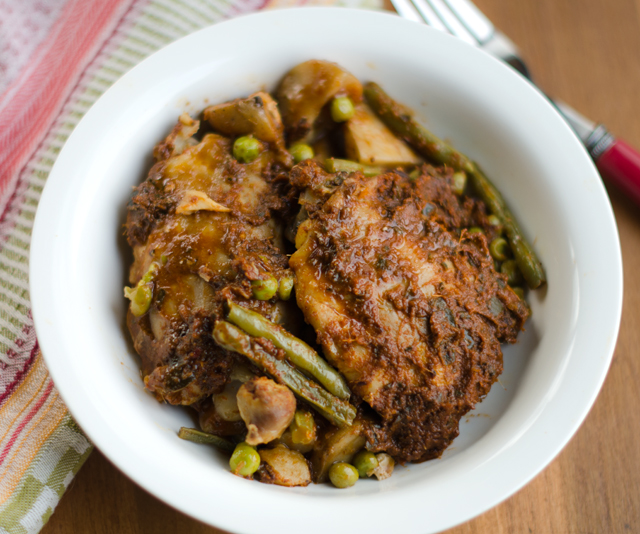
DSC_5680aSmoky Indonesian style chicken curry gets it’s intense heat from pasilla chilies, smoked paprika and sambal oelek balanced with the fragrant warm spices of ginger, coriander and cumin. This is another recipe from Bruce Weinstein and Mark Scarbrough’s article, Slow Cooker Secrets in Fine Cooking magazine

The dark meat of chicken thighs is a natural for the long simmer in the slow cooker. In this recipe, no browning is required,  the skin is removed before cooking and the thighs are coated with a rich complex chile paste.

Pasillas are the chile of choice for this recipe. A variety we have grown for many years, pasilla roughly translates “little raisin” from the Spanish, referring to the way the dark green fruit turns a reddish brown and slightly wrinkled when mature.  I especially like it for it’s mild heat and versatility for use in Mexican and Asian cuisine.Pasilla chiles can be used in chili sauces and pastes as well as moles. They are wonderful fresh on the grill in summer along with a steak.  Pasillas are rich, earthy and mildly spicy with just a hint of sweetness.

We had a bumper crop of peppers this year and to preserve the harvest, I dry some of them. Start with whole, unblemished peppers that have been washed and dried. Place the peppers on a wire mesh rack over a large baking sheet with room between each pepper for air to circulate. I used the lowest convection setting (140°F) in my oven. Drying time varies and I check them every now and then to see how they are progressing. Smaller peppers will dry quicker, the larger ones could take a day or more.  It is important that the peppers are completely dry before storing. Partially dry peppers will turn moldy and ruin the whole container, I know from prior experience.

To use dried chilies, reconstitute by placing them in a bowl and covering them with boiling water. Check at about twenty minutes to see if they are soft. To make the chili paste, the reconstituted pasillas are combined with shallot, lemongrass, tomato paste, spices, brown sugar and sambal oelek. I am fortunate to have a large supply of lemongrass at my disposal. Our lemongrass plant grows large and bushy in the garden every summer. Joe harvests a large portion of the stalks that I freeze for recipes like this. The significantly cut back plant is brought indoors for the winter where it’s only predator is Cody, our Golden Retriever who enjoys nibbling on the leaves. Lemongrass has a mild citrus flavor with a floral aroma. Sambal oelek is a ground paste made only of chili peppers and salt.  It is less acidic than sriracha and is chunkier and thicker in texture.  It is readily available in the Asian section of most supermarkets.

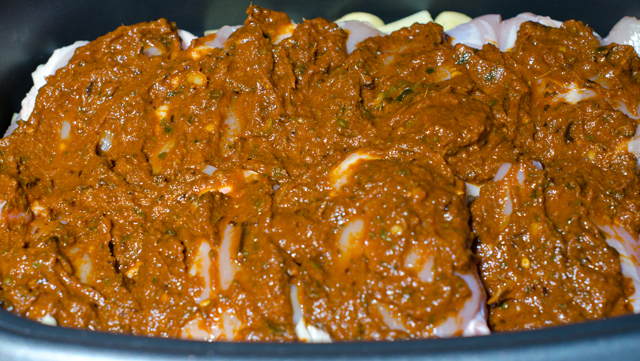
The chili ingredients are combined in the blender and chicken broth is added to make a thick sauce. I needed more broth than the original recipe called for, use as much broth as you need to make the sauce smooth, not chunky. Layer the potato pieces at the bottom of the slow cooker. Season the chicken pieces generously with salt and pepper. I found it easier to spread the chili paste on the chicken after it was in the slow cooker. Put the lid on and cook until the chicken and potatoes are tender, 2 to 3 hours on high, 6 hours on low. Turn the slow cooker on high (if you were cooking on low) and sprinkle the green beans evenly over the chicken and cook until crisp tender, 30 minutes. Add peas and cook until heated through, 10 minutes. They suggest serving it with rice, but one starch (potatoes) is sufficient for me.
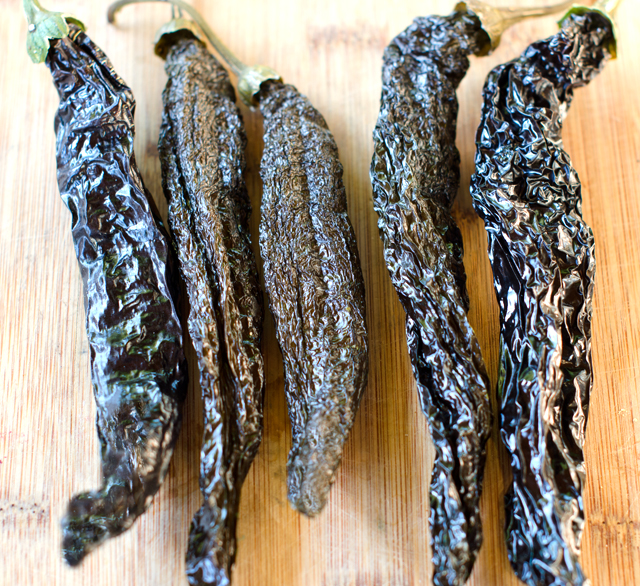
Dried pasilla bajio chilies from the garden.


Smoky Indonesian Style Chicken Curry

Serves four

Ingredients

  • 5 dried pasilla or New Mexico chiles, stemmed and seeded
  • 1 small shallot, quartered
  • 2 Tbs. thinly sliced lemongrass
  • 2 Tbs. tomato paste
  • 2 Tbs. sweet smoked paprika
  • 1 Tbs. minced peeled fresh ginger
  • 1 Tbs. packed dark brown sugar
  • 1 Tbs. sambal oelek
  • 1-1/2 tsp. ground cumin
  • 1-1/2 tsp. dried coriander
  • Kosher salt
  • 6 Tbs. lower-salt chicken broth
  • 8 bone-in chicken thighs (about 3-1/4 lb.), skin removed
  • Freshly ground black pepper
  • 1-1/4 lb. waxy potatoes, such as Yukon Gold, cut into 1-inch pieces (about 3-1/2 cups)
  • 1/2 lb. green beans, trimmed and cut into 1-inch pieces
  • 2/3 cup thawed frozen peas
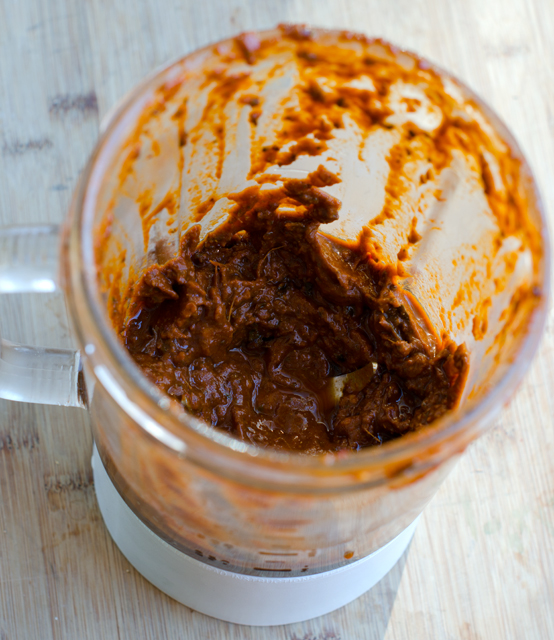
Ingredients for the chili paste.
DSC_5675a
The ingredients are blended together.
Chicken thighs are coated with the chili paste before cooking.

Directions

  1. Put the chiles in a medium bowl and cover with boiling water; set aside to soften for 20 minutes. Drain, then transfer the chiles to a blender.
  2. Add the shallot, lemongrass, tomato paste, smoked paprika, ginger, brown sugar, sambal oelek, cumin, coriander, and 2 tsp. salt. Blend the mixture until smooth, drizzling the broth through the hole in the lid and stopping occasionally to scrape down the inside of the jar.
  3. Generously season the chicken with salt and pepper and spread evenly with the chile mixture. Layer the potatoes in the bottom of a 5- to 6-quart slow cooker and arrange the chicken in an even layer on top. Cover and cook until the potatoes are fork-tender and the chicken is tender but not falling off the bone, 2 to 3 hours on high and 6 hours on low. (The curry can stay on the keep-warm setting for up to 3 hours.)
  4. About 45 minutes before serving, turn the slow cooker to high (if it was on low or keep-warm), sprinkle the green beans evenly over the top, cover, and cook until crisp-tender, about 30 minutes. Add the peas and cook until heated through, about 10 minutes. Stir to combine, season to taste with salt and pepper, and serve.
DSC_5684a


January 9, 2016 Spicy Slow Cooked Short Ribs with Lime and Basil

DSC_5664aI received my first slow cooker, a Crock Pot, almost thirty four years ago as a wedding present. It’s a very basic model,  just a low and high setting, no timers or special functions. Even though I have never replaced the glass lid that broke many years ago, I have other lids that fit just fine and it works as well today as the day I got it. I confess that in recent years my crock pot didn’t get much use, maybe just a little foodie snobbery on my part, only on Thanksgiving to keep soup warm or for hot apple cider. Then last February Joe used it to cook a short rib recipe from an article in a magazine as part of the multi course meal he treats me with every year for Valentine’s Day.

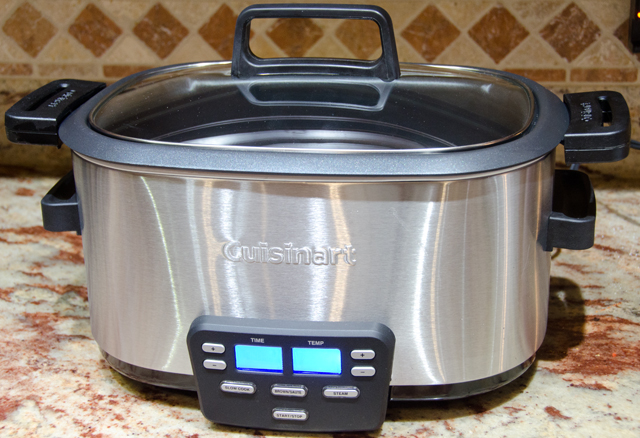
Before Christmas I discovered my brother and sister in law were in need of a slow cooker and I decided it would be a great and very practical gift.  I did some research and found one that I thought would fit the bill.  Not only can you slow cook in this model, you can brown your meat, steam vegetables or fish and it has a “keep warm” function that keeps your finished dish warm up to eight hours. Little did I know that when I was doing my research my hubby was looking for one for me as well. That meant my sister in law and I received new slow cookers (Cuisinart brand) as Christmas presents. It was the first gift I opened Christmas morning since Joe was anxious to recreate the recipe for our Christmas dinner.

The recipe for spicy slow cooked short ribs with lime and basil came from an article with recipes, Slow Cooker Secrets, in Fine Cooking magazine. Cookbook authors Bruce Weinstein and Mark Scarbrough wrote the article in conjunction with their recently published, The Great American Slow Cooker Book. Their goal in writing this book was to achieve the best results from an appliance that is found over 80% of American homes. They have found that the low and slow temperatures and the high moisture environment of the slow cooker are the perfect combination for braising all kinds of dishes. The busy cook can prepare their meal early in the day, set it and forget it while at work or doing other things.

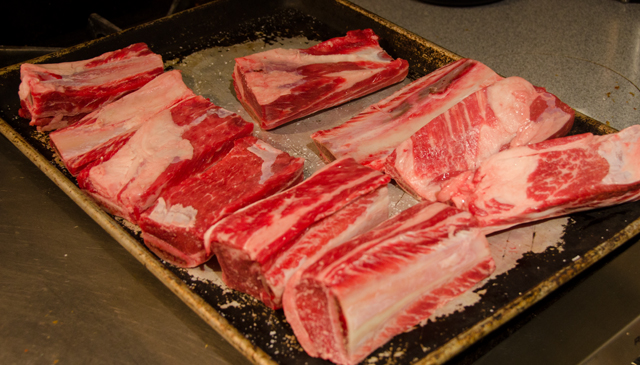
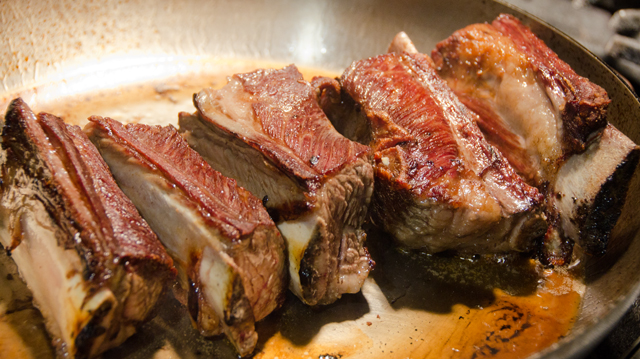
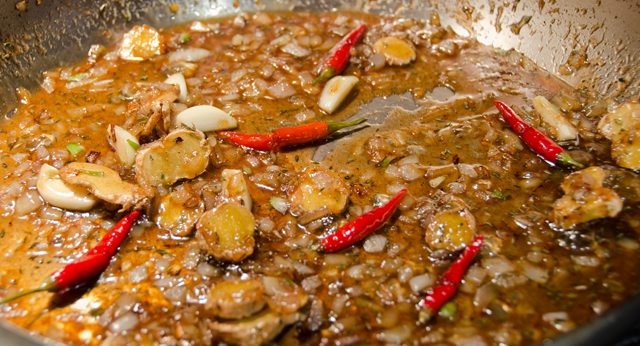
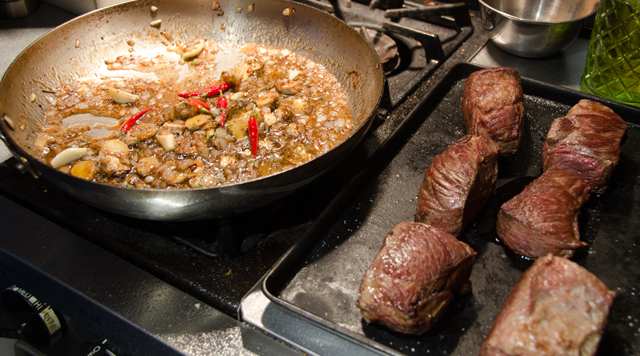
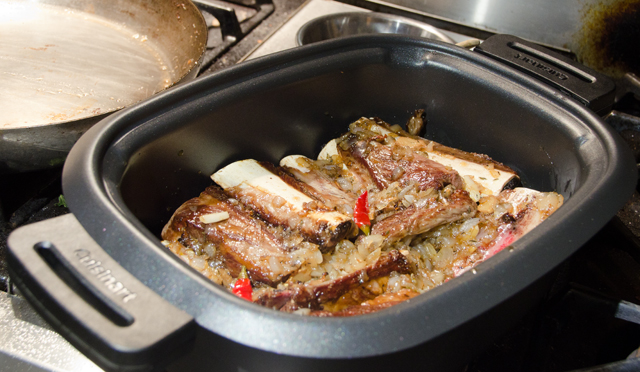
Short ribs are a perfect match for the slow cooker. The meat is dense and well marbled with connective tissue that softens during the long cooking process.  Be sure to get English cut short ribs which are cut parallel to the bone rather than cut across the bone. Ribs cut across the bone are referred to as flanken cut and are used for Korean style short ribs.  Even though our slow cooker has a browning function, Joe thought he would achieve higher temperatures and better browning in a skillet. Once browned, the ribs are set aside and the onion is added to the same pan and cooked until soft. Additional aromatics, ginger, thyme, chilis, garlic, nutmeg and allspice are the next additions to the pan. The original recipe uses Thai bird chilies cut in half, we used whole (frozen from the garden) for a little less heat.

The next step is small but adds a unique flavor to the sauce.  A half cup of lime marmalade is stirred into the onions and aromatics.  Lime marmalade is found in the British section of many larger supermarkets and I think it’s tangy sweetness is worth looking for. If you can’t find it, orange marmalade is a good substitute, just add a little fresh lime juice and peel.

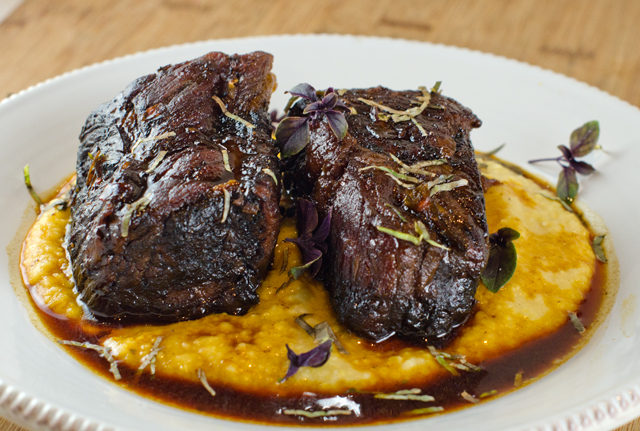
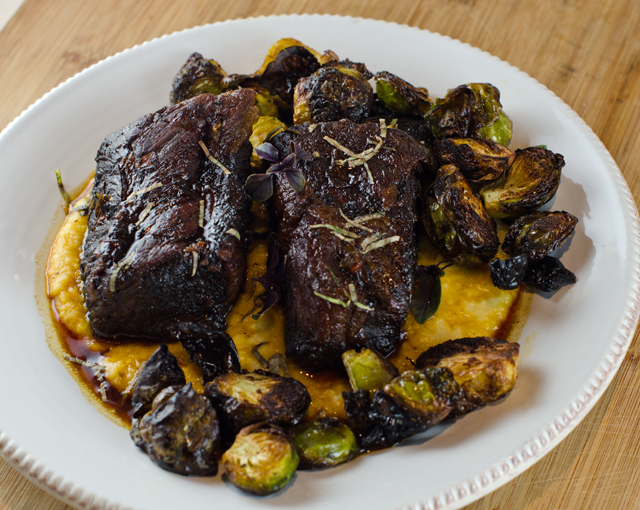
Add this sauce to the slow cooker insert, stir in soy and chicken broth and nestle your short ribs in the sauce. The ribs are cooked on low for 9 hours or 5-6 on high. The final step is to move the finished ribs to a platter, then defat and finish the sauce. Stir chopped basil into the sauce and season with salt and pepper to taste. Garnish with additional basil leaves. We made this twice in the week between Christmas and New Year, once with bone-in short ribs, the other time with boneless, both were delicious. The short ribs were incredibly tender and the sauce was spicy with a delicious citrusy tang.   We served this with soft polenta finished with some Parmesan to sop up the juices. A definite keeper for us.

The recipe uses English style short ribs, perfect for the slow cooker.
Brown the short ribs in a skillet or your slow cooker insert.
After the meat is browned, the onion and aromatics are added to the pan.

DSC_5638a

DSC_5642a
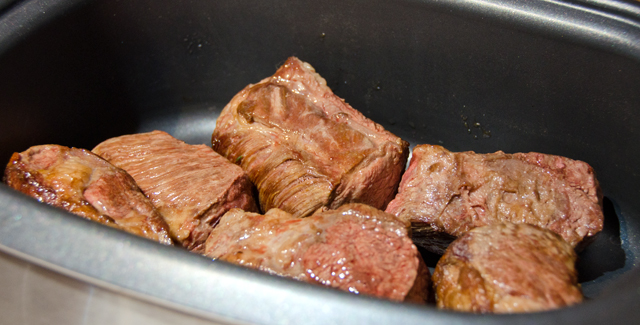
Adding the browned short ribs to the slow cooker insert.
My new Cuisinart slow cooker.
Nestling the browned short ribs into the sauce.


Spicy Short Ribs with Lime and Basil

Serves four

Ingredients

  • 1T peanut oil
  • 3lb bone-in short ribs
  • 1 medium onion, chopped
  • 6 small Thai bird chilies, stemmed and halved lengthwise
  • 2 medium cloves garlic, quartered
  • 1 3-inch piece of ginger, thinly sliced
  • 1t dried thyme
  • ½t ground allspice
  • ¼t freshly grated nutmeg
  • ½c lime marmalade
  • ½c lower salt chicken broth
  • 2T soy sauce
  • 1T white wine vinegar
  • 2T finely chopped fresh basil leaves; plus small leaves for garnish
  • Kosher salt and freshly ground pepper

Directions

  1. Heat the oil in a 12-inch skillet (or removable insert).
  2. Add half the short ribs, turn once, brown well.
  3. Transfer ribs to a bowl, repeat with remaining ribs.
  4. Add onion and cook stirring often until soft (about 3 minutes).
  5. Add chiles, garlic, ginger, thyme, allspice and nutmeg
  6. Stir until fragrant (about 1 minute).
  7. Add marmalade and stir until melted.
  8. Pour contents into slow cooker insert, if you were cooking in a skillet.
  9. Stir in broth and soy sauce.
  10. Nestle the ribs into the sauce pouring the meat juices into the pot.
  11. Cover and cook until fork tender (5-6 hrs on high or 9 hrs on high).
  12. The cooked ribs can stay on the “keep warm” setting for up to 2 hrs.
  13. Use tongs to transfer the short ribs to serving bowls or a platter.
  14. Strain the sauce, set aside.
  15. Pour the sauce into a saucepan.
  16. Add the vinegar to the sauce, bring to a boil, until reduced by half (about 8 min).
  17. Stir in basil and cook for 1 minute to let the flavors meld.
  18. Season to taste with salt and pepper, pour sauce over the short ribs.
  19. Garnish with small basil leaves.
Short ribs served on a bed of polenta.


November 21, 2015 Sheet Pan Chicken Thighs with Delicata Squash, Fennel and Grapes

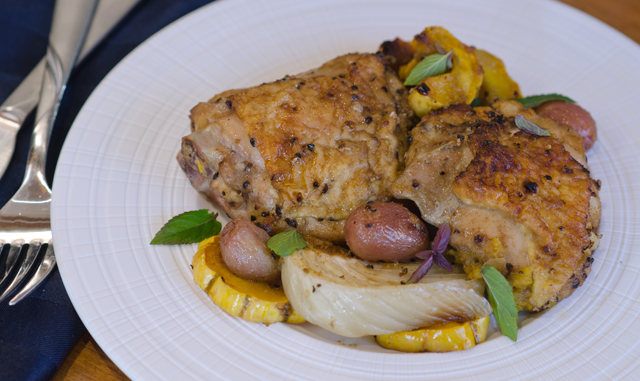
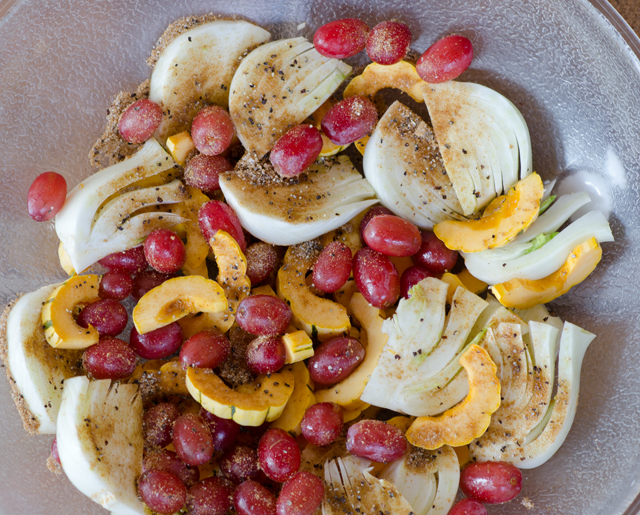
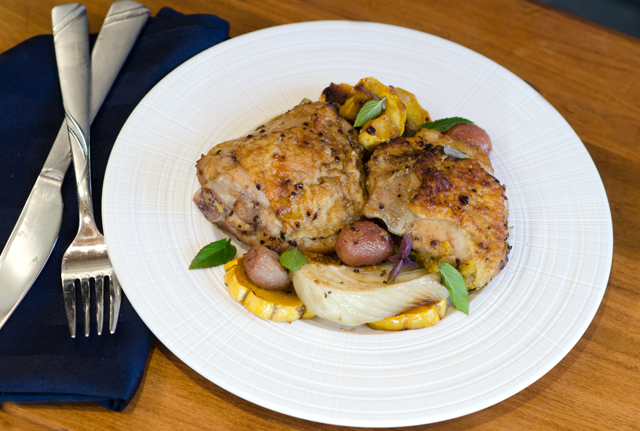
DSC_5102aHere is another no fuss sheet pan supper, this time from the Epicurious website. The star of the show, bone in chicken thighs, are paired with a different cast of characters, red grapes, fennel and delicata squash.

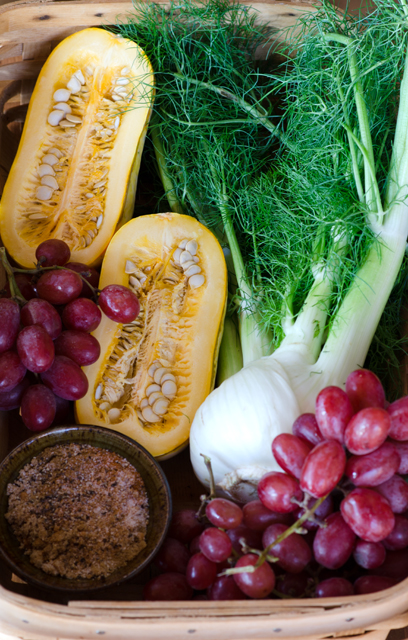
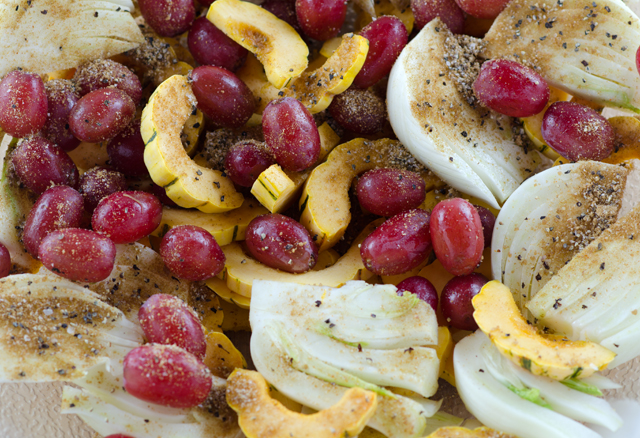
Fall is prime season for grapes, the fruit that is harvested now has been hanging on the vine all summer. This translates into succulent fruit with high sugar content and complex flavors. Roasted grapes are delicious and I doubled the amount from the original recipe. Crunchy and a little bit sweet, fennel is in season now and through early spring. I love it’s licorice flavor raw in salads and roasting fennel caramelizes it and mellows out it’s sweetness.  Delicata is the smallest of the winter squashes, usually weighing between 1/2 to 1 pound each. They are cylindrical in shape with yellow or cream colored skin with slight ribbing and dark green stripes. Unlike other winter squashes, the skin of the delicata is edible and has fewer seeds, making them easier to prepare.

The recipe starts with a flavorful rub that includes cumin, coriander, (my addition) brown sugar, salt, black and cayenne pepper. Half of the rub is tossed with the vegetables, the other half with the chicken thighs. You can do this step ahead earlier in the day and assemble the ingredients on the sheet pan before you are ready to roast. Space the components evenly on the baking sheet so all the ingredients get nice and brown. For even cooking, rotate  the pan halfway through the cooking time.  Be sure to use skin on bone in chicken thighs, even if you don’t eat the skin, it protects the meat while it is cooking.  As I previously posted, an instant read thermometer will give you the best results.

DSC_5042a

DSC_5077a

Sheet Pan Chicken with Delicata Squash, Fennel and Grapes

Serves four

Ingredients

  • 1T brown sugar
  • 1T ground cumin
  • 1T ground coriander
  • 1T kosher salt
  • 1T freshly ground black pepper
  • ¼t cayenne pepper
  • 1 delicata squash, about 1½lbs, halved lengthwise, seeded and cut into ¼” half moons
  • 1 fennel bulb, about ½lb, cut in half lengthwise, seeded and cut into half moons
  • 2c seedless red grapes
  • 1T olive oil
  • 2 lb. bone-in skin on chicken thighs (5-6 pieces)
  • 1/4c torn fresh mint leaves

DSC_5074a

Directions

  1. Preheat oven to 425°F with the rack in the lower third of the oven.
  2. Mix the first six ingredients in a small bowl. Toss squash, fennel and grapes with oil and half of the spice mixture. Arrange in a single layer on a sheet pan.
  3. Rub chicken thighs evenly with the remaining spice mixture. You can prepare both components several hours in advance and store in the refrigerator. Bring the chicken out about 20 minutes before proceeding with the recipe.
  4. Arrange the chicken thighs skin side up on top of fruit and vegetables. Roast until skin is browned and an instant read thermometer inserted into the thickest part of the thigh reads 165°F, about 25 minutes to one half hour.
  5. Divide chicken, fruit and vegetables between four plates and top with mint.

DSC_5101a

November 12, 2015 Okonomiyaki or Japanese Pancake

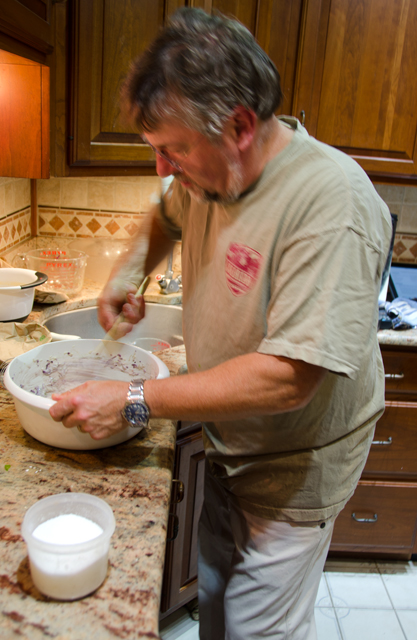
DSC_5036a“Okimiaki” was the one word message Joe sent me one Tuesday night during his office hours. My response, “huh?” seemed appropriate, poor guy, he has been working too much I thought. His response was “Japanese pancake made w cabbage- I want to make them”.

Okay, that was a new one for me, I thought I knew quite a bit about Japanese cooking so I did what everyone does these days, I Googled it. No appropriate response for the okimiaki spelling but when I googled “Japanese pancake” I started getting some information.

Joe heard about the Japanese pancake from a patient of his who is a chef and a writer. She and some friends were making them for a party. It was something new for both of us. I have quite a few Japanese cookbooks that go beyond the typical sushi and sashimi recipes, none gave any reference to Japanese pancakes or okonomiyaki as they are also called. I even called on a friend who travelled to Japan this past spring to see if she could give me any insight but she was not familiar with this now puzzling dish.

I learned that okonomiyaki is Japanese street food made popular in the cities of Osaka and Hiroshima. Because of it’s shape, it is sometimes referred to as Japanese pizza or pancake in the United States. The ingredients in an Osaka style okonomiyaki are mixed together while the ingredients in a Hiroshima style are layered and topped with noodles and a fried egg. Okonomi is translated “what you like” and “yaki” is grilled or cooked, so okonomiyaki is essentially “cooked as you like it.”  The one thing they all have in common is a pancake like batter and shredded cabbage, the rest is up to the cook to make the pancake “as they like it”. There is special okonomiyaki flour, the only difference I could find in it were the special seasonings and possibly some powdered yamaimo, Japanese yam. Yamaimo’s gelatinous texture gives the pancake added fluffiness.

The “as you like it” aspect can get interesting and I have seen recipes include shrimp, squid, pork belly, cheese and vegetarian options. How you top your pancake is equally important and might include chopped scallions, sesame seeds with a flourish of okonomi or tonkatsu sauce and Kewpie mayonnaise. Bottled tonkatsu with the red bull dog on the label is also labeled “vegetable and fruit sauce” but you have to read down the list of ingredients a bit to find either. I presume the brown color is from the prune paste. There are also recipes on line for tonkatsu sauce. You will find Kewpie mayonnaise on the Asian aisle in larger supermarkets. It has a Kewpie doll with outstretched arms on the package. It differs from our good old fashioned Hellman’s with it’s use of rice vinegar, giving it more tang and MSG to up the umami flavor.

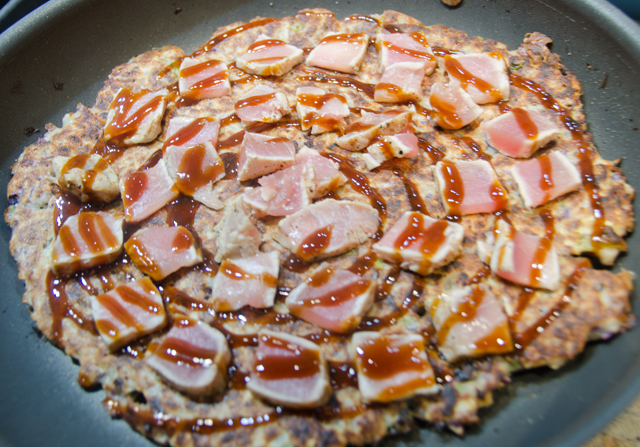
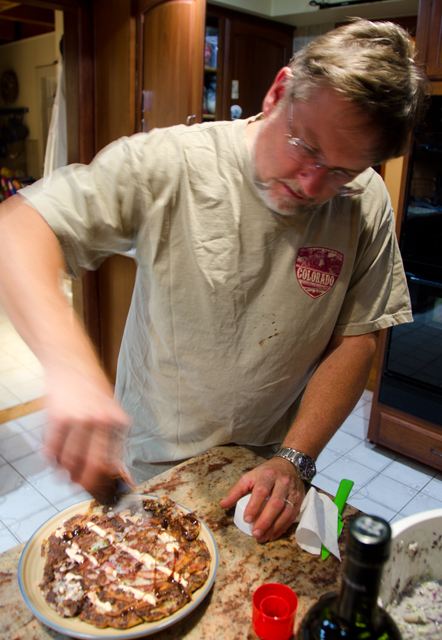
I spent quite a bit of time contemplating what recipe to use. I wanted to stay fairly basic for our first attempt and decided on an Osaka style recipe from Serious Eats. We, or as I should really say, Joe made them on a sashimi night which is a weekend night when we recreate some of our favorite sashimi recipes using salmon, scallops and tuna. His efforts turned out quite good, the first was topped with bacon, then he got a little more creative and topped the second with seared tuna. We finished them off with tonkatsu sauce, mayo (not Kewpie) with sriracha, toasted sesame seeds and pickled ginger. The combination of the crispy exterior and soft interior is quite addictive and very filling. We had enough for a breakfast okonomiyaki for Joe and smaller ones for dinner the next day. Would we try them again? Not every week, but definitely.

Okonomiyaki

Makes 4 large pancakes

Ingredients

  • 2 cups all-purpose flour
  • 1 1/3 cups dashi or low-sodium chicken stock
  • 4 large eggs, beaten
  • 8 cups finely chopped cabbage-we used a combination of green and red
  • 2 cups chopped raw shrimp or baby shrimp
  • 8 scallions, sliced, divided
  • Kosher salt, to taste
  • 8 slices bacon, sliced in half- the second, slices of seared tuna
  • 2 tablespoons vegetable oil
  • Kewpie Mayonnaise or sriracha mayo
  • Okonomiyaki or tonkatsu sauce
  • Toasted sesame seeds
  • Pickled ginger

Directions

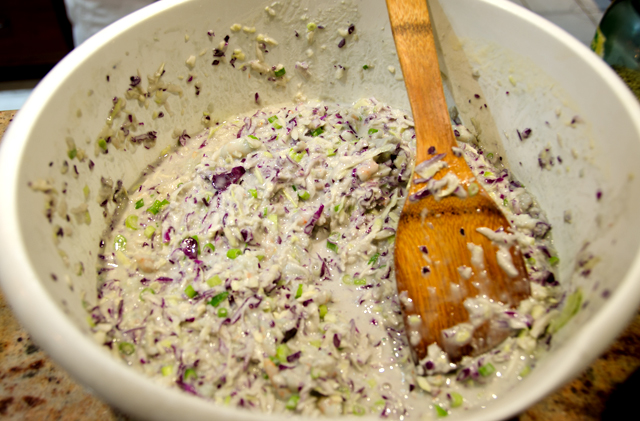
  1. In a large bowl whisk together flour, dashi or stock, and eggs. Add chopped cabbage and mix so that the cabbage is gently folded into the batter. Fold in shrimp and scallion whites then season with salt.
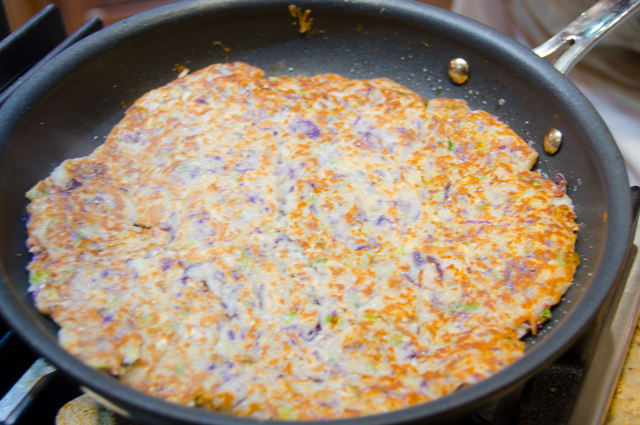
  2. Heat 1/2 tablespoon vegetable oil in a large non-stick skillet over medium high heat until shimmering. Add 1/4 of the batter, gently pushing the batter down with a spatula until flattened. Cook until underside is browned, about 4 minutes, then place 4 pieces of halved bacon on the top side. Gently flip the pancake so that the side with the bacon is now cooking. Cook until the bacon is crisp and the pancake is cooked through, about 5 more minutes. Serve immediately with mayonnaise, okonomiyaki sauce, toasted sesame seeds, pickled ginger, and scallion greens. Repeat with remaining pancakes.

    DSC_5024a

    DSC_5027a

    DSC_5028a

    DSC_5031a


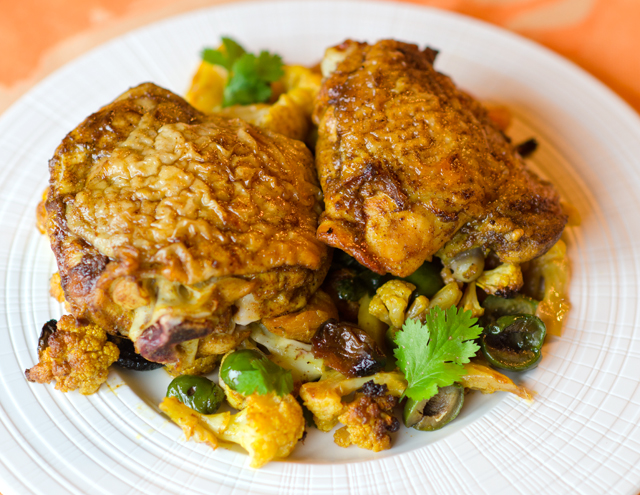
November 8, 2015 Curried Chicken with Cauliflower, Apricots and Olives

DSC_5012aStep aside slow cookers, move over microwaves, there’s  a new method for getting dinner on the table in a hurry, sheet pan suppers. It provides the busy weeknight cook with easy preparation, the convenience of cooking everything on one pan and makes clean up a snap.

The sheet pans I have stood the test of time, they have served me well for over 25 years.  They may have a little more “character” than a new one but they still do the job. As a caterer I used them constantly, for roasting vegetables and meats, baking cookies, rolls and countless hors d’oeurves. Actually the correct name is a half sheet pan, usually 13″x18″ in dimension,  just the right size to fit in most standard ovens. A full sheet pan is18″x26″, the size fits the rack in a commercial oven. Don’t confuse a jelly roll pan with a sheet pan, jelly roll pans are flimsy and you would need to double them up and you still wouldn’t achieve the same sturdiness. A sheet pan is an inexpensive addition to your cooking equipment. You will find them in both restaurant equipment stores or in the catering aisle of any big box store. Choose one that is aluminum or stainless steel, they hold up well under high heat cooking. I would not recommend a non stick sheet pan, the surface will eventually erode and could possibly contaminate the food you are cooking.

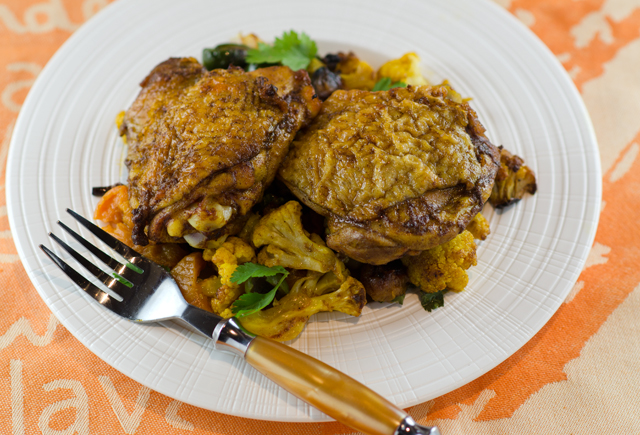
Curried Chicken Thighs with Cauliflower, Apricot and Olives is from Molly Gilbert, author of Sheet Pan Suppers. She calls this a riff on the classic eighties Silver Palate recipe for Chicken Marabella. In Ms. Gilbert’s version the flavor profile moves from Meditteranean to Moroccan, the capers in the original recipe are gone, the olives remain and the prunes have been replaced with dried apricots.

Start the recipe by combining the chicken thighs with half of the curry powder and smoked paprika, oil, vinegar, cinnamon, cayenne and salt. I think it’s beneficial for a  recipe that uses an ingredient in two different steps to read, 4 teaspoons curry powder, divided. That would be helpful for the cook, (and we all do it) who maybe isn’t reading the recipe that carefully.

Next is the issue of curry powder, a blend of many spices that can range in flavor from very mild (sweet) to the Madras blend which is quite hot. I think the sweet curry powder is the right choice for most palates making this recipe. The paprika called for in the recipe is smoked, giving another interesting flavor dimension to the dish.

Toss the chicken with the spices, cover and refrigerate for at least eight hours but preferably overnight. The recipe calls for boneless skinless chicken thighs, I used bone-in thighs because I felt they would hold up better to the high heat cooking. When you are ready to cook, place the rack in the center of the oven. The recipe calls for a 450°F oven but I reduced mine to 425°F since I was roasting with convection heat.

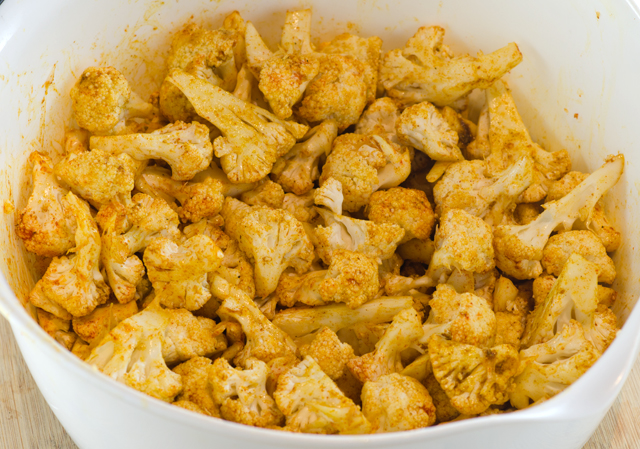
A large head of cauliflower translated into about eight cups for me.  I like to cut the head in half and then into quarters through the core. Then I separate the florets from the central stem and break the florets into smaller, relatively equal sized pieces. Toss the cauliflower with the remaining oil, curry powder, paprika and salt to evenly coat. Spread the cauliflower evenly on the sheet pan in a single layer and add the chopped apricots and olives. Soak the apricots for five minutes to soften, anything longer will turn them mushy. I used Castelvetrano olives, my personal favorites and easy to find on the Mediterranean bar of any good supermarket.

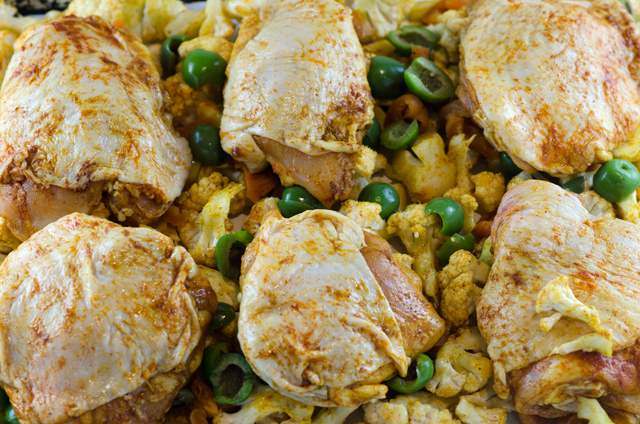
Remove the chicken from the marinade and space the pieces evenly over the cauliflower. Add the apricots and olives to the baking sheet. You might want to tuck some of them under the chicken since they get quite brown. Roast, rotating the pan halfway through the cooking time. I used an instant read thermometer and my chicken pieces were done in a little less than a half hour. If you are not using a convection oven it may take a little longer but no matter what, the instant read thermometer is always key to getting the best results.

This is a great weeknight supper because everything can be ready in advance, chicken marinated, cauliflower, apricots and olives prepped. At dinnertime get everything ready to cook while your oven preheats. A simple salad will complete the meal.

Curried Chicken with Cauliflower, Apricots and Olives

Serves 4

Ingredients

  • 8 bone-in chicken thighs (about 2lbs)
  • ¼c extra virgin olive oil, divided,  2T chicken, 2T cauliflower
  • 1T apple cider vinegar
  • 4t sweet curry powder, divided, 2t chicken, 2t cauliflower
  • 1t smoked paprika, divided, ½t chicken, ½t cauliflower
  • ½t ground cinnamon
  • ¼t cayenne pepper
  • Kosher Salt
  • 1 large head cauliflower, cut into bite-sized florets
  • ¾c chopped dried apricots, soaked in hot water for 5 minutes and drained
  • 1c pitted green olives, halved
  • ½c chopped fresh cilantro or parsley
  • 1 large lemon cut into wedges
DSC_5006a
Toss the cauliflower with curry powder, cinnamon, smoked paprika, cayenne pepper and salt.
Everything ready to go on the sheet pan.

Directions

  1. Combine the chicken thighs with 2T oil, the vinegar, 2t curry powder, cinnamon, cayenne and ¾t salt in a medium bowl, tossing to coat. Cover and refrigerate for at least 8 hours and up to overnight.
  2. Position the oven rack in the center and preheat oven to 450°F (425°F if using convection heat). Line a large sheet pan with parchment paper. Combine on the pan, the cauliflower with the remaining 2T oil, 2t sweet curry powder, ½t paprika and ¾t salt, tossing to coat. Be sure the cauliflower is spread out evenly.
  3. Add the apricots and olives and spread them evenly on the pan.
  4. Remove the chicken thighs from the marinade and place them evenly spread over the cauliflower. Roast, rotating the pan halfway through the cooking time, between 30-35 minutes. Remove the chicken from the pan and toss the cauliflower with the pan drippings. Serve chicken and cauliflower with a sprinkle of cilantro or parsley  and lemon wedges on the side.

DSC_5019a


July 23, 2015 Zucchini Pesto Frittata

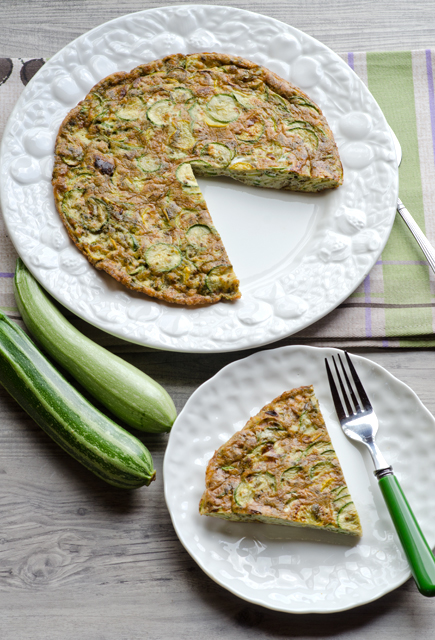
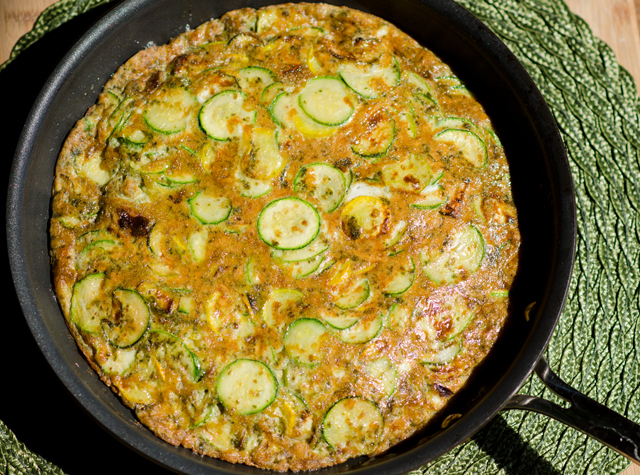
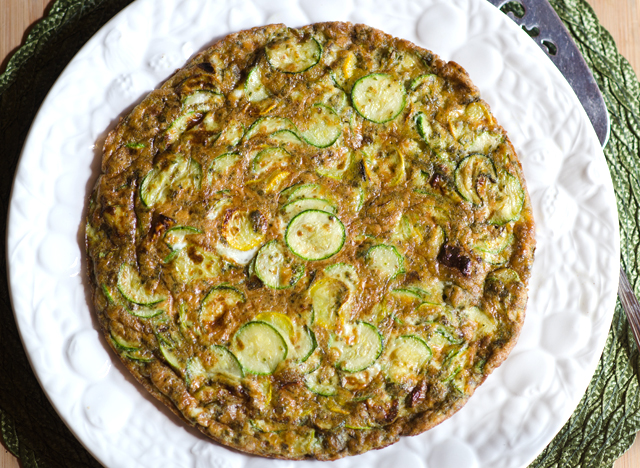
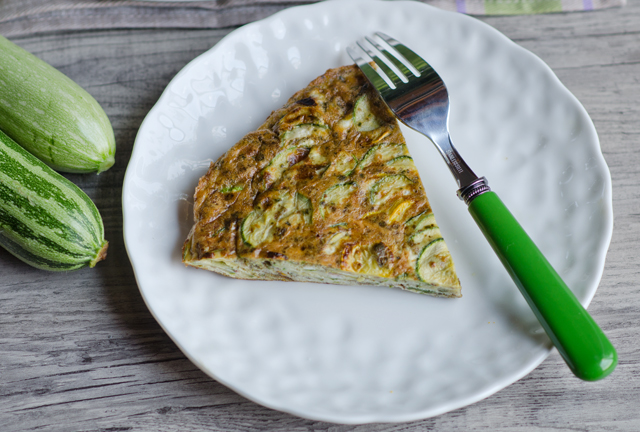
DSC_3760aIf you’re like me and not always in the mood to cook something when you get up in the morning for breakfast, but still want a little something to eat, a frittata is a great choice. Made the day before, they warm up quickly and also taste good at room temperature.  But frittatas aren’t just for breakfast, they make a nice lunch, light supper, sliced thin as an hors d’oeurve or anytime you just want a little nibble. This time of year they are a great way to showcase farm fresh eggs and produce.

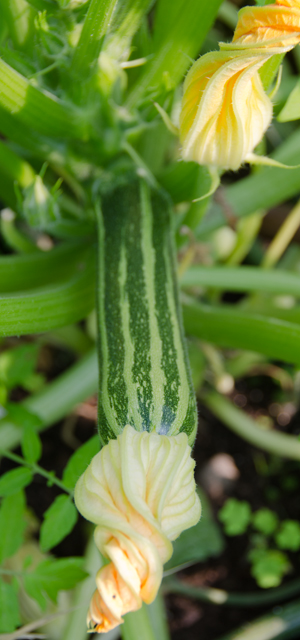
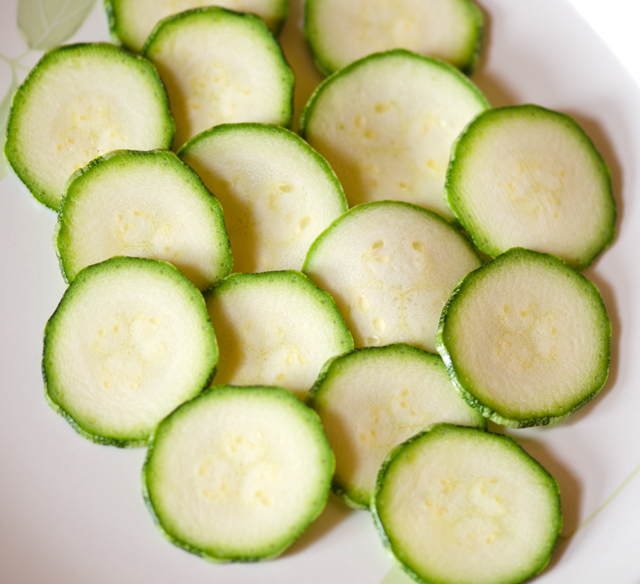
For this recipe I chose the smallest zucchini I could find in the garden. Since their seed pods are still underdeveloped, they have a sweet nutty quality to them. I wanted very thin slices rather than shreds which is the usual method of preparation. Slice by hand, or for real uniformity, I used the 2mm slicing disk on the food processor. Larger zucchini should be shredded and salted then squeezed dry before adding to the frittata. If you skip that step, when you cook the zucchini you essentially will be steaming, not sauteing it. A couple of tablespoons of a chopped fresh herb is a welcome addition to a frittata, but since I had just made some, I opted for pesto, a delcious addition to this dish.

A 10″ non stick skillet with an oven safe handle is essential for this recipe. Begin by cooking the zucchini until it releases some liquid and the slices start to brown and become tender, this should take about 5-6 minutes. Set the pan aside.

Preheat your oven’s broiler and place a rack in the upper middle position. Beat the eggs and Parmesan cheese in a medium bowl.  Stir in pesto and the cooked zucchini. Add the rest of the oil to the empty skillet and heat to medium. Add zucchini-egg mixture and cook for 4-5 minutes, frittata will look set around the edges. Move the skillet to the broiler and leave a potholder on the oven door, that handle will get hot. I set a timer now for 90 second intervals. It took about 2 intervals for the frittata to get brown, which translates to about 4 minutes.

Using the potholder, remove frittata from the oven and allow to rest for 5 minutes.Run spatula around the edge of the skillet to loosen the frittata. You can serve the frittata warm right from the skillet, or slide unto a platter for a prettier presentation.

DSC_3460a

Zucchini Pesto Frittata

Serves 4

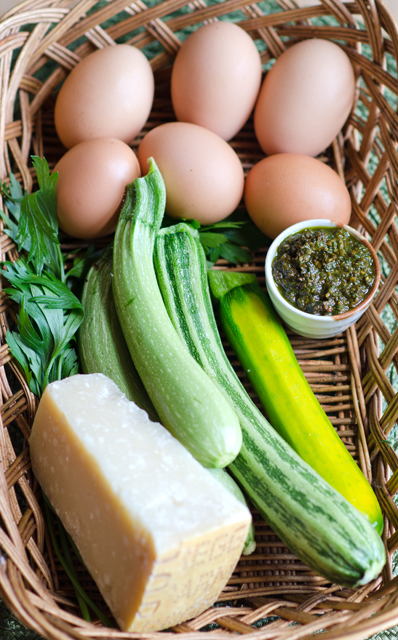
Ingredients

  • 2T olive oil
  • 1 1/3 lbs. of very small zucchini, washed and ends trimmed
  • Kosher salt and freshly ground pepper
  • 1-2T pesto or freezer pesto, thawed with cheese added
  • 6 large eggs
  • 3T grated Parmesan cheese
  • 2t olive oil

DSC_3719a

Directions

  1. Heat broiler.
  2. Slice trimmed zucchini by hand or with the thinnest slicing blade of the food processor.
  3. Heat 2 tablespoons oil in a 10-inch non stick skillet over medium high heat. Add zucchini; cook, stirring occasionally, until zucchini is tender, about 5 minutes. Season with kosher salt and freshly ground pepper.
  4. Beat six large eggs with 3 tablespoons grated Parmesan cheese in medium bowl. Stir in pesto and cooked zucchini into beaten eggs.
  5. Heat additional 2 teaspoons oil in the now empty skillet over medium heat. Add zucchini, pesto and egg mixture; cook until frittata is almost set, 4-5 minutes.
  6. Slide skillet until the broiler and cook until frittata is set and the top is browned.
  7. Serve directly from the skillet or flip unto serving plate. Serve hot or at room temperature.
The seed pods are not developed yet in baby zucchini.

DSC_3724a

DSC_3726a

DSC_3731a

DSC_3767a

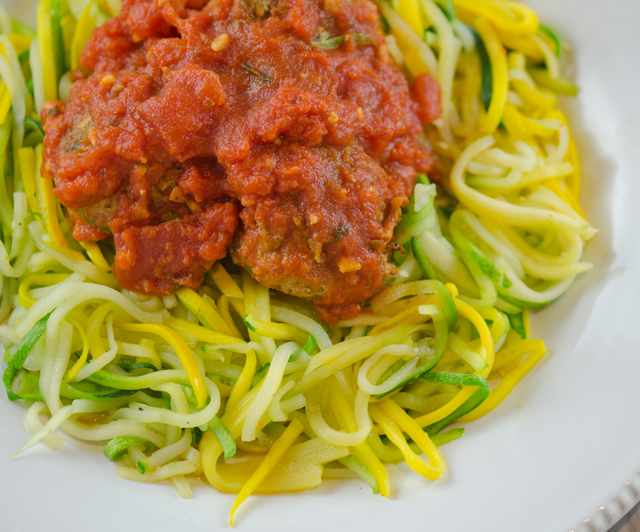
July 11, 2015 Turkey Zucchini Meatballs in Tomato Sauce with Zucchini Noodles

DSC_3563aThis year, after the holidays I was on the hunt for interesting healthy, flavorful recipes. I found just what I was looking for in turkey zucchini meatballs. The original recipe was for turkey and zucchini burgers from chef, restaurateur, and cookbook author Yotam Ottolenghi’s beautiful book, Jerusalem. Just like all the other recipes I have tried of his, the results were delicious.. It was easy enough to adjust the size of the original slider sized burgers to make into meatballs instead. Grated zucchini gives the typical ground turkey meatball the additional moisture that it needs.  Since zucchini is 95% water, it is very important to squeeze all of the excess moisture out of the shredded zucchini so the mixture holds together well.  The turkey and zucchini are combined with fresh cilantro and mint, along with garlic, cumin and spicy cayenne pepper to give them a little kick.  I served them as suggested with a sauce of Greek yogurt, lemon and sumac. At that time in the middle of a cold snowy January I was bemoaning the fact that I had to buy the zucchini and the herbs and if it were July, well, those ingredients would be from our garden.

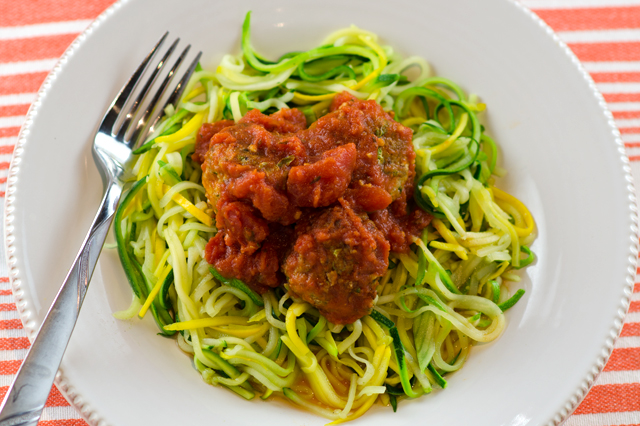
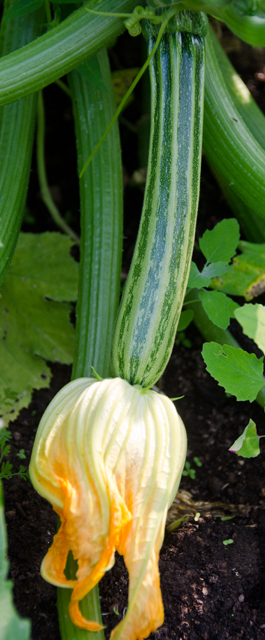
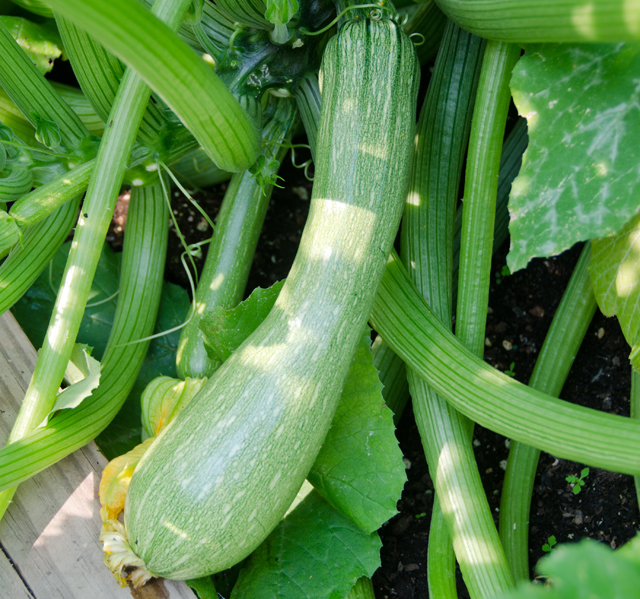
It’s July now and I remembered to make the turkey zucchini meatballs again, this time with our fresh picked zucchini and herbs from the garden. Back in January  I also thought it would be a good summertime variation on the recipe to serve the meatballs with tomato sauce and zucchini “noodles”. Our zucchini vines are producing like mad, I am picking four to six zucchini and yellow squash a day. That doesn’t count the ones that hide under the large leaves and turn into baseball bats!

To make the “pasta” choose straight sided zucchini or yellow squash, preferably of a medium size in diameter, the longer the better. My tool of choice for making the strands is the Kuhn Rikon stainless steel julienne peeler. Steady the zucchini with one hand, start at the top, press the teeth of the peeler into the flesh and pull down. Keep shredding on all sides until you reach the seedy interior. Place the strands in a bowl and separate the strands that stick together with your fingers. I lightly salt my pile of “pasta” to extrude any excess liquid.  I cook the strands in a saute pan, just long enough to warm them up a little and evaporate any additional excess liquid. I still want my zucchini to have a little crunch. If you prefer you can serve the meatballs with the pasta of your choice.

Our tomatoes are just starting to come in now, not quite enough to start making sauce. Until then I will use a good quality store brand. I like to warm the sauce and add the meatballs that I have kept warm after cooking them. Next time I will adjust the herbs in the meatballs for this dish, I think basil and a little oregano would complement the sauce and zucchini noodles nicely.

DSC_3458a

DSC_3465a

DSC_3554a
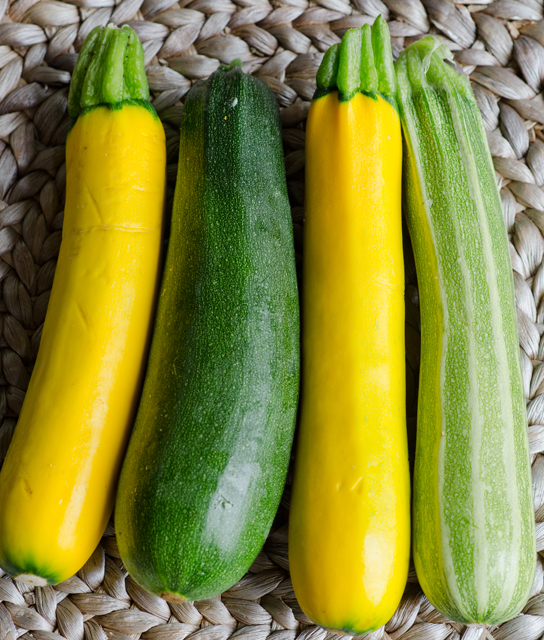
I love the different varieties of zucchini and squash we grow.
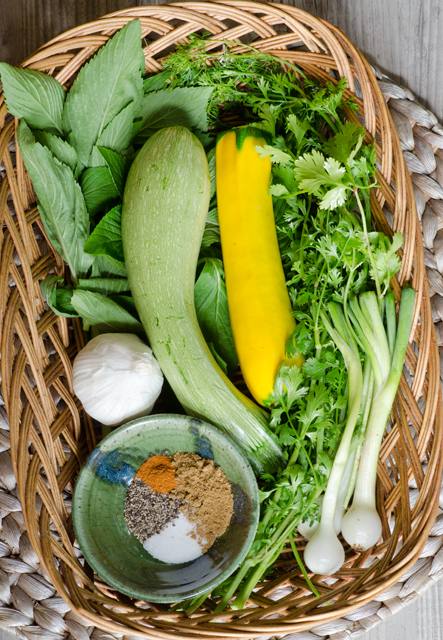
This time I had our own zucchini and herbs for the meatballs. I substituted baby shallots for the green onions.


Turkey and Zucchini Meatballs

Serves 4-6

Makes 18-20 meatballs

Ingredients for Meatballs

  • 1lb ground turkey, I used a 93/7 lean to fat ratio
  • 2c grated zucchini-wrung out in a clean tea towel to remove excess moisture
  • 3 scallions, white and green, thinly sliced
  • 1 large egg
  • 2T chopped mint
  • 2T chopped cilantro
  • 2 cloves garlic, crushed or finely chopped
  • 1t ground cumin
  • 1t table salt
  • 1/2t freshly ground pepper
  • 1/2t cayenne pepper
  • about 1/8c of a neutral cooking oil, canola, safflower
  • 3-4 cups of your favorite tomato sauce, warmed

Directions

  1. Preheat the oven to 425°F. In a large bowl combine all the ingredients for the meatballs, except the cooking oil. Mix well with your hands. Shape into 2″ balls. Place meatballs on a well greased baking sheet to ready for cooking. Pour enough oil into a large heavy frying pan to form a layer about 1/16 inch thick on the bottom of the pan. Heat over medium heat until oil is shimmering, sear the meatballs in batches on all sides. Cook each batch for about 4 minutes adding oil as needed, until browned.
  2. Transfer the seared meatballs to a baking sheet and place in the oven for 5-7 minutes, or until just cooked through. Serve warm with tomato sauce

Ingredients for Zucchini “Noodles”

  • 3-4 large straight sided zucchini and/or yellow squash
  • Kosher salt
I like making shreds with the julienne peeler, you could make them in a food processor with the shredding disk or a spiralizer tool I have seen in supermarkets.

Directions

  1. Wash and trim zucchini and/or squash. Cut stem and root end off. On a cutting board, steady your squash with one hand and shred with a julienne peeler. Start at the top, press the teeth of the peeler into the squash and pull all the way down.
  2. Shred on all sides of the squash until you reach the seeds. Repeat with the rest of the squash. Place the strands in a very large bowl, separate the strands that stick together and salt evenly. Let sit for 10 minutes to extrude any excess water.
  3. Over medium heat cook the strands in a large sauté pan to warm up the squash and remove any excess water.

DSC_3571a


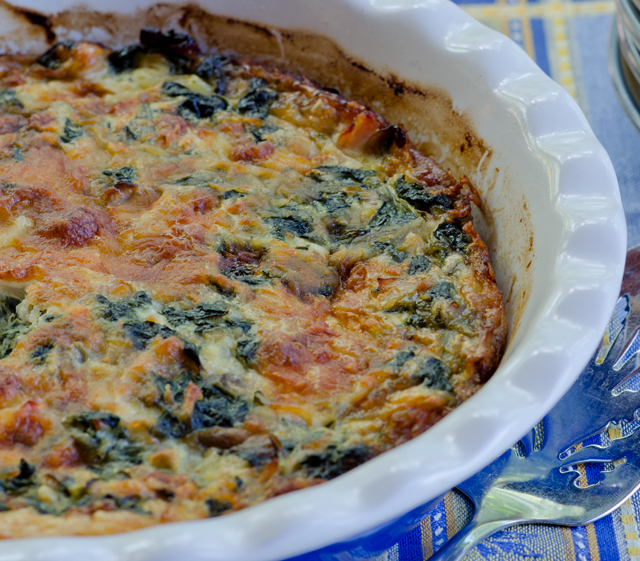
June 14, 2015 Crustless Spinach, Mushroom and Canadian Bacon Quiche

DSC_3155aConsider a humble little package of frozen chopped spinach, a convenience and a staple in many kitchens, including mine. You might be quite surprised how many cups of fresh spinach it takes to make that 10 ounce brick of frozen. That was the information I was looking for this week.

Our spinach plants are going to seed and it was time to do one last serious pick before pulling them out and getting the space ready for another planting. When picking spinach, especially in the extreme hot weather (95°F) it is important to not use a metal bowl or colander, they will put your freshly picked leaves into immediate wilt that will be hard to revive from.  I prefer using a clear plastic “pebble” bowl, sturdy hard plastic bowls I used in my catering business. I snip off the best leaves with scissors, leaving the plant and damaged leaves behind for the mulch pile. Next, I soak the spinach in a clean sink of cold water. I start the process by swishing the leaves around in the sink. I let them sit for a few minutes, the spinach will float to the top, and the dirt and debris will sink to the bottom.  Then I gently lift out the leaves and transfer them to a colander. I will repeat the process again to be sure all the dirt is removed. I refrigerated the spinach in the large bowls with some plastic wrap draped over the top.

Now it was time to find ways to use up this bounty.  Spinach is a powerhouse of nutrition, low in calories, a rich source of iron, vitamins A, C, and K, potassium, calcium and magnesium. End of the season spinach is still very good, but not necessarily something you would want to use in a salad. So I was on the hunt for recipes with cooked spinach. Frittata, quiche, spanakopita, all good choices but many recipes just call for that ubiquitous ten ounce package of frozen spinach. I needed to find the conversions to take that very large bowl to the amount of cooked spinach I needed.

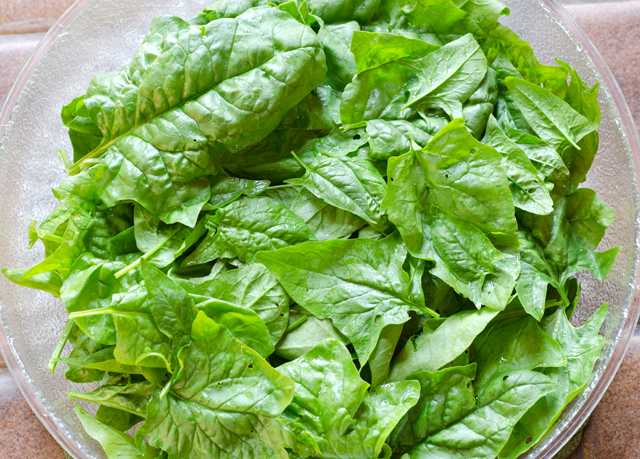
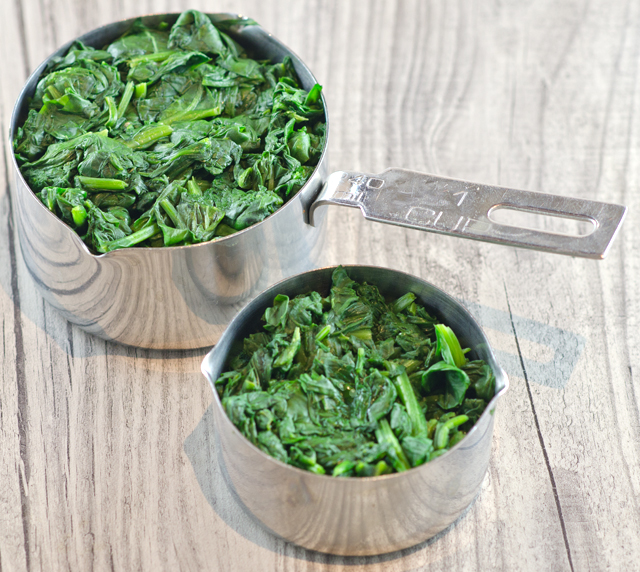
Spinach is 90% water in composition and when cooked, 1 pound of fresh spinach is equivalent to 10 to 12 cups and will cook down to 1 cup. One 10-ounce package of frozen spinach is the equivalent of 1 1/2 pounds of fresh spinach or about 15-18 cups of spinach. In my pictures you will see a before and after of the spinach. To reduce it, I cooked the spinach in a 10″ sauté pan using just the water that clung to the leaves. Then I drained it thoroughly in a fine mesh colander, squeezed it dry and chopped it roughly.

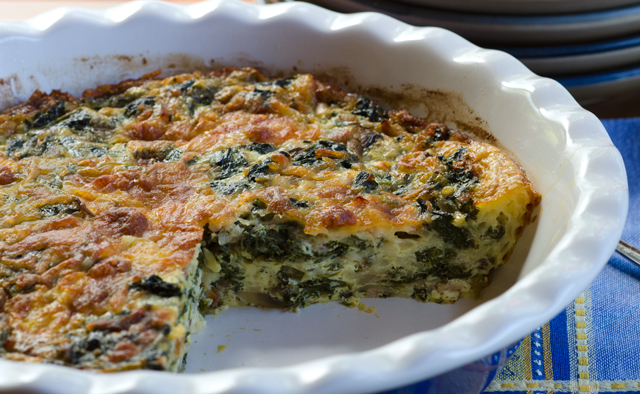
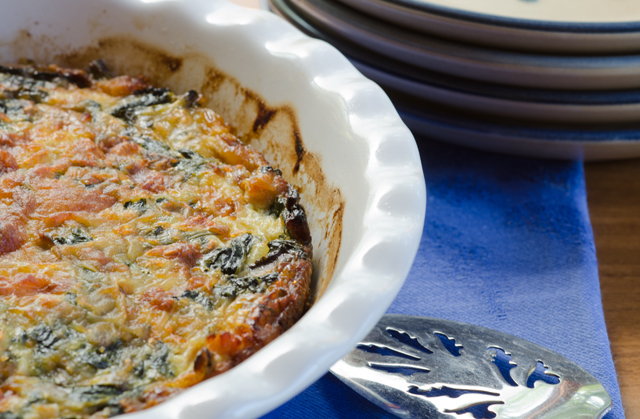
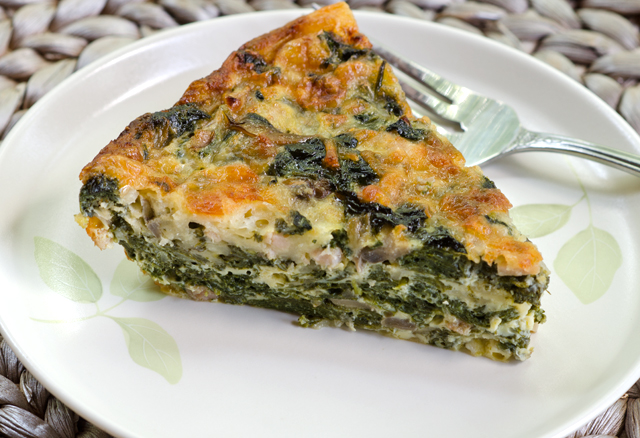
My efforts paid off. With the spinach I picked, I was able to make all three, frittata, quiche and spanakopita. This quiche can be put together in minutes since the most time consuming part is eliminated, making the crust.  I added some sauteed sliced mushrooms and Canadian bacon. In case you didn’t know, American bacon comes from the fatty belly of the pig and Canadian bacon is cut from the loin.  Of course a 10 ounce package of frozen spinach can be substituted in this recipe. It makes a nice breakfast or light lunch and reheats well the next day.

DSC_3115a
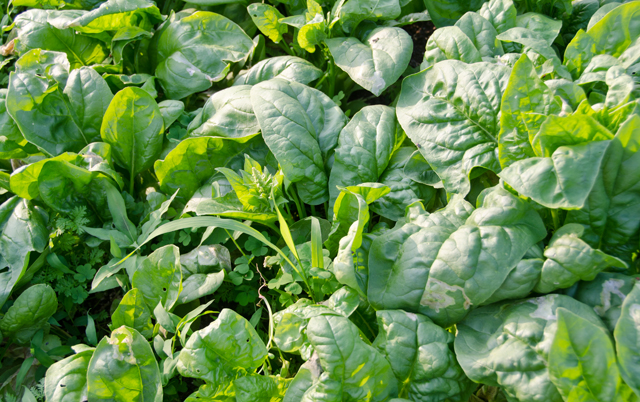
Fifteen to eighteen cups of fresh spinach.
Cooks down to this!
Cooks down to this!

DSC_3148a

Crustless Spinach and Canadian Bacon Quiche

Makes 6-8 servings

Ingredients

  • 1c finely chopped onion
  • 1c sliced fresh mushrooms
  • 1T vegetable oil
  • 1 package (10 ounces) frozen chopped spinach or 1½c cooked and chopped fresh spinach
  • 2/3c finely chopped Canadian bacon
  • 5 large eggs
  • 3c shredded swiss cheese (other cheeses will work too like cheddar or Monterey Jack)
  • 1/8t freshly ground pepper

Directions

  1. In a large skillet, sauté onion and mushrooms in oil until tender.
  2. Add spinach and ham, cook and stir until the excess moisture is evaporated.  Cool slightly.
  3. Beat eggs, add cheese and mix well. Stir in spinach mixture and season with pepper; blend well.
  4. Spread evenly into a greased 9-inch pie plate or quiche dish.
  5. Bake at 350°F for 40 to 45 minutes or until a knife inserted near the center comes out clean.

DSC_3145aDSC_3162a


June 6, 2015 Spinach and Chickpea Curry

DSC_2863aStill on the hunt for spinach themed dishes, I found this recipe for Spinach and Chickpea Curry in Fine Cooking. It is similar to a northern Indian dish called palak  chole, palak being the Punjabi word for spinach and chole the word for chickpea. The dish can be made in no time at all with some basic pantry ingredients.

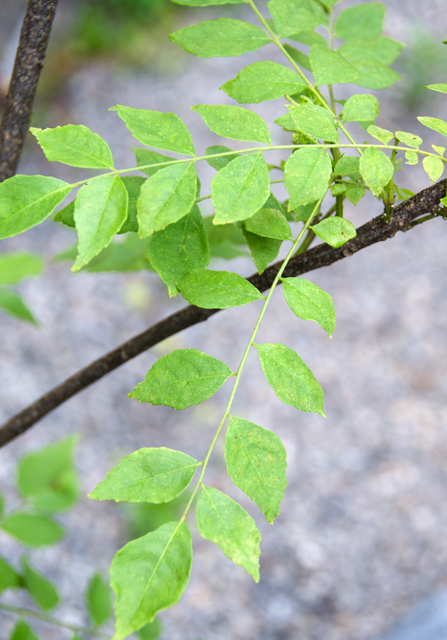
Curry powder, a staple in many kitchens, is not a single spice like basil or oregano but a combination of ingredients and will vary by region and country. Most curry powder recipes include coriander, turmeric, cumin, cayenne, ground ginger and mustard seed. To add to the confusion, there is also a curry plant that is supposed to smell like curry and a curry leaf plant. The leaves of the curry leaf plant are used mostly in the cooking of southern India.  The leaves look like small bay leaves but are edible and have a lime-lemony taste.

Garam masala is the other spice blend in this dish. Garam is the Indian word for warm or hot and masala is a mixture of spices. Garam masala is a blend of dry roasted ground spices from northern India. Dry roasting adds to the complexity of garam masala and it is not as hot and spicy as other blends. It may contain up to 12 spices including black pepper, cinnamon, cloves, coriander, cumin, cardamom, dried chilis, mace, nutmeg and other spices.  As with all spice blends they should be kept in a cool dark cabinet and have a shelf life of about six months.

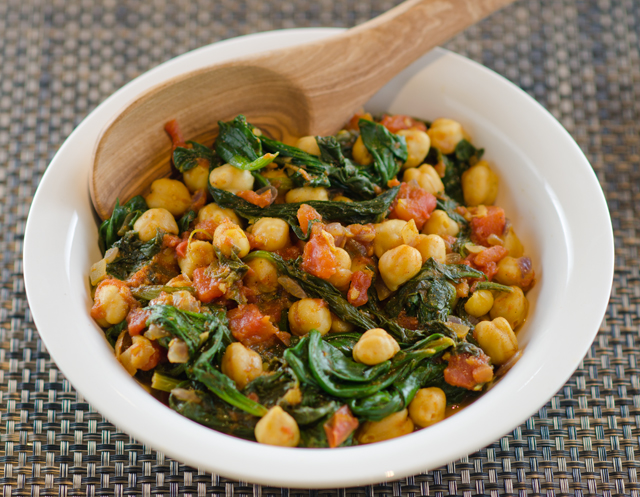
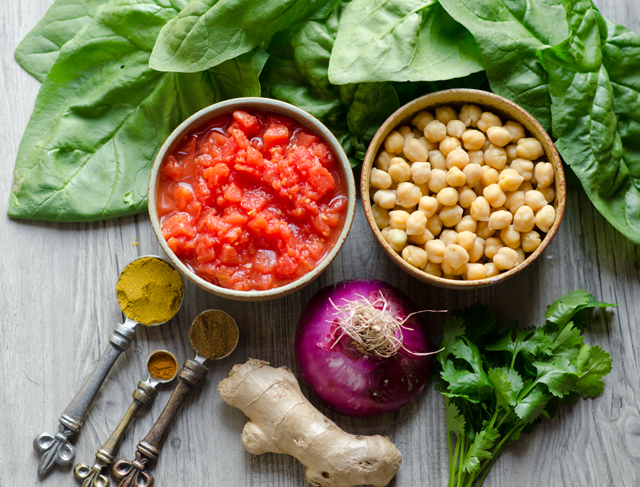
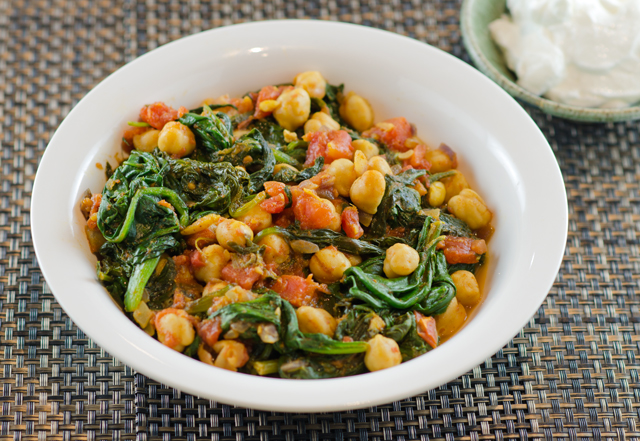
Saute onion, ginger, spice blends and cayenne over medium high heat. The fragrance is absolutely intoxicating. Stir in drained and rinsed chickpeas, canned diced tomatoes and a little kosher salt. Next, add handfuls of spinach, stirring to wilt as you go. The recipe calls for baby spinach but I used garden spinach that I cut down to size and removed large ribs and stems from. This was a dish that came together in less than an hour, and that including picking, washing and trimming the spinach. Serve garnished with cilantro and some plain yogurt to stir in if you choose. Next time I think I will make some naan to sop up the juices. Leftovers are fabulous, that is, if you have them.  This dish was so good, it was requested two days in a row.

DSC_2860a

Spinach and Chickpea Curry

Ingredients

  • 3T canola oil
  • 1/4c chopped red onion
  • 2T finely chopped fresh ginger
  • 1T curry powder
  • 1t garam masala
  • 1/8t cayenne pepper
  • 1 15oz can chickpeas, drained and rinsed
  • 1 14½oz can diced tomatoes
  • 1¼t kosher salt plus additional for final seasoning
  • 7-8c fresh spinach, torn into 1″ pieces
  • ¼c chopped cilantro
  • Plain Greek style yogurt for serving

Directions

  1. Heat canola oil in a 12″ sauté pan over medium high heat. Add onion, ginger, curry powder, garam masala and cayenne pepper. Cook, stirring often until the onion is softened, 2-3 minutes.
  2. Stir in one can of drained and rinsed chickpeas, one can of diced tomatoes and 1¼t salt.
  3. Add spinach by the handful, stirring to wilt as you go. Continue to cook, stirring often, until the spinach is completely wilted and the flavors have melded, 4 to 5 minutes more. Season to taste with more salt. Remove the pan from the heat and stir in ¼c cilantro.
  4. Spoon onto a platter and serve with Greek yogurt for dolloping on top.
The curry leaf plant.

DSC_2866a

June 2, 2015 Spinach, Sun Dried Tomato and Feta Frittata

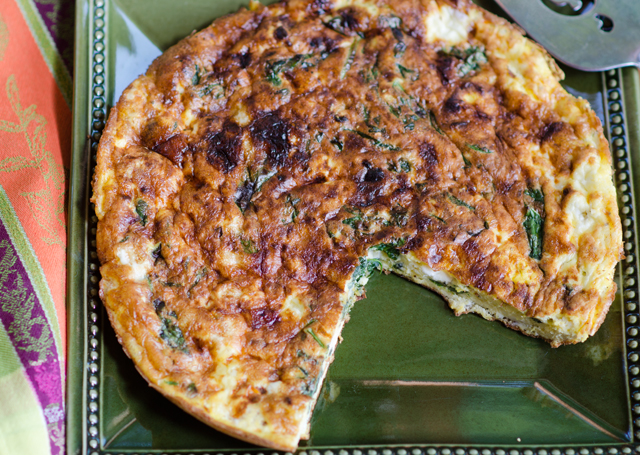
DSC_2848aI was looking for a different way to use some of our abundance of spinach and decided a frittata would be a good choice. Frittata is the Italian name for a flat open faced omelet. They are quick to make and can be enjoyed warm or at room temperature, not only just for breakfast, but at lunch and dinner as well.  In the late Marcella Hazan’s The Classic Italian Cookbook, she delineates three distinctions between the omelet and the frittata.

  • An omelet is cooked briefly over high heat, a frittata is cooked slowly over low heat.
  • An omelet is creamy and moist, just short of runny. A frittata is formed and set, although by no means, stiff and dry.
  • An omelet is rolled or folded over into an oval tapered shape. Frittatas are flat and perfectly round.

This recipe’s framework came from a recipe on the Cooks Illustrated website. It called for a dozen eggs and just a few tablespoons of half and half to add some creaminess. The original recipe was for a frittata with broccoli rabe, sun dried tomatoes and fontina cheese. I substituted four cups of lightly packed spinach with the large stems and ribs removed for the rabe. The spinach was just picked and washed so I was able to cook it down quickly with just the water that clung to the leaves, so very little oil was needed in the pan. I substituted my favorite French feta for the fontina, since spinach and feta are such a good combination. The sun dried tomatoes called for in the original recipe were oil packed. The sun dried tomatoes I used were ones I made last summer with Sun Gold tomatoes from the garden. They just needed to be reconstituted in some warm water for about ten minutes to bring them back to life. I was surprised (and pleased) that the skin came off in the process. I chopped them roughly before adding them to the frittata.

A  heavy bottomed oven safe non stick skillet is absolutely necessary to make the frittata. Before you proceed with the recipe be sure the skillet fits comfortably under the broiler without a great deal of maneuvering. The handle on my skillet was a bit high and made getting it in and out of the oven quite challenging. Have thick potholders at the ready so you don’t burn your fingers pulling the pan out of the oven. Once out, leave the potholder over the handle to remind yourself the pan is still hot. Use a spatula to loosen the frittata from the pan and transfer to a platter or cutting board. Of course, there are countless variations of the frittata and as the season moves on my add-ins will change.  Whatever you put in yours, it’s a great quick weeknight supper to serve alongside a simple green salad.

DSC_2601a
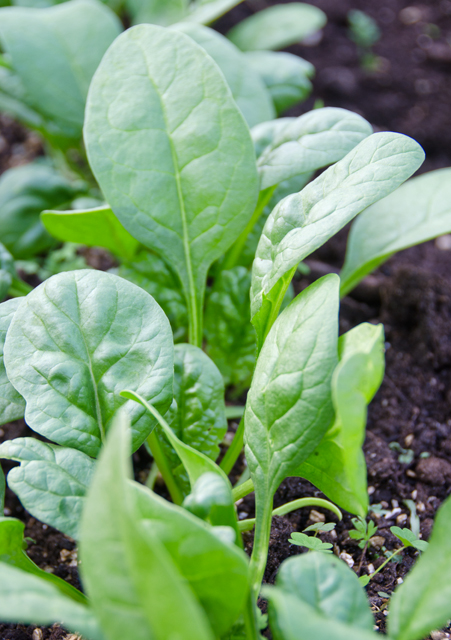
Spinach, just a few weeks ago.
DSC_2902a
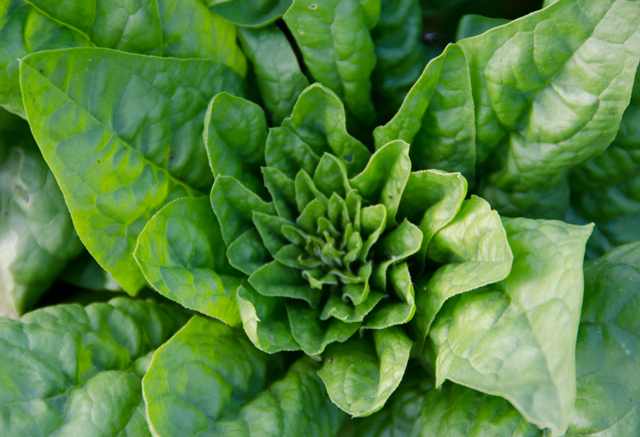
That same spinach a few days ago.

DSC_2901a

Spinach, Sun Dried Tomato and Feta Frittata

Makes one 12″ frittata

Ingredients

  • 12 large eggs
  • 3 T half and half
  • 1 teaspoon olive oil
  • 4 c loosely packed spinach, large ribs and stems removed, cut into 1 inch pieces
  • 1 clove garlic, finely minced
  • 1/8t red pepper flakes
  • 3/4c lightly crumbled feta cheese
  • 1/4c coarsely chopped sun dried tomatoes

DSC_2850a

Directions

  1. Adjust oven rack to upper middle position, about 5 inches away from the heating element. Heat broiler.
  2. Whisk eggs, half and half, ½t salt and ¼t freshly ground pepper in a medium bowl until well combined, about 30 seconds. Set eggs aside.
  3. Heat oil in a 12-inch non stick skillet over medium heat until shimmering; add spinach and cook until it wilts, about 1 minute. Add garlic and red pepper flakes and cook until fragrant, about 30 seconds. Stir crumbled Feta and sun dried tomatoes into eggs; add egg mixture to skillet and cook, using spatula to stir and scrape bottom of skillet, until large curds form and spatula begins to leave wake but eggs are still very wet, about 2 minutes. Shake skillet to distribute eggs evenly, cook without stirring for 30 seconds to allow the bottom to set.
  4. Slide skillet under broiler and broil until frittata has risen and surface is puffed and spotty brown, 3 to 4 minutes; when cut into with a paring knife the eggs should still be slightly wet. Remove skillet from oven and let stand 5 minutes to finish cooking; using spatula, loosen frittata from skillet and slide onto platter or cutting board. Cut into wedges and serve.
 

DSC_2855a