May 27, 2013 Yellowtail Snapper with Mango Salsa

DSC_0372aFirm white fleshed fish is a canvas on which many dishes can be created. With descriptors like clean, bright, and mild, the preparation can take you in many directions. A good pristine piece of fish can be prepared as simply with a little salt, pepper and a squeeze of citrus. You can also add a sauce and a rub and the flavors can transport you to the cuisine of your choice.

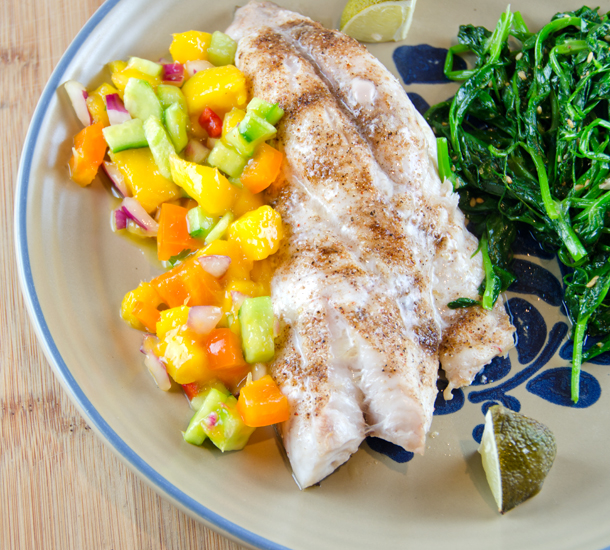
Our fish this evening was a yellowtail snapper fillet, named for the single yellow stripe that runs the length of the fish, even along the head. It is considered to be one of the best flavored snappers and since this very perishable fish made the trip up from Florida, I decided to “snap” one up.

I find that many people have a fear of cooking fish. They err on the side of overcooking it and the result is dry and flavorless. Perfectly cooked fish is moist and delicious. We have found a method of cooking fish that gives us consistently good results. In 1959, The Canadian Department of Fisheries and Oceans published a cookbook to help promote the country’s fishing industry. Popularized by late chef and food writer James Beard, they came up with a method of calculating how long to cook a piece of fish. Measure your piece of fish at the thickest point and cook at 10 minutes per inch or 1 minute per one tenth of an inch at 450°F. If you are baking a fillet, fold the thinner tail section under to maintain a uniform thickness. Check your fish a few minutes before the prescribed cooking time. It should be opaque in the center and cooked until translucency is gone. Also remember that the fish continues to cook from residual heat when first removed from the oven. To measure, any clean, well marked ruler will do. We still have our “Perfect Fish” that was patent pending in 1984 and not available now as far as my research found.

 
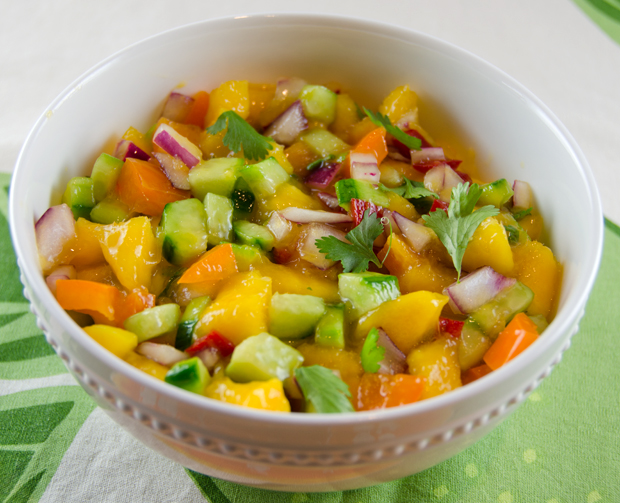
I decided to go in an island direction and prepared a Caribbean style rub and a simple mango salsa to accompany our fish. You can substitute red snapper, bronzino or sea bass for the yellowtail. It is important to note that your dish will only be as good as the fish you purchase. If you are purchasing whole fish look for bright, clear eyes. The flesh should be firm and shiny, not dried out. Ask to smell the fish if you need to, it should smell like seawater or nothing at all. Look for a dealer who properly handles seafood. My store of choice is Hellers Seafood in Warrington Pa, about 12 miles from my home. If I am planning to buy fish I bring a cooler filled with ice packs to keep the fish as cold as possible. Then it immediately goes in the fridge and used the same day. Just remember, no amount of sauce or rub will make a bad piece of fish taste any better.

DSC_0345a

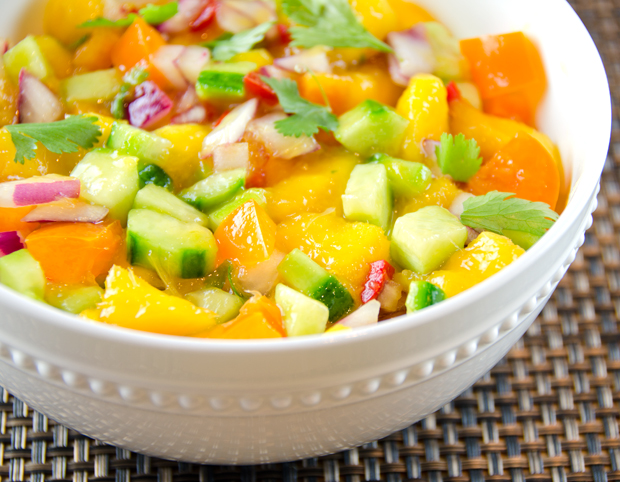
Mango Salsa

Makes 2 cups

  • 1 1/2c diced mango
  • 1c diced cucumber
  • 1/2c pepper (red, yellow or orange)
  • 1/3c diced red onion
  • 1 small red jalapeno, chopped, seeds and ribs removed
  • 3T fresh lime juice
  • 1/4c torn cilantro leaves
  • 1T or more of Persian lime oil
  • Kosher salt and freshly ground pepper to taste

Directions

  1. Combine all ingredients in a medium bowl. Add salt and pepper to taste.

Caribbean Rub for Fish

  • 1/2 t allspice
  • 1t cumin
  • 1 1/2t thyme
  • 1t onion powder
  • 1t black pepper
  • 1/2t salt
  • 1/4t cayenne pepper (or to taste)
  • 1t brown sugar

Directions

  1. Whisk all spices together in a small bowl.
  2. Sprinkle the spice rub over the fillet before cooking.

Canadian fisheries method of cooking fresh fish

General Directions

  1. Preheat your oven to 450°F.
  2. Measure your whole fish, steak or fillet at it’s thickest point.
  3. Bake fish for 10 minutes for every inch of thickness. The original instructions say to turn the fish over at the halfway point, you can, we don’t. If you check internal temperatures, it should be about 145°F.
 DSC_0360a

May 21, 2013 Chive Oil


DSC_0339aJust exactly what is a bunch? That is the question I had to pose after looking at Bon Appetit ‘s June issue.The current issues of  both Bon Appetit and Fine Cooking have extensive articles about cooking with herbs. The article and recipes in Fine Cooking were contributed by Aimee Olexy. We had the pleasure of dining at her Philadelphia restaurant,Talula’s Garden last year. The article is a wealth of recipes that use fresh herbs, in everything from a grain salad to a pound cake. There is also a page that gives the reader the basic formulas for herb butters, oils, vinegar, syrup etc.  Bon Appetit devotes ten pages, if you count photos, to a spiked lemonade, tea, dessert, a board dressing and chive oil, among others. Chive oil caught my eye since our chives are peaking and I am trying to find ways to use them in my everyday cooking. This is where the bunch question arose.


Bon Appetit’s recipe calls for 3 bunches of chives and 1 1/3 cups of grapeseed or vegetable oil. Gourmet Sleuth says 1 bunch of chives = 1/2c chopped, I’m not sure on what authority they have determined this. One CSA farm cooperative labeled a bunch at one ounce, another more generous with a 2 ounce measurement. Oh yes, there’s an app for that, Produce Converter. Basil, parsley and oregano made the cut, sadly no chives. 

So I returned to my old tried and true recipe from the Herbfarm Cookbook.  A book that is open in my kitchen all summer long, author and former chef of the Herbfarm restaurant, Jerry Traunfeld is more exacting in his measurements. His ratio of 1 cup of coarsely snipped chives to 3/4c extra virgin oil worked well for me. Bon Appetit’s recipe heats the oil for a more concentrated mixture. Aimee and Jerry’s recipes rely on the heat that is generated by the blender.

So is it better to make this in a food processor or a blender? All three articles agreed that the initial way to combine the herbs and oil is in a blender. Blenders are best suited for liquid preparations, pureeing, emulsifying and blending.  Food processors are better at shredding, chopping, slicing and grating. Even though the bowl of a food processor is large, liquids in it can be no higher that the blade or it will run out the sides, I can certainly attest to that. A blender bowl can be filled almost to the top without the contents leaking out.
Any herb oil must be stored in the refrigerator for safety reasons. Botulism can occur when fresh herbs and oil are combined and left at room temperature. The equation for spoilage is even greater if garlic is added to the recipe. Ms Olexy gives a shelf life of two days to her herb and garlic oil. All fresh herb preparations are at their best in the first few days. After topping salmon with it, adding it to a vinaigrette and using it in a sauce for chicken, I’m sure I will have to make a new batch in a few days.

Chive Oil

Makes 1/2 cup

Ingredients

  • 1 c coarsely chopped chives
  • 3/4c extra virgin olive oil

Directions

  1. Put the chives and oil in a blender and puree until the oil begins to warm, 2 to 3 minutes.
  2. Pour the oil into a very fine strainer, or a coarse strainer lined with a double layer of cheesecloth, set over a bowl. Let the oil drip for one hour or longer to extract as much as possible. The oil should drip undisturbed to achieve the clearest oil. Discard the contents of the strainer and store the oil in a covered container in the refrigerator. Bring to room temperature before using. Will keep for a week.
DSC_0308a
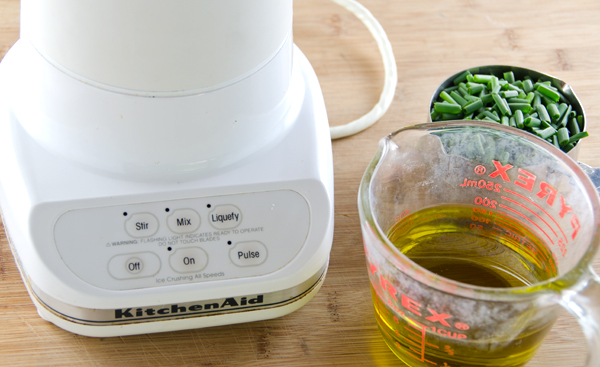
Everything ready to go.


DSC_0315a
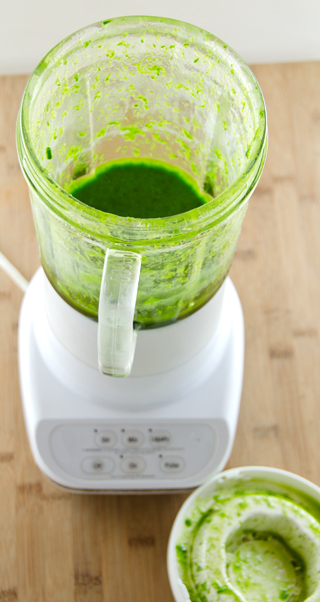
All blended up.


DSC_0316a
I love the bright green color!


DSC_0324a
Let the oil drip undisturbed for several hours for the clearest oil.

May 18, 2013 Chive Butter

 DSC_0301a

Martha was the first to introduce me to compound butters. Over thirty years ago when I was first married I spent a lot of time in bookstores paging through volumes of my new found interest, cookbooks. I always knew that I would enjoy cooking and Joe and I were beginning to enjoy preparing meals for ourselves and entertaining friends in our townhouse. One of the first books that really caught my attention was Entertaining, Martha Stewart’s first cookbook. At first I wasn’t sure if Martha was just a model for the book cover or in fact, the author. Actually both were true, she was a model through college and she had written the book from her experiences as a caterer. I was fascinated with the layout of the book, each chapter was a different type of party. Cocktail parties, dinner parties, holiday parties, the omelette party, eventually I would become familiar with them all.  At that time I wasn’t sure if I could justify the thirty-five dollars for this beautiful book. Fortunately, a dear friend loaned me the copy she had received as a wedding gift and I had it on a long term loan (thanks Wilma!).

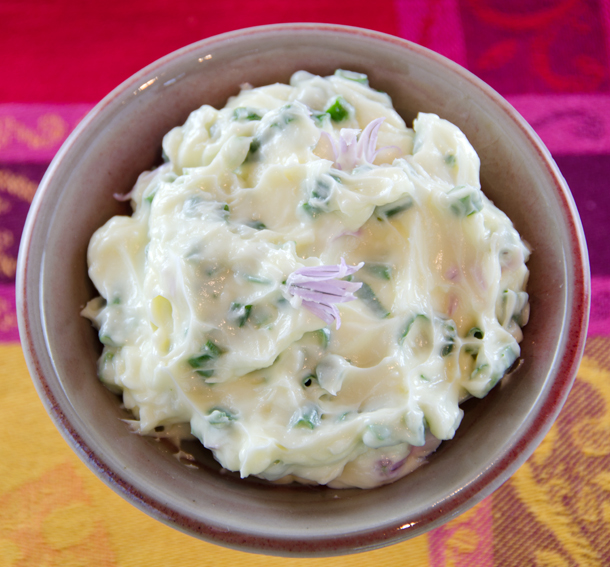
Back to the butters, Entertaining had a recipe for fruit butter to accompany muffins and sweet breads and an herb butter to serve along with homemade savory breads. As my well worn copy of the book would attest, yes I did break down and buy it, I have made them many times, for our parties and as a caterer, for countless occasions. Herb butter is a compound butter which simply means butter creamed with another ingredient, whether it’s herbs, garlic, shallots, or honey or jam in the case of sweet butters. Compound butters can be made at any time but it’s a great way to preserve and enjoy herbs at their peak. Right now and at the end of summer, chives flower and show new growth.  I kept the recipe simple this time, just chives, sea salt and a little lemon peel. It’s great on fish, vegetables, steak, maybe even mixed into some freshly popped popcorn. Just bring butter to room temperature and stir in finely minced herbs. You can do the mincing with either a knife or scissors. Using unsalted butter allows you to add salt, but to your own liking. Chives can be used in combination with other herbs, tarragon, parsley and dill to name a few.

Martha came out with a update to her Entertaining book last year, this time it’s called, Martha’s Entertaining: A Year of Celebrations. Seventy five dollars, weighing in at six pounds, about a hundred plus more pages and yes, a recipe for a compound butter. This time it’s a garlic and herb butter to accompany her garden crudites for a luncheon. Can’t wait to try that one too.

DSC_0271a
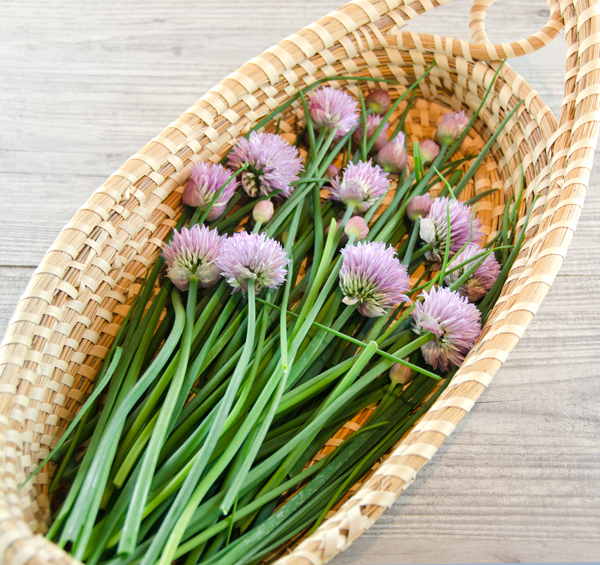
Chives from the garden in a basket from the low country of South Carolina.

Chive Butter

Makes 8 ounces

Ingredients

  • 2 sticks of unsalted butter
  • 1/4 c finely chopped chives (you can include flower buds also)
  • 1/4t finely minced lemon peel
  • Sea salt to taste

Directions

  1. In a large bowl, mash the butter with a potato masher.You can even cream the butter using the paddle attachment of a stand mixer or in the bowl of a food processor.The goal is just to get the butter soft so you can incorporate the chives.
  2. Add the chopped chives and continue mashing/mixing the butter until fully incorporated. Mix in the lemon peel and salt to taste.
  3. Spread out a large (1-foot or bigger) square of plastic wrap across your work surface. Spoon the butter out in a band about 1 inch wide on the bottom third of the plastic. Tightly roll up the butter in the plastic to form a log. Grab the excess plastic at both ends of the log and twist the ends in opposite directions. The cylinder should be taut and as round as possible. 
  4. Tie the excess plastic wrap at the ends of the cylinder into a knot, or just use little pieces of string to tie off the ends.
  5. To store the butter, wrap the plastic covered log tightly in aluminum foil and refrigerate for up to a week or freeze for up to 3 months.
DSC_0290a
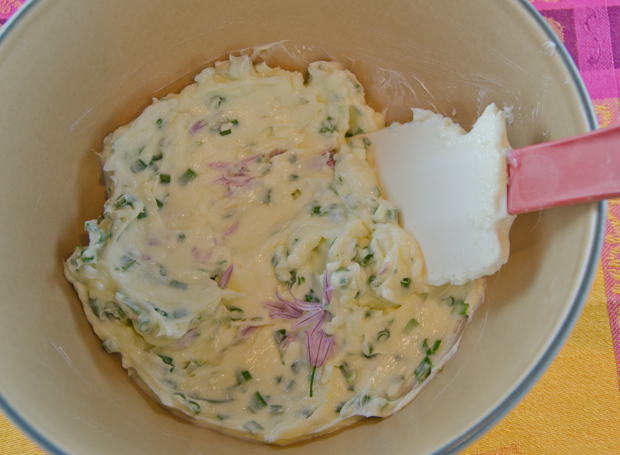
You can even add a few chive flowers along with your chopped chives.
DSC_0295a
Mixing the ingredients by hand will leave the chive flower petals intact. Using a food processor will produce a more homogeneous result.

DSC_0297a

March 29, 2013 Chervil Vinegar and a Spring Salad

DSC_9390a

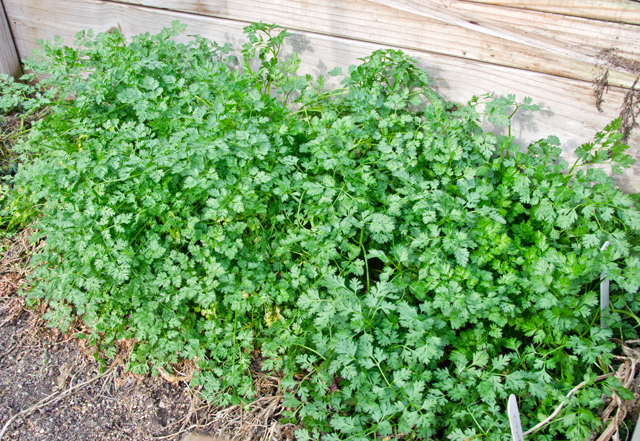
The calendar tells me it’s spring but it certainly doesn’t feel like it.  The fat wet snowflakes that coated the ground several days ago moved out as quickly as they came in, but there is still a definite chill in the air. Joe planted peas last Saturday, March 23rd, two weeks later than last year when we had many days in March with temperatures in the 60s and 70s. When we had our “garden walk” on Sunday, Joe pointed out one bright spot. Under the shelter and warmth of the cold frame, last years planting of chervil had wintered over, resulting in a bushy green row.

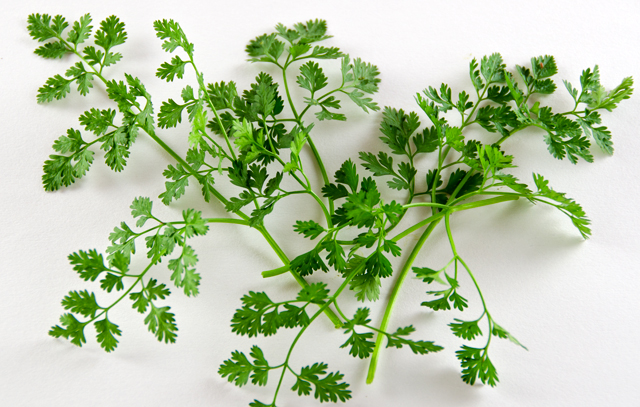
Chervil is an annual herb that prefers the cooler temperatures of spring and fall.  It is in the same plant family as parsley and carrots with delicate curly leaves that resemble something between the two.The flavor is delicate and reminiscent of mild anise or licorice. Mature chervil plants produce a delicate white flower that is also edible and looks pretty garnishing a salad.

This is definitely an herb to grow for yourself. Although it is sold dried (I wouldn’t bother), it is most fully appreciated when picked fresh. It is easy to grow and now is the time to plant.  Plant seeds in moist soil in an area that gets partial sun. It also does well in containers.

Heat is the enemy of chervil in more ways than one. Summer’s heat will cause the plant to bolt or go to seed.  Heating chervil in the cooking process dissipates the flavor so it is always best used fresh. Chervil marries well with delicate flavors like chicken, fish and eggs. It is part of the classic French seasoning blend, fines herbes that also includes tarragon, parsley and chives.

 
Appropriate for this week, I learned that chervil is linked to the Easter celebration in parts of Europe. Chervil’s aroma is similar to that of myrrh, one of the gifts presented to the baby Jesus by the three wise men. Because it is one of the first plants to come up in the spring garden, it is associated with rebirth. The literal translation for Maundy Thursday in German is Green Thursday so in some parts of that country they commemorate the day with a green chervil soup.

Chervil complements the garden’s first produce, asparagus, new potatoes, and root vegetables like beets and carrots. I like to add sprigs to a green salad for a touch of anisey flavor. I often infuse it in white wine vinegar for a delicacy I wouldn’t find in any gourmet shop.Choose a mild vinegar such as white wine or rice to match the flavor of chervil.

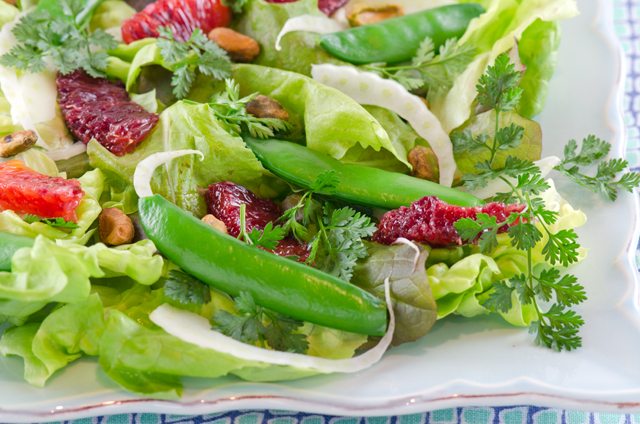
The garden isn’t ready yet, but this salad combines some of my early spring favorites. Bibb and baby romaine lettuce, sugar snap peas, blood oranges with a double dose of anise flavor from the shaved fennel and sprigs of chervil. I topped the salad with crunchy pistachios and tossed with a simple vinaigrette of white wine vinegar, finely chopped shallots and a good quality extra virgin olive oil.

DSC_9344a
A healthy crop of chervil growing in the cold frame.

Chervil Vinegar

Ingredients

  • A large handful of fresh chervil, 3-4 cups loosely packed
  • 2 cups of a mild vinegar, such as white wine or Chinese rice vinegar
  • One sterilized pint jar with lid

Directions

  1. Rinse the chervil and pat dry with paper towels. Pack chervil loosely into a sterilized dry heat proof pint jar.
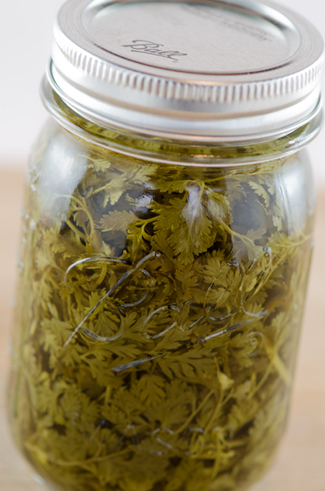
  2. Heat the vinegar to just simmering in a stainless steel pan. Pour it over the chervil; push any wayward stems or leaves under the surface. Allow the vinegar to cool, then cap the jar and leave at room temperature for two weeks, shaking the jar occasionally.
  3. Strain the vinegar and bottle it in sterilized dry bottles. Cap tightly and store in a cool spot or cupboard. If you like, drop a sprig of fresh chervil in the finished bottle.
DSC_9400a
Chervil vinegar will be ready in about two weeks.

DSC_9351a DSC_9367a

 Spring Salad for two

Ingredients

Vinaigrette

  • 1T white wine or rice vinegar
  • 1/4 Dijon mustard
  • Pinch of sugar
  • 3T extra virgin olive oil
  • 1T finely minced shallots
  • Kosher salt and freshly ground pepper

Salad

  • About 4-5 cups Bibb and Romaine lettuce
  • Two small blood oranges, segmented
  • 1/2c thinly shaved fennel
  • 1c sugar snap peas, steamed and patted dry
  • 1/2c chervil fronds, long stems removed
  • 1/4c pistachio nuts

Directions

  1. In a small bowl combine the vinegar, mustard, sugar and shallots. Gradually whisk in the olive oil.
  2. In a large bowl, season the greens with a pinch of salt and a few grinds of the pepper and toss with enough of the vinaigrette to lightly coat 
  3. Top with blood orange segments, shaved fennel, sugar snap peas, chervil fronds and pistachio nuts.  Gently toss and serve.  Top with additional freshly ground pepper if desired.

DSC_9371a

March 7, 2013 Dragon Fruit Salsa

DSC_9188a

I always look forward to my weekly excursions to Wegmans. It’s my one stop for food shopping, with the exception of fish and seafood that I get just a few miles down the road at Hellers Seafood. From the truffles that are kept under lock and key to the large selection of pristine fresh fruit and vegetables, I love their produce department. In the “off season” it’s the next best thing to growing your own. Sometimes I’m even introduced to something new, well at least to me. That was the case last week. I walked in, grabbed my cart and headed for my first stop, the produce section. The lady giving out samples of fresh-squeezed juice was quite busy so I happened to notice a gentleman from Melissa’s produce giving out samples of a fruit that I heard of but had never tasted before, dragon fruit. It was paired in a little sample cup with some strawberry slices. Although expensive (5.99 for one fruit!) I was feeling adventurous after a taste.  I bought two, I knew I wanted to try them on my own.

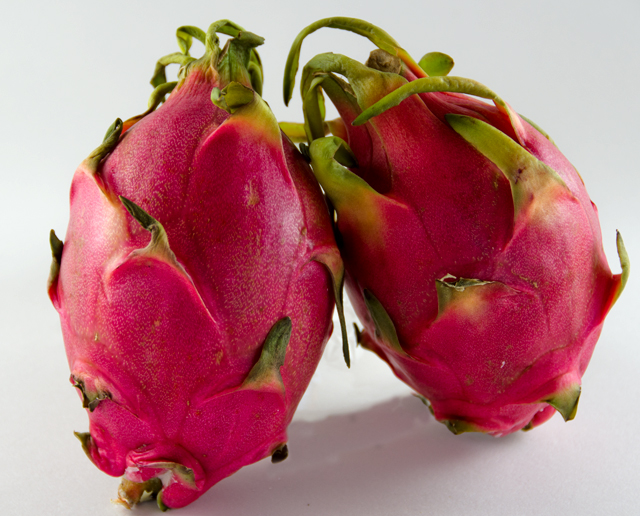
Dragon fruit, also known as pitaya, is the fruit of a cactus (this east coast girl can’t relate!)  It was first grown in Central and South America and expanded to Southeast Asia through the French. It is now grown domestically in Florida, Texas and Southern California. The fruit emerges from the aptly named moon flower that blooms for one night only. Pollination by fruit bats and other insects must occur that one night or no fruit will emerge. Dragon fruit is quite interesting in appearance. the ones I purchased were about the size of a mango and fuchsia in color with soft green spikes, resembling the scales of the dragon. There are also varieties with yellow and red skin. The flesh can vary from white to red.  The taste was lightly sweet, with crunchy little seeds, reminiscent of  those in a kiwi. The texture of the flesh reminded me of a crisp pear. Dragon fruit is very easy to prepare, just cut in half and either scoop out the flesh or cut away the flesh from the skin with a sharp knife.

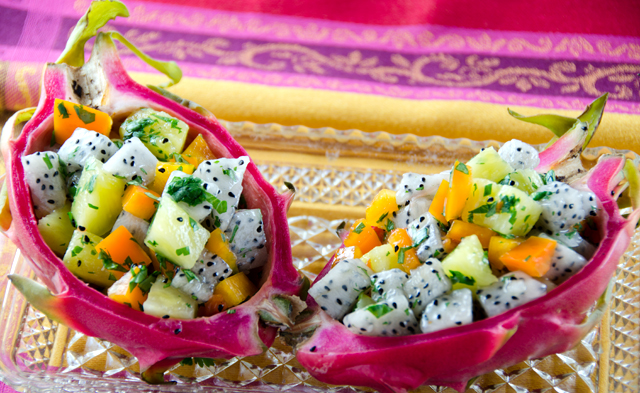
A current favorite of the marketing world, dragon fruit is being infused into everything from rum, vodka, a flavored Pepsi, an antioxidant tea to an air freshener and a scented candle.  Dragon fruit is low in calories, high in fiber, rich in B vitamins and antioxidants. The skin is not edible but makes a lovely serving vessel. It can be added to fruit salads, smoothies and desserts. In this salsa recipe I chose to pair the mild crisp dragon fruit to contrast with some very sweet pineapple and some heat from a jalapeno. The amount of heat you add to the salsa is up to you. My frozen jalapenos still pack quite a punch. Serve with fish or chicken.

DSC_9162a
Dragon fruit can vary from bright red to yellow, the ones I purchased were fuschia with green tips.


Dragon Fruit Salsa

Makes about 2 cups

Ingredients

  • 1 1/2c dragon fruit cut into 1/2 inch chunks
  • 1c peeled and cored pineapple cut into 1/2 inch chunks
  • 1 small bell pepper, stemmed and cored, cut into 1/2 inch chunks
  • 1/2 of a whole jalapeno pepper, chopped finely
  • Juice of one medium lime
  • 1/4c finely chopped cilantro
  • Kosher salt and freshly ground pepper to taste

Directions

  1. Combine the first six ingredients in a medium bowl and stir gently.
  2. Season to taste with salt and freshly ground pepper.
DSC_9171a
The flesh of the dragon fruit can be white or pink in color. The seeds remind me of a kiwi.


DSC_9178a
The firm fruit is easily cut in half and scooped out of the skin.

January 11, 2013 Preserved Lemons

DSC_8073a

One more condiment, really? My husband astutely pointed out that if we emptied all the condiments from our refrigerator we would be left with some eggs, celery and a container of half and half. In our refrigerator you can find four types of mustard, capers, several containers of olives and everything you might need to put together a Thai curry. Some of the condiments were my own home grown homemade treats, a half used jar of pickled jalapenos, some yellow tomato jam and a small jar of homemade nutella. So why one more? A Facebook post from America’s Test Kitchen for preserved lemons caught my eye. I knew that a jar of preserved lemons would be expensive in a gourmet store, but not expensive or time-consuming at all if I made them myself. I decided the little amount of work in the recipe  might result in something very interesting. 

Preserved or pickled lemons are common in Indian, North African and Moroccan cuisine. Cookbook author Paula Wolfert in her book, Food of Morocco, states that preserved lemons are made with the creme de la creme of Moroccan lemons, the thin-skinned Doqq. The Doqq is not grown in the US but the Meyer lemon is a reasonable substitute. Since the Meyer is actually a cross between a lemon and an orange, they are less acidic and have a thinner rind than the standard supermarket variety lemon, the Eureka.

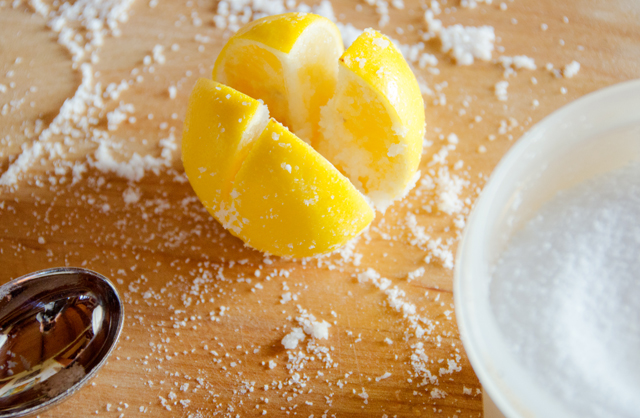
The lemons are pickled in a brine of lemon juice and salt. The lemons are sliced as if you are cutting them in quarters lengthwise, but not all the way through.  Kosher salt is packed in the incisions and the lemons are submerged in a bath of lemon juice. Additional seasonings can be added to the brine such as bay leaves, coriander seeds or cinnamon sticks. It takes very little time to put together, but it takes four to six weeks before the lemons are ready to use. As time goes on, more and more juice will exude from the lemons and the juice will take on a cloudy appearance. Shake the jar every now and then to keep the salt blended well in the liquid. Since they try to bob to the top, no matter how much juice you put in the jar, I cut a double round of parchment paper the size of the top of the jar to keep the lemons submerged in the juice-salt solution.

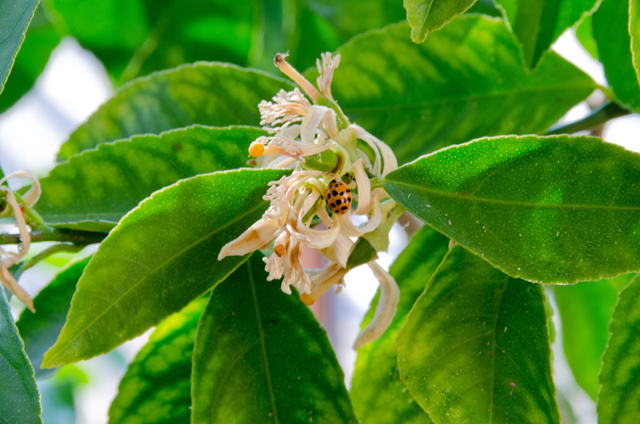
 If I lived on the west coast I would be telling you that I picked these lemons from organically grown trees in our backyard, but I live in Bucks County, Pennsylvania. We have a small Meyer lemon tree that we bought  in hopes that it will eventually produce fruit. We enjoy it on the deck in the spring and summer and it winters indoors to escape snow and freezing temperatures. The only thing it has offered us so far are the heavenly aromatic white blossoms that made their appearance several weeks ago. We bought the tree because only a few years ago I found it next to impossible to buy Meyer lemons in local supermarkets. That has changed recently. I bought my Meyer lemons at the local Sams Club. If that is your only option, wash them extremely well, since it is the skin you will ultimately be using.

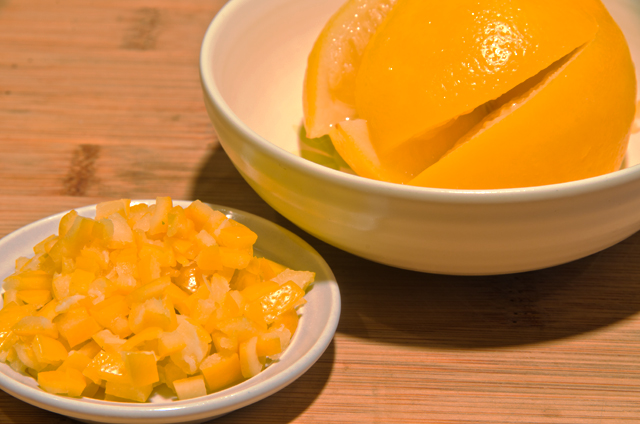
The sourness of the lemons mellow over time and they develop a unique and exotic flavor profile of tangy citrus and salty. The peel of  the lemons can be used in marinades for chicken, lamb or fish. Chopped finely, the peel is an interesting addition to grain based salads like quinoa and couscous.  Use it in a gremolata, the classic Italian condiment of garlic, parsley and lemon rind. I use the juice in salad dressings and marinades as well. Feel free to experiment, just remember, a little goes a long way.

Preserved Lemons

from America’s Test Kitchen

Makes One Quart Jar

Ingredients

  • 4 Meyer lemons preferably, if not regular lemons will do,  scrubbed and dried well
  • 1½ cups juice (8 lemons)
  • ½ cup kosher salt
  • 1 sterilized quart jar with lid

Directions

  1. Cut each lemon lengthwise into quarters, stopping 1-inch from bottom so lemons stay intact at base.
  2. Working with 1 lemon at a time, hold lemon over medium bowl and pour 2 tablespoons of salt into cavity of lemon. Gently rub cut surfaces of lemon together, then place in clean 1-quart jar. Repeat with remaining lemons and salt. Add any accumulated salt and juice in bowl to jar.
  3. Pour lemon juice into jar and press gently to submerge lemons. At this point I cut a double parchment round the size of the mouth of the jar to keep the lemons submerged. Cover jar tightly with lid and shake. Refrigerate lemons, shaking jar once per day for first 4 days to redistribute salt and juice. Let lemons cure in refrigerator until glossy and softened, 4 to 6 weeks. If you used regular lemons, it may take longer to achieve the desired softness. Preserved lemons can be refrigerated for up to 6 months.
  4.  To use, cut off desired amount of preserved lemon. Using knife, remove pulp and white pith from rind. Slice, chop, or mince rind as desired.
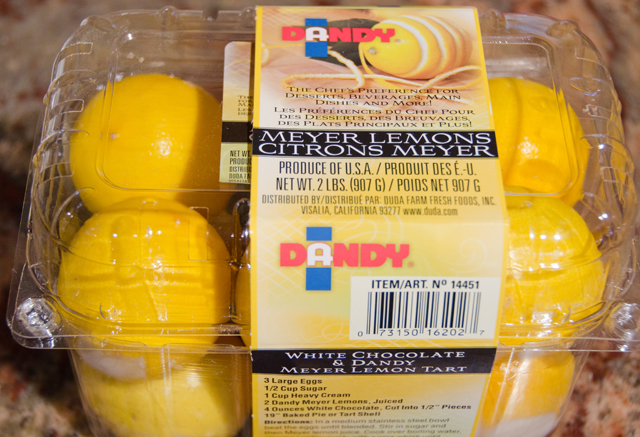
My lemons came in a nice protective tray.


Sprinkle kosher salt in the cuts you have made in the lemons.


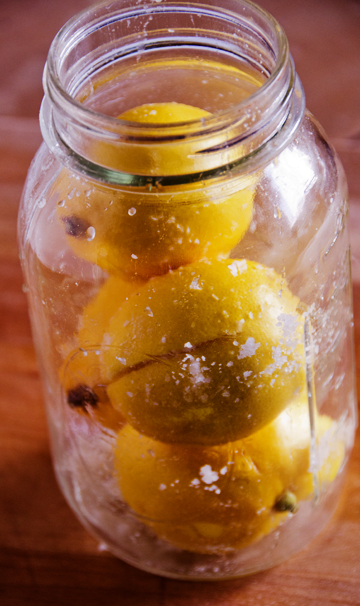
Pack the lemons in a sterilized quart jar. Add any additional seasonings at this time.


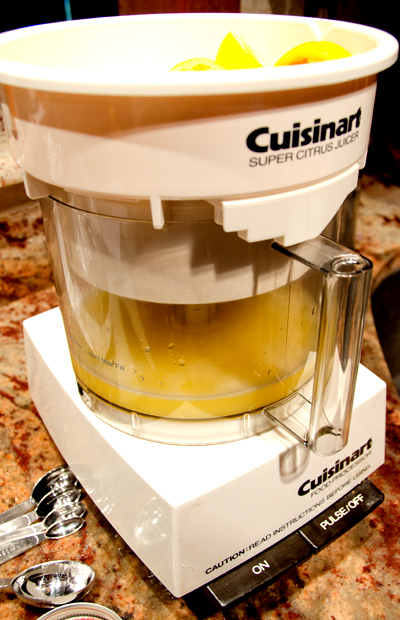
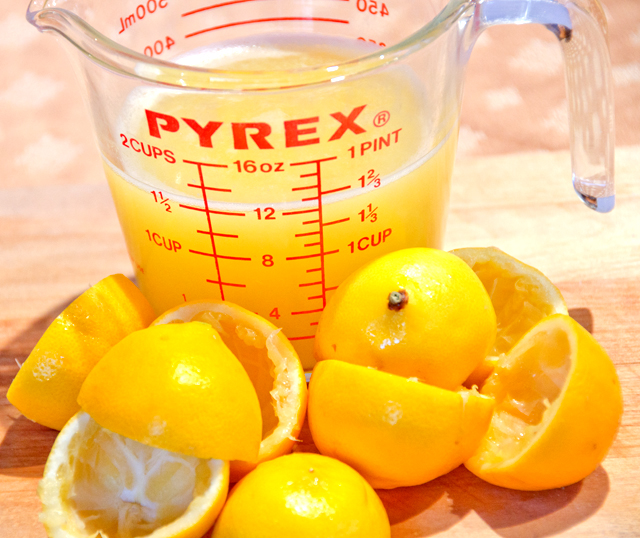
My Cuisinart juicer came in handy for this.


One and half cups of lemon juice are needed to cover the lemons.


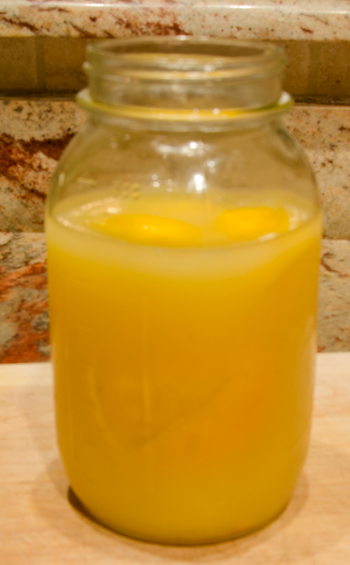
Over time the juice will take on a cloudy appearance.


Some day this tree will produce Meyer lemons.


November 24, 2012 Cranberry Chutney

I have a library of hundreds of cookbooks and food magazines from thirty years of cooking, entertaining and catering. Some hold a fonder place in my heart than others. The Silver Palate and Frog Commissary cookbooks are in their second copy after falling apart from years of constant use. Another book that holds a special place for me is Betty Rosbottom’s Cooking School Cookbook. My copy is dog-eared and stained from years of constant use. Her creative recipes were a constant source of inspiration for daily meals, entertaining and in developing my own menus in my fledgling years as a caterer. As someone who doesn’t normally make fancy cakes, I was even inspired to make her chocolate ribbon cake and chocolate apricot pecan torte, both featured on the cover of Bon Appetit. One of the recipes in the Cooking School Cookbook I have been making for years ironically isn’t hers but another cooking teacher, Shirley Rubenstein.  It’s a tangy sweet cranberry chutney that is a part of our Thanksgiving and Christmas table. Chutney, simply put, is a condiment, a mixture of chopped fruit, vinegar, spices and sugar cooked into a chunky spread. This chutney is delicious with turkey dinner and the leftover turkey sandwich your enjoy the next day. It’s also a good accompaniment to soft cheeses and crackers. Perfect as a hostess gift, it will keep for several weeks, refrigerated in an air tight container.

Shirley’s Cranberry Chutney

Ingredients

  • 1 c water
  • 1 c sugar
  • 2 cups fresh cranberries
  • 2 T cider vinegar
  • 1/2 c golden raisins
  • 1/4 c slivered almonds
  • 1 T light brown sugar
  • 1/4 t ground ginger
  • 1/2 t finely chopped garlic

Directions

  1.  Combine the water and sugar in a heavy 3 quart saucepan over medium high heat. Stir to dissolve the sugar and then bring to a boil without stirring.
  2. Add all the remaining ingredients. Boil very slowly, stirring occasionally, until fairly thick, 5 minutes or longer.
  3. Allow the chutney to cool, then cover and refrigerate. Chutney keeps well in the refrigerator, for several weeks.

Makes about 2 cups.