July 20, 2014 Pickled Coleslaw

DSC_8207a
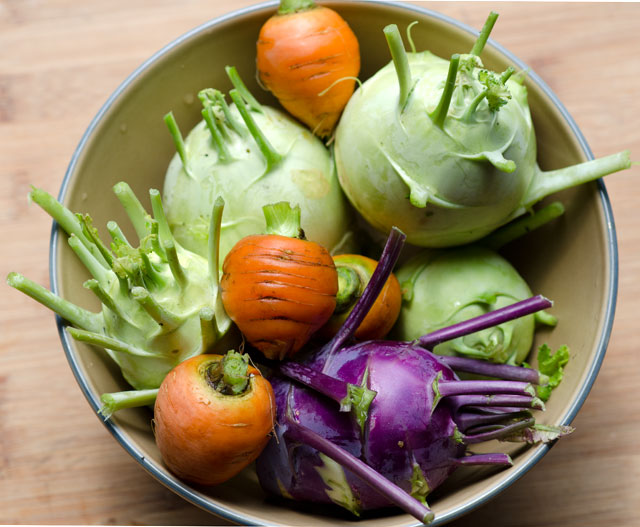
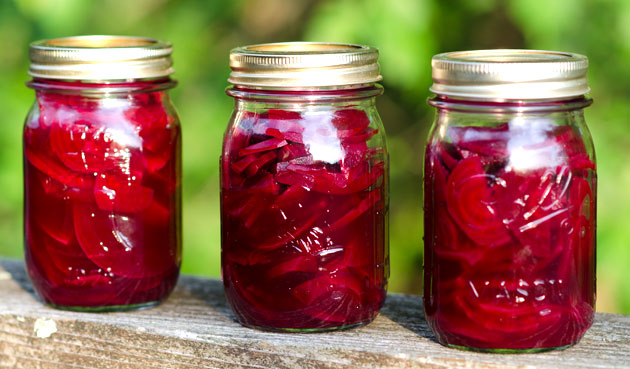
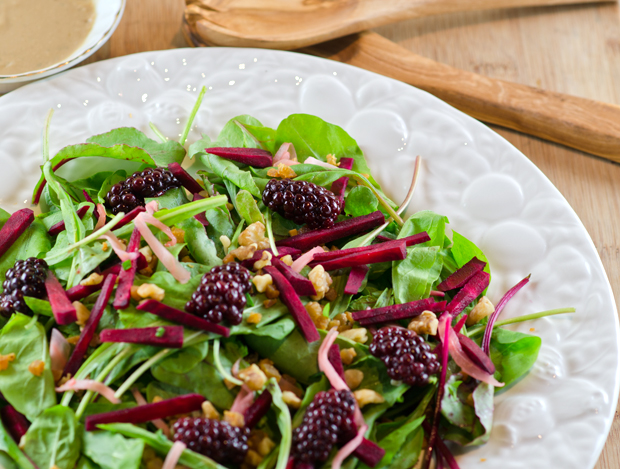
Another day, another pickle. This time it’s pickled coleslaw, a way to eliminate the mayo and make it picnic basket friendly. This slaw can be stored in the fridge for up to ten days. The cabbage in this coleslaw is turnip cabbage, or as it is better known, kohlrabi.
Kohlrabi is a member of the Brassica family, like cabbage, broccoli and cauliflower. The  tasty bulbs are low in calories, a good source of calcium, potassium, vitamins A and C and fiber.

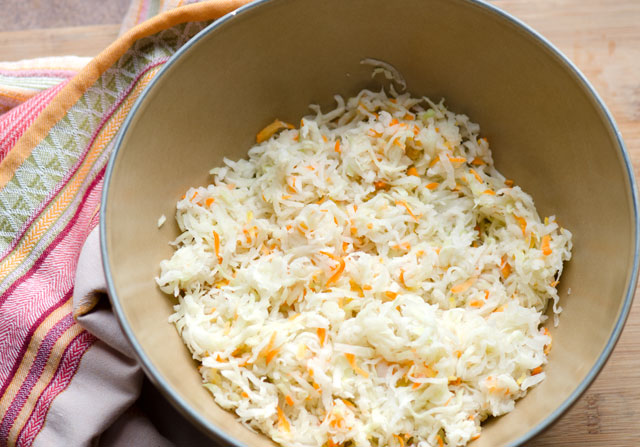
Kohlrabi is crunchy, a little bit sweet and can have the spicy kick of a radish or turnip. I peeled and shredded the little space alien looking veggies along with a few carrots in the food processor. Toss the shredded kohlrabi and carrot with some kosher salt to extrude as much water out of them as possible. After about ten minutes, use your hands or wrap in a clean kitchen towel  to squeeze as much water out of the kohlrabi as possible. The less water left behind the crunchier the slaw will be.

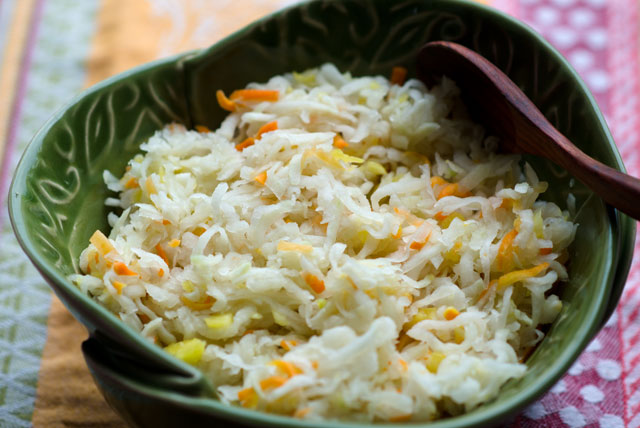
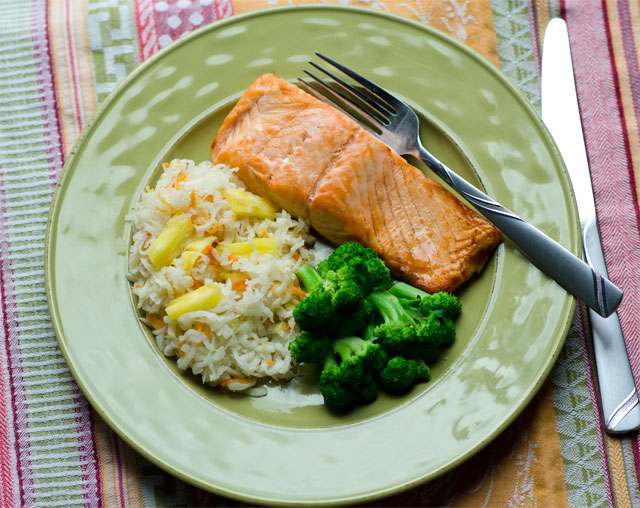
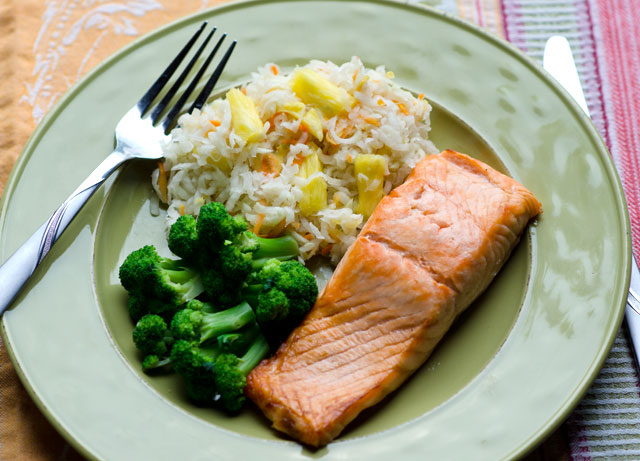
The original recipe called for white vinegar and pineapple juice. I had white balsamic pineapple vinegar and the sweet, slightly tart flavor really complimented the kohlrabi nicely. Add some pineapple chunks just when ready to serve. Goes great with fish, as a taco topping or even with hot dogs!

Pickled Coleslaw

Adapted from Fine Cooking

Makes 2 1/2 quarts

Ingredients

  • 9c shredded kohlrabi
  • 1/2c shredded carrot
  • 2T kosher salt (I use Diamond Crystal, if using Morton, use a little less)
  • 1/4c pineapple balsamic vinegar or white vinegar
  • 3/4c pineapple juice (fresh is best)
  • 1c fresh pineapple in small dice

Directions

  1. Toss the kohlrabi and carrot in a large bowl with the salt. Let sit at room temperature for about ten minutes.
  2. Wring out as much moisture as possible from the vegetables with your hands. Transfer the vegetables to a dry bowl.
  3. Add the vinegar and juice and toss thoroughly. The slaw can be served immediatley or placed in quart jars and refrigerated up to ten days.
  4. Add fresh pineapple right before serving.
DSC_8147a
Kohlrabi and carrots ready for trimming and peeling.
DSC_8154a
Kohlrabi and carrots after being salted and wrung out.
DSC_8206a
Add pineapple right before serving.

DSC_8198a

July 13, 2014 Pickled Beets and Pickled Beet Hummus

DSC_8128aPoor maligned beets! With descriptors like, they taste like dirty socks, mud and even wood, it’s no wonder they have a bad rap to overcome. Unlike former president George H.W. Bush who disliked broccoli, our current president is on the record as a beet hater, thus they are not grown in the White House garden.  Well all I am saying is “give beets a chance!”
Over the last few years I have developed a growing affection for beets.  In addition to the traditional Detroit Dark Red we have been growing the candy striped Chiogga (kee-oh-ja) and the bright orange-yellow Golden beet.We grow small crops of a row or two in succession all throughout the season. Beets pulled fresh from the garden have a sweet, rich and yes, earthy flavor.

I like to take small beets and either julienne or thinly slice them raw for salads. Roasted beets are good either sliced or cut in wedges on a bed of baby greens with orange supremes, goat cheese and toasted walnuts.
This summer I found myself with too many beets to use in a short amount of time. I decided to pickle some so they can be enjoyed over the course of several weeks. Pickling, simply put, is a way of preserving in a vinegar or brine mixture. The acid in the vinegar slows bacterial growth and the beets keep in the refrigerator for several weeks.

I chose a recipe from Fine Cooking magazine that used both red wine and red wine vinegar. As with any recipe, use a red wine as well as a red wine vinegar that you would be happy to drink and cook with on their own. A word of warning, red beets will stain your fingers, if you want to avoid that, wear disposable gloves when working with them. They taste great right away and even better once they have a chance to chill in the fridge. You can enjoy them on their own or add a few along with their liquid to brighten up a hummus recipe. Don’t forget, the beet greens are good to eat. Remove any large stems, blanch in boiling water for about 2-3 minutes, Drain well and saute in olive oil with some chopped garlic and red pepper flakes.

DSC_8111aDSC_8118a

Wine Pickled Beets

Makes about 1 1/2 quarts

Ingredients

  • 2 lb. trimmed red beets (about 5 medium)
  • 1 cup dry red wine, such as Cabernet Sauvignon
  • 3/4 cup red wine vinegar
  • 1/2 cup fresh orange juice
  • 1/4 cup granulated sugar
  • 4 whole allspice berries
  • 2 whole cloves
  • 1 tsp. kosher salt

Directions

  1. Put the beets in a 4-quart pot, add water to cover, and bring to a boil. Turn the heat down and simmer until the beets are crisp-tender, 20 to 25 minutes. Drain and set aside until cool enough to handle.
  2. Peel and halve the beets. Slice crosswise 1/4 inch thick and distribute among three 1-pint jars or other sealable nonreactive containers.
  3. In a 2- to 3-quart nonreactive saucepan, bring the wine, vinegar, orange juice, sugar, allspice, cloves, and salt to a simmer over medium heat, stirring until the sugar dissolves, 3 to 5 minutes.
  4. Pour the liquid over the beets to cover. Let sit, uncovered, at room temperature for 2 hours to cool and pickle the beets. Serve, or cover and refrigerate until ready to serve.
Make Ahead Tips

The pickles can be refrigerated in a covered container for up to 6 weeks

DSC_8137a

August 20, 2013 An August Summer Salad

DSC_1807a

That purplish red in your salad mix back in the eighties used to be red cabbage, there’s a good chance now your salad mix is called mesclun and the slightly crunchy burgundy red component is radicchio. Placed side by side, red cabbage and radicchio might look alike with their shiny smooth leaves and tight heads but that is where the similarities end.

Radicchio (pronounced rah DEE kee oh) is a member of chicory family that also includes endive, escarole and frisee. Originally cultivated and imported from the Veneto region of Italy, it is widely grown domestically by both commercial and home gardeners. Once again, we get our seeds from a company, Seeds of Italy. We have grown both the Treviso that produces heads that grow taller, much like a Romaine lettuce and the Verona that produces a rounder more compact head reminiscent of Bibb lettuce.

Our mid summer planting of radicchio will eventually yield tight magenta red heads with bright white ribs when the cooler temperatures of fall arrive. The initial growth is bright green, a little bit fuzzy, already displaying it’s characteristic bitter flavor. A good way of introducing reluctant palates to bitter greens is to pair them with contrasting flavors. Combining bitter greens with sweet, salty and acidic ingredients is a good way of taming their flavor and balancing out the bitterness. Since I needed to thin out both beet greens and radicchio I combined the bitter greens of the radicchio with the milder beet green.

Tangy pickled blackberries were an interesting addition to this salad. A recent recipe for them in Food and Wine magazine intrigued me enough to make a few pints from berries I picked up at the farmers market. I wasn’t sure where I would use them, perhaps with some thick juicy pork chops, but this salad seemed like the perfect opportunity to try them out. The sweet and sharp flavor of the berries contrasted nicely with the radicchio.  Crisply cooked cubes of pancetta provided a fatty and salty contrast.  A little bit of finely julienned pickled ginger and sweet earthy raw beets gave color, texture and yet another flavor element. The final touch, a dressing made with blackberry ginger balsamic vinegar, olive oil and a little Boursin cheese to provide a creamy element. A totally improvised and very flavorful way to use our baby greens.

DSC_1910a
These baby radicchio plants look nothing like the mature plants of the fall.


Radicchio and Beet Green Salad

Serves two

Ingredients

  • 1/2c creamy herb cheese (like Boursin)
  • 2 1/2T balsamic vinegar (I used a blackberry ginger balsamic)
  • 1T water
  • 1/3c extra virgin olive oil
  • 4-5 cups of baby beet and radicchio greens
  • 1/4c diced pancetta, cooked until crispy
  • 1/2c finely julienned raw beets
  • 2T finely julienned pickled ginger
  • 1/4c pickled blackberries (recipe follows) you could also substitute fresh black or blueberries
  • Kosher salt and freshly ground black pepper

Directions

  1. In a small food  processor, pulse the cheese with the vinegar, water and olive oil until the dressing is smooth. Season with salt and freshly ground pepper to taste.
  2. Place beet and radicchio greens on a serving platter, top with julienned beets, pancetta and pickled ginger. Toss with enough dressing to lightly coat, there will be some left over. Sprinkle blackberries on top. Finish with a grind of pepper.

DSC_1921a


Spiced and Pickled Blackberries

Makes 4 1/2 cups

Ingredients

  • 8 black peppercorns
  • 3 allspice berries
  • 2 juniper berries
  • One 1/2-inch piece of ginger, thinly sliced
  • 1 small bay leaf
  • 2c red wine vinegar
  • 2c water
  • 6T sugar
  • 3T kosher salt
  • 1 shallot, quartered lengthwise
  • 1 sprig fresh thyme
  • 18 ounces fresh blackberries

Directions

  1. In a mortar, lightly crush the peppercorns with the allspice, juniper berries, ginger and bay leaf. Transfer to a medium saucepan and add the vinegar, water, sugar, salt, shallot and thyme. Bring just to the boil, stirring to dissolve the sugar and the salt. Let the brine cool completely.
  2. Strain the brine into clean glass jars and add the blackberries. Cover and refrigerate for at least a week before serving.
  3. Pickled blackberries can be refrigerated for up to 3 months.

DSC_1802a


May 21, 2013 Chive Oil


DSC_0339aJust exactly what is a bunch? That is the question I had to pose after looking at Bon Appetit ‘s June issue.The current issues of  both Bon Appetit and Fine Cooking have extensive articles about cooking with herbs. The article and recipes in Fine Cooking were contributed by Aimee Olexy. We had the pleasure of dining at her Philadelphia restaurant,Talula’s Garden last year. The article is a wealth of recipes that use fresh herbs, in everything from a grain salad to a pound cake. There is also a page that gives the reader the basic formulas for herb butters, oils, vinegar, syrup etc.  Bon Appetit devotes ten pages, if you count photos, to a spiked lemonade, tea, dessert, a board dressing and chive oil, among others. Chive oil caught my eye since our chives are peaking and I am trying to find ways to use them in my everyday cooking. This is where the bunch question arose.


Bon Appetit’s recipe calls for 3 bunches of chives and 1 1/3 cups of grapeseed or vegetable oil. Gourmet Sleuth says 1 bunch of chives = 1/2c chopped, I’m not sure on what authority they have determined this. One CSA farm cooperative labeled a bunch at one ounce, another more generous with a 2 ounce measurement. Oh yes, there’s an app for that, Produce Converter. Basil, parsley and oregano made the cut, sadly no chives. 

So I returned to my old tried and true recipe from the Herbfarm Cookbook.  A book that is open in my kitchen all summer long, author and former chef of the Herbfarm restaurant, Jerry Traunfeld is more exacting in his measurements. His ratio of 1 cup of coarsely snipped chives to 3/4c extra virgin oil worked well for me. Bon Appetit’s recipe heats the oil for a more concentrated mixture. Aimee and Jerry’s recipes rely on the heat that is generated by the blender.

So is it better to make this in a food processor or a blender? All three articles agreed that the initial way to combine the herbs and oil is in a blender. Blenders are best suited for liquid preparations, pureeing, emulsifying and blending.  Food processors are better at shredding, chopping, slicing and grating. Even though the bowl of a food processor is large, liquids in it can be no higher that the blade or it will run out the sides, I can certainly attest to that. A blender bowl can be filled almost to the top without the contents leaking out.
Any herb oil must be stored in the refrigerator for safety reasons. Botulism can occur when fresh herbs and oil are combined and left at room temperature. The equation for spoilage is even greater if garlic is added to the recipe. Ms Olexy gives a shelf life of two days to her herb and garlic oil. All fresh herb preparations are at their best in the first few days. After topping salmon with it, adding it to a vinaigrette and using it in a sauce for chicken, I’m sure I will have to make a new batch in a few days.

Chive Oil

Makes 1/2 cup

Ingredients

  • 1 c coarsely chopped chives
  • 3/4c extra virgin olive oil

Directions

  1. Put the chives and oil in a blender and puree until the oil begins to warm, 2 to 3 minutes.
  2. Pour the oil into a very fine strainer, or a coarse strainer lined with a double layer of cheesecloth, set over a bowl. Let the oil drip for one hour or longer to extract as much as possible. The oil should drip undisturbed to achieve the clearest oil. Discard the contents of the strainer and store the oil in a covered container in the refrigerator. Bring to room temperature before using. Will keep for a week.
DSC_0308a
Everything ready to go.


DSC_0315a
All blended up.


DSC_0316a
I love the bright green color!


DSC_0324a
Let the oil drip undisturbed for several hours for the clearest oil.

September 25, 2012 Chard Chips and Pickled Chard Stems


When the new issue of Fine Cooking came last week I was ready to put it aside for a few weeks. The holiday desserts and side dishes looked very tempting, but the beginning of fall was just last Saturday and I am still enjoying cooking as much as I can with the harvest from our garden. As I quickly thumbed through the issue I happened to notice an article that interested me, “What We Are Cooking Now.” Specifically, what really caught my eye were Swiss chard chips. I had heard of kale chips, both the pricey little bags sold in health food stores and the homemade varieties that a friend introduced me to. So why not chard chips? We have three sections of chard of the Bright Lights and Rhubarb variety still producing, so I thought it would be fun to try my hand at this. Since I am a proponent of using both the chard leaves and the stems, I wanted to use the colorful stems in another healthy nibble so a refrigerator pickle seemed to be the best choice here.
My on-line research revealed many different approaches to making chard chips and after reading them all, came up with my own method. There are certain important things to remember if you are going to make chard chips. Wash the leaves thoroughly, chard leaves are usually very crinkly, and those crevices can be dirty. After washing the leaves, remove the stems, reserve if using. Spin the leaves dry in a salad spinner and use paper towels to remove any excess moisture. Any moisture left on the leaves will cause them to steam, not bake and crisp up. A  “bunch” is a non-specific term, to be exact as possible, I used 25 chard leaves that were about 12-14 inches long after stemming. When in doubt, keep the leaf pieces larger, 2 inch squares approximately. The leaves will break easily when they are dry and too many small pieces will give you chard crumbles or dust.  Place the dry leaf pieces in a large bowl and toss lightly with olive oil and your seasonings of choice. Start with a modest amount, about a tablespoon of oil, you can always add more, it’s not as easy to take it away. I used a little Espelette pepper olive oil, kosher salt, fresh ground pepper, a little garlic powder and a little plain olive oil to taste. I did not grease my baking sheet or use cooling racks to elevate the leaves. I did not crowd or overlap the leaves. I used four large baking sheets in two ovens, racks in the top and the bottom set to 275F on the convection bake setting. The caveat here is, know your own oven, my chips seemed to be ready quicker than most of the recipes I looked at, keep a watchful eye to ensure a crispy, not a burnt chip!
Chard Chips

  • 1 large bunch of chard, 25 leaves, 12-14 inches long
  • Olive oil
  • Seasoning of your choice, I used kosher salt, garlic powder and freshly ground pepper

Directions

  1. Preheat oven to 275F (convection bake). Put racks in the top and bottom of oven.
  2. Wash chard leaves thoroughly in several changes of water. Remove the stems from the leaves, reserve for chard stem pickles.
  3. Dry chard leaves, first in a salad spinner, then remove excess moisture with paper towels. Cut leaves into 2″x2″ pieces, or a size as close as possible, when in doubt, larger is better.
  4. Spread leaves on a large ungreased baking sheet, do not overlap or crowd. My leaves took up four sheets that I baked in two ovens.
  5. Bake chard for six to seven minutes, check to see how the leaves are drying, at this point I loosened the leaves with a spatula and my fingers and rotated the baking sheets, top to bottom and front to back.
  6. Bake for another six to seven minutes, chard should be crisp, not burnt.
Trimmed chard leaves ready to be tossed with olive oil and seasonings


Give the chard leaves enough room to ensure even baking.
Not the prettiest snack, but certainly tastes good!


Pickled Chard Stems

Colorful Bright Lights and Rhubarb chard stems are too pretty to waste.

Pickling shows off the brightly colored stems in another healthy nibble. Refresh the stems in some ice water to crisp them up and cut to even lengths to fit your canning jar. I chose pint jars but one cup sized jars would work as well. I used a basic refrigerator pickle recipe and added my own spice blend combination. Allow them to cure in the refrigerator for a few days, after three days they were ready. If your stems are wide, cut them in half lengthwise, there will be less chance for the stems to be stringy.

Quick Chard Pickle

Makes  2 pints

  • 2 pint canning jars and lids
  • Enough chard stems to pack tightly into the jars
  • 2c water
  • 1c rice wine vinegar
  • 1/4c granulated sugar
  • 1/2t cumin seed
  • 1/2t coriander seed
  • 1/2t fennel seed
  • 1 small piece of cinnamon stick about 2″
  • 1/2t pink peppercorns
  • 1/2t white peppercorns

Directions

  1. Sterlize two pint canning jars by washing them in hot soapy water, rinsing and drying them thoroughly. Crush spices in a mortar and pestle or small food processor. Distribute spices evenly between the two jars.
  2. In a medium saucepan bring two cups of water to a boil. Add vinegar, sugar and salt and bring the mixture back to a boil.
  3. Pack the chard stems in the jars as tightly as possible. Using a wide mouth canning funnel, pour the brine over the stems to cover completely. Place lids and bands on the jars and let cool. Refrigerate, chard pickles will be ready in a few hours but at their best in about two days.

    My spice blend ready to crush in the mortar and pestle.
Pickled chard stems ready for the refrigerator. Notice the classic Bicentennial Liberty Bell jar on the right.


August 21, 2012 Roasting Tomatoes

One of the joys of gardening is the abundance of produce and one of the sometimes frustrating things about gardening is the abundance of produce. If only I could spread the harvest over a longer period of time.Since I can’t, I have found some ways to enjoy summer’s bounty all year long.
Take tomatoes for example. You wait and wait for the blush on the first fruit and then it happens. Bins and bins of tomatoes on the vine to be picked. When I was catering I canned copious amounts of spicy tomato sauce throughout the summer. I used the sauce through the year for parties and other events in lasagna and other pasta dishes. For several years I have been roasting tomatoes in the oven and freezing them in quart-sized bags. These are not sun-dried, they are juicier with a more concentrated flavor. They are a more versatile product that can not only be used in pasta dishes, but chili, soups and other dishes where a 28 ounces can of tomatoes is needed.
The procedure begins with the harvest. I like Romas best, but any variety can be roasted. I find the Roma exude less liquid than other varieties. I don’t put any additional seasoning on the tomatoes, that can be done when the tomatoes are cooked in the finished product.


 After the tomatoes are washed, use a small knife to cut out the core of the tomato.

  Cut tomatoes in half and place cut side down on parchment lined baking sheets that have a one inch rim to collect the juices that will accumulate during the cooking process. Parchment paper will not eliminate clean up but will make it easier.


 Roast tomatoes in a 450F oven for about 10 minutes or until the skin starts to shrivel. Carefully remove skins (without burning your fingers!) and pour any accumulated juices into a bowl. Return tomatoes to oven to allow them to cook down more. Pour off any additional juice.

 Lower temperatue of oven to 375F and continue cooking until tomatoes have released most of their moisture, another 10 to 15 minutes.

 The liquid exuded from the tomatoes isn’t the prettiest, but it is the tastiest tomato juice you will ever drink!

 When tomatoes have cooled, transfer to quart-sized freezer bags. Freeze flat for easy stacking.