August 11, 2013 Roasted Beet, Beet Green and Peach Salad

DSC_1445a

This salad celebrates the beginning of one beet crop, the harvest of another and beautiful local peaches from the farmers market.

In the last several years we have discovered the advantages of succession planting. Succession planting means that with some shorter season crops, like salad greens, beets and carrots, we plant fewer rows at one time but we do multiple plantings throughout the growing season for a continuous harvest. Our most recent planting of beets is the fifth of the season, this works well for us since we are only feeding ourselves, friends and family with the vegetables we grow.

Beet “seeds” are actually a dried fruit or a seed cluster that is made up of 2-6 seeds. So if you only planted one beet seed, you would still get several plants. The first thinning can occur when the seedlings are about 2 inches in height leaving the healthiest plants to mature. Snip the greens with scissors at soil level so as not to disturb the remaining plants. This will allow the remaining plants to gain more water, sunlight and nutrients from the soil. If you don’t thin, you will get all tops (unless that’s what you wanted) and there will not be enough space for the roots to develop into healthy round beets. We do a second thinning when the greens are a little bit larger. Some of those greens can still be used in salads, the larger greens are best sautéed with a little garlic, olive oil, salt and pepper. Beets are in the same family as spinach and chard and the greens share a similar mild flavor.

So what is the difference between red and yellow beets? Beats me! Now could I resist that one? Other than the fact that they don’t “bleed” like red beets, the only other difference is their flavor is a bit milder than the red varieties.

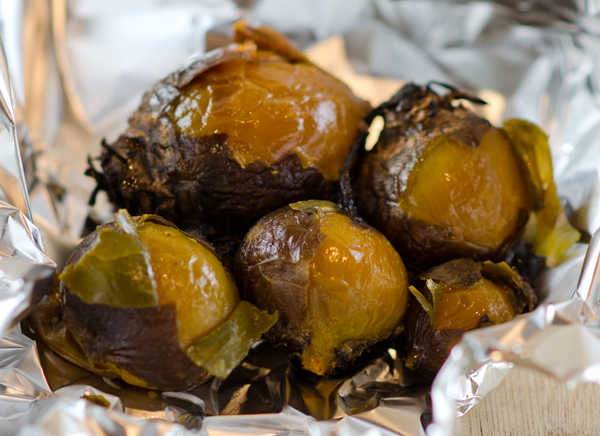
Roasting beets in foil brings out their sweet, earthy flavor and is the easiest and neatest way to cook them. If you are roasting both red and golden beets wrap them separately so the colors won’t bleed together. Scrub your beets well, no need to peel at this point, cut or snap off the top and trim the root end.  Place them on a sheet of heavy foil, top with a splash of olive oil, salt and pepper and maybe a sprig of thyme. My beets are rarely uniform in size, so I start checking them in 45 minutes. Beets that are easily pierced with a tip of a knife are ready. Once the beets are sufficiently cooled, the skins slip off easily.

Both yellow and white fleshed peaches are in season now at our local farmers market.  The standard yellow peach we are all familiar with has deep yellow skin with a vibrant red or pink blush and yellow flesh. White fleshed peaches have grown in popularity since the 1980’s when heartier varieties were developed that could be shipped to markets. The skin of the white peach is pale and pink with pale flesh and in the case of these peaches, tinged with vibrant red. White peaches are sweeter than their tarter yellow counterparts and are best enjoyed fresh, not cooked.

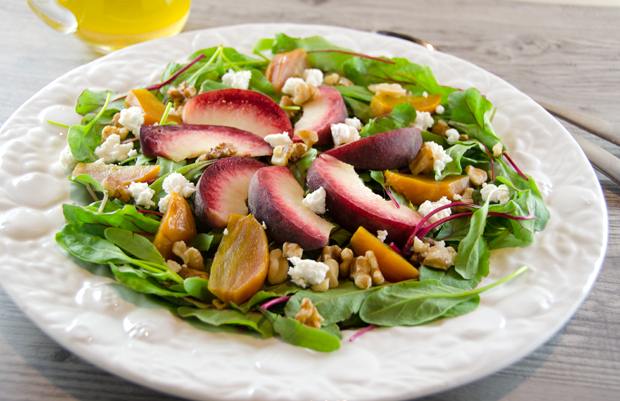
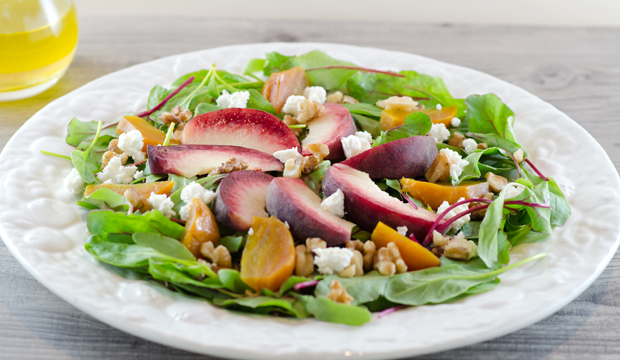
In this salad I combined the last of current beet harvest with the delicate baby greens of our most current planting along with sweet white peaches, creamy goat cheese and some toasted walnuts. The peach flavor was even more enhanced with a vinaigrette made with a peach balsamic vinegar from The Tubby Olive. A white wine vinegar combined with a touch of sweetness from honey or agave sweetener could substitute.

DSC_1460ajpg


Roasted Beet, Beet Green and Peach Salad

Ingredients

  • 3 small beets, roasted and cut into wedges
  • Olive oil, kosher salt and freshly ground pepper
  • 2 peaches, pitted and sliced
  • 6 ounces mixed greens- I used beet thinnings, any combination of baby greens will do
  • 1/4c peach or white wine vinegar
  • 3/4c extra virgin olive oil
  • 1 t  Dijon mustard
  • 1 t honey or agave sweetener, if using white wine vinegar
  • 1/3 to ½ cup blue or goat cheese, crumbled
  • ¼ cup walnuts, toasted and chopped

Directions

  1. Preheat oven to 425° degrees F.
  2. Wash and scrub the beets well.
  3. Place beets on a large piece of aluminum foil, season with a splash of olive oil and a little salt and pepper then fold the foil into a packet. Place the foil on a cookie sheet to catch any drippings and roast 45 minutes or until tender when poked with the tip of a knife. Allow beets to cool 15 minutes. Once cool, peel the skins off using your fingers or a paring knife (they should come off easily).
  4. Slice the beets into wedges and set aside.
  5. In a small bowl, whisk together the vinegar, oil, mustard, and honey until completely combined.
  6. In a large salad bowl, add the mixed greens and toss with desired amount of dressing.
  7. Add the peach slices, roasted beets and toss again.
  8. Serve salad with roasted walnuts and crumbled cheese on top.
DSC_1375a
The most recent harvest of golden beets.
DSC_1496a_edited-1
Beet greens ready to harvest for a salad.
DSC_1420a
Roasted golden beets, the skin peels off quite easily.

DSC_1434a

August 8, 2013 Pesto Summer Vegetable Salad

DSC_1354a

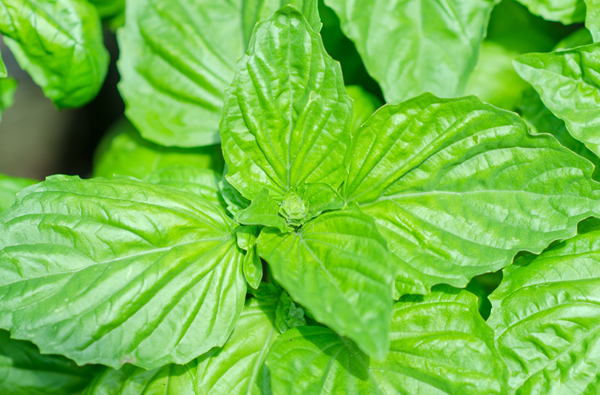
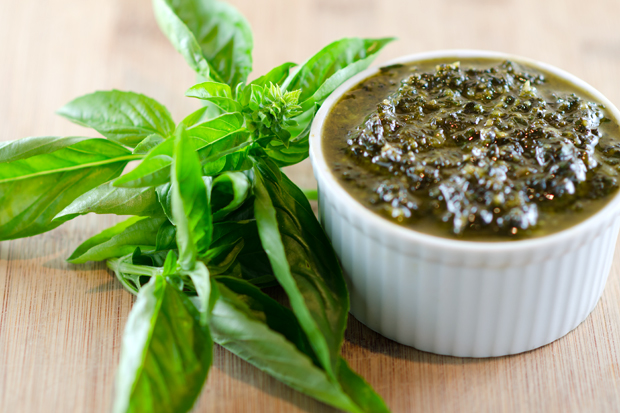
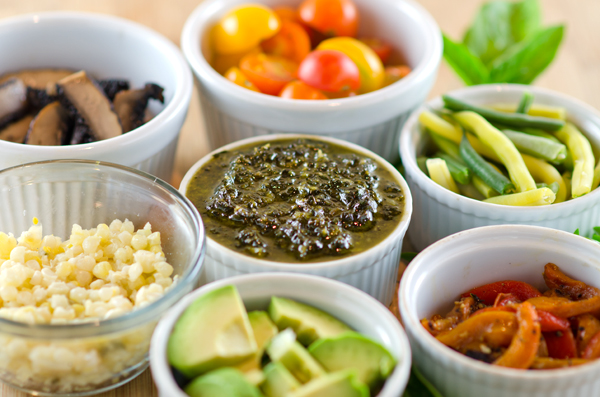
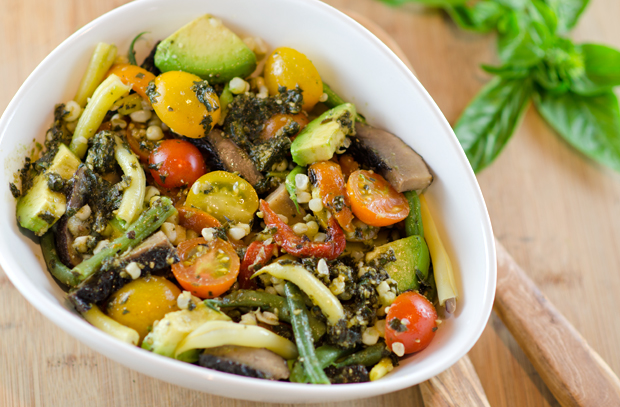
This isn’t a recipe as much as it is a formula. In the summer months when we are enjoying vegetables fresh from the garden and the farmers market, we have the occasional leftover. A cup of cooked beans, several ears of corn, cherry tomatoes, roasted peppers, you get the idea. I decided one evening to combine what I had on hand into a summer vegetable salad that I dressed with a few splashes of a lemon vinegar and a few tablespoons of fresh pesto from the garden. You could even add a grain like quinoa or some cooked pasta. A quick and easy side dish, as long as you have pesto on hand. And why shouldn’t you? Take advantage of your garden’s or the farmers market’s fresh basil and make a batch today.

DSC_1381a

Basil Pesto

Makes 1 cup

Ingredients

  • 3 cloves of peeled garlic
  • 3T pine nuts or walnuts
  • 1/4t salt
  • 3c gently packed basil leaves
  • 1/2c extra virgin olive oil
  • 1/2 c freshly grated Parmigiano

Directions

  1. Chop the garlic, pine nuts and salt in a food processor until finely ground, about 15 seconds. Add the basil leaves and process until no whole leaves remain, another 15 seconds or so.
  2. With the machine running, pour the oil through the feed tube in a steady stream. Stop and scrape down the sides, process for a few more seconds.  The mixture should be ground to a paste-like consistency with a little of the leaves texture still remaining.
  3. Add cheese and pulse until incorporated.

DSC_1400a

Pesto Summer Vegetable Salad

Serves four to six

Ingredients

  • 8 c mixed vegetables such as cooked asparagus spears, cut into thirds, avocado slices, roasted or raw pepper strips, cooked corn off the cob, cherry tomatoes, sliced in half. cooked green or yellow beans in 1″ pieces, roasted portabello mushroom strips, cucumber rounds, cooked zucchini slices-try to have a variety of at least three
  • White wine, Sicilian lemon or another light vinegar
  • Basil pesto
  • Crumbled feta or goat cheese

Directions

  1. For the dressing, in a small bowl, stir together 3 tablespoons pesto and 1 tablespoon vinegar.
  2. Place vegetables in a large bowl.Add just enough vinaigrette to moisten the vegetables taking care not to overdress it (you may not need it all). Add the feta, if using and toss again. Let the salad rest for 10 to 15 minutes to allow the flavors to meld and then taste the salad again. If necessary, add a little viniagrette and salt and pepper. Serve as soon as possible.

DSC_1407aDSC_1418a

July 30, 2013 Middle Eastern Party Side Dishes

DSC_1071a

Every good meal deserves some delicious and interesting side dishes and our Middle Eastern feast was no exception. I combined some past favorites with new additions.

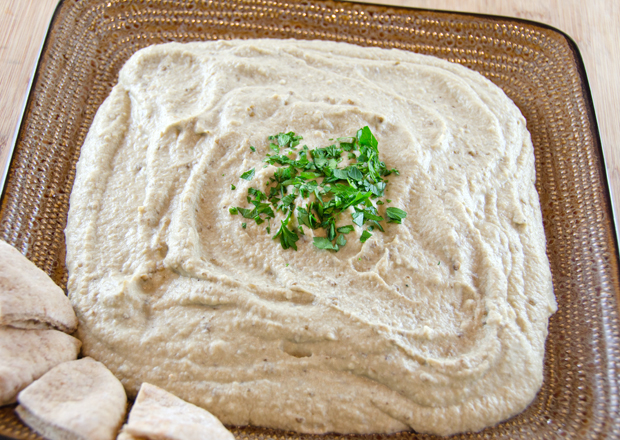
Every Middle Eastern country seems to have their own variation of an eggplant dip, baba ghanoush (also spelled ghanouj) is the Lebanese variety of this classic. This dish, often referred to as eggplant caviar is smooth, creamy and smoky. Char your eggplants first over a grill or a gas stove top to give it’s classic smoky flavor. The creamy eggplant flesh is combined with tahini (sesame seed paste), fragrant cumin and tart fresh squeezed lemon juice. Whether purple, white, speckled, fat and round or long and thin, choose eggplant that have firm, taut exteriors with unblemished glossy skin. So what does baba ghanoush mean? Middle Eastern cooking authority, Clifford Wright states the phrase “baba ghanoush” is untranslatable. Everyone agrees that baba is the Arabic word for an endearing form of the word father, think daddy… So Wright’s premise is that the eggplant is the “daddy” of the Arabic vegetable kingdom. Ghanoush, well that’s another story. I have seen everything from cute, coquettish, to spoiled or pampered. Could the originator of this classic been a privileged sultan? We may never know….

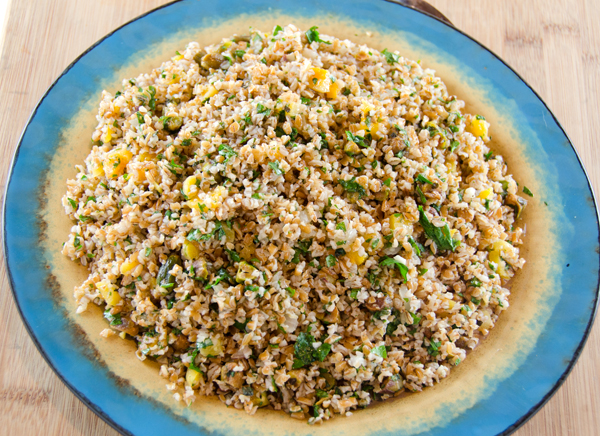
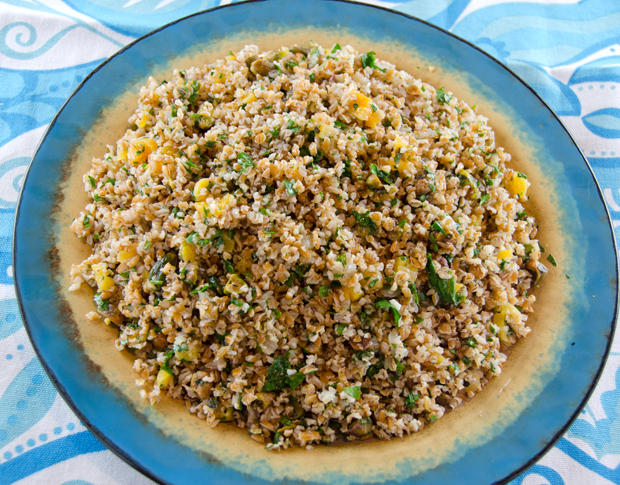
Correctly stated, tabbouleh is a Lebanese herb salad with bulgur and not a bulgur salad with herbs. My second side dish is similar to, but not tabbouleh since it does start out with copious amounts of  garden fresh parsley, mint and cilantro combined with bulgur wheat.  This recipe swaps out the traditional tomatoes and cucumbers for tangy sweet apricots and delicately nutty pistachios. Bulgur is whole wheat grain that has been cracked and sifted into four sizes ranging from fine to coarse. It is sometimes referred to as cracked wheat, but that is a misnomer. It differs from cracked wheat since bulgur has been partially cooked by parboiling or steaming. Cracked wheat is uncooked wheat that is dried and coarsely cracked, preserving the bran and germ layers. Bulgur cooks in half the time of cracked wheat.  Bulgur is a nutritional powerhouse, high in fiber, protein, iron, magnesium and B vitamins. Perfect as a take along for picnics and potlucks, bulgur salad with apricots and pistachios could become a main dish with the addition of chicken or shrimp. To properly eat your bulgur salad, scoop it up with a leaf of romaine lettuce, not with a pita or fork and knife.
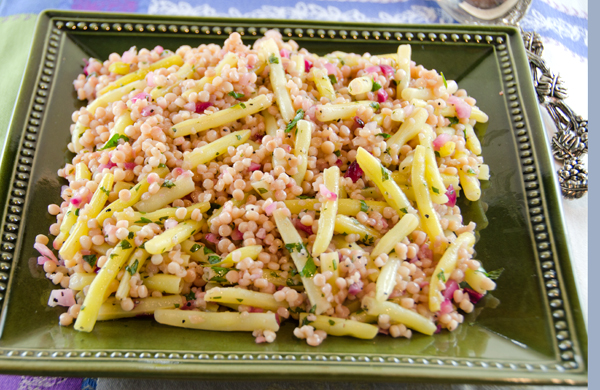
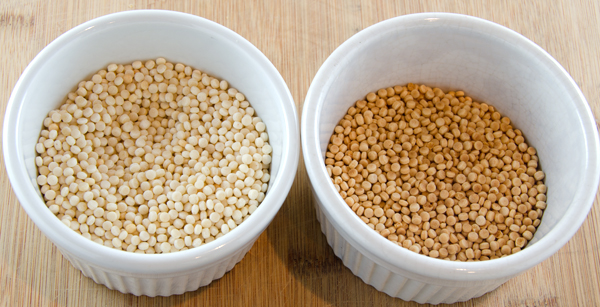
Israeli couscous is a subject I covered extensively last summer in this post. Pearled or Israeli couscous, like regular couscous is a whole grain made with semolina or wheat flour. It has a slightly chewy texture. In this recipe, Israeli or pearled couscous is combined with the garden’s first of the season yellow beans and pickled red onions. Toasting the grains before cooking gives them a nutty flavor. I found it is best to drain the pickled onion before adding to other ingredients to prevent the vinegar from overwhelming the dish. The pickled red onions will turn your couscous pink. One thing is certain, I have found no “written in stone” cooking proportions of Israeli couscous to water or broth, but I have found that 2 to 1, liquid to Israeli couscous works for me, otherwise the couscous retains too much liquid and doesn’t mix well with the other ingredients.

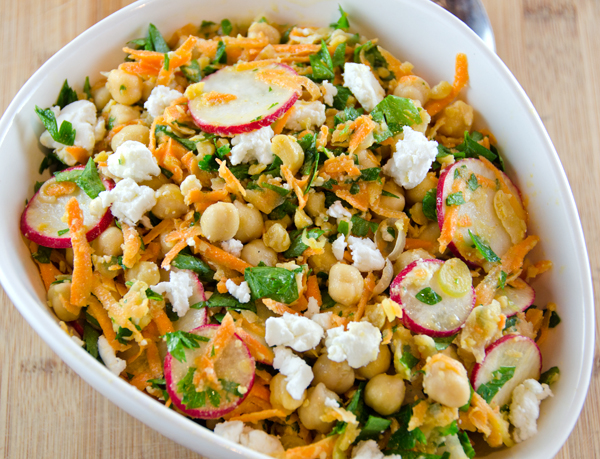
Chickpeas are a staple of Middle Eastern cuisine and the base for two of the classics, hummus and falafel. Chickpea, carrot and parsley salad took advantage of our carrot and radish harvest and made a colorful side with our meal.  Fresh cooked chickpeas are a revelation. The first time I had them was as a part of a Valentine’s day dinner my dear husband cooked for me many years ago. I’m not saying that canned are bad, in most instances I prefer the convenience of canned. Just cook them sometime to appreciate the wonderful nutty flavor of fresh chickpeas.

DSC_1082a Chickpea, Carrot and Parsley Salad Serves 4-6

from Fine Cooking magazine

Ingredients

  • 2c chickpeas, drained and rinsed
  • 1c loosely packed coarsely chopped fresh flat leaved parsley
  • 1/2c sliced radishes
  • 1/4c chopped scallions
  • 3T fresh lemon juice
  • 1t ground coriander
  • 1t ground cumin
  • Kosher salt and fresh ground pepper
  • 6T extra virgin olive oil
  • 1/3c crumbled feta cheese
  • 1/3c toasted pine nuts

Directions

  1. Mash 1/2c chickpeas into a coarse paste with a potato masher or wooden spoon.
  2. Toss in the remaining chickpeas, parsley, carrots, radishes and scallions. Stir to combine.
  3. Whisk together the lemon juice, spices, 1/2t salt and a generous grind of pepper. Whisk ingredients while adding the olive oil in a slow steady stream. Pour over the salad and toss gently. Season to taste with salt and pepper. Top with feta cheese and pine nuts and serve.

DSC_1064a Israeli Couscous, Yellow Bean and Pickled Red Onion Salad

Serves six

Adapted slightly from Fine Cooking magazine

Ingredients

  • 1/2c red onion in small dice
  • 1/4c red wine vinegar
  • 1T granulated sugar
  • Kosher salt
  • 3/4lb yellow or green beans trimmed and cut into 1/2″ pieces\
  • 1/2c pearled or Israeli couscous
  • 1c water or broth
  • 2T coarsely chopped fresh flat-leafed parsley
  • 2T extra-virgin olive oil
  • Freshly ground black pepper
DSC_1021a
Untoasted and toasted pearled or Israeli couscous.

Directions

  1. Put the onions in a bowl. In a small saucepan, bring the vinegar, sugar and 1/2T salt to a boil. Pour the mixture over the onions and let sit for 20 minutes. Drain and reserve liquid.
  2. Bring a medium saucepan of well salted water to a boil over high heat and cook the beans until crisp tender, about 4-5 minutes. Drain beans in a colander.
  3. Toast the couscous in a dry skillet stirring over medium heat until golden brown, about 3-4 minutes. In a small saucepan bring water or broth to a boil. Cook the couscous in the boiling water until tender, about 8-10 minutes. Drain in a colander.
  4. In a medium bowl toss the couscous, beans, onion, parsley and olive oil and toss. Add a little of the reserved vinegar to the salad if desired. Season to taste with salt and pepper and serve.

DSC_1070a Bulgur Salad with Herbs, Pistachios and Apricots

Serves 8 as a side dish

Adapted from Fine Cooking magazine

Ingredients

  • 2c medium bulgur
  • Kosher salt
  • 2/3c plus 2T extra virgin olive oil
  • 1/3c minced shallots
  • 1T minced garlic
  • 1/2c medium chopped dried apricots
  • 1c coarsely chopped fresh flat leafed parsley
  • 1/2c coarsely chopped fresh cilantro
  • 1/2c coarsely chopped fresh mint
  • 1/2c chopped roasted pistachios
  • 1/3c fresh lemon juice
  • Freshly ground black pepper
DSC_1010a
Fresh parsley from the garden that has been washed and spun in a salad spinner. Next I lay them out to further dry on clean cloth dishtowels.
DSC_1013a
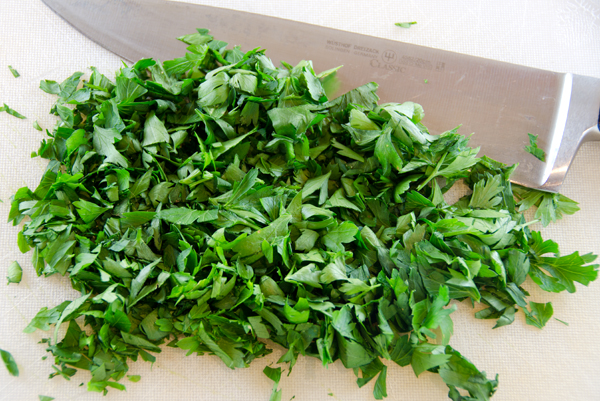
Just a rough chop is needed for the parsley.

Directions

  1. In a large skillet, toast the bulgur over medium heat, stirring constantly with a wooden spoon, until aromatic and a shade darker. Transfer to a bowl.
  2. In a medium saucepan bring 2 cups of water and 1t salt to a simmer over medium high heat.
  3. While you are waiting for the water to come to a simmer, heat 2T oil in the skillet over medium high heat.  Add the shallot and the garlic and cook, stirring until tender, about 3 minutes. Stir in the bulgur, apricots, 1t salt and the now simmering water.
  4. Put a lid on the skillet and remove it from the heat. Let stand until the bulgur is tender and has completely absorbed the liquid, 35-40 minutes. Gently fold in the herbs and pistachios.
  5. In a small bowl, whisk the lemon juice with a 1/4t each salt and pepper. Slowly whisk in the remaining 2/3c olive oil in a slow stream.
  6. Drizzle the salad with the dressing, season to taste with salt and pepper and serve. Salad can be made a day ahead. Bring to cool room temperature before serving. Season to taste with additional salt and pepper if necessary.

DSC_1042a

Baba Ganoush

Serve 6-8 as a side dish

Ingredients

  • 2 large eggplants
  • 5 cloves garlic, minced
  • Kosher salt
  • 1/2c tahini
  • 1/2t ground cumin
  • 1/2c fresh lemon juice
  • 1T extra virgin olive oil
  • Fresh chopped flat leaf parsley

Directions

  1. Preheat oven to 375°F
  2. Char eggplant over a grill or a gas cooktop, turning occasionally until the skin turns black, 5-10 minutes.
  3. Place the eggplants on a baking sheet and bake until very soft, 15-20 minutes. Cool the eggplant and peel the skin.
  4. Place the pulp in a food processor and pulse to make a smooth paste. Add garlic, salt, cumin, tahini and lemon juice to taste and pulse to combine. Season with additional lemon juice or salt if needed.
  5. Spread the puree on a plate. Drizzle with additional olive oil if desired and sprinkle with parsley. Serve at room temperature with pita bread.

July 21, 2013 Cucumber-Fennel Salad with Herb Yogurt Dressing

DSC_1121a

My subscription to Food and Wine expired, not intentionally, I guess I just didn’t heed their latest “this may be your last issue” notice. Magazines start sending out those warnings six months before the actual expiration date and sometimes you can get a little numb to their pleas. I like that within the last year, most magazine subscriptions include a subscription for your IPad as well. Certainly cuts down on clutter when you travel and many magazines include special features like videos for the IPad. I like Food and Wine, especially the chef recipes that are a part of every issue. I realized my grievous mistake at the chiropractor’s office. When I walked into the exam room I saw a cover that I was not familiar with, a colorful vegetable ceviche with the caption “Vegetables now”. How appropriate for the August issue when vegetables are at their peak. I had my adjustment, asked if I could take the magazine (yes!!) and was on my way.

Vegetables are a big part of our summer menus. The garden supplies us with an ever increasing bounty as the season progresses and we love to find new ways to present them. Food and Wine editor Dana Cowin in this issue proclaimed vegetables to be “the new pork, the new cupcake and the new craft beer all in one….they’re more interesting to cook than meat.” As a long time veggie lover I could have told her that long ago. Though it is great to enjoy just-picked vegetables prepared as simply as possible, finding new ways to feature them in recipes is one of the joys of summer cooking.

Tom Colicchio, cookbook author, restaurant owner and sage overlord of the Top Chef series is featured in an article “At the Judge’s Table”. The recipes he offers in the article revolve around local ingredients sourced near his home on Long Island’s North Fork. I am happy to say that Mr. Colicchio hasn’t just recently jumped on the vegetable bandwagon. His 1990 cookbook, Think Like a Chef has several chapters divided by season devoted to vegetables.  As an east coast gardener who cooks and gardens with the seasons I appreciate that. Even before it was the popular thing to do he was advising his readers to seek out locally grown produce. His recipe for roasted tomatoes is one I have used for years and freezing roasted tomatoes is my way to preserve them for the winter months. That recipe has saved me the many hours I used to spend over a hot stove canning tomatoes.

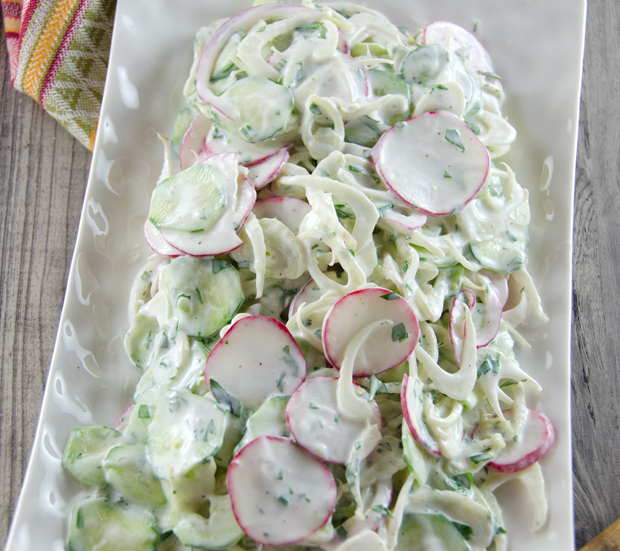
In this simple recipe, thinly sliced cucumbers and fennel are napped in a yogurt dressing enhanced with fresh seasonal herbs. It’s a slightly expanded version of tzatziki, the Greek salad of cucumbers and yogurt. Chef Colicchio uses a goat yogurt described as “tangy and funky” from a Long Island dairy farm. I used a non-fat Greek yogurt with good results though this weekend I will look to see if goat’s milk yogurt is available at my local farmers market. To extract excess water from the cucumbers, place the slices in a colander set over a bowl and sprinkle a little salt on them. Let the cucumbers drain for about a half hour and blot dry with paper towels. I replaced the celery and scallions in the original recipe with spicy radishes and red onion. Either combination would produce good results, it’s all a function of what’s in your kitchen that day. This crisp salad would be a cooling contrast to spicy dishes.  Paired with meat or fish or scooped into a pita for a quick lunch, this is a recipe that is quick to assemble and one I am sure to come back to again this summer.

Cucumber-Fennel Salad with Herb Yogurt Dressing

Adapted from Food and Wine Magazine August 2013

Serves Six to Eight

Ingredients

  • 1c plain non or low fat Greek yogurt
  • 3T white wine vinegar
  • 1/2c chopped flat leaf parsley
  • 3T snipped garlic chives
  • Kosher Salt and freshly ground pepper
  • 4-5 Kirby-style cucumbers, peeled and sliced thinly
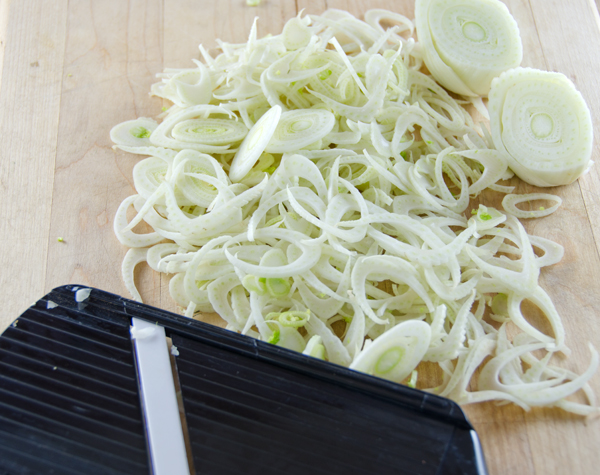
  • 2 fennel bulbs, halved lengthwise, cored and thinly sliced
  • 4-5 radishes, thinly sliced
  • 1/3c thinly sliced red onion

Directions

  1. In a large bowl, whisk the yogurt with the white wine vinegar, parsley and chives. Season the dressing with salt and pepper to taste. Fold in the sliced cucumbers, fennel, radishes and onion, season the salad with salt and pepper and serve.
DSC_1115a
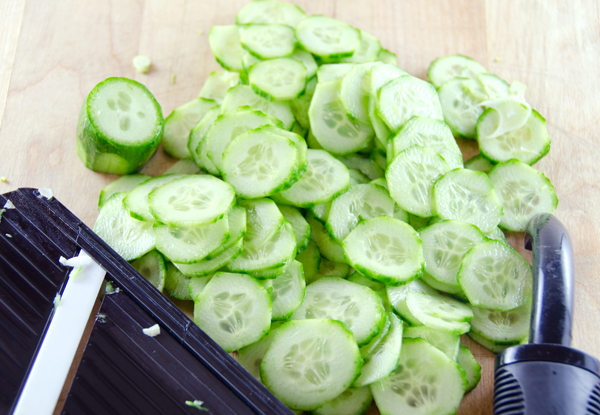
I left some of the peel on for color and sliced them thinly on my Kyocera mandolin.
DSC_1112a
Baby fennel from the farmers market.

July 9, 2013 Roasted Potato Salad

DSC_0951a“Maybe we can try them again.” That was Joe’s response as he chuckled while reading about the “hall of fame” vegetables that I mentioned in my last post. Specifically, he was talking about revisiting potatoes.  I certainly concur with that idea. Potatoes don’t take up a great deal of growing room, in fact they can be grown in containers. Home grown just harvested potatoes definitely taste fresher than ones that have been sitting on the supermarket shelf for weeks.  In previous seasons we grew varieties like Yellow Finn, Russian Banana, Red Norland and Purple Peruvian. Specialty potatoes are becoming more common  but they come with a hefty price. I prefer harvesting potatoes when they are relatively small and at their sweetest. . Small red potatoes are often labeled as “new” but any variety harvested before maturity is technically a new potato. Unlike purple/blue beans that turn a muddy green when cooked, blue or purple potatoes maintain their bright color when cooked. A combination of red, white and blue varieties made for a rather patriotic looking potato salad at our cookout one year.

For this Fourth of July holiday I wanted the simplest of potato salads to accompany the baby back ribs and grilled chicken that were on the menu. After some thought, I decided to use the recipe for roasted potatoes that I often make for dinner. Red bliss, or any other low starch potato will work best for this recipe. Low starch potatoes have a creamy texture and stay firm when they are cooked.  I looked for the smallest potatoes I could find and cut them in half, tossing them with salt and pepper and enough olive oil to coat. For optimal browning the potatoes need to be cut side down in a single layer and if you have one, a dark colored baking sheet helps this process along.  Cover the potatoes with foil for the first twenty minutes of cooking. A word of caution, when you remove the foil, be careful of the steam facial that will be released.

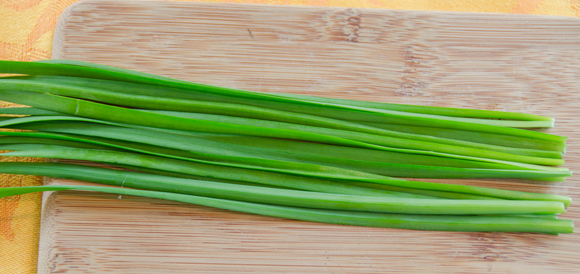
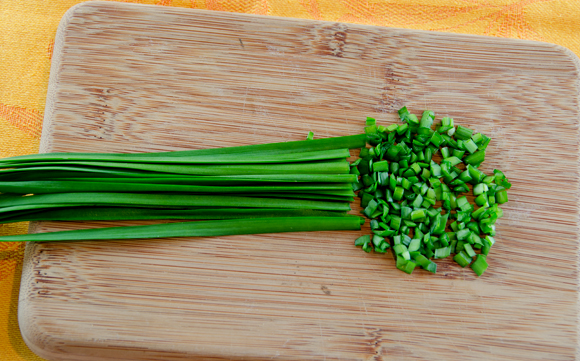
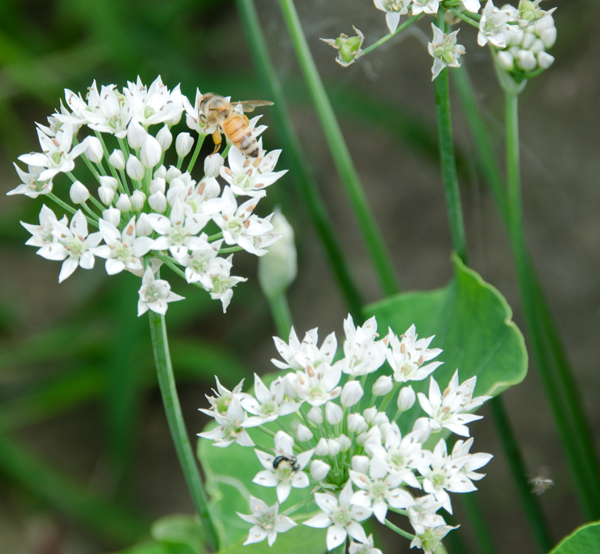
If you choose to plant garlic chives remember they can take over your garden.  To minimize their invasive potential, remove their flower stalk before they have a chance to broadcast their seeds.  Garlic chives have a mild flavor of garlic and the leaves are flat and strap-like with a white tall spiky flower as opposed to the purple flowers and tubular leaves of regular chives. To use garlic chives, I cut a handful, line them up and snip with scissors.

The cooled potatoes were tossed with just enough of a good quality balsamic vinegar, salt, freshly ground pepper and a sprinkling of freshly snipped garlic chives. The results were exactly what I had in mind and suited the rest of the menu quite nicely.

DSC_0975a
Line up your chives before chopping on a cutting board or gathering in your hand to snip with scissors

 DSC_0978a

DSC_5722a
The tall white spiky flower of the garlic chive appears in mid July.


Roasted Potato Salad

Roasted potato recipe adapted from Cooks Illustrated

Serves 4-6

Ingredients

  • 2 1/2lbs small low starch potatoes such as Red Bliss,
  • 3T Olive Oil, use a good quality, extra virgin is not necessary though
  • Kosher salt and freshly ground pepper
  • 1-2T Balsamic vinegar
  • 1-2T Freshly snipped garlic chives

Directions

  1. Adjust oven rack to lowest position and preheat to 425F.
  2. Cut potatoes in half and place in a medium sized bowl. Toss potatoes and olive oil to coat, season to taste with salt and pepper and toss again to blend.
  3. Place potatoes cut side down in a single layer on a baking sheet, cover tightly with foil and bake for about 20 minutes. Carefully remove foil and continue to bake about 10 minutes more. Remove pan from oven and carefully turn potatoes over with a metal spatula. Press the spatula against the metal as it slides under the potatoes to protect the crispy crusts. Return pan to oven and bake about 5 minutes more, the potato skins will start to wrinkle a bit. Remove pan from oven and allow potatoes to cool for about 10 minutes.
  4. Transfer cooled potatoes to a medium sized bowl. Toss with balsamic vinegar and snipped garlic chives. Serve potato salad at room temperature.

June 11, 2013 Classic American Potato Salad

 DSC_0432a

Potato salad is hard. It’s much easier to plunk down your 4.99 at the Giant than making this classic from scratch.  Potato salad was a popular side dish when I was catering, and I knew that I could never charge for the time it took to make a great potato salad. My copy of Julia Child’s “The Way to Cook”, naturally opens to the pages on cooking potatoes and potato salad because I have used her recipes countless times.
 
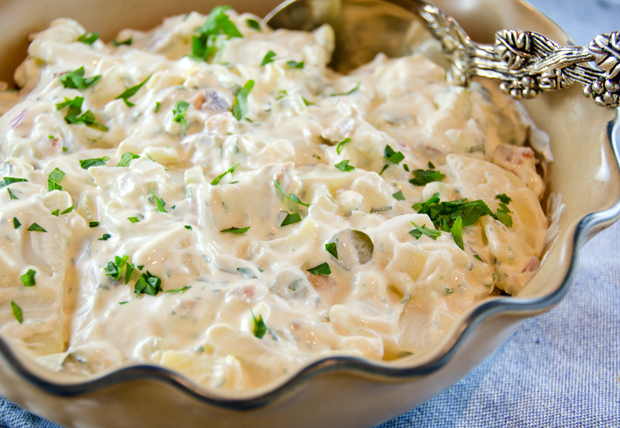
First, you need to choose your potatoes, carefully examining each one. I’ve given up on bagged potatoes because more than once that “one bad apple” or in this case potato, has started to spoil the whole bunch. Then the potatoes need to be peeled and uniformly sliced to insure the proper cooking time. Next you have to find the right moment when the cooked potatoes are not too hard, crunchy potato salad will never catch on, but not too soft so that the potatoes crumble and turn to mush. The potatoes are then drained and the slices are allowed to firm up for 3 to 4 minutes. Now you should be ready to do the initial seasoning with the still warm potatoes, salt, pepper, onions, celery, vinegar or maybe some potato water. Additional ingredients can be added when the potatoes have cooled off. I like finely diced cornichon pickles, some crispy bacon, chopped hard boiled egg and parsley with enough mayonnaise to coat it lightly. Homemade mayonnaise is wonderful but good old Hellmann’s does the trick for me most of the time.

Potato salad brings back good family memories for me. When I was growing up the summer family cookouts were at our house. Most of the relatives on my father’s side lived in the city and we were the only ones with a large enough backyard to host such an event. My dad was the grillmeister, cooking burgers and hot dogs in a cloud of barbecue smoke. Adults and the older children would play spirited games of badminton and the younger cousins enjoyed the swing set. I’m sure there were salads, jello and otherwise but the dish I remember most was my grandmom’s German potato salad. My dad’s mom, Grandmom to us, would come with her potatoes, onion, bacon and vinegar ready to cook. That was quite a challenge because my parent’s home had the typical fifties kitchen, small with very little counter space. Everyone would get out of her way and she went to work, peeling potatoes, chopping onions and cooking bacon. She poured her vinegary dressing over the potatoes and served it still warm. Delicious, you didn’t want to be one of the last ones to be served or you might not get any. Grandmom died suddenly, just one day after our Labor Day picnic of 1969. I never thought to get her recipe, I had just turned 15 at the time and the only cooking I had done to that point was for a Girl Scout badge. Many have attempted but no one has ever quite duplicated her recipe. The lesson to be learned here?  If you or someone in your family makes something that you love from memory, take the time to observe, write it down and capture the recipe for future generations. Don’t let it be just a memory but a part of your family’s legacy.

Master Recipe for Cooking Sliced Potatoes for Salad

  • 3lbs Yukon Gold or red potatoes
  • Kosher Salt-1t per quart of water

Directions

  1. Fill a saucepan to the halfway point with cold water. Wash the potatoes. Peel the potatoes and cut into 1/4″ thick slices. Drop the peeled potatoes into the pan of cold water to prevent discoloration while you peel the rest.
  2. Once all the potatoes are peeled, drain out the water and add fresh cold water to cover and add the salt. Bring the potatoes to the simmer and simmer for 3-4 minutes, until the potatoes are just tender. Test them by eating a slice to be certain you have achieved the right texture.
  3. Drain out the water, reserving a cup or so if you want to use it as part of your dressing. Cover the pan and set aside for 3 minutes and no longer than 5 to give the slices the time to “firm up”. Uncover the potatoes and do the initial seasoning while they are still warm.

American Potato Salad

Serves 6-8

Ingredients

  • 3lb Yukon Gold or red potatoes-cooked according to the master recipe
  • 2/3c liquid, 3T cider vinegar plus chicken broth or potato water to make up the difference
  • 1/2c finely diced red onion, soaked in ice water for 10 minutes to eliminate the “bite”, well drained
  • 2/3c finely diced tender celery
  • 1/4c finely diced cornichons or dill pickle
  • 3-4 strips of crisply cooked bacon, crumbled
  • 3 hard boiled eggs, diced
  • 3T minced Italian parsley
  • 3/4-1c homemade or Hellman’s mayonnaise

Directions

  1. Turn the still warm potato slices in a large bowl and toss gently with the vinegar/liquid mixture, onions, celery, pickle and seasonings to taste. Let it steep for about 10 minutes, carefully tossing several times.
  2. When the salad is cool, toss with the bacon, eggs, parsley and just enough mayonnaise to coat lightly. The potato salad can be made 24 hours in advance.
  3. Before serving, check for seasonings and add more mayonnaise if needed. Sprinkle with additional parsley.
DSC_0403a
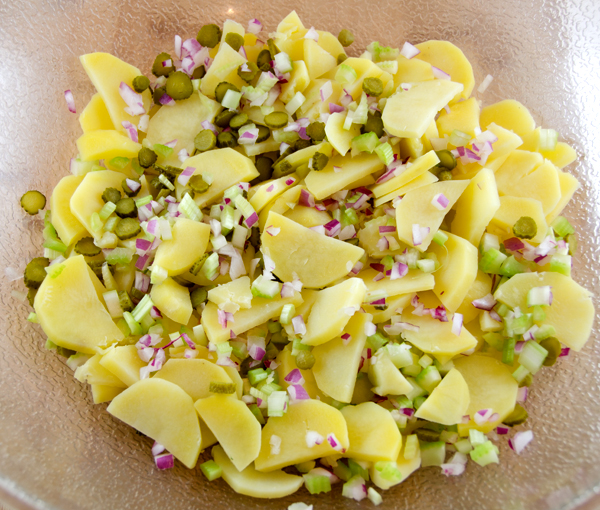
Cooked potatoes tossed with seasonings, finely chopped red onion, cornichons and celery.
DSC_0407a
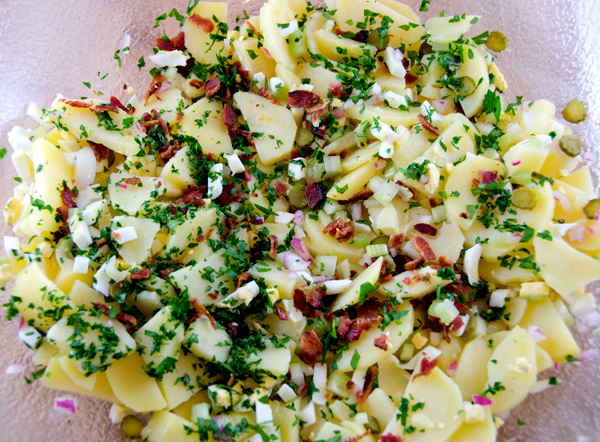
Once the potatoes have cooled, add bacon, chopped hard boiled egg and parsley.
DSC_0421a
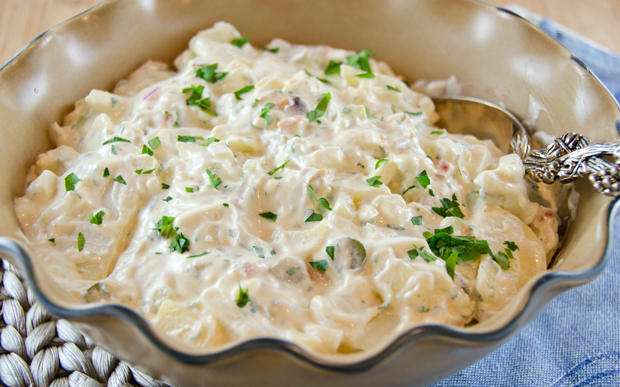
Add just enough mayonnaise to coat. Sprinkle a little more parsley on the salad before serving.


June 6, 2013 A Salad and a Slaw

DSC_0441a

The first  “burgers and dogs” cookout of the season called for sides, one, very traditional, the other, an update on an old classic.

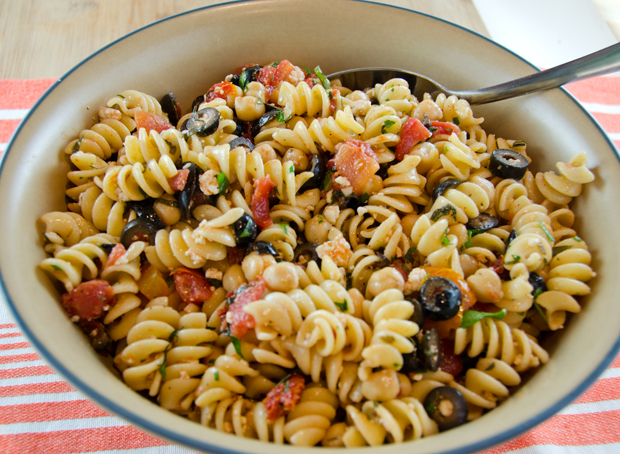
The variations are endless when it comes to pasta salad.  As a caterer I had more than a dozen in my repertoire. Pasta salads can reflect whatever taste or ethnicity you are in the mood for. They are a perfect addition to summer picnics and barbecues. This pasta salad features traditional Mediterranean flavors and is as simple as can be. It can be made in not much more time than it takes to cook the pasta and uses mostly pantry ingredients. Rotelle pasta works well here, feel free to substitute whatever twisted shape suits your fancy.  If you are using canned diced tomatoes, hold back on the saucy component of the tomatoes, you can always add more sauce later.

DSC_0433b
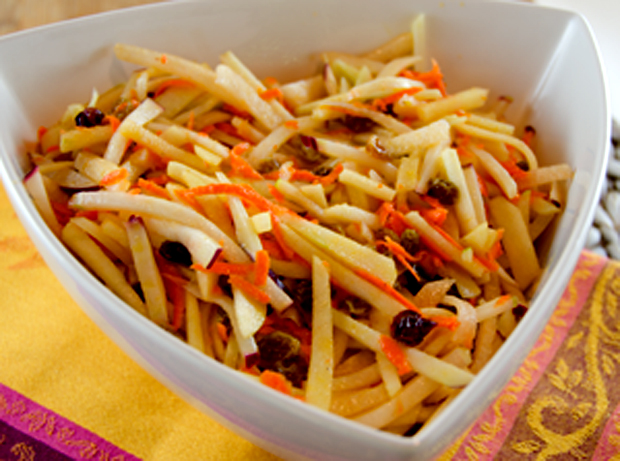
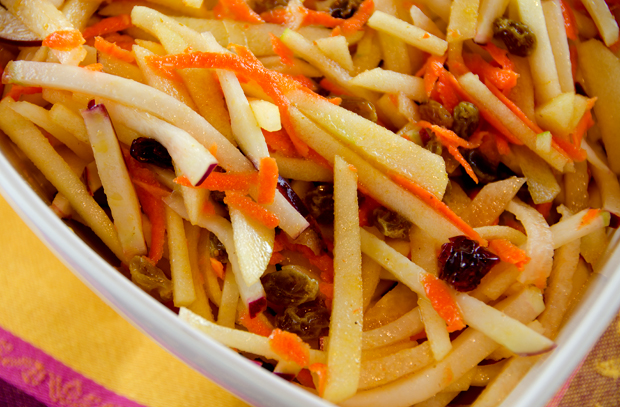
Cabbage is a main ingredient in many slaw recipes so why not substitute the “cabbage turnip” or kohlrabi as it is translated from the German. Though it looks like a root vegetable it is a swollen stem that grows above ground. Farmers markets and spring gardens are abundant with kohlrabi this time of year. The mild flavor is somewhere between broccoli stems and a turnip and young kohlrabi are sweet and quite tender. I added some jicama to my slaw for additional crispness, Granny Smith apples for their sweet-tart flavor and a carrot to enhance the color. The kohlrabi I used was young, there was no need to peel the purple skin and it gave the salad some more color. l chose to julienne the vegetables in my slaw, a box grater or the shredding disc of a food processor would work as well but would give the slaw a different texture.

 DSC_0444a

 Pasta Salad with Tomatoes, Garbanzos and Feta

Serves 6-8

  • 1/2lb pasta (rotelle or rotini works best here)
  • 1/4 c finely chopped fresh basil
  • 2 T fresh lemon juice
  • 2 T white wine vinegar
  • 1 T chopped garlic
  • 2 t  grated lemon peel
  • 6 tablespoons olive oil
  • 2 cups chopped plum tomatoes (fresh or canned)
  • 1/4c finely minced sun-dried tomatoes
  • 1/4c sliced black olives
  • 1 15- to 16-ounce can garbanzo beans (chickpeas), drained and rinsed
  • 4 ounces feta cheese, crumbled
  • Additional chopped fresh basil

Directions

  1. Cook pasta in large pot of boiling salted water until just tender but still firm to bite. Drain and rinse with cold water to cool. Drain again.
  2. Combine basil, lemon juice, vinegar, garlic and lemon peel in large bowl. Gradually whisk in oil. Add pasta, tomatoes, garbanzo beans and feta cheese. Toss to blend well. Season salad to taste with salt and pepper. (Can be prepared ahead. Let stand at room temperature 2 hours; or cover and refrigerate overnight, them let stand at room temperature 1 hour before serving.)
  3. Mound salad on large shallow platter. Garnish with additional basil.

DSC_0436a

Kohlrabi Slaw

Serves 6-8

Ingredients

  • 1 medium kohlrabi
  • 1/2 medium jicama
  • 2 Granny Smith apples
  • 1 medium carrot
  • 1/4c golden raisins
  • 1/4c dried cranberries
  • 1/4c balsamic vinegar (I used cranberry-pear)
  • 1/2c extra virgin olive oil
  • 1t lemon peel
  • Kosher salt and freshly ground black pepper

Directions

  1. Cut top, bottom and “tentacles” off the kohlrabi. Peel the skin off the kohlrabi only if it is tough. Peel the jicama, apples and carrots.
  2. Cut all vegetables into matchstick julienne or shred in a food processor or on a box grater. Combine in a bowl along with the raisins and dried cranberries.
  3. Combine vinegar, oil and lemon peel in a small bowl, whisk to combine.
  4. Add enough vinaigrette to coat, let sit at room temperature for about ten minutes and add a little more vinaigrette if necessary. Season to taste with salt and pepper.

May 29, 2013 Spring Salad

DSC_0389a


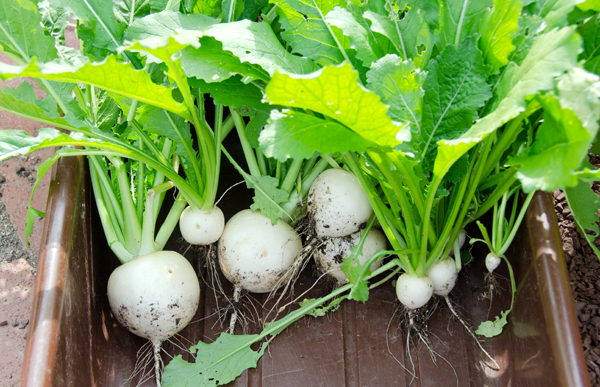
Our spring salads are a combined effort. The greens are from our garden, arugula, mache, spinach and lettuces with names like Freckles and Burgundy colored Red Velvet. Last year I discovered Hakurei turnips at the farmers market and they are a welcome addition to this years garden. We are harvesting them now and they are pure white and sweet as can be. The farmers market offered French breakfast radishes, purple and green kohlrabi and the first asparagus of the season. Our first batch of radishes has already been picked but with succession planting the next are soon to come.

Trimmed kohlrabi reminds me of little space aliens and are a crunchy addition to the salad. Since this is young kohlrabi, I julienne them raw since the purple color is only skin deep. Many years ago we had an asparagus patch, but the time and effort didn’t seem worth it. Now we enjoy the harvest from our local farms.

The supermarket provided organic golden baby beets, our own beets are less than a week away. The first beet micro green thinnings are part of our salads, then used as cooked greens as they get bigger. We are growing three varieties this year, Golden, candy-striped Chiogga and the ruby red Detroit Red.

Soft cheeses like feta and chopped nuts would be a welcome addition to this salad. In weeks to come our salads will include snow peas, more radishes, carrots and eventually tomatoes, cucumbers and all the produce that summer brings.

A Spring Salad for two

Ingredients

  • 1/4 c Sicilian lemon vinegar
  • 1t Dijon mustard
  • 1t minced shallot
  • 3/4 c extra virgin olive oil
  • splash of lemon olive oil
  • Kosher salt and freshly ground pepper
  • 6c loosely packed salad greens, spinach, mache, arugula, baby lettuces
  • 1 small kohlrabi, purple or green, cut into matchstick julienne (if possible, don’t peel to maintain the color)
  • 2 small Hakurei turnips peeled and thinly sliced on a mandoline
  • 1 Golden beet, peeled and very thinly sliced on a mandoline
  • 8 asparagus spears, trimmed, sliced on the diagonal and steamed until crisp-tender
  • 4 French breakfast radishes, sliced

Directions

  1. Combine the first five ingredients in a small bowl, whisk to combine, add salt and pepper to taste
  2. Place lettuce on serving platter, top with turnip slices, beet slices, asparagus and radishes. Toss with enough dressing to lightly coat, there will be some left. Top with fresh ground pepper to taste
DSC_3787a
Kohlrabi root is the swollen stem of the plant that grows above ground.
DSC_0508a
This variety of lettuce is named “Freckles”.
DSC_0465a
We harvest the Hakurei turnips very small.
DSC_0466a
Beautiful Red Velvet lettuce with some carrot greens peeking in.

April 29, 2013 Avocado Caesar Salad

DSC_9972a

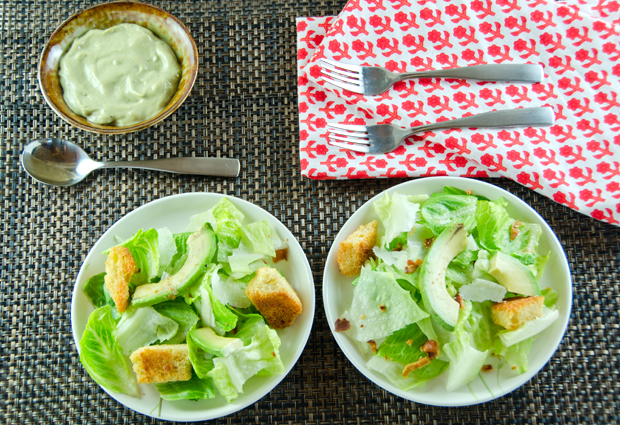
Meat loaf was on the menu for dinner one evening this past week so I decided to go a little retro with the salad as well and made a Caesar salad. By now many have heard the story of Caesar Cardini, Italian by birth, he immigrated to the San Diego area after the first World War. Caesar ran a restaurant just over the border in Tijuana Mexico avoiding the restrictions that Prohibition brought.
 
Caesar salad originated on a busy fourth of July weekend in 1924 when hungry diners depleted his kitchen’s resources. Mr Cardini was said to have concocted the first Caesar salad with ingredients he had on hand. A dramatic tableside preparation is what set this simple recipe apart. Of course there are other claimants to the recipe, including family members and staff who disputed his version of the story for years.  Caesar salad soon became popular with the Hollywood set and British royalty. Even Julia Child had the salad as a teen and she recounts watching it made by Caesar himself in her book In Julia Child’s Kitchen.

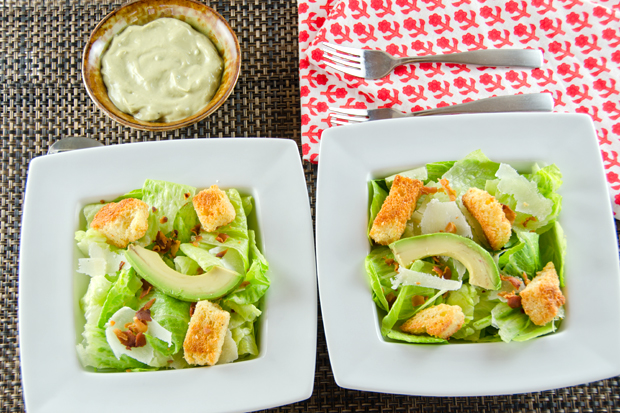
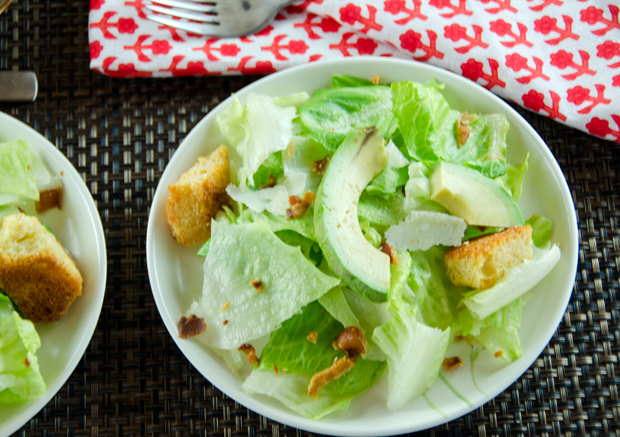
The original recipe is very basic, Romaine lettuce, a simple vinaigrette, Parmesan cheese and croutons. So anchovy haters take heart, you can claim that you are a Caesar purist. In my preparation I gave a nod to the Mexican origins of this dish by adding avocado in both the dressing and the finished salad. Avocados are native to central Mexico and were introduced to the United States in the late nineteenth century. Avocados are a powerhouse of nutrition providing amino acids, fiber, potassium, vitamin E, and B vitamins. Yes they are high in fat, but it is a healthy fat, oleic acid that boosts HDL levels. Haas or Hass? That was the burning question in my mind. For years I have seen the most readily available variety of avocado spelled both ways. Hass is correct, named for the postman who first planted the variety, Rudolph Hass.

In a traditional Caesar a raw egg is an important ingredient because of the creamy texture it gives the salad. Wanting to avoid the raw egg altogether, I remembered a Martha Stewart recipe I used in my catering days. A tablespoon of good quality mayonnaise was substituted for the raw egg yolk.  To enhance the lemon flavor I used a Sicilian lemon balsamic vinegar from The Tubby Olive.  A combination of lemon juice and a regular balsamic could fill in here. Infusing olive oil with garlic is fairly easy. Bring about a quarter cup of olive oil and several cloves of garlic to a simmer over low heat.  Turn off the heat, cover and allow the oil to pick up the garlic flavor, fifteen minutes or more. Strain and cool before using.  Croutons are a major player in the recipe and I didn’t want wimpy ones from sliced bread so I tore pieces from part of an unsliced loaf I had in the freezer. Make your croutons as close to serving time as possible. The crispy croutons are a nice contrast to the creaminess of the avocado and the dressing.  The original Caesar was to be eaten with the hands, the Romaine leaves were left whole and presented on the dish, stem end out. I prefer to eat my salad with a fork so I tore the greens into bite-sized pieces. Make this into a light entree by adding grilled chicken or shrimp.
  DSC_9959a

Avocado Caesar Salad

Serves four

Ingredients

  • 1 head of Romaine lettuce, rinsed, spun dry and cut into bite-sized pieces
  • Avocado Caesar dressing (recipe follows)
  • Garlic croutons (recipe follows)
  • 4-6 slices of pancetta, cooked until crispy, crumbled
  • Parmesan cheese
  • 1 avocado, sliced

Ingredients for the dressing

  • 1 medium ripe avocado, peeled and pitted
  • 2 minced cloves of garlic
  • 1/4c mayonnaise
  • 1T fresh squeezed lemon juice
  • 1T Worcestershire sauce
  • 3T Sicilian lemon balsamic vinegar
  • 3T extra virgin olive oil
  • Water to thin out mixture

Directions for Dressing

  1. Combine the dressing ingredients in the bowl of a food processor or a blender and blend/pulse until creamy. You will need to scrape down the sides with a spatula several times during this process.
  2. Add water as needed to thin it out. Taste for seasoning and add salt and freshly ground pepper as needed. Remember the pancetta and Parmesan will add saltiness to the final salad.
  3. Transfer to a bowl and set aside.

Ingredients for the croutons

  • 1 day-old baguette or other unsliced bread
  • Garlic olive oil or olive oil and garlic powder or olive oil that has been infused with garlic
  • Kosher salt

Directions for the croutons

  1. Preheat oven to 375°F.
  2. Remove crusts from bread and tear into irregular pieces, about 2 inches in size.
  3. Place bread cubes in a large bowl and toss to coat with oil.  Sprinkle lightly with salt; arrange in a single layer on a rimmed baking sheet.
  4. Bake until golden and crisp, tossing with spatula half way through the baking process to insure even browning, about 10 minutes.

Final assembly of the Salad

  1. Place Romaine in a large salad bowl. Add a small portion of the dressing and toss well to coat. You can serve additional dressing on the side for those who want more.
  2. Toss with croutons and crumbled pancetta.
  3. Top each serving with a slice or two of avocado, Parmesan shavings and fresh ground pepper.

 DSC_9980a


March 29, 2013 Chervil Vinegar and a Spring Salad

DSC_9390a

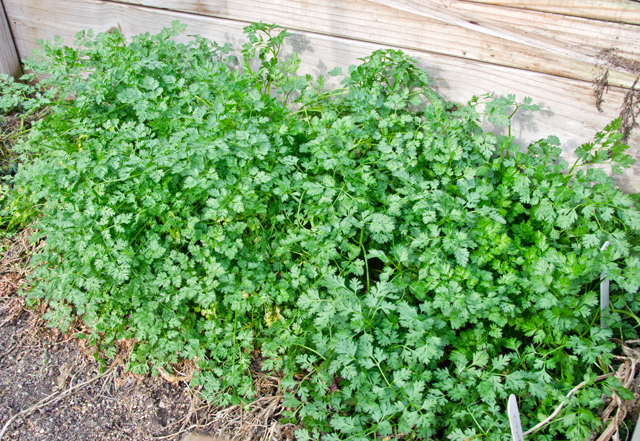
The calendar tells me it’s spring but it certainly doesn’t feel like it.  The fat wet snowflakes that coated the ground several days ago moved out as quickly as they came in, but there is still a definite chill in the air. Joe planted peas last Saturday, March 23rd, two weeks later than last year when we had many days in March with temperatures in the 60s and 70s. When we had our “garden walk” on Sunday, Joe pointed out one bright spot. Under the shelter and warmth of the cold frame, last years planting of chervil had wintered over, resulting in a bushy green row.

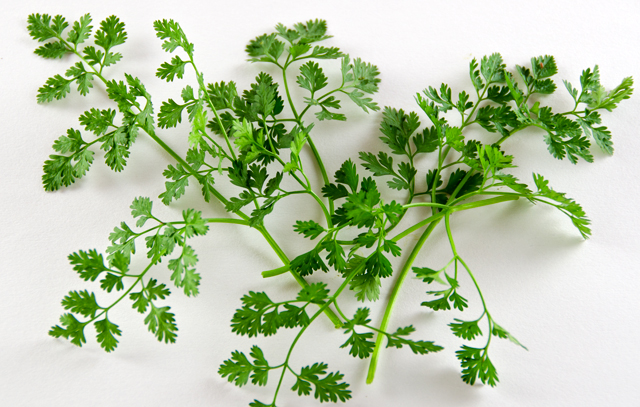
Chervil is an annual herb that prefers the cooler temperatures of spring and fall.  It is in the same plant family as parsley and carrots with delicate curly leaves that resemble something between the two.The flavor is delicate and reminiscent of mild anise or licorice. Mature chervil plants produce a delicate white flower that is also edible and looks pretty garnishing a salad.

This is definitely an herb to grow for yourself. Although it is sold dried (I wouldn’t bother), it is most fully appreciated when picked fresh. It is easy to grow and now is the time to plant.  Plant seeds in moist soil in an area that gets partial sun. It also does well in containers.

Heat is the enemy of chervil in more ways than one. Summer’s heat will cause the plant to bolt or go to seed.  Heating chervil in the cooking process dissipates the flavor so it is always best used fresh. Chervil marries well with delicate flavors like chicken, fish and eggs. It is part of the classic French seasoning blend, fines herbes that also includes tarragon, parsley and chives.

 
Appropriate for this week, I learned that chervil is linked to the Easter celebration in parts of Europe. Chervil’s aroma is similar to that of myrrh, one of the gifts presented to the baby Jesus by the three wise men. Because it is one of the first plants to come up in the spring garden, it is associated with rebirth. The literal translation for Maundy Thursday in German is Green Thursday so in some parts of that country they commemorate the day with a green chervil soup.

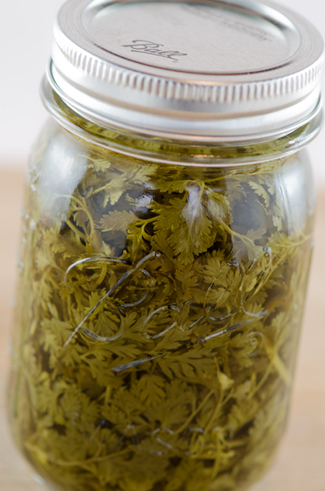
Chervil complements the garden’s first produce, asparagus, new potatoes, and root vegetables like beets and carrots. I like to add sprigs to a green salad for a touch of anisey flavor. I often infuse it in white wine vinegar for a delicacy I wouldn’t find in any gourmet shop.Choose a mild vinegar such as white wine or rice to match the flavor of chervil.

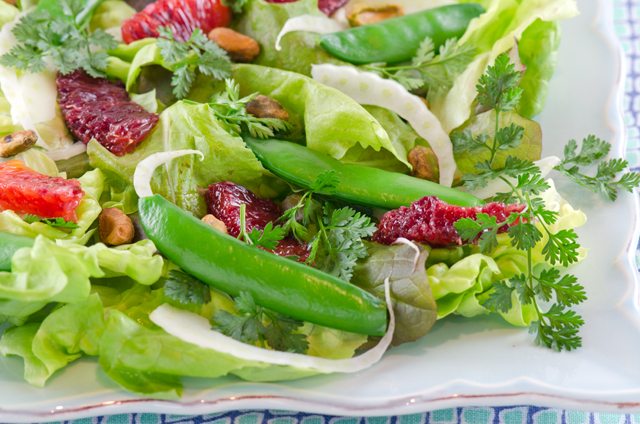
The garden isn’t ready yet, but this salad combines some of my early spring favorites. Bibb and baby romaine lettuce, sugar snap peas, blood oranges with a double dose of anise flavor from the shaved fennel and sprigs of chervil. I topped the salad with crunchy pistachios and tossed with a simple vinaigrette of white wine vinegar, finely chopped shallots and a good quality extra virgin olive oil.

DSC_9344a
A healthy crop of chervil growing in the cold frame.

Chervil Vinegar

Ingredients

  • A large handful of fresh chervil, 3-4 cups loosely packed
  • 2 cups of a mild vinegar, such as white wine or Chinese rice vinegar
  • One sterilized pint jar with lid

Directions

  1. Rinse the chervil and pat dry with paper towels. Pack chervil loosely into a sterilized dry heat proof pint jar.
  2. Heat the vinegar to just simmering in a stainless steel pan. Pour it over the chervil; push any wayward stems or leaves under the surface. Allow the vinegar to cool, then cap the jar and leave at room temperature for two weeks, shaking the jar occasionally.
  3. Strain the vinegar and bottle it in sterilized dry bottles. Cap tightly and store in a cool spot or cupboard. If you like, drop a sprig of fresh chervil in the finished bottle.
DSC_9400a
Chervil vinegar will be ready in about two weeks.

DSC_9351a DSC_9367a

 Spring Salad for two

Ingredients

Vinaigrette

  • 1T white wine or rice vinegar
  • 1/4 Dijon mustard
  • Pinch of sugar
  • 3T extra virgin olive oil
  • 1T finely minced shallots
  • Kosher salt and freshly ground pepper

Salad

  • About 4-5 cups Bibb and Romaine lettuce
  • Two small blood oranges, segmented
  • 1/2c thinly shaved fennel
  • 1c sugar snap peas, steamed and patted dry
  • 1/2c chervil fronds, long stems removed
  • 1/4c pistachio nuts

Directions

  1. In a small bowl combine the vinegar, mustard, sugar and shallots. Gradually whisk in the olive oil.
  2. In a large bowl, season the greens with a pinch of salt and a few grinds of the pepper and toss with enough of the vinaigrette to lightly coat 
  3. Top with blood orange segments, shaved fennel, sugar snap peas, chervil fronds and pistachio nuts.  Gently toss and serve.  Top with additional freshly ground pepper if desired.

DSC_9371a