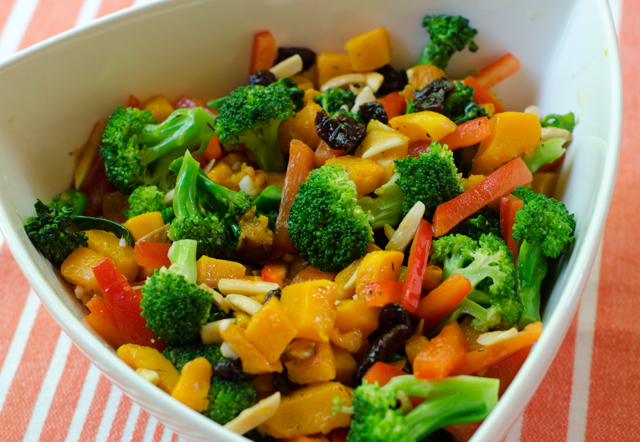
June 1, 2016 Broccoli and Butternut Squash Salad

DSC_7045aWe always leave room for a large row of broccoli plants in the garden. But somehow this year, Joe forgot to buy broccoli seeds. We remedied that by purchasing “starts”, small broccoli plants from the garden center at the Home Depot. They are very healthy plants. They took well to transplanting and we’ve encountered no cabbage worm problem this year. But something wasn’t right. Normally, broccoli plants have form one large head in the center. After the center head is harvested, it produces additional side growth for a few more weeks. This year the plants produced no center head but a reasonable amount of side growth.

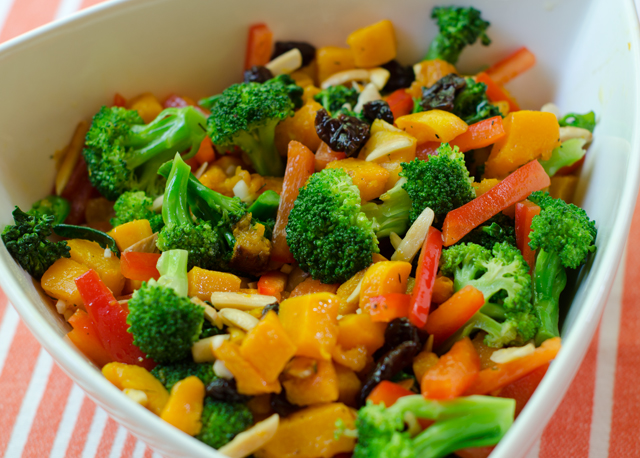
I did a little research and there is a good possibility that the plants were subject to “buttoning” before we bought them. They could have been exposed to cold temperatures (35-50°F) for several days. Other possible stressors include insufficient water, a lack of nitrogen, excessive salt in the soil, pests or disease. I guess the moral of the story is to plant as much as you can from seed, that way you can be certain your plants have been nurtured properly. That said, we still have some broccoli and I created this healthy salad from some of those side shoots plus other ingredients in my kitchen, butternut squash, red pepper, dried cherries and slivered almonds.

Toss butternut squash cubes with olive oil, salt and pepper. Spread them out on a baking sheet and bake in a 375°F oven. Toss them occasionally on the baking sheet to ensure even browning on all sides. Squash cubes shrink, the four cups you start with will yield about 2 1/2 cups of finished product. Even though the broccoli I used was picked that day, I prefer to blanch it for thirty seconds to brighten the color and bring out it’s flavor.  After you drain it in a colander,  plunge the broccoli into an ice bath. This will stop the hot broccoli cooking and prevent it from turning limp and watery.  After it has cooled down, place the florets on a clean kitchen towel to dry.

You could just add plain nuts to the recipe, but toasting them really brings out the flavor. Add the nuts to a skillet large enough to stir or toss them in, depending how brave you are. Cooking over medium high heat, keep the nuts moving at all times to ensure even toasting and no burnt spots. Toasting brings out some of their oil and makes the kitchen smell great! Any nut will work, walnuts, pecans even sunflower seeds.

I had several types of dried fruit in the kitchen and decided that dried cherries would add a tangy sweet element to the dish. I made a vinaigrette with Sicilian Lemon White Balsamic from The Tubby Olive. It has a pleasant acidity with a bright crisp lemon flavor. I combined it with a few tablespoons of their Roasted Almond Oil and finished it with some extra virgin olive oil. Toss the broccoli florets, squash cubes and pepper strips with some of the dressing. Add the cherries and almonds and toss again, adding dressing if necessary. Veggies exude their own liquid, so be judicious in adding the vinaigrette. Refrigerate the salad for several hours to bring out the flavors. Taste before serving, adding any additional dressing, salt and pepper. It’s a colorful, healthy and very flavorful salad.
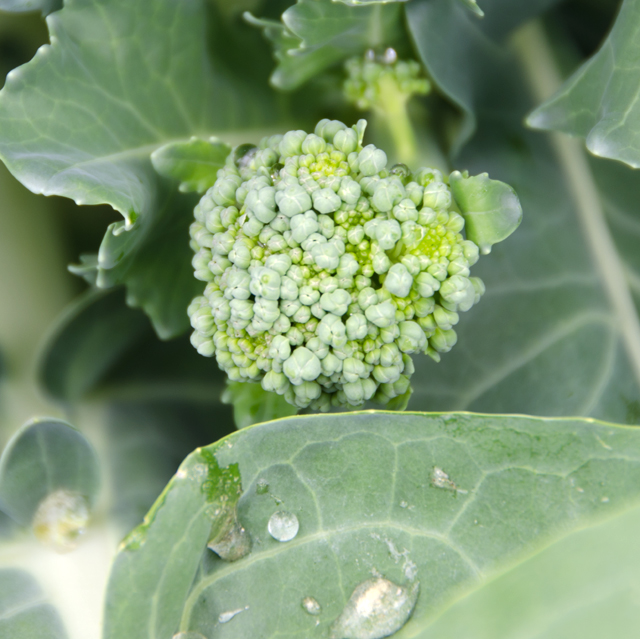
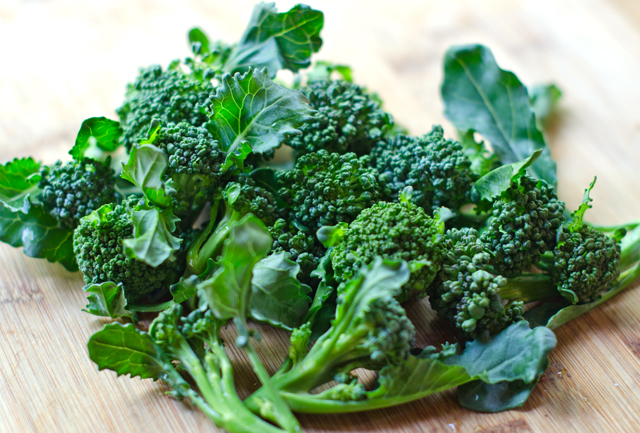
Little broccoli shoot hiding between the leaves.
DSC_7036a
Broccoli side growth, just as good for this salad.
DSC_7041a
Very colorful ingredients.

Broccoli and Butternut Squash Salad

Serves four

Ingredients

  • 4 c broccoli florets
  • 1 medium butternut squash, peeled, seeded and cut into 1″ cubes, about 4 cups
  • Extra virgin olive oil
  • Kosher salt and freshly ground pepper
  • 1 c red pepper strips, 2″ x ½” from one small pepper
  • ½c slivered almonds
  • ½c dried cherries
  • ¼c Sicilian Lemon balsamic vinegar
  • 1 small clove garlic, chopped
  • Pinch of dried thyme
  • 2 T Roasted almond oil
  • ¼c extra virgin olive oil

Directions

  1. Preheat oven to 375°F.
  2. In a large bowl, toss butternut squash cubes with 1-2 tablespoons of extra virgin olive oil and sprinkle with salt and pepper. Spread out evenly on a baking sheet.
  3. Place in the preheated oven and bake for 16-20 minutes, tossing occasionally to be certain squash gets browned on all sides. Let cool to room temperature.
  4. Fill a large pot with water and a pinch of salt and bring to a boil. Put a colander large enough to accommodate the broccoli in the sink.
  5. Have an ice bath (bowl with water and ice at the ready. Plunge the broccoli in the boiling water and count to 30. Immediately drain the broccoli in the colander then transfer it to the ice bath to stop the cooking.
  6. Drain the broccoli when it has cooled a bit and place broccoli florets on a clean dishcloth to dry them off a bit.
  7. Toast almonds in a medium dry skillet over medium high heat. Keep them constantly moving to ensure even coloring. They will exude some of their oil  and they smell great. Remove from the pan and cool.
  8. In a small bowl, combine the lemon balsamic, garlic, thyme and oils.  Stir to combine. Season with salt and pepper.
  9. Place the butternut squash, broccoli and pepper strips in a large bowl and toss with some of the dressing. Add the dried cherries and almonds and toss again, add a little more dressing if needed. Chill before serving.
DSC_7046a

February 16, 2016 Shaved Fennel and Arugula Salad with Blood Oranges and Walnuts

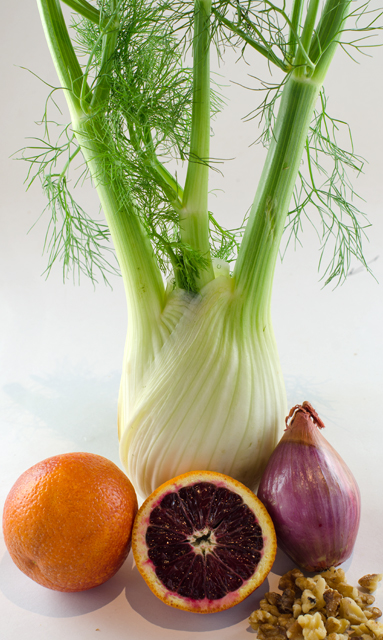
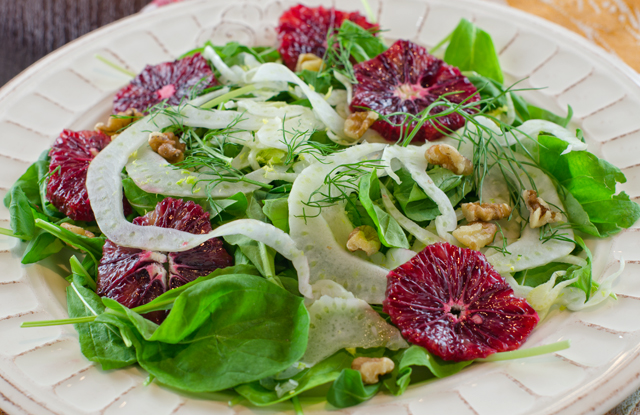
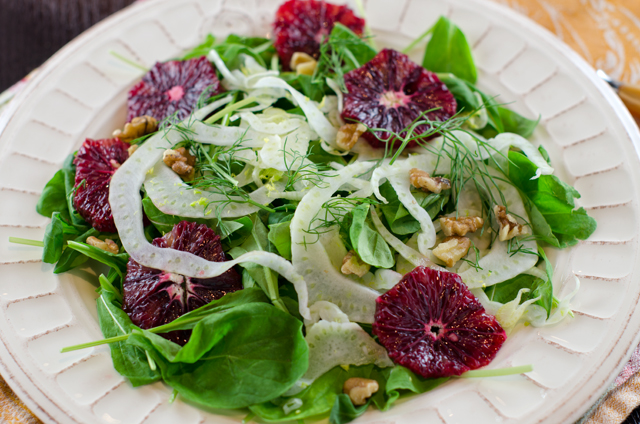
DSC_5859aThis simple salad unites two of winter’s best produce offerings, fennel and blood oranges. I added some peppery arugula, tossed them with a blood orange dressing with toasted fennel seed and topped it with toasted walnuts.

In the world of vegetables, poor fennel doesn’t get the attention that it truly deserves. Originally an Italian import, it’s readily found in any well stocked grocery store, usually keeping company near the radishes and lettuces. It’s full of nutrients like vitamin C, potassium and fiber with a texture that is crisp like celery and a flavor is mildly anisey. Fennel is available year round but it’s peak season is fall and winter.

I propose the reason for fennel negligence is twofold. One, many cooks aren’t sure what parts are usable and two, they are not sure how to cut it up. That’s easy to clarify, when shopping for fennel choose small to medium plump bulbs always with the stalks and feathery greenery still attached. To prepare for cooking, cut off the stalks and the feathery foliage. Remove any outside ribs that appear tough or damaged. Slice the trimmed fennel bulb crosswise thinly with a knife or mandoline for raw preparations or cut vertically into larger pieces for grilling or roasting. The stalks can be as a bed for cooking whole fish or stuffed in a chicken before roasting. The stalks could also be used as a component in chicken or vegetarian stock. The feathery fronds make an attractive edible garnish. I use raw fennel quite often in our winter salads and I also like fennel quartered either roasted or grilled. Grilling caramelizes fennel and enhances the flavor.

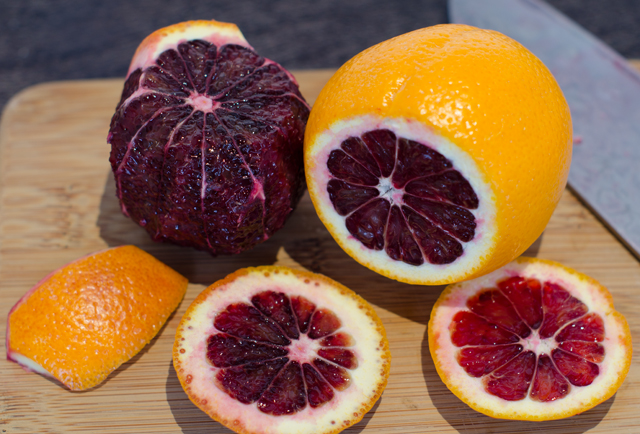
Blood oranges are readily available now and I like to use them as much as I can during their December to March season The red blush of the blood orange’s skin hints at what’s inside. The magenta flesh color is due to the presence of anthocyanins, the pigment that makes blueberries blue, cherries red and eggplants purple. Blood orange’s flavor is tart-sweet with just a hint of berry.

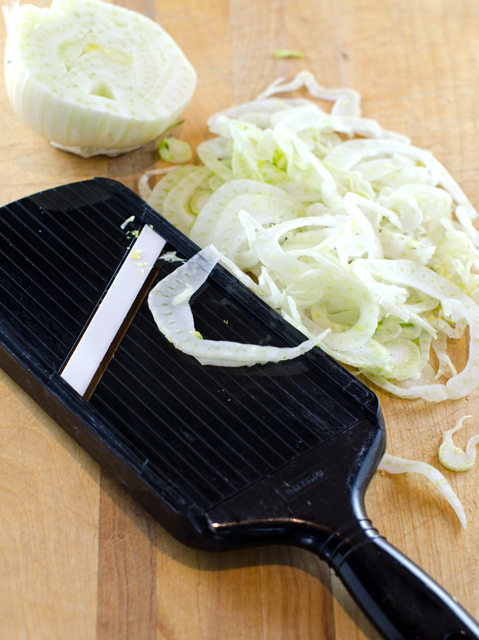
This is a very easy salad to make. Shave the fennel crosswise very thinly with a mandoline or sharp knife. Always use the finger guard with the mandoline, I learned the hard way on a new, very sharp mandoline a few years ago, when I was shaving fennel come to think of it. Cut the peel and pith from the orange, again using your sharpest knife and cut crosswise into rounds. The crispy fennel and peppery arugula are combined with a blood orange and toasted fennel seed vinaigrette. Add the blood orange sections and toss again. Top with toasted walnut pieces and fennel fronds.

Shaved Fennel and Arugula Salad with Blood Oranges and Walnuts

Serves four

Ingredients for the salad

  • 1 medium fennel, top trimmed off and fronds reserved
  • 4 blood oranges
  • 6-7 c baby arugula
  • ¼c toasted chopped walnuts

DSC_5863a

Ingredients for the dressing

  • l blood orange
  • 1 T fresh lemon juice
  • 1  T minced shallot
  • 1 t honey
  • ½t fennel seed
  • 1 t salt
  • ½c extra virgin olive oil
  • Kosher salt and freshly ground pepper

Directions for the dressing

  1. Juice the orange, you should have about ¼ cup.
  2. In a dry skillet, lightly toast the fennel seeds until fragrant. Cool slightly and crush with a mortar and pestle.
  3. Stir all the ingredients together in a medium bowl. Add salt and freshly ground pepper to taste.  Reserve.

DSC_5841a

DSC_5849a

Directions for the salad

  1.  Slice fennel very thinly crosswise with a mandoline or a very sharp knife, stopping before you get to the core. You should have 1½ to 2 cups.
  2. Using a very sharp knife, cut the peel and white pith from the oranges. Slice crosswise into thin rounds.
  3. In a large bowl add fennel and arugula and toss to combine. Whisk the dressing together to recombine. Add some of the dressing to the arugula and fennel and toss lightly. Season with salt and pepper. Add the blood orange sections and toss gently. Divide among the salad plates and top each portion with fennel fronds and walnuts. Season to taste with salt and pepper.

DSC_5854a


February 6, 2016 Roasted Cauliflower Salad with Orange and Tarragon


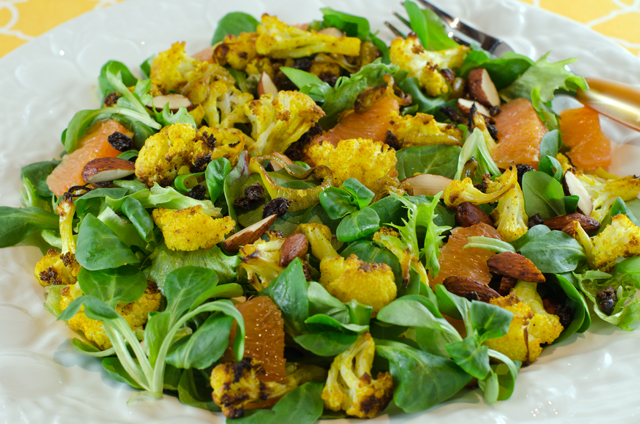
DSC_5828aThe produce department of a well stocked supermarket is a happy place for me. I love looking at neat rows of perfect produce with automatic misters that always seem to turn on the minute I reach in to pick out my choice. I look for new vegetables I have read about in food magazines. Kale sprouts? Not in local stores yet. I am inspired to try that new recipe, create a new salad. I bemoan the high cost of tiny bunches of fresh herbs and swear that I will ask Joe to pot up more to use in the winter season. In our gardening “off season” I can even find local lettuces and greens grown in indoor greenhouses not far from where I live.

About a month ago I discovered one of my favorite vegetables was missing from it’s place of prominence on the shelves. Cauliflower, usually placed near it’s cousin broccoli was all but missing in action. When I did find it, it was banished to a corner at the very end of the produce aisle. There was only a very sparse offering and the heads were probably half the size of those from local farms available just a few months ago. And the price? These tiny heads were selling at $5.99 a piece, I could easily pass that up.

After a little research, I learned that the problem was due to the changing weather and rainfall patterns from a strong El Nino in the primary areas where it is grown, California’s Imperial Valley and near Yuma Arizona. The combination of cauliflower’s current status as most favored vegetable (sorry kale!) and the recent shortage led to it’s conspicuous absence.

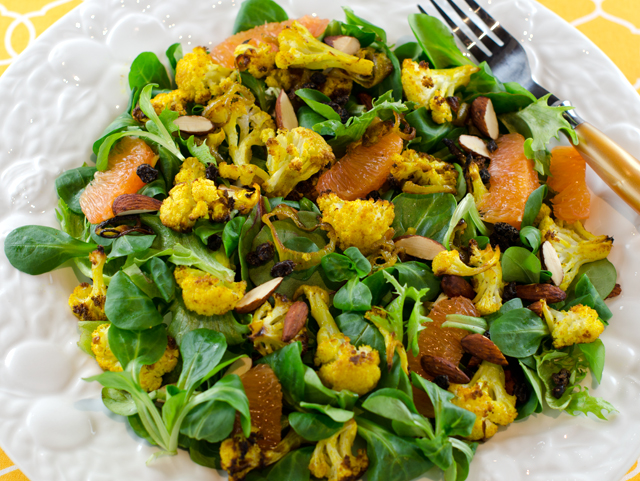
Several weeks have passed and the price is coming down a bit so I have currently suspended my moratorium on cauliflower. This salad, roasted curried cauliflower with orange and tarragon in the latest issue of Fine Cooking was the inspiration for my return.

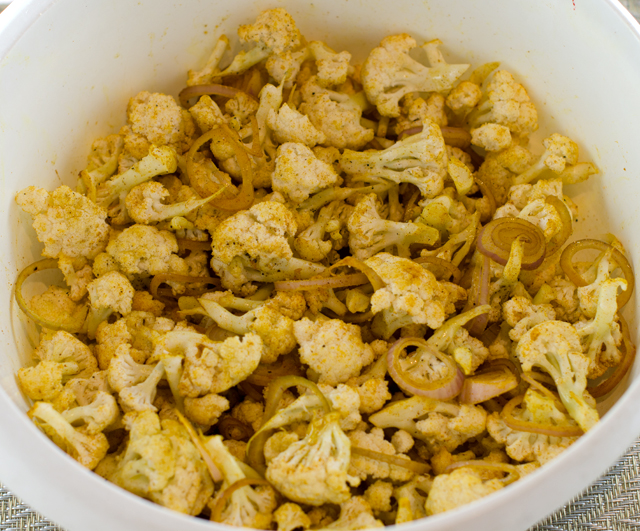
Florets of cauliflower and thinly sliced shallots are tossed with curry powder, olive oil, salt and pepper. Since they can vary in heat quite a bit, I chose a sweet curry powder from Penzey’s. Curry powders are are a blend of spices, thirteen in this case, including turmeric, coriander, cumin and ginger, just to name a few. You can also make your own curry blend according to your tastes. The cauliflower and shallots are spread out on a large baking sheet and roasted until the vegetables are tender and browned, 20 to 25 minutes. Watch carefully, since I was using convection heat I reduced the temperature from 450°F to 425°F. I also stir the cauliflower around at about the halfway point to insure even browning.

While the vegetables are roasting, prepare the orange segments, I discuss how to do it here. Unlike cauliflower, oranges and all citrus are plentiful and priced well this time of year. If you don’t want to try your hand at supreming, substitute Mandarin orange segments, not the ones packed in syrup, of course!

The vinaigrette is composed of rice vinegar, Dijon mustard, orange juice and extra virgin olive oil. Fresh tarragon brings a “licoricey” flavor to the dressing but if the expense of a small container of fresh tarragon bothers you as much as it does me, skip it or add a little dried. Toss the cooled vegetables along with the orange segments, almonds, currants and mache. I used a mache “blend” from Organic Girl that includes mache rosettes, baby red and green chard and tango lettuce. It’s a good quality product for non garden months. You could also choose baby arugula or any salad blend.

We loved the salad and finished it in one sitting. The flavors and textures all contrast very nicely. I added a little crumbled soft goat cheese to our salads, some chickpeas or finely chopped fennel would also be an interesting addition. This could also double as a vegetarian main dish and would be great for a buffet.

Roasted  Cauliflower Salad with Orange and Tarragon

Serves four (or two very hungry people)

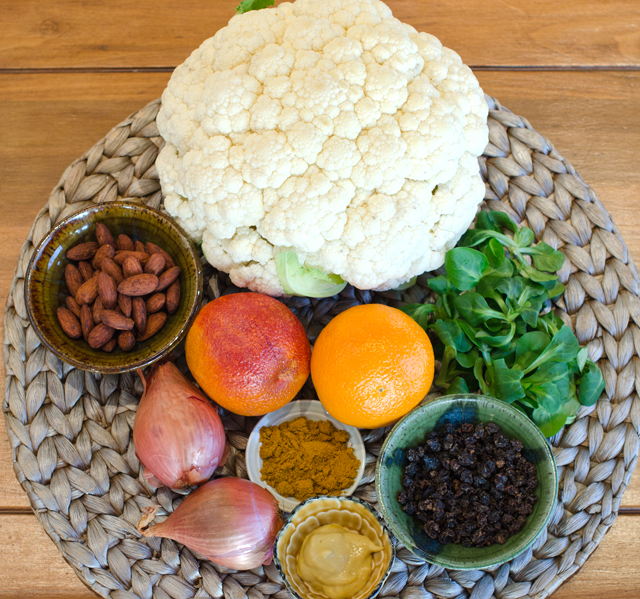
  • 1 large head cauliflower cut into 1″ florets (about 8 cups)
  • 1 c thinly sliced shallots
  • 1½t curry powder
  • 7 T extra virgin olive oil
  • Kosher salt and freshly ground pepper
  • 2 large oranges (I used Cara Cara)
  • 1 T rice vinegar
  • 2 t Dijon mustard
  • 2-3 T chopped fresh tarragon
  • 1/3 c coarsely chopped tamari almonds or toasted slivered almonds
  • ¼c dried currants
  • 5-6 c mâche or baby arugula

Directions

  1. Position a rack in the center of the oven to 450°F. Line a large rimmed baking sheet with foil.
  2. Toss the cauliflower and shallots with the curry powder, 2 T oil, salt and pepper. Spread on a baking sheet and roast until the vegetables are tender and browned, 20 to 25 minutes. Let cool.
  3. Slice the ends of the oranges so they rest flat on a cutting board, cut off the peel and the pith. Working over a bowl, cut the orange segments free from the membranes, letting them fall into the bowl. Squeeze the juice out of the membranes into a small bowl.
  4. In another small bowl, whisk the vinegar and the mustard. Slowly whisk in the remaining 5 T oil. Whisk in 3 T of the orange juice and the tarragon. Season to taste.
  5. Add the cauliflower, almonds and currants to the orange segments and toss with enough vinaigrette to coat well. Add the mache and toss again. Drizzle with remaining vinaigrette and serve.

DSC_5820a

Cauliflower tossed with curry powder. The orange color comes from the turmeric.
DSC_5833a
Delicious!

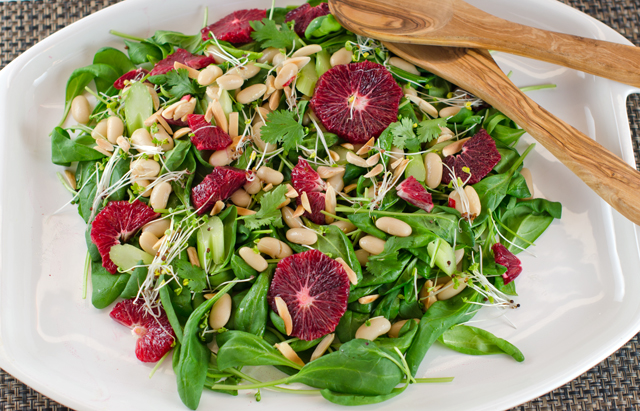
January 30, 2016 Spinach, Blood Orange and Bean Salad with Sprouts

DSC_5806aThe February issue of Bon Appetit includes a nine page (ten if you count the colorful illustration on the first page) article devoted to beans. The title, “Cool Beans” brings a smile to my face because it was an often used expression of a dear friend of mine.

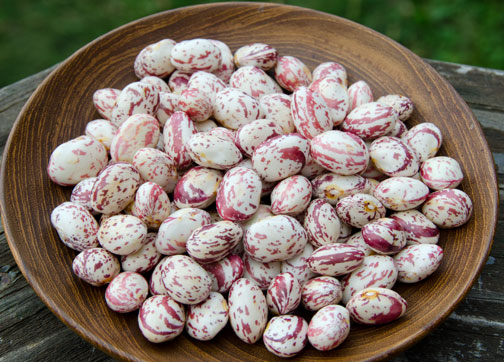
“Cool Beansincludes a four step method on how to cook dried beans from scratch, a pictorial of some of the prettiest beans I have ever seen, available by mail order only and they even address the, ahem, gas issue. There are recipes for cassoulets, pastas, stews and chilis. What caught my attention however was a bean salad; blood orange and mixed bean salad with sprouts. Since I wanted to make the salad for that evening, I needed to forgo the soaking and the next day slow cooking. So I did the next best, and most practical thing, I used a can of cannellini beans, Goya is my brand of choice. If you use canned beans, rinse and drain them well. A large can of cannellini beans will give you 1 1/2 cups of beans as opposed to the 2 cups in the original recipe.

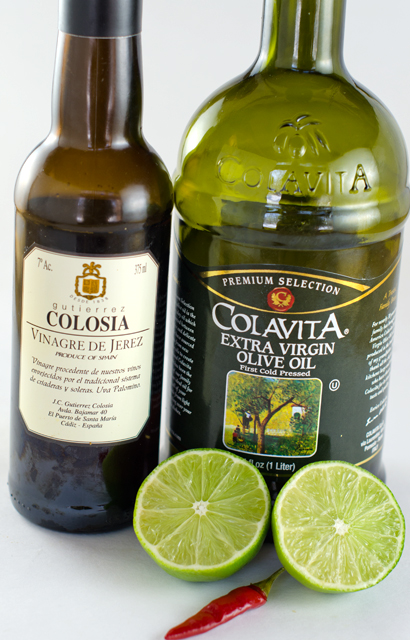
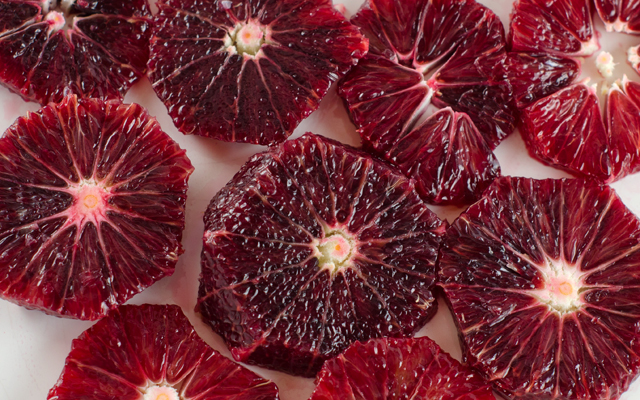
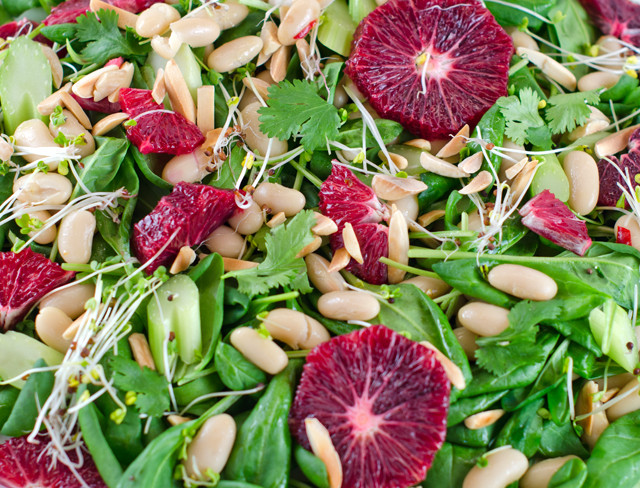
The salad comes together very quickly. Blood orange segments, readily available this time of year enhance the salad with beautiful garnet red color and deep sweet orange flavor with just a little bit of raspberry tartness. Celery slices, underused in salads (at least by me) and broccoli sprouts give a crisp contrast. Fennel would be an interesting substitution for celery. The dressing is a very simple vinaigrette, lime juice, sherry vinegar, extra virgin olive oil and a small Thai chili. Our rather large supply of frozen chilis pack as much heat as any fresh one. My additions to the original recipe were baby spinach leaves and toasted almonds for crunch. Top the salad with some cilantro or parsley leaves. This salad probably could serve four but we ate it in one sitting as a side dish.

The origin of the expression “cool beans”? A Cheech and Chong movie? The 80’s sitcom Full House? There doesn’t seem to be a true concensus. What I do know is that it’s time to place an order for some heirloom beans so I can make this delcious salad again.

Spinach, Blood Orange and Bean Salad with Sprouts

Serves four

For the vinaigrette

Ingredients

  • 2T fresh lime juice
  • 2t Sherry or red wine vinegar
  • ¼c extra virgin olive oil
  • 1 small Thai chili, thinly sliced
  • Kosher salt and freshly ground pepper

DSC_5793a

Directions

  1. Whisk ingredients together in a medium bowl. Season to taste with salt and freshly ground pepper. Set aside.

For the salad

Ingredients

  • 6c baby spinach leaves
  • 1 can cannellini beans, rinsed and well drained or fresh cooked beans
  • 3 blood or navel oranges
  • 1c celery stalks, sliced thinly on the diagonal
  • ½c radish or broccoli sprouts
  • ¼c toasted almond slivers
  • Kosher salt and freshly ground pepper

DSC_5797a

Directions

  1. Add beans to vinaigrette and toss to coat, let sit for 10 minutes for flavors to blend.
  2. Remove peel and pith with a small, very sharp knife from 3 blood or navel oranges. Cut crosswise into ¼” thick rounds.
  3. Add the spinach, orange sections, celery slices and sprouts to the bowl with beans and toss. Season with salt and pepper.
  4. Top with additional sprouts, cilantro leaves and toasted almonds.
DSC_6772a
The borlotti beans we grow in the garden are very pretty. Unfortunately they lose their mottled color when cooked.

DSC_5800a

January 21, 2016 Scallop Salad with Gremolata and Asian Vinaigrette

DSC_5726aThis is a twist on a recipe in the latest issue of Fine Cooking. In the Fine Cooking version, the scallops were tossed in a mixtue of citrus and Asian ingredients for a quick marinade. I wanted to make mine a salad so I patted the scallops dry, seared them and the marinade ingredients became the basis for an easy vinaigrette.
I love scallops for a quick meal and the jumbo sea scallops at Heller’s Seafood this week were pristine and just perfect. Wherever you shop, look for dry scallops. Wet scallops are soaked in a preservative phosphate solution. The solution preserves and whitens the scallops and causes them to absorb more water. So when you cook wet scallops they don’t brown as well or not at all because of the extra liquid. They can also have a soapy taste. Dry scallops are shucked and shipped packed on ice with no preservatives.  Therefore they have a shorter shelf life and are fresher when you buy them. Dry scallops come with a higher price tag, but they are fresher and you are not paying for water weight.

It’s fairly easy to tell the difference, wet scallops are bright white because of the phosphate solution and dry scallops are ivory or pinkish. Don’t hesitate to sniff them, the scallops should smell like the ocean.  When in doubt, ask, and if they don’t know, run! You shouldn’t be shopping there anyway.

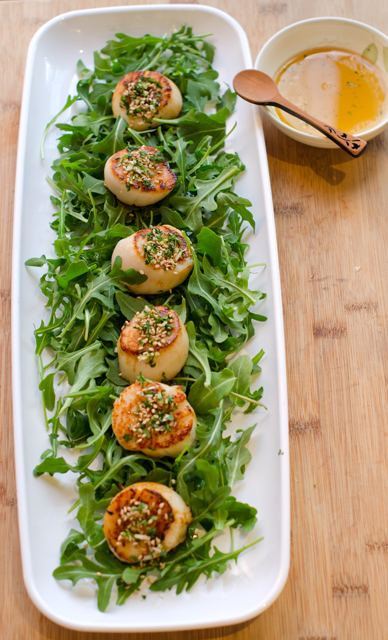
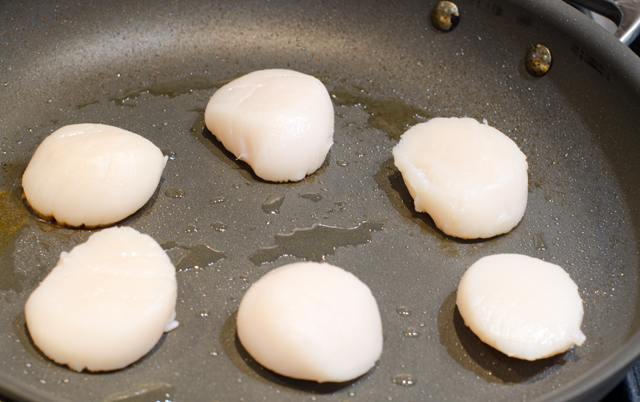
Prepare scallops by first removing the tough abductor muscle, it peels off easily. Then I pat them dry on both sides with paper towels. I coat a non-stick skillet with a neutral oil (vegetable or canola). Be sure that your skillet will hold the scallops without crowding them, you want to sear, not steam them. I turn the heat up to high and wait for the first sizzle. I add the scallops to the pan in a clockwise fashion with any extras in the middle. That way I know what scallop has cooked the longest. Now is the hard part, cook the scallops without moving them until a little peek (lift up the spatula a bit) shows a deep golden crust. Be sure not to overcook, you want the middle to stay tender and sweet.  Two to three minutes per side will do.

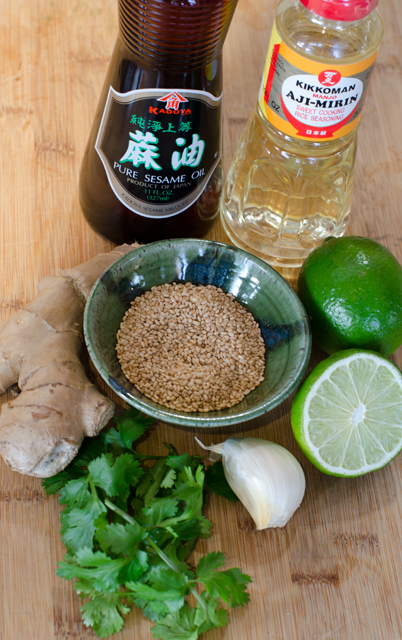
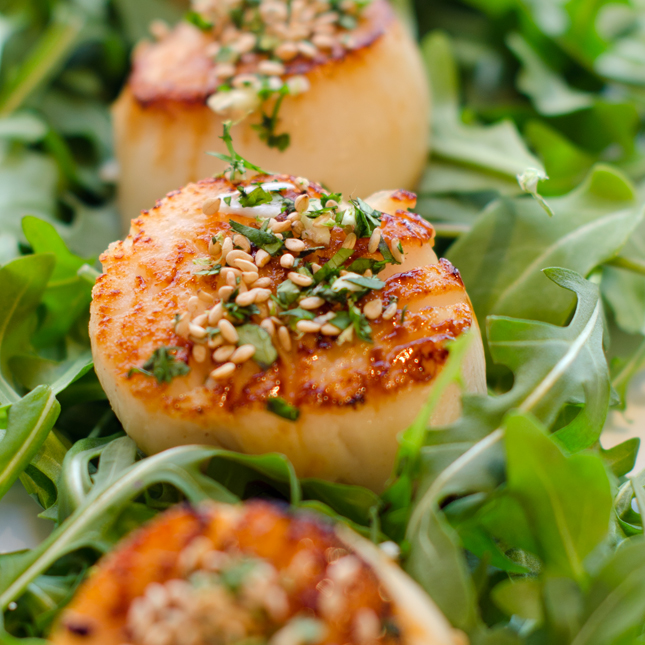
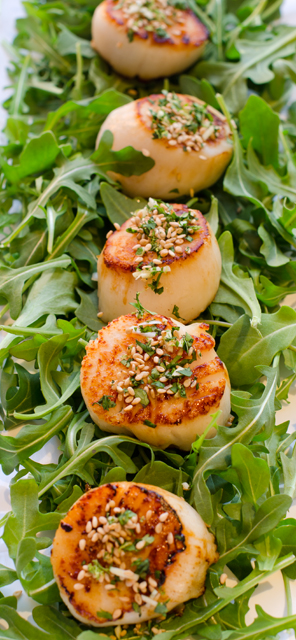
Gremolata is made from parsley, garlic and lemon zest and is the traditional topping for braised veal shank or osso buco. This version takes on a definite Asian flair using cilantro, garlic, sesame seeds and lime zest. These flavors harmonize perfectly with the sweet scallops. The marinade for the scallops included mirin, lime juice, ginger and sesame oil. In case you didn’t know, mirin is a type of rice wine, like sake but mirin is sweet and has a higher alcohol content. When you are looking for sesame oil it should be the dark variety. Both mirin and dark sesame oil are readily available in the Asian section of the supermarket.  I used these flavors with a little additional honey to dress my salad greens with. I chose baby arugula, but a spring mix or baby spinach would work well too.

This dish comes together quickly, both the gremolata and the vinaigrette are easy to make. It is just important to take the time to cook the scallops correctly. This recipe can be doubled and is perfect for a first course or part of a small plates dinner.

DSC_5720a

DSC_5721a
Don’t crowd the pan, give the scallops room to brown, too close and they will steam.

Scallop Salad with Gremolata and Asian Vinaigrette

Serves 2

Ingredients for the scallops

  • ½ to ¾lb dry packed sea scallops (about 6)
  • A neutral cooking oil, canola for example
  • Salt and freshly ground pepper

Directions for cooking the scallops

  1. Remove the tough abductor muscle from the side of each scallop (some scallops are sold with the muscle already removed). If you feel any grit on the scallops, rinse them under cold water. Pat the scallops dry with paper towels; surface moisture impedes browning.
  2. Heat a 10- or 12-inch nonstick skillet over medium-high heat for 1 to 2 minutes. Add the oil and heat until quite hot. Pat the scallops dry once more and put them in the pan in a single, uncrowded layer. Season with salt and pepper and let sear undisturbed until one side is browned and crisp, 2 to 3 minutes. Using tongs, turn the scallops and sear until the second side is well browned and the scallops are almost firm to the touch, 2 to 4 minutes.
  3. Take the pan off the heat, transfer the scallops to a plate, and set them in a warm spot while you finish the other components of the recipe.

Ingredients for the sesame cilantro gremolata

  • ¼c finely chopped cilantro
  • 1T toasted sesame seeds
  • 2t finely chopped garlic
  • 1t lime zest

Directions for the sesame cilantro gremolata

  1. In a small bowl, combine the cilantro, sesame seeds, garlic and lime zest. Set aside.

Ingredients for the dressing

  • 3T mirin
  • 1t grated ginger
  • 2t fresh lime juice
  • 1t honey (or more to taste)
  • 3T sesame oil

Directions for the dressing

  1. In a small bowl whisk all the ingredients together. Set aside

Final Assembly of the salad

Ingredients

  • 4-5 cups of baby arugula, spring mix or baby spinach

Directions

  1. Place the greens in one medium or individual salad plates.
  2. Top with seared scallops
  3. Sprinkle gremolata on the scallops.
  4. Dress greens and scallops lightly with dressing.
  5. Serve immediately.

DSC_5731a

DSC_5735a


January 5, 2016 Roasted Vegetable Salad

DSC_5416aJust because we are in the middle of a chilly (notice I didn’t say cold) and somewhat rainy winter, doesn’t mean that a green salad can’t be part of your meal. I have been using a formula from an article in Fine Cooking to make delicious and interesting winter salads. Hearty roasted vegetable salads combine mixed winter greens with roasted winter vegetables and fruits, nuts, cheeses and dried fruits.

I confess that even though I’m not making the trek out to the greenhouse these days where I still might find some spinach or claytonia, my local supermarkets are providing a varied assortment of fresh salad greens. I always purchase a smaller package because I am more likely use them up before the recommended expiration date. Choose from one of the many blends in your produce section or go solo with baby arugula or spinach.

Winter root vegetables are the next component in the salad. I line my pan first with parchment paper for easy clean up.  Uniformity is the key here, cut everything into a 3/4 inch dice or wedge and toss with a little olive oil and some kosher salt. If you choose to roast red beets they will need to be on a pan of their own so they won’t bleed into the other fruits and vegetables. High heat cooking carmelizes and brings out the sweetness in the vegetables and fruit. Just remember not to crowd the pan or you will end up steaming them.

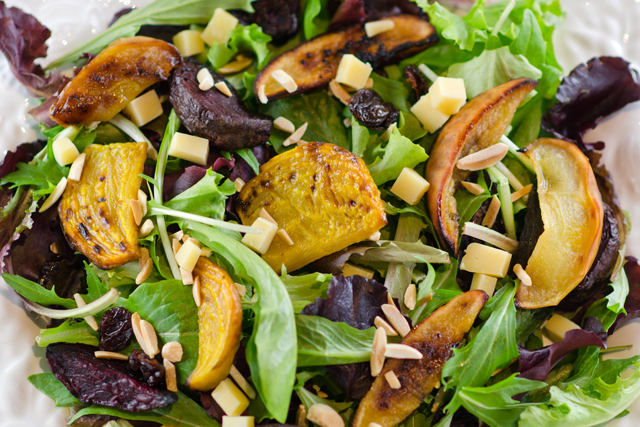
Dried fruit balances out the bitterness of the greens, for this recipe I chose dried cherries. Some aged Gouda brings another layer of flavor and toasted slivered almonds add a little crunch. Toss the salad with a simple fruity vinaigrette, I combined a tangy red apple vinegar with toasted almond oil from the Tubby Olive.

Roasted Vegetable Salad

Ingredients

  • 4 generous cups winter greens such as spinach, arugula, endive, baby greens-kale, chard etc.
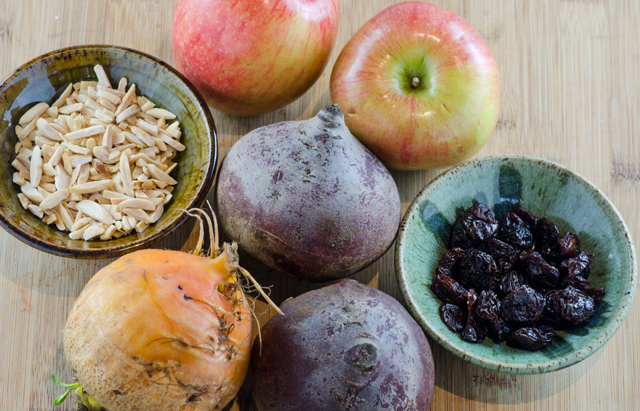
  • Roasted root vegetables and fruit, I used a combination of red and gold beets, and a firm tart apple such as a Braeburn, roasting recipe follows
  • ¼c toasted slivered almonds
  • 1/3c diced aged Gouda
  • 3T dried cherries
  • Kosher salt and freshly ground pepper
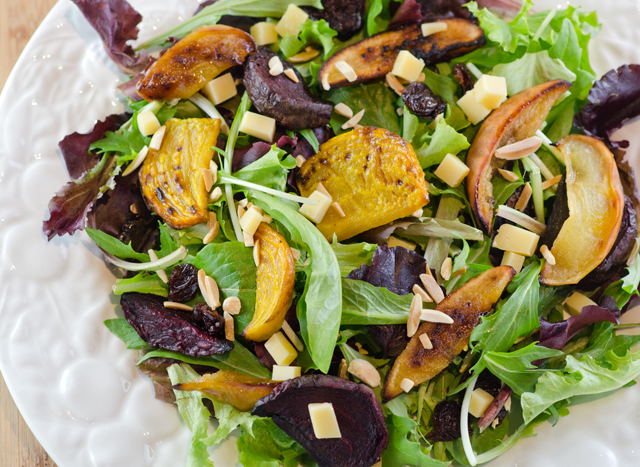
I roasted red and golden beets along with apples. Toasted almonds and dried cherries complemented the flavors nicely.


For the vinaigrette

Ingredients

  • 2T red apple balsamic vinegar
  • 1t honey
  • ½t Dijon mustard
  • 3T toasted almond oil
  • ¼ t grated lemon peel
  • Kosher salt and freshly ground pepper

Directions

  1. Whisk all the ingredients together in a small bowl.
  2. Season to taste with salt and pepper.

For the Roasted Vegetables

Ingredients

  • 6c mixed root vegetables and fruit (I used red and golden beets and apples) trimmed and cut into ¾ inch wedges
  • Olive oil to coat the vegetables
  • Kosher salt

Directions

  1. Position racks in the upper and lower third of the oven. Preheat oven to 450°F.
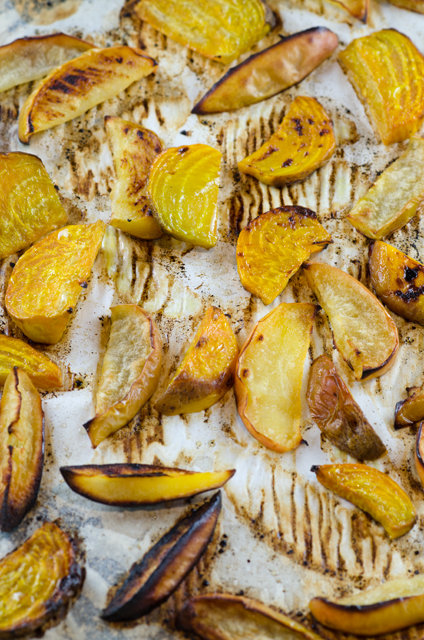
  2. In a large bowl combine the golden beets with the apples. Toss them with a little oil and some kosher salt. Transfer them to a large parchment lined heavy duty baking sheet and spread out in a single layer. Repeat the process with the red beets and transfer to their own baking sheet.
  3. Roast, flipping over with a spatula halfway through and rotating the baking sheets. The vegetables should be browned and tender.  It took me about 18 minutes, watch carefully so you don’t burn them.
Roasted golden beets and apples, red beets were roasted separately.


Directions for assembling the salad

  1. Put the greens in a bowl large enough to toss them. Drizzle the greens with about 2T of the vinaigrette. Toss the greens well and add a little more dressing if necessary. Arrange greens on salad plates or a large platter.
  2. Season the roasted vegetables lightly with some of the remaining vinaigrette. Arrange them over the greens, then top with the nuts, cheese and fruit.
  3. Serve with freshly ground pepper and additional dressing if desired.

DSC_5417a


November 27, 2015 Roasted Beet Salad with Beet Pesto, Goat Cheese and Hazelnuts

DSC_5227aAt the end of September we took a week long trip to Denver Colorado. Part of the time was fun, visiting Garden of the Gods, Pikes Peak, Rocky Mountain National Park, and the Denver Arboretum. Part of the time was study, well at least for Joe, he was attending the Family Medicine Experience, gaining CME (continuing medical education) in anticipation of the boards he took last week. All of the week was fun for me, I visited a local winery and a teahouse, went to Red Rocks, toured the Coors brewing facility (free samples) and went to a Mexican cooking demonstration at a Denver restaurant.

One of my main jobs in anticipation of any trip we take is to choose the restaurants we will enjoy that week. I take my responsibility seriously, and it took some arduous research to find the best restaurants. This was not our first trip to Denver, previous trips included dinners at the then trendy Rattlesnake Club, now closed and The Fort, a restaurant that serves “new foods of the old west”. On a more recent trip in 2004, we were one of the first to dine at the newly opened Frasca Food and Wine, now considered by many to be one of the best restaurants in the country. So the pressure was on.

I skip over the ads at the top of the search engine, any restaurant can call themselves “the best” and Trip Advisor is okay but sometimes a family friendly or a breakfast only spot can be at the top of the list. I prefer to look at the reviews of the local city magazine when I do this type of research, for that I turned to 5280 magazine which refers to Denver’s mile high altitude and their yearly ranking of the 25 best restaurants. I skipped over the restaurants that weren’t in Denver (sorry Frasca!) also steakhouses and sushi bars because I didn’t think they would provide enough of the local flavor.  I read the reviews, perused the menus and  looked for where they were in proximity to our hotel, we didn’t necessarily want to be driving all night to get to our destination.

I discovered there are a surprising amount of restaurants whose names include the word “and “, Stoic and Genuine, Beast and Bottle, Colt and Grey were all restaurants we ate at. That doesn’t include Work and Class, Olive and Finch, Hutch and Spoon. Definitely a trend.

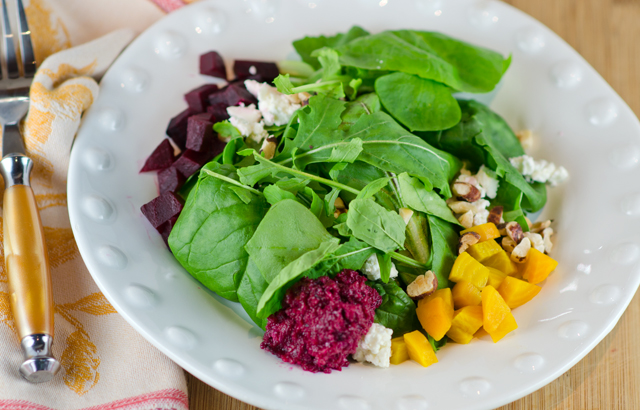
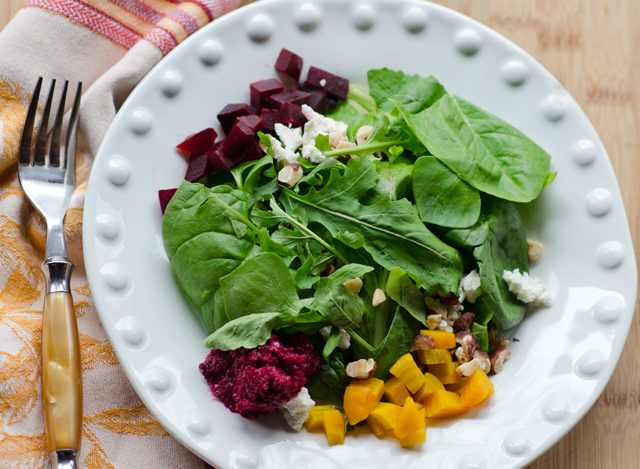
Another trend, and one we definitely approve of, is the number of farm to table restaurants. Although we had enjoyable experiences at all of the restaurants we dined at, the one that really reminded us of eating at home was Root Down, an award winning “field to fork” restaurant, housed in what was once a circa 1953 gas station. Every course was thoroughly enjoyed and documented with a photo on the IPad. One of our favorites was a dish that Joe had, a roasted baby beet salad. The beets, both red and golden were served on a bed of arugula with goat cheese and toasted hazelnuts. There was a dollop of beet pesto (!) and the dressing was a basil vinaigrette artfully drizzed in circles on the plate.

Now, the job would be interpreting the dish at home. The beet harvest in the Kipp garden was over so my beets came from the farmers market (red) and the supermarket (golden).Since I was using greens from our garden greenhouse I had a varied selection to choose from, spinach, leaf lettuces, claytonia, upland cress and yes, some arugula. The cheese varied in the Instagram pictures I saw, sometimes it was a slice of a creamy goat cheese, other times it was crumbles of  chevre. The cheese on the salad at  Root Down was from Broken Shovel Farm, a local supplier. I used a chevre from Giggling Goat Dairy,  a supplier I became familiar with this summer at our local farmers market.  I stayed with toasted hazelnuts, but I think walnuts would work just as well.

Beet pesto was new for me and at first I wasn’t quite sure what qualified this as a pesto. It is usually a sauce that combines an herb, most often basil, with nuts, olive oil and cheese. The definition of the word that pesto originates from is pestare which means to pound or to crush, so it does qualify as a pesto.  I combined cooked beets, a dash of red apple balsamic, toasted unsalted sunflower seeds, a little lemon juice and extra virgin olive oil. It turned into a delcious vibrant magenta sauce that would be great as a dip, tossed with pasta or as a sandwich spread.
I changed the vinaigrette to accompany the salad from basil, not in season now and not my first choice with beets to a tarragon vinaigrette. The anisy tarragon contrasts beautifully with the natural sweetness of the beets.

Roasted Beet Salad with Beet Pesto, Goat Cheese and Hazelnuts

For the Roasted Beets

Ingredients

  • 1½ lb. each red and golden beets

Directions

  1. Preheat oven to 425°F. Wrap beets in foil packets, separating by color. Place on a baking sheet; bake until beets are slightly soft to the touch, 45 minutes to 1 hour depending on their size. Cool beets in packets, then rub off skins (use a paring knife for tough spots).
DSC_5086a
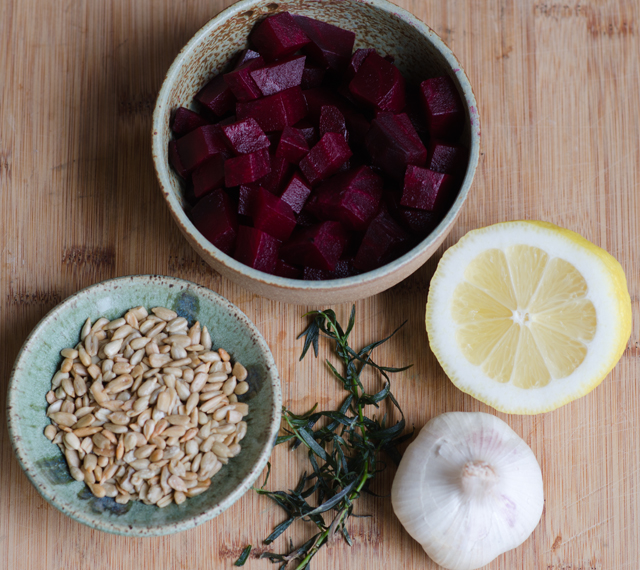
Ingredients for the beet pesto.

For the Beet Pesto

Ingredients

  • 1c cooked, roughly chopped red beets
  • 1 clove garlic, minced
  • 1/3c roasted unsalted sunflower seeds
  • 2T tarragon leaves
  • 1T apple balsamic vinegar
  • 1T lemon juice
  • 1/4c extra virgin olive oil

Directions

  1. Place all of the ingredients in a food processor and blend until smooth.

For the Vinaigrette

Ingredients

  • ¼c apple vinaigrette or a white balsamic
  • ½c roughly chopped red beets
  • 1t honey
  • 1/3c extra virgin olive oil
  • 2T tarragon leaves

Directions

  1. Combine all ingredients in a small food processor and process until well combined

Assembling the Salad

Ingredients

  • 6-8 c Baby arugula- I used a combination of greens from our greenhouse that included arugula
  • ½c toasted chopped hazelnuts
  • 4oz crumbled goat cheese
  • Roughly chopped roasted red and golden beets (from the first step)
  • Freshly ground black pepper

Directions

  1. Add arugula to salad plates. Top with goat cheese, hazelnuts and chopped beets.
  2. Add a dollop of beet pesto to the plate
  3. Serve vinaigrette on the side.
  4. Add a grind of black pepper to each salad as desired.

DSC_5231a

September 1, 2015 Mixed Bean Salad

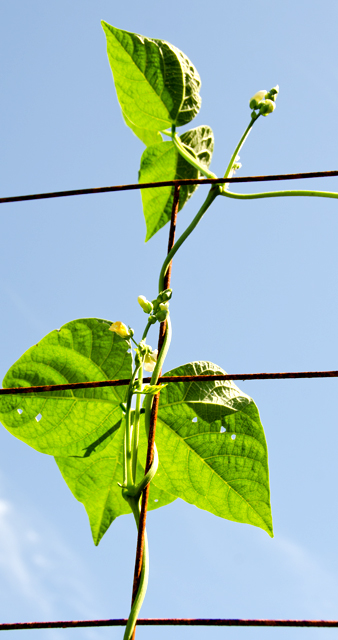
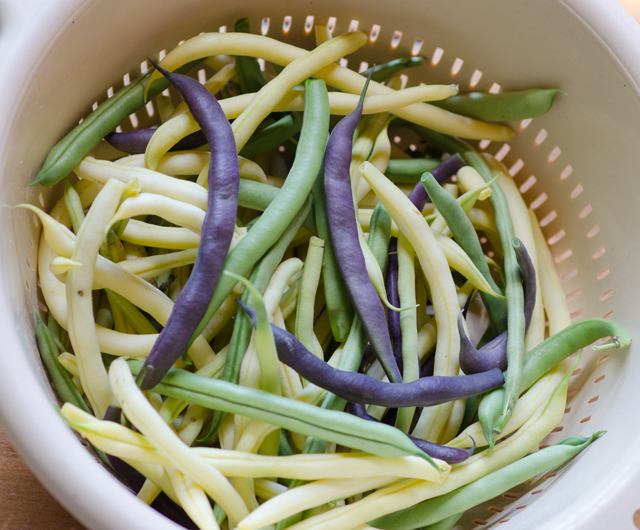
DSC_4130aString or snap beans are in season from mid summer to early autumn and we have had a steady stream of them since the middle of July. Joe grows both pole and bush varieties.  Pole bean plants fare best when they are given support to grow, like a trellis or a teepee while bush beans grow on their own without added support. The bush beans were the first to produce, followed by the later maturing pole beans and now the bush beans are producing again. The crop this year has been quite successful and at times, overwhelming. I froze quart bags of blanched beans for fall and winter days when I will miss being able to pick them fresh. I even pickled a few jars of the very slim and straight filet beans.

In the cooler months we serve them hot, simply seasoned with garlic and thyme, but in the summer I like to serve them along side grilled vegetables in a cold salad. My latest inspiration, Mixed Bean Salad  came from Yotam Ottolenghi and Sami Tamimi’s cookbook, Jerusalem. Jerusalem won the IACP cookbook of the year in 2013 and was the 2013 James Beard award winner for the best international cookbook. The recipes are very approachable, not too “cheffy” and introduces the reader to the vibrant multicultural cuisine of that city.

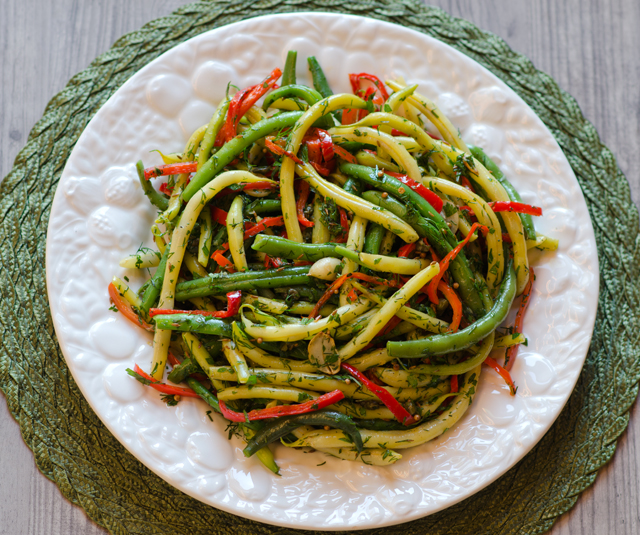
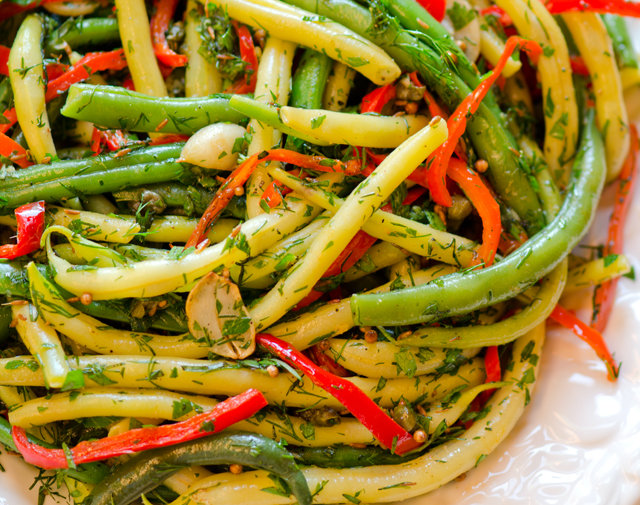
The “mixed” in the mixed bean salad refers to the combination of green and yellow beans paired with red pepper strips. Mr Ottolenghi likes yellow beans for their tenderness and the look they bring to the dish.  This is the best time of year to find them at the farmers markets and we have no shortage here. If you are making this and yellow bean are not available, substitute all green beans.

In his introduction to the recipe, Mr Ottolenghi states that string beans are symbolic of the Jewish New Year but he didn’t indicate how, so I did a little research of my own. Beans are mentioned in the Talmud as “ruviah” and are symbolic because their Hebrew name sounds like the Hebrew “to increase” and indicates a desire for increased blessings in the new year. Reminds me of the symbolism of foods associated with Chinese New Year.

Begin the recipe by blanching the beans until tender crisp. Look for beans that are relatively the same size in diameter so they will cook in the same amount of time. If you are not sure if the beans are ready, test one for doneness before draining the pot. Roast red pepper strips that have been tossed in olive oil until they are tender. They make a beautiful contrast to the green and yellow beans.  Next step are the aromatics, lightly toasted garlic, then capers that bring a salty element and their own unique texture. Rinse the capers well and dry them, careful when you add them to the oil, they will spit, so you might want to use a spatter screen. Cumin and coriander seeds are bloomed in the olive oil to best bring out their aromas and flavor.   Pour the warm dressing over the beans and pepper strips and toss. Green onions, herbs, lemon peel, salt and pepper are the next addition to the dish.

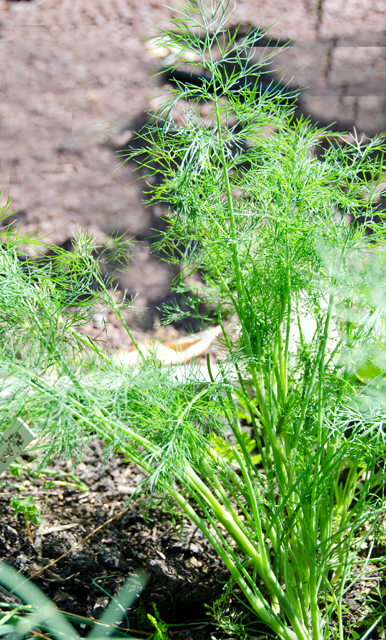
The original recipe calls for 2/3 cup chervil, not an easy or common ingredient for the home chef.  I have never seen it sold in the supermarket or even at our local farmers market for that matter.  We have an abundance of it that comes up from seed in the early spring and bolts as soon as the weather gets hot.  He suggests a substitute combination that everyone has access to, dill and parsley.

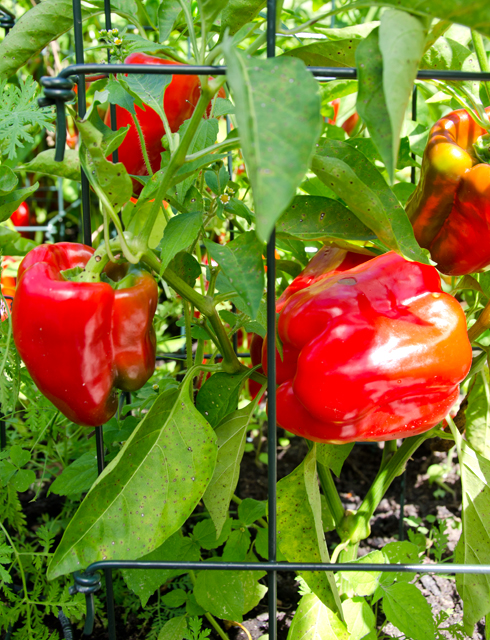
I will not mislead you, this is not a salad you can whip together in 15 minutes, but it is certainly worth making. Step one for me is a trip to the garden for beans, peppers and herbs.  It is very important for your ingredients to be “mis en place” ready to go so the warm dressing will thoroughly season the beans and peppers. I have had my cookbook only two weeks and I have made this salad twice and plan on making it again for a Labor Day picnic. I think that constitutes a winning recipe.

DSC_4114a

DSC_4125a

Dill in the garden.
Dill in the garden.


Mixed Bean Salad

From the Jerusalem Cookbook

Ingredients

  • 1¼ lbs. mixed green and yellow beans
  • 2 medium sweet red peppers, cut lengthwise into ¼ inch strips
  • 4T olive oil-1T for the peppers, 3T for the salad
  • 3 cloves garlic, thinly sliced
  • 6T capers, drained, rinsed and patted dry
  • 1t cumin seed
  • 2t coriander seed
  • 4 green onions, thinly sliced
  • 1/3 c each, roughly chopped tarragon, dill and shredded parsley.
  • Grated zest of one lemon
  • Kosher salt and freshly ground pepper

DSC_4111a

Directions

  1. Preheat the oven to 450°F.
  2. Bring a large pot of lightly salted water to a boil. Add the beans to the pot and cook for 4-5 minutes, take a bean out at this point to check doneness. It should be cooked through but still be “toothsome”. When done, immediately drain in a colander and refresh the beans with very cold water. Drain well, pat them dry with a towel and place in a large bowl.
  3. Toss the pepper strips with a teaspoon of olive oil, then spread them out on a baking sheet. Bake for five minutes or until tender. Add pepper strips to the bowl of cooked beans.
  4. Heat the remaining 3 tablespoon olive oil in a small saucepan. Add the garlic and cook for 30 seconds; add the capers (be on guard for spatters) and fry for 15 seconds. Add the cumin and coriander seeds and continue frying for another 15 seconds. The garlic slices should be golden by now. Remove pan from the heat and pour this over the bowl of beans and pepper strips. Toss and add the green onions, herbs, lemon zest, salt and pepper to taste.
  5. You may serve immediately or refrigerate up to one day. Just remember to bring the salad back to room temperature before serving.
DSC_4134a


August 20, 2015 Cucumber, Basil and Peanut Salad

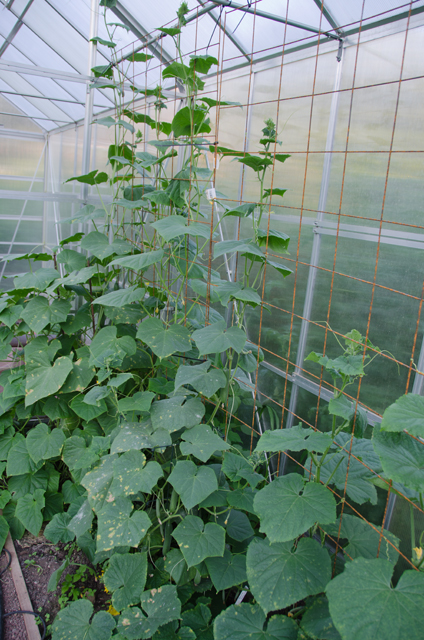
DSC_4048aThese days Joe is bringing in more cucumbers than I know what to do with them. I’m really not complaining, the season is short and I am using them in as many salads and cold soups as I can find recipes. Native to India, cucumbers require 70°F plus soil and air temperatures to grow but have a relatively short time from sowing to harvest. He has had great success growing them in the greenhouse that is situated in the garden. That environment provides just slightly warmer temperatures.
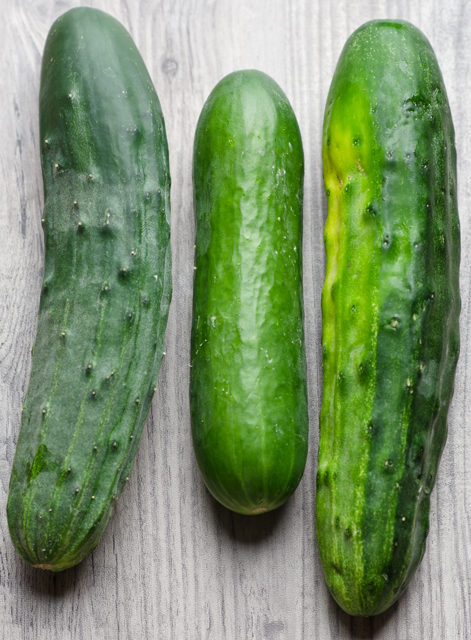
Since cucumbers are 96% water they are happiest when watered on a consistent basis. A well watered cucumber vine will produce the sweetest fruit. We stick with two varieties that produce well, Persian and Bush Champion. Persian cucumbers are small, about 6 inches long and 3/4 inch diameter with smooth edible skin and undeveloped seeds. They are the perfect size for pickling, if that is your inclination. Bush Champions are a bush variety that take one third of the space and are also suitable for containers.

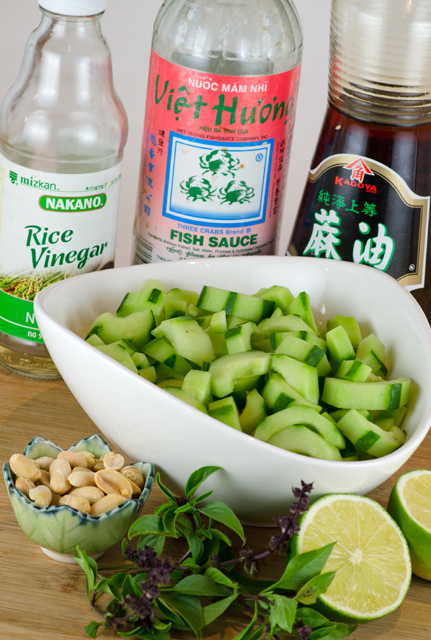
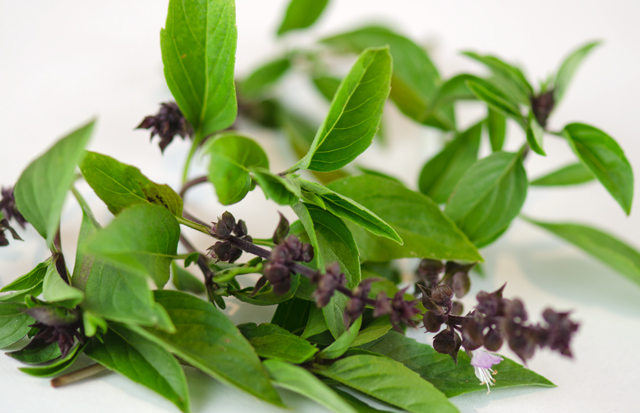
One of my all time favorite cucumber salads to make is a Thai cucumber salad.  Light and crunchy, it is quick and easy to make, combining sweet, spicy and tangy flavors. The dressing draws most of it’s ingredients from the Asian pantry. Seasoned rice vinegar is either made from sake or by adding salt and sugar to regular white rice vinegar and is an easy boost to the sweet, salty and tangy elements of a dish. Plain rice wine vinegar is a bit more versatile and could be substituted. Just remember to adjust the seasonings accordingly. Whether you call it nam pla, nuoc nam or patis, fish sauce is made from the liquid drained from fermented anchovies and is a flavor enhancer like salt or soy sauce. A little goes a long way here. I am partial to the Three Crabs brand that is readily available in Asian markets. Sesame oil was one of the first exotic ingredients to grace our kitchen. Be sure to look for toasted sesame oil. It is dark in color and has a very intense aroma and flavor. Use Thai basil in this salad if you can find it. The beautifully named Siam Queen is one of the varieties we grow. The plant is more compact in apppearance than the standard Italian basil with smaller bright green leaves. There are clusters of purple flowers at the top of the plant. It has an intense licorice aroma and flavor.

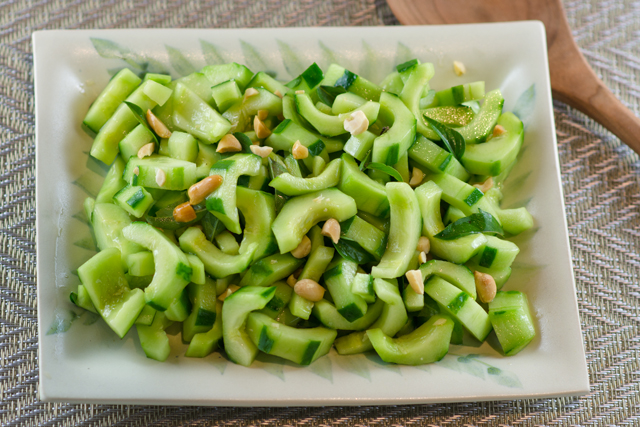
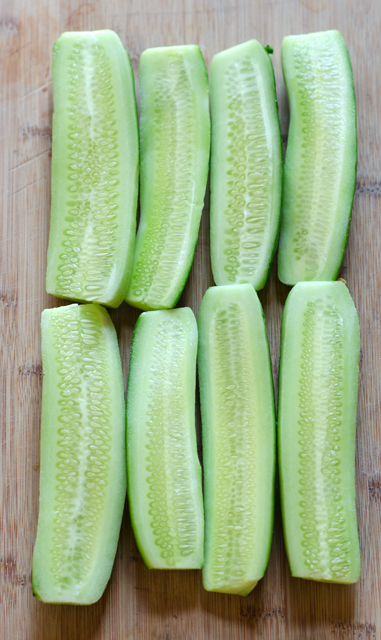
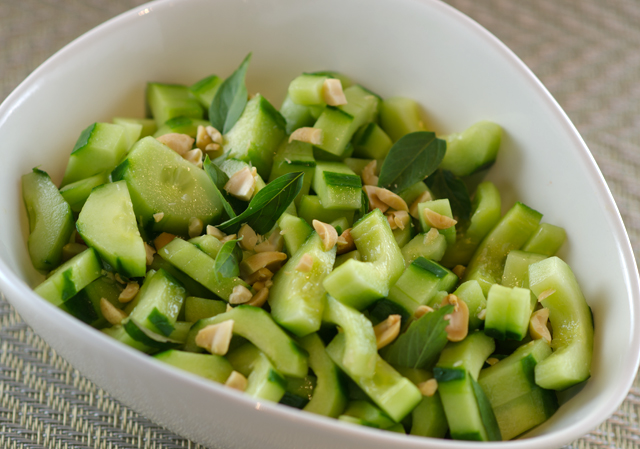
To make the salad, add the rice vinegar, sesame oil, lime juice and fish sauce to a large bowl. Peel about 1½ lbs cucumbers, I leave a little skin on for color contrast. Slice in half lengthwise, scoop out the seeds and slice diagonally into crescents. Peeling the cucumber allows the flavors of the dressing to be absorbed right into the flesh. Add cucumbers, basil and peanuts to the bowl, toss and serve. So simple to make, refreshing Thai cucumber salad is as much a natural next to a grilled satay as it is with your standard picnic fare.

Cucumber vines in the greenhouse.
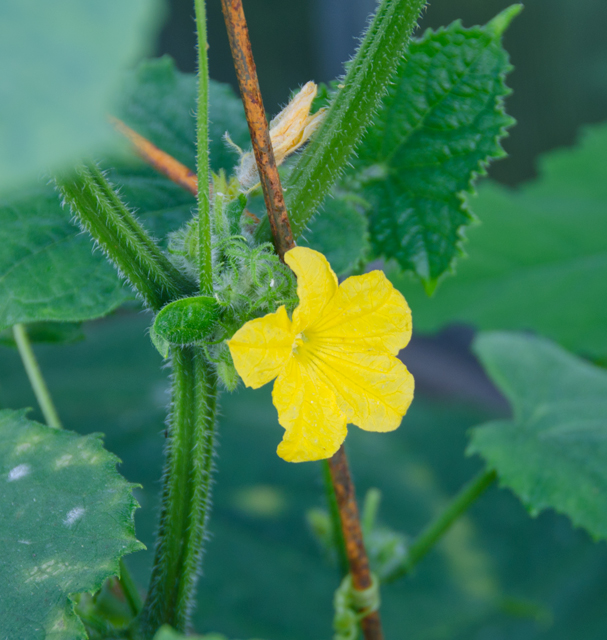
This little flower is the beginning of a cucumber.
Persian cucumber in the middle, flanked by the spiny Bush Champions.

I removed the seeds for this salad but really didn't need to.

Beautiful Siam Queen basil.

DSC_4042a

Cucumber, Basil and Peanut Salad

Adapted from Fine Cooking magazine

Serves six

Ingredients

  • 3T seasoned rice vinegar
  • 1t Asian sesame oil
  • 1t fresh lime juice
  • 1t fish sauce
  • 1½lb cucumbers
  • ¼c torn basil leaves (Thai is preferred)
  • ¼c coarsely chopped salted peanuts

Directions

  1. In a large bowl, mix the first four ingredients.
  2. Peel cucumbers (I like to leave small strips of skin for contrast), slice in half lengthwise. Scoop out the seeds and slice diagonally into ¼ inch crescents.
  3. Add the cucumbers, torn basil and peanuts to the bowl with the vinaigrette, toss and serve.

DSC_4047a

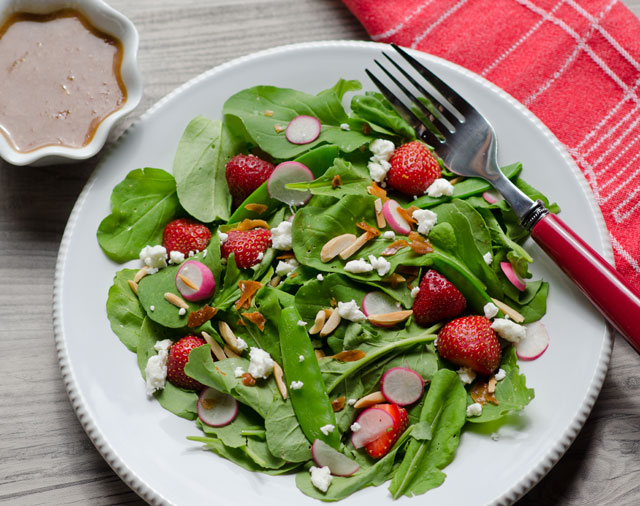
June 10, 2015 Arugula, Strawberry, Snow Pea and Radish Salad

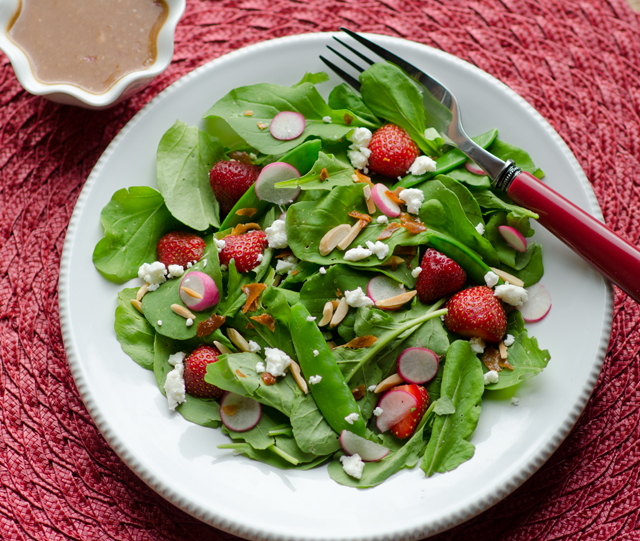
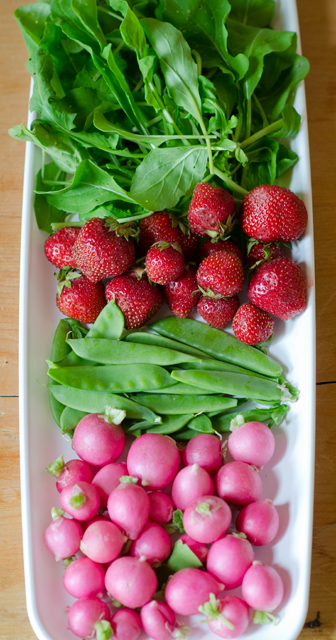
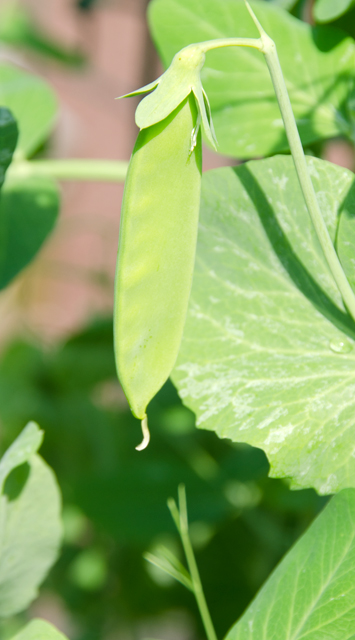
DSC_2927aJune’s warm temperatures are making an appearance again this week, but technically it’s still spring until the 21st. This end of spring salad brings together four elements that are a part of the early June gardens in our area. All salad greens love the cooler temperatures of spring and arugula is no exception. We have been enjoying pea shoots for several weeks now and the peas started making their appearance last week. They  will probably only last to the end of this month when warmer temperatures will cause the vines to die off.

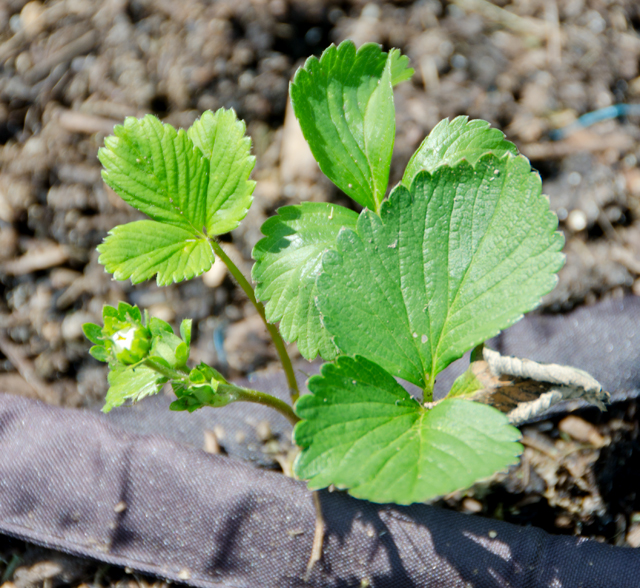
I just harvested our most currant crop of radishes, another vegetable that doesn’t like mid summer heat.  At my request, Joe planted a strawberry bed this spring.  In fact, some of the plants are already flowering. He has removed the flowers from these ambitious plants to give them time to establish themselves before producing fruit.  So there is a good chance that the plants that bear two times in a season will produce their first strawberries late in the summer.
A strawberry vinaigrette is the perfect accompaniment for this salad. I chose a strawberry balsamic vinegar from The Tubby Olive, a store that is always inspiring new salad combinations for me. For the dressing I combined garlic, shallot, Dijon mustard, strawberry balsamic, just a touch of honey and a good extra virgin olive oil. When making a salad be sure to use a bowl that gives you plenty of room to combine the ingredients.  I start by tossing the greens first with dressing to coat them lightly and then add some of the other components and toss again. I leave the rest to top the salad with, this ensures the last person who is served doesn’t get all the heavier ingredients that end up in the bottom of the bowl.

DSC_2940a

Arugula Strawberry Snow Pea and Radish Salad

Serves two

Ingredients

For the dressing

  • 1t finely minced garlic
  • 3T minced shallot
  • 1t Dijon mustard
  • 3T Strawberry balsamic vinegar
  • 1/4t honey
  • 1/4c extra virgin olive oil
  • Kosher salt and freshly ground pepper

For the salad

  • 4-5 cups of arugula, washed and trimmed
  • 1c strawberries, stemmed and sliced in half
  • 1c snow peas, strings removed, lightly steamed
  • 1c radishes, thinly sliced
  • 1/4c slivered almonds, lightly toasted
  • 2-3 slices of prosciutto, crisped in a non stick pan
  • 1/4c creamy feta, crumbled
  • Freshly ground pepper

Directions

  1. To make the dressing, combine all the ingredients in a small bowl and whisk together until evenly combined. Taste and adjust if necessary. Season to taste with kosher salt and pepper.
  2. Place the salad greens in a large bowl and toss with some of the vinaigrette and taste. Add about half of the other ingredients, toss again, adding more of the dressing if necessary. Top the salad with the remaining ingredients. Season each portion to taste with freshly ground black pepper. Reserve remaining vinaigrette for a later use.

DSC_7727a

DSC_3016a
Our new strawberry patch. They need to be “nipped in the bud” to produce stronger plants.
Joe will plant more arugula in the fall.

DSC_2933a