June 5, 2012 Salmon and Arugula Pesto


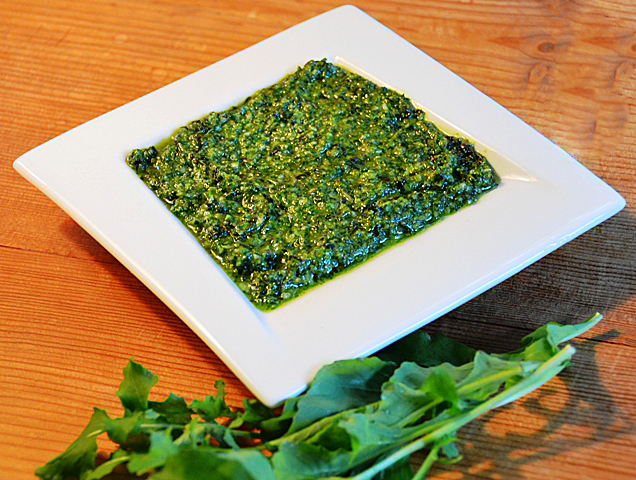
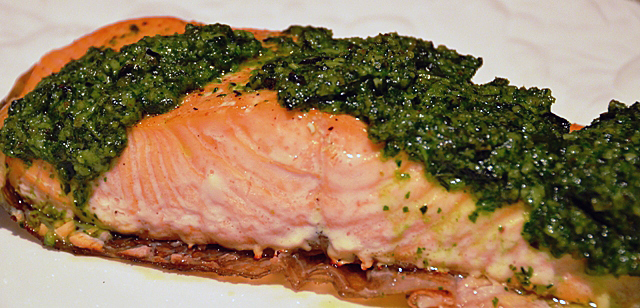
Considered trendy in the 80’s, arugula is still popular with chefs and home cooks alike thirty years later. The peppery green is known by many names, arugula, roquette, rocket, rugula or rucola. It may be the herb known as oroth in the Bible (2Kings 4:39-40). Even though it looks like dandelion greens or oak leaf lettuce, it is a member of the brassica family like broccoli and cauliflower, and is low in calories and rich in vitamins A and C, calcium and iron. We have been making succession plantings this spring so there is always more than enough arugula to add to our salads. In this recipe from Fine Cooking magazine the sharp peppery flavor of the arugula is a pleasant contrast to rich fattiness of the salmon. This recipe calls for arugula and basil, if your arugula is on the mild side and not “hot”, all arugula could be used. Different nuts such as pistachios, pecans or pine nuts could be interesting. Arugula pesto would also be good tossed with pasta or potatoes, added to soft goat cheese as a spread or even as a pizza topping. We use the Canadian fisheries method of cooking fish which equates 1 inch of the thickest part of the fish to 10 minutes of cooking time. We use a tool, a little fish-shaped ruler with a slide called “perfect fish”. After some research, the only source I could find was Fante’s, a gourmet cookware store in Philadelphia, but they are currently out of stock. Lacking the “perfect fish” use a ruler to measure the thickness of your fish. 

Bring back the "Perfect Fish"!


Roasted Salmon with Arugula Pesto

adapted from Fine Cooking magazine

Serves four

Ingredients

  • 1/3c walnut pieces
  • 2c loosely packed fresh arugula
  • 1c loosely packed fresh basil
  • 1/4c freshly grated Parmesan cheese
  • 1/4c extra virgin olive oil
  • 4 6-8 oz skinless salmon filets

Directions

  1. Preheat oven to 450F.
  2. Toast walnut pieces in a small dry skillet over medium heat until fragrant and a bit darker, about 4-5 minutes. Let cool slightly and transfer to a food processor.
  3. Add arugula, basil, Parmesan, and garlic and process until the mixture is finely chopped, this should take less than a minute.
  4. With the motor running, slowly add the olive oil in a steady stream until well combined.
  5. Transfer pesto to a bowl and season to taste with salt.
  6. Cut salmon into individual servings and salt lightly (kosher or sea salt)
  7. Measure thickest part of steak with the Perfect Fish tool. (every 10th of an inch  equals 1 minute of cooking time at 450 degrees F)
  8. At 1 minute prior to calculated time of completion, remove from oven and coat with thin layer of pesto and return to oven for 1 minute.
  9. Serve immediately or be sure to remove from baking pan immediately (so that the fish does not continue to cook.)
  10. For a more translucent preparation decrease cooking time by 1-2 minutes
  11. Serve on warmed plates 
 

May 30, 2012 A Spring Salad


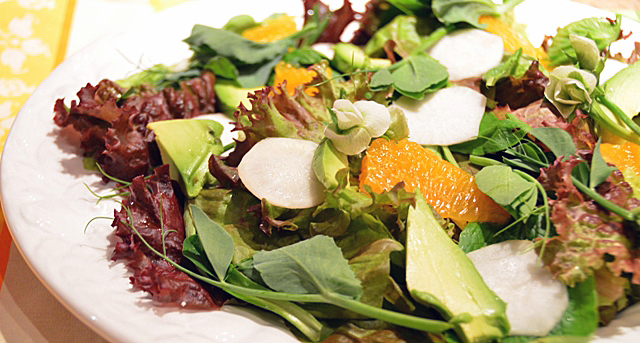
The spring salads we enjoy are a combination of our garden’s bounty, fresh produce from the Wrightstown farmer’s market and new tastes that have caught my eye, or in this case, my ear. This salad is no exception. The Lolla Rossa lettuce, snow pea shoots and Easter egg radishes were from the garden. The mini Hakurei turnips were from the farmer’s market and I had a ripe avocado in the fridge. The sweet Japanese turnips reminded me of something else sweet that originated in Japan that I had in the refrigerator, a Sumo citrus.
I first heard about the Sumo on two of the food podcasts I listen to, Good Food hosted by Evan Kleiman from KCRW Los Angeles and The Splendid Table hosted by Lynne Rosetto Kasper. Self proclaimed “fruit detective” and food writer for the Los Angeles Times, David Karp wove a tale of intrigue behind the fruit that took over 30 years to develop. The Dekopon, as it was originally known in Japan, is a cross between a satsuma mandarin and California navel orange. It has been sold in the United States since 2011 under the name Sumo citrus because the topknot on the orange resembles the hairstyle worn by sumo wrestlers. Karp told his listeners that “of the 1000 varieties of citrus he had tasted, the Dekopon is the most delicious” and “the pulp has the perfect balance of sweetness and acidity”. I wanted to try one but learned that most of the small distribution would be on the west coast with some in larger markets on the east. I was pleasantly surprised to find Sumos in my local Wegmans. Two of the plump Sumos were five dollars, a bit pricy, but the accolades piqued my curiosity. I must agree that the easy to peel Sumo was the tastiest citrus I ever tasted. I decided to add one to my salad this evening. The combination of the frilly magenta-leaved Lolla Rossa lettuce, sweet mini Hakurei turnips, delicate flowering pea shoots, creamy avocado slices and wonderful bursts of sweet citrus courtesy of the Sumo made a wonderful salad.

Spring Salad for two

Ingredients

  • 1/4 c pomegranate tangerine vinegar
  • 1t Dijon mustard
  • 1t minced shallot
  • 3/4 c extra virgin olive oil
  • splash of orange olive oil
  • Kosher salt and freshly ground pepper
  • Two small heads of Lolla Rossa lettuce
  • 4 Hakurei turnips, peeled and thinly sliced on a mandoline
  • 1 Sumo Citrus supremed
  • 1 firm-ripe avocado, pitted, peeled and thinly sliced
  • A handful of snow pea shoots and tendrils

Directions

  1. Combine the first five ingredients in a small bowl, whisk to combine, add salt and pepper to taste 
  2. Separate lettuce into leaves, wash and spin in salad spinner
  3. Place lettuce on serving platter, top with turnip slices, Sumo, avocado and pea shoots.
  4. Toss with enough dressing to lightly coat, there will be some left. Top with fresh ground pepper to taste


May 25,2012 Stir Fry of Bok Choy and Shiitake Mushrooms


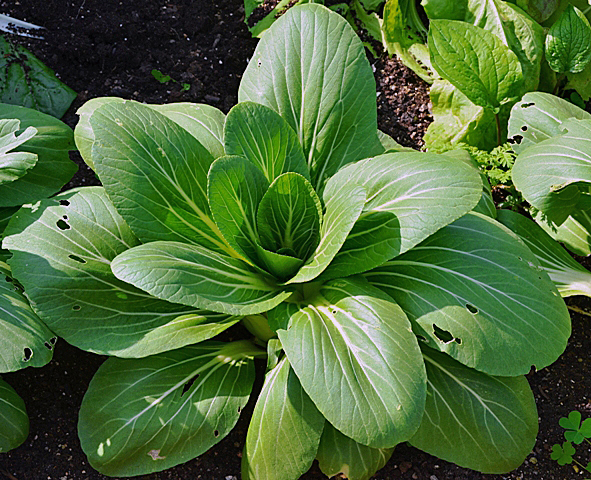
Mature bok choy in the garden.

Bok choy, bak choy, choy sum, however you name it we enjoy this Chinese vegetable year round. From the garden in the spring and again in the fall, first in it’s baby stage as thinnings all the way to the mature heads that finish out the season. In the off months I go to the Asian markets to purchase Shanghai Bok Choy, the smaller heads that we prefer. Bok choy always makes an appearance as a side dish at our Chinese New Year dinner.
Bok choy is from the Cantonese dialect literally meaning “white vegetable”. Low in calories and high in vitamins A, C and K as well as calcium and iron, it is classifed as a brassica or cabbage. It’s flavor is definitely not “cabbagy”, it is light, crisp and delicate. If you don’t  grow your own, choose bok choy that is unblemished and firm to the touch.  This recipe helped us to use up our first planting of bok choy, with many more rows to come.

Stir Fry of Bok Choy and Shiitake Mushrooms

Serves 6

  • 2lbs bok choy-if large, leaves cut in half lengthwise
  • 3/4lb shiitake mushrooms, cleaned and caps sliced thinly
  • 4T oyster sauce
  • 1/4c lower-salt chicken broth
  • 1T cornstarch
  • 1T Asian sesame oil
  • Peanut oil for stir frying
  • 3 large cloves garlic-sliced thinly
  • 2T fresh ginger peeled and cut into thin matchsticks

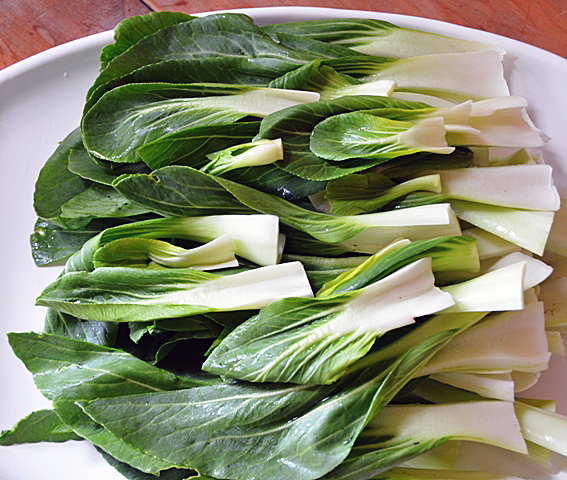
    Bok choy leaves washed, trimmed, ready to be blanched.


Directions

  1. Blanch large bok choy leaves in a large pot of boiling water until the white stems are softened, but not limp,  drain in colander.
  2. Combine the oyster sauce, chicken broth, cornstarch and sesame oil in a small bowl. Whisk well to dissolve the cornstarch.
  3. In a large wok, heat a tablespoon or so of  peanut oil over medium-high heat. The wok is ready when a drop of water sizzles on contact. Add bok choy and cook tossing frequently with 2 wooden spoons or tongs until stems are softened and slightly browned, about 5-6 minutes. Add shiitake mushrooms and stir fry for one minute. Add garlic and ginger and cook, stirring constantly until aromatics are tender, fragrant and starting to brown, about 2 minutes.
  4. Add sauce to wok and use spoons or tongs to mix with the vegetables. Simmer until the sauce is reduced and thickened, about 2 minutes. Serve immediately.

    All ingredients must be ready to go for a stir fry.


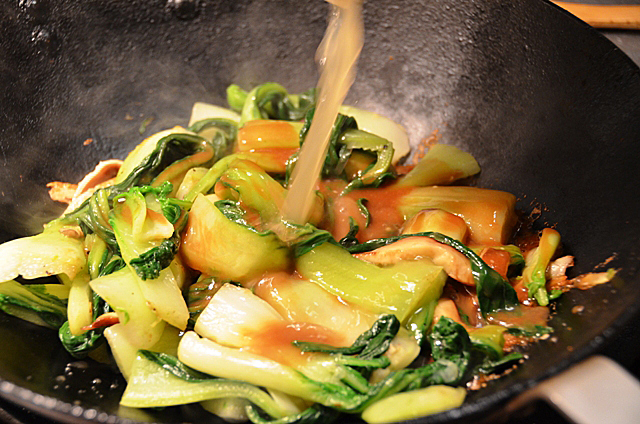
Thinning out the sauce with a little chicken stock.

May 23, 2012 Kohlrabi, Fennel and Blueberry Salad


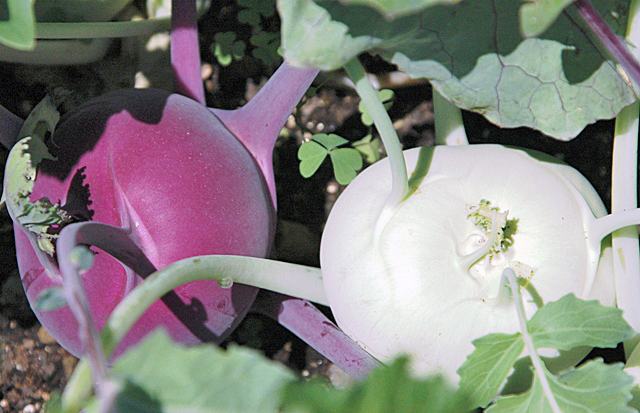
The kohlrabi bulb grows above ground.

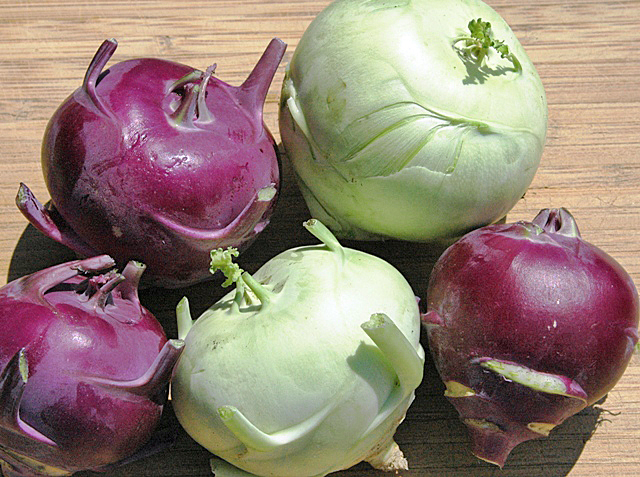
Just what you are clamoring for, another kohlrabi salad. What, you say you have never had a kohlrabi salad, or maybe you have never tried kohlrabi at all. The funny looking vegetable with the equally unusual name is a member of the cabbage family. Kohlrabi gets it’s name from a German word, kohl-cabbage (think cole slaw) and rabe -turnip. It has a milder flavor than either of those vegetables, the best description I read was that it tastes like broccoli stems. Kohlrabi is not a root vegetable since the bulbous part grows above the ground and is studded and topped with leaves that  resemble those on a broccoli plant. Kohlrabi has been a part of our spring garden for the past few years.  I enjoy it most harvested at 2-3 inches in diameter and served raw.

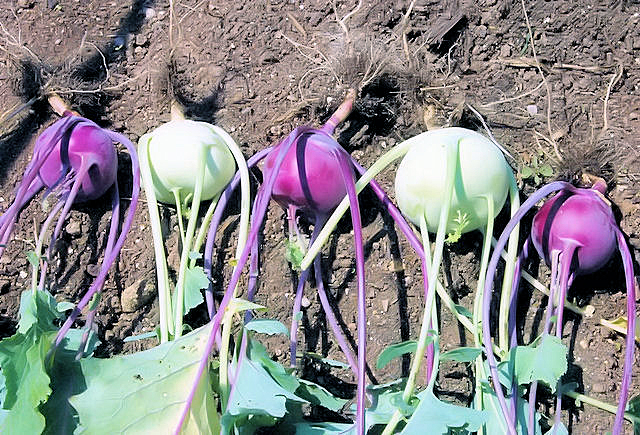
Just picked kohlrabi, love that purple color!

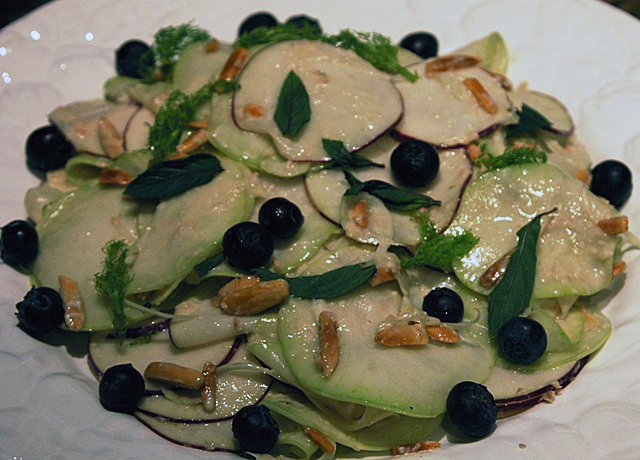
I was pleased to see the Best New Chefs issue of Food and Wine magazine of July 2011 included a kohlrabi salad from former Top Chef contestant,  Stephanie Izard. She was the winner of season four and currently is executive chef of The Girl and the Goat in Chicago. The goat part of the restaurant name comes from her last name, Izard, a type of goat antelope native to the Pyrenees mountains. I probably would have never made this recipe if it wasn’t for the fact that I was bored with making every variation of kohlrabi and apple slaw. A good combination, but it was time for something new. The balance of sweet and savory flavors in this recipe is spot-on. The crispness of the kohlrabi and fennel contrasts with the sweet blueberries and the warm nuttiness of the almonds and the  goat cheese. Since I am already a fan of Cypress Grove’s Humboldt Fog, I chose their Midnight Moon as the cheese to top my salad with but I’m certain that crumbles of a soft goat cheese would work as well. I did not peel my kohlrabi as indicated in the original recipe since it was fresh from the garden and it was sliced very thinly.

Trimmed bulbs, ready for slicing.


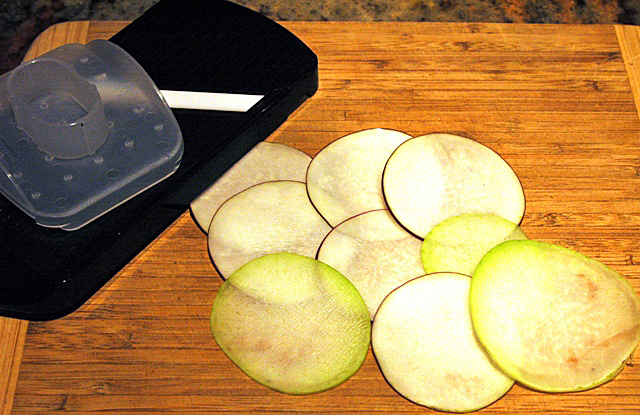
Notice how you can see through the slices…love my Kuhn-Rikon mandoline.


Kohlrabi, Fennel and Blueberry Salad

adapted from Stephanie Izard, Food and Wine Magazine

Ingredients

  • 1/2c slivered almonds
  • 1T minced peeled fresh ginger
  • 2T minced shallot
  • 1T white balsamic vinegar
  • 1T mayonnaise
  • 1 1/2t Dijon mustard
  • 1t soy sauce
  • 1t pure maple syrup
  • 1/4 canola or other flavorless oil
  • Salt and freshly ground pepper
  • 1 1/4lb kohlrabi, trimmed and very thinly sliced on a mandoline
  • 1 fennel bulb, trimmed and very thinly sliced on a mandoline
  • 1/2c semifirm goat cheese (I like Cypress Grove’s Midnight Moon,) shaved
  • 1c blueberries or pitted, halved sweet cherries
  • 1T torn mint leaves

Directions

  1. In a non-stick skillet, toast the almonds over medium heat until golden in color, about 4-5 minutes.
  2. In a blender combine ginger, shallot, vinegar, mayonnaise, mustard, soy sauce, and maple syrup and puree.  With the blender running, add the oil in a thin stream and blend until creamy. Season to taste with salt and pepper.
  3. In a large bowl, toss the kohlrabi with the fennel, cheese, toasted almonds with the dressing. Season to taste with salt and pepper and toss to coat.  Add the blueberries and mint and toss gently. Serve immediately.

May 19, 2012 Arugula and Strawberry Salad

 A marriage that began in the 70’s and is still going strong today is the arugula and strawberry salad. A mainstay of the once popular wicker and fern restaurants, the combination of peppery arugula and juicy sweet strawberries, unlike the leisure suit, still holds up today. We have several stages of growth in our arugula, thanks to Joe’s staggered plantings. I wanted to use the smaller leaves for salad as I thinned out the row. I took advantage of some of the first local strawberries from the farmers market, organic walnuts and creamy goat cheese to make this classic combination.

Arugula and Strawberry Salad

adapted slightly from Epicurious

Ingredients

  • 1/2 cup toasted walnuts
  • 2T sherry vinegar
  • 1 1/2 t fresh lemon juice
  • 2t finely minced shallot
  • 1t (or to taste) sugar
  • 2T canola oil
  • 1T walnut oil
  • Kosher salt and freshly ground pepper
  • 8c arugula, washed and spun dry, tough stems discarded
  • 1 1/2 c strawberries, trimmed and quartered lengthwise
  • 1/2c fresh goat cheese, crumbled

Directions

  1. Roast nuts in a shallow baking pan at 350F until fragrant and slightly browned, about 6-8 minutes, watch carefully. Cool nuts then coarsely chop.
  2. Whisk together vinegar, lemon juice, shallot, sugar. Add oils in a slow stream, whisking until well combined. Season dressing to taste with additional salt, pepper and a pinch more sugar.
  3. Toss together arugula, strawberries, walnuts and dressing to taste. Divide among salad plates, dot with goat cheese and a grind of freshly ground pepper.


May 18, 2012 Saute of Asparagus and Pea shoots


Today’s harvest

One of the spring garden’s most fleeting offerings are pea shoots.  Peas are the first seeds we plant in the garden. Snow peas or edible pods, as they are also called, are planted as early in March as possible, as soon as the ground is at it’s proper tilth. For several years we have been growing peas not just for their pods but some peas for the shoots alone.

Our first encounter with pea shoots was as a side dish in a Chinese restaurant where they are called dou miao . Once only available from Asian grocers, they have become increasingly common at the local farmers market. Pea shoots are the first vegetable ready to harvest from the garden, less than a month after their planting. The round leaves and wispy tips are reminiscent of a green butterfly. I pinch off the tender tips, the top several leaves and the tendril that ends the vine, in turn they will send out new growth for the next harvest in several days. It is hard to resist nibbling on a few while you are harvesting, they are crunchy and have the delicate flavor of  a fresh picked pea. Pea shoots are nutrient dense, an excellent source of vitamins C, K and A, and a good source of vitamin E.  The tendrils and leaves of any edible pea can be harvested for shoots. Just remember the shoots of the ornamental sweet pea are poisonous.

After they are rinsed and spun in a salad spinner they can be added raw to salads.  What might appear to look like a great quantity of shoots cooks down to next to nothing. A quick saute with some Asian sesame oil with a garnish of toasted sesame seeds is one of my favorite ways to prepare them. Last night I had asparagus from Milk House Farm so I combined the two together for a tasty spring side dish. We will enjoy pea shoots, and eventually peas until the warm summer temperatures in late June kill off the vines.

Snip off the tip and leaf right above the bottom leaf.


Saute of Asparagus and Pea Shoots

Recipe of my own design

  • 2 cloves garlic-peeled and chopped finely
  • 1 lb asparagus, ends trimmed, sliced on the diagonal in 1-2 inch pieces
  • 1 colander full of pea shoots, washed and spun 6-7 cups
  • Asian sesame oil and toasted sesame seeds
  • Kosher salt and freshly ground pepper
  1. Saute garlic in 1 T sesame oil, add asparagus and saute until asparagus is tender and beginning to brown, 5-6 minutes, this will depend on the thickness of the stalks.
  2. Add pea shoots and saute until wilted, about one minute. Add additional sesame oil, salt and pepper to taste. Top with toasted sesame seeds.

May 12, 2012 Jicama, Avocado, Radish and Orange Salad with Cilantro

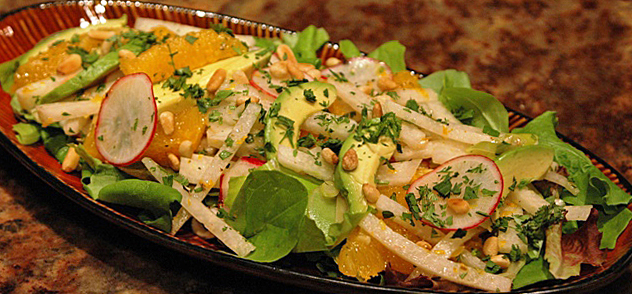
To say that I enjoy making salads would be quite the understatement. I love playing with the various elements that make up a interesting combination, crisp greens, raw and occasionally cooked vegetables, fruit, meats, grains, nuts and cheeses. Now that spring is here I can turn to the garden for some of my salad elements. Jicama, Avocado, Radish & Orange Salad originated with Fine Cooking magazine. This salad contrasts the crispness of the jicama and radishes with creamy avocado with the sweet tanginess of citrus.  The radishes and cilantro are from the garden and I made it my own with the addition of baby spinach and a sprinkling of toasted pine nuts. It would be appropriate with a Tex-Mex or South of the Border menu but would also be great with barbecued chicken.
The oranges in this salad are cut into supremes.  Supreming (soo-premming) is a technique that removes the membrane from citrus fruit so it can be served in slices. You will need a cutting board, a sharp knife to remove the peel and, as I prefer, a small thin blade knife to loosen the segments. Trim the top and bottom off the fruit so that it can stand up on the board.  Then, cut the skin from the flesh, starting at the top and following the curves down. Use your knife to cut the segments free from the membrane. I have been doing this for about a year and think my supreming skills are improving. It does take practice and not every fruit is perfectly segmented inside. Too much work? Substitute canned mandarin orange segments and a few tablespoons of orange juice in the dressing, I won’t tell…

Jicama, Avocado, Radish, Orange Salad with Cilantro

Adapted from Fine Cooking Magazine

Serves 6

Ingredients

  • 4 oranges
  • 1t cumin seeds
  • 1 medium clove garlic
  • Kosher salt and freshly ground pepper
  • 5T fresh lime juice or more to taste
  • Large pinch cayenne pepper
  • 1/4c extra virgin olive oil
  • 1 small jicama
  • 8 small radishes, cut into very thin round slices
  • 5 scallions, white and light green parts cut diagonally into thin slices
  • 2 large firm but ripe avocados
  • 1/4 c chopped cilantro
  • 4-5 cups baby spinach, washed and spun dry
  • 2T toasted pine nuts

Directions

  1. Finely grate 2t zest from the oranges and set aside. With a sharp knife, slice the ends off the oranges. Stand each orange on one of its ends and carefully pare off the peel and pith in strips. Working over a small bowl, cut the orange segments away from the connective membrane. Squeeze the membranes over the bowl to collect any remaining juice.
  2. Toast seeds in a dry skillet over medium heat, stirring until fragrant and a shade darker. Or, toast  in a shallow baking pan in a 350F oven, 5 minutes or so. Allow to cool and grind in a mortar and pestle or in an electric spice mill. Mince garlic and mash to a paste with 1/4t salt with the side of a large knife or in a mortar and pestle.  Place cumin and garlic in a small bowl and whisk in 2t orange zest, 3T orange juice, the lime juice and a large pinch of cayenne. Whisk in the olive oil.
  3. Peel the jicama and cut into matchsticks, 1/8 inch thick and 2 inches long. In a large bowl combine the jicama, radishes, scallions and toss with about 2/3 of the vinaigrette, add the orange segments and toss gently.
  4. Thinly slice the avocados, drizzle with vinaigrette and season with salt and pepper to taste. Place the spinach leaves in a serving bowl, top with the jicama mixture, then the avocado slices. Sprinkle with toasted pine nuts and chopped cilantro. Season to taste with remaining vinaigrette, salt and freshly ground pepper.

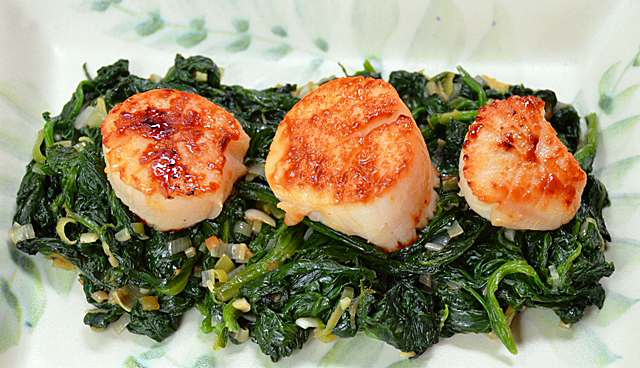
May 8, 2012 Seared Scallops with Spinach

 Scallops were a perennial favorite on my catering menu . Whether served wrapped in smoky bacon and served with a dill horseradish mayonnaise, or as a scallop puff on a crostini accented with dill and lemon, they were quick to disappear from the hors d’oeurve tray.  I learned early in my days as a caterer the importance of having a reputable seafood merchant. I knew of instances where the smaller sweeter (and more expensive) bay scallops were actually punched out of larger sea scallops. Other “scallops” were not scallops at all but were cut out of shark steaks.

 True scallops are sold in two different ways, wet or dry. Dry scallops have not been treated with water or chemicals, which gives them a shorter shelf life. They will range in color from vanilla to almost a peachy color and have a sweet briny aroma.  Wet scallops have been treated with a sodium phosphate solution that helps the scallops retain water for a longer period of time. It also gives them an unnatural uniformly white color.  The phosphate in the solution is an additive that is used in soap products.  So when a wet scallop is cooked it leaches a milky, slightly soapy solution. When you are at the seafood counter it is always best to ask if the scallops are wet or dry, and if they aren’t sure, run, don’t walk away from that store!

In the past ten years the addition of seared scallops became a part of my catering repetoire and is still my favorite way to prepare them now. Wet scallops will not work for this preparation because of the excessive water they exude. Before you cook scallops detach the tough adductor muscle, it peels off very easily.  High heat is the best way to cook scallops and be sure they are as dry as possible.  The outside of the scallop will have a beautiful caramelized crust while the inside is creamy soft, not tough.  I chose to serve it this evening on a bed of our fresh garden spinach.

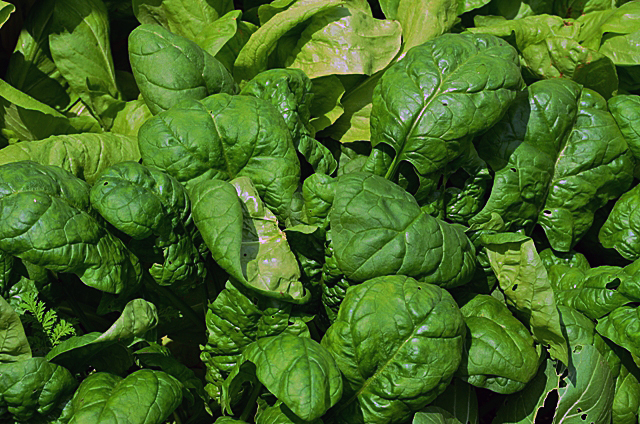
Garden spinach ready to harvest.

Seared Scallops with Spinach

Serves 2-3

Ingredients

  • 8 to 10 cups well washed spinach
  • 2 small leeks, chopped finely
  • 2 cloves garlic, chopped
  • 3/4 to 1 lb fresh dry scallops purchased from a reputable seafood dealer
  • Cooking oil that tolerates high temperature cooking-canola, grapeseed etc.
  • 1T butter and 1T olive oil
  • 6-8 cups well washed fresh spinach

Directions

  1. Clean the spinach by filling your sink with cold water. Soak the spinach to remove dirt and sand. The dirt and sand will sink to the bottom and the spinach will float to the top. Remove spinach to a colander while you drain the sink and clean out any dirt.  Repeat the soaking process several times, cut off any large stems and spin in salad spinner to remove excess water. Set aside.
  2. Pat scallops as dry as possible with paper towel or clean dishcloth
  3. Season well with Kosher salt and fresh ground pepper, if you are fussy, then it should be white pepper
  4. Heat oil over medium-high heat in a large non-stick pan that will hold all the scallops comfortably. Sometimes I use a brush to be certain the whole pan is coated. Be sure the pan is hot before adding scallops, a drop of water should bead up on contact.
  5. Add scallops, flat side down and cook undisturbed for several minutes, the length of cooking will depend on the size of the scallop, 2-4 minutes per side is a good guideline. Flip scallops and brown on the other side. they will still be somewhat firm to the touch. Transfer scallops to a platter and keep warm.
  6. Wipe residue out of pan, return to medium high heat. When pan is warm, add butter and oil.
  7. Add chopped leek and garlic to the melted butter and oil. Saute until leek is softened but not browned. Add spinach by the handfuls and saute until the spinach is cooked down.

May 6, 2012 Shrimp, Chickpeas & Spinach with Ginger and Cumin

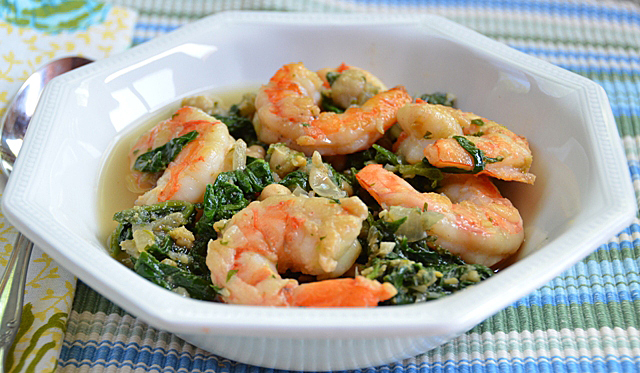
  An abundance of “mature” spinach in the garden and some shrimp in the freezer led me to this recipe, Shrimp, Chickpeas and Spinach with Ginger and Cumin. Since the advent of bagged salads within the last 20 years or so, baby spinach has been very common in supermarkets and the larger leafed spinach has been the spinach of choice for cooked preparations. I missed the baby stage for the first planting of our spinach. We have had wonderful salad greens from the cold frames and even with the staggered plantings Joe is doing, it is still a challenge to keep up with the greens.  I always have some frozen shrimp on hand for a quick dinner. Though Heller’s has the occasional fresh Florida shrimp, frozen shrimp, for this area of the country (mid-Atlantic) is not a bad thing. The shrimp we see in our supermarket seafood case, is thawed out.  Convenient, yes but you can’t be sure how long they have been thawed. I prefer to buy frozen in the 2lb bag to have on hand  and thaw what I need. It doesn’t take long at all. Either thaw overnight in the refrigerator or what I usually do, in a colander under cool running water.  Shrimp is sized anywhere from extra small, 61-70 lb to U10, which simply means under 10 shrimp a pound. Easy peel, meaning the shell is split down the back and deveined is the quickest way to go. Deveining isn’t that hard to do, either use a small paring knife or the tool that is specifically made for that purpose. The “sand vein” is actually the digestive tract, and although removal is not essential, it makes for a more attractive preparation. I made some changes to the recipe. I chose larger shrimp, making it less likely to overcook them. I substituted leeks from the garden, increased the amount of spinach because it cooks down so quickly, and used chicken stock instead of water to make a more flavorful broth.  A little bread on the side would be nice to sop up the juices. It’s even better the next day, if you are lucky enough to have any leftover.

 Shrimp, Chickpeas & Spinach with Ginger and Cumin

Adapted from Fine Cooking magazine

Ingredients

  • 1 lb jumbo shrimp, peeled and deveined
  • Kosher salt
  • 2T olive oil
  • 1/2 lemon cut into four wedges
  • 1 small onion or 2 leeks, finely chopped
  • 1 1/2 T finely chopped ginger
  • 1t ground cumin
  • 1t ground coriander
  • Pinch of cayenne pepper
  • 1 14-oz can chickpeas, rinsed and drained
  • 1 1/2 c low sodium chicken broth or stock
  • 1 lb mature spinach, well washed, stemmed and coarsely chopped
  • 1/4 c chopped fresh cilantro

Directions

  1. Toss shrimp with 1/2t salt in a small bowl. Heat 1T oil in a large nonstick skillet over medium high heat. Add shrimp and cook until one side  is pink, about 2 minutes. Turn shrimp over and continue to cook until shrimp is pink all over but still a bit translucent in the center, about 2 minutes more, do not overcook! Transfer the shrimp to a bowl squeeze one of the the lemon wedges over it and keep warm. I do this under the heat lamp of my cook top.
  2. Return the skillet to the stove and heat to medium. Add the remaining tablespoon of oil into the skillet and add the chopped leek or onion. Sprinkle generously with salt and cook until the edges are starting to turn brown, about 5 minutes. Add ginger and garlic, cook until fragrant, one minute. Add the cumin and cayenne, cook stirring until fragrant, about 20 seconds.  Add 1 1/2 cups chicken stock or broth, the chickpeas and 1/2t salt. Simmer over medium heat for 5 minutes to reduce stock a little and develop flavors.
  3. Using a potato masher, mash about 1/2 of the chickpeas right in the pan. Add spinach and cilantro. Using tongs, carefully toss the greens to wilt and help them cook evenly, about 2 minutes.
  4. Add reserved shrimp and any juices that have accumulated in the bowl. Cook for another minute or so to reheat and finish cooking the shrimp. Season to taste with salt .  Serve in warmed bowls with lemon wedges on the side.

May 1, 2012 Osso Buco

The finished dish, topped with gremolata and accompanied by risotto Milanese.

The last time I made osso buco was before the freak snowstorm we had last October. Osso buco, a hearty slow-cooked dish, is translated from the Italian, “bone with a hole”. The bone in this case is a cross cut veal shank. Veal shank is cut from the leg and benefits from slow cooking and gives the meat it’s melt in your mouth texture. Veal shanks are pricey. In October the shanks were 10.99 a pound at Wegmans. This time they told me they would have to order them and I wouldn’t be able to get them until next week.  Next stop, Costco where Plume de Veau veal shanks were 7.99 a pound, expensive still, but a relative bargain after Wegmans. With the veal shank you are paying for bone as well as the meat but the bone holds part of the treat, the marrow from the bone that melts into the sauce.

The first time I made osso buco was for a catering job. A gourmet club, a group of doctors wives hired me for their Christmas party.  They were so pleased with my dish that the hostess sent me a note months later saying she had the same dish in a fine restaurant with her son, and she thought mine was better. I chose the recipe because most of the work can be completed ahead of time, leaving more time to complete any side dishes, or as on this day, do a little plant thinning in the garden.

My experience in October 2011 was a bit different. We were without power for twelve hours, Saturday afternoon to very late that evening. The only part of the recipe I had completed were the aromatics, chopped onion, celery and carrots. I just resumed cooking Sunday morning, fearing more blackouts. There were a few, none lasting more than ten minutes, just enough time to reset all the clocks. My version of the recipe is different because of the last step, I take all the diced vegetables and in my case, home roasted tomatoes and peeled Juliet tomatoes and make a smooth sauce to cover the shanks. I also browned my shanks in bacon fat to add another interesting element of flavor. I like to accompany this dish with the customary topping of gremolata and serve it with risotto Milanese.

And “what is gremolata?” you ask. It is a mixture of chopped parsley, garlic and lemon peel, and in Milan, anchovies.

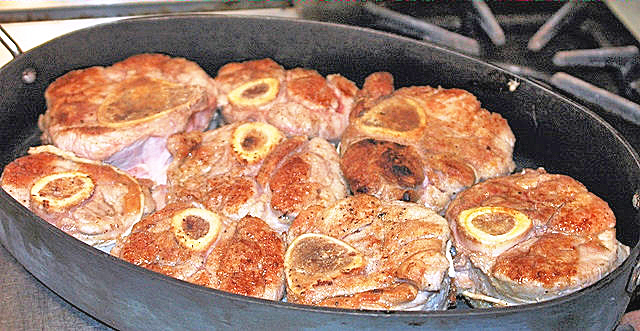
The first step is to brown the veal shanks. Those bones hold a lot of marrow.

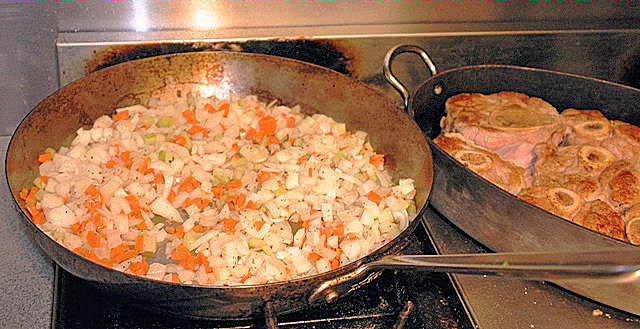
The onion, celery and carrots are sauteed in the same pan the shanks were browned in.

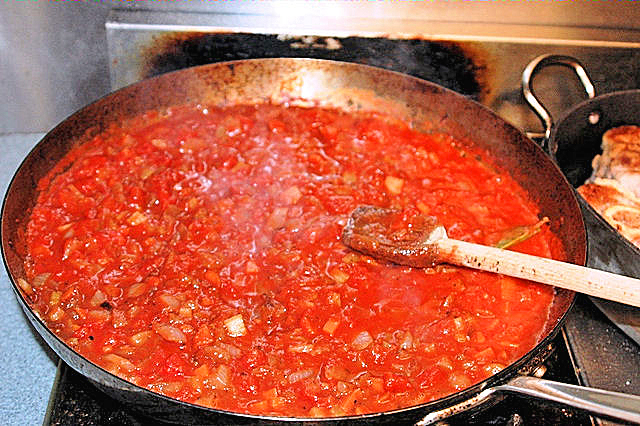
The next addition, tomatoes, white wine and a bay leaf.

After 1.5 hours, the shanks are ready to come out.

Osso Buco – my own interpretation

Ingredients:

  • 8 pieces of veal shank, 2 inches thick
  • Kosher salt and freshly ground pepper
  • All purpose flour to dust the veal shanks
  • 3-4T bacon fat or olive oil
  • 4c finely diced yellow onion
  • 1 1/2c finely diced celery
  • 1 1/2c finely diced carrot
  • 1t each of dried thyme, oregano and marjoram
  • 1c dry white wine
  • 3T tomato paste
  • 2 28-oz cans Italian plum tomatoes, drain and chopped or I used 2 quart bags of frozen peeled Juliet tomatoes and 1 quart bag of roasted tomatoes
  • 2 fresh bay leaves

Directions:

  1. Preheat oven to 350F or 325F convection. Season shanks generously with salt and pepper. Place flour in a small bowl.  Dredge the shanks in flour and shake off excess.
  2. Heat fat or oil in a large skillet over medium high heat, add shanks to the pan, do not overcrowd and brown shanks on all surfaces, about six minutes per side. Set aside and repeat with remaining shanks.
  3. Add the onion, celery and carrot to the empty pan, cook this mixture until the onion is translucent, about 8-10 minutes or so. Add the dried herbs, wine, tomato paste,  tomatoes, a teaspoon of salt and a few grinds of pepper. Bring to a boil and simmer for five minutes.
  4. Place shanks in a dutch oven, pour the chunky sauce over shanks-it should come up halfway up the sides, if not, add a little chicken broth and cover with lid. Cook the meat until tender, about 1 1/2 hours. Remove as much of the tomato-vegetable mixture from the pan as possible, it is okay if some clings to the shanks, keep the shanks  in a warm oven. Put the mixture through the medium disk of a food mill to make a rich tomato sauce. Warm sauce over low heat. Spoon the sauce over the shanks.
  5. Garnish the shanks with gremolata and serve with risotto Milanese.