October 13, 2015 End of Summer Green Gazpacho

DSC_4896a
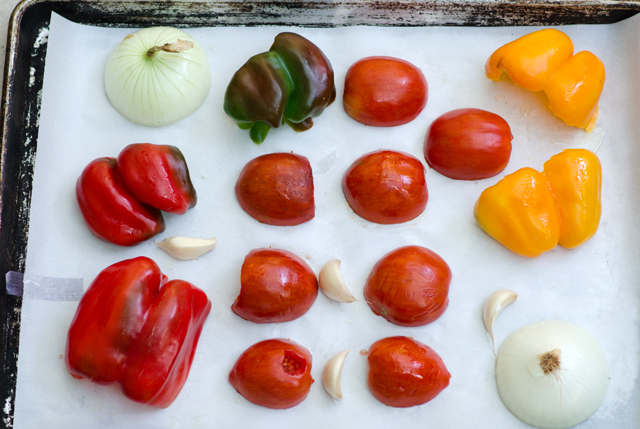
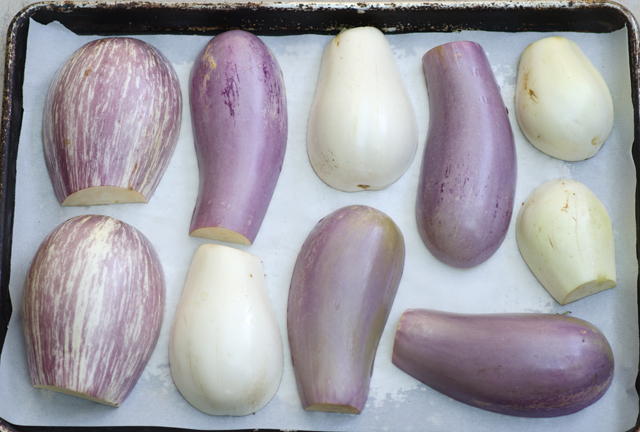
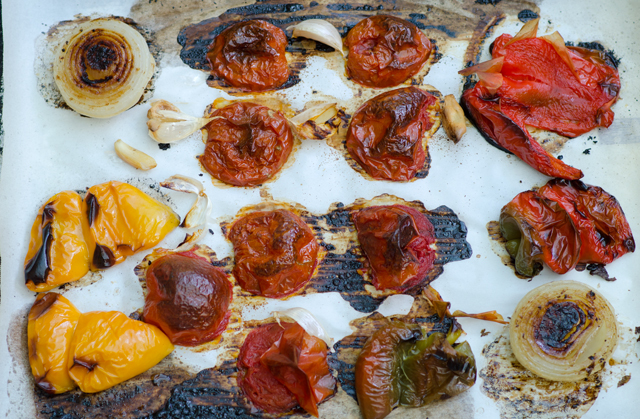
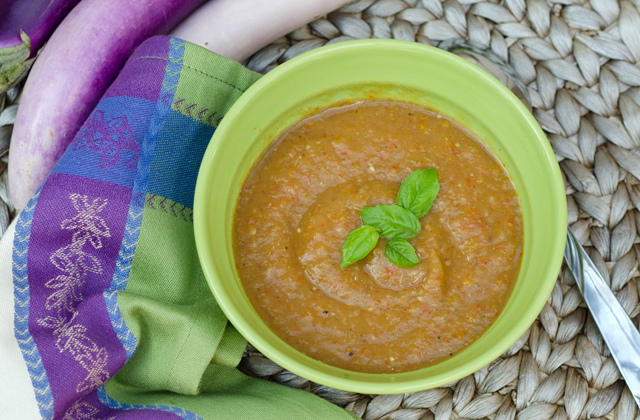
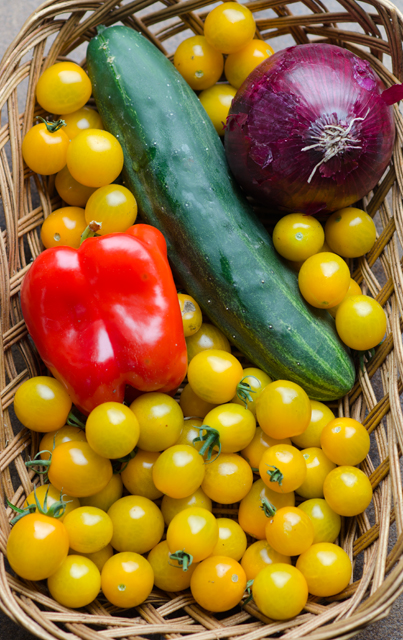
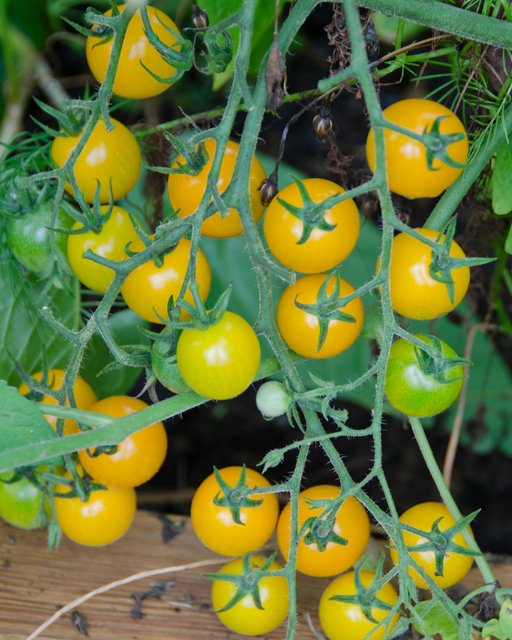
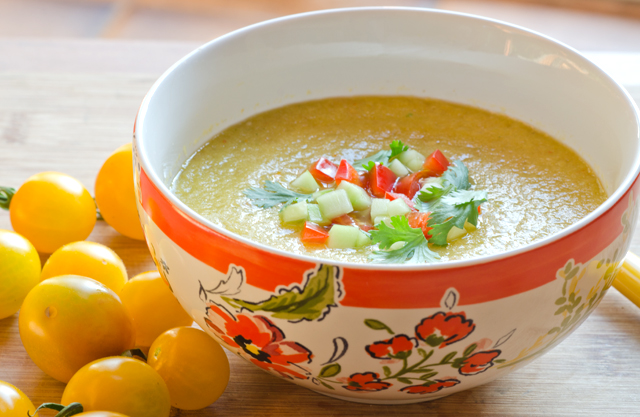
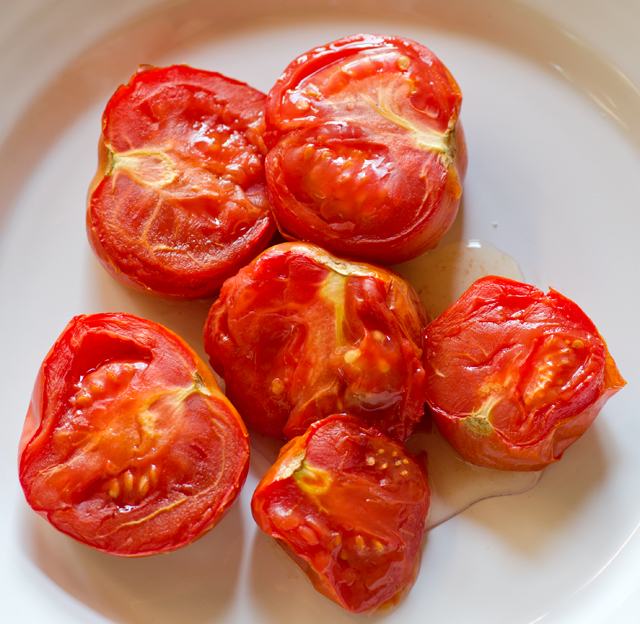
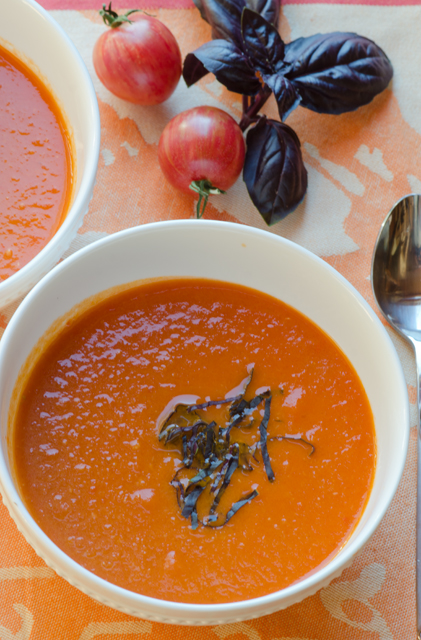
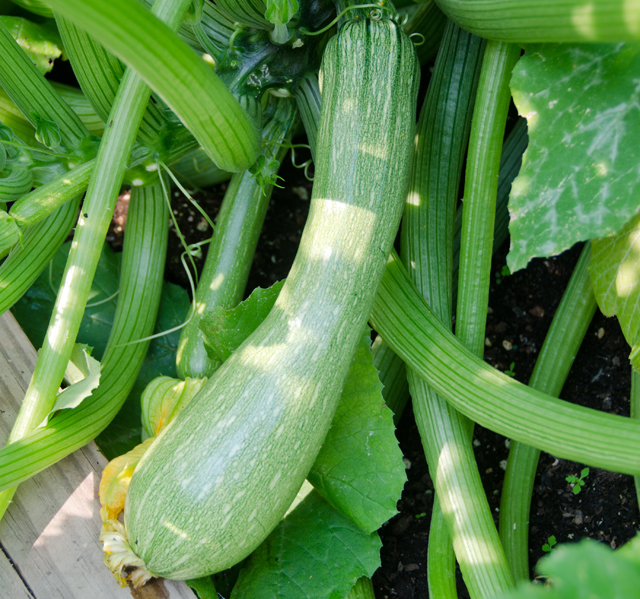
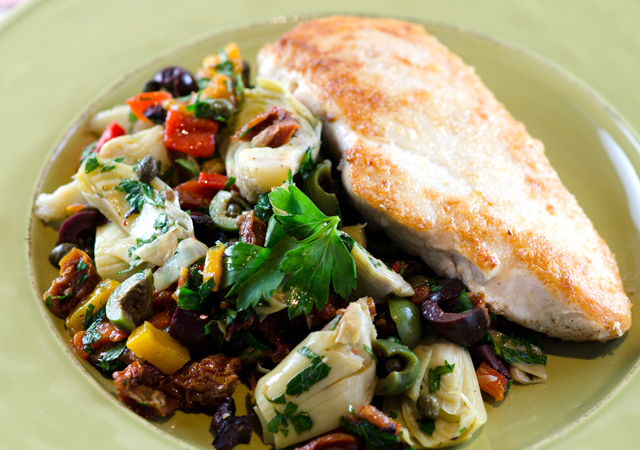
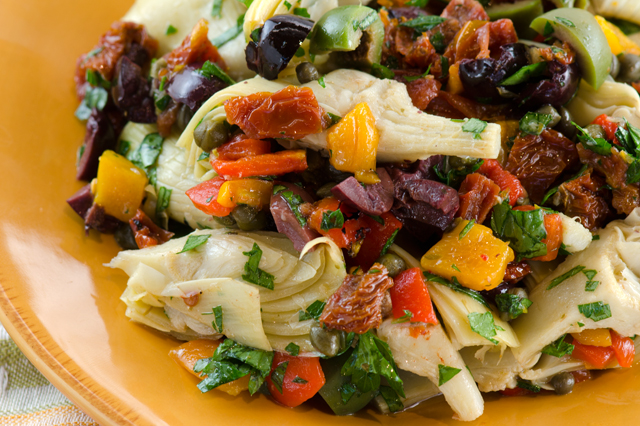
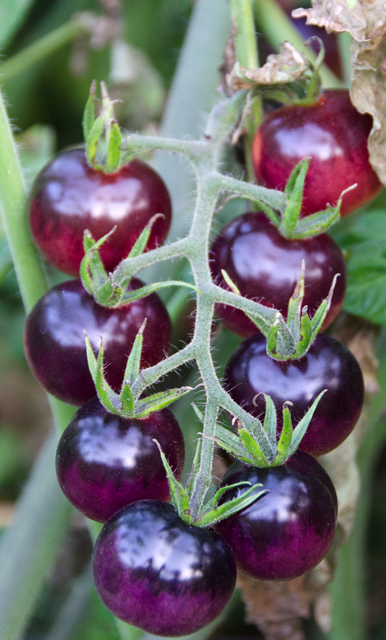
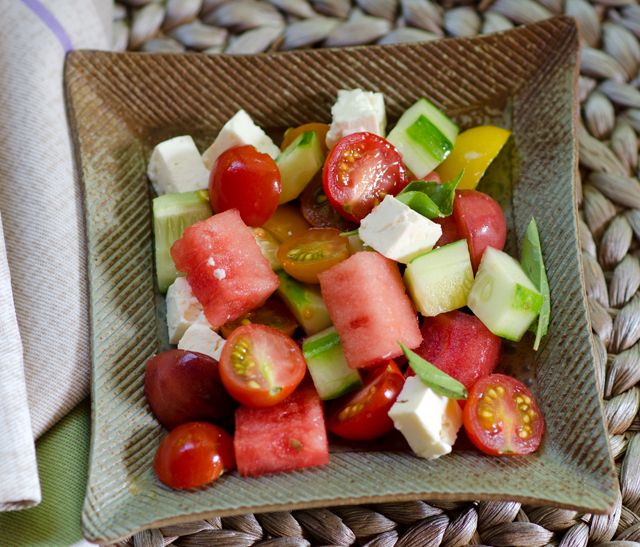
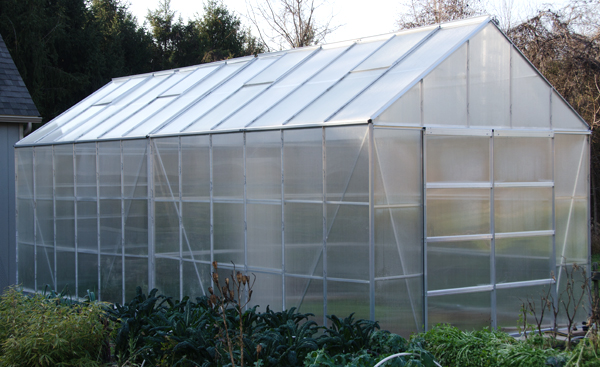
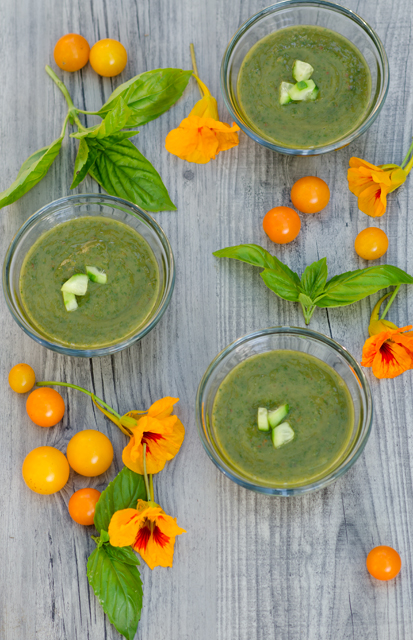
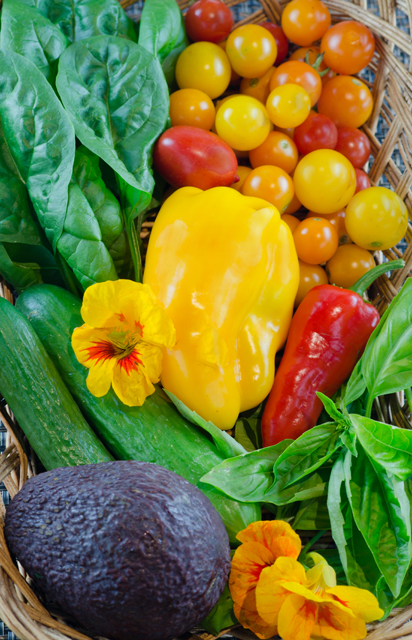
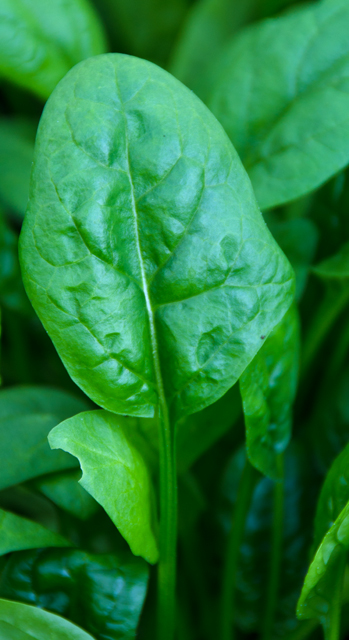
Summer was officially over several weeks ago and the first touch of frost was on our lawn Sunday. That doesn’t mean the garden is giving up yet. There are still some tomatoes, peppers, both sweet and hot, eggplants and herbs ready for the picking.The tomatoes may not be the prettiest, but they are certainly the sweetest.  Joe has planted a large crop of spinach and salad greens in the garden greenhouse that we will enjoy for several months to come. After a week of indulging in Denver’s finest cuisine it was time to get back on the healthy eating track. What better way to use some of  these ingredients than in a cold refreshing green gazpacho?

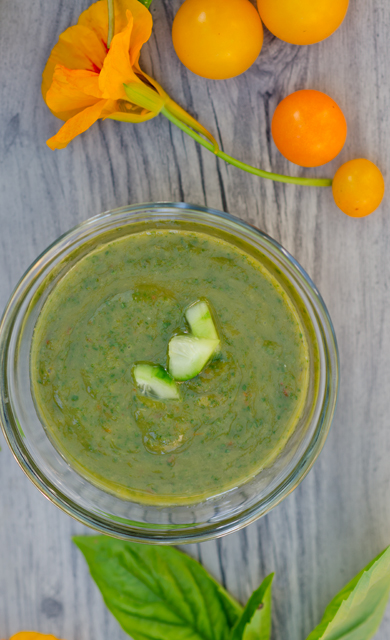
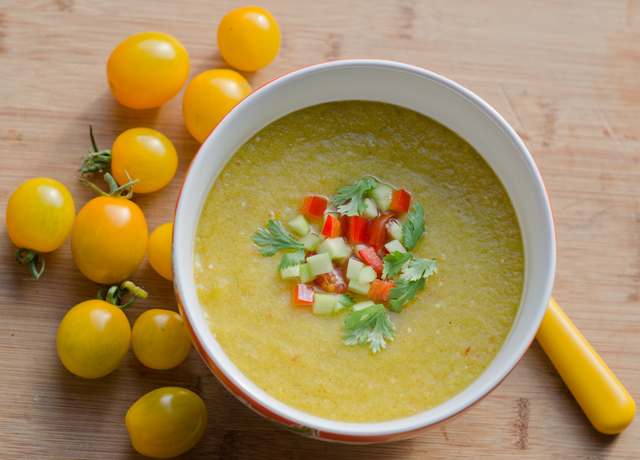
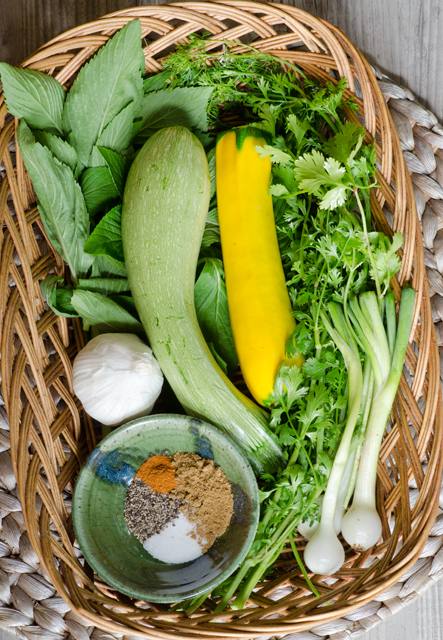
Gazpacho by definititon is a liquid salad that originated from the southern Spanish region of  Andalusia. The name possibly originated from the Latin word “caspa” meaning fragments, alluding to the small pieces in gazpacho. You can make this as chunky or as smooth as you choose. I love the addition of avocados in our nightly salad with dinner and had a few extra ripe ones to give this soup a creamy texture. I used the bounty of our garden and the addition of a cucumber for it’s crisp sweetness. Give this soup several hours to chill and the flavors to blend.

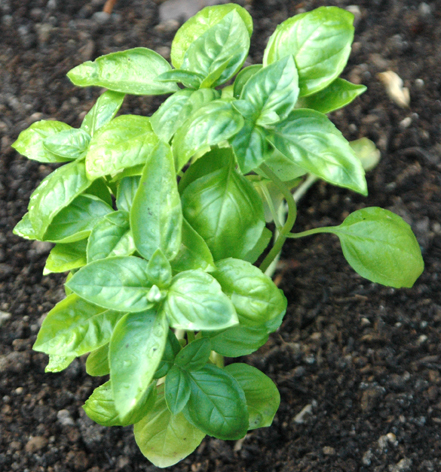
Substitutions  are permitted, watercress for the spinach, that will bring a spicy kick to the soup.  Cilantro can sub for the basil, add a touch of Tabasco if you don’t have a fresh hot pepper, I would be happy to share.  I always stock up on vinegars at The Tubby Olive and used their Alfoos Mango in my soup, love them in our vinaigrettes too. If you don’t  have a fruit vinegar, use white wine vinegar and a touch of honey. A little chopped cucumber as garnish gives a little crunch and since our nasturtiums are still in bloom I couldn’t resist adding a few for their vibrant color and spiciness.

DSC_4913a

A new crop of spinach in the garden greenhouse is ready for harvest.


End of Summer Green Gazpacho

Makes about 4 cups

  • 2 medium tomatoes or 12-15 small tomatoes
  • 3-4 small cucumbers peeled and cut into chunks
  • 1 avocado, flesh cut into large chunks
  • ½c basil leaves
  • ½c flat leafed parsley leaves
  • ½ to 1 whole hot pepper, jalapeno or serrano
  • 1 sweet pepper, seeded, stemmed and cut into chunks
  • 2c packed baby spinach leaves
  • 2 cloves garlic, finely chopped
  • 2-3T fruity balsamic vinegar (I used Mango from Tubby Olive)
  • Cold water to blend
  • Kosher salt and freshly ground pepper
  • Water as needed
  • 1T extra virgin olive oil

Directions

  1. Reserve ½ cup cucumber chunks and chop finely.
  2. Combine the tomatoes, cucumbers, avocado, basil, hot pepper and sweet pepper, spinach, garlic and balsamic vinegar with cold water as needed in the bowl of a food processor or blender. Process until smooth adding more water as necessary to achieve a smooth texture. Taste and season with salt, pepper and more vinegar if desired.
  3. Refrigerate until cold, pour into bowls and garnish with cucumber chunks.

DSC_4906a

September 23, 2015 End of Summer Eggplant Soup

DSC_4242aEven though the temperatures are still in the eighties, fall is rapidly approaching and  it’s time to say goodbye to our summer vegetables. What better way to use them now and enjoy them later than in an end of summer eggplant soup. Another good reason to have soup on hand was the stomach virus that Joe and I suffered through last week. Nothing tastes better when you are on the road to recovery is a nutritious soothing soup.

I am still picking eggplants, peppers and tomatoes, but not in the same quantities as a few weeks ago. The days are getting shorter and even though the days are warm, the nights are definitely cooler. After an afternoon pick yesterday I came back with quite a nice variety of eggplants, several peppers and a few tomatoes.   This is the type of recipe you could make differently every time, depending on what is still there for the picking. I wanted to make this as easy as possible so I decided to roast the vegetable first before combining them in a soup. Carrying over on the easy concept, I lined the baking trays with parchment to make clean up a snap. I cut the eggplants in half and lightly brushed the cut edge with olive oil and sprinkled with salt and pepper.  On the second large baking sheet I added several tomatoes, peppers, an onion and some unpeeled garlic cloves, brushed everything with olive oil, and sprinkled on kosher salt and freshly ground pepper.

I decided on a 375°F oven, the temperature we use when oven roasting vegetables. I checked the tray with the tomatoes, peppers, garlic and onion first, they were done in about 12-15 minutes, getting a nice toasty brown. The eggplants took a little longer, they are done when the skins start to collapse. Once cooled, it’s easy to separate the flesh from the skin. Squeeze the garlic from the skins and roughly chop the onion. I pureed the vegetables in the food processor in batches. Because some of my eggplants were seedy I put the puree through a food mill with a medium disc. Pour the finished puree into a stockpot. I added ground cumin, coriander, salt, freshly ground black pepper and a touch of cayenne. Add chicken or vegetable stock to thin out the consistency. Make some to enjoy now and freeze some for the cold winter months.

DSC_4181a

Late summer harvest of eggplants.

DSC_4230a

Place vegetables on a parchment lined baking sheet.


The skin easily peels off the peppers and tomatoes. Roughly chop the onion.
Eggplants are ready when they start to collapse. The flesh separates from the skins.


End of Summer Eggplant Soup
Serves: 6

Ingredients

  • 3 ½lb eggplant, any type, halved lengthwise
  • 2 red or yellow bell peppers, or any combination, halved and cored
  • 3-4 tomatoes, halved and cored
  • 1 small onion peeled and halved
  • 4 garlic cloves
  • Olive oil
  • Kosher salt and freshly
  • ½t ground cumin
  • ½t ground coriander
  • 3-4 cups chicken or vegetable stock
  • Basil leaves as garnish

Directions

  1. Preheat oven to 375°F.
  2. Line two large baking pans with parchment paper.  Brush cut side of eggplant with olive oil, sprinkle with salt and pepper and arrange cut side down in one layer on baking sheet. On the second sheet,  arrange tomatoes, bell peppers, garlic, and onions, cut side down, in a single layer. Brush with olive oil and sprinkle with salt and freshly ground pepper. Bake vegetables until eggplant and bell peppers have a slight char on their skins. Check at 15 minutes, as garlic may need to come out earlier so that it doesn’t burn. Let cool until ready to handle. Remove skins as much as possible.
  3. Working in batches, pulse vegetables in a food processor, you can either roughly chop or take them down to a puree. If necessary, put the mix through a food mill.  Transfer vegetables to a large stockpot and add broth and spices. Cook for 15-20 minutes over medium heat, stirring occasionally.
  4. Adjust seasonings to taste.
  5. Serve garnished with basil leaves

DSC_4239a


August 13, 2015 Yellow Tomato Gazpacho

DSC_3992aIn August, when tomatoes are at their peak, I enjoy making cool and refreshing soups like this yellow tomato gazpacho. This recipe, a classic from Los Angeles chef Suzanne Goin from her cookbook, Sunday Suppers at Lucques, combines a few of summer’s best offerings and comes together in very little time.

This is a recipe that demands the freshest of ingredients, whether your tomatoes were picked right from the garden or bought at the farmers market. Our bright yellow Sweet Gold  tomatoes are one of a trio of cherry tomatoes available from Renee’s Garden Seeds that Joe has planted for several seasons now. Sweet Golds have a full, sweet, fruity flavor with little acidity. Their flesh is dense and crack free compared to varieties we have grown in past seasons.

The most time consuming part of the recipe was blanching and peeling the tomatoes. I’m pretty sure Ms. Goin doesn’t make her soup with about 75 yellow cherry tomatoes! But that said, it took less than a minute to blanch the tomatoes and the skins slipped off very easily, once they cooled down a bit. I did not core the tomatoes as called for in the original recipe, because they were small. The original recipe called for red wine vinegar, I substituted a white grapefruit balsamic to emphasize the fruitiness. The blanched tomatoes along with cucumber, jalapeno, cilantro, garlic, vinegar and oil are blended in batches. Since I prefer a smoother texture, I put the soup through a food mill.

As with all cold soups this needs to be chilled until very cold. While you are chilling the soup, it’s time to prepare the garnishes. Finely dice cucumber, red pepper for a nice contrast and some red onion. Season some red cherry tomato halves with salt and pepper and prepare some cilantro leaves. If you don’t like cilantro, substitute some flat leafed parsley. The finishing touch is a drizzle of your best quality extra virgin olive oil.

This recipe is great for entertaining, everything can be made in advance, soup chilled and garnishes prepped. It also could be dressed up with a seared scallop or a poached shrimp on top. Yellow tomato gazpacho can be served family style too. Serve the soup in an attractive container, garnish with tomato halves and pass the diced vegetables on the side.

DSC_4002a

Yellow Tomato Gazpacho

Serves 6

Ingredients

  • 2½lb ripe yellow tomatoes
  • 3 small or 1 large cucumber-reserve part for garnish
  • ½ jalapeno, seeded and cut in half
  • Cilantro or flat leafed parsley sprigs
  • 2 garlic cloves, coarsely chopped
  • 2T red wine vinegar
  • 1/3c extra virgin olive oil (optional)
  • Kosher salt and freshly ground black pepper
  • 3T diced red or orange sweet pepper
  • 3T diced red onion
  • 18 small cherry tomatoes, cut in half
  • Fine quality extra-virgin olive oil for drizzling
The skins of the Sun Gold tomatoes slipped off easily after they were blanched.

Directions

  1. Blanch the yellow tomatoes in rapidly boiling water until the skins begin to burst, 30-45 seconds. Cool the tomatoes in a bowl of ice water for a few minutes. Once cool enough, use your fingers to slip off the skins. If using small tomatoes, leave them whole, for large tomatoes, core and coarsely chop. Reserve the ice water.
  2. Reserve about 3T of  peeled and seeded cucumber for the garnish. Peel and coarsely chop the rest of the cucumber.
  3. Place half of the yellow tomatoes, the coarsely chopped cucumber, jalapeno, several cilantro sprigs, garlic, vinegar and olive oil (if using) in a blender with salt and pepper to taste. Process on the lowest speed until the mixture is broken down. Turn the speed to high and puree until the soup is completely smooth. If the soup is too thick, add a little of the reserved ice water. Strain the soup through a fine mesh sieve or a food mill, pressing out as much liquid as possible. Taste for  seasoning. Repeat with the rest of the soup ingredients. Chill the soup in the refrigerator until very cold.
  4. While you are waiting for the soup to chill, dice the cucumber, pepper and red onion. Toss them  together in a small bowl.  Season the cherry tomatoes halves with salt and pepper To serve, pour the gazpacho into chilled soup bowls and scatter the pepper mixture over the soup.  Place 6 cherry tomato halves and a few cilantro leaves at the center of each bowl. Finish each soup with a drizzle of olive oil.
Sun Golds at different stages of ripeness.

DSC_3999a

August 6, 2015 Smoked Tomato Soup

DSC_3892aSituated just 30 miles north of New York City on the former Rockefeller estate in rural Potantico Hills, New York is Blue Hill at Stone Barns. It is a restaurant that exists within the Stone Barns Center for Food and Agriculture and a four season working farm. The mission of James Beard award winning chef Dan Barber is to “create a consciousness about the effects of everyday food choices”.

One of the first true “farm to table” restaurants, the menu at Blue Hill is based on what the farm has harvested that day, not on the diner’s whim. I can relate, that’s how we eat from spring to fall, especially now when the harvest from our garden is so abundant.  I am freezing buckets of string and wax beans, the zucchini harvest is plentiful and I have just started roasting tomatoes to freeze for winter soups, stews and chilis. Needless to say, I am always on the hunt for new takes on familiar recipes. One that recently caught my eye was a recipe that has been published in both Food and Wine magazine and Bon Appetit, chef Barber’s Smoked Tomato Soup.

The idea of smoking tomatoes intrigued me, I have smoked salmon, every variety of poultry, and even cheese. In this recipe, some of the tomatoes in the soup are skillet-smoked, a chef’s trick that is easily achieved by the home chef. Before you begin this recipe, turn the kitchen exhaust fan on.  Fragrant wood chips are scattered in a cast iron skillet and heated until they begin to smoke. Tomato halves, cut side up of course, so none of the juices are lost, are placed on a thick foil square. The skillet is taken off the heat, covered tightly and the tomatoes are allowed to sit until they are smoky, 5-8 minutes. Alternately, as I did, start with a stovetop smoker and spread the wood smoking dust on the bottom of the base pan.The drip tray and rack are placed on top. I placed the tomato halves on the rack, closed the lid and smoked the tomatoes for 10 minutes. It is important to only use wood chips or dust that are specifically made for smoking, and not sprayed with chemicals.

On the stovetop, an onion, a leek, (the first harvested from the garden), garlic, bay leaves and coriander seed are sauteed over medium heat. The recipe also calls for 2 teaspoons of fresh or prepared horseradish, an interesting addition that didn’t make the soup hotter but added another flavor dimension. The rest of the tomatoes are chopped and added to the soup along with chicken broth. To make this recipe vegetarian, substitute vegetable broth for the chicken. Let the pot simmer for about 45 minutes, remove the bay leaves and blend the mixture. Butter adds to the richness of the soup, but you can eliminate it if you are watching your calories. Top the soup with a chiffonade of basil.  Served warm or cold, smoked tomato soup is a refreshing summer treat.

DSC_3871a

Smoked Tomato Soup

Serves four

Ingredients

  • 4lb. plum tomatoes, halved and divided
  • ¼c olive oil
  • 1 large onion, chopped
  • 1 large leek, white and pale green parts only, halved lengthwise
  • 3 garlic cloves, crushed
  • 2 bay leaves
  • 2tsp coriander seeds
  • 2tsp finely grated fresh horseradish or prepared horseradish
  • 1½c low sodium chicken broth
  • 4T unsalted butter at room temperature
  • Kosher salt, freshly ground pepper
  • Thinly sliced basil leaves (for serving)

Special equipment

  • ½c hickory, pecan or apple wood chips
  • 2T finely ground oak chips

Directions

  1. Scatter wood chips in a medium cast-iron skillet and heat over high until chips begin to smoke, about 5 minutes. Cut a 24″ sheet of heavy duty foil and fold in half twice more to make a large square. Fold in half twice more to make a small, thick square. Place the square carefully over the chips and set 5 tomato halves, cut side up on top, remove skillet from heat. Cover with foil and top with a lid or another medium skillet. Let tomatoes sit until barely softened and smoky, 5-8 minutes. Transfer tomatoes to a plate and let cool slightly.
  2. If you have a stovetop smoker:  Place 2 tablespoons of finely ground oak chips in the bottom of the base pan of a stovetop smoker. Set the drip tray on top of the chips, and place the rack on the drip tray. Place 5 tomato halves, cut side up on the rack, and slide the lid closed. Place the smoker on the stovetop. Set the heat to medium, and smoke the vegetables for 10 minutes.
  3. Meanwhile, chop remaining tomatoes. Heat oil in a large pot over medium heat and cook onion and leek, stirring occasionally, until tender but not taking on any color, 8 to 10 minutes.
  4. Stir in garlic, bay leaves, coriander seeds and horseradish and cook, stirring occasionally, until fragrant, about 2 minutes.
  5. Add chopped tomatoes and broth, increase heat to medium high and bring to a boil. Reduce heat, cover pot and simmer until the tomatoes are soft, 35-45 minutes. Let cool slightly, discard bay leaves.
  6. Working in batches if needed, blend tomato mixture, smoked tomatoes and butter in a blender until smooth. Strain soup through a food mill with the medium disc in place into a large bowl; season with salt and pepper. Serve warm or at room temperature topped with chopped basil.
Tomatoes after smoking, softened and smoky!

DSC_3911a


July 11, 2015 Turkey Zucchini Meatballs in Tomato Sauce with Zucchini Noodles

DSC_3563aThis year, after the holidays I was on the hunt for interesting healthy, flavorful recipes. I found just what I was looking for in turkey zucchini meatballs. The original recipe was for turkey and zucchini burgers from chef, restaurateur, and cookbook author Yotam Ottolenghi’s beautiful book, Jerusalem. Just like all the other recipes I have tried of his, the results were delicious.. It was easy enough to adjust the size of the original slider sized burgers to make into meatballs instead. Grated zucchini gives the typical ground turkey meatball the additional moisture that it needs.  Since zucchini is 95% water, it is very important to squeeze all of the excess moisture out of the shredded zucchini so the mixture holds together well.  The turkey and zucchini are combined with fresh cilantro and mint, along with garlic, cumin and spicy cayenne pepper to give them a little kick.  I served them as suggested with a sauce of Greek yogurt, lemon and sumac. At that time in the middle of a cold snowy January I was bemoaning the fact that I had to buy the zucchini and the herbs and if it were July, well, those ingredients would be from our garden.

It’s July now and I remembered to make the turkey zucchini meatballs again, this time with our fresh picked zucchini and herbs from the garden. Back in January  I also thought it would be a good summertime variation on the recipe to serve the meatballs with tomato sauce and zucchini “noodles”. Our zucchini vines are producing like mad, I am picking four to six zucchini and yellow squash a day. That doesn’t count the ones that hide under the large leaves and turn into baseball bats!

To make the “pasta” choose straight sided zucchini or yellow squash, preferably of a medium size in diameter, the longer the better. My tool of choice for making the strands is the Kuhn Rikon stainless steel julienne peeler. Steady the zucchini with one hand, start at the top, press the teeth of the peeler into the flesh and pull down. Keep shredding on all sides until you reach the seedy interior. Place the strands in a bowl and separate the strands that stick together with your fingers. I lightly salt my pile of “pasta” to extrude any excess liquid.  I cook the strands in a saute pan, just long enough to warm them up a little and evaporate any additional excess liquid. I still want my zucchini to have a little crunch. If you prefer you can serve the meatballs with the pasta of your choice.

Our tomatoes are just starting to come in now, not quite enough to start making sauce. Until then I will use a good quality store brand. I like to warm the sauce and add the meatballs that I have kept warm after cooking them. Next time I will adjust the herbs in the meatballs for this dish, I think basil and a little oregano would complement the sauce and zucchini noodles nicely.

DSC_3458a

DSC_3465a

DSC_3554a
I love the different varieties of zucchini and squash we grow.
This time I had our own zucchini and herbs for the meatballs. I substituted baby shallots for the green onions.


Turkey and Zucchini Meatballs

Serves 4-6

Makes 18-20 meatballs

Ingredients for Meatballs

  • 1lb ground turkey, I used a 93/7 lean to fat ratio
  • 2c grated zucchini-wrung out in a clean tea towel to remove excess moisture
  • 3 scallions, white and green, thinly sliced
  • 1 large egg
  • 2T chopped mint
  • 2T chopped cilantro
  • 2 cloves garlic, crushed or finely chopped
  • 1t ground cumin
  • 1t table salt
  • 1/2t freshly ground pepper
  • 1/2t cayenne pepper
  • about 1/8c of a neutral cooking oil, canola, safflower
  • 3-4 cups of your favorite tomato sauce, warmed

Directions

  1. Preheat the oven to 425°F. In a large bowl combine all the ingredients for the meatballs, except the cooking oil. Mix well with your hands. Shape into 2″ balls. Place meatballs on a well greased baking sheet to ready for cooking. Pour enough oil into a large heavy frying pan to form a layer about 1/16 inch thick on the bottom of the pan. Heat over medium heat until oil is shimmering, sear the meatballs in batches on all sides. Cook each batch for about 4 minutes adding oil as needed, until browned.
  2. Transfer the seared meatballs to a baking sheet and place in the oven for 5-7 minutes, or until just cooked through. Serve warm with tomato sauce

Ingredients for Zucchini “Noodles”

  • 3-4 large straight sided zucchini and/or yellow squash
  • Kosher salt
I like making shreds with the julienne peeler, you could make them in a food processor with the shredding disk or a spiralizer tool I have seen in supermarkets.

Directions

  1. Wash and trim zucchini and/or squash. Cut stem and root end off. On a cutting board, steady your squash with one hand and shred with a julienne peeler. Start at the top, press the teeth of the peeler into the squash and pull all the way down.
  2. Shred on all sides of the squash until you reach the seeds. Repeat with the rest of the squash. Place the strands in a very large bowl, separate the strands that stick together and salt evenly. Let sit for 10 minutes to extrude any excess water.
  3. Over medium heat cook the strands in a large sauté pan to warm up the squash and remove any excess water.

DSC_3571a


February 6, 2015 Mediterranean Style Pan Seared Chicken Breasts

DSC_1136aMy yearly “pantry purge” brought to my attention some items that would expire in the next few months and needed to be used sooner rather than later.  The jar of marinated artichoke hearts I bought at Trader Joe’s last year would reach it’s expiration date in a month.  Not wanting to waste them, I started with the artichoke hearts as a foundation. I looked for other items on the shelf that would add some complimentary Mediterranean flavors.  Also in the pantry I found jarred sun dried tomatoes and roasted peppers. In the refrigerator I found a container of olives, a previously opened  jar of capers and some fresh parsley. I was set to put together an improvised combination that would work well as a topping for the chicken breasts I planned on cooking that evening. I was calling it a “salsa” though Joe pointed out there was nothing sauce-like about it.

To make this dish I started with the marinated artichoke quarters, draining and reserving the marinade in case I needed to add some to the finished dish. The sun dried tomatoes were next, and even though I drained some of the oil off,  they retained enough to give the right balance.  Capers add a salty element to the dish so I made sure to rinse them well before adding them to the dish. I used Kalamata olives and Castelvetrano, an olive with a mild buttery flavor and one of my favorites. The red and yellow roasted peppers,  just needed to be drained and chopped. Combining all of the ingredients in a medium bowl I tasted for seasoning and in this case, a little bit of lemon juice and  a splash of balsamic vinegar was the right addition.

So what should I call this? It’s not quite a sauce, but is a versatile topping for fish, chicken, pasta, it could also be used as an omelet filling or even as a topping for a flatbread pizza.  The ingredients are interchangable as well. Petite diced canned tomatoes could be substituted for the sun dried tomatoes, mushrooms for the artichoke hearts, a little pesto would be a good addition, you can see what I mean. It’s just important to taste as you go to achieve the right balance of flavors.

This would have been great over the poached chicken breasts I made from the last post but I decided to learn another method.  In this recipe, also from Cooks Illustrated, boneless chicken breasts are lightly salted, then parcooked in a covered casserole in the oven. The chicken is then pan seared in a moderately hot skillet and kept moist with a slurry of flour, butter and cornstarch that is brushed on at the end. It gives a nice coating to the chicken and helps it stay moist. As with all meat, poultry and fish recipes, an instant read thermometer takes away the guesswork  and is essential for the best results.

DSC_1107a
The ingredients for the topping.

Mediterranean Topping

Makes about 4 cups

Ingredients

  • 2c marinated, quartered artichoke hearts from a 12oz jar, drained (save liquid)
  • 2T capers, drained and rinsed
  • 1/2c sun dried tomatoes, drained, chopped and lightly patted dry
  • 1/2c olives, combination of green and black, pitted and chopped
  • 1/3c chopped roasted peppers
  • 1/4c chopped fresh parsley
  • Balsamic vinegar and lemon juice to taste
  • Kosher salt and freshly ground pepper

Directions

  1. In a medium bowl combine the artichoke hearts, capers, sun dried tomatoes, olives, roasted peppers and parsley.
  2. Add balsamic vinegar, salt and freshly ground pepper to taste.

DSC_1115a

DSC_1124a

Pan Seared Chicken Breasts

From Cooks Illustrated March 2010

Serves 4

Ingredients

  • 4 boneless skinless chicken breasts, 6-8 ounces each, trimmed of excess fat
  • 2t kosher salt (1t regular salt)
  • 1T canola oil
  • 2T unsalted butter melted
  • 1T all purpose flour
  • 1t cornstarch
  • 1/2t freshly ground black pepper

Directions

  1. Place oven rack in the lowest position and heat to 275°F. Poke the thicker end of the chicken breast with a fork five to six times and sprinkle evenly with the salt. Place the chicken, smooth side down in a 9×13″ baking dish. Cover the dish tightly with foil. Bake until the thickest part of the breast registers 145-150°F on an instant read thermometer, start checking at the 30 minute mark, it could take as long as 40 minutes.
  2. Remove pan from the oven and transfer the chicken with tongs to a towel-lined plate and pat dry. Heat the oil in a 12-inch skillet over medium high heat until smoking. While you are waiting for the pan to heat up, whisk the melted butter, cornstarch and flour together. Brush the top of the chicken with half of the butter mixture. Place the chicken in the skillet, coated side down and cook until browned, 3-4 minutes. While the chicken is browning, coat the other side of the chicken with the remaining mixture. Flip the chicken over with tongs, reduce heat to medium and cook until the second side is browned and the thickest part of the breast registers 160°F, another 3-4 minutes. Transfer chicken to a serving plate.
  3. Serve chicken with Mediterranean topping.

DSC_1120a


Sept 13, 2014 Tomato, Cucumber and Watermelon Salad

DSC_8707aCool, crisp, quick and delicious, what higher praise could I bestow on a summertime salad? This best-of-summer salad brings together sweet cherry tomatoes, crunchy cucumbers, succulent watermelon and creamy salty feta.

Joe has grown more tomatoes than ever and the varieties are amazing. Indigo Blue Berries, Black Cherry, Pink Bumble Bee, Sungold, to name a few, as beautiful to behold as they are sweet and juicy to devour.

Indigo Blue Berries are a new variety this year. Like the blueberry, Indigo Blue Berry tomatoes contain high levels of anthocyanin, a naturally occuring antioxidant. Pink Bumble Bee tomatoes are a round pink cherry tomato striped with yellow and orange.  The Black Cherry tomato is a deep red with a blackish hue. Sungolds are an apricot orange in color with a sweet tropical flavor.
It’s best to cut the tomatoes in half for easier eating. My serrated edge Cutco knife always gives me a neat cut through the tomato skin. I peel most of the skin from the cucumber and leave a strip of skin on for color. Scoop out the seeds if they are too large.

Another member of the cucurbit family, watermelon, brings a refreshing sweetness to the salad. The watermelon you will most likely find anywhere these days will be seedless.  Over the past several years it has become increasingly difficult to find seeded watermelons. Only 10% of watermelons grown on farms in 2011 were of the seeded variety, in 2003, almost 37% were.

Seedless watermelons are not genetically modified but are “the watermelon version of the mule.” They are a sterile hybrid achieved by crossing the pollen of the normal diploid (2 sets of chromosomes) watermelon with a female flower that is a tetraploid (4 sets of chromosomes). The genetic change occurs from the use of colchicine, a chemical derived from the fall blooming crocus that impacts chromosomes and has been used for years to treat and cure gout. The resulting seeds from these two plants are triploids (3 sets of chromosomes) and will produce sterile seedless watermelons. The white seeds, also known as “pips”  you may find in your seedless watermelons are hollow seed coats that didn’t mature.

Seedless or seeded, which type tastes better? Is it just nostalgia, do we fear the end of the days of watermelon seed spitting contests? If you still want seeds in your watermelon you may find those varieties at your farmers market or you may just need to grow your own.

As someone who always likes to sprinkle a little salt on her watermelon, feta just seems like a natural addition to this flavor combination. Feta brings both a creamy texture and a contrasting saltiness that brings out the flavors of the other elements of this salad. The simplest of dressings and a scattering of fresh basil and you have a great summer salad, colorful and easy to put together, a refreshing addition to any barbecue or cookout.

DSC_8735a
Pink Bumble Bee is a new addition to our tomato selection this year.
DSC_8728a
The Indigo Blue Berry is definitely blue, when ripe it develops a reddish hue.

Tomato Cucumber and Watermelon Salad

Serves four

Ingredients

  • 2c assorted cherry tomatoes, halved
  • 1 1/2c medium diced seedless watermelon
  • 1 large cucumber, peeled, quartered, seeded if necessary, cut into 3/4″ pieces
  • 3/4c feta cheese, cut into half inch cubes
  • 1/4c fresh mini basil leaves or large leaves torn into small pieces
  • 1T extra virgin olive oil
  • 1T lemon juice
  • Kosher salt and freshly ground pepper

Directions

  1. Put the cherry tomatoes, watermelon, cucumber, feta and basil in a large bowl.
  2. In a small bowl whisk together the olive oil, lemon juice, 1/4t salt and a 1/4t fresh ground pepper. Drizzle the dressing over the salad and toss gently to coat.

DSC_8704aDSC_8710a

November 17, 2013 Eggplant “Pizzas”

DSC_3935a


Joe’s not so little greenhouse set out in the garden extended our growing season for some vegetables to the latest date ever. When he brought in the last of the peppers and eggplants on Sunday I knew I needed to find a special way to use them to commemorate the end of their growing season. The peppers, for the most part were transformed into one of his favorites, stuffed peppers and for the eggplant I turned to a recipe from Julia Child.

In her 1975 cookbook, From Julia Child’s Kitchen, among personal anecdotes  and recipes for Caesar Salad (yes, Mr. Caesar Cardini actually made this tableside for a young Julia and her family), consommés, stews and apple charlotte is this gem. Tranches d’aubergine a l’italienne might put off the average cook, but eggplant pizzas, now that’s something we can all relate to. The recipe made a second appearance as miniature eggplant pizzas in her 1989 work and one of my favorite go-to cookbooks, The Way to Cook.

The classic pear shaped variety of eggplant like Black Beauty works best here. I began by cutting the eggplants crosswise into 3/4 inch planks, the skin was relatively thin so I left it on.Then I salted the slices on both sides to extract excess liquid. This is a step I would skip in the summer when the eggplants are at their freshest and not very seedy. I let the eggplants sit for about a half hour and started my sauce.

The day before I defrosted two quart bags of my roasted tomatoes, a 28 ounce can of plum tomatoes or a store bought sauce can substitute here. Step one for me is to pour off the liquid that accumulates in the bag, a little lagniappe for the chef. It’s definitely not the prettiest, but it is the best tasting tomato juice you will ever try. I sautéed one finely chopped onion and two chopped cloves of garlic until softened but not brown, about five minutes. Then the tomatoes and the rest of the liquid are added to the pan, breaking up the larger chunks of tomatoes with the back of a wooden spoon. When the tomatoes have cooked down sufficiently, I put them through a food mill to strain out most of the seeds. This results in a smoother sauce.

The eggplant slices are patted dry and lightly brushed with olive oil. I baked the eggplant slices on a wire rack over a baking sheet so that both sides would cook evenly. As Julia says “not so long that the slices become mushy and lose their shape”. After twenty five minutes I removed the baking sheet from the oven and now set the oven to broil. I covered the slices with a generous coating of tomato sauce and sprinkled a combination of mozzarella and grated Parmesan. The “pizzas” are now returned to the oven until the cheese is melted and slightly browned. Julia suggests these as part of a vegetarian combination or arranged around a main event, be it an omelet, a steak or a roast lamb.

Eggplant pizzas would make a good snack or a light lunch with a salad. A recipe that’s vegetarian, low carb and gluten free, as always “Our Lady of the Ladle“, Julia was ahead of her time.


Julia Child’s Eggplant Pizzas

Ingredients

  • 2  large eggplants (about 1 lb. each)
  • 1T salt, for drawing water out of eggplant
  • 2T olive oil for brushing eggplant before roasting
  • 2 t Italian seasoning, for sprinkling on eggplant before roasting
  • 1/3 c freshly grated Parmesan
  • 1/3 c finely grated low-fat mozzarella

Sauce Ingredients

  • 1T olive oil
  • 1 small onion, finely chopped (about 1 cup)
  • 2 large garlic cloves, very finely chopped
  • 1 28 oz. can of plum tomatoes (or use 3 cups peeled and diced fresh tomatoes)
  • 1/2 t Italian seasoning
  • 1/4 t dried oregano

Directions

  1. Cut eggplant into 3/4 inch thick slices. Place eggplant pieces on a double layer of paper towels and sprinkle both sides generously with salt. Let the eggplant sit with the salt on it for about 30 minutes to draw out the liquid. (After the eggplant sits for 15 minutes, turn on the oven to 375°F.
  2. Make the tomato sauce while the eggplant sits. Heat 1 tablespoon of olive oil and sauté the onion and garlic just until it becomes softened and fragrant.   Add the diced tomatoes, Italian seasoning and oregano.
  3. Then let the sauce simmer on low until it’s thickened. Break up tomatoes with a fork while the sauce cooks. (You can add water as needed. Let sauce simmer until ready to put on eggplant slices.)
  4. After 30 minutes, pat the eggplant dry with paper towels. Brush both sides of the eggplant slices lightly with olive oil and sprinkle tops with Italian seasoning. Place eggplant slices on a wire rack over a baking sheet. Roast the eggplant about 25 minutes, but “not so long that the slices become mushy and lose their shape” as Julia says.
  5. While the eggplant roasts, combine Parmesan with mozzarella. After 25 minutes or when eggplant pieces are done, remove eggplant from the oven and turn oven setting to broil. Spread a few tablespoons of sauce on the top of each eggplant slice, sprinkle with thin basil slices and top with cheese blend. Put pizzas under the broiler until the cheese is melted and slightly browned.
DSC_3951a
We are still harvesting salad greens, spinach and arugula from the greenhouse.
DSC_3918a
Cooking down the roasted tomatoes.
DSC_3919a
Putting the cooked tomato sauce through a food mill makes a smoother sauce and eliminates most seeds.
DSC_3911a
Doesn’t look like the stuff in a bottle, but it is the best tasting tomato juice you will find.
DSC_3932a
Served with a simple salad of baby greens and radishes from the garden, eggplant pizzas make a delicious light lunch.


April 23, 2013 Chicken Parmesan

DSC_9878a

What’s in a name? Sometimes a bit of confusion. You might think a dish with the name Parmesan originated from the city of Parma in the northern Italian region of Emilia- Romagna .  Well you would be wrong. Both the island of Sicily and southern region of Campania claim the origins of this dish.  There it is known as Parmigiana di Melanzane or Parmesan of Eggplant because of the prominence of Parmigiana-Reggiano in the dish. Author Mary Taylor Simeti offers another interesting explanation in her book, “Pomp and Sustenance: 25 Centuries of Sicilian Food”. Sicilians thought that their local dish of sliced eggplant layered with tomato sauce and caciocavallo cheese was originally Melanzane alla Palmitiana. Palmitiana means shutter in Sicilian and refers to the layered louver-like pattern of eggplant slices. It is said that Sicilians have a difficult time pronouncing the letter “l”, so the dish became known as parmigiana.
Whatever the explanation, Cooks Illustrated offered their second version of Chicken Parmesan in their March/April 2013 issue. It is a lighter version of the Italian classic. I used my own roasted tomatoes that I froze last summer to make a very simple but flavorful sauce. In the Cooks Illustrated recipe the breast cutlets are sliced horizontally,  I like to pound mine to an even thickness. The chicken has a light coating of panko crumbs, herbs and Parmesan cheese. Always buy real Parmigiano-Reggiano not the green powdered stuff in a can.

When Cooks Illustrated did their first redo of this classic fifteen years ago in 1998 they suggested using panko bread crumbs, not widely available at that time. Then you could only get them in Asian markets or by mail order. Now every supermarket and big box store carries panko. Even Emeril has his own brand. Panko differs from other bread crumbs because it is processed into flakes, not crumbs. Flakes result in a broader surface area when frying and gives the finished product a lighter crispy coating. A sprinkling of mozzarella and fontina and the chicken goes under the broiler to finish.Only two tablespoons of the sauce top the finished cutlet  That way all the components maintain their integrity; the chicken is juicy with a nice crispy crust, the sauce complements without overwhelming and there is just enough creamy melted cheese to coat it .  The recipe makes plenty of sauce so be certain to cook some pasta to enjoy it with the chicken.

DSC_9894a

Chicken Parmesan

Adapted slightly from Cooks Illustrated #121

Serves four

Ingredients for sauce

  • 1T olive oil
  • 2 minced garlic cloves
  • 1/2t dried oregano
  • Pinch of red pepper flakes
  • 1 (28oz) can crushed tomatoes (I used 2 quart bags of roasted tomatoes)
  • 1/4t sugar
  • 2T chopped fresh basil

Directions for sauce

  1. Heat the olive oil in a straight sided sautepan over medium high heat until just shimmering.
  2. Add garlic, 1t salt, oregano and pepper flakes, cook, stirring occasionally until fragrant, about 30 seconds.
  3. Stir in tomatoes and sugar, increase heat to high and bring to a simmer.
  4. Reduce heat to medium-low and simmer until thickened, 20-25 minutes. Since I use my own tomatoes this is the point where I put the tomatoes through a food mill to eliminate the seeds and give the sauce a smooth texture.
  5. Off heat, stir in basil. Season with salt and pepper to taste. Cover and keep warm.

Ingredients for the chicken

  • 4 boneless, skinless chicken breasts, 4-6 oz each, pounded 1/2 inch thick
  • 1t kosher salt
  • 1/2c shredded whole milk or part-skim mozzarella cheese
  • 1/2c fontina cheese
  • 1 large egg
  • 1T all-purpose flour
  • 3/4c freshly grated Parmesan cheese
  • 1/2c panko bread crumbs
  • 1/2t garlic powder
  • 1/4 t dried oregano
  • Freshly ground black pepper
  • 1/3c vegetable oil
  • 1/4c fresh basil, julienned

Directions for the Chicken

  1. Sprinkle each side of the cutlets with 1/8 t of salt and let stand at room temperature for twenty minutes.
  2. Combine the mozzarella and fontina cheese in a bowl. Set aside.
  3. Adjust oven rack 4 inches from the broiler element and heat broiler.
  4. Whisk egg and flour together in a shallow pan until completely smooth.
  5. Combine Parmesan, panko, garlic powder, oregano and a grind of fresh pepper in a second shallow pan.
  6. Pat the chicken dry with paper towels. Working with 1 cutlet at a time, dredge cutlet in egg mixture. Allow excess to drip off.
  7. Coat the cutlets in the Parmesan mixture, pressing gently so crumbs adhere. Transfer to a large plate.
  8. Heat oil in a 10-inch nonstick skillet over medium high heat until shimmering. Carefully place two of the cutlets in the skillet and cook without moving them until bottoms are crispy and golden brown, 1 1/2 to 2 minutes. Using tongs, carefully flip cutlets and cook on second side until golden brown, 1 1/2 to 2 minutes. Transfer cutlets to a paper towel lined plate and repeat with remaining cutlets.
  9. Place cutlets on a rimmed baking sheet and sprinkle cheese mixture evenly over cutlets. Broil until cheese is melted and beginning to brown, 2-4 minutes. Watch carefully! Transfer chicken to serving platter and top each cutlet with 2 tablespoons sauce. Sprinkle with basil, serve immediately, passing remaining sauce separately.
DSC_0470a
Can’t wait for the basil in the garden.


DSC_5375
Some of last year’s tomato harvest.

DSC_9884a


September 19, 2012 Roasted Eggplant Caponata

The days are getting shorter, there is a chill in the morning air, only three days until the official beginning of autumn. Our summer vegetables are on the wane and this morning I harvested some of the last eggplants, peppers, fennel and tomatoes of the season. The sweet and sour flavors of eggplant caponata would be the right contrast to the richness of the king salmon we were having for dinner.
Caponata is a dish native to Sicily by way of the Arabs (then called the Saracens)  who ruled the island from the ninth to the eleventh century. Along with citrus fruits, pasta and eggplants, just to name a few, the Saracens brought the sweet and sour flavor combination to Sicily, the sour coming from vinegar and sweet from sugar or honey.  Among several theories, the word caponata came from the Sicilian dialect, capunata, the name for a sailor’s dish of a biscuit steeped in oil and vinegar, served with chopped vegetables.
The vegetables in my caponata were the “last gasp” of certain varieties we were growing. I used lavender-white Asian Bride  and magenta colored Beatrice eggplant, both ideal because of their thin skin (no peeling required), some small yellow Admiral peppers, and  a red Anaheim pepper that had just a little heat. Fennel isn’t typically an ingredient in caponata, but I thought the slight licorice flavor would add to the sweetness. The most time consuming part of the recipe is the hand chopping of the vegetables, a food processor is definitely not the right choice here. Unlike most of the recipes I make with eggplant, I salted the eggplant to eliminate any bitter flavors from these plants that had been on the vine for a while. Salting also prevents the eggplant from absorbing too much oil and becoming greasy. I decided to roast the vegetables in this recipe is to keep the olive oil to a minimum. I cut the vegetables a bit smaller than I would usually since I was using it as a topping for fish. Caponata is also wonderful scooped up with a pita, in a sandwich and as a topping for pasta. It is best made a day ahead so the flavors have time to blend. Caponata keeps about a week in the refrigerator, if it lasts that long.

Eggplant Caponata

Makes about 4 cups

  • 1 medium eggplant or a combination of smaller eggplants to equal about 1 1/2lbs, unpeeled, and trimmed
  • 3 ribs of celery cut into 1/2 inch dice
  • 1 small red onion cut into 1/2 inch dice
  • 1 small yellow pepper cut into 1/2 inch dice
  • 1 small red pepper cut into 1/2 inch dice
  • 1 small fennel bulb cut into 1/2 inch dice (optional)
  • Olive oil
  • 1 1/2 cups peeled plum tomatoes with juices or 1 14 oz can of diced tomatoes
  • 1T tomato paste
  • 2-3T Pomegranate red wine vinegar
  • 1-2t granulated sugar or honey
  • 2 anchovy filets, minced
  • 1/3 c green olives, pitted and slivered
  • 3T drained and rinsed balsamic capers
  • 2T chopped Italian parsley
  • Kosher salt and freshly ground pepper

Directions

  1. Preheat oven to 450F. Place racks in the top and bottom shelves of the oven.
  2. Cut the eggplant into 1-inch cubes. Place the cubes in a bowl, sprinkle with a tablespoon of  kosher salt. Spread the cubes on a baking sheet that has been lined with a paper towel. Allow cubes to sit for one hour. Pat cubes dry with paper towel and remove any excess salt. Do not rinse.
  3. Place the cubes in a bowl and toss with 1-2T of olive oil. Place cubes on a baking sheet, spread them out evenly, crowded vegetables will steam, not roast. Set aside. In another bowl, toss the celery, onion, fennel and peppers with another tablespoon or more of olive oil. Spread on another baking sheet, making sure that the vegetables are spread out evenly and not crowded.
  4. Place vegetables in preheated oven and cook for about 5 minutes. With a spatula, loosen them from the baking sheet to promote even browning and rotate the baking sheets, top and bottom as well as front and back. Continue to roast in the oven until vegetables are softened and browned around the edges. Start checking the pan after 5 minutes.
  5. Allow vegetables to cool on baking sheet. In a medium saute pan cook tomatoes and their liquid. Add tomato paste, red wine vinegar, sugar or honey and anchovies (if using) and stir to combine. Taste and adjust the sweet and sour flavor as desired.  Add the cooled vegetables, toss gently but thoroughly to combine. Add chopped olives, capers and chopped parsley. Taste and adjust seasoning as desired. Set aside to allow flavors to blend. Serve at room temperature as accompaniment to fish or chicken or with crusty bread or crostini.