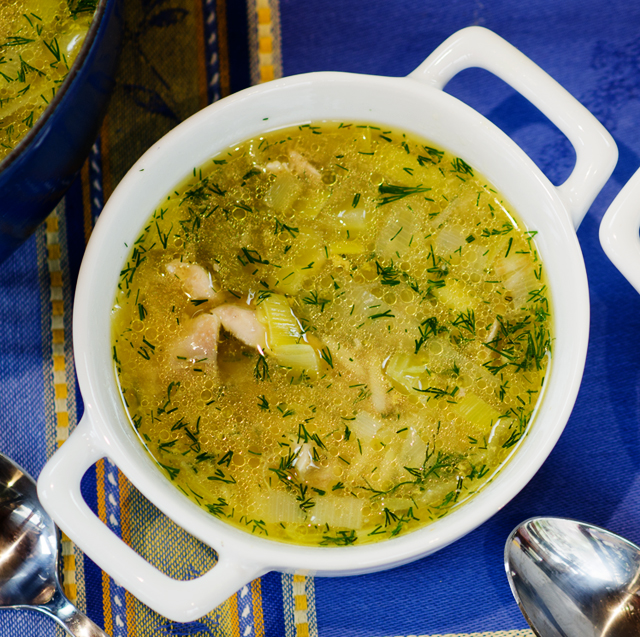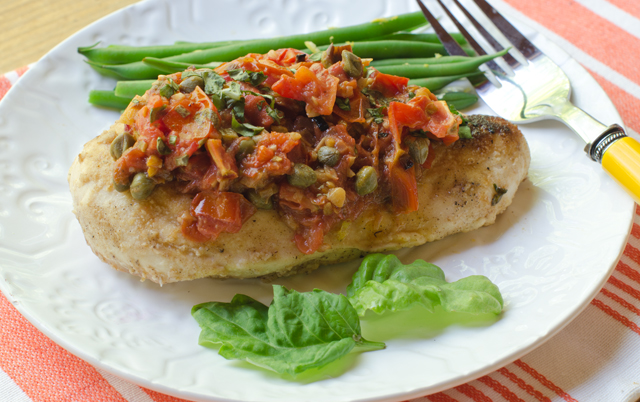
May 27, 2016 Sauteed Chicken Breasts with Tomato Basil Sauce with Capers

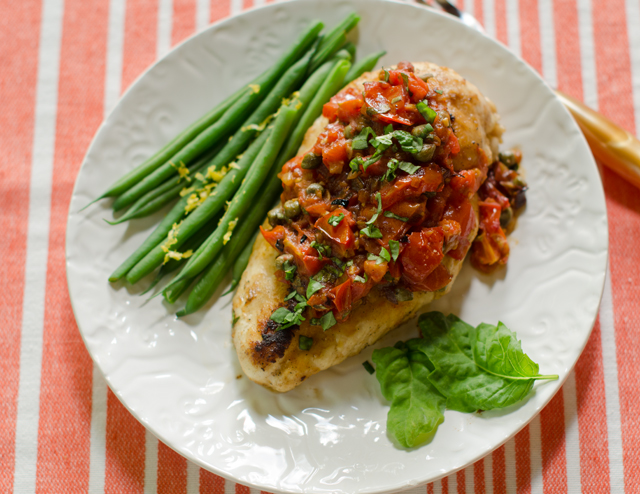
DSC_6957aBoneless skinless chicken breasts, the little black dress of dinnertime. A sautéed chicken breast with a simple sauce can make a delicious quick dinner or has the potential to turn into a dried out disaster. So it is very important to learn how to cook them properly. I’d like to share the method I’ve learned via Cooks Illustrated magazine that will provide excellent results every time.

The most important ingredient and foundation of the dish is the chicken. I use a chicken that is antibiotic and hormone free and not injected with water or other additives. My favorite brand is Bell and Evans, a little more expensive but definitely makes for a much better finished product.

The original recipe, written in 1993 called for the chicken to be rinsed under cool water. Research now shows that washing poultry can increase the risk of cross contaminating something else in your kitchen, the sink, countertops, utensils etc. So it’s best just to pat the chicken dry. The flour will adhere better and any bacteria on the surface of the chicken will be killed when you cook it.

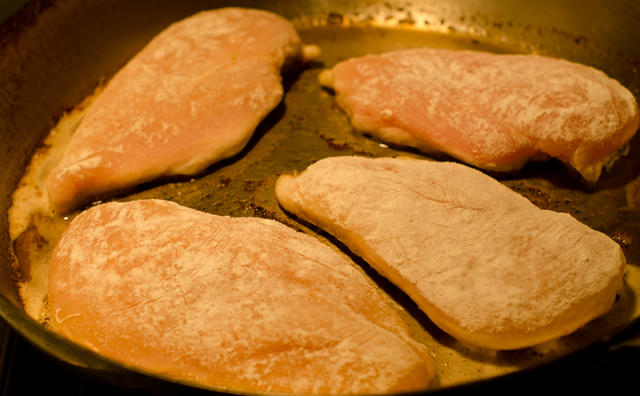
Remove any fat, gristle or small pieces of bone from the chicken breasts. If the tenderloin is still attached, remove for another use. The chicken breast needs to be dried thoroughly on all surfaces with paper towels. Salt and pepper then lightly flour both sides of the breast before cooking. The flour produces a moisture barrier so the fat spits less and the chicken develops a browned crispy crust.

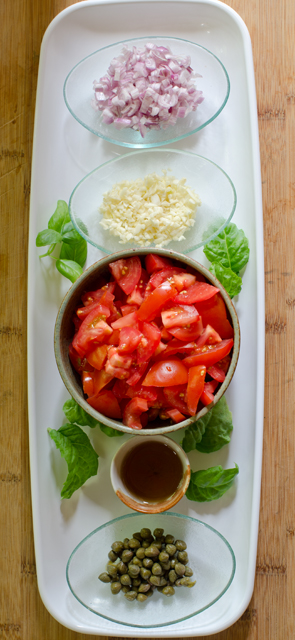
When you are ready to make the recipe, the whole procedure takes less than 10 minutes. It’s important to have all the ingredients, including the components for the sauce ready to go. The French have a phrase for it, mise en place. I have all the ingredients measured out in small bowls in the fridge until it’s time to cook. The only thing I would wait to do until the last minute would be to dry the chicken breasts. There is only a quarter cup of flour to coat four pieces of chicken and have found I use less than half of it. If you are gluten-free you could substitute a combination of rice flour and cornstarch or a nut flour. Working with one cutlet at a time dip it into the flour and evenly coat.

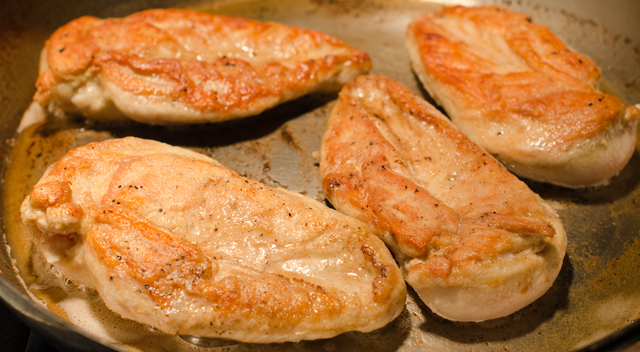
Turn your oven to the lowest setting or turn on the heat lamp above your stove. I have a commercial style cook top and have found I need to use a little more oil and butter to cook the chicken breasts than the original recipe. Place the chicken breasts tenderloin side down in the sizzling oil and butter combination. Set your timer for four minutes. Flip them over and cook on the second side for about three minutes, move to a plate and keep warm.

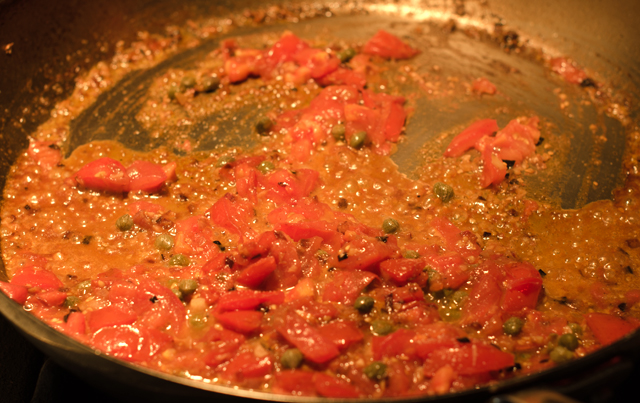
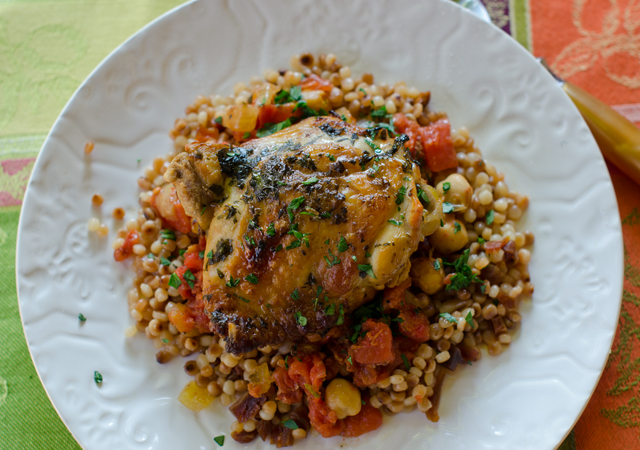
Add shallots to the pan, and sauté until soft, next add the garlic and tomatoes and cook until the tomatoes are juicy. When I am not using tomatoes from our garden I like Campari tomatoes. They have an excellent texture (read not mealy) with the right balance of acid and sweetness. They are considered a cocktail tomato, a little bigger than a cherry tomato but smaller and rounder than a plum.  The original recipe called for seeding the tomatoes, I chose to skip that time consuming step. Add the wine or vermouth and the capers and boil until the sauce is thickened. Stir in chopped basil and salt and pepper to taste. The result? A chicken breast that is nicely browned on the outside with a tender and juicy interior with a delicious and easy sauce to accompany it.
DSC_6936a
Sauce ingredients ready.
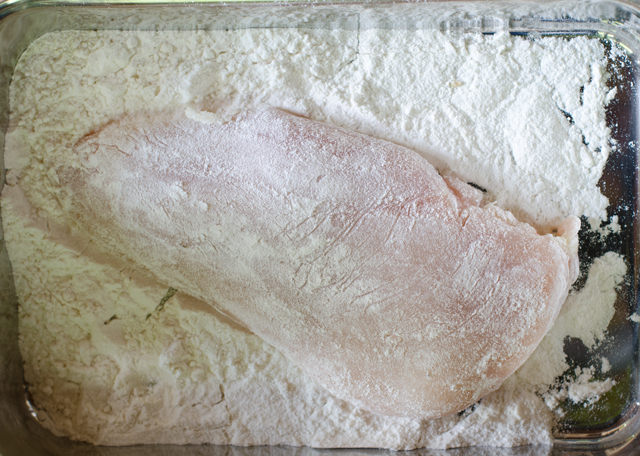
Lightly flour each cutlet.
Add chicken to pan.
Add chicken to pan.
DSC_6943a
Flip chicken after four minutes.
Sauce ingredients come together quickly


Sauteed Chicken Breasts with Tomato Basil Sauce with Capers

Serves Four

Ingredients

  • 4 boneless skinless chicken breasts (about 1½ to 1¾ lbs)
  • Kosher salt and freshly ground pepper
  • ¼ c all purpose flour
  • 2 T unsalted butter
  • 2 T vegetable oil

Directions for cooking the chicken

  1. Dry the chicken thoroughly with paper towels and sprinkle 1 teaspoon salt and ½ teaspoon pepper on both sides of the cutlet.
  2. Measure flour into a pie plate or similar container. Working with one cutlet at a time, press both sides into flour.
  3. Heat butter and oil in a 9 inch or larger heavy skillet until the butter has foamed and has just started to take on color.  Place the cutlets in the skillet, tenderloin side down.
  4. Keep the skillet on medium high heat, reducing heat if it starts to smoke. Saute the cutlets for 4 minutes on the first side,  using tongs, turn to the other side.  Cook for 3 minutes then remove cutlets to a plate and keep warm in an oven on the lowest setting or under a heat lamp.

Ingredients for the tomato basil sauce

  • 1/3 c shallots
  • 2 T chopped garlic
  • 2 c chopped tomatoes
  • ¼ c dry white wine or vermouth
  • 2 T capers, drained
  • 2 T shredded basil leaves

Directions for the tomato basil sauce

  1. Without discarding the fat, place skillet over medium heat. Add shallots and saute until softened, about 1 minute. Stir in garlic and then the tomatoes. Increase heat and cook, stirring frequently until the tomatoes have broken down and become juicy, about 2 minutes.
  2. Add wine, capers and any chicken juices from the plate. Boil sauce until it thickens, stir in herbs and season to taste with salt and pepper. Serve immediately.
DSC_6950a

DSC_6957a


April 16, 2016 Chicken Stew with Chickpeas and Tomatoes

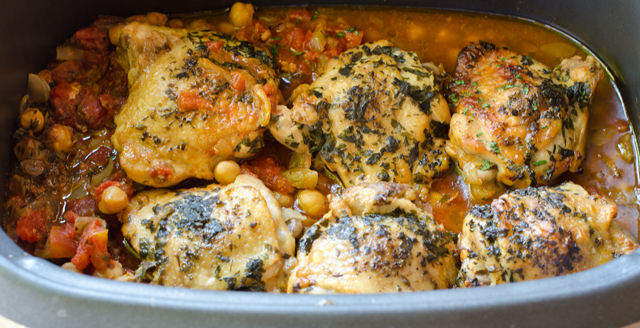
DSC_6681aThe slow cooker I received as a Christmas gift from my hubby has inspired me to look for new and great tasting recipes that utilize this handy appliance. Many of the recipes that interest me start with chicken thighs. They are an inexpensive cut of meat, full of flavor and hold up well to slow cooking. This easy to assemble chicken stew gets great flavor from smoked paprika, oregano and just a dash of saffron. The original recipe from The Great American Slow Cooker Book called for bone in skinless chicken thighs that went directly in the slow cooker. I like to brown the meat first, it only takes a few minutes and I think adds a real depth of flavor. Also, I leave the skin on, I think it protects the meat, whether you choose to eat it or not.
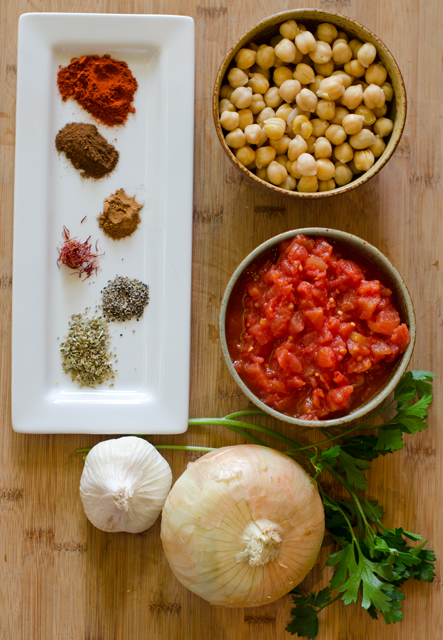
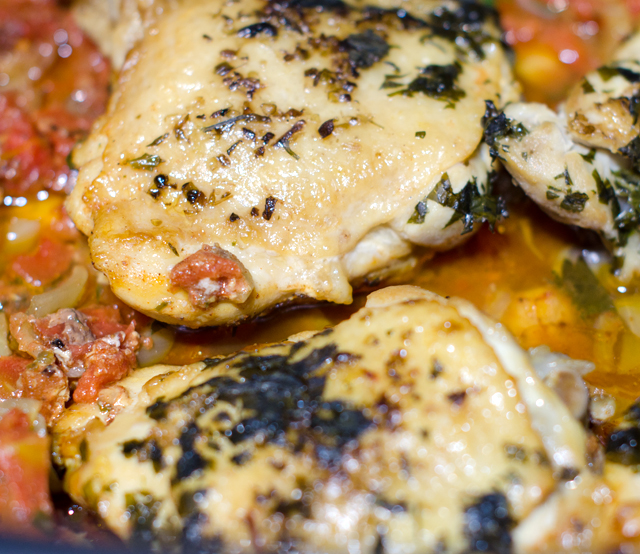
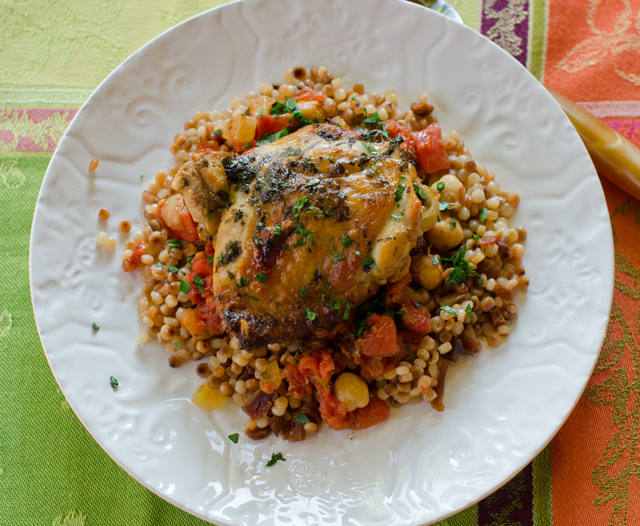
The recipe is so simple. Drained diced tomatoes, chickpeas, onion, parsley and spices are stirred together in the slow cooker. A paste of garlic, oregano, salt and olive oil is rubbed on the thighs, whether you have browned them first or decide to go the skinless route. Place the thighs in the cooker. Set your timer for 4 hours on high or low for 7 hours. I put the thighs under the broiler for a crispy skin. Serve with toasted Israeli couscous with pine nuts and apricots for a delicious satisfying supper. Definitely a recipe I will make again.

Chicken Stew with Chickpeas and Tomatoes

Serves four

Ingredients

  • 1¼ c drained canned diced tomatoes
  • 1¼ c drained and rinsed chickpeas
  • 3/4c chopped onion
  • ¼c minced parsley leaves
  • 1 t smoked paprika
  • ½ t ground cloves
  • ½ t ground cumin
  • ¼ t ground cinnamon
  • ¼ t saffron threads
  • ¼ t freshly ground black pepper
  • 2 t dried oregano
  • 2 T olive oil, one for the pan and one for the paste
  • 2 t minced garlic
  • 1 t salt
  • 3 lb bone-in skin-on chicken thighs

DSC_6678a

DSC_6690a

DSC_6694a

Directions

  1. Stir the tomatoes, chickpeas, onion, parsley, paprika, cloves, cinnamon, saffron and pepper in a 4 to 5½ quart slow cooker.
  2. Warm a large skillet set over medium high heat and swirl in the olive oil. Add the chicken thighs skin side down, as many as will fit in the pan without crowding. Brown on one side, about 4-6 minutes, turn over and brown another 3-4 minutes. Transfer to a plate and continue browning in batches. Alternately, remove the skin and place thighs directly in the slow cooker.
  3. Mix the oregano, olive oil, garlic and salt into a paste and rub a little on each chicken thigh. Set them into the cooker until they are submerged about halfway.
  4. Cover and cook on high for 4 hours or on low for 7 hours.
  5. If desired, remove the thighs from the cooker and broil for about 2 minutes to crisp up the skin.

DSC_6686a

January 13, 2016 Smoky Indonesian Style Chicken Curry

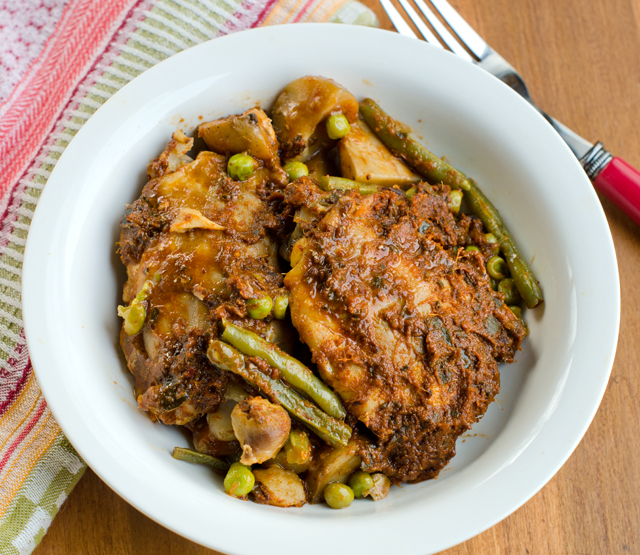
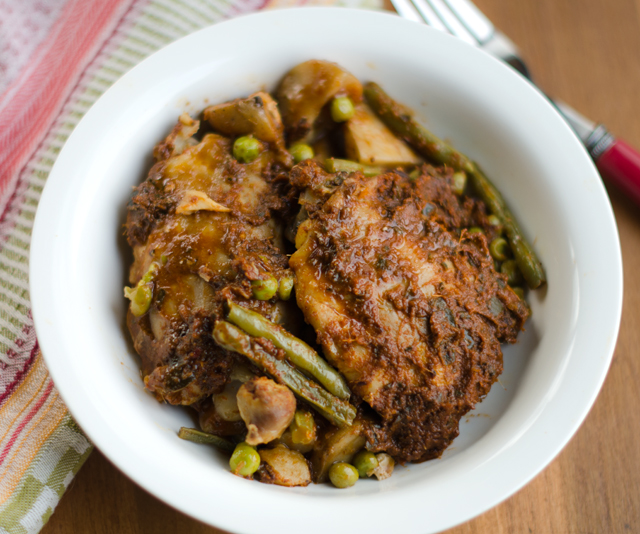
DSC_5680aSmoky Indonesian style chicken curry gets it’s intense heat from pasilla chilies, smoked paprika and sambal oelek balanced with the fragrant warm spices of ginger, coriander and cumin. This is another recipe from Bruce Weinstein and Mark Scarbrough’s article, Slow Cooker Secrets in Fine Cooking magazine
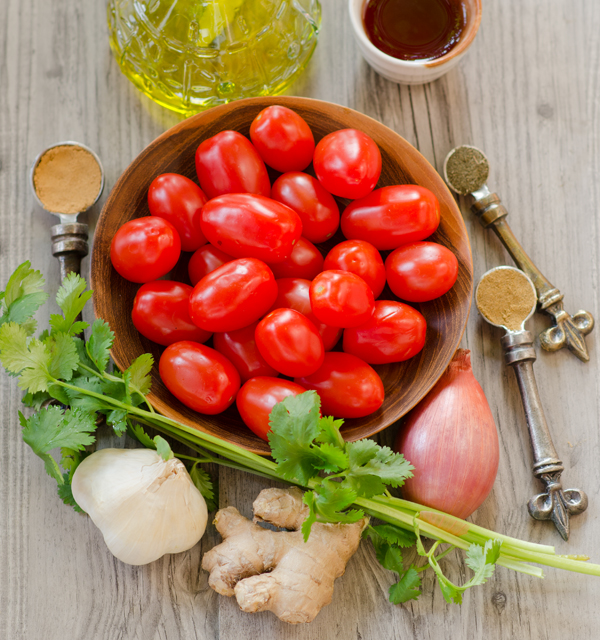
The dark meat of chicken thighs is a natural for the long simmer in the slow cooker. In this recipe, no browning is required,  the skin is removed before cooking and the thighs are coated with a rich complex chile paste.

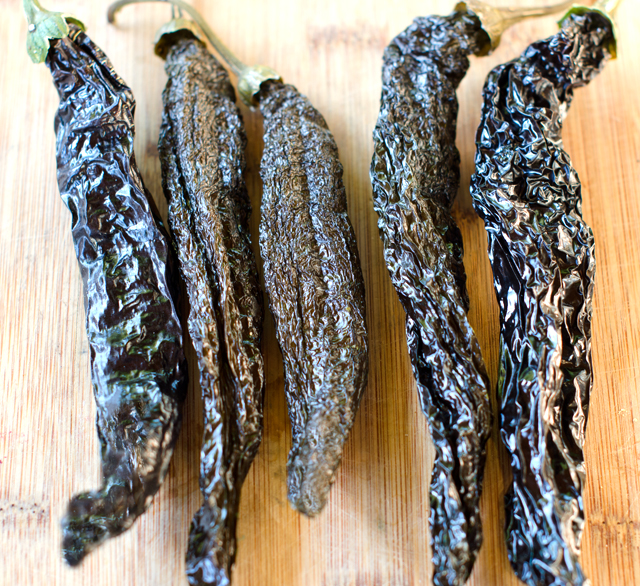
Pasillas are the chile of choice for this recipe. A variety we have grown for many years, pasilla roughly translates “little raisin” from the Spanish, referring to the way the dark green fruit turns a reddish brown and slightly wrinkled when mature.  I especially like it for it’s mild heat and versatility for use in Mexican and Asian cuisine.Pasilla chiles can be used in chili sauces and pastes as well as moles. They are wonderful fresh on the grill in summer along with a steak.  Pasillas are rich, earthy and mildly spicy with just a hint of sweetness.

We had a bumper crop of peppers this year and to preserve the harvest, I dry some of them. Start with whole, unblemished peppers that have been washed and dried. Place the peppers on a wire mesh rack over a large baking sheet with room between each pepper for air to circulate. I used the lowest convection setting (140°F) in my oven. Drying time varies and I check them every now and then to see how they are progressing. Smaller peppers will dry quicker, the larger ones could take a day or more.  It is important that the peppers are completely dry before storing. Partially dry peppers will turn moldy and ruin the whole container, I know from prior experience.

To use dried chilies, reconstitute by placing them in a bowl and covering them with boiling water. Check at about twenty minutes to see if they are soft. To make the chili paste, the reconstituted pasillas are combined with shallot, lemongrass, tomato paste, spices, brown sugar and sambal oelek. I am fortunate to have a large supply of lemongrass at my disposal. Our lemongrass plant grows large and bushy in the garden every summer. Joe harvests a large portion of the stalks that I freeze for recipes like this. The significantly cut back plant is brought indoors for the winter where it’s only predator is Cody, our Golden Retriever who enjoys nibbling on the leaves. Lemongrass has a mild citrus flavor with a floral aroma. Sambal oelek is a ground paste made only of chili peppers and salt.  It is less acidic than sriracha and is chunkier and thicker in texture.  It is readily available in the Asian section of most supermarkets.

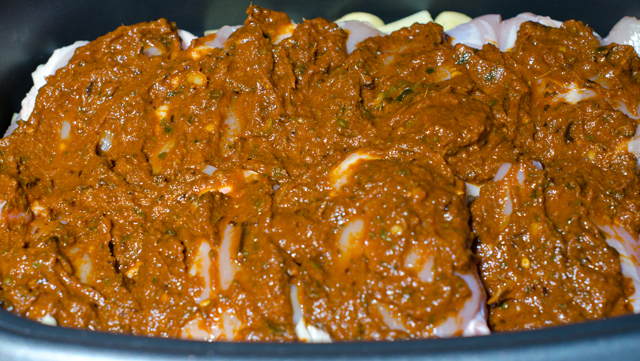
The chili ingredients are combined in the blender and chicken broth is added to make a thick sauce. I needed more broth than the original recipe called for, use as much broth as you need to make the sauce smooth, not chunky. Layer the potato pieces at the bottom of the slow cooker. Season the chicken pieces generously with salt and pepper. I found it easier to spread the chili paste on the chicken after it was in the slow cooker. Put the lid on and cook until the chicken and potatoes are tender, 2 to 3 hours on high, 6 hours on low. Turn the slow cooker on high (if you were cooking on low) and sprinkle the green beans evenly over the chicken and cook until crisp tender, 30 minutes. Add peas and cook until heated through, 10 minutes. They suggest serving it with rice, but one starch (potatoes) is sufficient for me.

Dried pasilla bajio chilies from the garden.


Smoky Indonesian Style Chicken Curry

Serves four

Ingredients

  • 5 dried pasilla or New Mexico chiles, stemmed and seeded
  • 1 small shallot, quartered
  • 2 Tbs. thinly sliced lemongrass
  • 2 Tbs. tomato paste
  • 2 Tbs. sweet smoked paprika
  • 1 Tbs. minced peeled fresh ginger
  • 1 Tbs. packed dark brown sugar
  • 1 Tbs. sambal oelek
  • 1-1/2 tsp. ground cumin
  • 1-1/2 tsp. dried coriander
  • Kosher salt
  • 6 Tbs. lower-salt chicken broth
  • 8 bone-in chicken thighs (about 3-1/4 lb.), skin removed
  • Freshly ground black pepper
  • 1-1/4 lb. waxy potatoes, such as Yukon Gold, cut into 1-inch pieces (about 3-1/2 cups)
  • 1/2 lb. green beans, trimmed and cut into 1-inch pieces
  • 2/3 cup thawed frozen peas
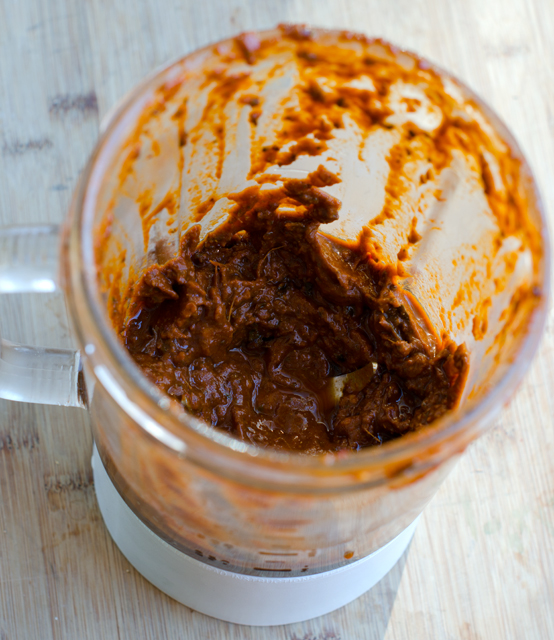
Ingredients for the chili paste.
DSC_5675a
The ingredients are blended together.
Chicken thighs are coated with the chili paste before cooking.

Directions

  1. Put the chiles in a medium bowl and cover with boiling water; set aside to soften for 20 minutes. Drain, then transfer the chiles to a blender.
  2. Add the shallot, lemongrass, tomato paste, smoked paprika, ginger, brown sugar, sambal oelek, cumin, coriander, and 2 tsp. salt. Blend the mixture until smooth, drizzling the broth through the hole in the lid and stopping occasionally to scrape down the inside of the jar.
  3. Generously season the chicken with salt and pepper and spread evenly with the chile mixture. Layer the potatoes in the bottom of a 5- to 6-quart slow cooker and arrange the chicken in an even layer on top. Cover and cook until the potatoes are fork-tender and the chicken is tender but not falling off the bone, 2 to 3 hours on high and 6 hours on low. (The curry can stay on the keep-warm setting for up to 3 hours.)
  4. About 45 minutes before serving, turn the slow cooker to high (if it was on low or keep-warm), sprinkle the green beans evenly over the top, cover, and cook until crisp-tender, about 30 minutes. Add the peas and cook until heated through, about 10 minutes. Stir to combine, season to taste with salt and pepper, and serve.

DSC_5684a


November 21, 2015 Sheet Pan Chicken Thighs with Delicata Squash, Fennel and Grapes

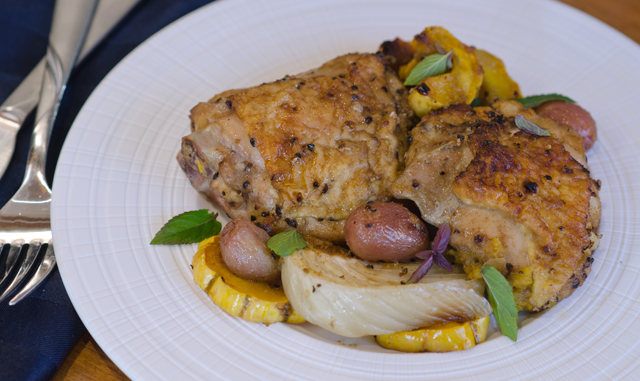
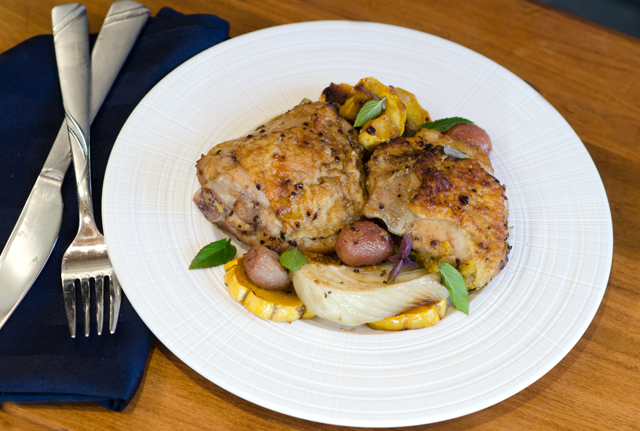
DSC_5102aHere is another no fuss sheet pan supper, this time from the Epicurious website. The star of the show, bone in chicken thighs, are paired with a different cast of characters, red grapes, fennel and delicata squash.
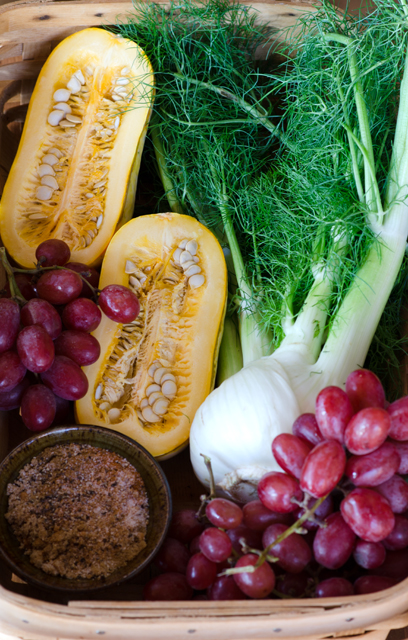
Fall is prime season for grapes, the fruit that is harvested now has been hanging on the vine all summer. This translates into succulent fruit with high sugar content and complex flavors. Roasted grapes are delicious and I doubled the amount from the original recipe. Crunchy and a little bit sweet, fennel is in season now and through early spring. I love it’s licorice flavor raw in salads and roasting fennel caramelizes it and mellows out it’s sweetness.  Delicata is the smallest of the winter squashes, usually weighing between 1/2 to 1 pound each. They are cylindrical in shape with yellow or cream colored skin with slight ribbing and dark green stripes. Unlike other winter squashes, the skin of the delicata is edible and has fewer seeds, making them easier to prepare.
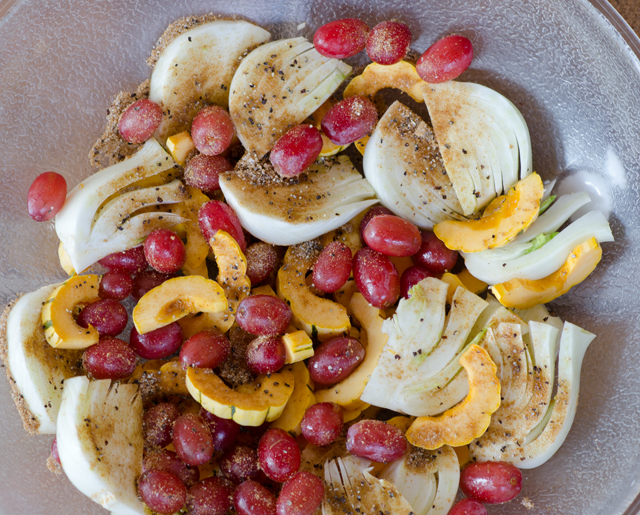
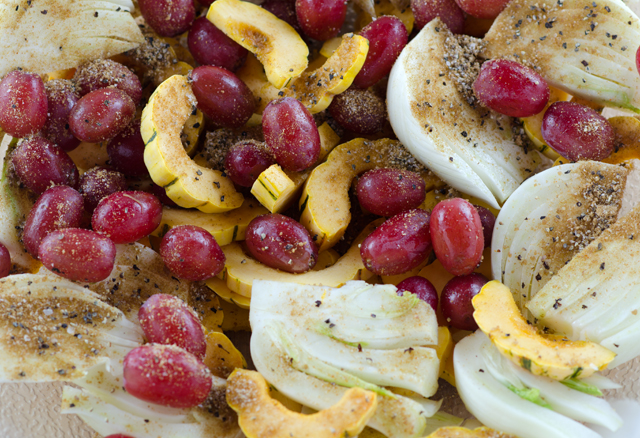
The recipe starts with a flavorful rub that includes cumin, coriander, (my addition) brown sugar, salt, black and cayenne pepper. Half of the rub is tossed with the vegetables, the other half with the chicken thighs. You can do this step ahead earlier in the day and assemble the ingredients on the sheet pan before you are ready to roast. Space the components evenly on the baking sheet so all the ingredients get nice and brown. For even cooking, rotate  the pan halfway through the cooking time.  Be sure to use skin on bone in chicken thighs, even if you don’t eat the skin, it protects the meat while it is cooking.  As I previously posted, an instant read thermometer will give you the best results.

DSC_5042a

DSC_5077a

Sheet Pan Chicken with Delicata Squash, Fennel and Grapes

Serves four

Ingredients

  • 1T brown sugar
  • 1T ground cumin
  • 1T ground coriander
  • 1T kosher salt
  • 1T freshly ground black pepper
  • ¼t cayenne pepper
  • 1 delicata squash, about 1½lbs, halved lengthwise, seeded and cut into ¼” half moons
  • 1 fennel bulb, about ½lb, cut in half lengthwise, seeded and cut into half moons
  • 2c seedless red grapes
  • 1T olive oil
  • 2 lb. bone-in skin on chicken thighs (5-6 pieces)
  • 1/4c torn fresh mint leaves

DSC_5074a

Directions

  1. Preheat oven to 425°F with the rack in the lower third of the oven.
  2. Mix the first six ingredients in a small bowl. Toss squash, fennel and grapes with oil and half of the spice mixture. Arrange in a single layer on a sheet pan.
  3. Rub chicken thighs evenly with the remaining spice mixture. You can prepare both components several hours in advance and store in the refrigerator. Bring the chicken out about 20 minutes before proceeding with the recipe.
  4. Arrange the chicken thighs skin side up on top of fruit and vegetables. Roast until skin is browned and an instant read thermometer inserted into the thickest part of the thigh reads 165°F, about 25 minutes to one half hour.
  5. Divide chicken, fruit and vegetables between four plates and top with mint.

DSC_5101a

November 8, 2015 Curried Chicken with Cauliflower, Apricots and Olives

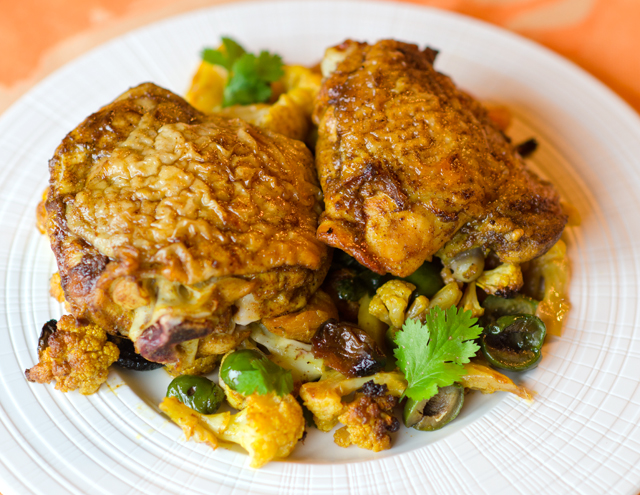
DSC_5012aStep aside slow cookers, move over microwaves, there’s  a new method for getting dinner on the table in a hurry, sheet pan suppers. It provides the busy weeknight cook with easy preparation, the convenience of cooking everything on one pan and makes clean up a snap.

The sheet pans I have stood the test of time, they have served me well for over 25 years.  They may have a little more “character” than a new one but they still do the job. As a caterer I used them constantly, for roasting vegetables and meats, baking cookies, rolls and countless hors d’oeurves. Actually the correct name is a half sheet pan, usually 13″x18″ in dimension,  just the right size to fit in most standard ovens. A full sheet pan is18″x26″, the size fits the rack in a commercial oven. Don’t confuse a jelly roll pan with a sheet pan, jelly roll pans are flimsy and you would need to double them up and you still wouldn’t achieve the same sturdiness. A sheet pan is an inexpensive addition to your cooking equipment. You will find them in both restaurant equipment stores or in the catering aisle of any big box store. Choose one that is aluminum or stainless steel, they hold up well under high heat cooking. I would not recommend a non stick sheet pan, the surface will eventually erode and could possibly contaminate the food you are cooking.

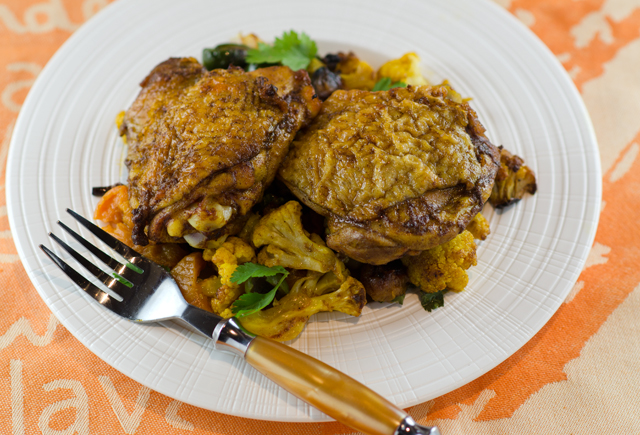
Curried Chicken Thighs with Cauliflower, Apricot and Olives is from Molly Gilbert, author of Sheet Pan Suppers. She calls this a riff on the classic eighties Silver Palate recipe for Chicken Marabella. In Ms. Gilbert’s version the flavor profile moves from Meditteranean to Moroccan, the capers in the original recipe are gone, the olives remain and the prunes have been replaced with dried apricots.
Start the recipe by combining the chicken thighs with half of the curry powder and smoked paprika, oil, vinegar, cinnamon, cayenne and salt. I think it’s beneficial for a  recipe that uses an ingredient in two different steps to read, 4 teaspoons curry powder, divided. That would be helpful for the cook, (and we all do it) who maybe isn’t reading the recipe that carefully.

Next is the issue of curry powder, a blend of many spices that can range in flavor from very mild (sweet) to the Madras blend which is quite hot. I think the sweet curry powder is the right choice for most palates making this recipe. The paprika called for in the recipe is smoked, giving another interesting flavor dimension to the dish.
Toss the chicken with the spices, cover and refrigerate for at least eight hours but preferably overnight. The recipe calls for boneless skinless chicken thighs, I used bone-in thighs because I felt they would hold up better to the high heat cooking. When you are ready to cook, place the rack in the center of the oven. The recipe calls for a 450°F oven but I reduced mine to 425°F since I was roasting with convection heat.

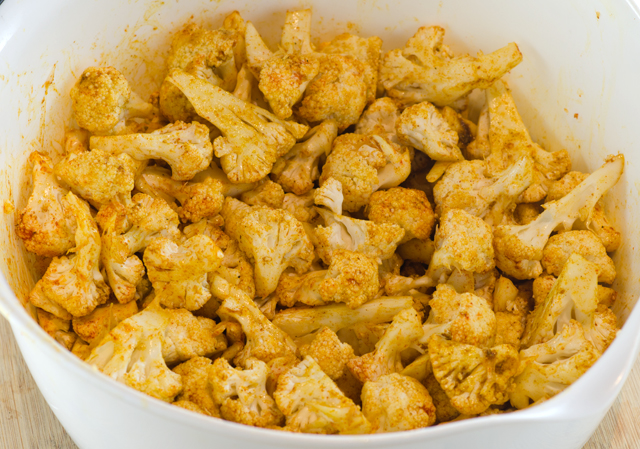
A large head of cauliflower translated into about eight cups for me.  I like to cut the head in half and then into quarters through the core. Then I separate the florets from the central stem and break the florets into smaller, relatively equal sized pieces. Toss the cauliflower with the remaining oil, curry powder, paprika and salt to evenly coat. Spread the cauliflower evenly on the sheet pan in a single layer and add the chopped apricots and olives. Soak the apricots for five minutes to soften, anything longer will turn them mushy. I used Castelvetrano olives, my personal favorites and easy to find on the Mediterranean bar of any good supermarket.
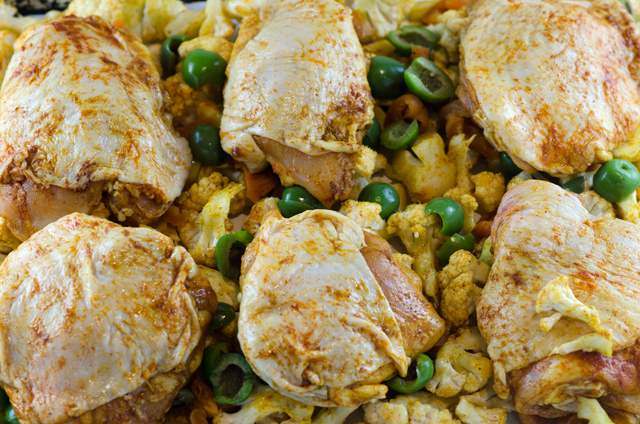
Remove the chicken from the marinade and space the pieces evenly over the cauliflower. Add the apricots and olives to the baking sheet. You might want to tuck some of them under the chicken since they get quite brown. Roast, rotating the pan halfway through the cooking time. I used an instant read thermometer and my chicken pieces were done in a little less than a half hour. If you are not using a convection oven it may take a little longer but no matter what, the instant read thermometer is always key to getting the best results.

This is a great weeknight supper because everything can be ready in advance, chicken marinated, cauliflower, apricots and olives prepped. At dinnertime get everything ready to cook while your oven preheats. A simple salad will complete the meal.

Curried Chicken with Cauliflower, Apricots and Olives

Serves 4

Ingredients

  • 8 bone-in chicken thighs (about 2lbs)
  • ¼c extra virgin olive oil, divided,  2T chicken, 2T cauliflower
  • 1T apple cider vinegar
  • 4t sweet curry powder, divided, 2t chicken, 2t cauliflower
  • 1t smoked paprika, divided, ½t chicken, ½t cauliflower
  • ½t ground cinnamon
  • ¼t cayenne pepper
  • Kosher Salt
  • 1 large head cauliflower, cut into bite-sized florets
  • ¾c chopped dried apricots, soaked in hot water for 5 minutes and drained
  • 1c pitted green olives, halved
  • ½c chopped fresh cilantro or parsley
  • 1 large lemon cut into wedges
DSC_5006a
Toss the cauliflower with curry powder, cinnamon, smoked paprika, cayenne pepper and salt.
Everything ready to go on the sheet pan.

Directions

  1. Combine the chicken thighs with 2T oil, the vinegar, 2t curry powder, cinnamon, cayenne and ¾t salt in a medium bowl, tossing to coat. Cover and refrigerate for at least 8 hours and up to overnight.
  2. Position the oven rack in the center and preheat oven to 450°F (425°F if using convection heat). Line a large sheet pan with parchment paper. Combine on the pan, the cauliflower with the remaining 2T oil, 2t sweet curry powder, ½t paprika and ¾t salt, tossing to coat. Be sure the cauliflower is spread out evenly.
  3. Add the apricots and olives and spread them evenly on the pan.
  4. Remove the chicken thighs from the marinade and place them evenly spread over the cauliflower. Roast, rotating the pan halfway through the cooking time, between 30-35 minutes. Remove the chicken from the pan and toss the cauliflower with the pan drippings. Serve chicken and cauliflower with a sprinkle of cilantro or parsley  and lemon wedges on the side.

DSC_5019a


February 6, 2015 Mediterranean Style Pan Seared Chicken Breasts

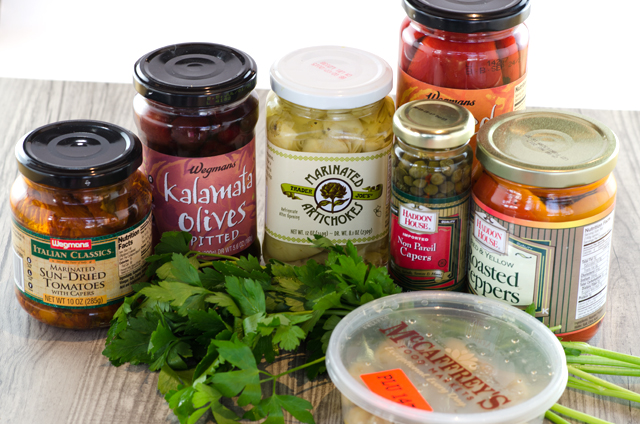
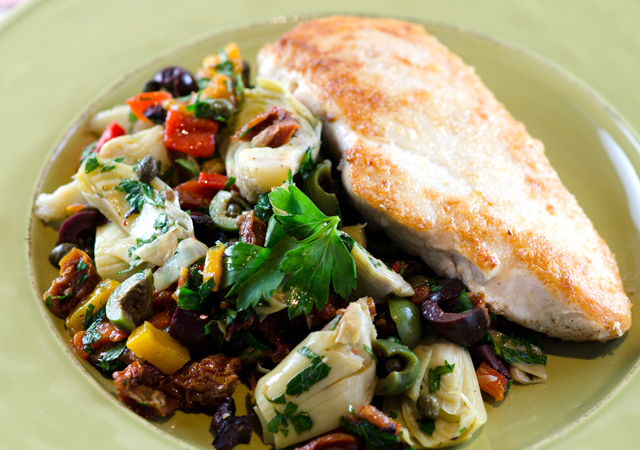
DSC_1136aMy yearly “pantry purge” brought to my attention some items that would expire in the next few months and needed to be used sooner rather than later.  The jar of marinated artichoke hearts I bought at Trader Joe’s last year would reach it’s expiration date in a month.  Not wanting to waste them, I started with the artichoke hearts as a foundation. I looked for other items on the shelf that would add some complimentary Mediterranean flavors.  Also in the pantry I found jarred sun dried tomatoes and roasted peppers. In the refrigerator I found a container of olives, a previously opened  jar of capers and some fresh parsley. I was set to put together an improvised combination that would work well as a topping for the chicken breasts I planned on cooking that evening. I was calling it a “salsa” though Joe pointed out there was nothing sauce-like about it.

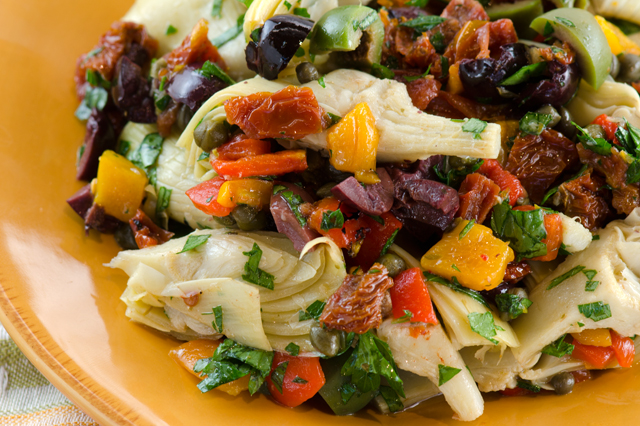
To make this dish I started with the marinated artichoke quarters, draining and reserving the marinade in case I needed to add some to the finished dish. The sun dried tomatoes were next, and even though I drained some of the oil off,  they retained enough to give the right balance.  Capers add a salty element to the dish so I made sure to rinse them well before adding them to the dish. I used Kalamata olives and Castelvetrano, an olive with a mild buttery flavor and one of my favorites. The red and yellow roasted peppers,  just needed to be drained and chopped. Combining all of the ingredients in a medium bowl I tasted for seasoning and in this case, a little bit of lemon juice and  a splash of balsamic vinegar was the right addition.

So what should I call this? It’s not quite a sauce, but is a versatile topping for fish, chicken, pasta, it could also be used as an omelet filling or even as a topping for a flatbread pizza.  The ingredients are interchangable as well. Petite diced canned tomatoes could be substituted for the sun dried tomatoes, mushrooms for the artichoke hearts, a little pesto would be a good addition, you can see what I mean. It’s just important to taste as you go to achieve the right balance of flavors.

This would have been great over the poached chicken breasts I made from the last post but I decided to learn another method.  In this recipe, also from Cooks Illustrated, boneless chicken breasts are lightly salted, then parcooked in a covered casserole in the oven. The chicken is then pan seared in a moderately hot skillet and kept moist with a slurry of flour, butter and cornstarch that is brushed on at the end. It gives a nice coating to the chicken and helps it stay moist. As with all meat, poultry and fish recipes, an instant read thermometer takes away the guesswork  and is essential for the best results.

DSC_1107a
The ingredients for the topping.

Mediterranean Topping

Makes about 4 cups

Ingredients

  • 2c marinated, quartered artichoke hearts from a 12oz jar, drained (save liquid)
  • 2T capers, drained and rinsed
  • 1/2c sun dried tomatoes, drained, chopped and lightly patted dry
  • 1/2c olives, combination of green and black, pitted and chopped
  • 1/3c chopped roasted peppers
  • 1/4c chopped fresh parsley
  • Balsamic vinegar and lemon juice to taste
  • Kosher salt and freshly ground pepper

Directions

  1. In a medium bowl combine the artichoke hearts, capers, sun dried tomatoes, olives, roasted peppers and parsley.
  2. Add balsamic vinegar, salt and freshly ground pepper to taste.

DSC_1115a

DSC_1124a

Pan Seared Chicken Breasts

From Cooks Illustrated March 2010

Serves 4

Ingredients

  • 4 boneless skinless chicken breasts, 6-8 ounces each, trimmed of excess fat
  • 2t kosher salt (1t regular salt)
  • 1T canola oil
  • 2T unsalted butter melted
  • 1T all purpose flour
  • 1t cornstarch
  • 1/2t freshly ground black pepper

Directions

  1. Place oven rack in the lowest position and heat to 275°F. Poke the thicker end of the chicken breast with a fork five to six times and sprinkle evenly with the salt. Place the chicken, smooth side down in a 9×13″ baking dish. Cover the dish tightly with foil. Bake until the thickest part of the breast registers 145-150°F on an instant read thermometer, start checking at the 30 minute mark, it could take as long as 40 minutes.
  2. Remove pan from the oven and transfer the chicken with tongs to a towel-lined plate and pat dry. Heat the oil in a 12-inch skillet over medium high heat until smoking. While you are waiting for the pan to heat up, whisk the melted butter, cornstarch and flour together. Brush the top of the chicken with half of the butter mixture. Place the chicken in the skillet, coated side down and cook until browned, 3-4 minutes. While the chicken is browning, coat the other side of the chicken with the remaining mixture. Flip the chicken over with tongs, reduce heat to medium and cook until the second side is browned and the thickest part of the breast registers 160°F, another 3-4 minutes. Transfer chicken to a serving plate.
  3. Serve chicken with Mediterranean topping.

DSC_1120a


January 25, 2015 Poached Chicken Breasts with Warm Tomato Ginger Vinaigrette

DSC_0828a

Poach (poch) verb, to take by illegal methods, in this case, as in taking all the flavor out of a chicken breast, leaving it tough, stringy and tasteless.  Sound familiar? If you were offered a poached chicken breast you might be inclined to decline, and rightfully so.  Cooks Illustrated has taken this classic techinque and perfected it for the home cook. It’s not that difficult or time consuming and will produce consistently good results.

Poaching is a gentle cooking method, best for delicately flavored foods, whether it be an egg, fish, or in this case, chicken. The chicken is cooked in a simmering liquid, just under the boiling point between 160°F and 180°F. Problems occur when the poaching liquid is either too cool or too hot or the cook minding the pot has left the poaching process go on too long.  This method does require some watchfulness but is much easier than traditional approaches to poaching.

As with any recipe, start with the best product you can find. Just like you, your chicken shouldn’t be bloated so look for a brand that has not been injected with a saline solution.  Trim away any excess fat or sinew before proceeding with the recipe. I have found that four 6-8 ounce chicken breasts are optimal. Wrap each chicken breast in plastic wrap and pound firmly on a stable surface. Your goal is to even out the thickness of the breast so you should be pounding the thicker top part to be more in line with the thinner “tail”. Whatever you do, don’t pound with the jagged side of a meat tenderizer. It will tear the meat and leave you with something unusable. I have a flat mallet expressly for this purpose but a heavy skillet or the flat side of the tenderizer will work as well.

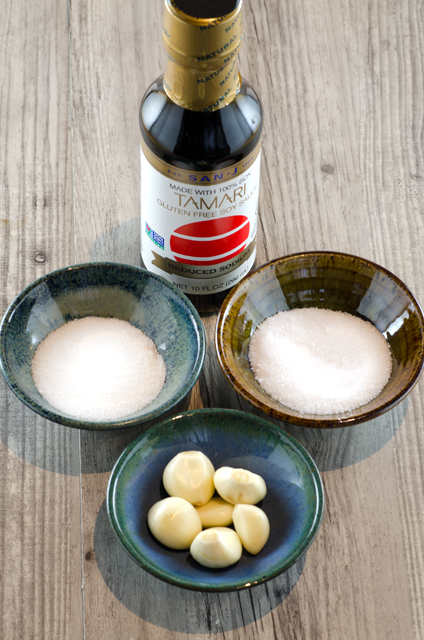
Next step is the poaching liquid, classic French recipes usually include flavorings such as wine, lemon, stock or a bouquet garni. The chefs at Cooks Illustrated have done years of testing for various recipes to determine what flavorings will actually permeate into the cell wall of the meat. With the knowledge they have acquired over the years, they determined that salt, sugar, garlic and soy sauce would flavor the meat and still leave the chicken with a neutral flavor suitable to a wide range of recipes. Soy brings that desired “umami” or meaty, savory flavor.  I chose to use a gluten-free low sodium soy sauce since salt was one of the ingredients in the poaching liquid.

You will need a very large pot to cook the breasts, enough to accomodate four quarts, a full gallon of water plus a little room at the top. A word to the wise, start with your pot on the burner and bring the water and the ingredients to it. In my case, a Le Creuset pot filled with a gallon of water is quite cumbersome and heavy to carry. Whisk the ingredients together in your pot until the salt and sugar are dissolved. Place a steamer basket, metal works best here, in the bottom of the pot. This is used to keep the breast from making contact with the bottom of the pot, allowing for the chicken to cook evenly on all sides.  My steamer has a ten inch diameter when opened and comforably held the breasts without overlapping or crowding. Cover and let the pot sit at room temperature for 30 minutes. This allows the internal temperature of the breast you just recently took from the refrigerator to slowly rise. After the short brine, turn the heat on your stove to medium.

Stir the water occasionally to even out any hot spots. It should take about 15-20 minutes for the water to reach a temperature of 175°F. I used my thermapen to check every five minutes or so but clipping a thermometer to the inside of the pot works as long as you are diligent to check the temperature’s progress. When the water is at the right temperature, turn off the heat and cover the pan.

Now you have a little time to make a salad and a vinaigrette (the one that follows or your own) while the chicken cooks.  Cooks Illustrated suggests that you remove the chicken at 160°F, the suggested internal temperature for poultry. I remove mine at a slighly lower temperature (155°F) knowing that the chicken will continue to rise in temperature even after it is removed from the cooking liquid. Place the chicken breasts on a piece of foil and wrap loosely.

Let chicken rest for 5 minutes. Slice the breast on a slight bias, running with the grain of the meat. I served it with a warm tomato ginger vinaigrette, an excellent accompaniment, inspired by chutney ingredients. Just remember if you are using grape tomatoes, they are meatier with a thicker skin and will not break down as easily as a cherry tomato. Serve the chicken on a bed of greens, stuff in a pita pocket or shred as a last minute addition to a soup recipe.

Wrap each chicken breast in plastic wrap and pound with the flat edge of a mallet to an even thickness.


The ingredients that flavor the chicken breast, soy, salt, sugar and garlic.

Perfectly Poached Chicken Breasts

Cooks Illustrated March/ April 2014

Serves four

Ingredients

  • 4 (6 to 8 ounce) boneless, skinless chicken breasts, trimmed
  • ½c soy sauce (I used gluten-free, low sodium)
  • ¼c salt (I used kosher)
  • 2T granulated sugar
  • 6 garlic cloves, smashed and peeled

Directions

  1. Individually wrap each breast in plastic and pound thick ends to an even thickness with tail end, about 3/4 inch thick.
  2. Whisk 4 quarts water, soy sauce, salt, sugar and garlic in a Dutch oven until the sugar and salt are dissolved. Arrange breasts, skinned side up in a steamer basket, making sure the breast don’t overlap. Submerge the steamer basket in the brine. Let sit at room temperature to brine for 30 minutes.
  3. Heat the pot over medium heat, stirring occasionally to even out any hot spots. In 15-20 minutes the water should reach a temperature of 175°F.  Turn off the heat,  take it off the burner and cover. Let stand until meat reaches desired temperature, 155°F to 160°F, start checking temperature of the meat in the thickest part of the breast at the 15 minute mark.
  4. Transfer breasts to a cutting board, cover with aluminum foil and let rest for 5 minutes. Slice the breast on the diagonal into 1/4 to 1/2 inch thick slices and serve.

DSC_0823a

Warm Tomato-Ginger Vinaigrette

Ingredients

  • ¼c extra virgin olive oil
  • 1 minced shallot
  • 1 ½t freshly grated ginger
  • ¼t ground cumin
  • 1/8t ground fennel
  • 12 ounces of cherry or grape tomatoes (halved if cherry tomatoes, quartered if grape)
  • Salt and pepper
  • 1T red wine vinegar
  • 1t packed brown sugar
  • 2T chopped fresh cilantro or parsley

Directions

  1. Heat 2 tablespoons of the olive oil in a  10-inch skillet until shimmering. Add shallot, garlic, cumin and fennel and cook until fragrant, about 15 seconds.
  2. Stir in the tomatoes and a pinch of salt and cook, stirring frequently until the tomatoes have softened, 3 to 5 minutes.
  3. Off heat stir in the vinegar and sugar and season with salt and pepper to taste, cover or put under a heat lamp to keep warm. Stir in cilantro or parsley and remaining oil just before serving.

DSC_0846a

June 27, 2014 Grilled Chicken with Chermoula Sauce

DSC_7879a

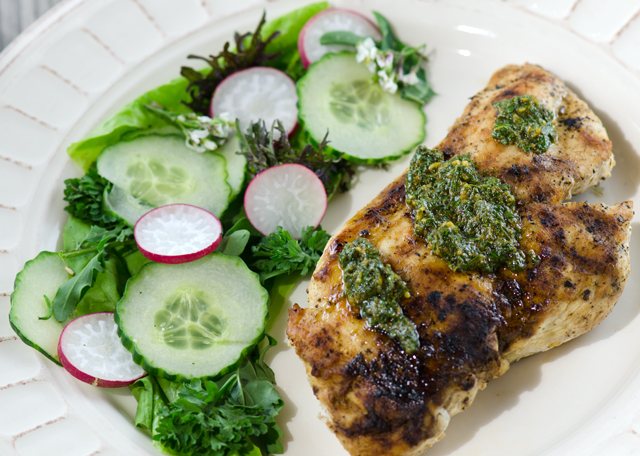
As a lover of all things related to food and cooking, I am especially pleased when I discover something new, at least new to me. In the tradition of herb and olive oil based sauces like pesto and chimichurri, chermoula is a sauce that originates from Morocco and other North African countries. It is a tangy blend of fresh herbs and spices, lemon and olive oil.

It is traditionally used to season fish but pairs equally as well with chicken or grilled vegetables. It can be both a dry spice mixture or more commonly, an herb sauce. I used it both ways in this recipe. First, as the rub for the chicken and then as the sauce to serve with the chicken. If you like, preserved lemon peel or a pinch of saffron would be a welcome addition to the mix. If you don’t like cilantro, either change the proportions of cilantro and parsley or eliminate it altogther. Traditionally, like pesto, this was made in a mortar and pestle but a mini food processor makes quick work of the recipe. I cooked these indoors on a grill pan, if I were cooking on an outdoor grill I would prefer whole chicken pieces.  Friendly to many diets, chermoula is a sauce worth discovering.

Grilled Chicken Breasts with Chermoula Sauce

Serves four

Ingredients for marinated chicken
  • 4 pieces boneless, skinless chicken breast
  • 4 T fresh-squeezed lemon juice
  • 4T olive oil
  • 1t ground cumin
  • 1t ground coriander
  • 1t garlic powder
  • 1t sweet paprika

DSC_7856a

Ingredients for the Chermoula Sauce

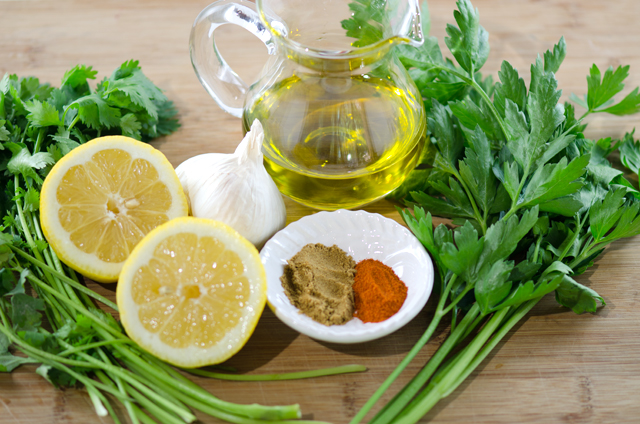
  • 2 large garlic cloves, coarsely chopped
  •  1/2 c coarsely chopped cilantro
  • 1/4 c coarsely chopped parsley (flat is my preference, but curly works too)
  • 1 T + 2 t freshly squeezed lemon juice
  • 1/2 t sweet paprika
  • 1/2 t ground cumin
  • 1/4t cayenne pepper (optional)
  • 1/8t saffron threads (optional)
  • 4 -5 T olive oil
  • Kosher salt and pepper to taste

Directions

  1.  Trim all fat and sinew from chicken breasts. Place chicken breast between two pieces of plastic wrap and with the flat edge of a mallet, pound to an even thickness, season generously with kosher salt. Whisk together lemon juice, olive oil and spices to make the marinade. Put chicken pieces inside a Ziploc bag or plastic container with a snap-tight lid, pour marinade over and let chicken marinate in the refrigerator 4-6 hours, turning bag occasionally.
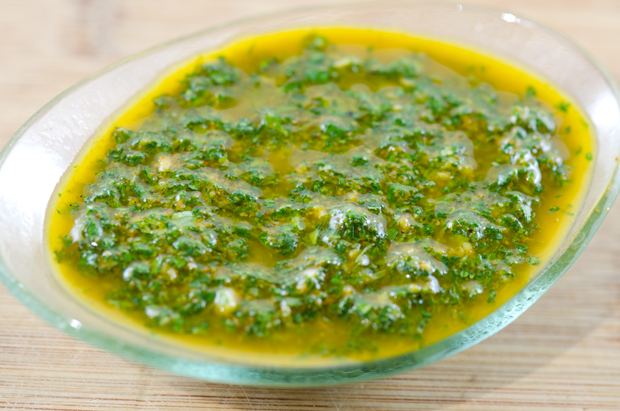
  2. To make the chermoula sauce, put chopped garlic, chopped cilantro, chopped parsley, lemon juice, sweet paprika, and ground cumin, cayenne and saffron (if using) in food processor and pulse to combine. Add the 4 T olive oil and pulse just enough to get it mixed in, then taste to see if you want the other tablespoon of oil and add it if you want a milder sauce. (Don’t over-process; the mixture is not supposed to be smooth.) Add salt and pepper to taste.
  3. To cook the chicken in a grill pan, spray grill pan with nonstick grill spray or brush with oil and preheat grill pan to high (you can only hold your hand there for a few seconds at that heat.) Let chicken come to room temperature while the pan heats.
  4. To get criss-cross grill marks, lay the chicken top-side down at a diagonal across the grill pan and let it cook until well-defined grill marks are showing, about 3-4 minutes. It’s okay to lift a corner to check.  Turn the chicken so it’s going the opposite way at an angle to the grill grates and cook about 3-4 more minutes. Then turn chicken over and cook 4-5 minutes on the second side, or until chicken is firm but not hard to the touch.Serve chicken hot, with Charmoula Sauce spooned over.

DSC_7862aDSC_7886a

June 9, 2014 Chicken Paillards with Asparagus, Garlic and Tarragon

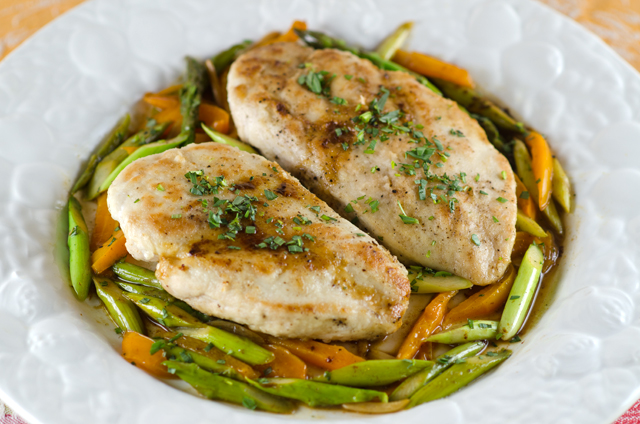
DSC_7650aFor an easy weekend supper, nothing comes together quicker than a chicken paillard. A paillard, (pi-YAR) is a  boneless piece of meat, in this case, chicken that has been pounded flat and sauteed or grilled quickly. Actually the term paillard has fallen out of favor in the cooking world and has been replaced with the word escalope (es-kuh-LOHP). In English we would refer to it as a “scallop”, not of the seafood varety of course.

I couldn’t find the word paillard in The Food Lover’s Companion or in James Peterson’s exhaustive work, Glorious French Food. But everyone, from Rachael Ray to Daphne Oz of “The Chew” to Martha Stewart has recipes online for chicken paillards, so it’s worth keeping that definition under your hat.

Remove any tenderloins or extra fat before wrapping the breast in plastic wrap. Then pound out the meat with the flat side of a mallet to an even thickness. Pound from the fattest part of the breast outward to avoid tearing the meat.
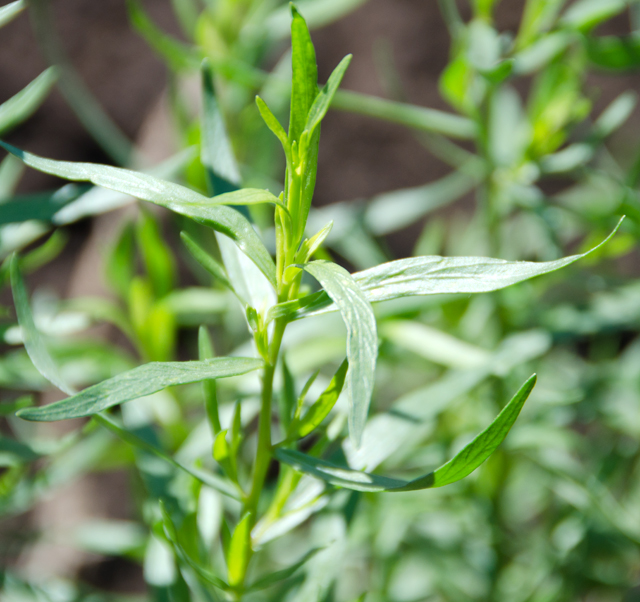
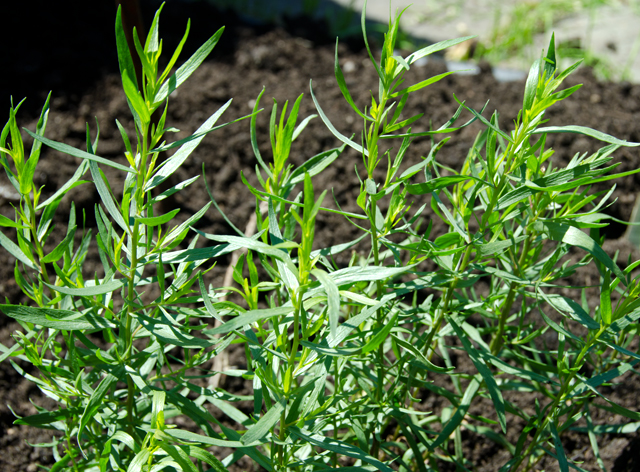
Another French term is very important to this recipe, mise en place (MEEZ ahn plahs). Translated, this means “to put in place”. Start by reading the recipe all the way through, then check to see that you have all the ingredients necessary, or at least a reasonable substitute. I chose to use tarragon in this recipe, the original used dill. The tarragon in our garden is starting to fill in nicely and it’s anisey flavor is a natural with chicken dishes. All of the other ingredients should be measured out, prepped and ready to go, garlic sliced, lemon zested and juiced and vegetables cleaned and cut to size. In less than fifteen minutes of cooking time you can have a meal on your table that is easy and elegant.

Tarragon in the garden.

Chicken Paillards with Asparagus, Lemon, Garlic and Tarragon

Serves 4

Ingredients

  • 4 boneless, skinless chicken breast halves, tenders removed
  • 1/3c all purpose flour
  • Kosher salt and freshly ground pepper
  • 1/4c extra virgin olive oil
  • 1/2c lower salt chicken broth or chicken stock
  • 6 medium cloves garlic, thinly sliced
  • 1 large lemon, finely grated to yield 1t zest and squeezed to yield 3T juice
  • 1 lb. asparagus, trimmed and cut into 2-inch pieces
  • 1 medium orange or yellow pepper cut into 2-inch strips
  • 2T chopped fresh tarragon
  • 2T unsalted butter, cut into 3-4 pieces

Directions

  1. Using the flat side of a meat mallet, pound each chicken breast between 2 sheets of plastic wrap to an even 1/4-1/2 inch thickness
  2. In a shallow bowl, combine the flour, 2t salt and 1t pepper.
  3. Heat 2T oil in a 12-inch skillet over medium-high heat. Dredge 2 paillards in the flour, shaking off any excess, and place in the skillet. Cook, flipping once, until lightly browned, about 4 minutes total. Transfer chicken to a plate and keep warm. Repeat with the remaining oil and paillards
  4. Add the garlic to the skillet and cook over medium high heat, stirring occasionally, for about a minute. Add the chicken broth and lemon zest, scraping up any browned bits from the skillet. Add the asparagus, pepper, chicken and any accumulated juices. Nestle the chicken pieces into the liquid. Bring to a boil, turn down the heat to maintain a simmer. Cover and cook until the chicken is cooked through and the vegetables are tender, 5 to 7 minutes. Transfer the chicken to a serving platter or plates.
  5. Remove the skillet from the heat and stir in the lemon juice, tarragon and the butter. Season to taste with salt and pepper. Spoon the vegetable mixture over the chicken and serve.

DSC_7646a

May 4, 2014 Lemony Chicken and Orzo Soup

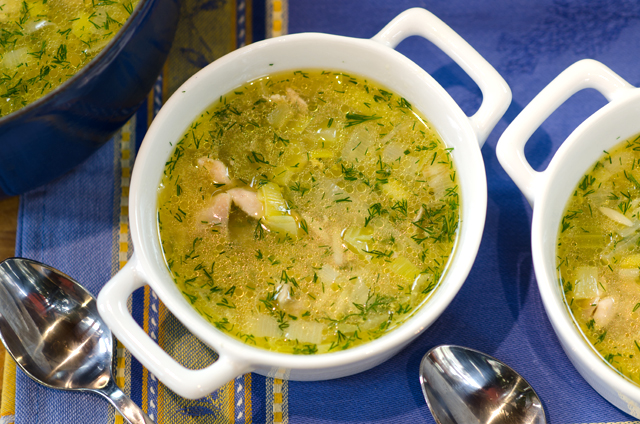
DSC_6841aWhat could be better on a chilly and rainy spring evening than a bowl of warming soup? Our latest rainstorm brought us cooler than normal temperatures and rain that was coming down at a half an inch per hour. Lemony chicken and orzo soup was the perfect choice. It’s a blend of the comfort of chicken noodle soup with a tip of the hat to avgolemono, the classic Greek egg and lemon soup.

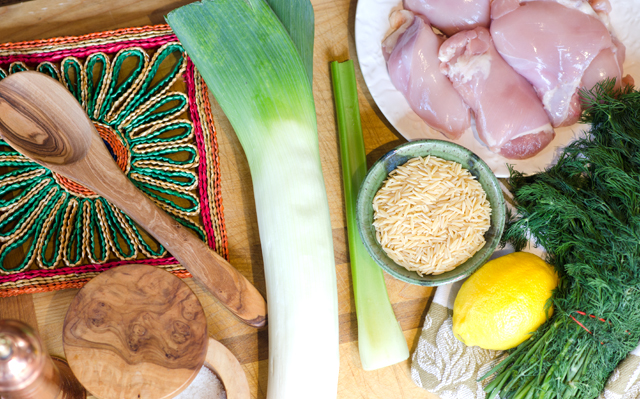
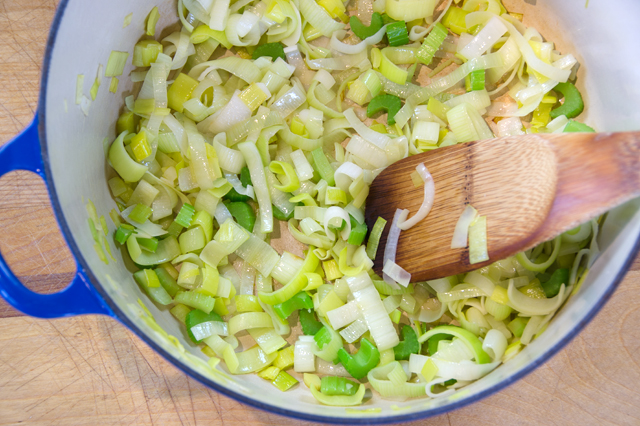
Easy enough for a weeknight dinner, the initial prep time is only about five minutes and soup is on the table in less than an hour. It starts with chopped leek and celery sautéed in olive oil until softened. Next boneless chicken thighs and broth are added to the pot, brought to the boil and simmered. Chicken thighs are the best choice in making soup, they hold up well and stay tender in cooking. Orzo means “barley” in Italian and is the rice shaped pasta in this soup. Though not essential, you could toast the orzo first, it adds a depth and nuttiness to the soup. If you choose to toast, do this first in the pot you will cook the soup in, eliminating the need to dirty an extra pot. The orzo is cooked in the broth and the chicken is shredded and added back to the soup.


What really takes this soup from average to outstanding is the addition of fresh chopped dill and a squeeze of lemon at the end that brightens the flavors. Let each diner add  lemon to their own taste. More vegetables could be added if desired, sliced carrots or baby spinach would be good choices. A new approach on an old classic that is quick, simple and delicious.

DSC_6828a

Lemony Chicken and Orzo Soup

Serves four

Ingredients

  • 1 T butter (if toasting the orzo)
  • 1 T olive oil
  • 1 medium leek, white and pale-green parts only, halved lengthwise, sliced crosswise 1/2″ thick
  • 1 celery stalk, sliced crosswise 1/2″ thick
  • 12 oz. skinless, boneless chicken thighs
  • 6 c low-sodium chicken broth
  • Kosher salt, freshly ground pepper
  • 3/4c orzo
  • 1/3 to 1/2 c chopped fresh dill
  • Lemon halves (for serving)


DSC_6837a

Directions

  1. If toasting the orzo. Heat a dutch oven over medium heat. Add butter to melt. Add orzo and cook until toasted, 3-5 minutes. Transfer to a plate
  2. Heat oil in a large heavy pot over medium heat. Add leek and celery and cook, stirring often, until vegetables are soft, 5-8 minutes.
  3. Add chicken and broth; season with salt and pepper. Bring to a boil, cover, reduce heat, and simmer until chicken is cooked through, 15-20 minutes. Transfer chicken to a plate. Let cool, then shred chicken into bite-size pieces.
  4. Meanwhile, return broth to a boil. Add orzo and cook until al dente, 8-10 minutes.
  5. Remove pot from heat. Stir in chicken and dill. Serve with lemon halves for squeezing over.

DSC_6843a