September 8, 2013 Anise Hyssop Ice Cream

DSC_2170a


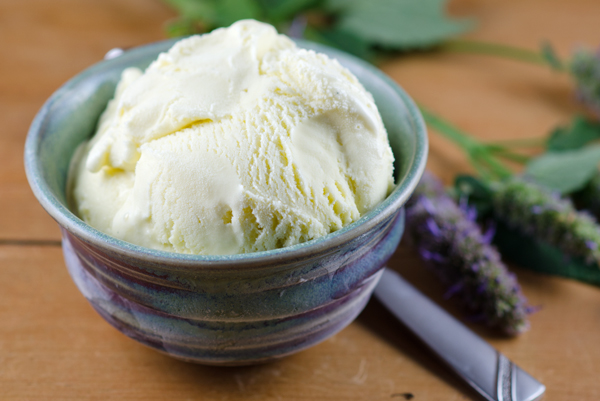
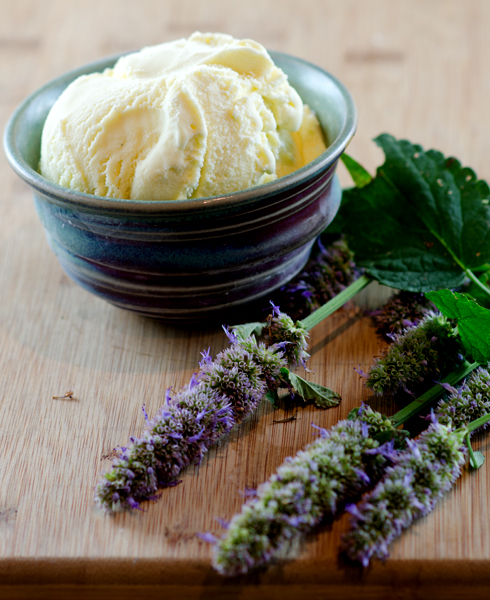
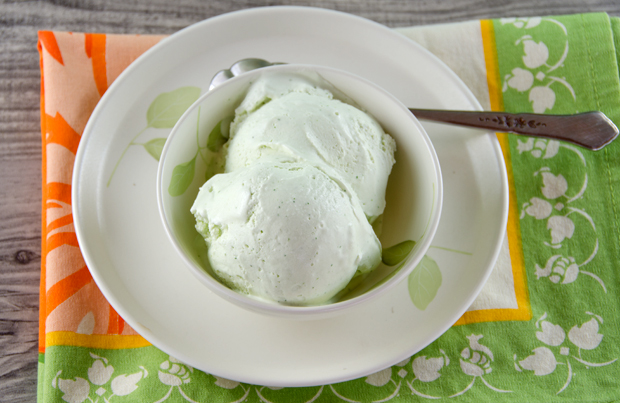
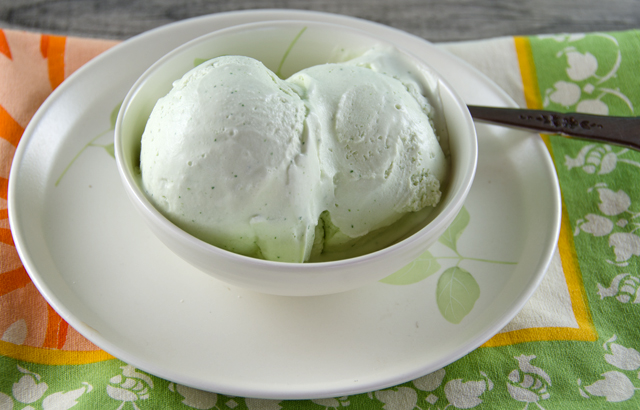
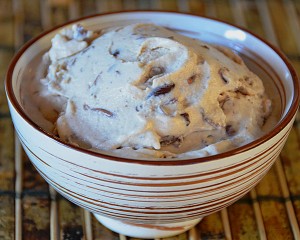
Herbal ice creams are a delicious way to capture the flavors of summer. I can’t let the season go by without making one of my favorite treats, sweet licorice flavored anise hyssop ice cream.

Anise hyssop is indigenous to North America and has been used for many years by Native Americans as a medicinal cure for everything from bad breath to a “dispirited heart”. The name can be misleading, it doesn’t belong to the same genus as anise or hyssop, though it smells like anise and it’s flower and stem are similar to hyssop. Anise hyssop belongs to the mint family, it’s botanical name is Agastache foeniculum and is sometimes referred to as licorice mint.

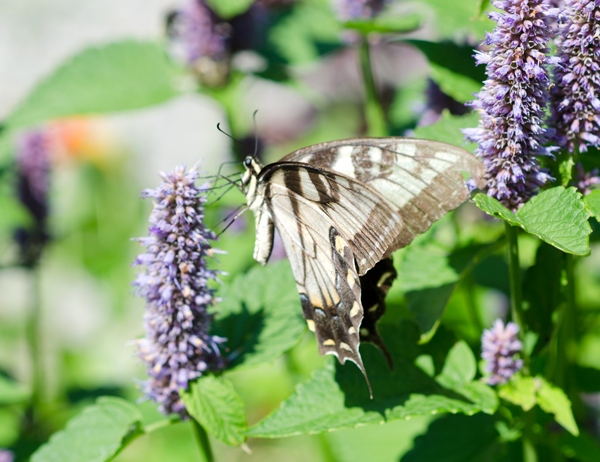
The plant can grow to 3 feet tall with beautiful blue-violet 4 to 6 inch spikes reminiscent of the flowers of a lavender plant. We have been growing anise hyssop for many years. The plants are a colorful addition to our herb garden and the blossoms attract both butterflies and bees. The plants die back in the winter, some plants will come back in the spring while others reseed themselves. The leaves are surprisingly sweet, the sweetest leaves are the ones closest to the blossoms.

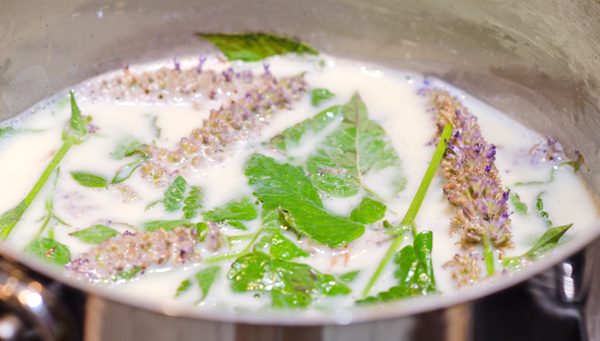
The flowers and stems can be used in various infusions. Try infusing a simple syrup with anise hyssop for poaching summer fruit or in milk or cream for a crème brulee or a custard sauce. It’s blossoms can add a touch of sweetness to a fruit salad. It makes a tea with natural sweetness either hot or iced.  I have always used anise hyssop on it’s own in making ice cream but it could be combined with summer fruits like apricots, nectarines or peaches for a refreshing treat.   As with all herbal ice creams, the milk and some of the cream are first heated and then the anise hyssop sprigs are pushed under the surface of the liquid. The milk and cream mixture infuse off heat, an hour is sufficient to achieve the fullest flavor. I chose to make custard style ice cream that requires tempering eggs and produces a richer ice cream. An easier choice would be a Philadelphia style ice cream that is just made with cream and milk.

Anise Hyssop Ice Cream

Made with the Fine Cooking Recipe Maker

Makes one quart

Ingredients

  • 2c heavy cream
  • 1c whole milk
  • 3/4c granulated sugar
  • Table salt
  • 6 4-inch anise hyssop sprigs, with flower buds if possible
  • 5 large egg yolks
  • 1t vanilla extract or vanilla paste

DSC_2163a

Directions

  1. In a medium saucepan, mix 1 cup of the cream with the milk, sugar and a pinch of salt.  Warm the cream mixture over medium-high heat, stir occasionally, until the sugar dissolves and tiny bubbles begin to form around the edge of the pan, 4-5 minutes.
  2. Stir anise hyssop sprigs into warmed mixture. Cover and remove the pan from the heat and let sit for 1 hour. After 1 hour, taste and let sit longer if you desire a stronger flavor.
  3. Prepare an ice bath by filling a large metal bowl with several inches of ice water. Set a smaller metal bowl in the ice water. This will help the custard to cool quickly. Set a fine strainer over the smaller bowl.
  4. Whisk the egg yolks in a medium bowl.
  5. Rewarm the cream mixture over medium high heat until tiny bubbles begin to form around the edges of the pan, 3-4 minutes. In a steady stream, pour half the warm cream mixture into the egg yolks, whisking constantly to prevent the eggs from curdling.
  6. Pour the egg mixture back into the saucepan and cook over low heat. Stir constantly and scrape the bottom of the pan with a heat proof spatula until the custard thickens slightly. The custard will be thick enough to coat a spoon and hold a line drawn through it with a finger. An instant read thermometer will read 175°F to 180°F. It is important to remove the custard immediately from the heat at this point to prevent it from curdling. Immediately strain the custard into the cold cream in the ice bath. Press firmly on the anise hyssop in the strainer with the spatula to extract as much flavor as possible.
  7. Cool the custard to below 70°F by stirring it over the ice bath. Stir the vanilla extract or paste into the cooled custard.
  8. Refrigerate the custard until completely chilled, at least 4 hours or overnight. Freeze the custard in your ice cream maker according to manufacturer’s directions. Transfer the ice cream to an air-tight container for 4 hours and up to a week before serving.
DSC_1841a
Infusing the milk and cream with anise hyssop leaves and blossoms.
DSC_1823
Both butterflies and bees love anise hyssop!

DSC_1817aDSC_2163a

August 27, 2013 Chocolate Mint Sorbet

DSC_2055a

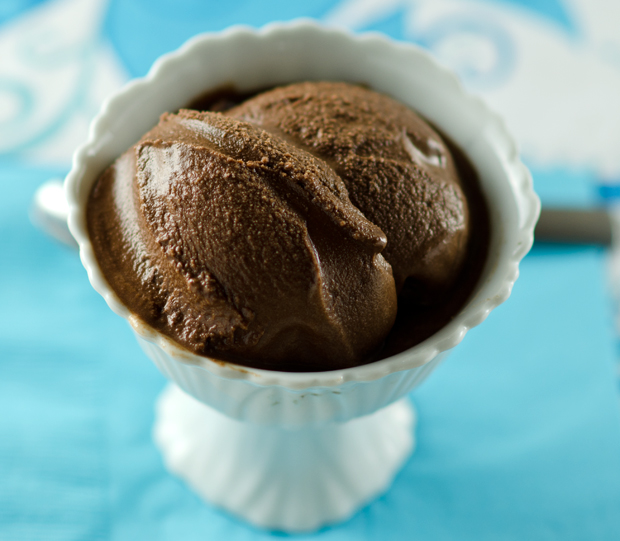
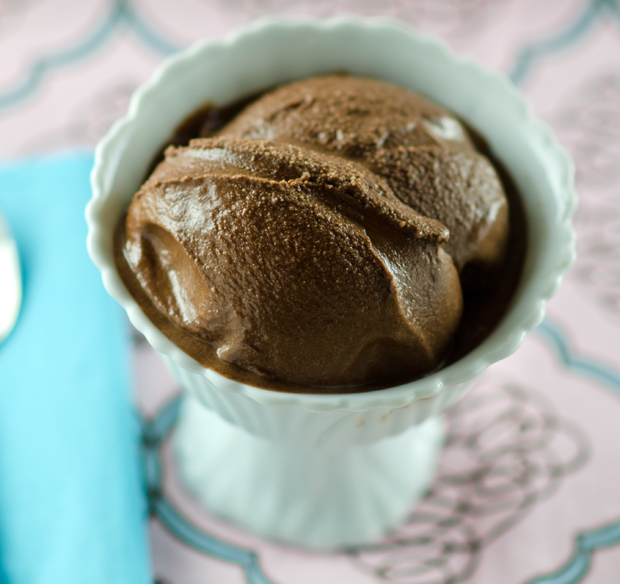
When given a choice between ice cream and sorbet, nine times out of ten I am going to opt for ice cream. But when the frozen treat is made with rich dense chocolate and cool refreshing mint I will be the first to make my choice sorbet.

Sorbet, by definition is a frozen dessert that contains no dairy or eggs. Most of the time it is made with a fruit base, but in this recipe, chocolate, in the form of semi or bittersweet chunks and cocoa powder bring an unexpected creamy smoothness to the frozen treat.

Making sorbet is relatively easy. It starts with a syrup that combines the simplest of ingredients, granulated sugar and water. The typical one to one ratio of many simple syrups is increased in this recipe to more than three to one (water to chocolate) because of the addition of sweetened chocolate to the syrup. If you chose to use unsweetened chocolate the syrup should be sweeter. The two are brought to a boil, taken off the heat and infused with sprigs of mint.

DSC_1879a
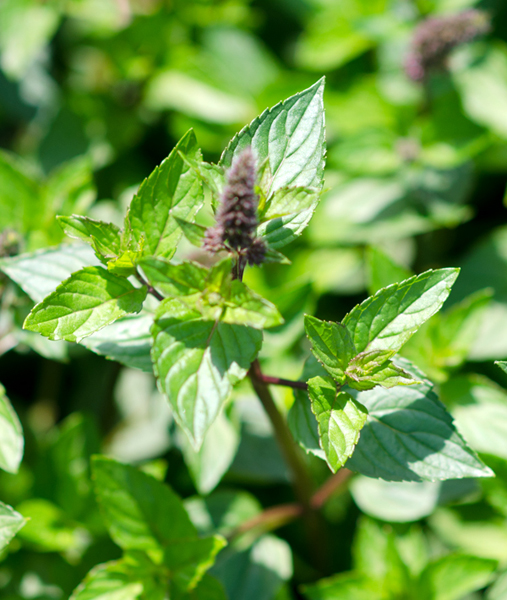
Mint with blossoms.


Mint is one of the easiest herbs to grow and we have many varieties in our garden. It is a perennial (meaning it will come up every year) and can quickly become invasive. Either choose an area in the garden where you don’t mind if it spreads or plant mint in containers. I chose spearmint for my sorbet, it has a milder, sweeter flavor than the more robust flavor of peppermint. Mint can be quite intense so taste your syrup after it has steeped a bit. A half hour is usually my stopping point. The mint should bring a refreshing flavor and never overwhelm the mixture. Strain the simple syrup, I like to do this several times to ensure no particles of mint are left behind. Return the syrup to a simmer add the chopped chocolate and cocoa powder and whisk until smooth. Choose a good quality chocolate for your sorbet since it will be the star of the dish. In a 2008 taste test with a large selection of brands, Cooks Illustrated recommended both Callebaut and Ghirardelli, the later having a wider distribution in many supermarkets.

Whisk the mixture until smooth. Refrigerate until thoroughly chilled, overnight works best. Be sure to stir the mixture before adding it to the ice cream maker.  If you don’t own an ice cream maker you can still make this dessert. Place the mixture in a shallow wide stainless steel pan and place in the freezer for several hours until set. Remove the pan from the freezer and puree the almost frozen mixture in a food processor. Return this mixture to the pan, cover and freeze several hours before serving. The texture will be more grainy, like a granita, but just as delicious. Let the sorbet stand at room temperature for about ten minutes to soften before scooping. So when you crave something cold and minty with some satisfying richness, try this delicious treat.
DSC_2052a

Chocolate Mint Sorbet

Makes 5 cups

Ingredients

  • 3/4c granulated sugar
  • 3c water
  • 6 4-inch sprigs of peppermint, spearmint or chocolate mint
  • 6 oz premium bittersweet or semisweet chocolate, chopped
  • 1/2c unsweetened cocoa powder

Directions

  1. Bring the sugar and water to a boil in a medium saucepan. Add the mint, cover, and remove from the heat and steep for 30 minutes. Strain and return the syrup to the saucepan.
  2. Return the syrup to a simmer. Add the chocolate and cocoa, remove the pan from the heat and whisk until smooth. Refrigerate until thoroughly chilled. Freeze in an ice cream maker according to manufacturer’s directions.
DSC_2037a
Infusing mint into the simple syrup.
DSC_1880a
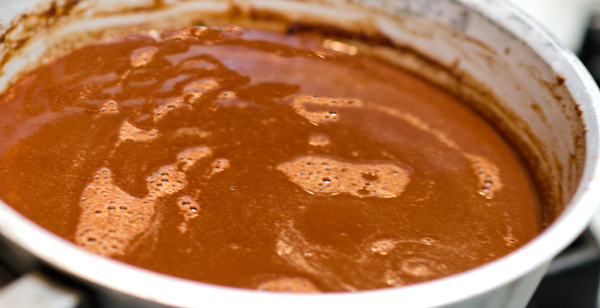
After straining the mixture, add both chocolates and whisk thoroughly.

DSC_2057a

June 12, 2013 Strawberry Frozen Yogurt with Strawberry Sauce

 DSC_0592a

Our Sunday cookouts are taking on an international flavor this year and a craving for lamb (mine!) gave rise to a Greek theme for this past week. I like to contribute a frozen dessert of some type so the first ripe red strawberries at the local farmers market inspired me to make strawberry frozen yogurt.

It’s hard to believe it but frozen yogurt has only been part of the dessert scene for less than forty years. It appeared first in New England in the late seventies as a healthier alternative to ice cream. At first consumers complained about the too tart flavor. Manufacturers retooled their recipes and frozen yogurt started to catch on in the health conscious eighties.

Making your own frozen yogurt is hands down better than anything you might find at the local “froyo” shop. When I have made frozen yogurt in the past, step one was to strain the yogurt through cheesecloth to give the finished product a denser texture and prevent the finished product from becoming too icy. Now that Greek yogurt is readily available I can skip that step.

What is the difference between regular and Greek yogurt? The watery whey is strained off several more times than regular yogurt resulting in a thicker product. Greek yogurt is more expensive than regular yogurt but it has almost twice the protein content and half the amount of sodium. The term “Greek” yogurt is not regulated at this point, so some manufacturers achieve thickness with cornstarch and milk protein concentrate. If that is important to you, look for Greek yogurt that contains only milk and live active cultures.

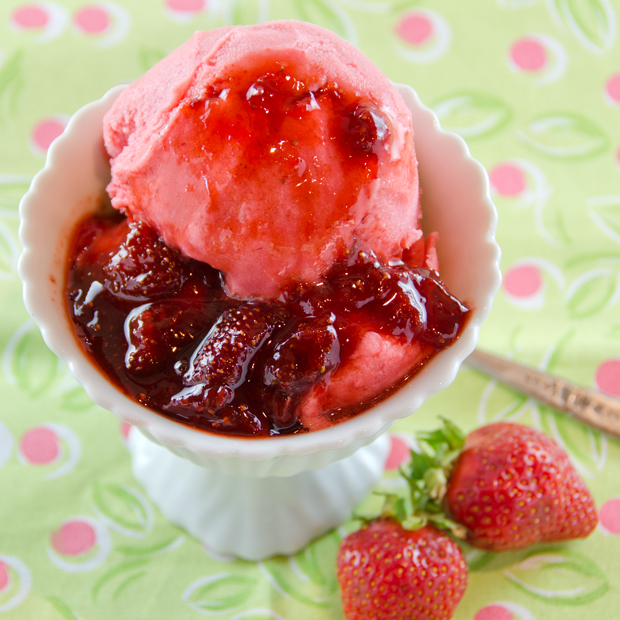
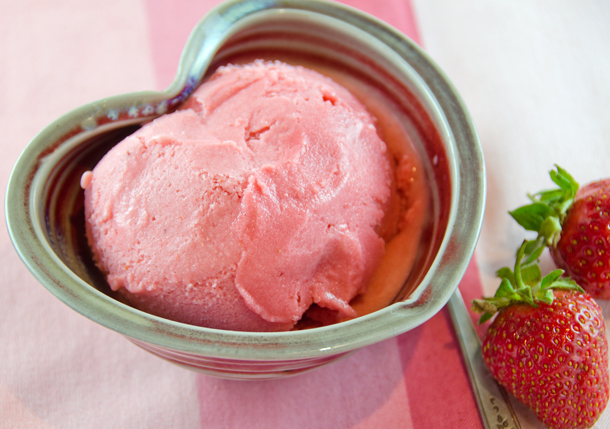
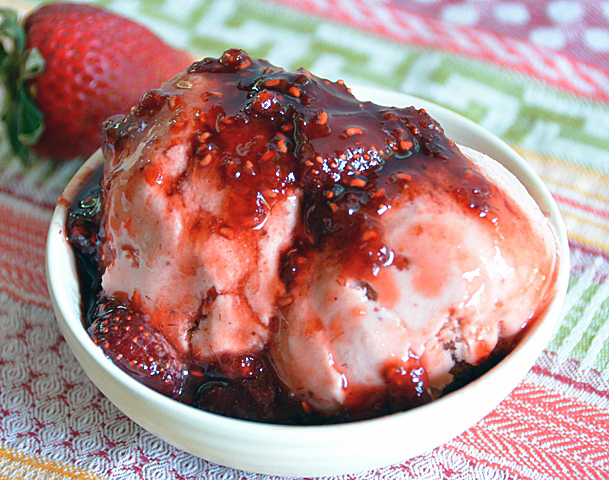
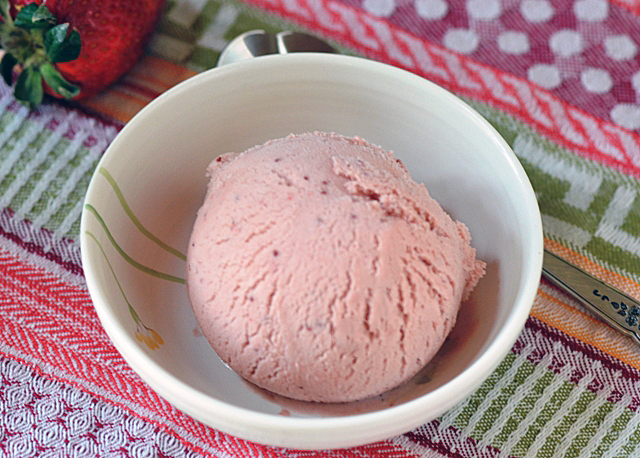
I turned to the always reliable recipes of David Lebovitz for my frozen strawberry yogurt recipe. David prefers a full-fat yogurt for his base, I went cross eyed looking over the very large display of yogurt at the local market. First, it was hard to find any plain varieties and most were labeled zero fat. I settled on a Greek plain 2% fat version and the results were great. A creamy and smooth frozen yogurt with just the right amount of tartness with early summer’s best fruit, sweet flavorful strawberries. I topped my frozen strawberry yogurt with even more berries in a simple sauce made from strawberries, sugar, a dash of lemon juice with a little pomegranate molasses.

Strawberry Frozen Yogurt

from David Lebovitz’s book The Perfect Scoop

 Makes about 1 quart

Ingredients

  • 1 pound strawberries, rinsed and hulled
  • 2/3 c sugar
  • Optional but good, he suggests  2 teaspoons vodka or kirsch, I used Chambord
  • 1 c  plain 2% Greek yogurt
  • 1 t fresh lemon juice

Directions

  1. Slice the strawberries into small pieces. Toss in a bowl with the sugar and liquor of your choice until the sugar begins to dissolve. Cover with plastic wrap and let stand at room temperature for 2 hours, stirring every now and then.
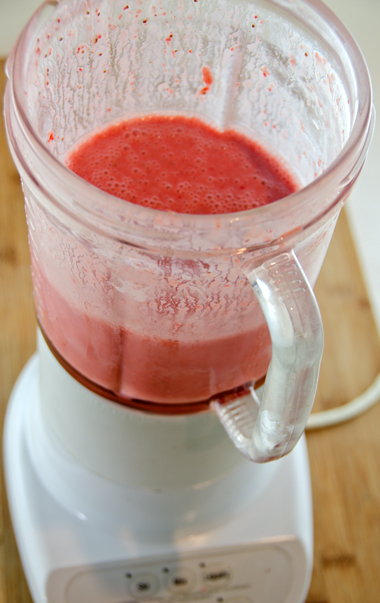
  2. Transfer the strawberries and their juice to a blender or food processor. Add the yogurt and fresh lemon juice. Pulse the machine until the mixture is smooth. If you wish, press mixture through a mesh strainer to remove any seeds. (I did..)
  3. Chill for 1 hour, then freeze in your ice cream maker according to the manufacturer’s instructions.

Strawberry Pomegranate Sauce

Makes about a cup

Ingredients

  • 1 c fresh strawberries, rinsed, hulled and cut into quarters
  • 2/3c granulated sugar
  • 1t fresh lemon juice
  • 2T pomegranate molasses

Directions

  1. Combine all ingredients in a small saucepan and cook over medium heat  until the strawberries cook down and begin to look syrupy.
  2. Serve at room temperature.
DSC_0409a
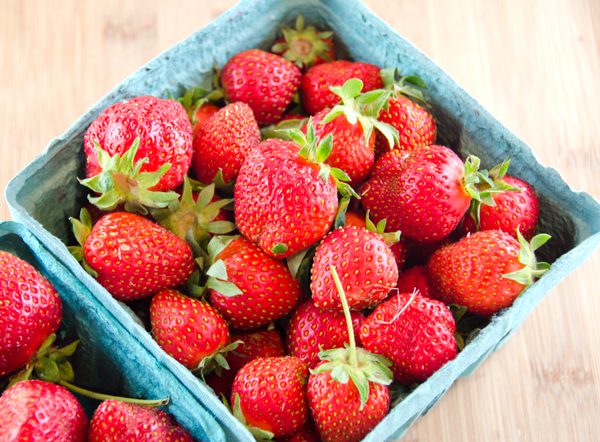
Beautiful ripe strawberries from the Wrightstown Farmers Market.
DSC_0411a
Getting juicy!
DSC_0420a
Blend it up!


DSC_0582a

April 10, 2013 Chervil Ice Cream

DSC_9671a

Warmer temperatures this week are letting us know that spring is truly here. Seedlings are poking up and soon we will be picking our first salad of the season. The chervil is thriving and I was looking for another way to use it this past weekend. I have enjoyed the licoricey flavor of anise hyssop ice cream for years, would the delicate flavor of chervil translate into an ice cream? Normally to infuse the flavor of an herb, whether it be anise hyssop, lavender or cinnamon basil, the milk and cream are heated and the herb is steeped off heat for about 30 minutes. The infusion is then strained and then you continue with the next step in the recipe. Chervil is very delicate and loses flavor when heated.

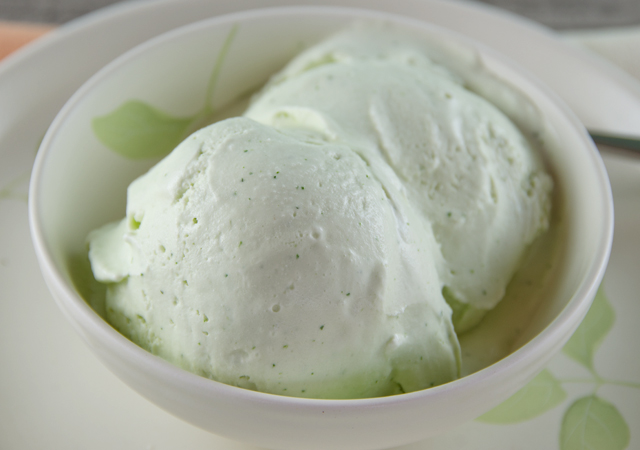
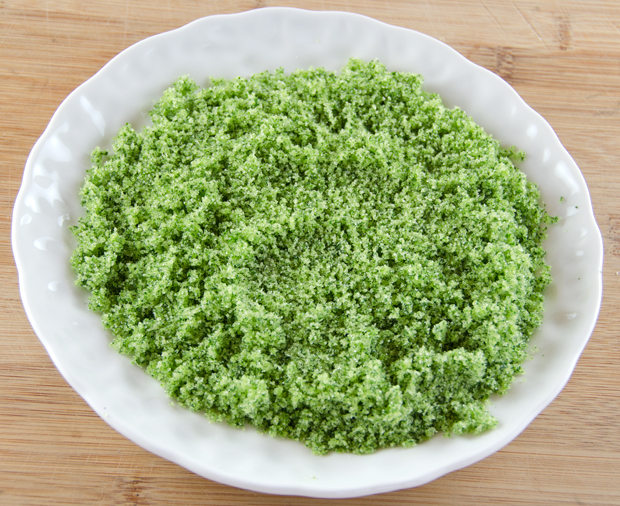
I turned to a method used in the Herbfarm Cookbook. In this recipe, chef Jerry Traunfeld uses a different approach with another delicate herb that loses flavor when heated, lemon verbena. The herb was ground with sugar and stirred into a cooled milk that had been steeped with ginger. I decided not use the ginger since I was concerned about another flavor dominating the chervil. I warmed the cream and milk to a simmer and let it cool to room temperature. Then I added the chervil sugar and let it steep for about a half hour. The mixture is chilled before a whirl in the ice cream maker. The results, very smooth and creamy with tiny, bright green flecks. The addition of sour cream to an ice cream recipe gives it a luscious mouth feel and unexpected tang.  If I made it again I would possibly enhance the flavor with a teaspoon of Pernod, that ‘s not cheating, is it? Enjoy this ice cream the same day it is made for maximum flavor.

DSC_9676a

Chervil Ice Cream

Makes a generous quart

Ingredients

  • 2c heavy cream
  • 1c whole milk
  • 1c gently packed chervil leaves
  • 1c plus 2T sugar
  • 1c full or low fat sour cream or creme fraiche
  • 1t freshly squeezed lemon juice
  • 1/8t kosher salt

Directions

  1. Bring the cream and milk to a simmer over medium heat (bubbles will form around the edges of the pan). Take pan off heat and allow to come to room temperature.
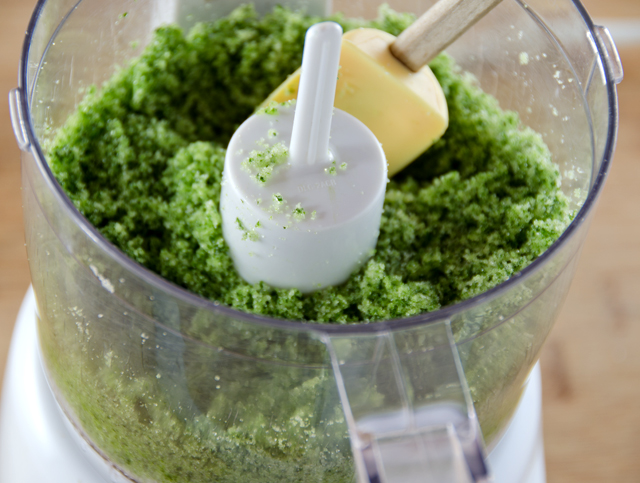
  2. Chop the chervil leaves in the food processor until the leaves are finely ground, about 1 minute. Stir the chervil sugar into the room temperature milk. Allow to steep for 30 minutes. Strain the mixture through a fine sieve. Refrigerate until chilled.
  3. Whisk the sour cream or creme fraiche in a medium mixing bowl to smooth it out. Gradually whisk in the chervil mixture, then mix in the lemon juice and salt.
  4. Freeze in an ice cream maker according to the manufacturer’s directions. Allow ice cream to further harden in the freezer for an hour or so before serving.
DSC_9650a
Grind the chervil with the sugar in a mini-processor.
DSC_9655a
Green sugar, how come you taste so good?

DSC_9663aa

DSC_9674a

December 15, 2012 Peanut Butter and Jam Bars

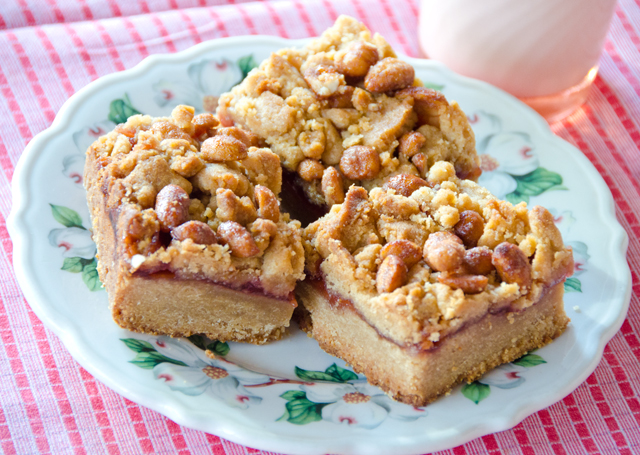
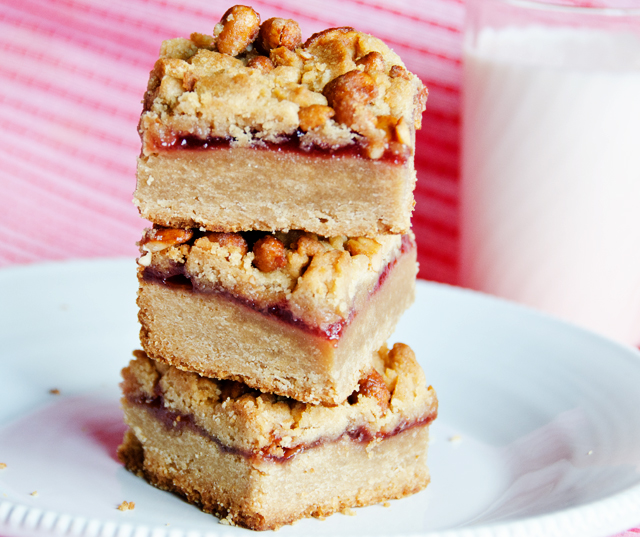
A broken foot put me out of commission and out of the kitchen for way too many weeks. During that time my sister in law Jody’s birthday occurred, and now that I am back on my feet I wanted to commemorate her special day, about two months after the fact! Jody is a lover of all things peanut butter. Her wedding shower even featured a table exclusively of various peanut butter treats. I decided on peanut butter and jam bars, so we could enjoy them for  dessert after Sunday dinner and I could send some home with everyone for later. 

In this classic combination of flavors, creamy peanut butter, crunchy peanuts and tangy sweet strawberry jam combine to make a delicious bar cookie. It’s a nice mix of sweet and salty, crunchy and soft. Interestingly, Ina’s original recipe is titled  Peanut Butter and Jelly bars, even though Ina calls for raspberry jam in hers. The classic duo, of course would be the childhood favorite, peanut butter and grape jelly. Feel free to substitute the jelly/jam of your choice. After much deliberation, I used strawberry jam.

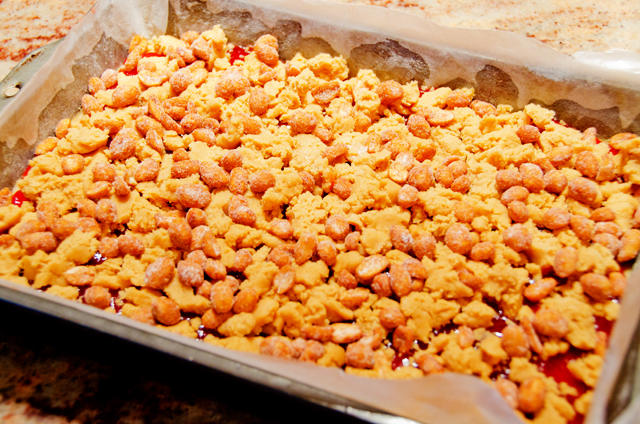
Don’t skip the parchment layer, it will make your life easier when you remove the cooled cookies from the pan.  I increased the amount of peanuts in my nut topping and chose honey roasted salted peanuts, because I like a little salty with my sweet. The next time I make these bars I will sprinkle some of the nuts on the jam so they will stick better before I crumble on the streusel topping. When I cut my bars this time I had too many escaped “errant nuts” that I had to push back on or consume in the name of neatness!!

The yield stated for the bars according to the original recipe is 24. I would most likely cut them on a 6×4 grid. However, as a former caterer I would be inclined to cut them even smaller, especially if they were going to be part of a dessert buffet.  I have always found that the smaller the portion, the more likely someone will take one. That way your guests can sample a larger variety of sweets with a little less guilt.  The bars keep best in the refrigerator and they get better with time, if you can keep them that long.

I must conclude with my rant concerning the ever shrinking world of product sizes. When Ina first developed this recipe in the kinder and simpler world of  2005, a standard 18 ounce jar of peanut butter and an 18 ounce jar of jam or jelly would be used for the recipe, leaving no leftovers. In late 2008, Unilever Brands, makers of Skippy, reduced the size of their standard 18 ounce jar of peanut butter to 16.3 ounces. The jar still looks exactly the same in shape and size, but there is a “dimple” in the bottom that reduces the content by about 10%. I am loyal to Skippy but if you are a “choosy mother”, you will find an additional ounce in your 17.3 ounce jar of Jif. So, what to do, reduce the amount of peanut butter in the recipe by about 2 ounces? I think not. The next size jar is 28 ounces, so 10 ounces of Skippy creamy peanut butter is waiting for the next recipe, another batch anyone?

Peanut Butter and Jam Bars

Yield 24 bars

From Barefoot Contessa at Home

Ingredients

  • 1/2 lb (2 sticks) unsalted butter, at room temperature
  • 1 1/2 c sugar
  • 1 t pure vanilla extract
  • 2 extra-large eggs, at room temperature
  • 2 c (18 ounces) creamy peanut butter (recommended: Skippy)
  • 3 c all-purpose flour
  • 1 t baking powder
  • 1 1/2 t kosher salt
  • 1 1/2 c (18 ounces) raspberry jam or other jam or jelly of your choice
  • 1 c  honey roasted salted peanuts, coarsely chopped

Directions

  1. Preheat the oven to 350 degrees F.
  2. Grease a 9 by 13 by 2-inch cake pan. Line it with parchment paper, then grease and flour the pan.
  3. In the bowl of an electric mixer fitted with the paddle attachment, cream the butter and sugar on medium speed until light yellow, about 2 minutes. With the mixer on low speed, add the vanilla, eggs, and peanut butter and mix until all ingredients are combined.
  4. In a small bowl, sift together the flour, baking powder, and salt. With the mixer on low speed, slowly add the flour mixture to the peanut butter mixture. Mix just until combined.
  5. Spread 2/3 of the dough into the prepared cake pan and spread over the bottom with a knife or offset spatula. Spread the jam evenly over the dough. Drop small globs of the remaining dough evenly over the jam. Don’t worry if all the jam isn’t covered; it will spread in the oven. Sprinkle with chopped peanuts and bake for about 45 minutes, until golden brown. Cool completely and cut into squares.

    Parchment makes it easier to pull the bars out after they cool.


October 15, 2012 Pear Pie with Dried Cherries and Brown Sugar Streusel


I am not a pie maven, I will bestow that title on my friend Kathy who can whip up a pie to complement your menu at a moment’s notice. One of my favorites is her classic double crusted apple pie with an amazingly flaky crust. That being said, I do make the occasional pie. From the failures and successes with pie crusts I have experimented with over the years I have found two favorites. One is a crust from Cooks Illustrated that uses vodka in place of water. 80 proof vodka is 60% water and 40% alcohol. It makes an easy to roll crust and alcohol does not promote the formation of gluten which results in tough crusts. Don’t worry about your friends becoming tipsy, the alcohol evaporates in the baking process so it helps the crust stay flaky and tender. The other crust recipe I use is from Fine Cooking. It is an all butter crust that is made by hand. You, the baker, control the size of the butter pieces in the flour, also resulting in a flaky crust. Obviously, flaky is what we are going for when it comes to pie crusts. All I know is that I will not make a crust on a humid day or a day that I am rushed for time, remember I am not a pie maven.

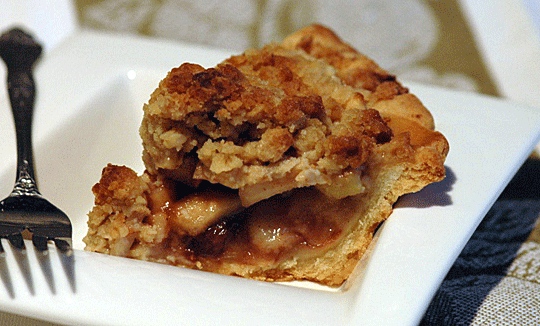
 The pear streusel pie is one that has become a favorite in my fall baking rotation. I love the combination of sweet juicy pears, and tart dried cherries, I am certain that other tart dried fruit like cranberries or blueberries would work as well. Use your best spices, I used freshly grated Penzey’s nutmeg and Korintje cinnamon which they describe as, “strong as China cinnamon but smoother and not as nippy.” Some important things to note if you make this pie. The recipe makes a great deal of pear filling, mound it up in the crust, it will cook down, any juices that run over will be caught by the baking pan. Press the streusel topping into the pears to keep it from falling off.  The crust for the pie is blind baked which just means it is pre baked to prevent the bottom of the pie from getting soggy. The pie is delicious on its own but even better with a scoop of homemade vanilla or cinnamon ice cream.

Pear Pie with Dried Cherries and Brown Sugar Steusel

Serves 8

Ingredients

For the streusel

  • 1c unbleached all purpose flour
  • 1/2c old fashioned rolled oats
  • 1/2c packed light brown sugar
  • 1/4t table salt
  • 8T (1 stick) unsalted butter, melted

For the filling

  • 3lbs ripe Anjou or Bartlett pears, peeled and cored, cut lengthwise into 8 wedges and then cut crosswise into 1/2inch slices, about 7 cups
  • 1 1/2T fresh lemon juice
  • 2/3c granulated sugar
  • 1/4c unbleached all purpose flour
  • 1/4t table salt
  • 1t cinnamon
  • 1/8t freshly ground nutmeg
  • 3/4c dried cherries, coarsely chopped
  • 1 blind baked  9″ pie crust of your choice

Directions

  1. Position a rack in the center of the oven, set a heavy duty rimmed baking sheet on the rack and heat the oven to 350F.
  2. Make the streusel. In a medium bowl combine the flour, oats, sugar and salt. Blend the butter into the flour mixture using your fingers. The mixture will be moist. Set aside.
  3. Make the filling. In a large bowl, toss the pears with the lemon juice. In a small bowl, whisk the sugar, flour, salt, cinnamon and nutmeg. Add this mixture to the pears and toss well to combine. Stir in the dried cherries.
  4. Mound the filling into the pie crust. Sprinkle the streusel topping over the pear mixture, pressing the streusel between your fingers into small lumps as you sprinkle.
  5. Place pie on the heated baking sheet. Bake the pie until the pastry is golden-brown and the filling is bubbly and thickened at the edges, 55 to 65 minutes. Rotate the pie halfway through baking, if the pastry or streusel browns before the filling is thickened, loosely cover the top or edges of the pie as needed with pie shields or aluminum foil.
  6. Transfer to a rack and cool completely before serving. The pie can be stored at room temperature for up to 2 days.
 

July 21, 2012 Cinnamon Basil Peach Ice Cream

A southern style dinner of pulled pork called for a southern style dessert. I had Georgia on my mind when I decided on cinnamon basil peach ice cream with toasted pecans. Herbal ice creams are a delicious way to capture the flavors of summer. Infuse your herb of choice in a warmed cream and milk mixture before proceeding with your recipe. This year I have used lavender, anise hyssop, lemon grass with lemon basil and cinnamon basil. Cinnamon basil is a cultivar of regular basil. It is a smaller plant with small dark green leaves tinged with purple. It gets it’s cinnamon flavor and aroma from a chemical compound, cinnamite.  Peach is a nice complement to the cinnamon basil. Be sure to taste the pureed peaches for sweetness before adding them to the base. I also added a small piece of cinnamon stick to the infusion to accentuate the cinnamon flavor.

For this recipe I chose to make a custard or French ice cream. Ice cream comes in two different styles, Philadelphia style and custard. Custard style ice cream contains eggs or just egg yolks that are cooked gently with milk and heavy cream. The egg yolks are emulsifiers that make the ice cream smooth and rich. Philadelphia style ice cream contains cream, sugar and a flavor base, such as vanilla bean with no eggs. It is less rich than custard ice cream but is said to have a more intense flavor. Let me add making a Philadelphia style ice cream would be more desirable for a beginner, no chance for sweetened scrambled eggs!

Cinnamon Basil Peach Ice Cream

Made with the assistance of  Fine Cooking’s ice cream recipe maker

Makes a generous quart

Ingredients

  • 2 c heavy cream
  • 1 c whole milk
  • 3/4 c granulated sugar
  • table salt
  • 1 c tightly packed, coarsely torn cinnamon basil leaves
  • 1 vanilla bean, split lengthwise, seeds scraped out
  • 1 4-inch cinnamon stick broken in half
  • 5 large egg yolks
  • 1-1/2 fresh peaches, peeled, pitted, cooked to soften, and pureed
  • 1/2 c toasted pecan pieces

Directions

  1. In a medium saucepan, mix 1 cup of the cream with the milk, sugar and a pinch of salt. Warm the cream mixture over medium-high heat, stirring occasionally, until the sugar dissolves and tiny bubbles begin to form around the edge of the pan, 3 to 4 minutes.
  2. Stir in the basil, split vanilla bean and cinnamon stick. Cover, remove from heat, and let sit for 1 hour. Taste and let sit longer if you want a stronger flavor.
  3. While the mixture is steeping, prepare an ice bath by filling a large bowl with several inches of ice water. Set a smaller metal bowl  (one that holds at least 1 1/2 quarts) in the ice water. Pour the remaining cup of cream into the inner bowl. This helps cool the custard cool quicker when you pour it in later. Set a fine strainer on top. Whisk the egg yolks in a medium bowl.
  4. Rewarm the cream mixture over medium high heat until tiny bubbles begin to form around the edge of the pan, 1 to 2 minutes. In a steady stream pour half of the warm cream mixture into the egg yolks, whisking constantly to prevent the eggs from curdling.
  5. Pour the egg mixture back into the saucepan and cook over low heat, stirring constantly and scraping the bottom with a heatproof rubber spatula until the custard thickens slightly (it should be thick enough to coat the spatula and hold a line drawn through it with a finger), 4 to 8 minutes. An instant read thermometer should read 175 degrees to 180 degrees F at this point. Do not let the custard overheat or boil, or it will curdle. Immediately strain the custard into the cold cream in the ice bath. Press firmly on the basil, vanilla bean and cinnamon in the strainer with the spatula to extract as much flavor as possible.
  6. Cool the custard to below 70 degrees F by stirring it over the ice bath. Taste your peach puree for sweetness and adjust accordingly.  Stir the peach puree into the cooled custard.
  7. Refrigerate the custard until completely chilled, at least 4 hours or preferably over night.
  8. Toast pecan pieces in a small dry non-stick skillet until lightly browned and fragrant. Set aside to cool.
  9. Freeze the custard in your ice cream maker according to the manufacturer’s instructions.  When the ice cream is at the soft serve stage, stir in the nuts.
  10. Transfer the just-churned ice cream to an air-tight container and freeze for at least 4 hours or up to 2 weeks (if it lasts that long…)

June 26, 2012 Basil Gelato


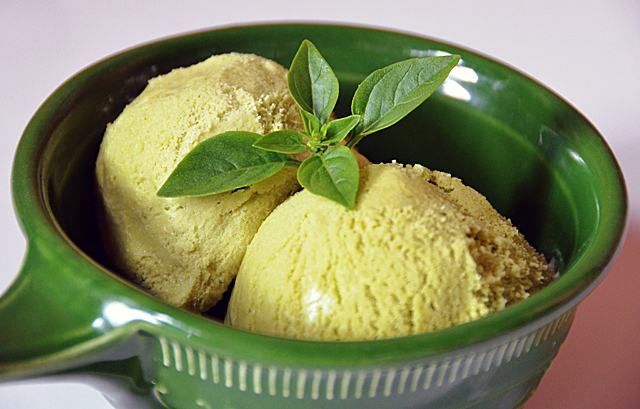
I knew the minute I saw the picture of bright green Basil gelato on Saveur’s magazine’s blog this week that I would be pulling out my behemoth Il Gelateria and making it for Sunday’s dessert. Every summer I make an assortment of ice creams and sorbet with the herbs we grow in the garden. Lavender and anise hyssop have become standards as well as fruit and herb combinations like peach and cinnamon basil. The basil in our garden is flourishing and it’s good to cut it back periodically to slow it down from going to seed.

Gelato means frozen in Italian, and yes it is different from ice cream. Gelato is made with a larger proportion of milk to cream. By definition, ice cream can have a minimum of 10% fat while gelato is 5-7% fat.  Real gelato is churned at a slower speed than ice cream so less air is incorporated in gelato. Ice cream can contain as much as 50% air, gelato only 25-30% air.

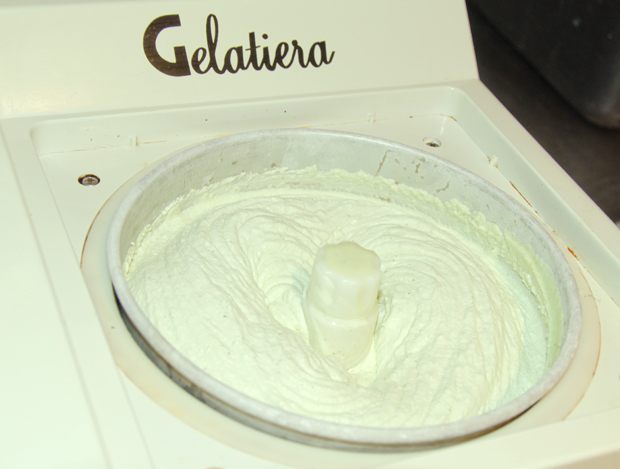
I have a gelato, not an ice cream maker, a Gaggia Il Gelatiera that has served me well over the last twenty years. I originally purchased the machine for a catering job. The couple whose wedding I was catering requested white chocolate and espresso ice cream to accompany their wedding cake and I was happy to oblige. I knew I wouldn’t get very far with the frozen canister type or even the old-fashioned hand crank that is chilled with rock salt and large quantities of ice.  I was going to be making ice cream for one hundred people at an outdoor reception on a warm June day. My research sent me to the nearest Williams-Sonoma store which at that time was in Princeton, New Jersey to purchase an Il Gelateria. The Il Gelatiera is a self-refrigerating ice cream maker, meaning the refrigeration mechanism is built-in. You just plug it in, switch on the refrigeration unit, wait a few minutes until it cools down, add your chilled base and switch on the paddle. A batch, about one quart was ready in a half hour. But I could continue to make batch after batch, without having to refreeze a canister or crank for hours on end. Expensive, yes, twenty years ago it was a little less than five hundred dollars, so definitely an investment. The Il Gelatiera is not available for sale in the U.S. at this time. Amazon’s U.K. site offers an updated model with free shipping, in the U.K. that is, at about the same price I paid for mine. Today’s gold standard is most likely the Cuisinart ICE-50BC. At about half the price and one-third the weight, (my machine weighs 28.4 lbs!) it’s what I would most likely choose if I were buying an ice cream maker today.

Now to jump on my soap box. If you are going to take the time to make homemade ice cream or gelato, or any dairy based item (cheese, yogurt, even whipped cream)  avoid ultra pasteurized dairy products. Ultra pasteurization is a process that gives dairy an extended shelf life but can adversely affect the taste and texture of the product.

Basil Gelato

Recipe from Saveur Magazine

Makes 1 quart

Ingredients

  • 2 c basil leaves
  • 2 c whole milk
  • 1 c heavy cream
  • ¾ c sugar
  • 1 T     lemon zest
  • ¼t  salt
  • 6 egg yolks

Directions

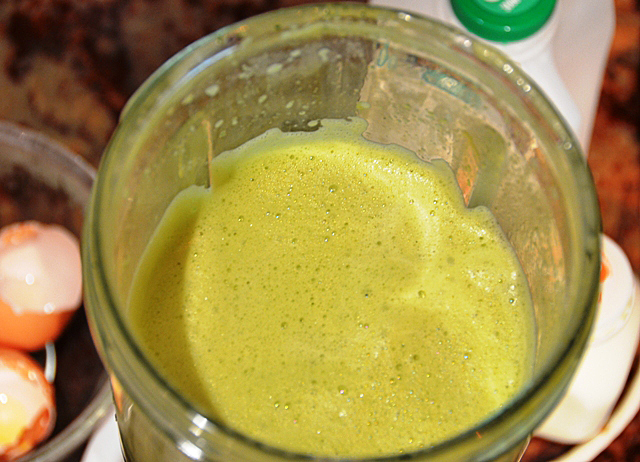
  1. Combine basil, milk, cream, sugar, lemon zest, salt, and yolks in a blender and puree until smooth. Because of the size of my blender bowl, I averted possible disaster and did not put all the milk in, I whisked it in afterward.
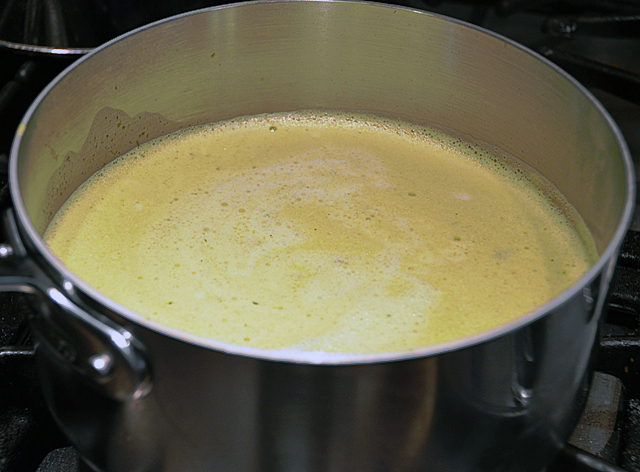
  2. Pour into a 2 quart saucepan and heat gently until sugar dissolves. Remove from heat and pour through a fine strainer, chill in the refrigerator.
  3. Pour chilled mixture into an ice cream maker and freeze according to manufacturer’s instructions.
  4. Serve garnished with fresh basil leaves.

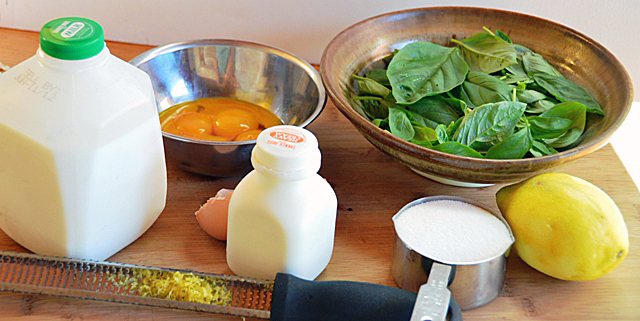
All the ingredients are ready to go.

All the ingredients are combined in a blender.

Bring the ingredients to a simmer. Strain and chill before freezing.

June 18, 2012 Roasted Balsamic Strawberry Ice Cream with Strawberry-Raspberry Sauce

Strawberries and balsamic vinegar, a classic combination from Italy”s Emilia-Romagna region inspired this recipe. Rain delayed our local berry season by about two weeks so we are still able to purchase beautiful ripe strawberries at the farmer’s market .Roasting vegetables intensifies their flavor, so why not fruit/?  The further addition of balsamic vinegar enhances the color and flavor of the strawberries. The roasted berries could be used on their own as a topping for store-bought ice cream, yogurt or cheesecake. To insure success in custard making, It is very important to have your mis en place ready  for the ice cream recipe. Otherwise you could end up with sweetened scrambled eggs.  The accompanying sauce is very easy, no need to even strain out the seeds, unless you want to.

Roasted Strawberry Balsamic Ice Cream

Yields a generous quart

For the roasted strawberries:

Ingredients:

  • 3c strawberries
  • 1T balsamic vinegar
  • 1T turbinado sugar

Directions:

  1. Preheat oven to 375F
  2. Wash, stem, hull and halve strawberries.
  3. Place in a bowl and sprinkle a tablespoon or so of turbinado sugar and a tablespoon of balsamic vinegar over the berries. Toss lightly.
  4. Arrange on a parchment lined rimmed  baking sheet, cut side down.
  5. Bake until the fruit softens and the juices start to bubble, start looking at 20 minutes and judge accordingly. Remove from oven and let cool.
  6. Transfer berries to a blender or food processor. Puree until smooth and refrigerate until ready to use.

Ice Cream Base:

  • 2c heavy cream
  • 1c whole milk
  • 3/4c granulated sugar
  • Kosher salt
  • 5 egg yolks
  • 1t vanilla extract

Directions:

  1. Prepare an ice bath by filling a large bowl with several inches of ice water.  Place a smaller metal bowl (large enough to hold your ingredients) inside the large bowl. Pour one cup of heavy cream in the small bowl. Have a fine strainer nearby.
  2. Whisk the egg yolks to break them up.
  3. In a medium non-reactive saucepan, mix 1 cup of heavy cream with the milk, sugar and a pinch of salt. Warm over medium high heat until tiny bubbles begin to form around the edge of the pan.
  4. In a steady stream, pour one cup of the warm cream mixture into the egg yolks, whisk constantly to prevent the eggs from curdling.
  5. Pour the egg and cream mixture back into the saucepan and cook over low heat , stirring constantly with a rubber spatula, scraping the bottom. Cook until the custard is thickened, 4 to 8 minutes.  The custard will be thick enough to coat the back of a spoon and hold a line drawn through it with a finger. An instant read thermometer, which I prefer,  should read 175 to 180F at this point. Immediately remove from the stove and put the custard through a strainer into the bowl that has the cream in the ice bath.
  6. Cool the custard to room temperature and whisk in the berry mixture.
  7. Refrigerate custard until completely chilled, overnight or at least four hours. Then freeze custard in your ice cream maker according to manufacturer’s directions.
  8. Store ice cream in an air-tight container, freeze for at least four hours before serving.
Balsamic Strawberry-Raspberry Sauce:

Ingredients:

  • 1c strawberries
  • 1c raspberries
  • 1c sugar
  • 2T balsamic vinegar (or more to taste)

Directions:

  1. Cook berries, sugar and balsamic vinegar in a medium sauce pan until sugar dissolves. Bring to a boil, reduce heat and simmer until thickened, this will depend on the water content of your berries,anywhere from 5 to 8 minutes. Berries should be able to coat the back of a spoon.
  2. Transfer sauce to a bowl. Chill until cold, two hours or so.

February 13, 2012 Red Bean Ice Cream

Birds nests, lily bulbs and red beans are just a few of the not so common ingredients in Chinese sweets. Chinese dinners usually end with fruit and traditionally sweets are not served with meals but with afternoon tea. Ice cream certainly wouldn’t be on any list of classic Chinese sweets, so for our Chinese New Year Celebration I thought I would put an Eastern twist on a Western classic.

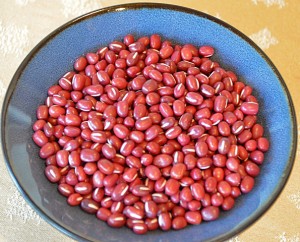
Adzuki beans are used in Asian desserts such as red bean soup or glutinous rice balls filled with red bean paste. Adzuki beans originated in China and are harvested in November and December. They are believed to strengthen the heart and aid circulation and fatigue.  I thought it would be fun to feature these small reddish-brown beans in ice cream.

Some of the recipes I saw started with a pre-made paste that is available in  Asian groceries but I wanted my beans to have a little more texture I started with a fresh vacuum-packed container of beans. As with any recipe, older beans could lose moisture and require a longer cooking time.

Fresh adzuki beans ready for an over night soak.

They took a little longer than I expected, but now at the right consistency.

The finished product, creamy with a bit of texture from the beans.

Sweet Adzuki Bean Paste

  • 1 cup adzuki beans
  • 1 cup sugar
  • pinch of salt

1. Rinse beans, cover with water in bowl and soak overnight.

2. Drain beans, rinse well. Put beans in saucepan and add water to cover. Bring to a boil and drain.  Return to the saucepan and add water to cover by 1 inch. Bring to the boil and then simmer, skimming any scum from the surface. Continue to simmer until beans reach desired softness, 30-45 minutes.

3. Add sugar, stirring to dissolve and bring to a boil. Reduce heat to low and simmer covered, stirring frequently until beans thicken, at least another 30 minutes. Stir beans frequently so that beans do not stick to the bottom of the pan. Remove from heat, add a squeeze of lemon and a  pinch of salt and stir well. Cool to room temperature before adding to ice cream base.

Makes about 2 1/2 cups.

Using the formula from Fine Cooking Homemade Ice Cream Recipe Maker

Adzuki Bean Ice Cream

  • 2 cups heavy cream
  • 1 cup whole milk
  • 1/2 cup sugar or to taste
  • 5 egg yolks
  • 2 cups adzuki bean paste
  • 1 teaspoon vanilla extract

1. Prepare an ice bath by filling a large metal bowl with several inches of ice water. Set a smaller bowl in the ice water. Pour one cup of heavy cream into the inner bowl. Set a strainer on top. Whisk the egg yolks in a separate bowl.

2. Warm one cup of cream with the milk and sugar in a medium saucepan until tiny bubbles form around the edge of the pan. In a steady stream pour half of the warm cream mixture into the egg yolks, whisk constantly to prevent eggs from curdling.
3. Pour egg mixture back into the saucepan and cook over low heat, stir constantly and scrape the bottom with a rubber spatula until the custard thickens. I like to use my thermapen thermometer to monitor this process closely. The temperature should read 175-180, don’t overheat or the custard will curdle and become sweetened scrambled eggs. Immediately strain the custard into the chilled cream. Once the mixture has cooled, add  teaspoon of vanilla extract and two cups of the sweetened adzuki beans. Transfer adzuki custard to refrigerator to chill overnight or at least 4 hours.

4. Freeze custard in your ice cream maker according to manufacturer’s directions.

Additional note-check the custard before freezing to make sure it is at your desired sweetness level, if not, add a tablespoon or so of honey or agave sweetener.