July 9, 2013 Roasted Potato Salad

DSC_0951a“Maybe we can try them again.” That was Joe’s response as he chuckled while reading about the “hall of fame” vegetables that I mentioned in my last post. Specifically, he was talking about revisiting potatoes.  I certainly concur with that idea. Potatoes don’t take up a great deal of growing room, in fact they can be grown in containers. Home grown just harvested potatoes definitely taste fresher than ones that have been sitting on the supermarket shelf for weeks.  In previous seasons we grew varieties like Yellow Finn, Russian Banana, Red Norland and Purple Peruvian. Specialty potatoes are becoming more common  but they come with a hefty price. I prefer harvesting potatoes when they are relatively small and at their sweetest. . Small red potatoes are often labeled as “new” but any variety harvested before maturity is technically a new potato. Unlike purple/blue beans that turn a muddy green when cooked, blue or purple potatoes maintain their bright color when cooked. A combination of red, white and blue varieties made for a rather patriotic looking potato salad at our cookout one year.

For this Fourth of July holiday I wanted the simplest of potato salads to accompany the baby back ribs and grilled chicken that were on the menu. After some thought, I decided to use the recipe for roasted potatoes that I often make for dinner. Red bliss, or any other low starch potato will work best for this recipe. Low starch potatoes have a creamy texture and stay firm when they are cooked.  I looked for the smallest potatoes I could find and cut them in half, tossing them with salt and pepper and enough olive oil to coat. For optimal browning the potatoes need to be cut side down in a single layer and if you have one, a dark colored baking sheet helps this process along.  Cover the potatoes with foil for the first twenty minutes of cooking. A word of caution, when you remove the foil, be careful of the steam facial that will be released.

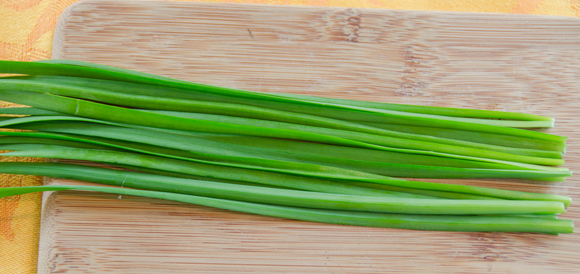
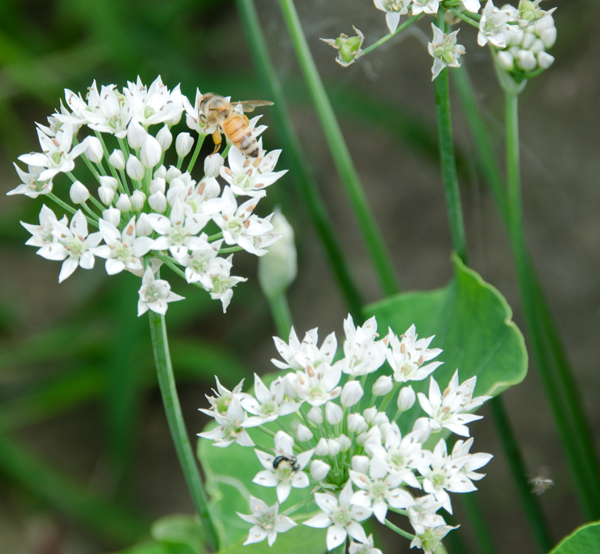
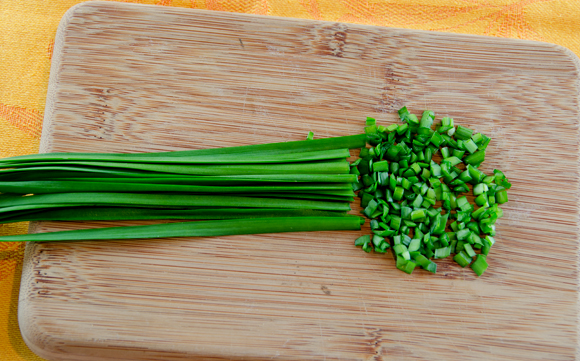
If you choose to plant garlic chives remember they can take over your garden.  To minimize their invasive potential, remove their flower stalk before they have a chance to broadcast their seeds.  Garlic chives have a mild flavor of garlic and the leaves are flat and strap-like with a white tall spiky flower as opposed to the purple flowers and tubular leaves of regular chives. To use garlic chives, I cut a handful, line them up and snip with scissors.

The cooled potatoes were tossed with just enough of a good quality balsamic vinegar, salt, freshly ground pepper and a sprinkling of freshly snipped garlic chives. The results were exactly what I had in mind and suited the rest of the menu quite nicely.
DSC_0975a
Line up your chives before chopping on a cutting board or gathering in your hand to snip with scissors
 DSC_0978a

DSC_5722a
The tall white spiky flower of the garlic chive appears in mid July.


Roasted Potato Salad

Roasted potato recipe adapted from Cooks Illustrated

Serves 4-6

Ingredients

  • 2 1/2lbs small low starch potatoes such as Red Bliss,
  • 3T Olive Oil, use a good quality, extra virgin is not necessary though
  • Kosher salt and freshly ground pepper
  • 1-2T Balsamic vinegar
  • 1-2T Freshly snipped garlic chives

Directions

  1. Adjust oven rack to lowest position and preheat to 425F.
  2. Cut potatoes in half and place in a medium sized bowl. Toss potatoes and olive oil to coat, season to taste with salt and pepper and toss again to blend.
  3. Place potatoes cut side down in a single layer on a baking sheet, cover tightly with foil and bake for about 20 minutes. Carefully remove foil and continue to bake about 10 minutes more. Remove pan from oven and carefully turn potatoes over with a metal spatula. Press the spatula against the metal as it slides under the potatoes to protect the crispy crusts. Return pan to oven and bake about 5 minutes more, the potato skins will start to wrinkle a bit. Remove pan from oven and allow potatoes to cool for about 10 minutes.
  4. Transfer cooled potatoes to a medium sized bowl. Toss with balsamic vinegar and snipped garlic chives. Serve potato salad at room temperature.
July 5, 2013 Corn Maque Choux

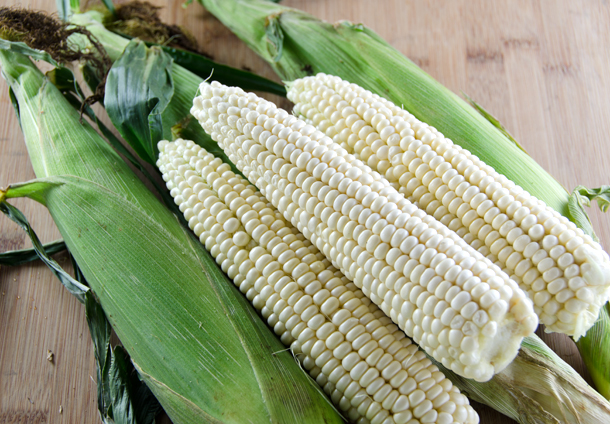
DSC_0935a

We had a wonderful crab fest last weekend courtesy of Nik. Along with a half bushel of crabs he brought our first fresh corn of the season from the Eastern Shore of Maryland. We love corn and take advantage of the local harvest for as many weeks as it lasts. We even grew corn at one point but it entered our “too much work to warrant growing it” hall of fame along with asparagus and potatoes. It’s been so long since we’ve grown it I almost don’t remember why we stopped. When we grew our own corn, Joe wanted as little time as possible to pass between the harvesting and the cooking. He certainly had a good point there, as soon as corn is cut from the stalk, the sugars begin converting to starch. I just read in Fine Cooking that some varieties will lose 50 percent of their sweetness when left at room temperature for only a few hours. Therefore, if you grow it, you should take advantage of the freshness.  I would fill up a large pot of water on the stove and get it ready for the boil. Then he would run down to the corn patch, harvest the corn, quick shuck the ears and cook it.  A little salt, melted butter, ah perfection!!

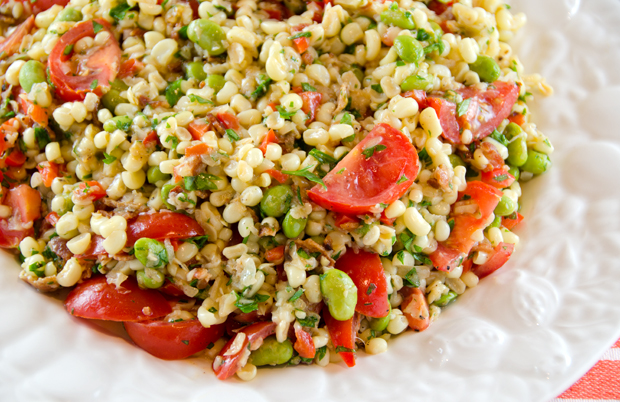
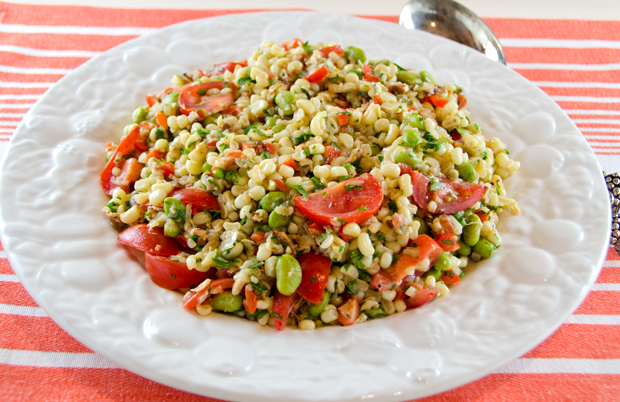
The corn and crabs of Sunday were wonderful and we had about six ears left uncooked. I have made corn pudding and black bean and corn salad with leftover fresh corn in the past, this time I decided on corn maque choux. Maque choux or “smothered corn”  is pronounced “mock shoe” and is a Cajun interpretation of a Native American dish. It is typically a side dish but it can also be the base of entree of shrimp, seared scallops, or chicken.

One of the books I consulted likened maque choux to succotash, a dish of corn kernels, lima beans and sweet peppers. I wanted to add some beans since I didn’t quite have enough corn to make the quantity I desired. Not being a fan of lima beans (both Joe and I have bad childhood memories) I decided edamame would make an excellent substitute for the limas.

Edamame, in case you didn’t know already, are immature soybeans, picked before the “hardening” stage. They are sold both in the pod and shelled, shelled worked out fine for this recipe. Edamame have a sweet, nutty flavor, not dried out and mushy like the canned or frozen limas of years ago.   Frozen corn could be used for this recipe but now is the time to take advantage of the fresh corn that is or will be appearing in your local farmers market.

The best way to remove the kernels from the ears? For me, I first shuck the ears and remove the silk.  To remove the corn from the cob, hold the stem end of the husked ear of corn and rest the tip of the ear on the bottom of a very large shallow bowl. Use a very sharp paring knife to cut off corn kernels and let them fall into the bowl. Be careful to cut just the kernels and not include any of the tough, inedible cob. It’s better, in fact, to leave some kernel behind than to include some cob!  Continue cutting around the ear to remove all kernels. Cutting the kernels into a bowl makes much less mess of splattering corn “milk” and makes it easier to hold the ear at an angle that allows you to cut down around the ear safely.

Considering the low carb, low fat diet everyone seems to following these days, corn, bacon, butter and whole milk put this dish in the category of occasional splurge. But it is also those ingredients that make it a flavorful way to “repurpose” those extra ears from your last cookout.

DSC_0923a
Delicious sweet corn from Maryland.

Corn Maque Choux

Serves 6 as a side dish

Ingredients

  • 5 slices of bacon
  • 1 c of finely chopped onion
  • 2t chopped garlic
  • 4T unsalted butter
  • 4c fresh corn kernels
  • 1c edamame, cooked according to package directions
  • 1/2 finely chopped red pepper
  • 1/4c chicken broth
  • 1/4c whole milk
  • 1c chopped tomato
  • 1/4c finely chopped Italian parsley
  • Kosher salt and fresh ground pepper

Directions

  1. Cook bacon in a large heavy bottomed pot over medium high heat until crisp, about 12 minutes. Transfer to a paper towel lined plate to drain, then coarsely chop.
  2. Add onion to the bacon drippings in the pot and cook until golden and softened, about 10 minutes. Add garlic and cook until fragrant, about 2 minutes. Add butter, corn, and cook for about 8 minutes. Then add edamame and red pepper and cook until heated through, another 3-4 minutes.
  3. Return bacon to pot, add broth and milk and bring to a boil. Reduce heat and simmer until most of the liquid has evaporated, about 3 minutes. Remove from heat and stir in tomato and parsley. Season to taste with kosher salt and freshly ground pepper. Dish can be served warm or at room temperature. Maque choux can be made up to a day ahead and stored in refrigerator; bring to room temperature before serving.
DSC_0931a
Corn, butter, bacon, what’s not to love?

June 6, 2013 A Salad and a Slaw

DSC_0441a

The first  “burgers and dogs” cookout of the season called for sides, one, very traditional, the other, an update on an old classic.

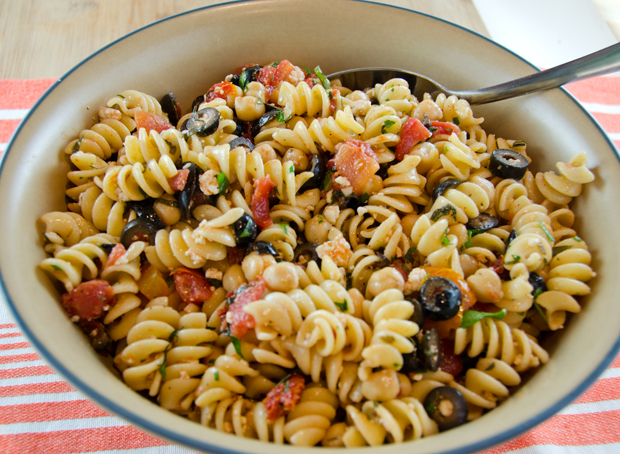
The variations are endless when it comes to pasta salad.  As a caterer I had more than a dozen in my repertoire. Pasta salads can reflect whatever taste or ethnicity you are in the mood for. They are a perfect addition to summer picnics and barbecues. This pasta salad features traditional Mediterranean flavors and is as simple as can be. It can be made in not much more time than it takes to cook the pasta and uses mostly pantry ingredients. Rotelle pasta works well here, feel free to substitute whatever twisted shape suits your fancy.  If you are using canned diced tomatoes, hold back on the saucy component of the tomatoes, you can always add more sauce later.

DSC_0433b
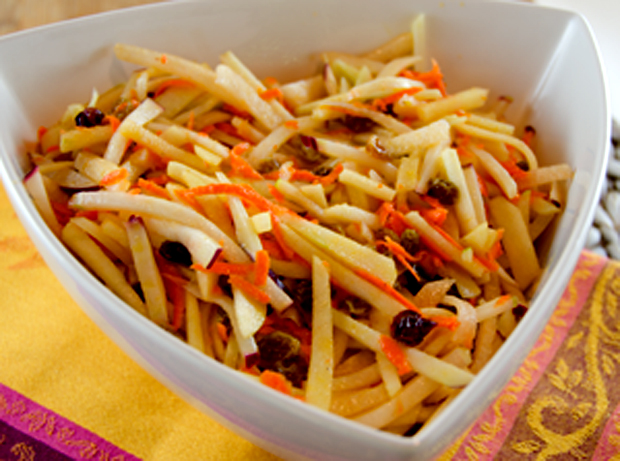
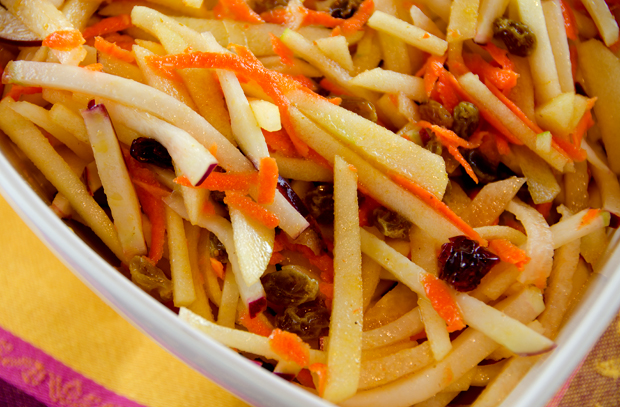
Cabbage is a main ingredient in many slaw recipes so why not substitute the “cabbage turnip” or kohlrabi as it is translated from the German. Though it looks like a root vegetable it is a swollen stem that grows above ground. Farmers markets and spring gardens are abundant with kohlrabi this time of year. The mild flavor is somewhere between broccoli stems and a turnip and young kohlrabi are sweet and quite tender. I added some jicama to my slaw for additional crispness, Granny Smith apples for their sweet-tart flavor and a carrot to enhance the color. The kohlrabi I used was young, there was no need to peel the purple skin and it gave the salad some more color. l chose to julienne the vegetables in my slaw, a box grater or the shredding disc of a food processor would work as well but would give the slaw a different texture.

 DSC_0444a

 Pasta Salad with Tomatoes, Garbanzos and Feta

Serves 6-8

  • 1/2lb pasta (rotelle or rotini works best here)
  • 1/4 c finely chopped fresh basil
  • 2 T fresh lemon juice
  • 2 T white wine vinegar
  • 1 T chopped garlic
  • 2 t  grated lemon peel
  • 6 tablespoons olive oil
  • 2 cups chopped plum tomatoes (fresh or canned)
  • 1/4c finely minced sun-dried tomatoes
  • 1/4c sliced black olives
  • 1 15- to 16-ounce can garbanzo beans (chickpeas), drained and rinsed
  • 4 ounces feta cheese, crumbled
  • Additional chopped fresh basil

Directions

  1. Cook pasta in large pot of boiling salted water until just tender but still firm to bite. Drain and rinse with cold water to cool. Drain again.
  2. Combine basil, lemon juice, vinegar, garlic and lemon peel in large bowl. Gradually whisk in oil. Add pasta, tomatoes, garbanzo beans and feta cheese. Toss to blend well. Season salad to taste with salt and pepper. (Can be prepared ahead. Let stand at room temperature 2 hours; or cover and refrigerate overnight, them let stand at room temperature 1 hour before serving.)
  3. Mound salad on large shallow platter. Garnish with additional basil.

DSC_0436a

Kohlrabi Slaw

Serves 6-8

Ingredients

  • 1 medium kohlrabi
  • 1/2 medium jicama
  • 2 Granny Smith apples
  • 1 medium carrot
  • 1/4c golden raisins
  • 1/4c dried cranberries
  • 1/4c balsamic vinegar (I used cranberry-pear)
  • 1/2c extra virgin olive oil
  • 1t lemon peel
  • Kosher salt and freshly ground black pepper

Directions

  1. Cut top, bottom and “tentacles” off the kohlrabi. Peel the skin off the kohlrabi only if it is tough. Peel the jicama, apples and carrots.
  2. Cut all vegetables into matchstick julienne or shred in a food processor or on a box grater. Combine in a bowl along with the raisins and dried cranberries.
  3. Combine vinegar, oil and lemon peel in a small bowl, whisk to combine.
  4. Add enough vinaigrette to coat, let sit at room temperature for about ten minutes and add a little more vinaigrette if necessary. Season to taste with salt and pepper.

February 10, 2013 Spicy Sichuan Noodles

DSC_8417a

Searching out new and unusual ingredients has always played an important part in my “joy of cooking”.  In the olden days (the eighties) and  b.i. (before Internet), the hunt would involve trips to ethnic markets, phone calls to vendors and an ever-growing stack of mail order catalogs to aid in my search.  Gardening has always given us the ability to grow fresh herbs and vegetables that were not readily available in our markets. There was one elusive spice that I encountered in Chinese cookbooks that wasn’t just hard to find, but unavailable for many years in the United States, Sichuan peppercorns. 

Banned in 1968, Sichuan peppercorns were safe for human consumption. The real concern here was citrus canker, a disease the imported spice could carry and infect the foliage of citrus plants in the United States. The ban was lifted in 2005 when it was discovered that heating the peppercorns to 170 degrees, killed the bacteria that harmed plants.

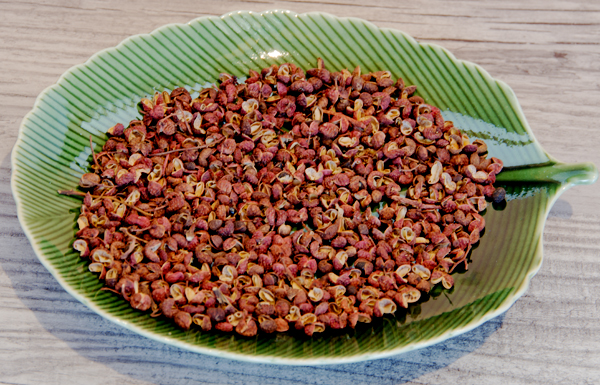
Sichuan peppercorns are not true peppercorns or chilies but tiny crimson berries that come from the prickly ash trees that grow in the mountainous regions of Sichuan province. The first taste of a Sichuan peppercorn on the tongue starts with the impression of a mentholy flavor with some lemony overtones followed by a numbing tingle in the mouth.  According to Harold McGee, author of “On Food and Cooking”, Sichuan peppercorns can produce the same effect as carbonated drinks on the lips and tongue. Combined with chili peppers or ginger, they create a taste combination unique to Sichuan cooking, ” ma la ” or the spicy and tingly sensation left in the mouth after eating a dish with this combination.  Ma means both anesthetic and “pins and needles” in Chinese. La, of course, is the spicy part of the equation, provided by chills and ginger.

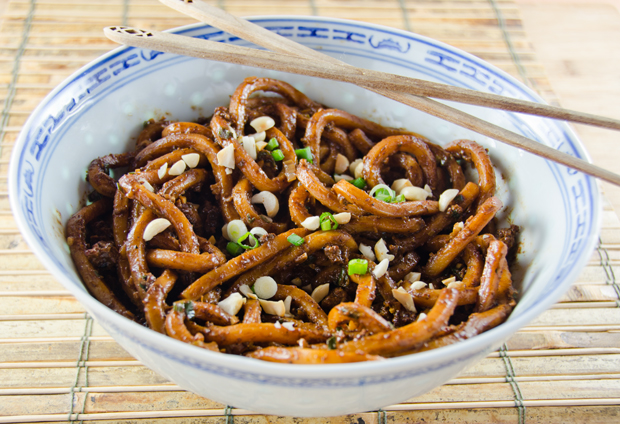
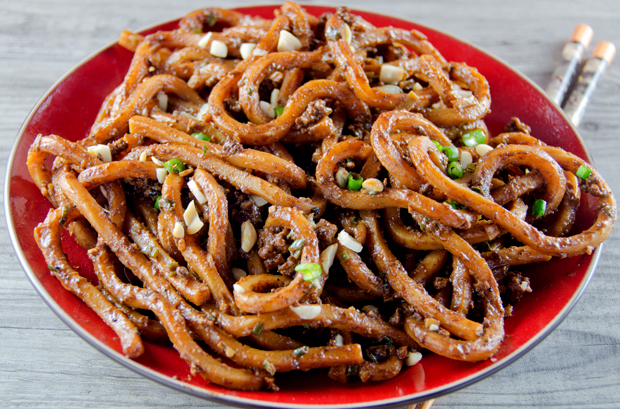
Spicy Sichuan Noodles showcases the ma la combination very nicely. Using the original recipe as a starting point, we recreated a dish as best memory would allow. It was one of many dishes that we shared with friends in an excellent Sichuan restaurant hidden away in a New Jersey strip mall. Dry roasting the Sichuan peppercorns releases their aromatic oils and brings out their flavor. Only roast the amount you will be using in a recipe since the oils dissipate quickly. In our version, we chose to stir fry, not deep fry the pork. We also chose thicker udon noodles instead of Chinese egg noodles and added some roasted peanuts on top for extra crunch. Noodles are always a part of the Chinese new year celebration, as they symbolize longevity. Noodles should never be cut, even when eating. Twist those noodles around your chopsticks for a long life.


Spicy Sichuan Noodles

Adapted from “The Taste of China” by Ken Hom

Serves 4-6 as part of a Chinese meal, 2-4 as a single dish

 Ingredients

  • 1 tablespoon Sichuan peppercorns
  • 1/2 pound ground pork
  • 3 tablespoons dark soy sauce
  • 3 teaspoons salt
  • 3T peanut oil
  • 3 tablespoons chopped garlic
  • 2 tablespoons finely chopped peeled fresh ginger
  • 5 tablespoons finely chopped scallions
  • 2 tablespoons sesame paste or smooth peanut butter
  • 2 tablespoons chili oil
  • 1 cup chicken stock
  • 12 ounces fresh or dry Chinese egg noodles
  • 1 T toasted, chopped peanuts

Directions

  1. Heat a wok or heavy skillet over medium heat. Add the peppercorns and stir-fry for about 5 minutes until they brown slightly and start to smoke. Remove them from the heat and allow them to cool, then grind them. Set aside.
  2. Heat the same wok over medium high heat and add 1T oil. When the oil is hot add the ground pork, stirring with a spatula to break up the pieces. Add the dark soy sauce and continue to cook pork until browned, about four minutes. Remove pork with a slotted spoon and drain on paper towels.
  3. Bring a 3-4 quart pot of water on the stove to a boil.
  4. Reheat the wok with the 2 tablespoons oil and stir-fry the garlic, ginger and  4 tablespoons of the scallions for 30 seconds, then add the peanut butter or sesame paste, the remaining soy sauce and salt, the chili oil and chicken stock. Simmer for four minutes. Return the pork to the pan and stir.
  5. Cook the noodles in the boiling water two minutes if they are fresh, five minutes if they are dried. Drain in a colander. Transfer them to a serving bowl or individual bowls. Ladle on the sauce and top with the  pork mixture. Sprinkle with the ground Sichuan peppercorns, toasted peanuts, scallions and serve.

DSC_8455a

DSC_8432a

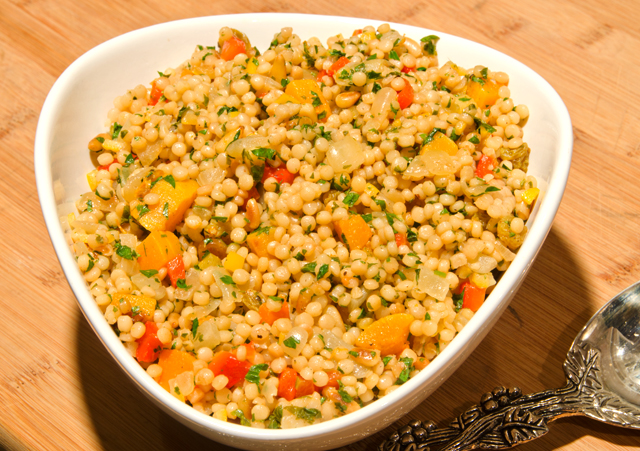
January 12, 2013 Israeli Couscous with Roasted Butternut Squash and Preserved Lemon

 DSC_8091a

 Now that the preserved lemons were ready, it was time to use them. In my research, I saw reference to a recipe that caught my attention, Israeli couscous with roasted butternut squash and preserved lemon. It was on the Epicurious website and I noted the original source was the September 1999 issue of Gourmet magazine. The issue is a part of my large food magazine library so I was able to see the recipe in it’s original context. The recipe was part of a larger menu, “Wedding in the City. When a caterer is out of the question.” The recipes had a definite Moroccan-middle eastern flair: caviar and hummus on pita toasts, grilled charmoula lamb chops, recipes for stuffed grape leaves and eggplant with cilantro vinaigrette. The fantasy wedding reception was scaled to serve fifty guests. Another article, “Without Ceremony” noted that the wedding banquet menu was too good to save for a special event and scaled some of the recipes, including the one for Israeli couscous, down to serve six.

The September 1999 issue of Gourmet was Ruth Reichl’s debut as  editor-in-chief, a position she held until the magazine’s print version demise in November 2009. In this issue Pat Conroy took readers along in the “Romance of Umbria”, the late actor-writer Spalding Gray gave account of his adventures in Disney World with his wife and children.  Described as a “great young American novelist” Ann Patchett wrote an essay called “Let Them Eat Kale.” Add to this Julia Child’s and Jacques Pepin’s roast chicken recipes and restaurant reporting by Pulitzer prize winner Jonathan Gold, it was quite an impressive issue, countless ads and all.

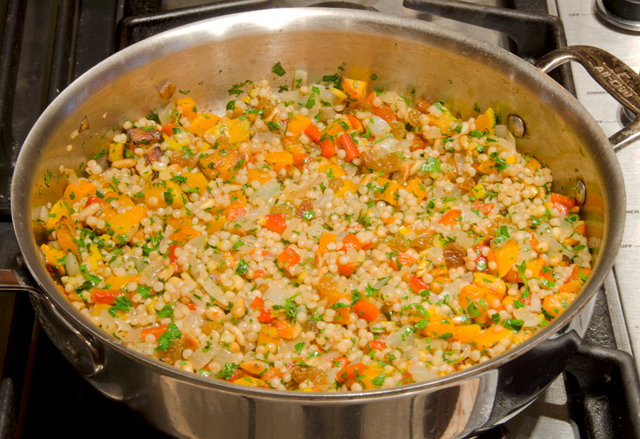
I made some changes to the original recipe. I used less squash and added a roasted pepper to the mix. You can either buy roasted peppers, or roast your own.  I roasted a red bell pepper on my trusty asador. To add another flavor dimension, I toasted my Israeli couscous in the saute pan before cooking. If you have issue with pine nuts, chopped toasted walnuts would substitute nicely. Farro or even orzo could take the place of Israeli couscous. Served warm or at room temperature, the tangy-salty combination of the preserved lemon peel and juice are what makes this recipe truly stand out.

 Israeli Couscous with Roasted Butternut Squash and Preserved Lemon

Serves 4-6

  • 1 preserved lemon (see this post)
  • 1 medium roasted sweet pepper, cut into 1/4″ dice
  • 3c butternut squash, peeled, seeded and cut into 1/2″ dice
  • 3T olive oil
  • 1 medium sweet onion, chopped
  • 1 1/4c low sodium chicken broth
  • 1 1/4 cups Israeli couscous
  • 1 (3 inch)  cinnamon stick
  • 1 bay leaf (Turkish)
  • 1/2 c chopped fresh flat leaf parsley
  • 1/2c chopped fresh cilantro
  • 1/3c toasted pine nuts
  • 1/2 c golden raisins
  1. Preheat oven to 450F.
  2. Cut enough preserved lemon peel into 1/4 inch dice to measure 1/4c, set aside.
  3. In a large bowl, toss squash cubes with 1T oil and salt to taste. Spread cubes in a large shallow baking pan. Check occasionally, tossing cubes with a spatula so they are evenly roasted on all sides and tender, about 15 minutes. Transfer cubes to a large bowl.
  4. Cook onion in 1T oil in a 10″ straight sided saute pan over medium high heat until golden. Add to the squash.
  5. Add diced roasted pepper to the squash and onions.
  6. Add 1T butter and 1T olive oil to  same pan over medium heat.  Add couscous, cinnamon stick, and bay leaf and stir until couscous browns slightly, stirring often, about 5 minutes. Add broth and salt and bring to boil. Reduce heat to low; cover and simmer until couscous is tender and liquid is absorbed, about 10 minutes.
  7. Add the vegetables into the couscous, stir to combine all ingredients. Transfer back to the large bowl,  toss with 1T olive oil and 1T juice from the preserved lemons to coat.
  8. Add lemon peel, pine nuts, parsley, cilantro and pepper to taste. Adjust seasonings adding more of the preserved lemon juice if needed. Toss to coat well.
  9. Serve warm or at room temperature.
The vegetables are added back into the couscous.

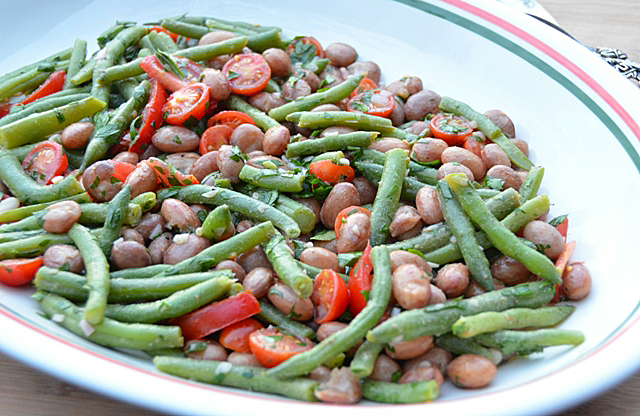
October 2, 2012 Borlotti and Green Bean Salad

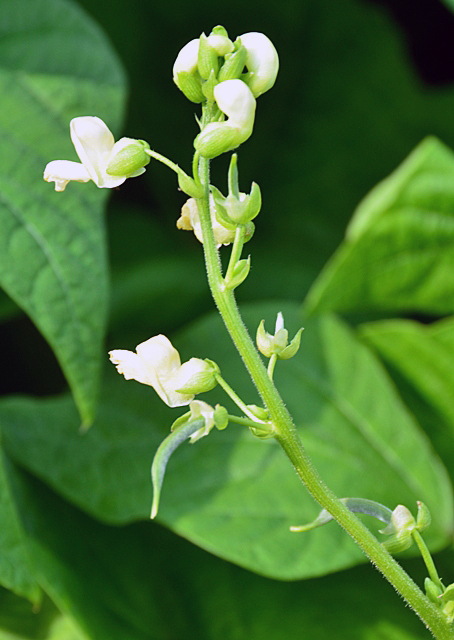
It was six thirty p.m., not even a half hour before the sun would set on this unusually warm early autumn evening. Some of the streaks in the evening sky were almost the same shade of hot pink as the mottled shells of the Borlotti beans I went down to the garden to pick. What I didn’t expect when I went to pick the Borlottis was that some of the second crop of green bush beans Joe planted in August were ready to pick as well. To the visible eye the bush bean plants seemed to have a lot of flowers, but no beans. When I reached my hand down into the plants I found they were full of mature beans, ready for picking.
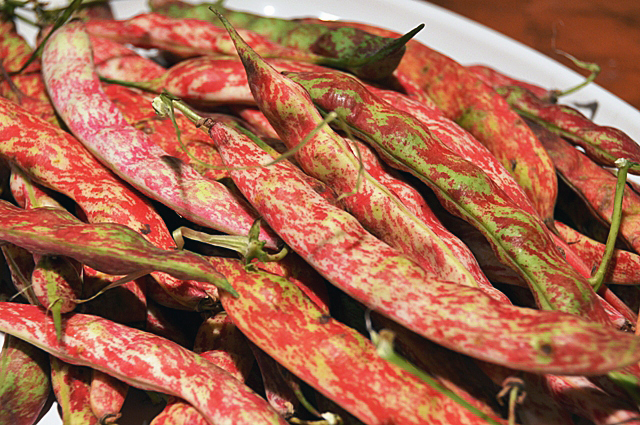
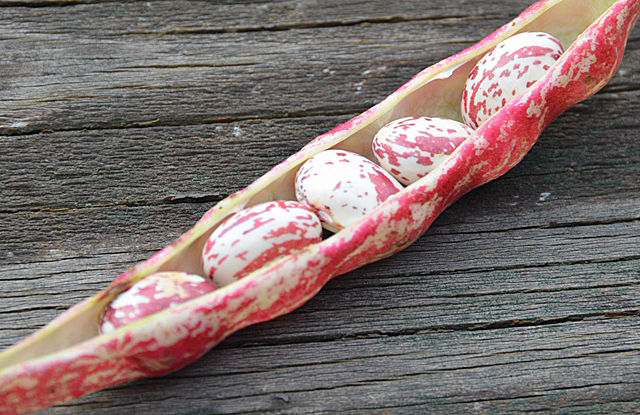
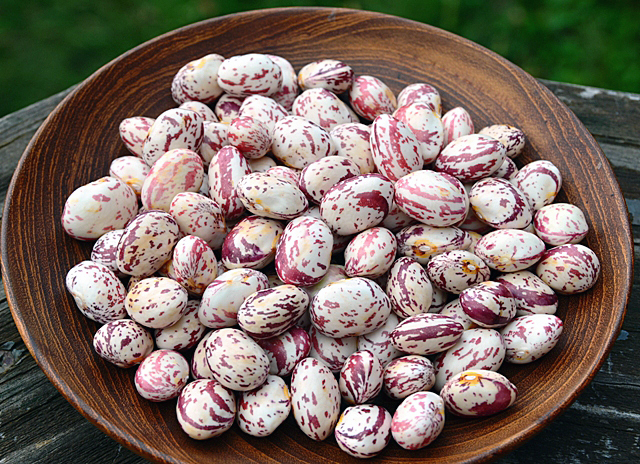
Borlottis are a shelling bean, grown primarily for the seed inside. They are one of the many Italian seed varieties that we have grown for the past two summers.   Green bush and pole beans and yellow wax beans however are grown for their pods. The inedible but colorful pods of the Borlotti beans  add visual interest to the garden, climbing up the trellis, in this case a salvaged frame from an old garden gazebo. The shelled beans are ivory in color with maroon speckles. When cooked they lose their spots and turn a light tan color.
Hailed as a nutritional “superfood” by some doctors and nutritionists, dried beans are an important part of a healthy diet. They are high in antioxidants, fiber, protein and many vitamins. Borlotti beans, also known as cranberry or French horticultural beans, have a nutty flavor and a meaty texture that makes them a delicious addition to soups, stews and salads. Green beans may not be the nutritional powerhouse that shell beans are, but they are low in calories, and a good source of fiber and vitamins A and C. Plus their neutral flavor is appealing to almost everyone. Fresh shelling beans require about twenty to thirty minutes of simmering, not the hours of soaking and cooking that dried beans do.  I decided to combine the borlotti beans and the green beans in a salad along with the last of the garden tomatoes, some garlic, a shallot, fresh herbs and a simple vinaigrette. My two bean salad was the perfect accompaniment for the roasted salmon we had for dinner.

Two Bean Salad

Makes four cups

  • 1/2lb green beans, washed and trimmed
  • 1c freshly hulled cranberry beans
  • 1-2 cups halved cherry tomatoes
  • 1 minced clove garlic
  • 1 minced small shallot
  • 1/4c flat leafed parsley
  • 1T Cabernet wine vinegar (or any good quality red wine vinegar)
  • 1t dijon mustard
  • 2T extra virgin olive oil
  • 1T or more walnut oil
  • Salt and freshly ground pepper

Directions

  1. Bring two large pots of lightly salted water to a boil. Add green beans to one pot, reduce heat to a simmer and cook for 6 to 7 minutes, beans should be tender, not falling apart.  Drain green beans in a colander, then transfer beans to a large bowl.
  2.  In the second pot, add the Borlotti beans, reduce heat to a simmer and cook for 25-30 minutes, until beans are soft, not mushy. In both cases, test an individual bean for doneness. Drain Borlotti beans in a colander and rinse with cool water.
  3. While the Borlotti beans are cooking, make the vinaigrette. Whisk together the red wine vinegar, dijon mustard and olive oil.
  4. Add the warm Borlotti beans to the green beans. Add the garlic, shallot and the tomatoes to the bowl, toss the ingredients. Add vinaigrette to taste. Toss salad again and add about a teaspoon or more of walnut oil to the salad. Add chopped parsley and season to taste with salt and freshly ground pepper. Garnish with miniature basil leaves.
    Borlotti beans in the shell

    Shelled Borlotti beans, too bad they lose their spots when cooked!


    Blossoms and tiny beans were all I saw on the surface.


Green bean harvest

August 23, 2012 Pearl Couscous with Olives and Roasted Tomatoes

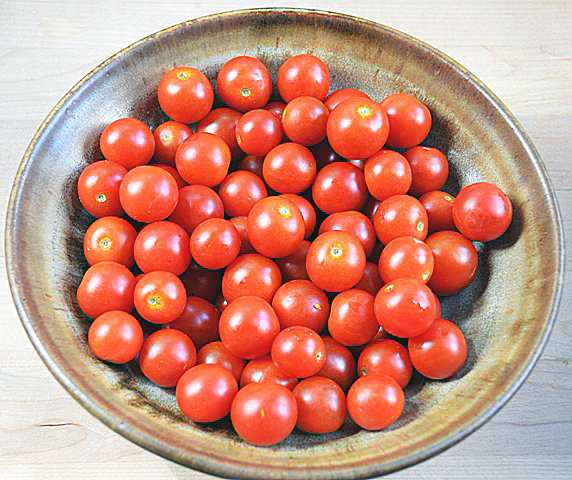
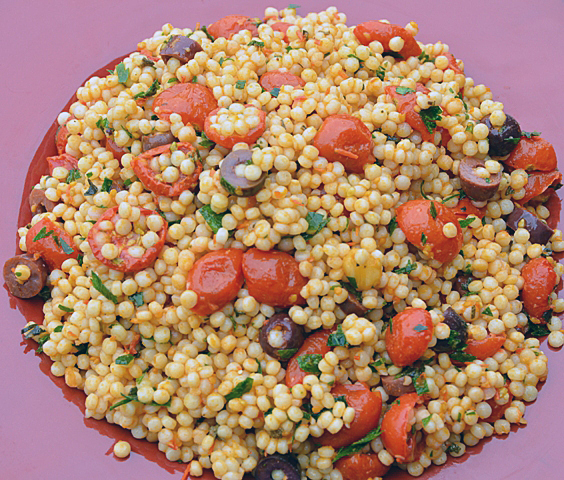
The marinated grilled leg of lamb we were having for dinner led me to look for a complementary side dish with a Middle Eastern flair. After a short search on Epicurious I found a recipe that I wanted to try, Pearled Couscous with Roasted Tomatoes and Olives. Our Supersweet 100’s cherry tomatoes are quite prolific now and one and a half pounds were needed to toss with the couscous and make the dressing in this recipe. I weighed one ounce of tomatoes on my kitchen scale which equaled four tomatoes.Using that formula, I calculated that one and a half pounds of tomatoes or 24 ounces times 4 would equal 96 tomatoes (give or take a few…). I certainly had picked more than enough for the recipe. A serrated knife made easy work of cutting the Supersweet 100’s in half and roasting them concentrated and intensified their flavor.
Pearled or Israeli couscous is not the traditional tiny yellow semolina pasta associated with North African cooking. Resembling barley or tapioca pearls,they are small round granules of semolina coated with wheat flour that are toasted in an open flame oven.Toasting gives Israeli couscous a nutty flavor and the larger size allows the “pearls” to maintain their texture without sticking. So where did the term “Israeli couscous” come from? Opinions differ here. Some say it was a product developed at the behest of Israel’s first prime minister, David Ben-Gurion. Israel as an emerging nation went through a period of food rationing due to the burgeoning population. Ptitim, as it is known in Israel, was developed as a wheat-based rice substitute for emigrating Asian Jews. Others just see it as a marketing term for a product that was already popular in other parts of the Middle East.
The couscous is combined with some of the roasted tomatoes, chopped olives, herbs and dressed with the roasted tomato vinaigrette. The only change I made to the original recipe was to eliminate the mint and add a little more parsley. Strips of grilled chicken or shrimp could make this a light entree. This salad would be a great choice to bring along to a picnic or a summer potluck.
 Pearl Couscous with Olives and Roasted Tomatoes

From the Epicurious website and Gourmet magazine September 2002

Serves eight

Ingredients

For roasted tomatoes and dressing

  • 1 1/2 lbs cherry tomatoes
  • 3 large cloves of garlic, unpeeled
  • 1/4c extra virgin olive oil
  • 1/4c warm water
  • 1t fresh lemon juice
  • 1t salt
  • 1/4t fresh ground black pepper

For couscous

  • 2 3/4c lower sodium chicken broth
  • 2 1/4c pearl (Israeli) couscous
  • 1T olive oil
  • 1/2c brine cured olives (Kalamata) pitted and chopped
  • 1/2c chopped flat-leaf parsley
  • 1t chopped fresh thyme

Directions

  1. Preheat oven to 250F. Halve tomatoes through stem ends and arrange, cut sides up, in one layer in a large one inch deep baking pan. Add garlic to pan and roast until the tomatoes are slightly shriveled around the edges, about 1 hour. Cool in pan for about 30 minutes.
  2. Peel garlic and puree with oil, water, lemon juice, salt, pepper, and 1/2 cup roasted tomatoes in a blender until the dressing is very smooth.

Make couscous:

  1. Bring broth to a boil in a 3 quart heavy saucepan and stir in couscous, then simmer, uncovered, 6 minutes. Cover pan and remove from heat. Let stand 10 minutes.
  2. Spread couscous in a single layer on a baking sheet and let cool for 15-20 minutes.
  3. Transfer couscous to a large bowl and stir in remaining ingredients, dressing, roasted tomatoes, season with salt and fresh ground pepper to taste.

         Sweet 100’s are a delicious pop in your mouth treat!

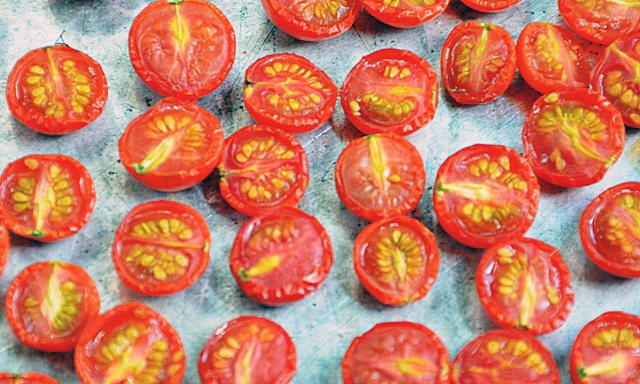
 Roasting the tomatoes cut side up helps the liquid to evaporate and intensifies the flavor.


The tomatoes after one hour of roasting.

August 14, 2012 Mediterranean Eggplant and Barley Salad


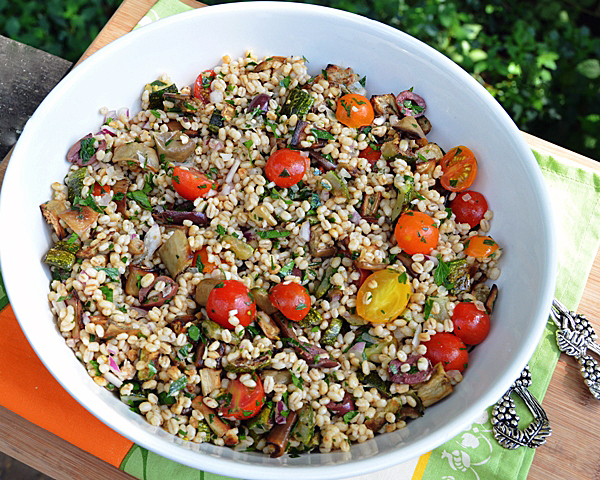
My daily trips to the vegetable garden are a weight-lifting exercise these days. An abundance of tomatoes and eggplant has me scrambling to find new ways to use our bounty.  A grain salad that uses fresh vegetables and herbs is just what we needed to serve along with grilled chicken. A great make-ahead dish, nutty, nutritious barley is combined with seasonal vegetables and a lemony dressing. What starts out as looking like too much zucchini and eggplant is tossed with olive oil and cooks down to toasty little cubes that contrast nicely with the creamy barley. Aromatic spices and shallots are toasted in olive oil before the barley is tossed into the mix and it will have your kitchen smelling wonderful. This would be a great vegetarian entree, just substitute vegetable broth or water for the chicken broth. Not only does the salad taste great, barley is often touted as a “superfood”. Rich in fiber, niacin and thiamine it also helps lower blood cholesterol levels.
I did make some changes to the original recipe. I did not use extra virgin olive oil to toss with the eggplant and zucchini or in the barley preparation. I prefer to use extra virgin olive oil when it is not cooked and you are tasting the oil, as in a vinaigrette dressing. I substituted the more subtle shallots for scallions when cooking the barley. I chopped rather than sliced  the red onion because I preferred the way it looked.  I used a combination of cherry tomatoes from our garden, Sun Gold, Yellow and Sweet 100s. They are small enough that they only needed to be halved, not quartered as you would with a larger variety of cherry tomato. I eliminated the mint, mostly because my husband isn’t a fan, but also mint seems to permeate a cold salad and takes over the dish. The accompaniment to the salad was ricotta salata, in thin slices. Were you supposed to crumble it over the dish? I didn’t feel it was necessary, but some feta crumbled on top might be a nice addition.

Mediterranean Eggplant and Barley Salad

adapted from Gourmet magazine and the Epicurious website

Serves four as a main dish, eight as a side dish

Ingredients

For the vegetables

  • 1 1/2 lb eggplant, cut into 1/2 inch cubes
  • 1 1/2lb zucchini cut into 1/2 inch cubes
  • 5T olive oil (more if needed)
  • 3/4t salt
  • 3/4t fresh ground pepper

For the barley

  • 2T olive oil
  • 3/4 c chopped shallot
  • 1 1/2t ground cumin
  • 1/2t ground coriander
  • 1/4t cayenne pepper
  • 1 1/4c pearl barley
  • 1 14oz can reduced sodium chicken broth
  • 3/4c water

For the dressing

  • 2T lemon juice
  • 1 garlic clove, minced
  • 1/4t sugar
  • 1/4t salt
  • 1/4t pepper
  • 3T extra-virgin olive oil

For final assembly of the salad

  • 1/2 lb cherry tomatoes quartered or Sun Golds, Yellow and Sweet 100’s halved
  • 1/3c Kalamata or other brine cured olives, pitted and halved
  • 1/2c finely chopped red onion, soaked in ice water and drained if desired
  • 1c chopped fresh flat leaf parsley

Directions

  1. Put oven racks in upper and lower thirds of oven and preheat oven to 425F.
  2. In a large bowl toss eggplant and zucchini with 5T oil, 3/4t salt and 3/4t pepper. Spread zucchini and eggplant on two oiled large shallow baking pans.
  3. Roast vegetables in oven, stir occasionally and switch pan positions halfway through baking, until vegetables are golden brown and tender, 20-25 minutes total. Combine vegetables in one pan and cool, reserving other pan for cooling barley.
  4. Heat 2T oil in a 3-4 quart saucepan over moderately high heat until hot but not smoking. Cook the shallot, cumin coriander and cayenne, stirring, until fragrant, about 1 minute. Add barley and cook until well coated with oil and spices, 2 minutes more. Add broth and water and bring to a boil. Reduce heat and simmer, covered, until all the liquid is absorbed and barley is tender, 30 to 40 minutes. Remove from heat and let stand, covered, 5 minutes. Transfer to the reserved shallow baking pan and spread barley to quickly cool, uncovered, to room temperature, about 20 minutes.
  5. Whisk together lemon juice, garlic, sugar and remaining 1/4t salt, 1/4t pepper and 3T olive oil in a large bowl. Add barley, roasted vegetables and remaining ingredients to bowl with dressing and toss until combined well.

Can be made 1 day ahead and chilled, covered. Return to room temperature before serving.


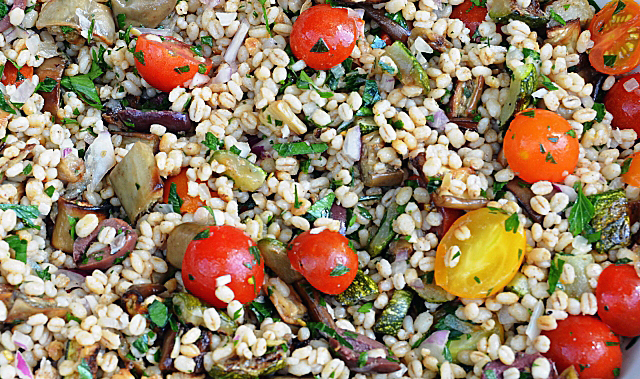
Three colors of cherry tomatoes make this a very colorful salad.


Today’s pick of Globe, Asian Bride and Rosa Bianca eggplants.

August 7, 2012 Pasta Salad with Sun Gold Tomatoes, Green Beans and Pesto Dressing

Pasta salad, that ubiquitous summer take along for picnics, barbecues and potlucks doesn’t have to be boring. This particular one was made with fresh ingredients from our garden and a spicy pesto vinaigrette. I picked very sweet and fruity Sun Gold tomatoes and a combination of our second growth of bush beans with the first of the pole beans. I chose penne rigate as the pasta, not just because it was the only acceptable pasta shape we had on hand but the ridges would nicely hold the bits of pesto. The dressing is a slightly deconstructed take on pesto, the toasted pine nuts are added to the salad separately rather than part of the dressing to give the salad some extra crunch. Sun gold tomatoes are a relatively new favorite of ours. They are a tangerine-orange cherry tomato developed in Japan where consumers prefer a tomato that is sweet rather than tart. The recipe is just a canvas to fill in with your own summer ingredients. Choose grilled slices of zucchini, chunks of pepper, cubes of cooked eggplant, or a different variety of tomato. Walnuts would be a good choice to replace the pine nuts and a Grana Padano could replace the more traditional  Parmigiano Reggiano. Just be sure to use freshly grated cheese, not pre grated or the stuff that comes in a green can!

Pasta Salad with Sungold Tomatoes, Green Beans and Pesto Dressing

Created using the Fine Cooking pasta salad recipe maker

Serves eight

Ingredients

For the Vinaigrette

  • 1 1/2 c lightly packed basil leaves
  • 1/2c extra virgin olive oil
  • 1/2 c or more fresh, finely grated Parmigiano-Reggiano cheese
  • 3T red wine vinegar
  • 2T fresh lemon juice
  • 2t  finely chopped garlic
  • 1/2t finely grated lemon zest
  • 1t kosher salt
  • Freshly ground black pepper

For the salad

  • kosher salt
  • 1 lb green, purple and wax beans, trimmed and cut into 2-inch lengths
  • 1/2 lb small chunky pasta
  • 1T olive oil
  • 2 1/2 cups of cherry tomatoes, halved (l love using my Cutco steak knife for this)
  • 3T pine nuts, toasted
  • Freshly ground pepper

Directions for the Vinaigrette

  1. Put the basil, olive oil, Parmigiano, vinegar, lemon juice, garlic and lemon zest in a blender. Blend until smooth. Season with salt and pepper to taste.

Directions for the salad

  1. In a large pot bring 4 quarts of salted water to a boil over high heat
  2. Drop the beans into the boiling water and cook until they are just crisp-tender, about 4-5 minutes. Remove beans from pot with a slotted spoon and place in colander. Rinse with cool water and transfer beans to a baking sheet lined with paper towels to drain and cool.
  3. Return the water to a boil and add the pasta. Cook until al dente, following package instructions. Drain the pasta thoroughly in a colander and transfer to a rimmed baking sheet. Toss the pasta with the olive oil to prevent sticking.
  4. Transfer the cooled pasta to a large serving bowl. Add beans and cherry tomatoes and toss. Add just enough vinaigrette to moisten the pasta, do not over dress. Add the pine nuts and toss again. Let the salad rest for 20 minutes or so to allow the flavors to blend and then taste the salad again. If needed, add a little more vinaigrette, salt and pepper. Grate a little extra cheese on top if desired.


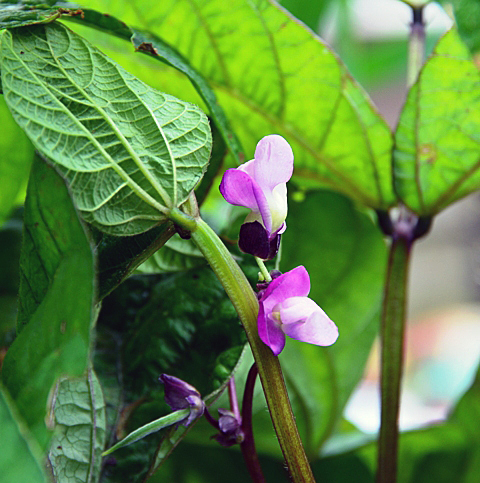
The little green bean at the bottom left of the picture will eventually turn as purple as the blossoms!


Sun Golds at various stages of ripeness.

July 12, 2012 Swiss Chard


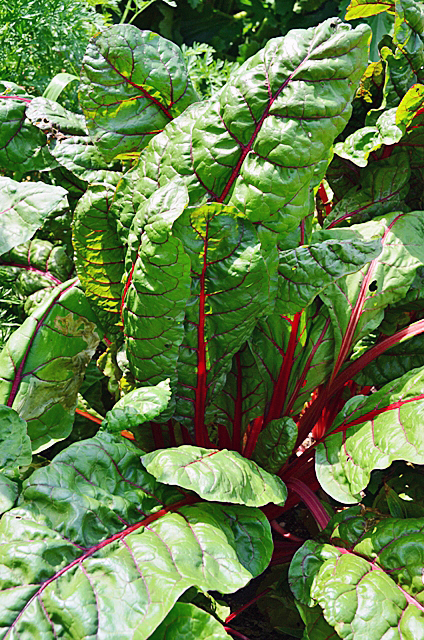
Let’s begin with two misconceptions regarding chard. Swiss chard is not from Switzerland, but the botanist who named it in the nineteenth century was, and named it for his homeland.  Second, it is pronounced chard, not shard. I can understand why the mistake can occur. Chardonnay, a wine grape varietal, is referred to in a shorthand kind of way  by many people (moi included) as “shard”. The “ch” is pronounced “sh” in French, like chalet. Also a shard is a sharp piece of glass, not something one would consume.

Chard is from the Latin and the French for the word “thistle”. However, chard is not a member of the thistle family but belongs to the beet family.  Chard is cultivated for the leaves and stems of the plants, not the roots.  It is the cooked green of choice in the summer months in our house. We grow many varieties that are as pretty to look at as they are nutritious for you. Varieties like Rhubarb with its bright red stems and Bright Lights with its neon pink, orange and yellow stems give beautiful accents of color in the garden. Chard is a nutritional powerhouse with vitamins K, A and C, and is  a good source of potassium, iron and fiber.

European cooks are partial to chard stems discarding the leafy part and in America most cooks use the leaf and discard the stem. I take advantage of both the stems and the leaves .  The tiniest leaves are an interesting addition to salad mixes. When using larger leaves, the stems need to be separated from the leaves to cook both parts correctly. This is a recipe with the gardener in mind. If you don’t grow your own, your local farmer’s market is a good source for chard. Supermarket chard looks sad for the most part and wouldn’t make a chard lover out of anyone.

Swiss Chard with Garlic

Serves 4-6

Ingredients

  • 1 large bunch of chard
  • Kosher salt and fresh ground pepper
  • Low sodium chicken broth
  • Extra virgin olive oil
  • Several cloves of garlic, peeled and chopped

Directions

  1. Trim the bottoms of the stems and wash chard in several changes of water
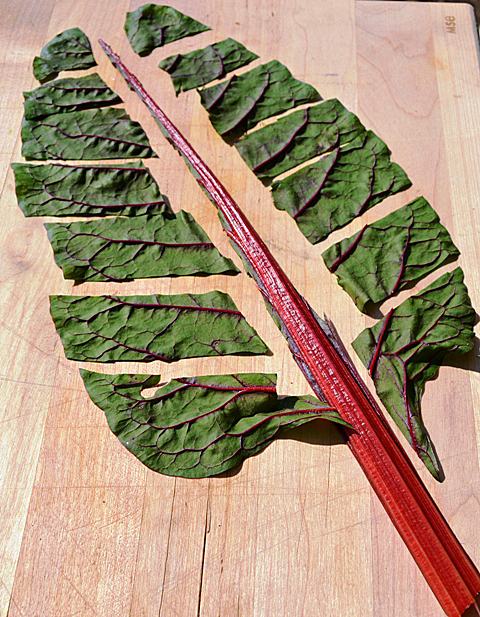
  2. Cut the stems from the leaves. Chop stems into 1/2 to 1 inch pieces. Cut leaves into 1 to 2 inch ribbons. Stacking leaves on top of leaves and stems in an even row  makes the task go quicker.
  3. Bring a large pot of well-salted water to a boil. Add chard stems and blanch for 4-5 minutes. The timing will depend on how thick you cut the stems and how soft you want them to be. Remove stems from water with a slotted spoon or spider. Add a little more water to the pot if necessary and keep at a boil.
  4. Add chard leaves in batches and blanch until wilted, 2-3 minutes. Drain in a large colander. Squeeze out excess liquid when cool enough to handle.
  5. Heat a tablespoon or so of extra virgin olive oil in a large skillet over medium high heat for about a minute. Add stems and toss gently to coat. Add wilted chard leaves and stir often, until tender, adding a little chicken broth if the mixture seems too dry. Push chard to one side of pan, add a little more olive oil, add garlic to pan and saute garlic until golden, another minute or two.
  6. Serve warm. Cooked chard could be added to a frittata or omelet as well.


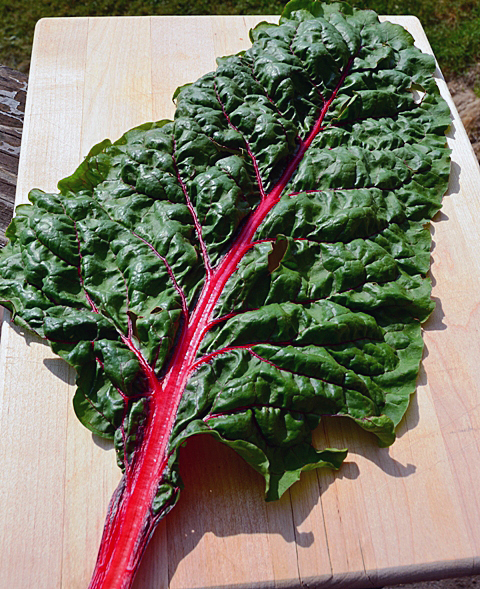
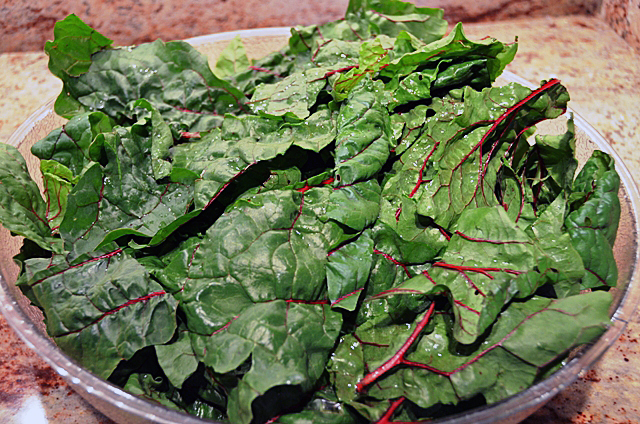
Crinkly rhubarb chard leaf with bright red stem.

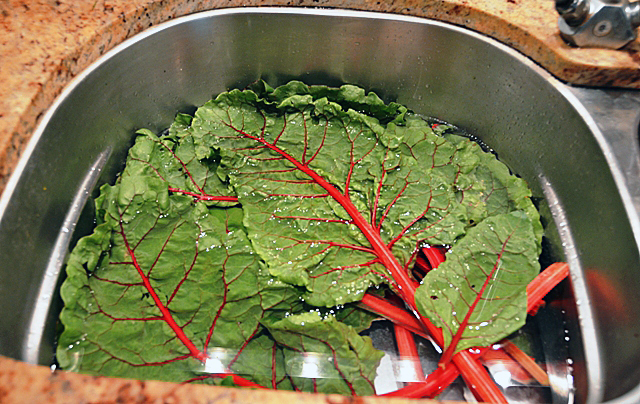
Soak chard leaves in several changes of water. Dirt will sink to the bottom when you lift the leaves out. Drain chard in a colander.


Trim the bottom of the chard leaves. Cut the leaf away from the stalks, I prefer using scissors or a small serrated knife. Chop leaves in 1-2 inch ribbons. Stacking the leaves speeds the process along.

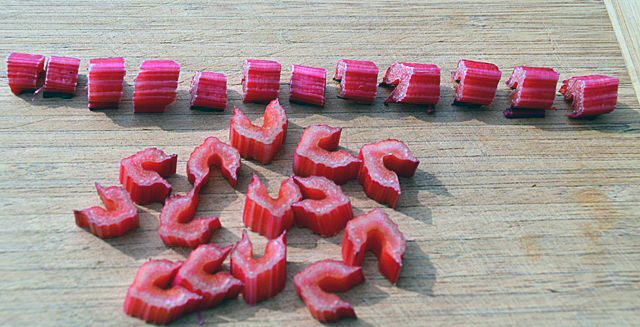
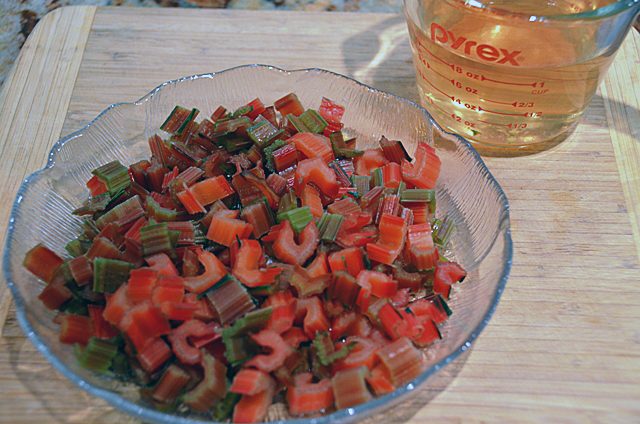
Chop stalks into 1/4 to 1/2 inch pieces.


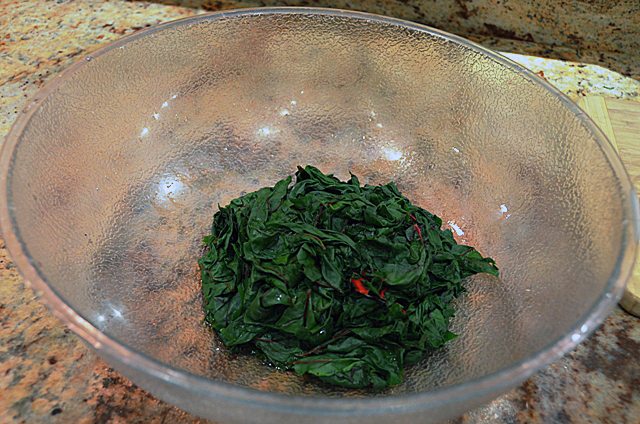
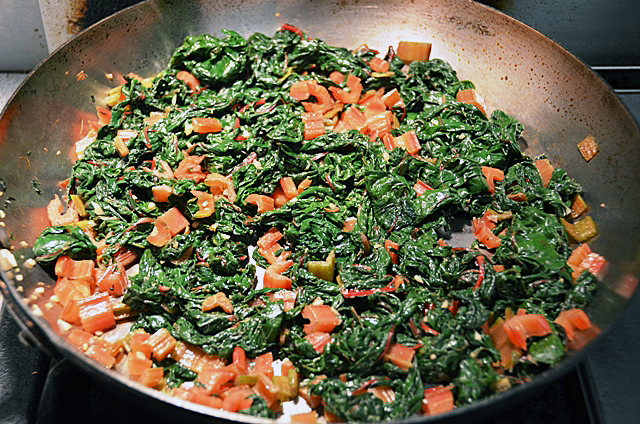
Always cook more chard than you think you will need. This large bowl cooked down to this.


As you can see from the measuring cup, some of the color leaches out during the blanching process but they remain predominately red.


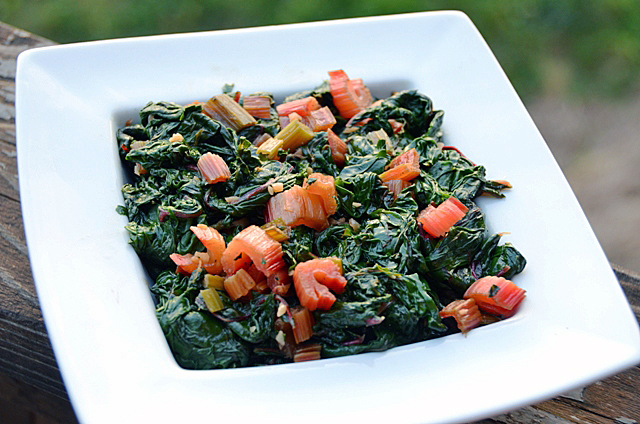
Saute the stems and leaves together and finish with a little chopped garlic.  A flavorful extra virgin olive oil will really enhance the flavors in this dish.