April 21, 2014 Creamy Asparagus Soup

DSC_6574a

Spring is finally in the air and asparagus is one of the first spring vegetables to emerge.  When I was examining the asparagus in the supermarket, a fellow shopper asked me if it was local asparagus or not. The sign indicated that the asparagus was from Mexico. My fellow shopper told me she would wait a little longer for the local asparagus. Because of our exceptionally cold and snowy winter I am sure that local asparagus won’t be appearing in our farmers markets until late May and early June. I wanted to make asparagus soup for Easter so I decided to buy it anyway.

When purchasing asparagus, choose spears that are bright green, even purplish with firm, tight tips. Markets usually sell asparagus in one pound bundles. Pick the bunch up and examine for split or broken ends. The cut ends are fibrous, the plant’s reaction to when it is cut in the field. If the stem end is excessively woody or wrinkly,  the asparagus is past its prime.

Fat, thin or in between, when it comes to asparagus you could say they were “born this way”. When we had an asparagus patch the spears varied from skinny ones to very plump ones. Fatter spears of asparagus weren’t left out in the field too long unlike that zucchini you grew that became as thick as a baseball bat. Thickness is a sign of the age of the crown which produces the asparagus stalks. Thinner asparagus originates from younger plants or from crowns  that are planted closer together. Mature crowns and certain varieties produce thicker spears.

Thin asparagus is predominant in the off-season in this area and many view it as more desirable. I personally prefer a medium to slightly thicker stalk when the local farms are producing.The taste testers at Cooks Illustrated liked both thick and thin asparagus. They found the thicker spears to be more tender because the fibers are more concentrated in the thin spears. The trade-off? Thicker spears may need to be peeled.

The best way to store asparagus is to trim the cut ends slightly and stand them in a shallow container of water. Cover the container with a plastic bag and refrigerate for several days. The alternative (my personal favorite) is to wrap the stem ends with a damp paper towel and store in the produce bin of your refrigerator. To snap or to cut? I prefer to cut the ends of asparagus for a more uniform appearance.

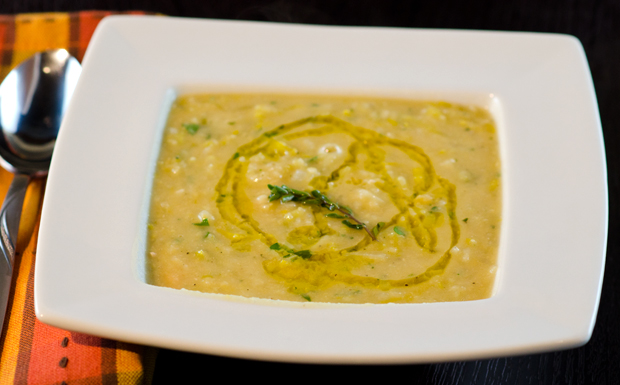
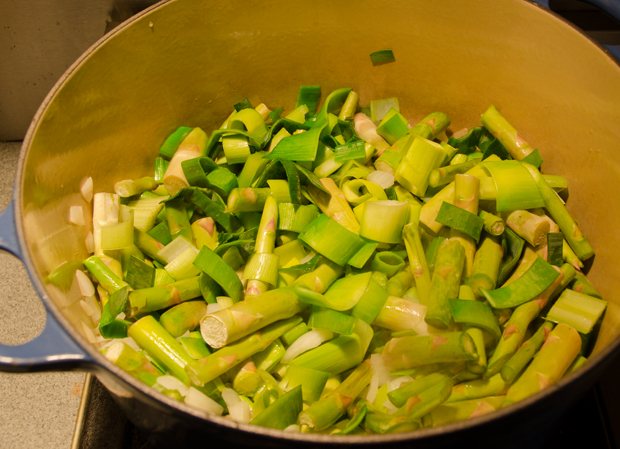
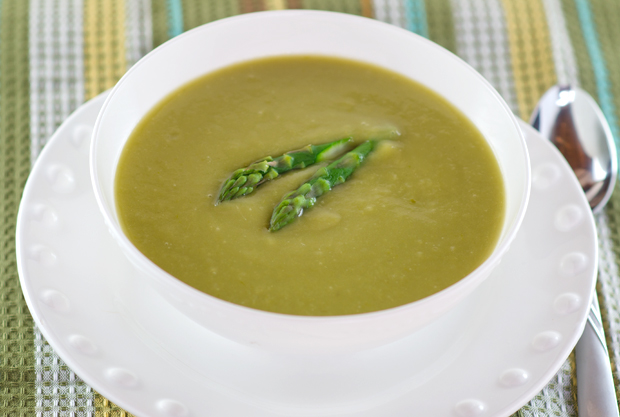
Waste not, want not could be the subtitle of this recipe. Every part of the asparagus stalk is used from the ends to the tips. The “waste not” is the woody stems of the asparagus and the dark green tops of the leeks that are usually relegated to the compost bin in most recipes. For the “want not”, these usual discards are combined with celery and onions, herbs and water to make a flavorful vegetable stock. Then the rest of the celery, leeks and garlic are sautéed in butter. The tender stalks of the asparagus along with some potato are added next  to give the soup more body before the vegetable stock is added.  It was not called for in the original recipe, but I put the soup through a food mill to give it a smoother texture. The asparagus tips are blanched separately for a minute or two and added to the soup before serving as a final garnish. Cream is added to the soup as a final touch, you could use half and half or skip the dairy altogether.  Served hot or cold, this soup is a delicious springtime treat.
DSC_6524a
Asparagus stems and leek trimmings combine to make a flavorful stock.
DSC_6530a
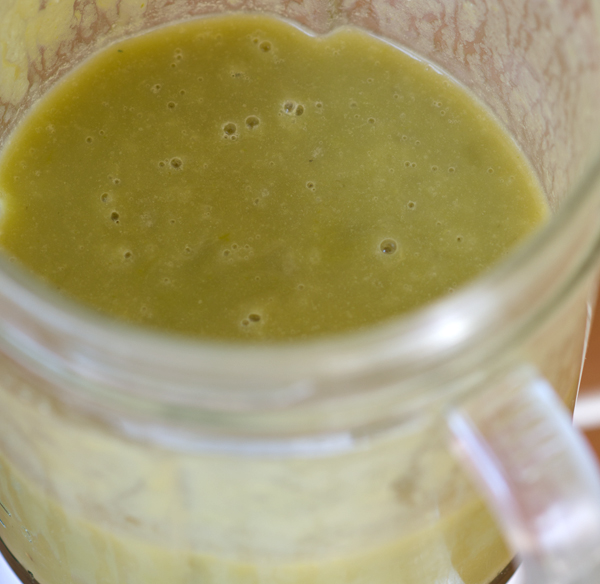
Blend it up!
DSC_6595a
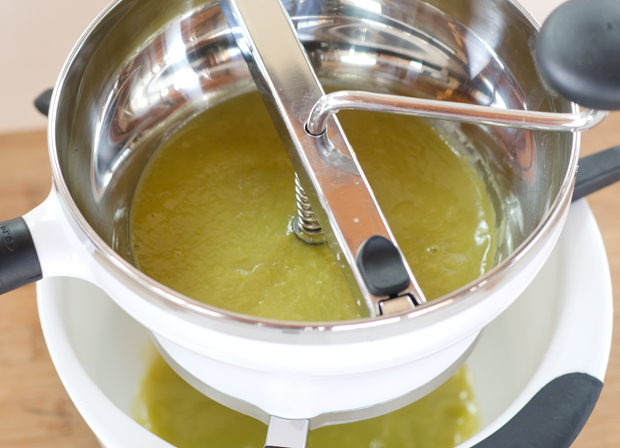
Putting the soup through the mill.


Creamy Asparagus Soup

From Fine Cooking magazine

Serves eight

Ingredients

  • 2 lb asparagus
  • 3 ½ T unsalted butter
  • 1 c coarsely chopped celery ribs
  • 2 c coarsely chopped yellow onion
  • 1 large leek (white and green parts), halved lengthwise, thoroughly rinsed, and thinly sliced crosswise (keep dark green parts separate from light green and white parts
  • 8 whole peppercorns
  • 5 sprigs flat leaf parsley
  • 2 sprigs thyme
  • Kosher salt
  • 2 medium cloves garlic, chopped
  • ½ lb small red potatoes, peeled and cut into 1/2 inch dice (1 heaping cup)
  • ¼ c heavy cream or half and half (optional)
  • Freshly ground white pepper

Directions

  1. Snap off the tough ends of the asparagus, but don’t discard them. Cut about 1½ inches of the tips off the asparagus spears and cut the spears crosswise in thirds; set the spears and tips aside separately.
  2. Melt 1½ T of the butter in a 3 quart saucepan over medium low heat. Add the tough asparagus ends, half of the celery, the onion, and the dark green parts of the leek. Cook uncovered, stirring occasionally, until the vegetables look very soft, about thirty minutes. If the vegetable show any sign of browning, reduce the heat to low. Add 6 cups cold water and the peppercorns, parsley, thyme and a ½ t salt. Bring to a boil over high heat, reduce the heat to medium low, cover, and simmer for 30 minutes to make a flavorful vegetable stock.
  3. Meanwhile, bring a 2 quart pot of salted water to a boil over high heat. Add the asparagus tips and cook until just tender, 2 to 3 minutes. Drain in a colander, rinse with cold water to stop the cooking, and drain again. Set aside.
  4. In another 3 quart (or larger) saucepan, melt the remaining 2T butter over medium low heat. Add the white and light green sliced leek and the remaining celery and season with a with a generous pinch of salt. Cook, stirring occasionally, until the leeks look soft but not browned, 3 to 4 minutes. Add the garlic and cook for one minute more. Add the asparagus spears and the potato. Set a wire mesh strainer over the pot and pour the stock from the other pot; discarding the solids. Stir well and bring to a boil over high heat. Reduce the heat to medium low, cover and simmer until the potatoes and asparagus are very tender, about 20 minutes. Turn off the heat and let cool slightly.
  5. Purée the soup in a blender in two or three batches. If you want, put the soup through a food mill for the smoothest texture. Return the puréed soup to the soup pot.
  6. Add cream or half and half if desired, and stir well. Reheat the soup gently over medium low heat. Season to taste with more salt and a large pinch of white pepper. Ladle soup into bowls and scatter in the asparagus tips, distributed them evenly among the bowls.
DSC_6592a

DSC_6585a

March 8, 2014 Chicken and Andouille Sausage Gumbo

DSC_6186a

A whole new world opened up to me when I discovered my love of cooking and good food over thirty years ago. To learn as much as I could, I immersed myself in cooking magazines, cookbooks and food programs on television. In the pre Food Network days the only option was the local PBS affliliate. Sure there was Julia, but there was also Nathalie, Madeline and a program called The Great Chefs. The Great Chefs programs were the first to take the television cameras behind the scenes and into the kitchens of the finest restaurants in the world. Two of the those programs, Great Chefs of New Orleans and the Great Chefs Louisiana New Garde became my first encounter with the Cajun and Creole cooking of New Orleans. Probably the first celebrity chef to come out of  that town, even before Emeril, was Paul Prudhomme. I bought his first cookbook, Chef Paul Prudhomme’s Louisiana Kitchen and began cooking away.

We had parties revolving around the food of NOLA, Jambalaya Jams, we called them, featuring the spicy cuisine of that city. We also had the pleasure of visiting New Orleans several times and even dined at K-Paul’s, Prudhomme’s eponymous restaurant. While Joe was busy with medical seminars, I enjoyed some demonstration cooking classes to further my exploration in the cooking techniques of the region. I learned about a very different “holy trinity” than I was familiar with, how simple it is to make “prah-leens”,and that a roux (pronounced roo) was the basis of many of the region’s best dishes.

A New Orleans style roux is a fifty-fifty mixture of flour and oil. The oil, always something neutral like a vegetable oil, is heated to a high temperature, then the flour is added gradually. The flour will first bubble as it releases it’s moisture, then toasts as you continue to stir, and stir you must, constantly. The tool of choice here is a long-handled wooden spoon or heat proof spatula. The well-earned nickname “Cajun napalm” comes from the fact that splattering roux will stick to your skin and result in a nasty burn.  The roux will toast and begin to turn a caramel color and develop a wonderful nutty fragrance. A roux can range anywhere from light brown to almost black. Chef Prudhomme says that Cajun tradition is the darker the meat in the dish, the lighter the roux. A dark roux will provide less thickening since the starch is thoroughly cooked but will impart a richer flavor to the dish. If the roux has black specks in it, or smells burnt, discard it and start all over again. A burnt roux cannot be saved!

Gumbo is a classic New Orleans dish claimed by both Cajun and Creole cooks.  Along with a toasty roux, the flavor base of gumbo is enhanced by the “holy trinity” that I mentioned before, a Creole mirepoix of celery, onion and green pepper.  I chose to make this gumbo with chicken thighs since they stand up well to reheating and some andouille sausage to add a little spiciness and authenticity to the dish. Okra and file powder are traditional thickeners added at the end of the cooking process.  Okra is a green pod that is sliced into rounds and breaks down to thicken the gumbo. Okra, both the plant and it’s fruit contain mucilage. That is why some think okra brings a “slimey” quality to the dish. The other option, filé powder is made with the ground leaves of the sassafras tree. It smells like eucalyptus and adds a certain earthiness to gumbo. Filé powder needs to be added to individual bowls right before serving, cooking it makes it become stringy.

Intrestingly enough either one of these two thickeners could be the origin of the word gumbo. The African Bantu word for okra is “kingombo” and the Choctaw Indians were the first to make and sell filé powder which they called “kombo”.

Gumbo is a great make ahead dish. As with many stews, it tastes even better the next day. Gumbo can be stored in the refrigerator for several days or frozen. Serve over white rice, garnish with chopped scallions and pass around the Louisiana style hot sauce for a satisfying one dish meal.

DSC_6194a


Chicken and Andouille Sausage Gumbo

Serves 6-8

Ingredients

  • 2lbs boneless skinless chicken thighs, cut into 1″ pieces
  • 1t kosher salt
  • 1t garlic powder
  • 1/2-1t cayenne pepper
  • 6c chicken stock or low sodium chicken broth
  • Vegetable oil (1/2 cup plus a little more)
  • 1/2lb Andouille sausage or other spicy sausage, sliced in half lengthwise, then cut into 1/3 inch half moon slices
  • 1/4c Canadian bacon, cubed
  • 1 1/2c finely chopped onion
  • 1c finely chopped green pepper
  • 1c finely chopped celery
  • 3 cloves garlic, finely chopped
  • 2 bay leaves
  • 2t dried thyme
  • Finely chopped scallions
  • Louisiana style hot sauce
  • Hot cooked white rice
  • Filé powder

Directions

  1. Place the chicken in a bowl large enough to hold it comfortably. Mix salt, garlic powder and cayenne in a small bowl. Toss the chicken with the spices and let stand at room temperature for 30 minutes.
  2. Warm the chicken stock over medium heat.
  3. Heat 1 tablespoon vegetable oil in a 7-8 quart Dutch oven over medium high heat until hot, 1-2 minutes. Add the sausage and the Canadian bacon and cook, stirring occasionally with a wooden spoon, until well browned, 4-6 minutes. Transfer to a bowl with a slotted spoon.
  4. Add 2 tablespoons to the Dutch oven and sauté the chicken in several batches until golden brown, about 6-7 minutes. Transfer the chicken to the bowl with the sausage.
  5. Add enough vegetable oil to the Dutch oven to make 1/2 cup. Using a wooden spoon to scrape and loosen browned bits from the bottom of the pot.
  6. Using a long handled whisk, gradually stir in the 1/2 cup flour. Cook whisking constantly. I switched back and forth between a whisk and flat edged wooden spoon to make sure nothing stuck to the bottom of the pan. It will take anywhere from 4 to 8 minutes for the roux to reach a dark caramel color.
  7. Remove the pan from the heat and immediately add the onion, celery, pepper and garlic. Stir constantly to stop the roux from getting darker.
  8. Return pan to low heat and cook until vegetables are soft, about 5 minutes, stirring constantly and scraping the bottom of the pan well.
  9. Stir in the chicken broth, sausage, Canadian bacon, chicken, thyme and bay leaves.
  10. Bring to a boil and then reduce heat and simmer for 30 minutes.
  11. Gumbo can be served immediately or stored in the refrigerator for several days. Reheat gently before serving.
  12. Serve in large soup bowls over cooked rice. Add scallions, filé powder and hot sauce to taste.

DSC_6206a

February 21, 2014 Chickpea and Leek Soup

DSC_4682a

I am a lucky woman. My husband planned, shopped, and took the day off from work and shoveling snow to cook a very special Valentine’s Day dinner for me. At the time I wasn’t even sure what the menu would be. I made a few requests and he filled in the rest. They were small courses or “bites” as he called them. A favorite tradition of mine, the demands of life and family required us to take a break from this meal for several years.The “meal of love” as he calls it, lasted several hours so I had some movies and the season finale of Top Chef to watch. I should have probably worked out between courses, we went to a wedding the next day and I was concerned about fitting into the dress I was wearing.

One dish I did request was a soup made with fresh chickpeas that stayed in my memory as a favorite after all these years. I love chickpeas and fresh ones have a wonderful nutty quality. My job now was to locate the source of memorable recipe. After some thought I remembered where it was from, a magazine that I subscribed to for some time, The Herb Companion.

The tag line of The Herb Companion was “in celebration of the useful plants”. Useful they are, The Herb Society of America defines an herb as “a plant valued for it’s flavor, fragrance, medicinal and healthful qualities, economic and industrial uses, pesticidal properties and coloring materials (dyes).”  The magazine helped familiarize readers with herbs, both common and quite unique, how to grow them and their uses from culinary to crafts.

This issue (Feb-Mar 95) was in part devoted to alliums. Allium is a classification (genus) that includes garlic, onions, shallots and leeks to name just a few. Alliums are rich in sulphur compounds and have been said to be useful in everything from lowering blood pressure to relieving pain and inflamation.

However, my main interest was in the recipes, not the health benefits of alliums. Alliums pair well with the culinary herbs, in this case, Italian or flat leaved parsley and marjoram. Marjoram is closely related to oregano with a sweeter, more delicate flavor. Appropriate for the occasion, marjoram, according to Roman legend is known as the “herb of love”,

In this simple soup the delicate onion flavor of leeks combines with nutty chickpeas and fragrant fresh herbs. The original recipe called for water but Joe substituted a rich homemade turkey stock that brought another layer of flavor to the soup. When making any dish with dried beans, it’s best to purchase them from a bulk bin with a high turnover rate for the freshest possible beans. Old beans don’t rehydrate very well. Store dried beans in a cool dark pantry and use within a year. Chickpeas,as with all beans are a good source of iron, folate and dietary fiber. Canned beans could be substituted but they also bring additional salt and preservatives to the soup.

My memory was happily confirmed, this was a delicious soup and the recipe made enough to freeze for future meals. Sad to say, The Herb Companion is no more. As of 2013, after more than twenty years of bimonthly publication, the magazine has been incorporated into Mother Earth Living Magazine.

DSC_4628a
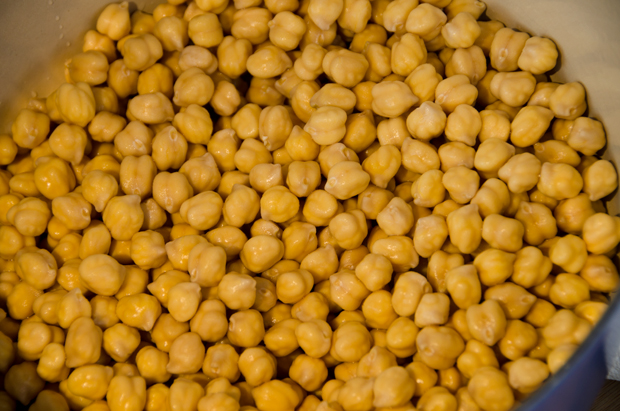
Fresh chickpeas after an overnight soak.

Chickpea and Leek Soup

Serves four to six

Ingredients

  • 1/2lb. dried chickpeas
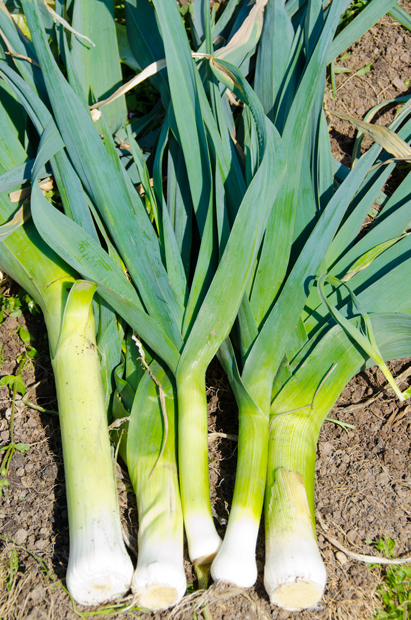
  • 1 bunch leeks (about 1 1/2lbs.)
  • 1 medium onion
  • 3 large cloves garlic
  • 3-4c water, chicken or turkey stock
  • 1/3c extra virgin olive oil
  • 5 sprigs Italian parsley
  • 3 marjoram sprigs
  • Kosher salt and freshly ground black pepper
DSC_4638 copy
The other players in the soup

Directions

  1. Soak the chickpeas in cold water to cover overnight
  2. Drain, rinse and cover with fresh water. Bring to a boil, reduce heat and simmer until very tender, about an hour. Puree half the chickpeas (or more for a thicker textured soup) Return them to the pot and salt well.
  3. Meanwhile, clean and trim the leeks, including only the tender green and slice 1/8 inch thick. Dice the onion and mince the garlic. Gently cook the vegetables covered, in 3 tablespoons of oil over low heat until they have softened,
  4. Add the vegetables to the chickpeas along with 3 cups of water or stock. Salt and pepper lightly and simmer the soup for about 30 minutes. Chop the parsley and marjoram leaves and add them to the soup. Simmer for an additional 5 minutes and adjust seasoning.

  5. Serve the soup hot with the remaining olive oil drizzled on top.
DSC_2854a
Leeks from the garden will have to wait for a spring thaw.

DSC_4681a

February 4, 2014 Borlotti Bean Soup

DSC_4440a

Punxsutawney Phil saw his shadow yesterday and we woke this morning to what weather forecasters are calling our eleventh snow “event” of the season, so it’s safe to say that winter isn’t going away anytime soon. At least we can settle in by a warm fire and enjoy the fruits of last fall’s harvest of borlotti beans in a simple, warming soup.

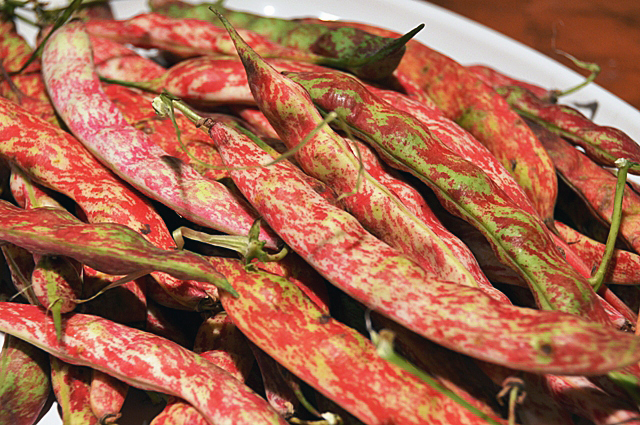
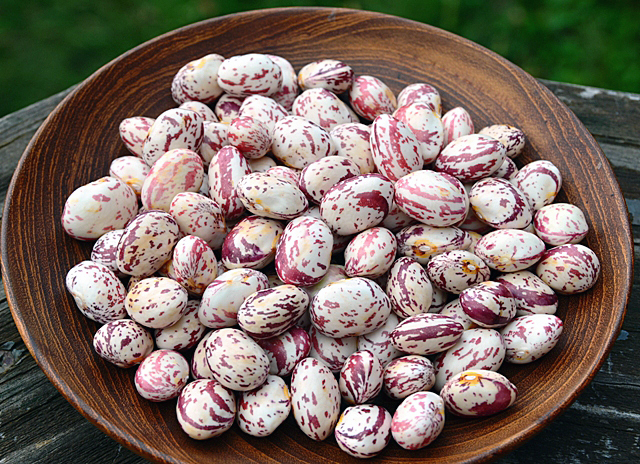
Borlotti beans are an Italian heirloom variety and a beautiful addition to the garden.  Also known as cranberry and the very non-exotic sounding French horticultural beans, the inedible pods are off white in color with cranberry markings, resembling the crimson speckled beans they hold inside.   Ours take center stage in the garden, climbing up and around the tall frame of an old outdoor shelter.

We harvest some fresh in the fall, but usually wait for the pods to dry out and turn brown so the beans can be stored for the winter. After the beans are harvested I shuck them from their pods and lay them on a tray, making sure not to crowd them. As they start to dry, I shake the tray to move the beans around. It may take several weeks for the beans to dry out completely. I store mine in clean quart sized canning jars in a cool pantry. Make certain they are dry before you store them. It takes only one bean that isn’t sufficiently dry to make the entire jar moldy,and your labor would be for nothing! You can substitute dried or canned canellini beans for the borlottis in this recipe.

To use the beans I soak the quantity I need overnight to cover with cool water. I have found that the dried beans almost triple in size, so if I need three cups, I would soak one cup. Sadly,the beans lose their speckles when cooked and turn a light beige color. The flavor does not disappoint however, Borlotti beans are creamy in texture with a delicious nutty flavor. They are good in stews, casseroles and this very simple soup made with fridge and pantry ingredients.

DSC_4437a

Borlotti Bean Soup

Serves 4-6

  • 1 1/2 c dried Borlotti beans, picked over, soaked overnight, drained and rinsed
  • 1 medium onion, about 1 1/2 cups, finely chopped
  • 2 medium cloves garlic, finely chopped
  • 4-6 slices Canadian bacon, finely chopped
  • 1 quart bag, or the canned equivalent, chopped roasted tomatoes
  • 1 quart of homemade chicken stock or low sodium chicken broth
  • 1t dried oregano
  • 1t dried thyme
  • 5c roughly chopped kale
  • Kosher salt and freshly ground pepper to taste
  • Water, as needed, to thin out soup.
SDSC_6624b
Fresh borlotti beans in the pod.

DSC_4447a


Directions

  1. Soak dried beans in cool water to cover generously. Let sit overnight, at least eight hours, loosely covered. Drain and thoroughly rinse the beans.
  2. In a large heavy bottomed Dutch oven over medium high heat, heat 2T olive oil. Add the onion and cook, stirring occasionally, until onion is tender, 4-6 minutes.
  3. Add Canadian bacon to the pan and cook until lightly browned, 4-5 minutes. Add the garlic and cook for an additional minute.
  4. Add beans, chopped tomatoes, stock and dried herbs and bring to a boil.
  5. Reduce heat to a simmer with the lid slightly ajar and cook for 30 minutes.
  6. Add chopped kale to pot and cook an additional 20 minutes, or until kale is sufficiently wilted.
  7. If soup is too thick, thin out with more stock or water. Taste for seasoning and adjust with salt and pepper.
  8. You can serve immediately, but it even gets better the second day.


SDSC_6781b

SDSC_6772b
Too bad they lose their spotted appearance when cooked!

January 9, 2014 Fridge and Pantry Turkey Chili

DSC_4387a

Warm and inviting, there’s nothing like a bowl of chili on a bitterly cold evening. What’s even better is when you can stay in your nice warm house and all the ingredients for that chili are at hand. Having a well stocked pantry doesn’t put you at the mercy of one more supermarket trip every time you follow a recipe or create a new dish on your own. Having basic ingredients on hand means you will be less likely to give up on cooking that night and order another mediocre take out dinner.

Your basic pantry will depend on your personal likes and dislikes. Love chili? Then you should have tomatoes, beans and some good chili powders on hand. Enjoy Asian food? Then your pantry should include soy sauce, oyster sauce, noodles, toasted sesame oil.

Keeping your pantry up to date is an ongoing task. Did you use the last bit of Dijon mustard? Immediately put it on your shopping list so you’re not surprised the next time you need it. When I was catering I had an endless source of materials to work with, now I try to be a bit more discriminating and choose the items we use most. I don’t keep much meat in the freezer, mostly ground turkey and pork tenderloins and try to use them within a month of purchase. Less chance for freezer burn or becoming that frosty mystery meat at the back of the shelf.

My three tiered lazy Susan (never liked that term) holds my spices that I attempt to keep in alphabetical order, not that they always stay that way. Having a varied supply of spices is a definite plus to impromptu cooking. Label everything you put in the freezer. You’re positive you’ll know what that brown sauce is in the container but two months later it will be an unidentified frozen object that is relegated to the garbage pail.

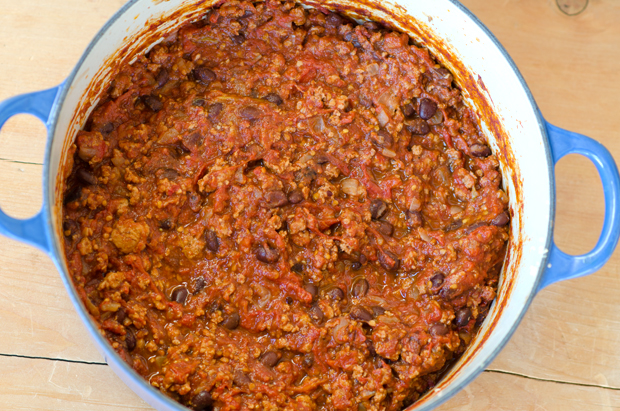
All I needed to do to prepare for this chili was to thaw out the low fat ground turkey and two bags of frozen roasted tomatoes. I am a Penzeys addict and am always looking for new spices and blends to add to my collection in addition to the basic items I purchase. I decided on adobo seasoning, a combination of onion, garlic, black pepper, Mexican oregano, cumin and cayenne pepper to season the ground turkey. When I added the tomatoes to the chili I added chili powder, chipotle chili powder and just a little unsweetened cocoa. Chipotle chili powder gives a deep smoky flavor and the cocoa powder adds a depth of flavor along with richness and a velvety texture. This chili turned out to be only moderately spicy, if you like it hotter, add more chili powder. Usually I would have added kidney beans to my chili but I only had black beans. Corn or another type of bean would be a good addition. Next time I’ll think ahead and presoak and cook the dried borlotto beans from our garden. A simple garnish of  cilantro, sour cream and cheddar to blend into the bowl and you are set for a warm satisfying bowl of chili.

DSC_4382a

Fridge and Pantry Turkey Chili

Serves 4-6

Ingredients

  • 1T olive oil
  • 1 medium onion, finely chopped
  • 1t finely chopped garlic
  • 1 1/4lb ground turkey (mine was low fat)
  • 1T Adobo seasoning
  • 1 28oz can chopped tomatoes (I use my frozen chopped tomatoes)
  • 1T Chili powder
  • 1T unsweetened cocoa powder
  • 1-2T Chipotle chile powder
  • 1T tomato paste
  • 1 can black beans

Directions

  1. In a medium Dutch oven, heat the oil over medium heat. Add the chopped onion and cook, stirring frequently, until the onion is softened, about 5 minutes, add garlic and sauté one minute more.
  2. Loosely break apart the ground turkey and add it to the pot. Gently stir until slightly more separated and sprinkle the adobo seasoning over the meat. Saute the meat until it starts to turn brown, 5-6 minutes.
  3. Stir in the diced tomatoes, tomato paste, medium chile powder, chipotle chili powder and unsweetened cocoa powder. Bring to a boil, reduce the heat to medium low or low and simmer, stirring frequently, until the sauce is slightly reduced and thickened, about 20 minutes. Stir in the black beans and taste, adding more seasonings . Garnish with sour cream, and shredded Cheddar cheese, if you like.
Make Ahead Tips

The chili can be refrigerated for up to two days, if it lasts that long.

DSC_4384a

December 17, 2013 Pork Chili Verde

DSC_4267a
We left the warmth and sunshine of a much needed vacation visiting dear friends in south Florida to return to the frigid temperatures and snow of Bucks County. It’s hard to believe that we are experiencing our third snowfall and winter is still about a week away. Cold temperatures call for warming dishes so chili is always a good choice. I wanted to try something a little different and watching television with mom gave me my inspiration. Guy Fieri, of Food Network and Diners, Drive-Ins and Dives was preparing a pork chili with tomatillos. I froze quite a few bags of tomatillos from our fall harvest and wanted to see what they would add to the flavor of a warm bowl of chili.
Pork shoulder is the meat of choice in this recipe. It is a well marbled cut that benefits from slow cooking and because of it’s higher fat content is less likely to dry out.  Be sure to cook the pork in a single layer and don’t crowd the pan which will yield nicely browned cubes of meat. A crowded pan will result in steamed, not browned pork. Don’t be tempted to turn the pieces too quickly, if they stick, they are not ready to turn yet.A combination of fresh and dried chiles adds to the depth of flavor in the finished dish.
I used both fresh and dried poblano peppers . Fresh poblano peppers are very dark green in color and bring flavor more than overwhelming heat to the dish. Ancho chile is the dried version of the poblano. The heat of the ancho is mild to medium with a sweet smoky flavor reminiscent of raisins or figs. Fresh jalapeno peppers brings just enough heat to the dish. Since every pepper can be a little different, It’s wise to taste just a little bit of your fresh chili peppers before adding them to the dish. It’s always easier to add heat than try to tone it down.
Roasting tomatillos gives the chili a little smokiness along with citrusy kick.  The chili is thickened with masa harina, a dry powder made from corn and used to make corn tortillas. I made this a day before serving it, giving time for the flavors to blend. Leftovers? It would be a delicious filling for a pork taco.
DSC_4258a
Pork Chili Verde
Ingredients
  • 2 dried ancho peppers, stems removed
  • 2 tablespoons canola oil
  • 1 large sweet onion, diced
  • 1 fresh poblano pepper, seeded and diced
  • 1 jalapeno, seeded and minced
  • 3 garlic cloves, minced
  • 1 pounds tomatillos, husks removed
  • 2 1/2 pounds boneless pork butt, trimmed of fat and cut into 1-inch cubes
  • ½ cup white wine
  • 2 tablespoons white vinegar
  • 1 quart low-sodium chicken stock
  • 1 tablespoons dried oregano (I used Mexican oregano)
  • 1 tablespoons ground cumin
  • 1 bay leaf
  • Kosher salt and freshly ground black pepper
  • scant 1/4 cup masa harina
  • 1 lime, juiced
  • Freshly chopped cilantro,
  • For garnish: crispy tortilla strips, shredded cheese, chopped scallions, sour cream
Directions
  1. Begin by rehydrating the ancho chilis. Place them in a bowl with ¾ cup warm water and let sit for 20 minutes.
  2. Place the tomatillos on a sheet tray and place under broiler for 7-8 minutes until lightly charred all over. Set aside to cool, then roughly chop them up.
  3. Tear up the hydrated Ancho peppers into small pieces and reserve the water they were rehydrated in.
  4. In a large Dutch oven, heat the oil, add the onion, ancho, poblano and jalapeno peppers, and garlic. Sauté until translucent but not brown. Remove from pan and set mixture aside.
  5. Season the pork with salt and pepper. Add to Dutch oven and cook over high heat until browned on all sides, about 8 minutes. Add the onion-pepper mixture back to the pan with the pork. Mix thoroughly, then deglaze with the wine and vinegar. Cook the mixture for 5 minutes to reduce, then add the chicken stock, 2 cups water, oregano, cumin, bay leaf, tomatillos, torn ancho, 2 cups water and soaking water.  Season with salt and pepper. Bring to a boil, then lower the heat to a simmer.
  6. Place a lid on the Dutch oven and simmer for 30 minutes. Whisk in the masa harina, which will thicken the chile. Simmer for 30 minutes more, or until sauce is thickened and pork is tender.
  7.  Finish with a squeeze of fresh lime juice. Serve in bowls and garnish with fresh cilantro, crispy tortilla strips, shredded cheese, and chopped scallions.

DSC_4261a

November 23, 2013 Chicken Tomatillo Soup

DSC_3964a


As previously confessed, when we first grew tomatillos I wasn’t only unfamiliar with how to cook with them, but more importantly how the fruit develops and matures in the garden. The first year we grew them by about the beginning of July I was certain our crop was a bust.

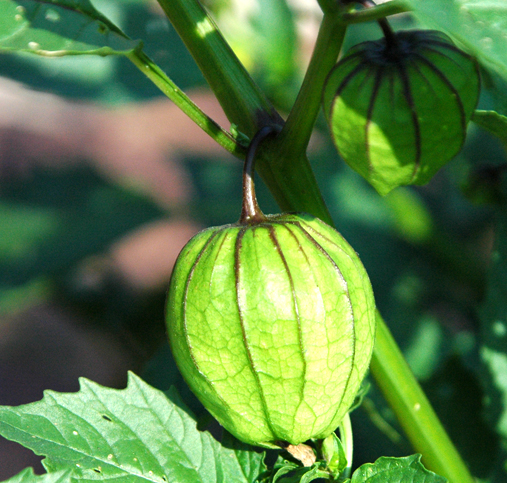
The sprawling bushy plants grew to about three foot tall and were quite healthy. The vines produced little yellow flowers that eventually turned into small bright green papery looking Chinese lanterns.  When I examined the fruit, it felt like only a small pea was inside the husk. So I would either forget about them or months later gather up the few that would finally burst out of their now light brown husks.

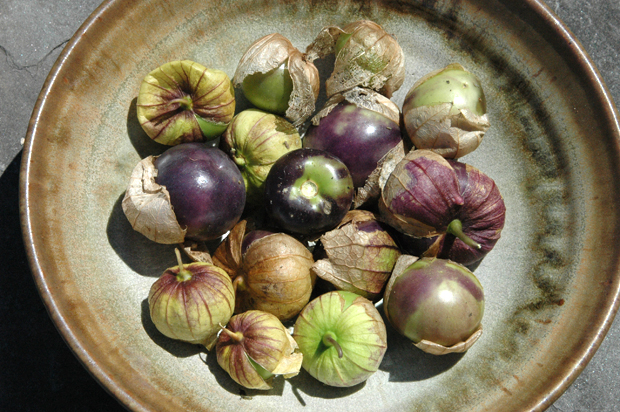
Since then I have learned quite a bit about this member of the nightshade family. Tomatillos are more closely related to cape gooseberries than they are to eggplants and tomatoes.  I learned that as the fruit matures it fills out the husk. Tomatillos are about the size of a large cherry tomato, low in calories, a good source of iron and magnesium and vitamins C and K. Though they look like green tomatoes, they are much firmer in texture when ripe.  The thin papery coating will turn light brown as the fruit matures. They can be stored in the fridge for a couple of weeks or frozen whole.  Leave the husks on the fruit until ready to use.  To prepare tomatillos, remove the husk and stem and rinse off the remaining sticky residue that coats the fruit.

I am enjoying tomatillos more each season. We grow both green and purple tomatillos. The purple variety is supposed to be sweeter, I can’t say that for certain, but they certainly make an attractive addition to the garden. My tomatillo recipe repertoire to this point was limited to accompaniments. Roasting tomatillos for salsa verde was initially a good way to use them but now I wanted to branch out  This year I did something I never did before, I ate one raw. I was surprised and delighted with the bright, not too tart citrusy flavor. Prior to this I thought that biting down on a tomatillo would be the same as eating a green tomato, not necessarily a pleasant experience.

This time I used them in an easy to put together soup.  Bright lemony flavored tomatillos are combined with tomatoes, smoky cumin and green chilies. Homemade chicken stock is always a good base for a soup but low sodium chicken broth is fine also. I prefer using chicken thighs in soup recipes because they will hold up better if the soup is reheated.

DSC_0233a


Chicken and Tomatillo Soup

Ingredients

  • Olive oil
  • 1lb boneless, skinless chicken thighs cut into 1″ pieces
  • 1 medium onion, finely chopped
  • 2 t chile powder
  • 1T cumin
  • 1 t dried oregano (for this recipe I prefer Penzey’s Mexican oregano)
  • 1 clove garlic finely chopped
  • 2T diced canned roasted mild green chiles
  • 8 cups chicken stock or substitute low sodium chicken broth
  • 2c diced tomatoes, I use my roasted tomatoes, substitute your brand of choice
  •  3c finely chopped tomatillos
  • 1 can Great Northern beans
  • Kosher salt and freshly ground black pepper

Directions

  1. Heat 1T olive oil over medium-high heat in a 5- to 6-quart Dutch oven. Add the chicken pieces and brown on all sides, about 5-6 minutes. Remove to a plate and keep warm.
  2. Add onion and cook, stirring, until tender, 4 to 5 minutes. Add the chili powder cumin, oregano, and garlic and cook until fragrant, about 1 minute longer.
  3. Stir in the chicken and chiles and then add the broth, chopped tomatoes and tomatillos and a can of beans. Bring to a simmer. Reduce the heat to low and simmer, partially covered and stirring occasionally, until the flavors blend, about 30-40 minutes. Season to taste with salt and pepper.

DSC_0030aDSC_3961a


November 12, 2013 Kale, Shellfish and Sausage Soup

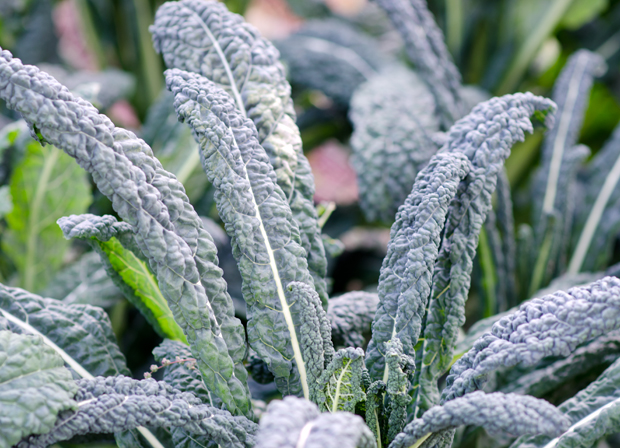
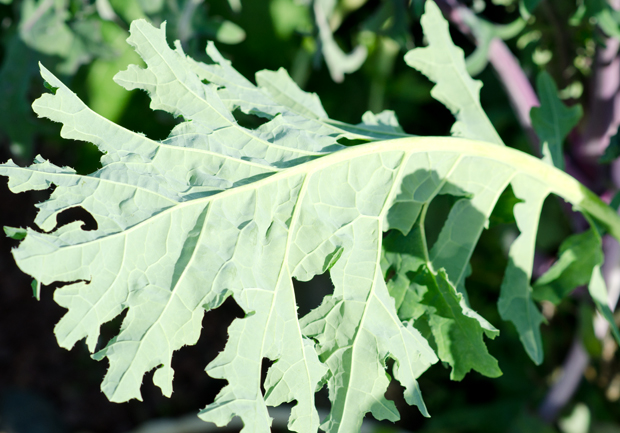
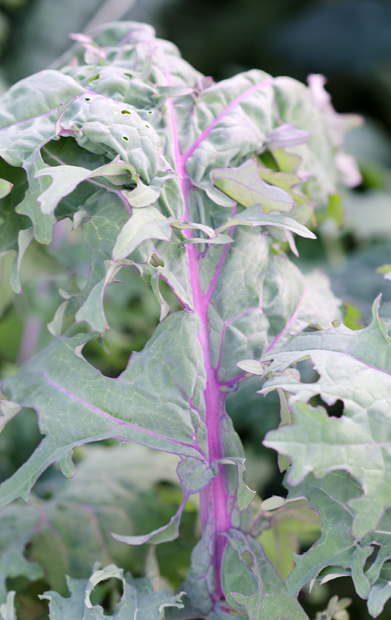
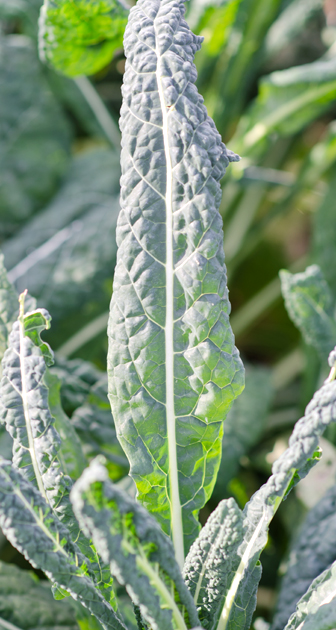
DSC_3868a It’s the beginning of November and the garden is still providing inspiration and produce for our menus. The spinach and chard have been harvested but the kale is now at it’s peak. The first kiss of frost sweetens the taste of this vitamin and mineral rich member of the cabbage family. We are currently growing two varieties in the garden. Lacinato kale, which also goes under the names of dinosaur kale, Tuscan kale, black kale or Cavolo Nero and the very distinctive Red Russian. Lacinato, the current “rock star” of the vegetable world has deep green oblong leaves with a pebbly texture. The Red Russian variety has sage green leaves with reddish purple veins. Red Russian has flat fringed leaves that resemble oversized oak leaves.

DSC_3895a
Cavalo Nero or Tuscan kale
DSC_3888a
Red Russian kale

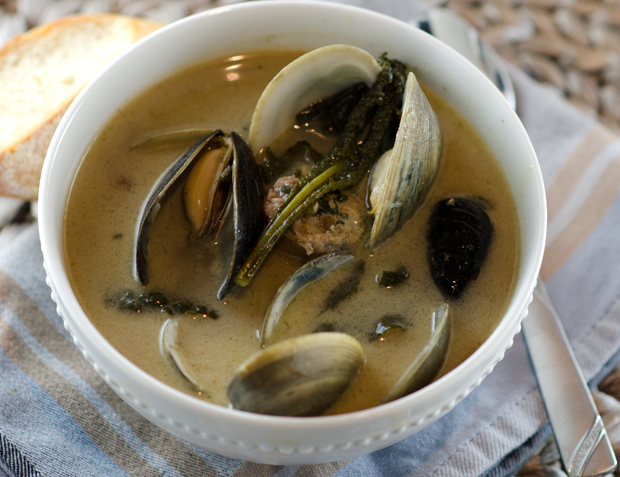
This soup is very loosely based on the national soup of Portugal, caldo verde which translates “green soup”. In it’s simplest form caldo verde is broth or water, onion, thin strips of kale or collard greens and potatoes for thickening. Since this was considered peasant food, small slices of linguica, a Portuguese pork sausage would be added before serving. This soup takes on many variations for us. The base this time was homemade chicken stock but we have made it with a combination of low sodium chicken broth and bottled clam juice. How much kale is up to you, about eight cups of shredded leaves is a good starting point. The leaves need to be separated from the hard kale stems and then cut into thin strips. This will allow the kale to cook quicker. I added littleneck clams and mussels adding another depth of flavor. I wanted a lighter soup this time, so I did not add the traditional potatoes. Chopped tomatoes or cannelini beans would also be flavorful additions to this soup. Sausage like linguica or chorizo would bring another layer of flavor, my sausage was from our local pork producer, Purely Farms. I chose their very delicious cervallata  which features broccoli rabe, aged provolone, fennel and freshly ground black pepper along with the Purely Pork sausage. Joe added a few hot peppers, remove them after cooking or they will permeate the dish.

Is this a soup or a stew? Definitions of both terms abound, I turned to The Food Lovers Companion written by Sharon Tyler Herbst as my final authority. Ms Herbst defines a soup as any combination of vegetables, meat or fish cooked in a liquid. Soup can be thick or thin, smooth or chunky, cold or hot.  A stew is a dish of meat, vegetables and a thick broth resulting from the combination of the stewing liquid and the natural juices of the food being stewed. She also states that the food in a stew is cooked slowly for a long period of time. So a kale, shellfish and sausage soup it is.

DSC_3876a

Kale, Shellfish and Sausage Soup Serves 4-6 Ingredients

  • 1T olive oil
  • 1 lb.  linguica, chorizo, or other spicy sausage, split along the length and sliced 1/2-inch thick
  • 1 onion, diced
  • 3 cloves garlic, minced
  • 8 c (about 1 lb.) kale, preferably Tuscan, stems removed and chopped into thin ribbons
  • 4 cups chicken broth
  • 1 small hot pepper (optional)
  • 2 dozen littleneck clams
  • 2 dozen mussels
  • Kosher salt and freshly ground pepper to taste

Directions

  1. Set a dutch oven or large soup pot over medium-high heat and add the oil. When the oil is hot, add the sausage and sauté until the sausage is golden brown on all sides. Remove the sausage and drain on a paper towel.
  2. Reduce heat to medium and add the onion. Sauté until the onion is translucent then add the garlic and sauté until fragrant, about 30 seconds.
  3. Add the chicken broth, pepper if using and the kale to the pot. Stir to coat everything with chicken broth and then cover the pot with a lid. Stir the kale every three minutes until it is barely tender.
  4. Add the clams and mussels to the pot. Add the sausage and cook until the mussels and clams have opened and the kale is tender. Taste for seasonings and salt.
  5. Serve this soup in individual bowls with  a crusty slice of bread to sop up the broth at the bottom of the bowl.
DSC_3894a
The veins of the Red Russian kale are magenta in color.

DSC_3881a

September 14, 2013 Yellow Tomato Soup

DSC_2187a


The tomatoes in our garden come in every color of the rainbow. We are growing red ones like the Brandywine, Big Mama and Bloody Butcher, orange ones like the Mandarin, Amana and Sun Gold, Green Zebras that remain green when ripe, and even a tomato that is named Rainbow, it has a yellowish orange flesh with streaks of bright red.

One of the most interesting tomatoes we grow is the Garden Peach. True to it’s name, the fruits are small, about 3 ounces, yellow in color with a peachy pink blush when ripe. The skin of the Garden Peach is light and fuzzy, reminiscent of a peach. That slight blush sometimes carries over to the tomatoes’ flesh. They are an heirloom tomato, more than fifty years old and an indeterminate variety, Garden Peaches will produce fruit throughout the tomato season. Their simple sweet flavor is a contrast to the bright acidity in red varieties.

Garden Peach is crack resistant and stores well. It produces fruit up to the first frost and many gardeners bring in the last of their crop to ripen on kitchen counter tops. Maybe I’ll remember to do that this year!

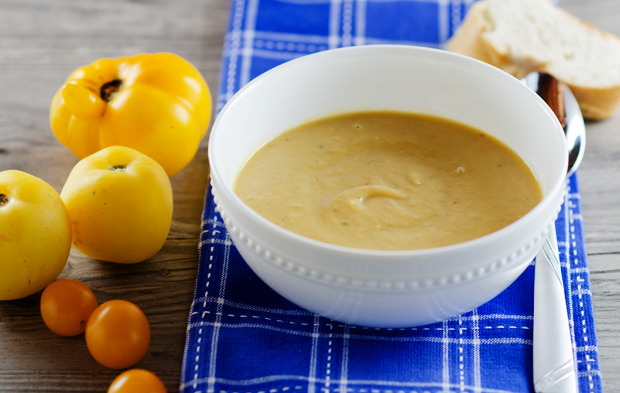
Many of our tomato plants have been quite prolific this year. I have been roasting and freezing countless bags of tomatoes to be made into sauces, chilis and soups. We will enjoy them when the weather turns cold and we are missing the vibrant flavor that only a fresh tomato can bring. Since we have a bumper crop of Garden Peaches along with other yellow varietals, I decided to make some of  them into a soup. The sweetness of the yellow tomatoes contrasts nicely with the smoky bacon and the spiciness of the chiles in adobo sauce. The addition of heavy cream is good, but not really necessary. You can substitute half and half or low fat sour cream with good results. It will last several days in the refrigerator but I made several batches to freeze so that we can enjoy this delicious soup on chilly autumn evenings.

DSC_2196a-copy


Yellow Tomato Soup

Makes 6-8 cups

Ingredients

  • 2 1/2 c chopped onion
  • 6 bacon slices, chopped
  • 6-8 c chopped yellow tomatoes
  • 3 cloves garlic, minced
  • 1/2 c dry Sherry
  • 3 c chicken stock or low sodium chicken broth
  • 1-2 t minced canned chipotle chiles
  • 1 t dried oregano
  • 1/2 c cup heavy cream (if desired) you can substitute half and half or low fat sour cream

Directions

  1. Sauté onion and bacon in a heavy large pot over medium-high heat until onion is tender and beginning to brown, about 12-15 minutes.
  2. Add tomatoes and garlic and simmer until tomatoes are tender and juicy, stirring occasionally, about 20 minutes. Add sherry and simmer another 5 minutes.
  3. Add stock and simmer until mixture is reduced to about 6 cups, 15 minutes or so.
  4. Stir in chipotle chiles and dried oregano. Working in batches, puree soup in blender.
  5. If freezing, pack soup in freezer containers, refrigerate until thoroughly chilled. Then transfer to freezer. If serving immediately, return to pot and stir until heated through, add cream if desired.
  6. Season to taste with salt and pepper and serve.
DSC_2079a
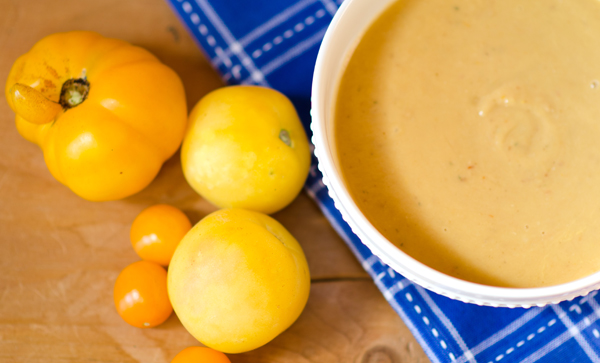
The Garden Peach variety is yellow with a pinkish peach blush.
DSC_2087a
I used about 8 cups of yellow tomatoes in this recipe.
DSC_2210a
The sweet flavor of yellow tomatoes contrasts nicely with smoky bacon and spicy chipotles in adobo.

DSC_2206a

August 26, 2013 Curried Yellow Squash Soup

DSC_2026a

It’s around this time of year when the output of garden produce really starts to sneak up on us. The mounting pile of zucchini/yellow squash were calling out to me again. Joe was “looking forward” (not!) to yet another trip to the dentist. Not certain of the state his mouth would be in when he got home, I decided to make a curried summer squash soup. No chewing required!

Curried summer squash soup gets it’s heat from Thai curry paste. A paste, as opposed to a curry powder is made up of mostly wet ingredients. A Thai cookbook I have lists fourteen different recipes for curry paste. Green curry paste is a combination of aromatic herbs such as lemongrass, galangal, kaffir lime and gets its color from fresh green chilis. Red chili paste uses dried red chilis.  We grow many of the uniquely Thai ingredients and someday should make my own but I decided on the convenience of a jarred variety.

Since green curry paste is considered the hottest, add it to your own taste. Start with a half teaspoon and go from there. We like a little heat so I used a whole tablespoon.

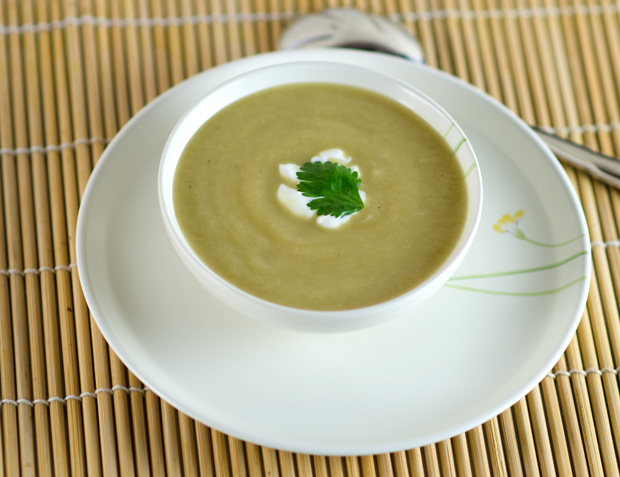
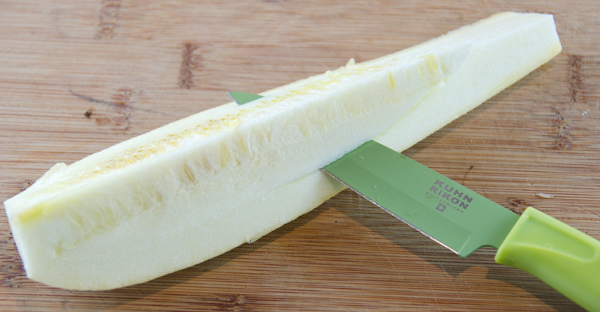
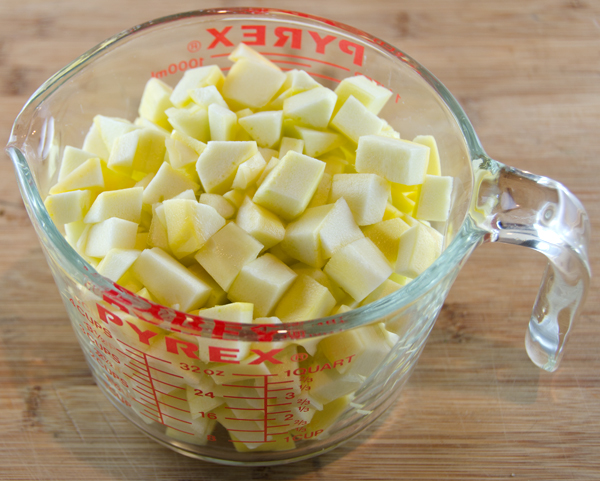
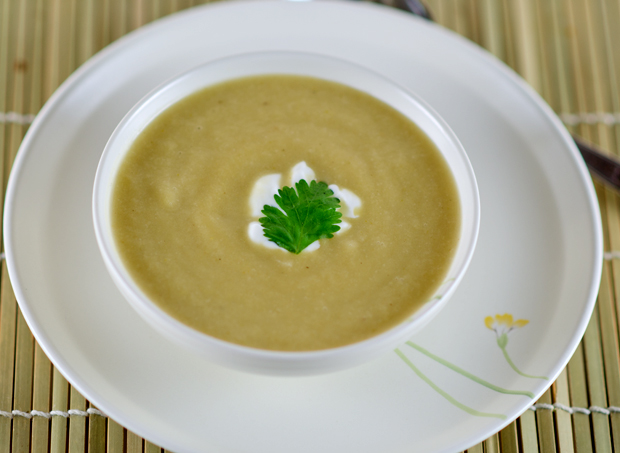
This recipe is very simple. I peeled the bumpy skin and removed the seeds from the squash.  Just a little chopping, sautéing and into the blender for a spin. It’s equally good hot or cold. The mild nutty flavor of the squash pairs nicely with the heat of the curry paste. Top with a dollop of sour cream and a sprinkling of cilantro for a creamy warming summer taste treat.

DSC_2019a

Curried Yellow Squash Soup

Adapted from a recipe in Bon Appetit

Serves four

Ingredients

  • 3T vegetable oil
  • 4c chopped yellow squash (zucchini would be fine also)
  • 3/4 c chopped onion
  • 1/2t to 1T Thai green curry paste
  • Kosher salt and freshly ground pepper
  • 3 1/2c low sodium chicken broth
  • Sour cream
  • Cilantro sprigs

Directions

  1. In a medium saucepan heat 3T vegetable oil over medium high heat.
  2. Add squash, onion and curry paste. Season with kosher salt and freshly ground pepper to taste. Cook until tender, 8-10 minutes.
  3. Add chicken broth and bring to a boil. Reduce heat and simmer until the squash is tender, 25-30 minutes.
  4. Puree the soup in a blender until smooth. Taste to correct seasonings.
  5. Serve soup warm or cold, topped with sour cream and cilantro sprigs.
DSC_1955a
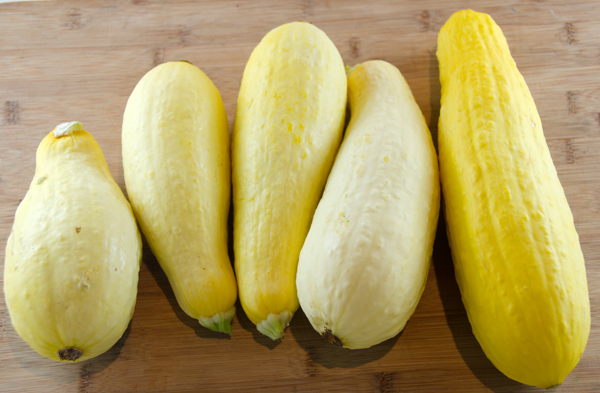
Summer squash of different sizes.
DSC_1962a
I like to remove the seeds before chopping them.
DSC_1964a
Two large squash made four generous cups of cubed squash.
DSC_1965a
Saute squash and onion in a saucepan.
DSC_1980a
The squash becomes silky smooth in the blender.
DSC_2033a
Delicious warm or cold.