September 19, 2012 Roasted Eggplant Caponata

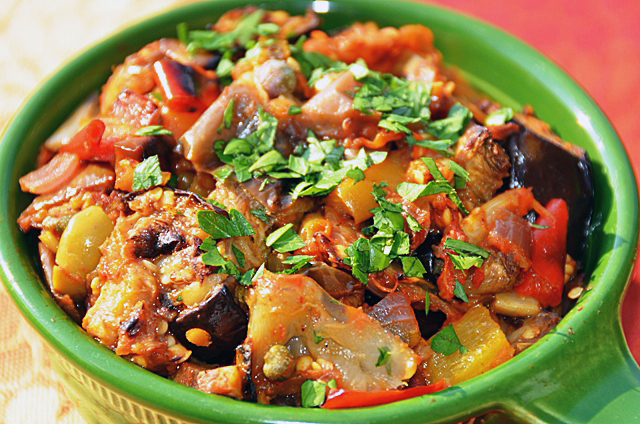
The days are getting shorter, there is a chill in the morning air, only three days until the official beginning of autumn. Our summer vegetables are on the wane and this morning I harvested some of the last eggplants, peppers, fennel and tomatoes of the season. The sweet and sour flavors of eggplant caponata would be the right contrast to the richness of the king salmon we were having for dinner.
Caponata is a dish native to Sicily by way of the Arabs (then called the Saracens)  who ruled the island from the ninth to the eleventh century. Along with citrus fruits, pasta and eggplants, just to name a few, the Saracens brought the sweet and sour flavor combination to Sicily, the sour coming from vinegar and sweet from sugar or honey.  Among several theories, the word caponata came from the Sicilian dialect, capunata, the name for a sailor’s dish of a biscuit steeped in oil and vinegar, served with chopped vegetables.
The vegetables in my caponata were the “last gasp” of certain varieties we were growing. I used lavender-white Asian Bride  and magenta colored Beatrice eggplant, both ideal because of their thin skin (no peeling required), some small yellow Admiral peppers, and  a red Anaheim pepper that had just a little heat. Fennel isn’t typically an ingredient in caponata, but I thought the slight licorice flavor would add to the sweetness. The most time consuming part of the recipe is the hand chopping of the vegetables, a food processor is definitely not the right choice here. Unlike most of the recipes I make with eggplant, I salted the eggplant to eliminate any bitter flavors from these plants that had been on the vine for a while. Salting also prevents the eggplant from absorbing too much oil and becoming greasy. I decided to roast the vegetables in this recipe is to keep the olive oil to a minimum. I cut the vegetables a bit smaller than I would usually since I was using it as a topping for fish. Caponata is also wonderful scooped up with a pita, in a sandwich and as a topping for pasta. It is best made a day ahead so the flavors have time to blend. Caponata keeps about a week in the refrigerator, if it lasts that long.

Eggplant Caponata

Makes about 4 cups

  • 1 medium eggplant or a combination of smaller eggplants to equal about 1 1/2lbs, unpeeled, and trimmed
  • 3 ribs of celery cut into 1/2 inch dice
  • 1 small red onion cut into 1/2 inch dice
  • 1 small yellow pepper cut into 1/2 inch dice
  • 1 small red pepper cut into 1/2 inch dice
  • 1 small fennel bulb cut into 1/2 inch dice (optional)
  • Olive oil
  • 1 1/2 cups peeled plum tomatoes with juices or 1 14 oz can of diced tomatoes
  • 1T tomato paste
  • 2-3T Pomegranate red wine vinegar
  • 1-2t granulated sugar or honey
  • 2 anchovy filets, minced
  • 1/3 c green olives, pitted and slivered
  • 3T drained and rinsed balsamic capers
  • 2T chopped Italian parsley
  • Kosher salt and freshly ground pepper

Directions

  1. Preheat oven to 450F. Place racks in the top and bottom shelves of the oven.
  2. Cut the eggplant into 1-inch cubes. Place the cubes in a bowl, sprinkle with a tablespoon of  kosher salt. Spread the cubes on a baking sheet that has been lined with a paper towel. Allow cubes to sit for one hour. Pat cubes dry with paper towel and remove any excess salt. Do not rinse.
  3. Place the cubes in a bowl and toss with 1-2T of olive oil. Place cubes on a baking sheet, spread them out evenly, crowded vegetables will steam, not roast. Set aside. In another bowl, toss the celery, onion, fennel and peppers with another tablespoon or more of olive oil. Spread on another baking sheet, making sure that the vegetables are spread out evenly and not crowded.
  4. Place vegetables in preheated oven and cook for about 5 minutes. With a spatula, loosen them from the baking sheet to promote even browning and rotate the baking sheets, top and bottom as well as front and back. Continue to roast in the oven until vegetables are softened and browned around the edges. Start checking the pan after 5 minutes.
  5. Allow vegetables to cool on baking sheet. In a medium saute pan cook tomatoes and their liquid. Add tomato paste, red wine vinegar, sugar or honey and anchovies (if using) and stir to combine. Taste and adjust the sweet and sour flavor as desired.  Add the cooled vegetables, toss gently but thoroughly to combine. Add chopped olives, capers and chopped parsley. Taste and adjust seasoning as desired. Set aside to allow flavors to blend. Serve at room temperature as accompaniment to fish or chicken or with crusty bread or crostini.

 

August 7, 2012 Pasta Salad with Sun Gold Tomatoes, Green Beans and Pesto Dressing

Pasta salad, that ubiquitous summer take along for picnics, barbecues and potlucks doesn’t have to be boring. This particular one was made with fresh ingredients from our garden and a spicy pesto vinaigrette. I picked very sweet and fruity Sun Gold tomatoes and a combination of our second growth of bush beans with the first of the pole beans. I chose penne rigate as the pasta, not just because it was the only acceptable pasta shape we had on hand but the ridges would nicely hold the bits of pesto. The dressing is a slightly deconstructed take on pesto, the toasted pine nuts are added to the salad separately rather than part of the dressing to give the salad some extra crunch. Sun gold tomatoes are a relatively new favorite of ours. They are a tangerine-orange cherry tomato developed in Japan where consumers prefer a tomato that is sweet rather than tart. The recipe is just a canvas to fill in with your own summer ingredients. Choose grilled slices of zucchini, chunks of pepper, cubes of cooked eggplant, or a different variety of tomato. Walnuts would be a good choice to replace the pine nuts and a Grana Padano could replace the more traditional  Parmigiano Reggiano. Just be sure to use freshly grated cheese, not pre grated or the stuff that comes in a green can!

Pasta Salad with Sungold Tomatoes, Green Beans and Pesto Dressing

Created using the Fine Cooking pasta salad recipe maker

Serves eight

Ingredients

For the Vinaigrette

  • 1 1/2 c lightly packed basil leaves
  • 1/2c extra virgin olive oil
  • 1/2 c or more fresh, finely grated Parmigiano-Reggiano cheese
  • 3T red wine vinegar
  • 2T fresh lemon juice
  • 2t  finely chopped garlic
  • 1/2t finely grated lemon zest
  • 1t kosher salt
  • Freshly ground black pepper

For the salad

  • kosher salt
  • 1 lb green, purple and wax beans, trimmed and cut into 2-inch lengths
  • 1/2 lb small chunky pasta
  • 1T olive oil
  • 2 1/2 cups of cherry tomatoes, halved (l love using my Cutco steak knife for this)
  • 3T pine nuts, toasted
  • Freshly ground pepper

Directions for the Vinaigrette

  1. Put the basil, olive oil, Parmigiano, vinegar, lemon juice, garlic and lemon zest in a blender. Blend until smooth. Season with salt and pepper to taste.

Directions for the salad

  1. In a large pot bring 4 quarts of salted water to a boil over high heat
  2. Drop the beans into the boiling water and cook until they are just crisp-tender, about 4-5 minutes. Remove beans from pot with a slotted spoon and place in colander. Rinse with cool water and transfer beans to a baking sheet lined with paper towels to drain and cool.
  3. Return the water to a boil and add the pasta. Cook until al dente, following package instructions. Drain the pasta thoroughly in a colander and transfer to a rimmed baking sheet. Toss the pasta with the olive oil to prevent sticking.
  4. Transfer the cooled pasta to a large serving bowl. Add beans and cherry tomatoes and toss. Add just enough vinaigrette to moisten the pasta, do not over dress. Add the pine nuts and toss again. Let the salad rest for 20 minutes or so to allow the flavors to blend and then taste the salad again. If needed, add a little more vinaigrette, salt and pepper. Grate a little extra cheese on top if desired.


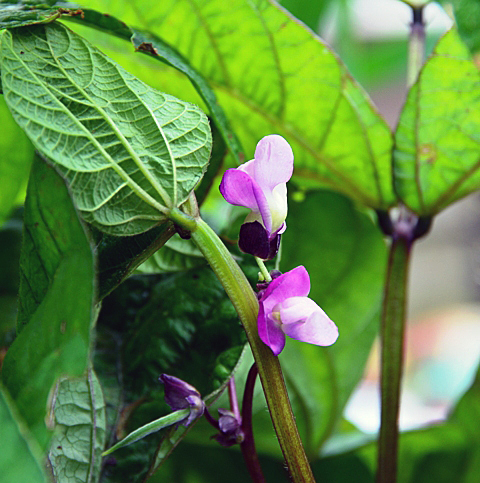
The little green bean at the bottom left of the picture will eventually turn as purple as the blossoms!


Sun Golds at various stages of ripeness.

August 3, 2012 Zucchini “Pasta”

Gardeners, we’ve all done it. You are diligent at first picking zucchini from your garden. For days you happily pluck small to medium zucchini off the vines, sometimes with the blossoms still attached. Then it happens, you get busy doing other things, it rains for several days or you just simply forget. Those compact little fruits are now the size of a major league baseball bat. Well, before you make one more loaf of zucchini bread or sneak it down to the compost pile, I have another idea.

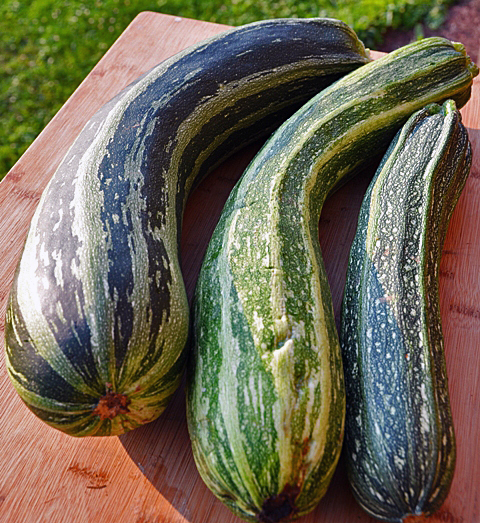
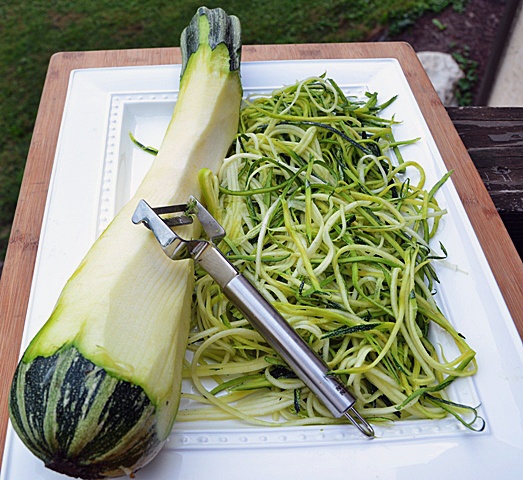
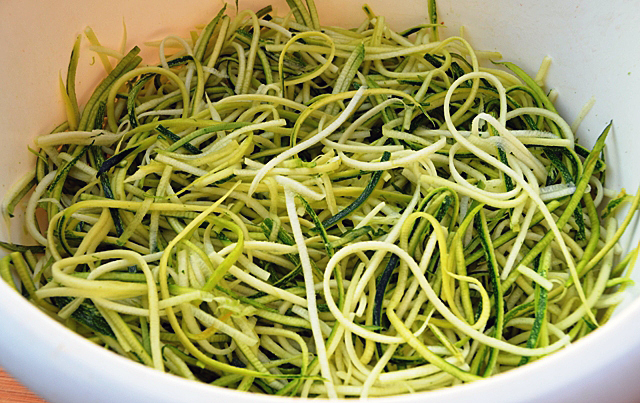
I make something I refer to as “zucchini pasta”. Kuhn-Rikon, a Swiss cookware company has a tool that makes short work of over-sized zucchini. The stainless steel julienne peeler moves effortlessly down the length of the squash. Steady the zucchini with one hand, start at the top, press the teeth of the peeler into the flesh and pull down. You will have the finest Julienne imaginable in no time. Just stop soon enough to avoid the seedy interior. Although all varieties of zucchini work well with this preparation, I especially like the Italian variety Striato d’Italia which translates Italian stripe. When this variety gets bigger, it doesn’t get as fat as other zucchini, it gets longer, making for longer capellini pasta-like shreds. Put your strands into a bowl and separate any that stick together with your fingers. I like to slightly wilt the strands in a saute pan with some olive oil but  they could  be used raw. I like to toss the “pasta” with some pesto and sometimes I will add halved cherry tomatoes, either raw or cooked slightly. You could also pair it with a cooked tomato sauce or just about anything you like on regular pasta.  Don’t just use the julienne peeler for zucchini. Shred carrots and jicama for a slaw or beets for a salad. The possibilities are limitless.

The longest zucchini in this picture is 22 inches!

The julienne peeler makes short work of this zucchini.

Use your fingers to separate any strands that stick together.


July 12, 2012 Swiss Chard


Let’s begin with two misconceptions regarding chard. Swiss chard is not from Switzerland, but the botanist who named it in the nineteenth century was, and named it for his homeland.  Second, it is pronounced chard, not shard. I can understand why the mistake can occur. Chardonnay, a wine grape varietal, is referred to in a shorthand kind of way  by many people (moi included) as “shard”. The “ch” is pronounced “sh” in French, like chalet. Also a shard is a sharp piece of glass, not something one would consume.

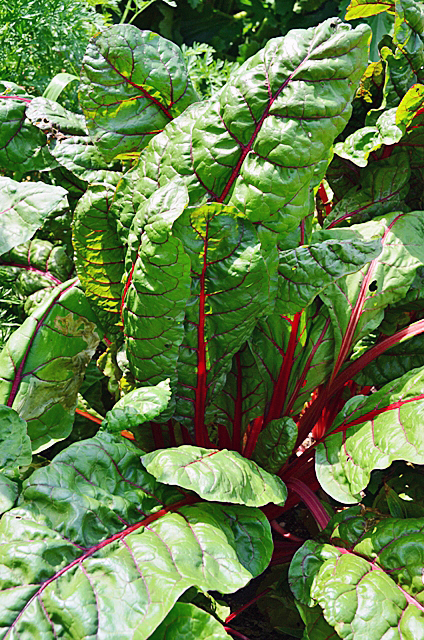
Chard is from the Latin and the French for the word “thistle”. However, chard is not a member of the thistle family but belongs to the beet family.  Chard is cultivated for the leaves and stems of the plants, not the roots.  It is the cooked green of choice in the summer months in our house. We grow many varieties that are as pretty to look at as they are nutritious for you. Varieties like Rhubarb with its bright red stems and Bright Lights with its neon pink, orange and yellow stems give beautiful accents of color in the garden. Chard is a nutritional powerhouse with vitamins K, A and C, and is  a good source of potassium, iron and fiber.

European cooks are partial to chard stems discarding the leafy part and in America most cooks use the leaf and discard the stem. I take advantage of both the stems and the leaves .  The tiniest leaves are an interesting addition to salad mixes. When using larger leaves, the stems need to be separated from the leaves to cook both parts correctly. This is a recipe with the gardener in mind. If you don’t grow your own, your local farmer’s market is a good source for chard. Supermarket chard looks sad for the most part and wouldn’t make a chard lover out of anyone.

Swiss Chard with Garlic

Serves 4-6

Ingredients

  • 1 large bunch of chard
  • Kosher salt and fresh ground pepper
  • Low sodium chicken broth
  • Extra virgin olive oil
  • Several cloves of garlic, peeled and chopped

Directions

  1. Trim the bottoms of the stems and wash chard in several changes of water
  2. Cut the stems from the leaves. Chop stems into 1/2 to 1 inch pieces. Cut leaves into 1 to 2 inch ribbons. Stacking leaves on top of leaves and stems in an even row  makes the task go quicker.
  3. Bring a large pot of well-salted water to a boil. Add chard stems and blanch for 4-5 minutes. The timing will depend on how thick you cut the stems and how soft you want them to be. Remove stems from water with a slotted spoon or spider. Add a little more water to the pot if necessary and keep at a boil.
  4. Add chard leaves in batches and blanch until wilted, 2-3 minutes. Drain in a large colander. Squeeze out excess liquid when cool enough to handle.
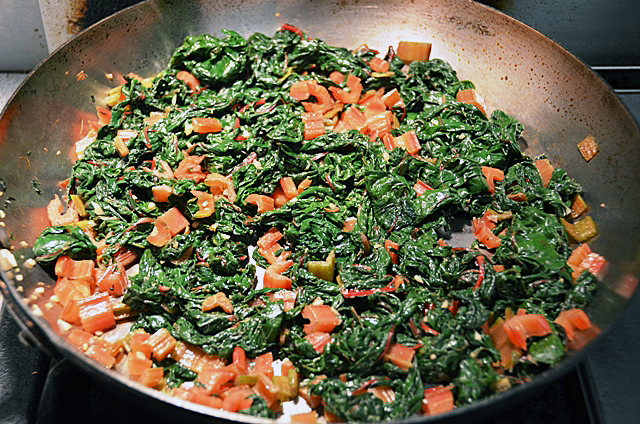
  5. Heat a tablespoon or so of extra virgin olive oil in a large skillet over medium high heat for about a minute. Add stems and toss gently to coat. Add wilted chard leaves and stir often, until tender, adding a little chicken broth if the mixture seems too dry. Push chard to one side of pan, add a little more olive oil, add garlic to pan and saute garlic until golden, another minute or two.
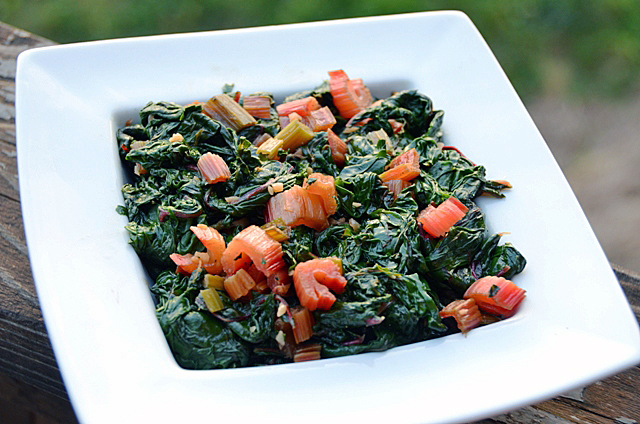
  6. Serve warm. Cooked chard could be added to a frittata or omelet as well.


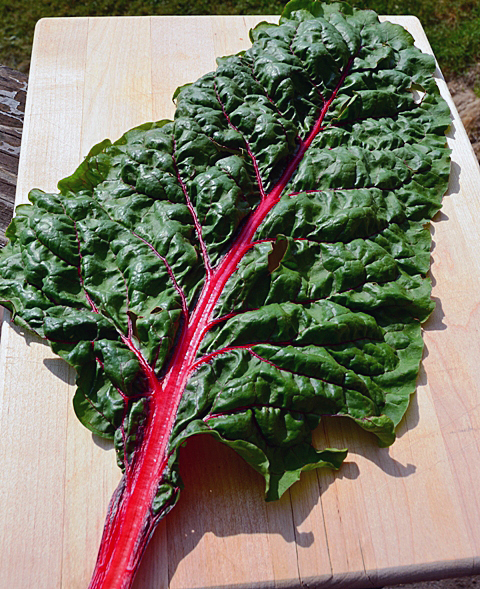
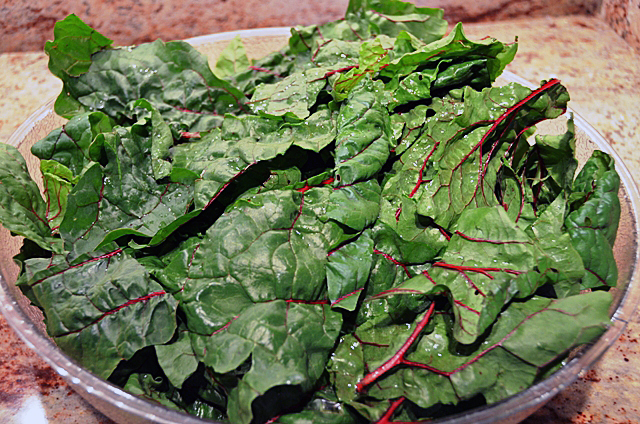
Crinkly rhubarb chard leaf with bright red stem.

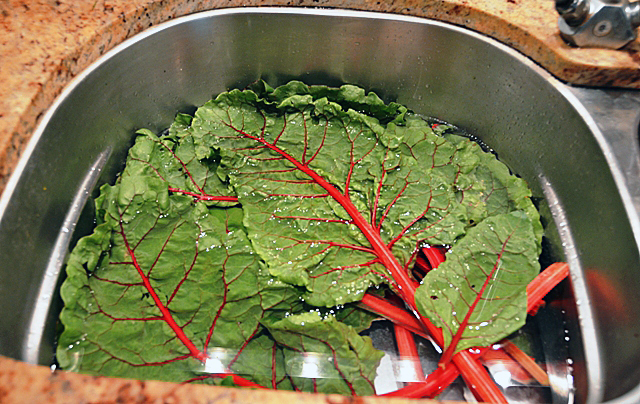
Soak chard leaves in several changes of water. Dirt will sink to the bottom when you lift the leaves out. Drain chard in a colander.


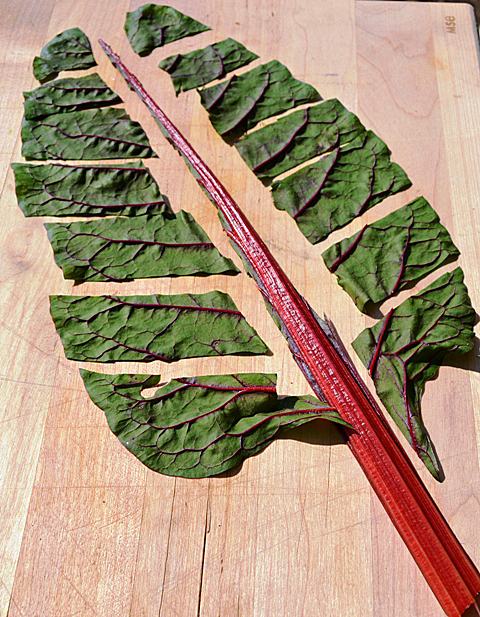
Trim the bottom of the chard leaves. Cut the leaf away from the stalks, I prefer using scissors or a small serrated knife. Chop leaves in 1-2 inch ribbons. Stacking the leaves speeds the process along.

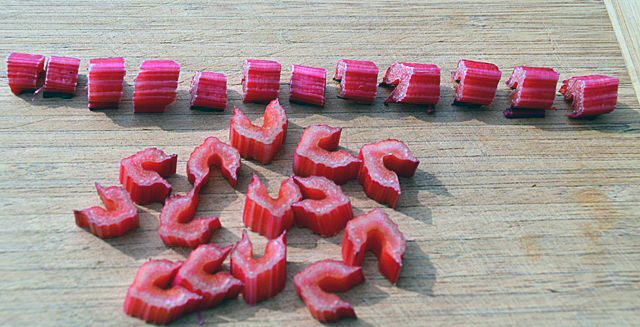
Chop stalks into 1/4 to 1/2 inch pieces.


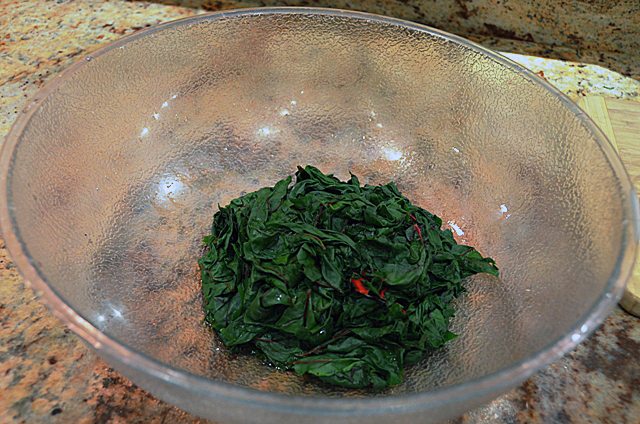
Always cook more chard than you think you will need. This large bowl cooked down to this.


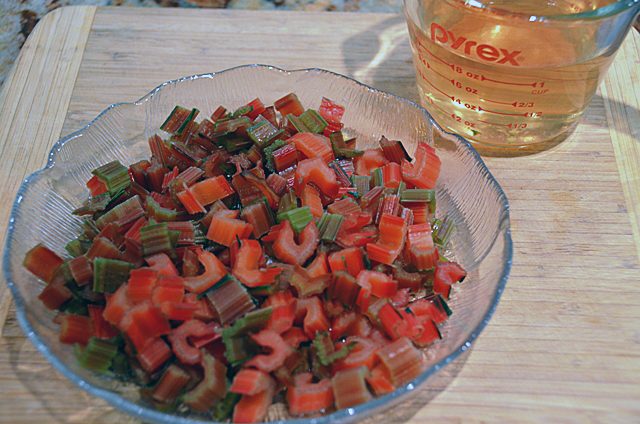
As you can see from the measuring cup, some of the color leaches out during the blanching process but they remain predominately red.


Saute the stems and leaves together and finish with a little chopped garlic.  A flavorful extra virgin olive oil will really enhance the flavors in this dish.


July 7, 2012 Turnip Fries


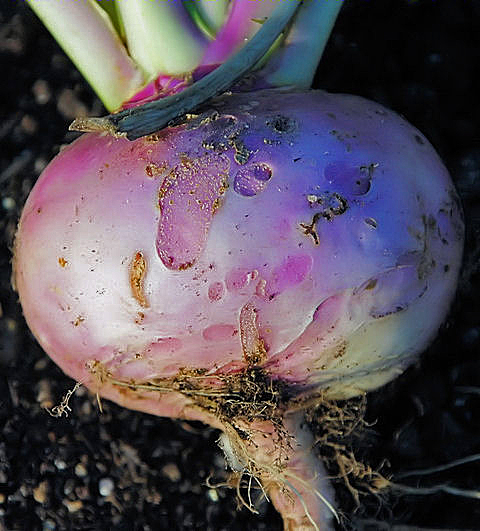
In the last several years we have added more root vegetables to our gardening repertoire, carrots, kohlrabi, daikon radish, rutabagas for the first time and turnips. We use turnip and beet top thinnings as a cooked green and now the last of the spring turnips have been harvested and a new crop will be planted for fall. Since we pick them on the small side, they are a nice crispy addition to slaws or cold salads. I wanted to try something a little different. Searches I did on my computer turned up roasted, pureed, glazed dishes, usually from the November and December issues of magazines when cooks are looking for hearty fare. Finally Saveur magazine provided me with the recipe I was looking for, turnip fries. Turnips are cut into julienne, tossed with olive oil, parmigiano-reggiano and nutmeg and baked until golden.
This is one of those dishes that never quite makes it to the dinner table due to pre-meal munching. A dipping sauce next time perhaps…

Turnip Fries

Ingredients

  • 4 medium peeled trimmed turnips
  • 1/4 cup olive oil
  • 1/4 cup grated parmigiano-reggiano
  • 2 pinches grated nutmeg
  • Kosher salt and freshly ground black pepper

Directions

  1.  Preheat oven to 450F. Cut turnips into 1/2″ sticks and toss in a bowl with oil, grated parmigiano-reggiano,nutmeg, and salt and pepper. Spread turnips out on an oiled sheet pan. Bake until golden, 18-20 minutes.


May 25,2012 Stir Fry of Bok Choy and Shiitake Mushrooms


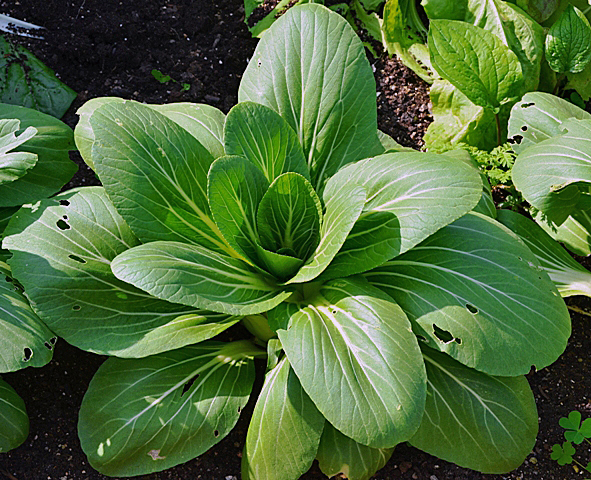
Mature bok choy in the garden.

Bok choy, bak choy, choy sum, however you name it we enjoy this Chinese vegetable year round. From the garden in the spring and again in the fall, first in it’s baby stage as thinnings all the way to the mature heads that finish out the season. In the off months I go to the Asian markets to purchase Shanghai Bok Choy, the smaller heads that we prefer. Bok choy always makes an appearance as a side dish at our Chinese New Year dinner.
Bok choy is from the Cantonese dialect literally meaning “white vegetable”. Low in calories and high in vitamins A, C and K as well as calcium and iron, it is classifed as a brassica or cabbage. It’s flavor is definitely not “cabbagy”, it is light, crisp and delicate. If you don’t  grow your own, choose bok choy that is unblemished and firm to the touch.  This recipe helped us to use up our first planting of bok choy, with many more rows to come.

Stir Fry of Bok Choy and Shiitake Mushrooms

Serves 6

  • 2lbs bok choy-if large, leaves cut in half lengthwise
  • 3/4lb shiitake mushrooms, cleaned and caps sliced thinly
  • 4T oyster sauce
  • 1/4c lower-salt chicken broth
  • 1T cornstarch
  • 1T Asian sesame oil
  • Peanut oil for stir frying
  • 3 large cloves garlic-sliced thinly
  • 2T fresh ginger peeled and cut into thin matchsticks

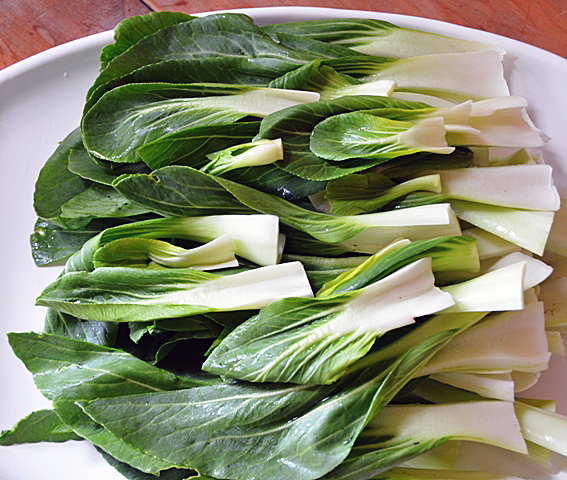
    Bok choy leaves washed, trimmed, ready to be blanched.


Directions

  1. Blanch large bok choy leaves in a large pot of boiling water until the white stems are softened, but not limp,  drain in colander.
  2. Combine the oyster sauce, chicken broth, cornstarch and sesame oil in a small bowl. Whisk well to dissolve the cornstarch.
  3. In a large wok, heat a tablespoon or so of  peanut oil over medium-high heat. The wok is ready when a drop of water sizzles on contact. Add bok choy and cook tossing frequently with 2 wooden spoons or tongs until stems are softened and slightly browned, about 5-6 minutes. Add shiitake mushrooms and stir fry for one minute. Add garlic and ginger and cook, stirring constantly until aromatics are tender, fragrant and starting to brown, about 2 minutes.
  4. Add sauce to wok and use spoons or tongs to mix with the vegetables. Simmer until the sauce is reduced and thickened, about 2 minutes. Serve immediately.

    All ingredients must be ready to go for a stir fry.


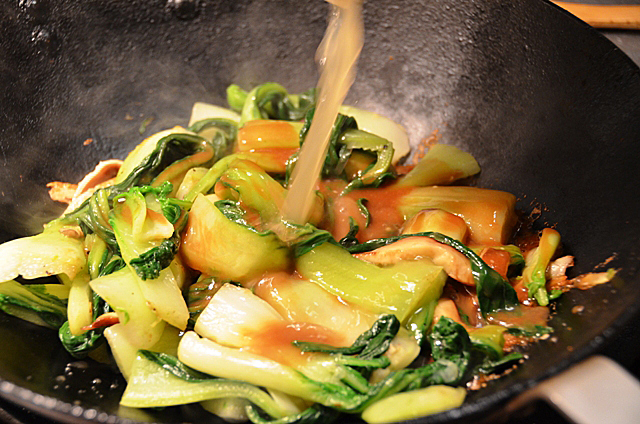
Thinning out the sauce with a little chicken stock.

May 18, 2012 Saute of Asparagus and Pea shoots


Today’s harvest

One of the spring garden’s most fleeting offerings are pea shoots.  Peas are the first seeds we plant in the garden. Snow peas or edible pods, as they are also called, are planted as early in March as possible, as soon as the ground is at it’s proper tilth. For several years we have been growing peas not just for their pods but some peas for the shoots alone.

Our first encounter with pea shoots was as a side dish in a Chinese restaurant where they are called dou miao . Once only available from Asian grocers, they have become increasingly common at the local farmers market. Pea shoots are the first vegetable ready to harvest from the garden, less than a month after their planting. The round leaves and wispy tips are reminiscent of a green butterfly. I pinch off the tender tips, the top several leaves and the tendril that ends the vine, in turn they will send out new growth for the next harvest in several days. It is hard to resist nibbling on a few while you are harvesting, they are crunchy and have the delicate flavor of  a fresh picked pea. Pea shoots are nutrient dense, an excellent source of vitamins C, K and A, and a good source of vitamin E.  The tendrils and leaves of any edible pea can be harvested for shoots. Just remember the shoots of the ornamental sweet pea are poisonous.

After they are rinsed and spun in a salad spinner they can be added raw to salads.  What might appear to look like a great quantity of shoots cooks down to next to nothing. A quick saute with some Asian sesame oil with a garnish of toasted sesame seeds is one of my favorite ways to prepare them. Last night I had asparagus from Milk House Farm so I combined the two together for a tasty spring side dish. We will enjoy pea shoots, and eventually peas until the warm summer temperatures in late June kill off the vines.

Snip off the tip and leaf right above the bottom leaf.


Saute of Asparagus and Pea Shoots

Recipe of my own design

  • 2 cloves garlic-peeled and chopped finely
  • 1 lb asparagus, ends trimmed, sliced on the diagonal in 1-2 inch pieces
  • 1 colander full of pea shoots, washed and spun 6-7 cups
  • Asian sesame oil and toasted sesame seeds
  • Kosher salt and freshly ground pepper
  1. Saute garlic in 1 T sesame oil, add asparagus and saute until asparagus is tender and beginning to brown, 5-6 minutes, this will depend on the thickness of the stalks.
  2. Add pea shoots and saute until wilted, about one minute. Add additional sesame oil, salt and pepper to taste. Top with toasted sesame seeds.

April 10, 2012 Thinnings

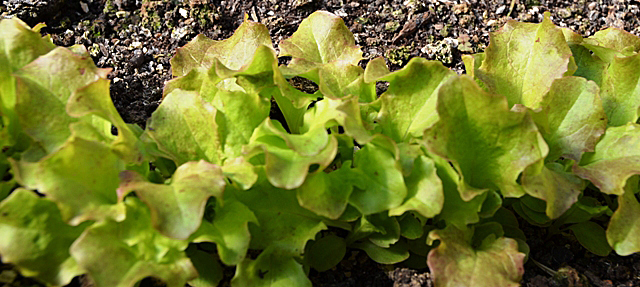
It’s time to thin these lettuce plants!

We have been vegetable gardening for over thirty years now and it has been only in the last few years that I have truly gained an appreciation for the thinning process. Tiny seeds we just planted would emerge from the ground only for me to pluck them out. I wondered, was I just wasting plants? Armed with scissors and a knife I halfheartedly would go about my task. I felt guilty that I was killing off  some of our potential yield  when in fact I was preparing for stronger  plants. I got over my fear of thinning when I saw it’s real benefits. Vegetables are healthier when they are thinned out, they need room for their roots to expand. When you sow seed in the garden you may plant it  a little heavier than the eventual five, six or more inches you need between each plant. Not every seed will germinate and some, like beet and chard seeds are actually a clump of seeds. Root crops, like beets and carrots, need room to expand or you will have misshapen, undeveloped vegetables.  It’s better to have 30 well formed carrots, rather than 60 scraggly ones that have no use at all.

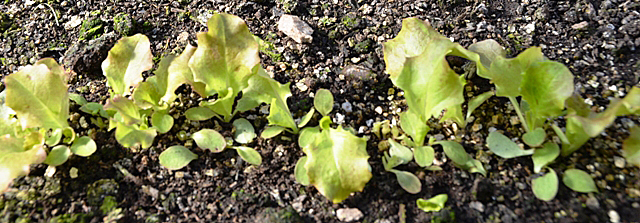
Now these lettuce plants have more breathing room.

The process is quite simple, just check your seed packet to see how close the plants should eventually be and with a pair of scissors, snip away the little plants in between, leaving the healthiest plants alive. I prefer to thin periodically, getting closer to the exact spacing over a series of thinnings. For plants that should eventually be six inches apart, you may want to start with two inches, then in a week or so, four inches.  With baby greens such as arugula, turnip, radicchio and spinach,you will have a micro green salad, worthy of a fine restaurant. Here’s a flavorful dressing for your greens.

Orange Vinaigrette

  • 1/2 cup fresh orange juice
  • 2 T balsamic blood orange vinegar
  • 1T champagne vinegar
  • 2T hazelnut oil
  • 3T extra virgin olive oil
  1. Bring the orange juice to a boil in a small saucepan over medium high heat. Reduce the heat to medium and simmer until juice is reduced by one-half. Transfer syrup to a small bowl and let cool  to room temperature.
  2. Transfer cooled juice to salad dressing shaker and add vinegars and oils. Season to taste with salt and pepper.  Shake mixture until emulsified, about 20 seconds.
  3. The dressing can be stored in the refrigerator for one week. Bring to room temperature before using, shake vigorously to recombine before using.
  4. Place cleaned salad greens in a large bowl. Drizzle dressing over green and toss. Add more dressing to taste.